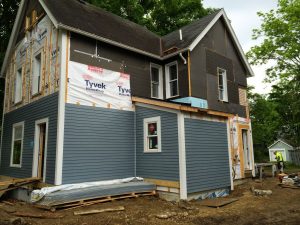
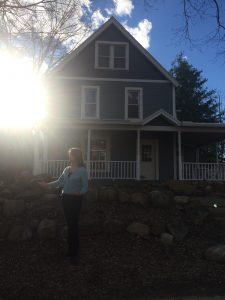
This tremendously leaky house had a bunch of questionable construction including a shady addition and a poor foundation.
Lots of decisions had to be made.

Summary
This home was donated to Hiram College for the purpose of being converted into the Environmental Studies department. Part of the donation requirement was to make the home as sustainable as possible. The house is now all electric, so it could be powered by renewables like solar and wind. Solar power for the building is planned. This is a House of the Future, the first one of my clients to remove their gas meter.
The project was wild and woolly with a lot of shifts in personnel as the project moved forward. Energy Smart was shifting business models during the project, so we tackled much of the insulation, but not the HVAC. Thanks to a few key people really digging in, particularly faculty member Debbie Kasper, the TREE House is a success!
Photo Album
See a bunch of project photos here. Many are explained in the Full Story below.
Problems to Solve
- Turn a home into the Environmental Studies department with 1-2 classrooms plus faculty offices at Hiram College.
- Poor foundation – five different foundation types, several without footers.
- Reduce energy use by 70%+, a Deep Energy Retrofit.
- Use methods others could use to upgrade their homes.
Results
- Gas meter was removed, it’s all electric!
- Lowest energy use per square foot of any of our projects, a 24.9 EUI!
- Very comfortable.
- HERS score dropped from a very high 208 to a pretty low 52.
Testimonial
“Nate is terrific! When I was charged with renovating a very old leaky house into a highly efficient and comfortable new home for our college’s environmental studies department, I was thrilled to meet Nate. His approach to home performance has been a breath of fresh air.
In contrast with the tendency of contractors to focus on their one piece of the picture, Nate maintains a perspective on the whole house as a system. His attention to the building shell, and to insulating and air sealing it, reduced our blower door number by an incredible 85%!! And while the standard practice in HVAC seems to be installing a piece of (often oversized) equipment and calling it a day, Nate is constantly striving for optimal design. He’s one of the few professionals in my area who prioritizes the appropriate downsizing of HVAC and other equipment to improve comfort and save energy.
Throughout the entire process, Nate has been enthusiastic, evidence-driven, reliable, and a whole lot of fun to work with!” Dr. Debbie Kasper, Hiram College Faculty and TREE House project manager.
Upgrades
-
Air Sealing and Insulation
- Attics – Air sealed with spray foam, taped foam board over attic floor in upper attic, R-60 cellulose installed.
- Walls – Dense packed with cellulose insulation. 3” recycled polyisocyanurate foam board on exterior (yep, a mouthful!) 2” closed cell spray foam on walls in two new areas.
- Basement – New insulated concrete form (ICF) foundation. Closed cell foam sprayed on rim joists.
-
HVAC
- 2.5 Ton Multi-Split Heat Pumps
- Fresh Air – ERV (energy recovery ventilator)
- Heat Pump Water Heater for basement radiant floor and domestic hot water.
Full Story
My wife read in the paper about this house being donated, and I reached out to contact Dr. Debbie Kasper via email. At the time I was an insulation contractor, and was curious to learn more about a Deep Energy Retrofit. These are typically wild projects and often involve a gut rehab. About a year later I got an email from Debbie that it was getting going.
Now I had to get up to speed on Deep Energy Retrofits, which was gut wrenching and terrifying for me because I take my job seriously – my goal is to always deliver results. I was used to much more standard methods and projects. A bunch of friends in the industry helped me out including Blake Reid and Sean Lintow.
This project was unusual in that there were so many stakeholders involved. Typically my clients are a husband and a wife, usually with one taking lead. Now we had a bunch of complicated decisions to make with about 20 people in the room, and rather than being a chief, I was an indian.
I went to several Design Charrettes, which are meetings where all the contractors on a project are brought together to discuss how a project will get done. It’s pretty intense, and the varying levels of experience with high performance building made things, um, interesting.
Lots of decisions needed to be made:
- What insulation strategy should be used?
- What HVAC system should be chosen?
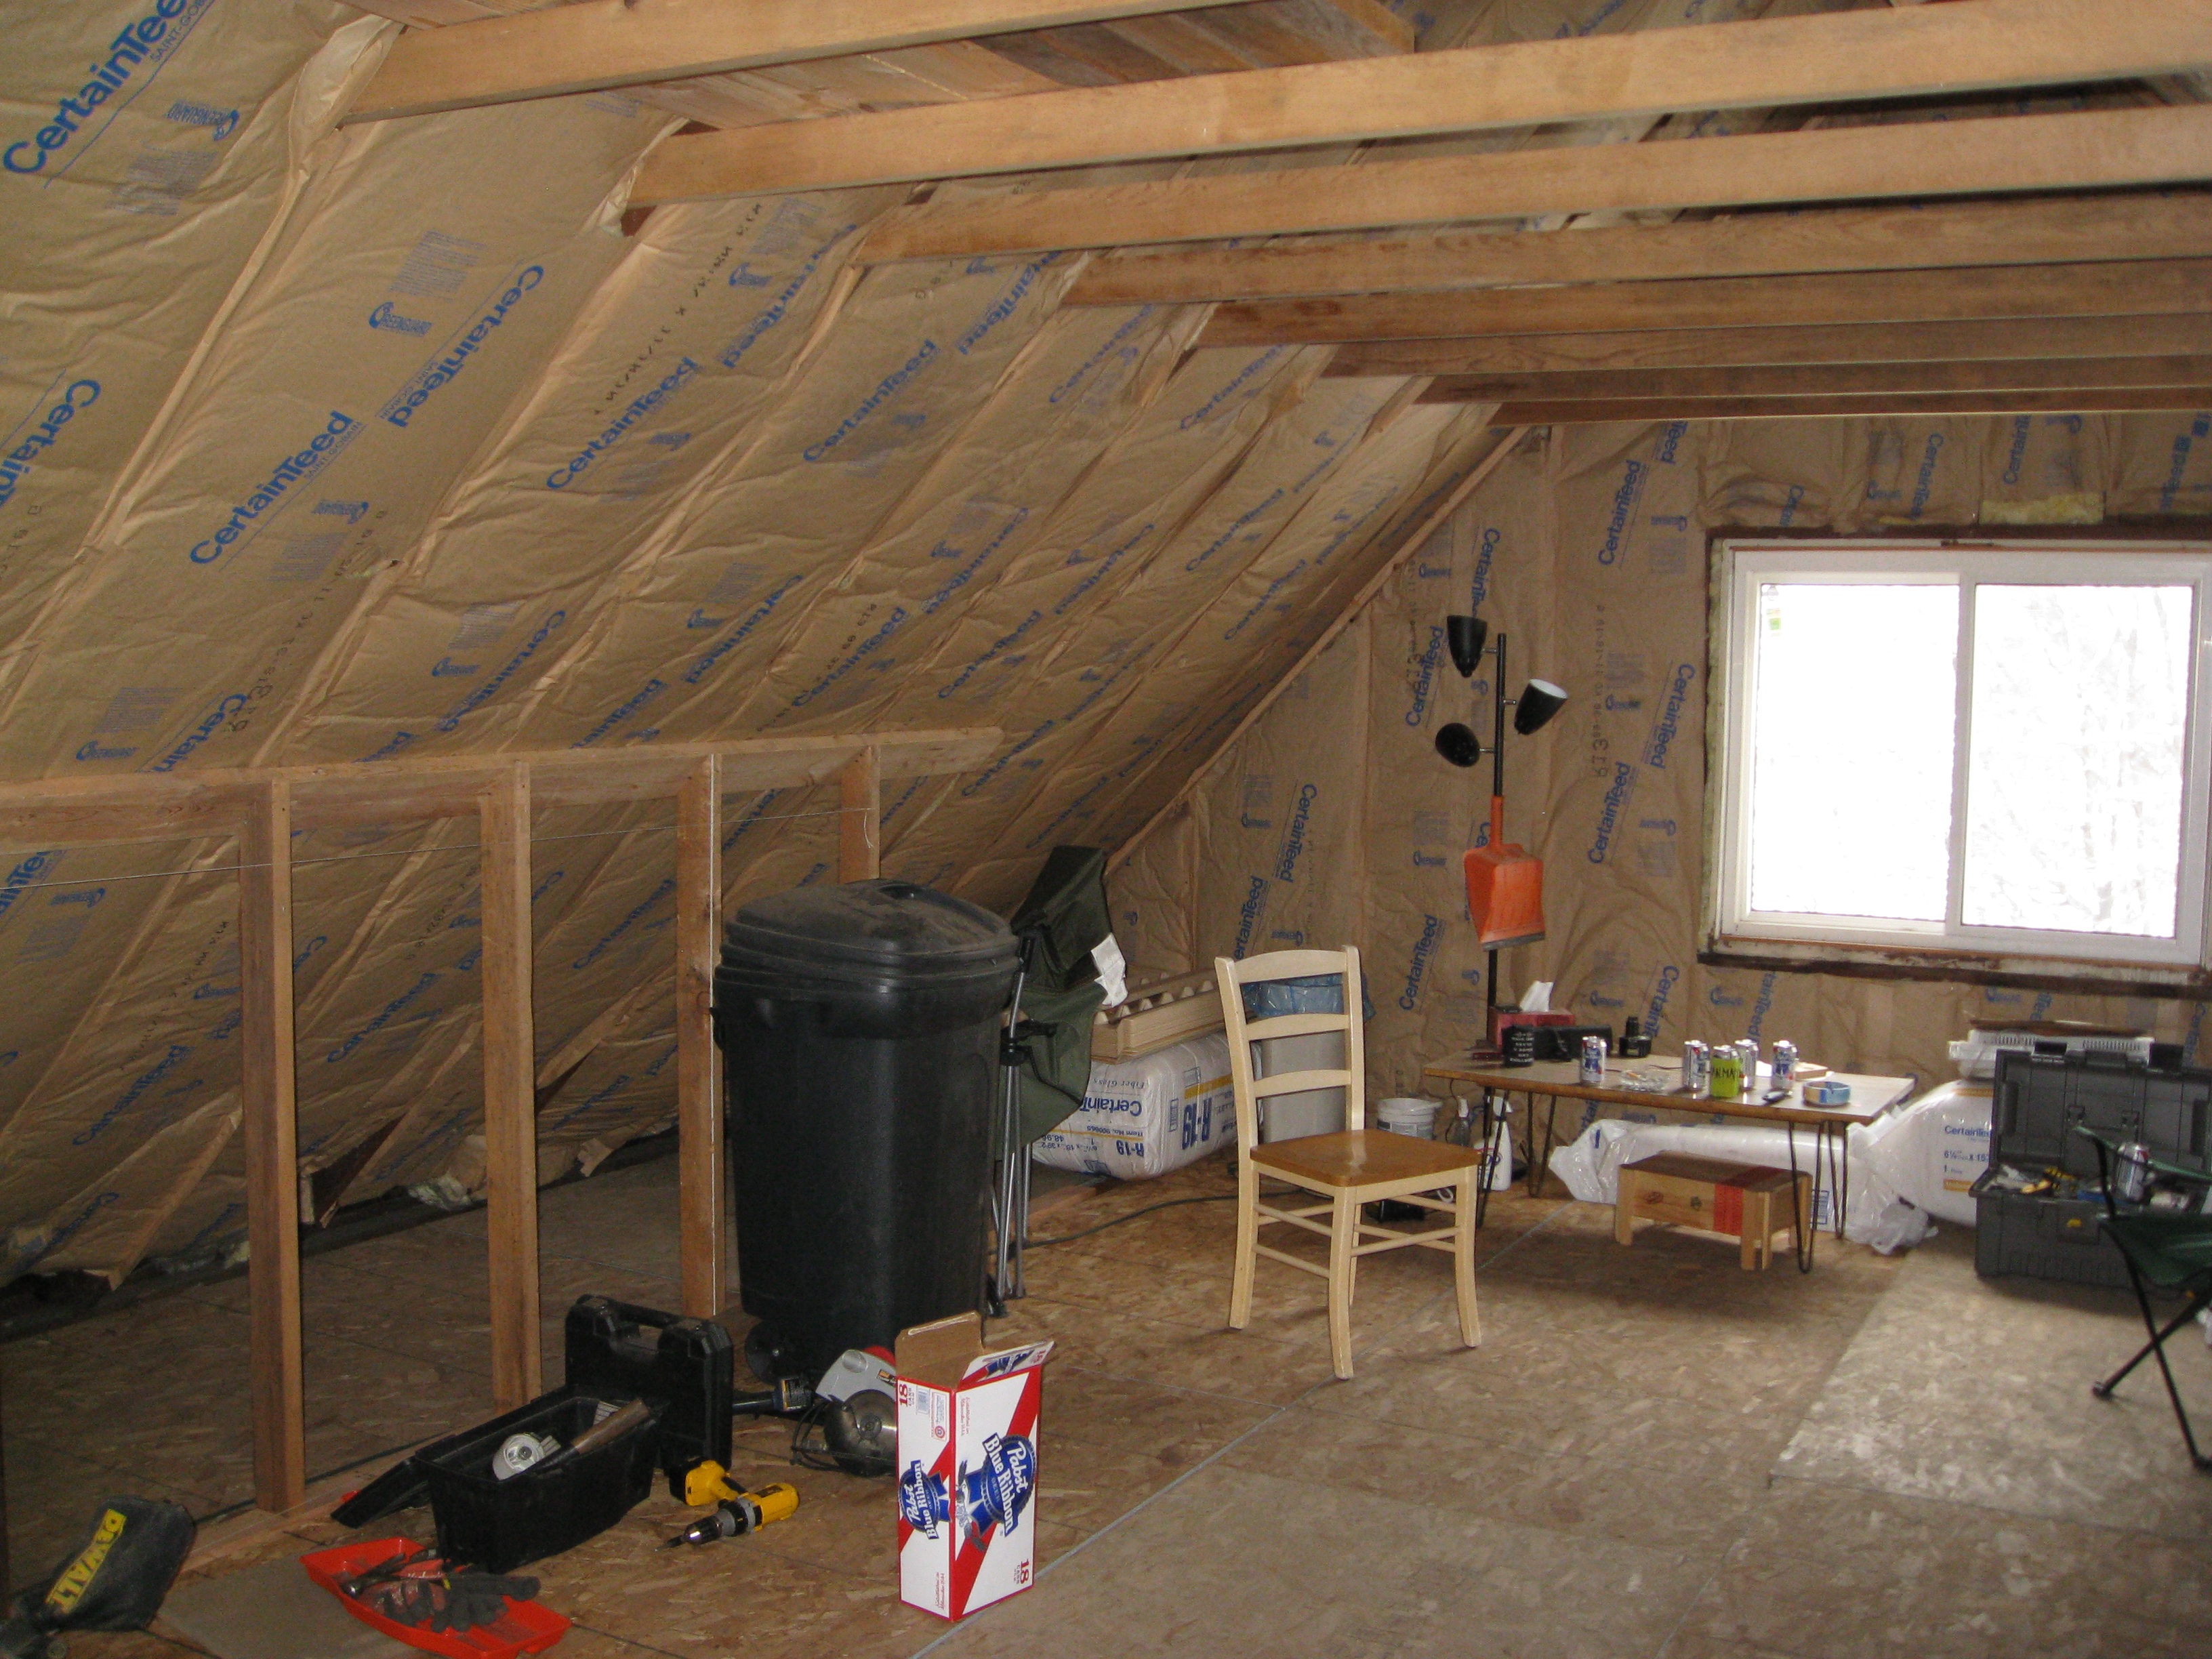
- Would the strange third floor room that you had to get to by walking through the attic be kept?
- Would the rear addition be kept?
- What would be done with the foundation?
- Would the garage stay or go?
It was decided that removing extraneous areas was the best call – the garage and the rear addition were demolished, and the weird third floor room was abandoned. I’m thankful for this, it drastically reduced the complexity of the project.
At the time I didn’t have much HVAC expertise, so I was excluded from those decisions.
The foundation was found to be missing footers (concrete pads that go underneath the first layer of brick as a support), so the house was lifted and given a new foundation, which also left space for a future classroom. This burned about ⅓ of the budget, but literally was foundational to the project.
Uh oh…
At this point, the project came off the rails for a while. The intended leader of the project, through a number of circumstances, no longer led the project. The energy auditor that was supposed to lead the insulation and HVAC projects drifted away from the project. Much of the design work was complete, but the construction hadn’t started yet.
Debbie Kasper, Jim Zella (a custom builder from Hiram who served as construction manager), and myself ended up at the helm of the project. We had a few rather heated meetings, which sorted out a number of questions about the project and let us vent frustration. Thankfully, it strengthened us as the core team.
Jim brought in Scott Robinson, also a contractor from Hiram, who handled a ton of the details of the house. Scott installed the foam board on the exterior, added the deep window sills (bucks) needed for the thicker walls, built the front porch, and more.
Things got smoother from this point forward, and the project started to roll.
Sealing It Up
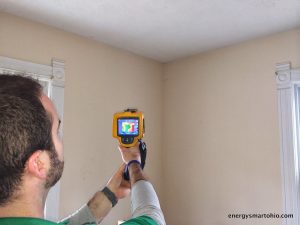
George Trappe of Residential Energy Services had checked for holes in the wall insulation with an infrared camera, I crudely marked the spots with spray paint to hit later (there’s no way I could remember them all!)
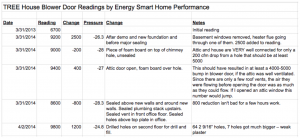
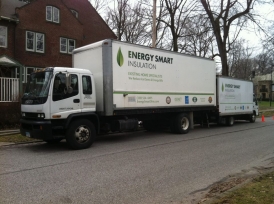
I had bid installing the cellulose in the walls, but had since sold my box truck, so I managed to cart my small blowing machine to the project and tackled the wall insulation myself. I spent time checking my work with a blower door and infrared camera. I found a lot of misses, then fixed them. I tracked my air sealing work through the whole process here.
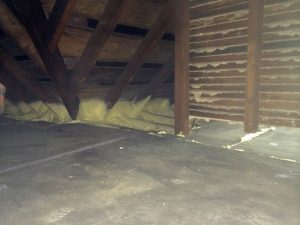
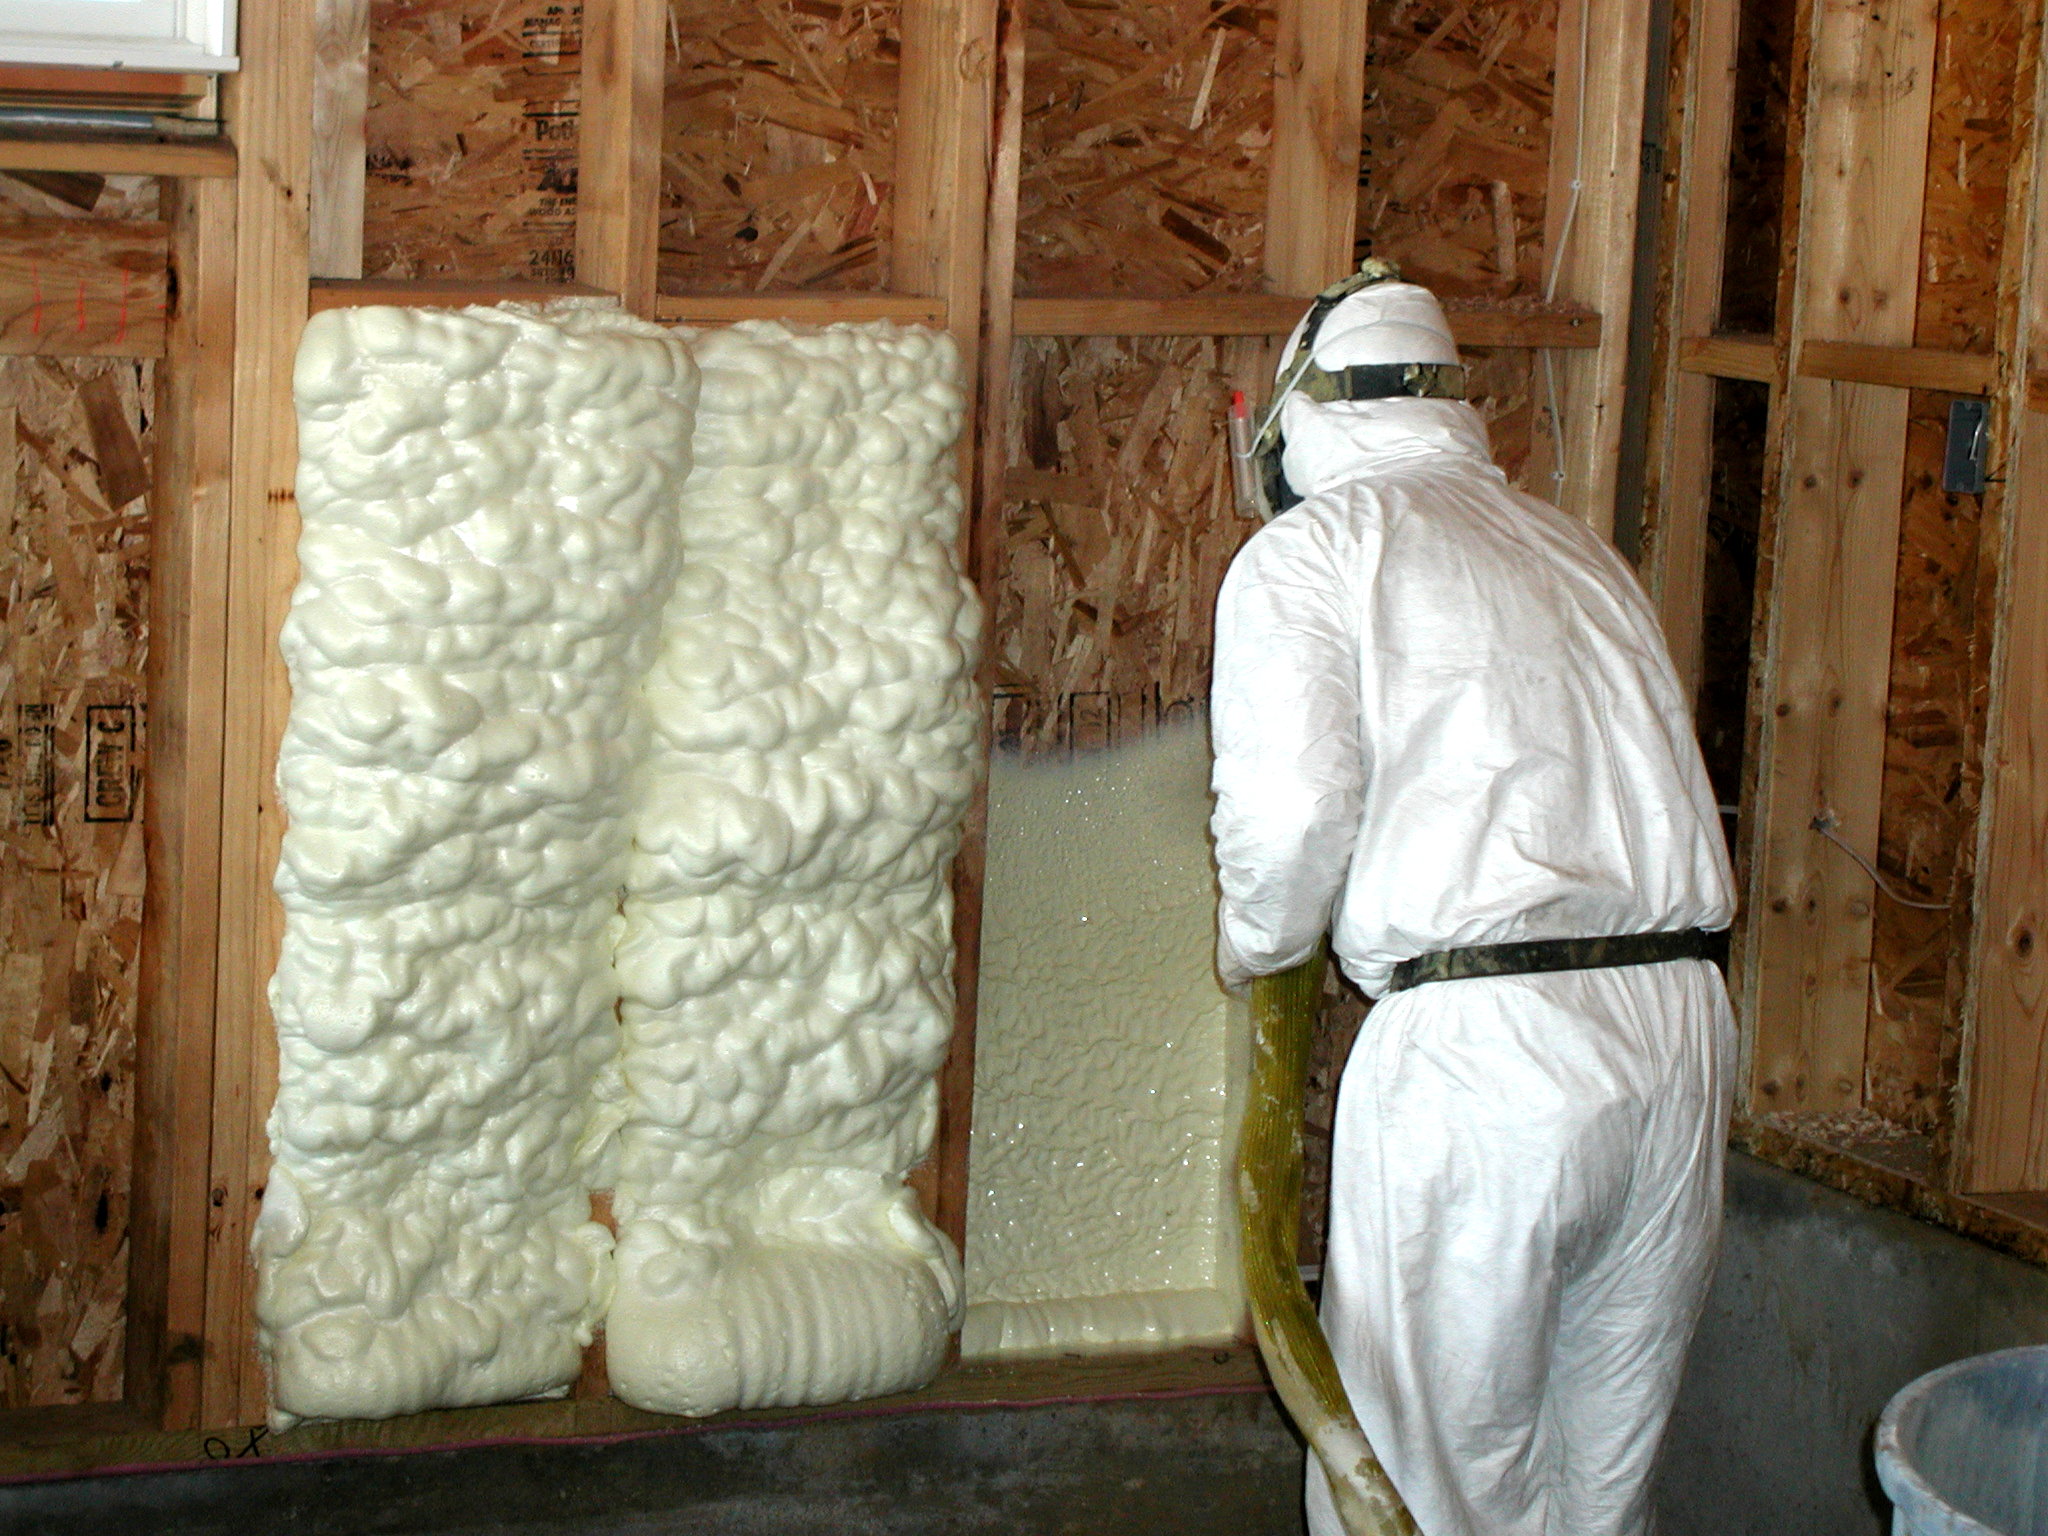
We also needed to use a little spray foam to seal some leaks in key (and difficult to fix) places. The tops of the walls in the attic were leaky, note the light yellow at the edge of the attic, that’s foam. The plaster and lath wall is the abandoned third floor room. We put foam board down over the flooring and taped the seams to air seal. A few places still leaked, note the foam in the seams right under the wall.
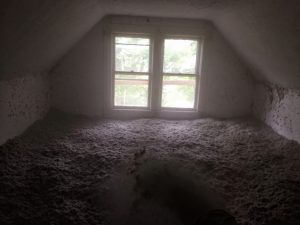
Dr. Michael Benedict, the department chair, was kind enough to volunteer to load the blow machine while I installed the blown cellulose in the attic. Here’s a point of view photo with me manning the blow hose in the attic:
Scott Robinson executed the last piece of air sealing: the foam board on the exterior:
In the end the team was able to reduce the air leakage from 6700 cfm50 (cubic feet per minute at 50 Pascals, the standard blower door metric) to 962 cfm50, a whopping 85% reduction! The target was 2000, it’s safe to say we beat the snot out of it. The air sealing and insulation, or building enclosure, is in very good shape. The best by far of any project I’ve worked on since. (A $150K budget helps…)
HVAC
Good air sealing and insulation is nice and all, but if you don’t have a heat source, you’re stuck. Since the goal of this project was to be sustainable, putting a furnace in (which burns fossil fuels) didn’t seem like a good idea.
Like I mentioned earlier, I wasn’t part of the HVAC decision, so this setup is not what we would have chosen, but it works ok. We’ll touch on some parts of the design that could be improved. We applied these lessons at the Habitat for Humanity project we worked on in 2016.
What was chosen is called a “ductless mini-split heat pump”. You can read up on them on GreenBuildingAdvisor.com, but basically a heat pump is an air conditioner that can run backwards and heat as well as cool. Mini splits don’t have ductwork, the refrigerant lines (the same ones you can see running from your outdoor AC unit into the house) run all the way to the indoor unit. The indoor unit pumps heat or cool directly into whatever room it is placed in. Here’s what the outside unit looks like:
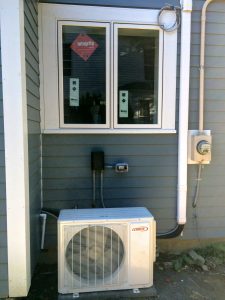
In a great example of what happens when a Building Scientist is not point person, this outdoor unit is installed incorrectly. Heat pumps should be on pedestals. This is to keep them above the snow. Since this HVAC contractor was used to installing air conditioners, which can be mounted on the ground, this got missed. (It was fixed later.)
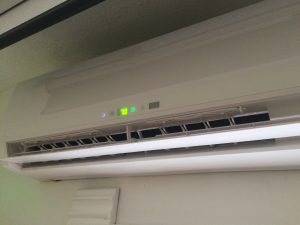
Here’s what an indoor unit, or head, looks like:
Basically, think of a smaller version of the heater/air conditioner you see in hotels. This type of mini-split is actually called a “multi-split” because it can run up to 4 heads, or indoor units. Another error was made here because only 3 heads were planned in the faculty offices on the second floor. No heating or cooling was going to happen on the first floor where the classroom is. That’s a problem because that is the room that will see the most occupants, sometimes as many as 15 students in a class.
I squawked about it and the fourth head was installed in the classroom, which is the one you see above. It would have been better to have two heads upstairs, one on the first floor, and one in the basement. Since all four spots for heads on the outdoor unit have been taken, if cooling or more efficient heating is needed in the basement (it has another form of heating I’ll show shortly), it will require another mini-split, which is $3-4K at minimum. With better planning, it would have been the same installed cost it is today.
Radiant Floors in the Basement
Jim Zella has radiant floors in the addition of his house and loves them, so he pushed for a similar setup in the basement. It makes the basement floor pleasant to walk on.
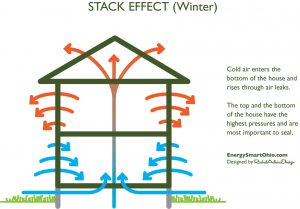
With a poorly performing building, the heat from the basement would tend to rise through the house in the winter with what is known as “The Stack Effect”.
Most homes act like smoke stacks and heat rises through them as cold air comes in low in the house and warm air rises out through the top. With higher performing buildings like this one, the effect is muted.
Dr. Michael Benedict noted that when I set the basement floor to 60, the first floor (literally the floor) felt cold. We settled on a 63 degree setpoint, down from 70 to start. Why? Stay tuned…
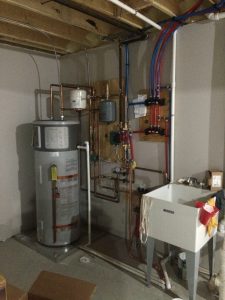
This is a high efficiency boiler. It was meant to heat the floor, but was also supposed to make the hot water as well in what is known as a “Kombi” unit. (German spelling, likely a German invention, ja?)
Unfortunately, the specification of the equipment wasn’t specific enough and didn’t call for a Kombi boiler, this is a plain old boiler that was only meant to run the floor heat in the basement. There was no hot water for sinks and the shower.
This left two options: remove the boiler and replace it with the correct one, or replace the boiler system entirely with another type.
Since this system is only used a few months per year and the water heating needs of the house are mostly limited to handwashing, I advocated to Debbie Kasper for an all electric water tank called a Heat Pump Water Heater. These have very similar operating costs to natural gas water heaters when in heat pump mode. This also allowed us to remove the gas meter.
The basement floor heat and water heating were the only remaining items using natural gas. Just having a gas meter costs about $25/month with Dominion East Ohio Gas. In switching to an all electric model, it allowed us to disconnect the gas meter entirely and gave us a $300/year slush fund. We could burn up to $300/year of extra electricity and still have it cost less than having a gas meter.
The heat pump water heater (HPWH) gets heat from the air around it to heat water. Since it is scavenging heat from the very area it is supposed to heat, I wondered if it would fall behind. It did. Heat pump water heaters also have a resistance electric coil just like a standard electric water heater for when the heat pump can’t get enough heat or can’t heat fast enough. The bad part is that resistance electric is about three times more expensive than heat pumps to operate. The mini split heat pumps that heat the house are 2-5 times more efficient than the electric water heater, depending on several factors, but particularly outdoor temperature. (Heat pumps get less efficient at lower temperatures.)
An eGauge energy monitor was installed, I am curious to find out how much energy the floor uses. Click here to see real time usage at the TREE House.
In another example of why commissioning (or optimization) is important, the Egauge wasn’t set up perfectly, so the data it created was useless. It said the whole building only used 300 kilowatt hours in a year when in fact it used just shy of 15,000. It was a relatively simple fix of calling the help center and switching some of the circuits which were saying they were putting power back into the grid rather than taking power from it. A simple +/- problem. Now that problem is sorted, so this winter we will find out how much power the water heater uses (mostly for the basement floor).
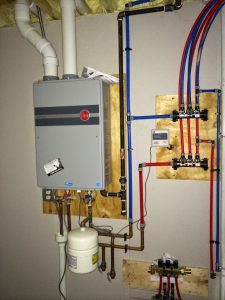
Here’s what the heat pump water heater looks like, note the red and blue “pex” plumbing on the wall which goes to the basement floor.
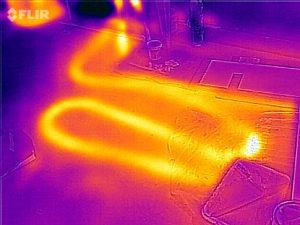
This is what the floor heat looks like in infrared. Blue is cold, yellow/white is hot.
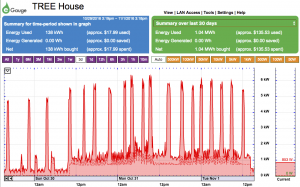
As I wrote this, I decided to check the energy usage to see if the water heater stood out. Here is some initial data in finding out how much power the basement floor uses.
In the summer, the use in the building peaked between 1500-2000 watts, or 1.5-2 kW. The water heater is pulling about 5000 watts when it’s on, all of the big spikes are due the resistance electric coils of the water heater. Meanwhile the 4 heads for the mini split heat pumps heating the rest of the house are pulling about 1500 watts. This is not a perfectly fair comparison because outdoor temps haven’t gotten cold enough yet to tell how much the mini splits will use, but I’ll keep an eye on it over the winter. Remember, we have a $300/year slush fund, or 3000 kilowatt hours. My house uses about 7000 kWh/year, so 3000 is a lot.
That said, we may be able to substantially reduce the energy use of the building if we had a heat pump in the basement, which would have been possible with a slight change in planning.
Fresh Air
When buildings get very tight, the air inside gets stale, and it’s best to pipe in some outside air, preferably well-filtered outside air. The TREE House has an ERV, or energy recovery ventilator. It pumps in fresh outside air and pushes stale indoor air out. In the process it transfers some of the heat from one stream to the other so all the energy isn’t lost. This helps keep the air inside fresh.
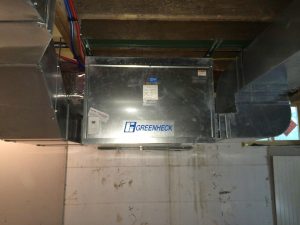
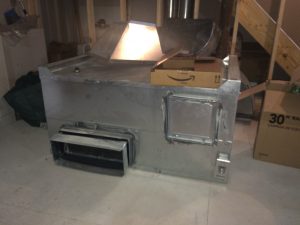
It also caused me to curse in front of one of Debbie’s classes. I walked in to find this monstrosity at the bottom of the stairs:
The massive ductwork hung down where you could hit your head on it, and it was in a place that made creating a classroom down there very difficult. I wanted to scream. Come to think of it, I did. Thanks to George Trappe for his help making the HVAC contractor’s life uncomfortable enough to get it changed. George said it was “misapplied” which is tantamount to severely insulting someone’s mother.
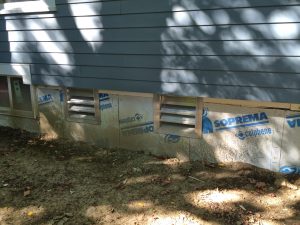
The HVAC contractor doing this job specialized in commercial jobs, and this is a commercial grade ERV, suitable for something like a 10,000 square foot warehouse. This is a 2000 square foot house. It was indeed misapplied. The ductwork installed to serve this ginormous HRV was large enough to heat and cool the whole house with a central unit (which is what we would have preferred, more on that in a bit.) Worse, they punched 2 HUGE holes in my carefully sealed building envelope, and didn’t seal them.
But that’s ok because they also weren’t high enough above the ground to avoid sucking snow in. Just like the heat pump was not off the ground. (If you sense me seething right now, you are dead on, I was really upset.)
This was a tremendously expensive unit and install. And it was WRONG. That made me swear. Design for HVAC systems is utterly critical for delivering results, here is a great example why. If you don’t carefully specify what equipment you want, HVAC contractors tend to just throw something in, regardless of what is an optimal choice. Grrrr.
The old ERV is for sale. It’s currently a large and expensive paperweight on the floor:
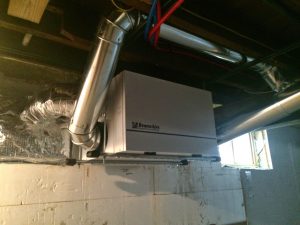
The new ERV is much smaller:
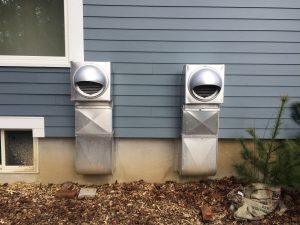
And the vents got changed to snorkels so they are above the snow:
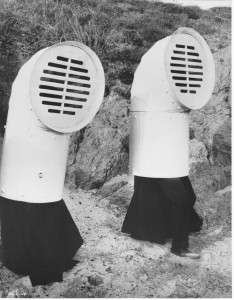
Once again, though, this is not a unit I would have chosen. It only has one speed, 200 cubic feet per minute (about 4 bath fans worth). The first unit was 450-750 cfm, by the way. 200 cubic feet per minute (cfm) is great for when students are there, but overkill the rest of the time. Most of the time you want something like 50-100 cfm, or even none when no one is there at night.
Because it is single speed, the only options are on or off. The control allows for a percentage of run time per hour, i.e. 50% run time would run for 30 minutes per hour. The control is in the basement, so to change it a student or faculty member has to go down to do it. That’s unlikely to happen before and after every class. Consequently I set it at 70% and let it rip.
Another bad part, though, is that it has an inefficient motor. 40-60 watts should be adequate for this purpose, this unit uses 140 because it has a lower quality type of motor. That extra 100 watts costs about $70/year. Not a huge sum, but an easily avoidable one if a different unit for $100-300 more had been specified.
As you can see, the HVAC system in the TREE House drove me a little batty. The poor choice of mini-split head placement, lack of a head in the basement, decision to use heated floors in the basement, the wrong boiler installed, and particularly the wildly incorrect ERV made me want to scream (and Debbie too.)
Here was Debbie, a novice at Building Science, construction, and project management. She was trying to figure out what the best HVAC choices were from rather exotic choices. She really needed a helping hand. Sadly I was still learning HVAC at the time and had a lot of trouble expressing myself, so the only thing I suggested that got done was a mini-split head in the classroom.
The Good News
I don’t want to sound like a Debbie Downer here, overall this project was a big success. The process was certainly a lot harder than it needed to be, and I think Debbie likely took a little time off her life with the project. I think I did too. It doesn’t have to be that way, as I’ve seen since. It just takes a bit more planning up front with a point person knowledgeable in Building Science helping guide the project.
I’ve spent a great deal of time in the TREE House since completion while I work on my book. (I’d like to thank the Environmental Studies faculty for being so welcoming, you all are a treat to be around!) It is a very comfortable building, far more comfortable than the campus library where I also like to work. It looks great visually. The house is very, very tight. It is far less likely to develop expensive moisture issues (mold and rot) than other homes. Most importantly, it has the lowest energy use per square foot (by far) of any of my clients. It was a lesson in process, and how important having someone who can keep all the disparate Building Science pieces together in their head is. During this project I wasn’t capable of being point person. I am now.
Post Project Continuous Optimization
During this project I was basically cutting my teeth as an energy auditor and project manager. I flailed like an idiot quite a bit, if I were to do this project now I would be much more assertive.
I’ve also come to greatly appreciate what’s called “commissioning” or “optimization”. When a new ship is built, before it is given to the client, it is put through “sea trials” or commissioning. The builders take the ship out, see how fast it will go, how fast it will turn, and basically try to break it. Then they go back to port, fix anything that broke, and tell the client how to operate the ship. It might do 25 knots, but that could rattle it apart, so only run it 23. That is called commissioning a ship.
High Performance Homes (really all homes) need some commissioning. We call it “Continuous Optimization”. While a ship is complete after sea trials, a home has a lot of different conditions that need to be optimized. A hot summer day is very different from a cold winter night, both of which are different from a mild spring or fall day. All of these require a slightly different way to operate the house. Not only does a house need to be optimized, it needs to be optimized continuously for every season. Here’s the Continuous Optimization story for the TREE House.
Indoor Air Quality
High Performance Homes are naturally tight, so Indoor Air Quality becomes a much larger concern. In a leaky house if you use nasty cleaning products, they will work their way out of the house fairly quickly. In a tight house, they tend to concentrate. The chemical pollutants are often called Volatile Organic Compounds, or VOCs. It’s important to control them. First, you try to avoid bringing them in, second you dilute them with fresh air.
Small dust, aka Particulate Matter or PM can also be a problem. Small dust can not only get into our lungs, but it can head straight into our bloodstreams. The WHO considers particulate pollution to be the single largest environmental health problem in the world. Bad news. And something we want to keep an eye on.
Tight homes also tend to stay more moist because the moisture can’t work its way out, particularly in fall, winter, and spring. (See my free HVAC chapter here for more about this.) Higher humidity levels make VOCs offgas faster, can lead to mold and rot, typically make a house uncomfortable, and can attract pests. Controlling moisture is critical.
But wait Nate! If all these are so important, how do I know what’s going on?!
Easy, with “datalogging”. A datalogger automatically records readings for various things. At a minimum, we’d like to keep an eye on temperature, humidity, PM2.5 (some of the small bad stuff), and VOCs. Ideally we’d like to track them simultaneously in different places. We also want to watch what happens over time. A short time period like 2-7 days could miss things, and certainly won’t tell us what’s going on in summer and winter. 2-7 days is like a snapshot, we want a movie.
We’ve become fans of Foobot Indoor Air Quality monitors, particularly when we have one on each floor. (Full disclosure, we have consulted for Foobot and they have given us units to test.)
All orange is bad, I blew into the left one, which stirs up dust and makes it mad. All blue is happy like the one on the right.
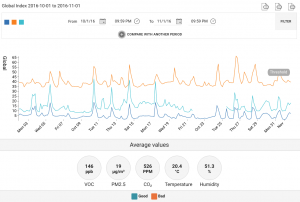
Their dashboard lets us compare multiple monitors simultaneously. Here’s what it looks like:
This is the overall score (they call it Global) which is a mixture of multiple factors. Note the spikes, those usually happen when class is in session and students drive up carbon dioxide levels in the building. The numbers at the bottom give averages over the period for the measured attributes. It’s a French company, hence the temperature in Celsius (soon to be Fahrenheit.) 20.4C is 68.7 degrees F. We placed 3 Foobots in the building, one on each floor.
Here’s what we found using Foobots:
- Humidity was too high. Spring and fall are damp seasons, and moisture generally builds up. We set the mini-splits to dehumidification mode. We also added a dehumidifier in the basement to handle spring and fall. It seems to be working.
- Particulate Matter got high sometimes. Students were asked to remove their shoes when coming into the building. Mini-splits have mediocre filters and the ERV only filters incoming air, so there is no central filtration. This problem remains only partially solved. A central heat pump with a central filter likely would have solved this, it has worked for a number of other clients. This discovery informed our decision to use a central heat pump with a good filter in the Habitat for Humanity project. I did an experiment with a cheap “fan filter”. This is a furnace filter taped onto a box fan. It seems to be reasonably effective, but it only works well in the room the fan is in. (Image in the photo gallery.)
- During classes, VOC levels get high. This indicates that the 70% run time is inadequate. It would be better to run at 100% for an hour before, during, and an hour after class. With the current controller, we can’t do that. A workaround is planned.
- Low ERV runtime makes it stinky. I set the ERV at 10-20% runtime. Both Debbie and Michael commented that the classroom got a lot “riper”. It spiked the VOC monitor, which also picks up carbon dioxide. Humans exhale a lot of CO2 when we breathe, so this makes sense.
- Low ERV runtime makes students sleepy. Higher carbon dioxide levels have been associated with poor decision making abilities and sleepiness. Dr. Kasper confirmed this…
While the Foobots didn’t pick it up because they weren’t close enough, Dr. Michael Benedict also commented that students didn’t want to sit near the ERV vent in the classroom over the winter. It blew cold air out of it. Even though an ERV transfers some heat to the incoming air, on a 10 degree day it may blow 40 degree air out of the vent. With a central duct system that cold air can be mixed with 3-10 times as much inside air to make the effect less noticeable. There is no easy solution for this now aside from running the ERV less, which also makes students sleepier.
The faculty also noted that the mini splits in air conditioning mode seem to pump out too much cold when it’s 70-80 outside, freezing out the two female faculty members. They then turn off the heat pump heads. Not being an expert in mini-splits yet, I’m not sure how to solve it. (Fellow pros, if you read this and know how, shoot me an email.)
After doing continuous optimization at the TREE House on and off for almost a year now, the building is as good as it can easily be. Further improvement will take a good sized budget.
Giving Instructions
After doing continuous optimization for a while, I wrote up little signs to post on the equipment around the TREE House telling how to use it. Recently the three faculty members and myself got together and discussed how to operate the house. Several things took some getting used to, like don’t open the windows (which allows humidity and often dust to come in.) Leaving the thermostats alone was also tricky, as we’ve all been trained to turn it down when we leave. With high performance buildings it’s best to just leave it alone and let the HVAC do its job. Fingers crossed the instructions lead to better operation of the building!
Conclusion
In the end, the TREE House works really well. I do wish for better filtration and mixing the air from the HRV so students don’t get cold, but those are pretty minor in the grand scheme of things. The building is very comfortable and very efficient, and it’s all electric so it can be powered by the wind and sun. This is a House of the Future.
I learned a heck of a lot on it, and it earned me a few gray hairs. The most important lesson is how important it is to have one point person on a project that has a decent grasp on how all the systems of a building work together, particularly the building shell (air sealing and insulation) and HVAC. That’s a Building Scientist. With a bit more planning this project could have been substantially smoother, but again, in the end it is a success.
I can’t thank Dr. Debbie Kasper enough for sticking with it and putting up with my rants when something pushed me over the edge, which happened a few times during the project. We’ve become good friends through the process, a lovely blessing in my life. The TREE House may never have been completed if it weren’t for her tireless efforts (and the many volunteer hours her awesome husband Tim put in too.) My hat is also off to Jim Zella and Scott Robinson for keeping the project going. This truly was a team effort!
Detailed Numbers
Gas Use Before Unknown
Predicted Use After 269 therms
Actual Use After None
Electric Use Before Unknown
Predicted Use After 17,037 kWh
Actual Use After 14,900 kWh
IAQ measurements
- Before
- Predicted
- After
Load Calculation – Based on REMRATE model from Residential Energy Services
- Predicted Heating 36,400 BTU/hr
- Predicted Cooling 20,400 BTU/hr


