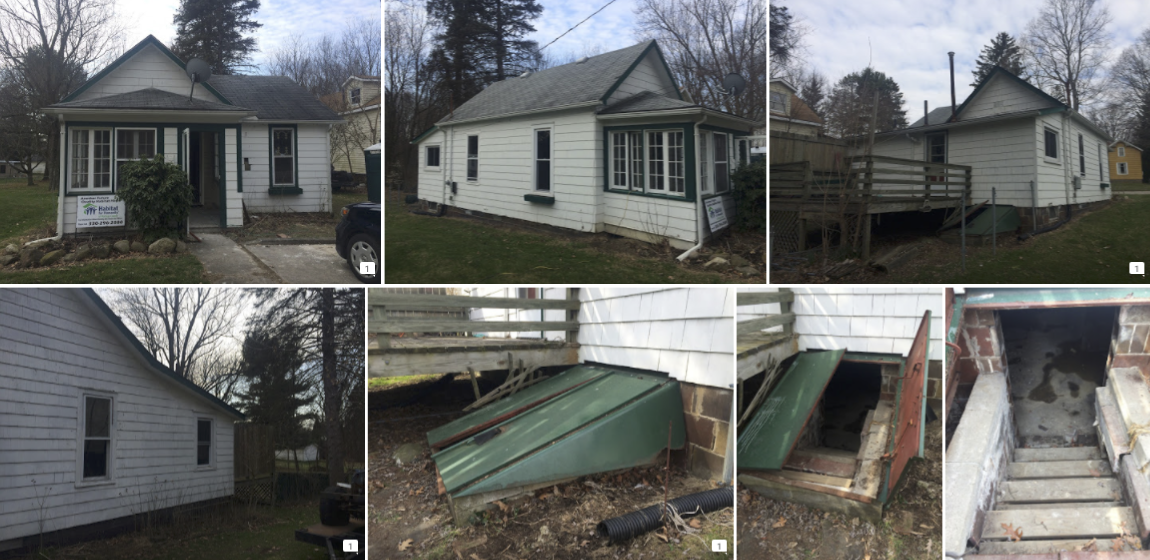
The house had sat vacant for several years and was very damp.
It was also extremely leaky, these problems lent themselves to a spray foam solution.

A Deep Energy Retrofit by Habitat for Humanity?
This case study is special, because it was also published in the September issue of the Journal of Light Construction. We will be publishing a follow up article on the results of the project sometime next year, and this case study will be updated. Here’s the article:
Who knew Habitat for Humanity doesn’t just build new homes?! In Ohio they are bringing cutting edge thinking to retrofits – proving you don’t have to be a gazillionaire to do deep energy retrofits. I was very lucky to get a call to help with this Habitat for Humanity rehab project. What follows is the story of the diagnosis, design, and most of the energy work on this project. Let’s start at my beginning…
Scott Craven, the construction manager for Habitat for Humanity of Portage County normally builds new homes and found my website while looking for help with this rather tricky existing one.
This home was purchased because it fit requirements of a disabled client who wanted a small home with an open floorplan in a city full of older homes. Sadly, the client passed away suddenly and the house sat while Habitat looked for another client that would be a good fit. Houses don’t like to sit, they get wet. So we had a few extra things to deal with.
That’s the background. Shortly, we’ll dig into the initial diagnosis, iterative energy modeling, and our decision process on insulation and HVAC.
Photo Album
See a bunch of project photos here.
Problems
- Dirt crawlspace was making home extremely damp
- Bio-growth on walls and roof deck
- New HVAC required
- Tight budget
Results
- Encapsulated crawlspaces mean they no longer smell musty
- Foam covered bio growth
- New heat pump (instead of a furnace) heats and cools home, normally Habitat does not do air conditioning
- Full insulation and HVAC package under $20,000 thanks to discounts and donations
- Final results are forthcoming as we tweak the house
Upgrades
-
Air Sealing and Insulation
- Attic – Roof deck coated with 3.5″ closed cell spray foam.
- Walls – 1″ closed cell spray foam on interior for air sealing, Dow 2″ R-10 extruded polystyrene foam board on the exterior.
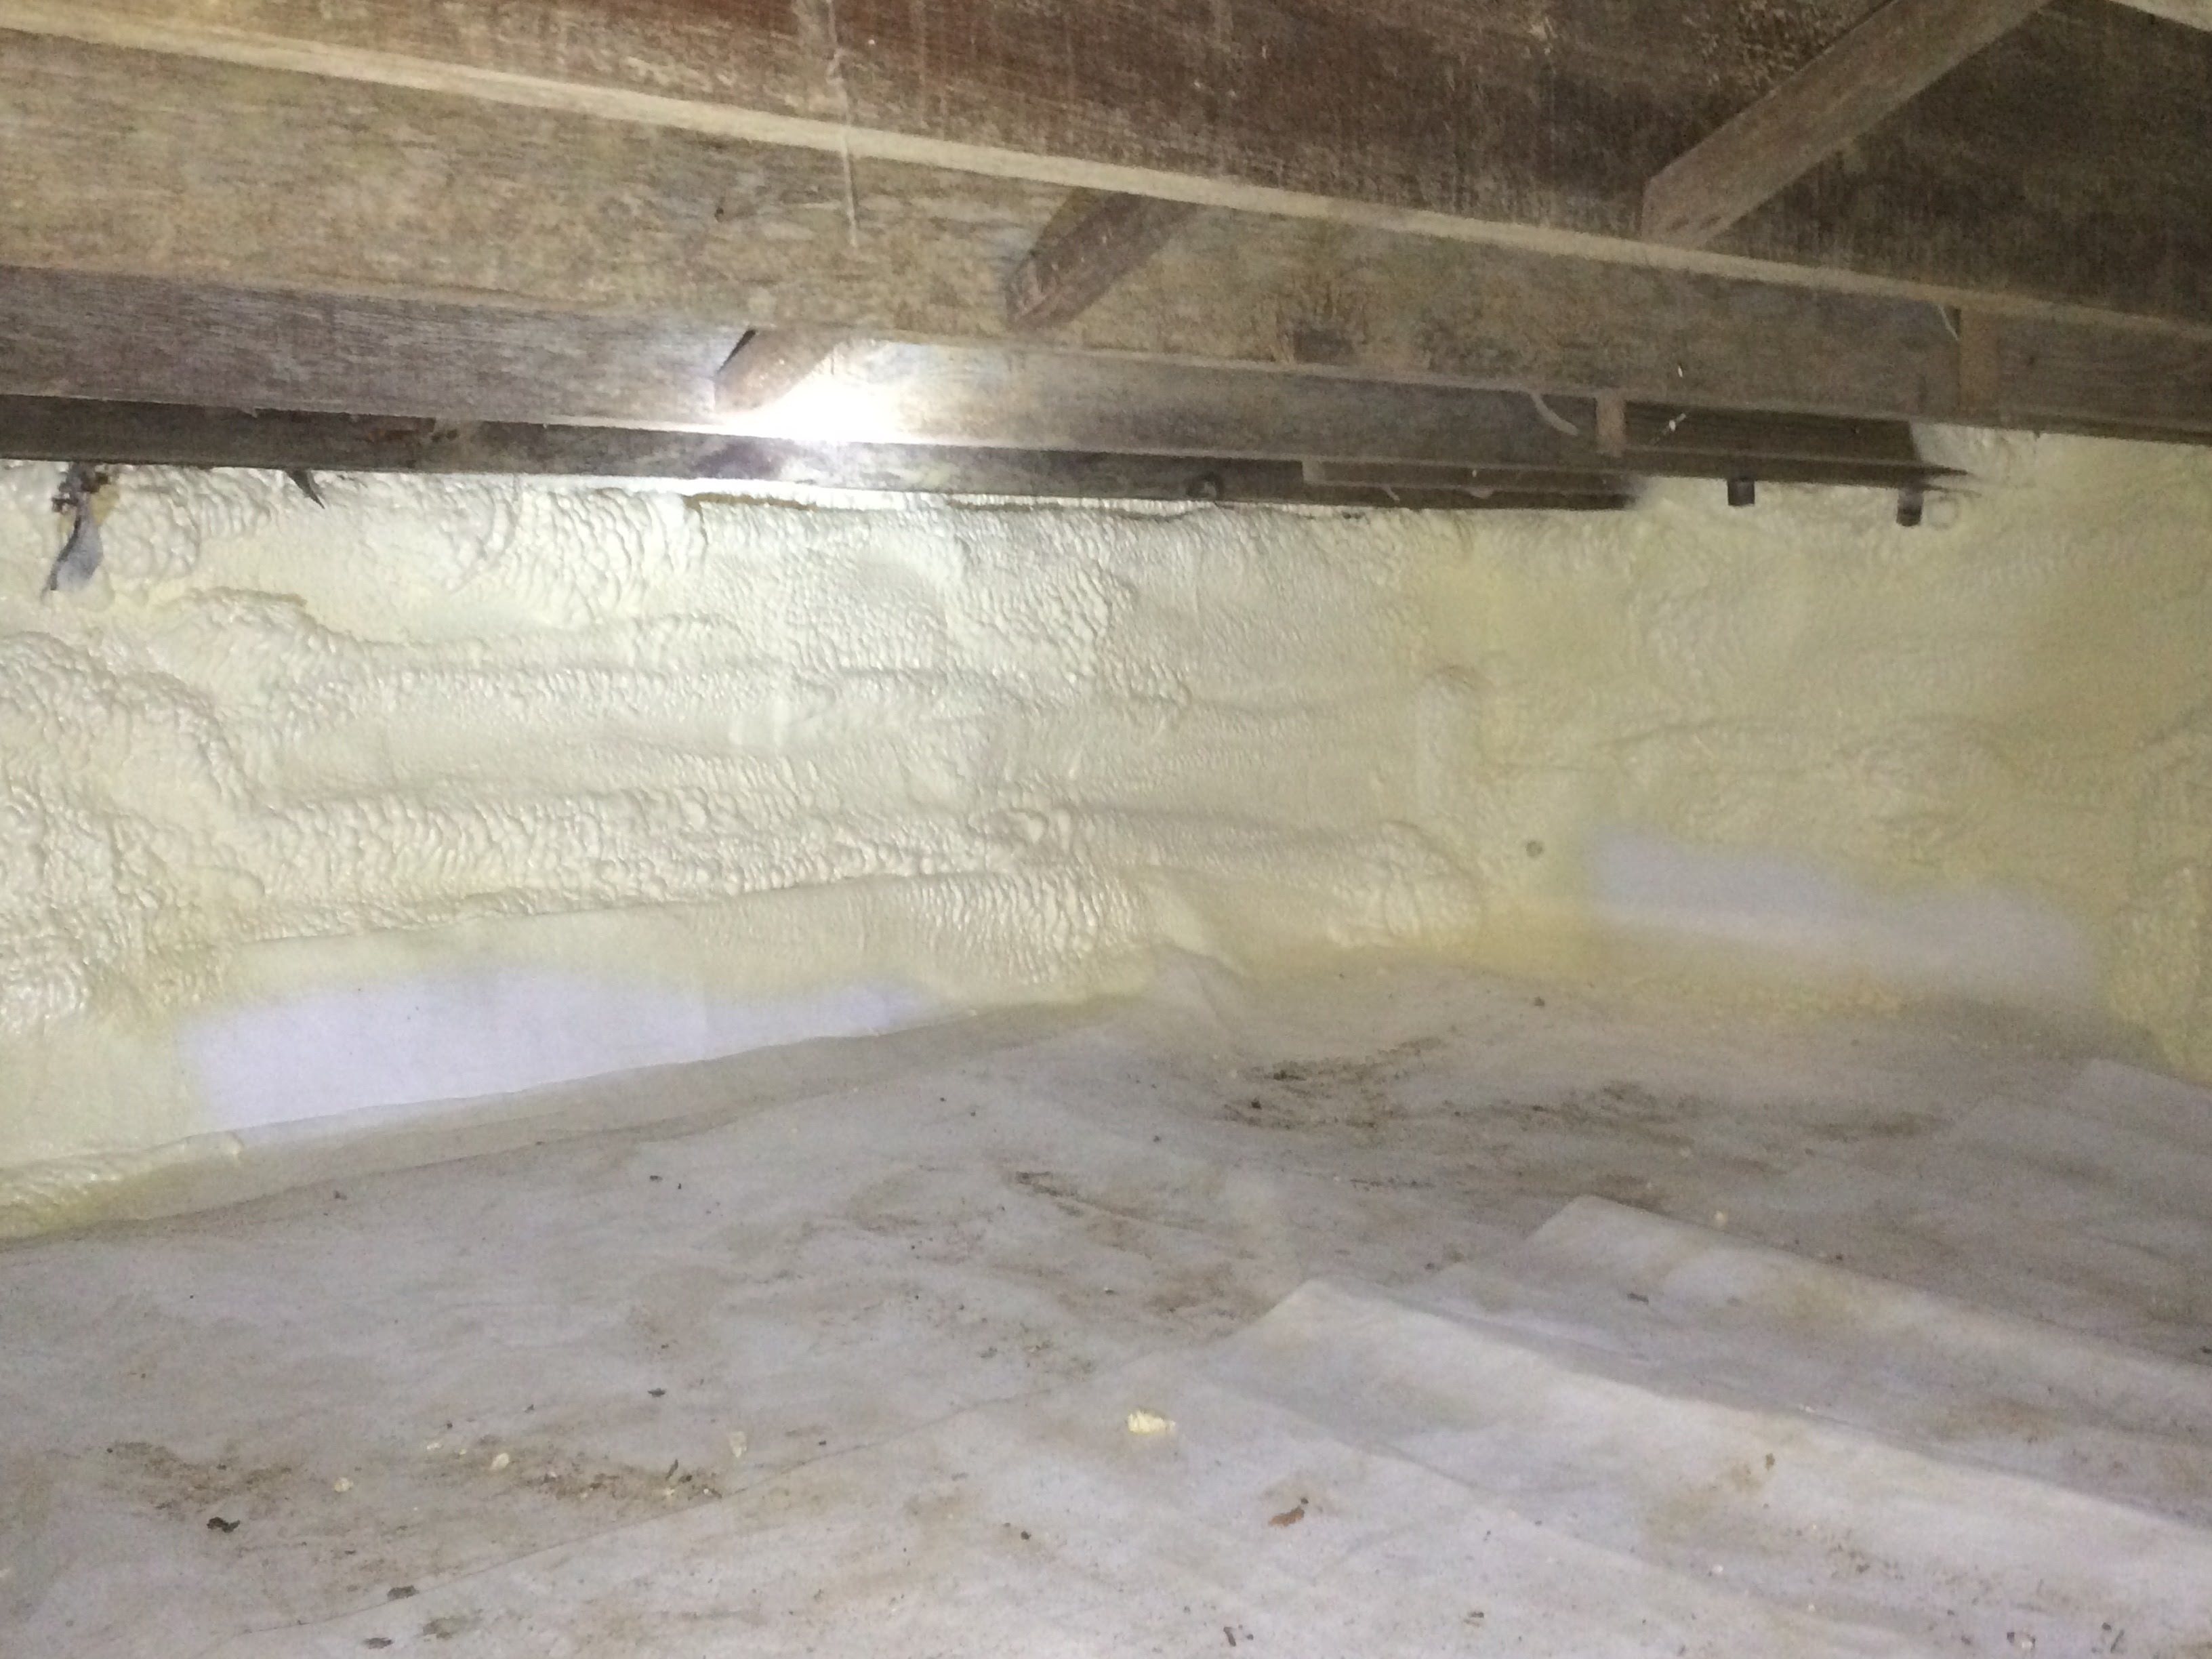
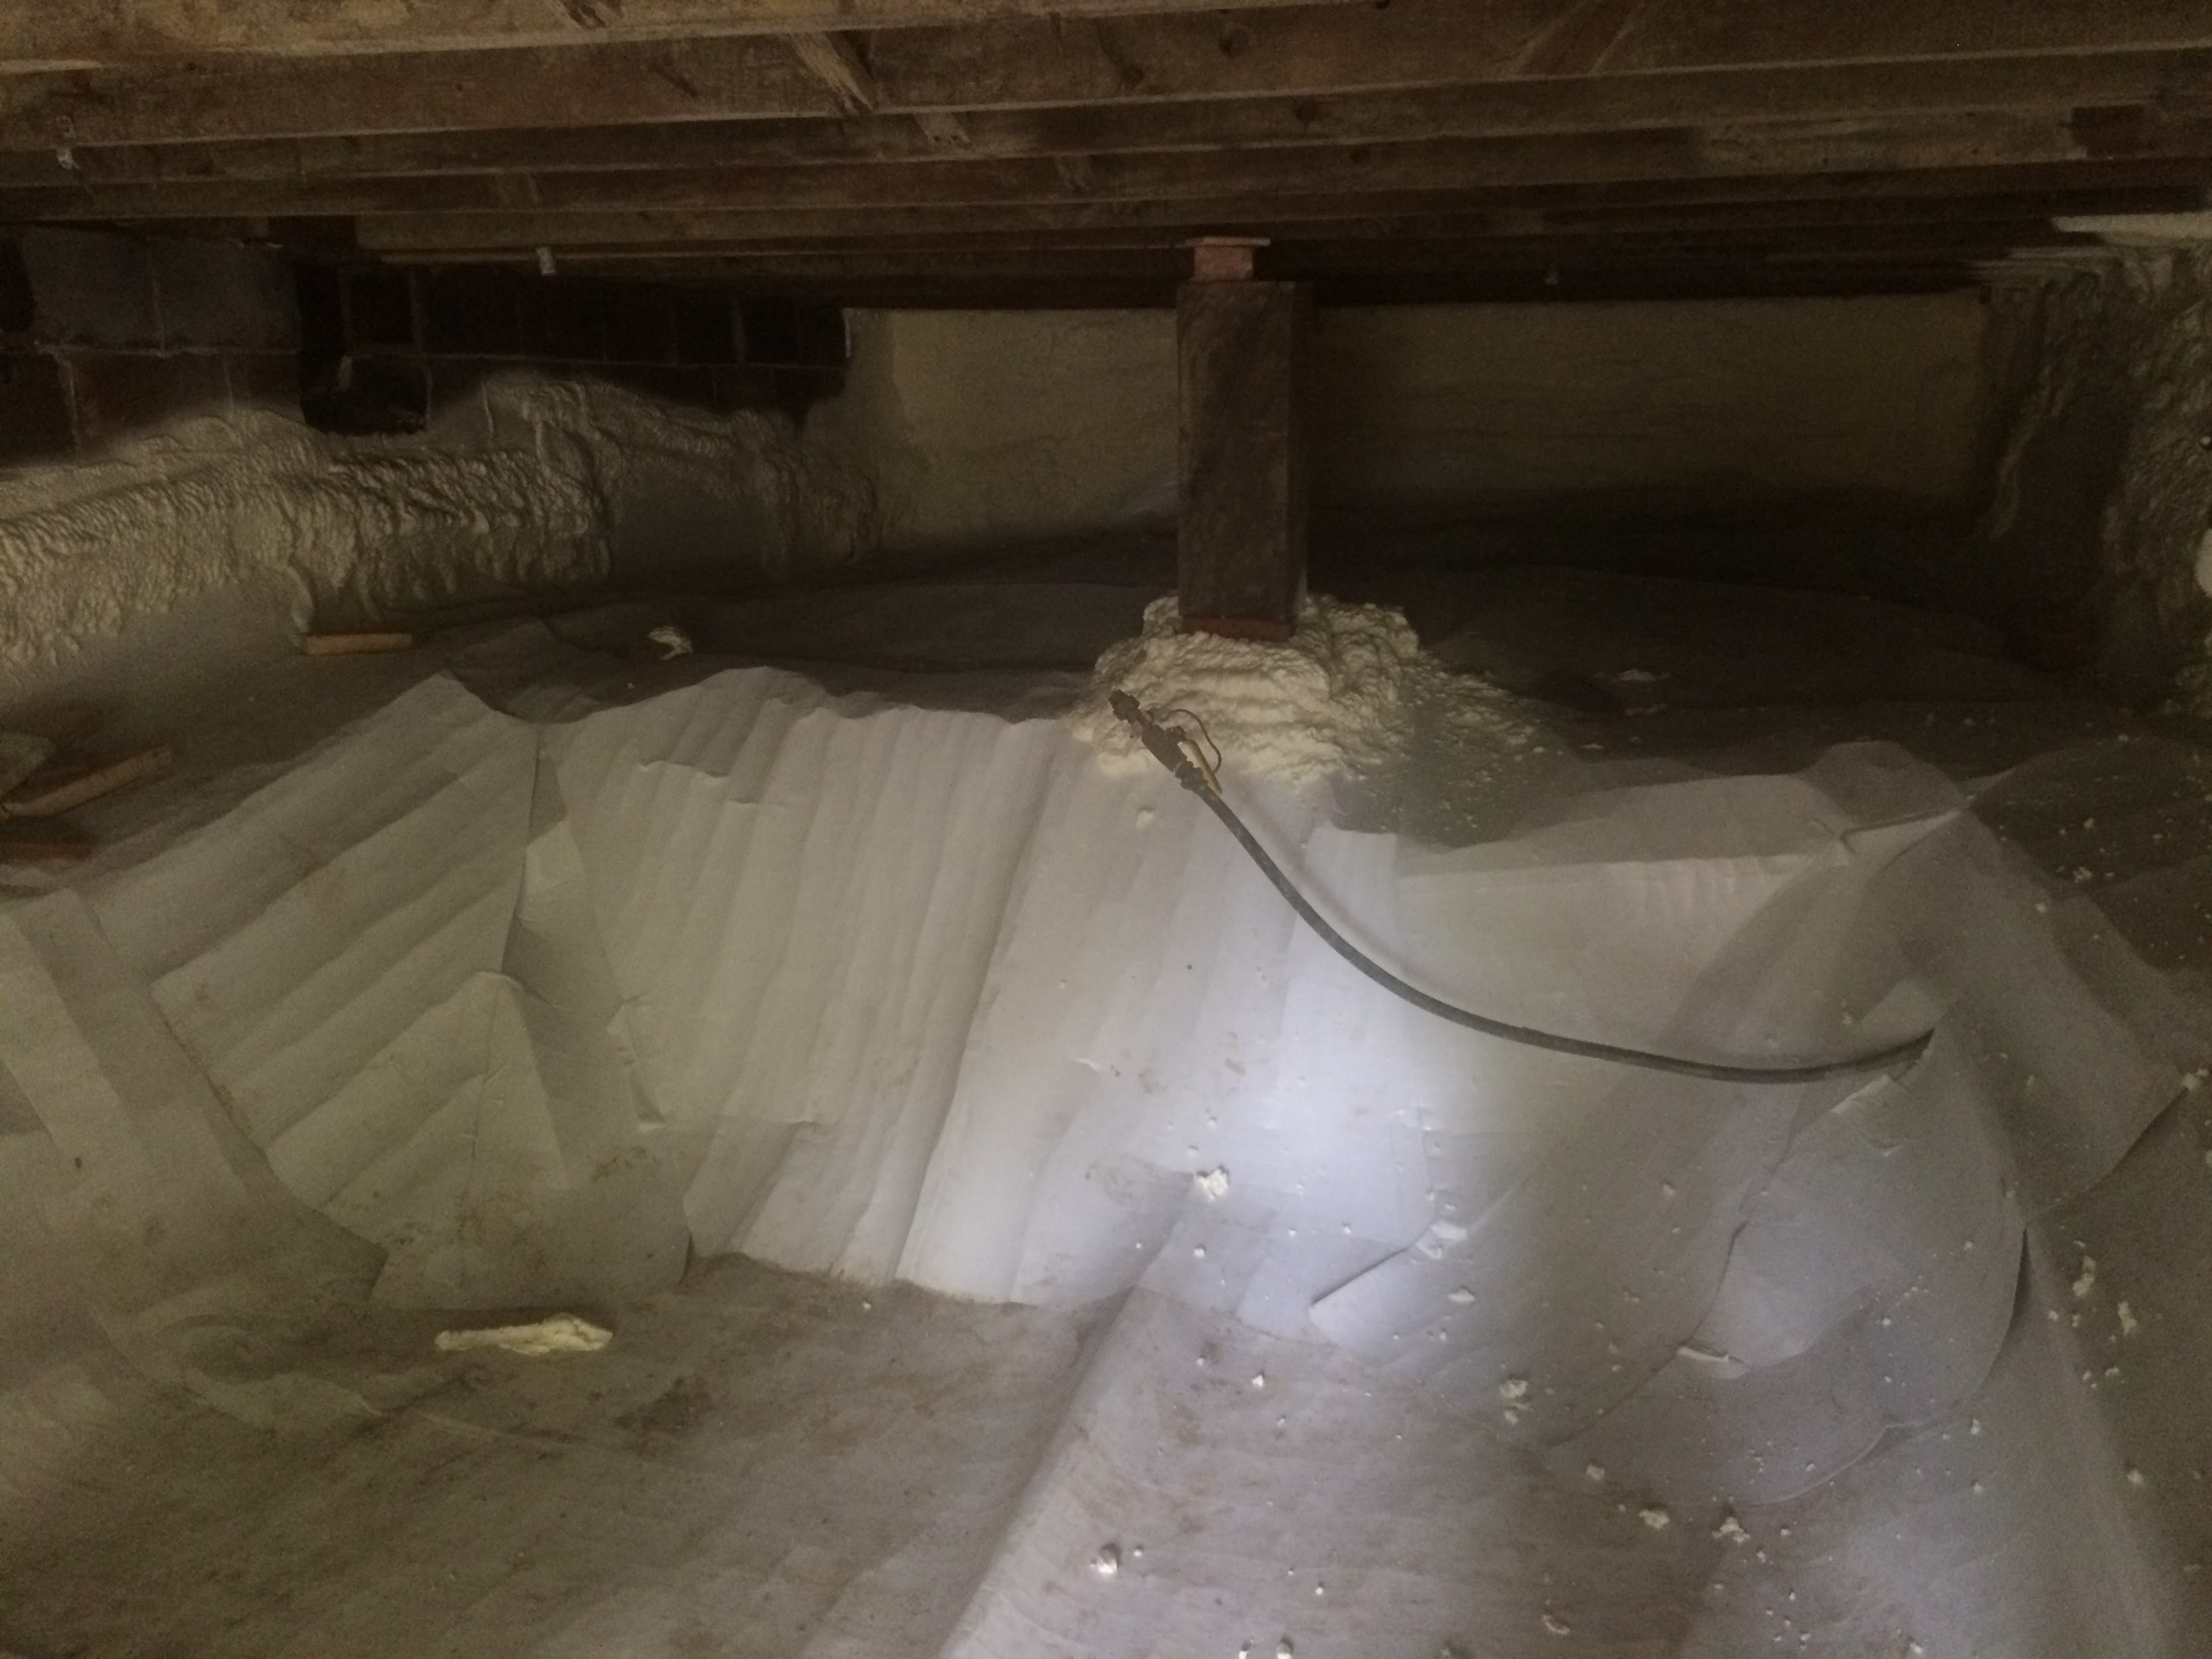
- Basement & Crawlspace – Encapsulated with reinforced vapor barrier to prevent moisture intrusion. 2″ closed cell spray foam against exterior walls.
-
HVAC
- Gas meter was removed, all electric
- Goodman 24,000 BTU two stage 16 SEER heat pump and media filter
- 70 pint Thermastor ventilating dehumidifier
- Electric water heater
-
Datalogging Tools
- Curb Energy Monitor to better understand energy use
- Foobot Indoor Air Quality monitors
- Ecobee EMS-02 datalogging thermostat
Full Story
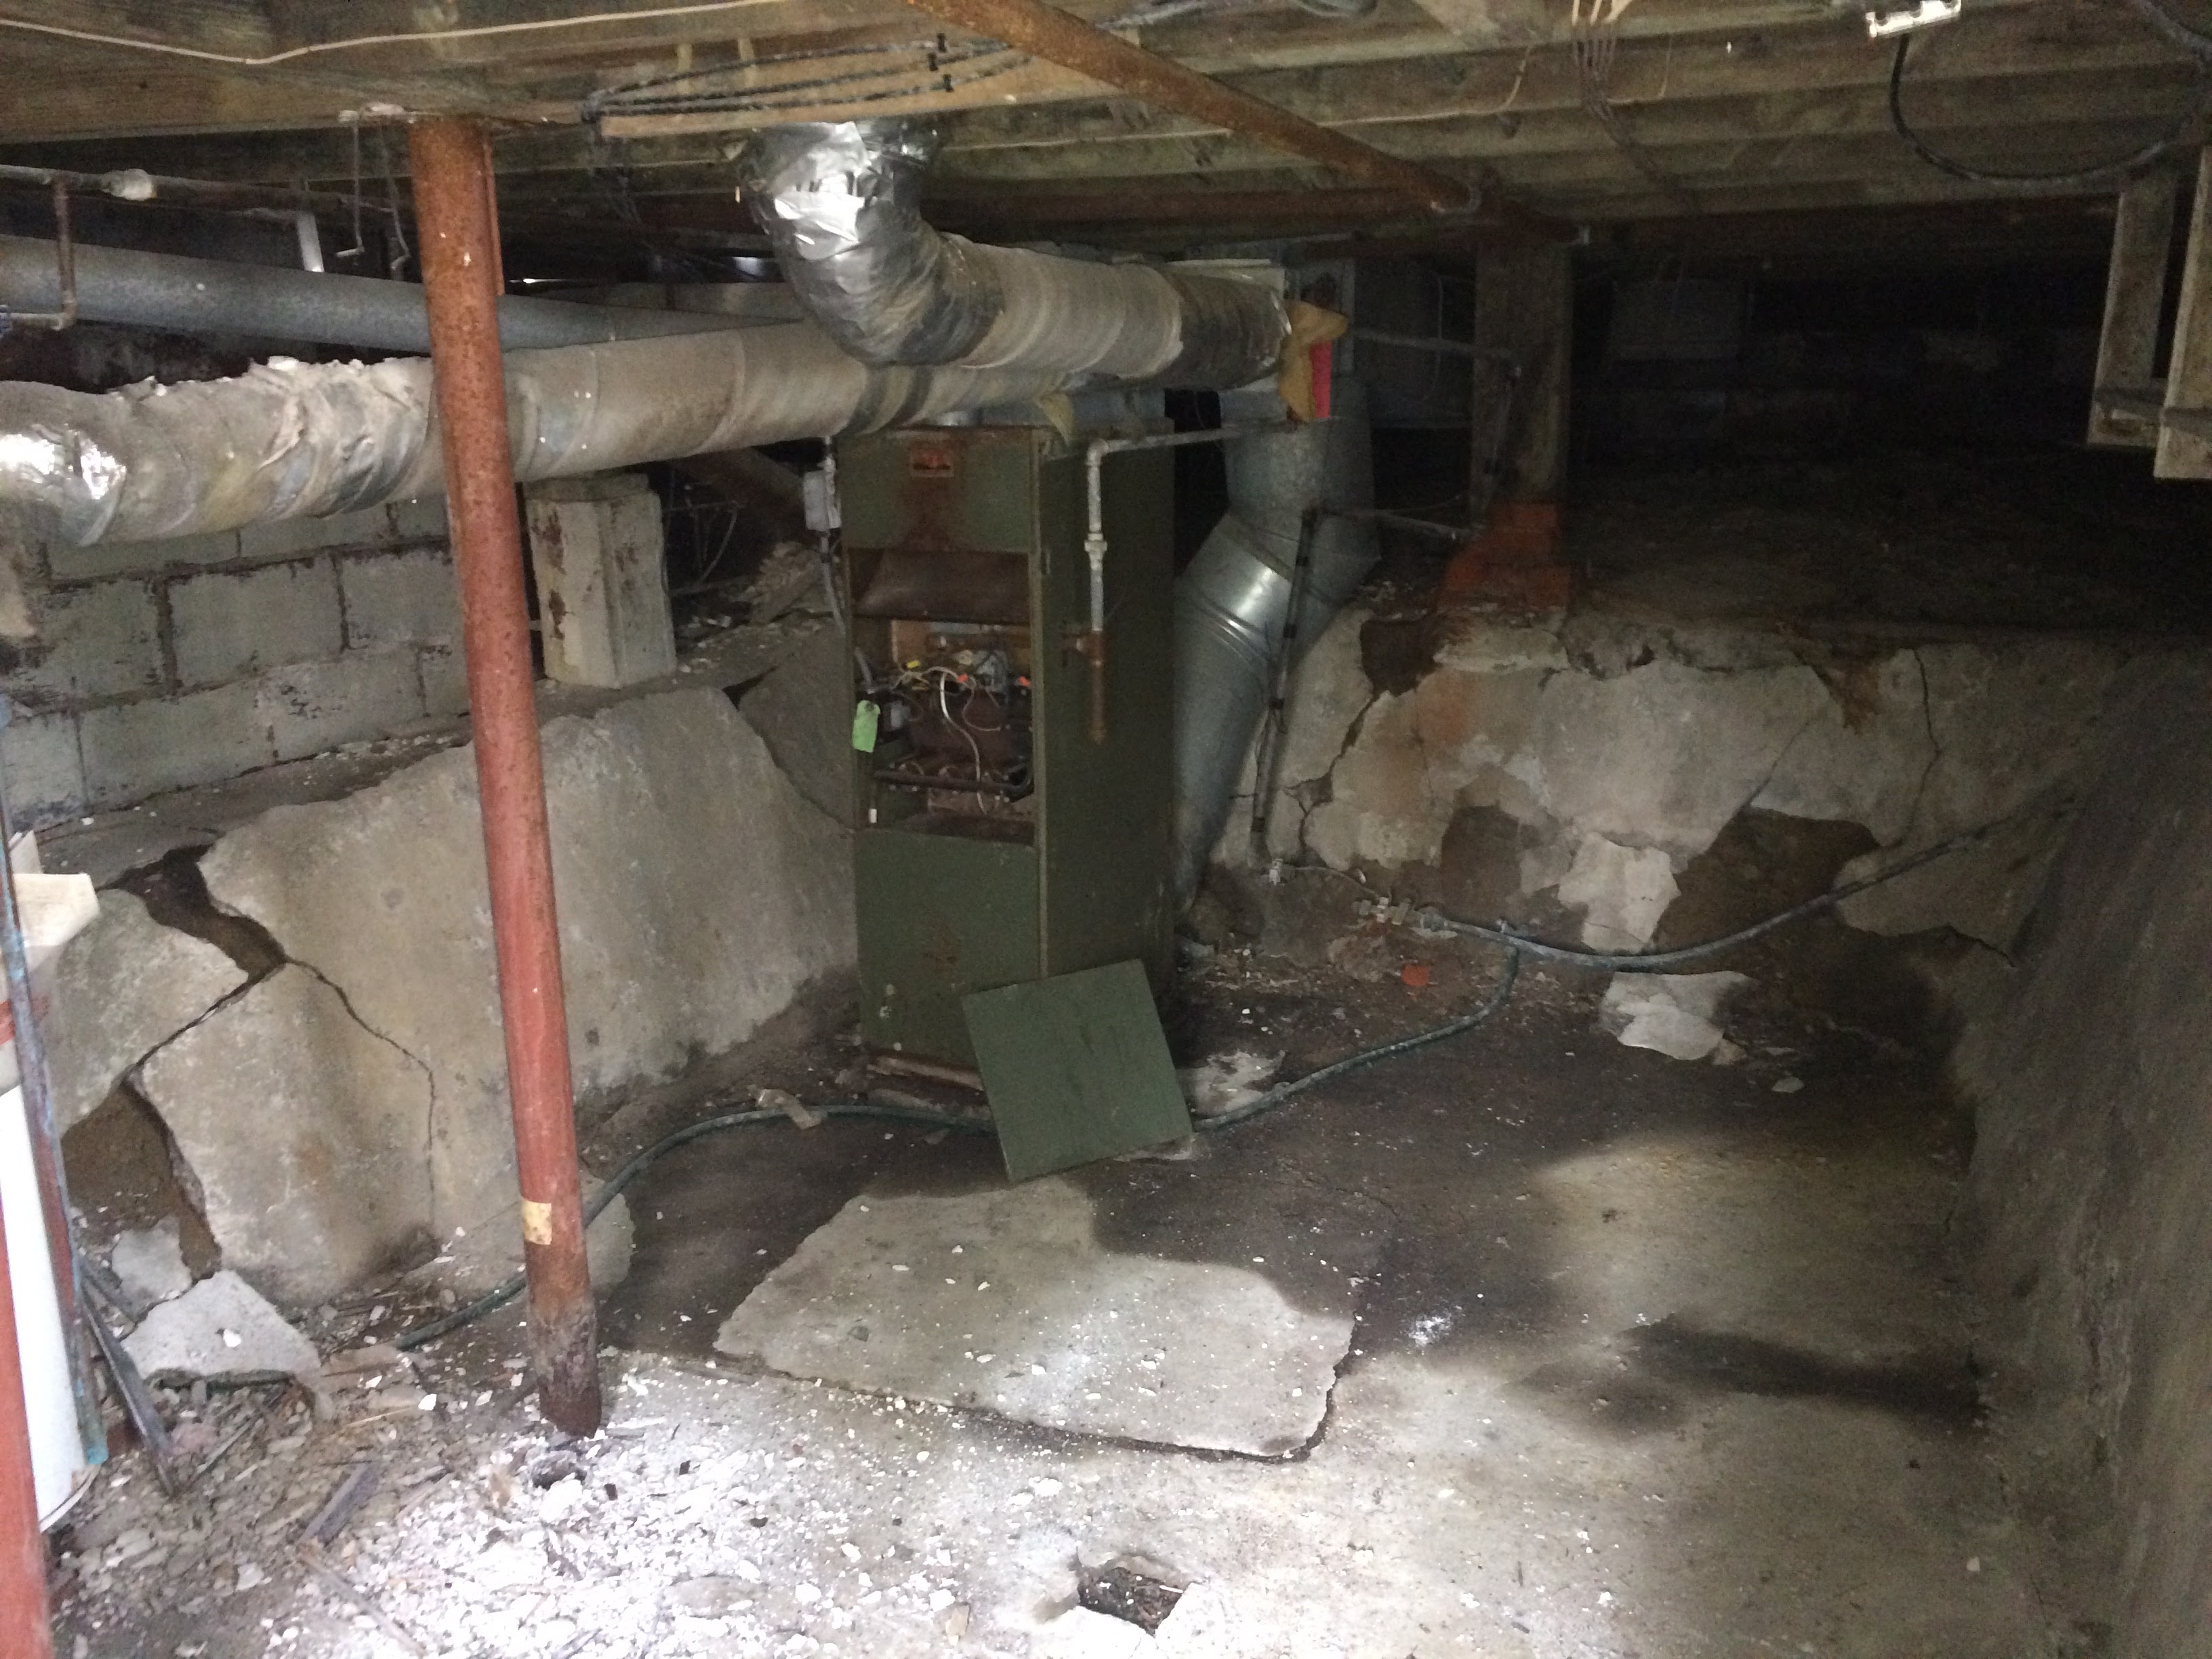
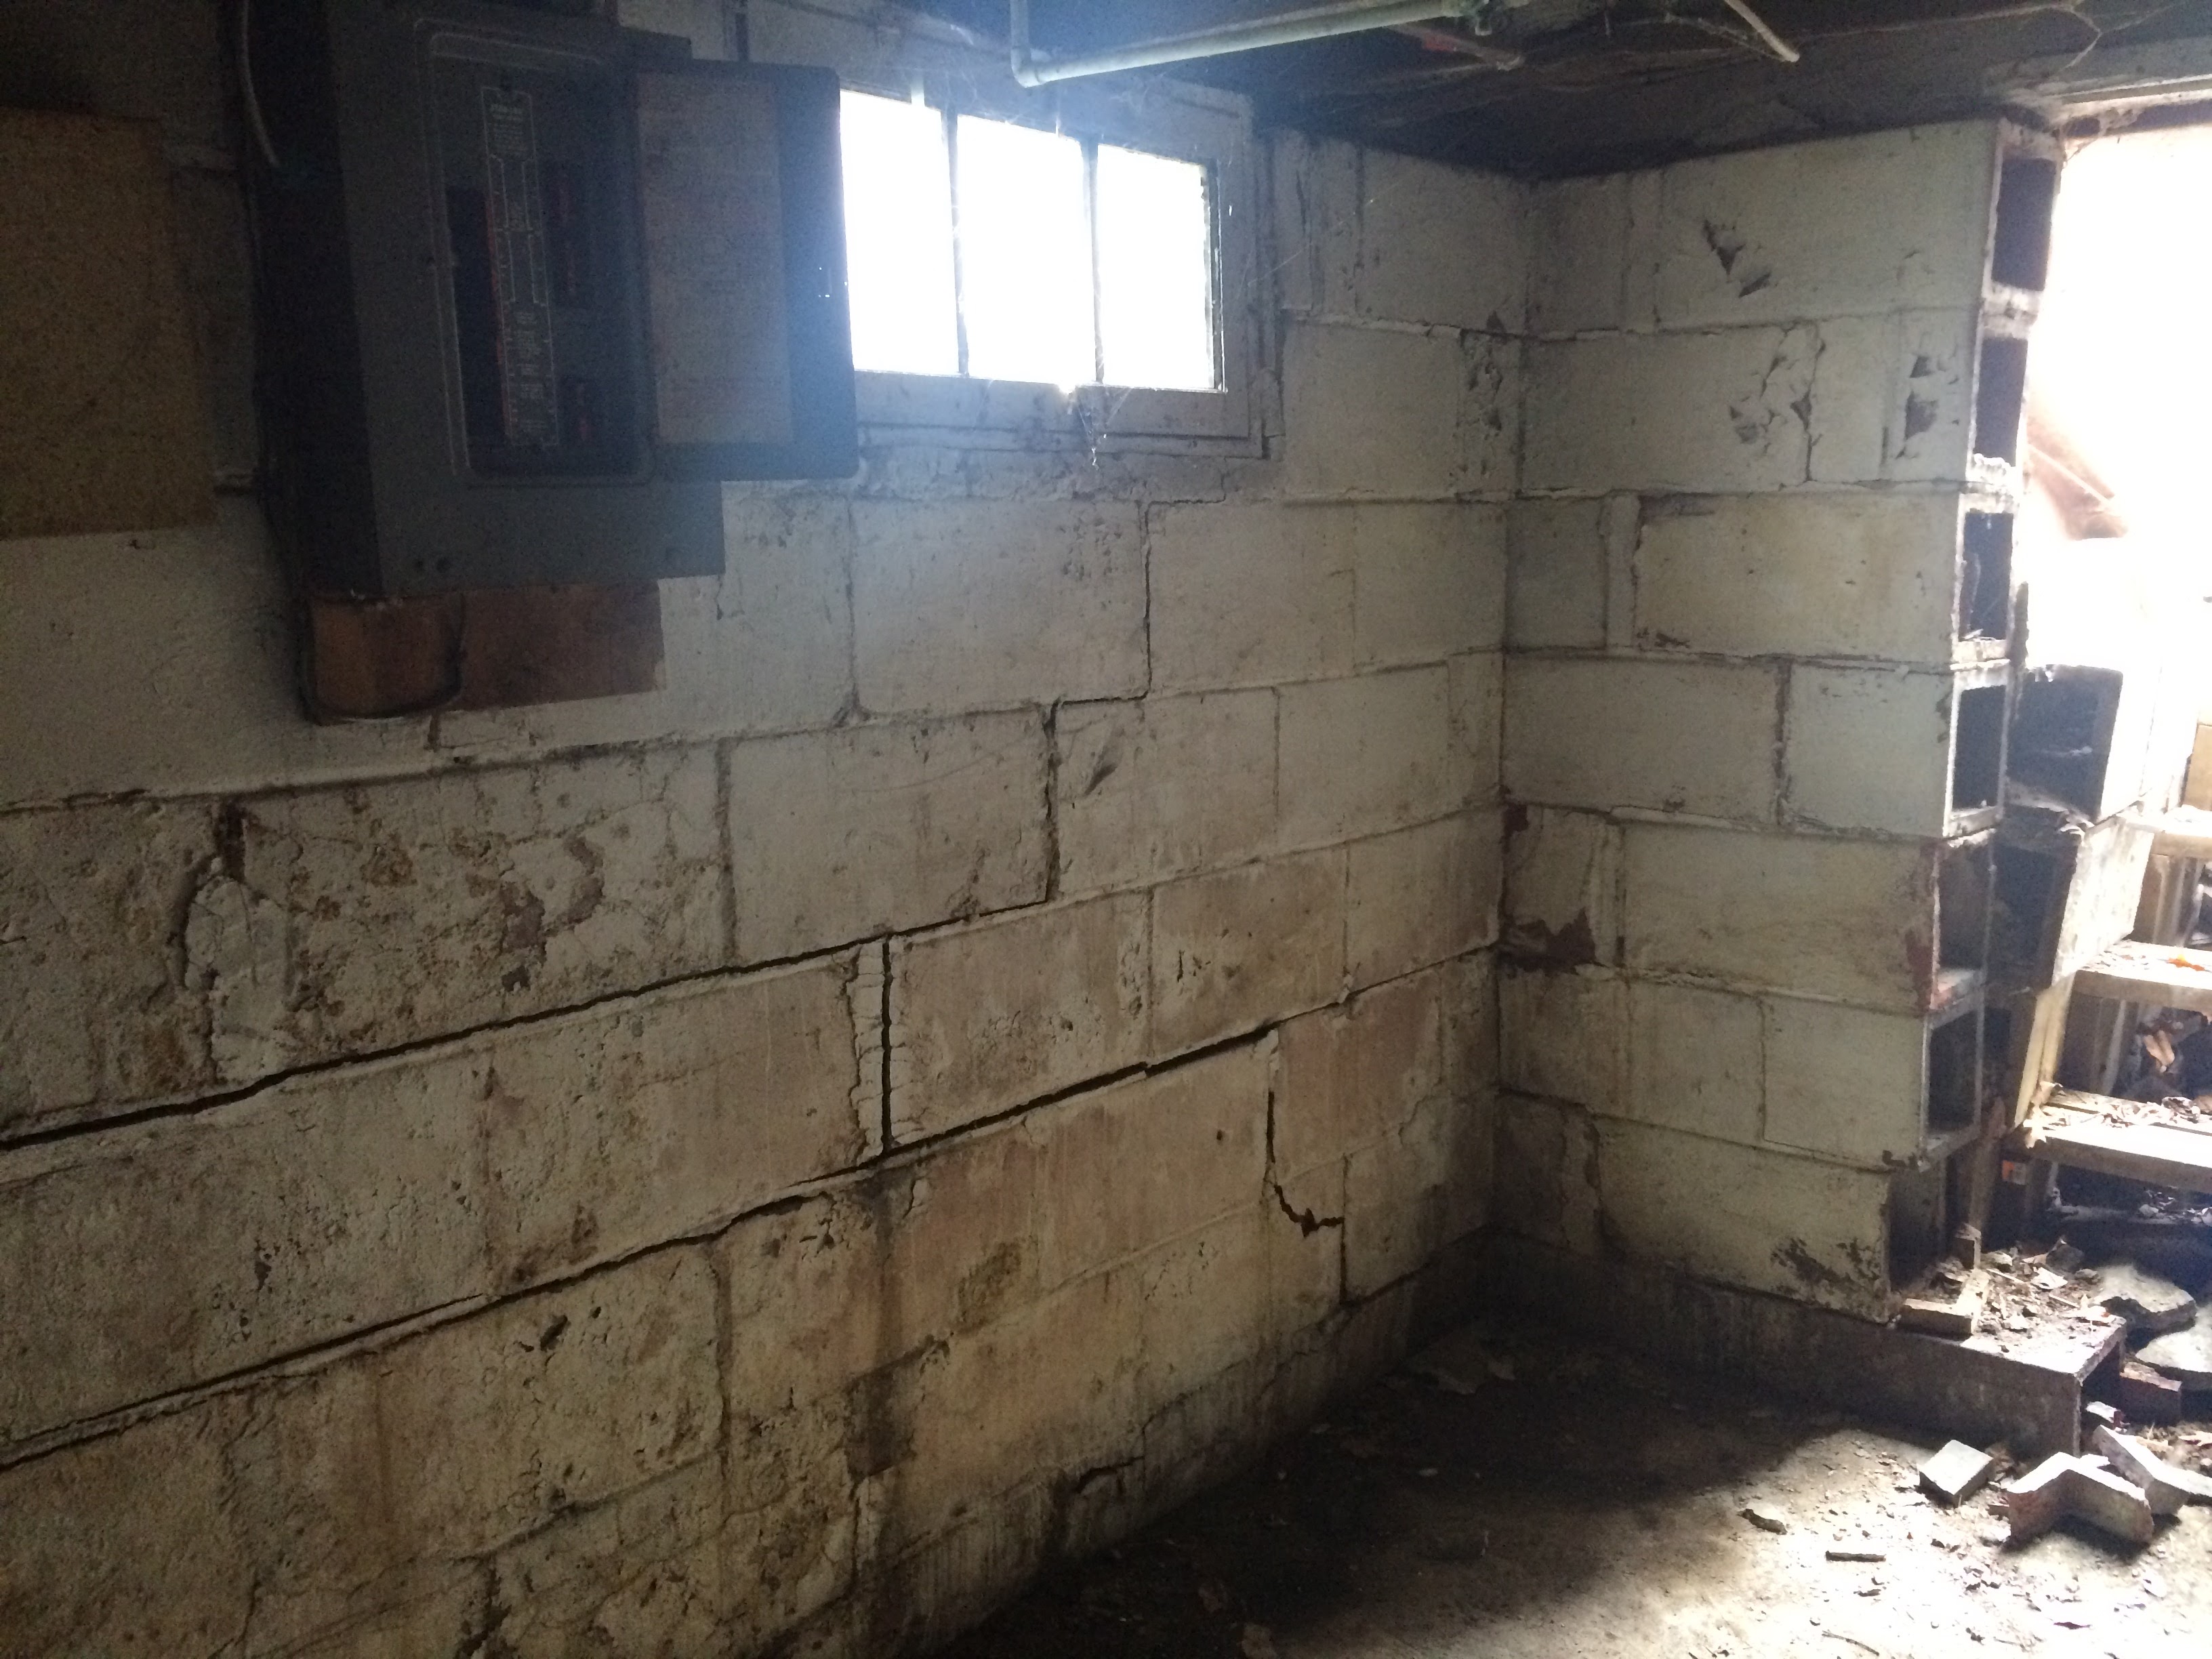
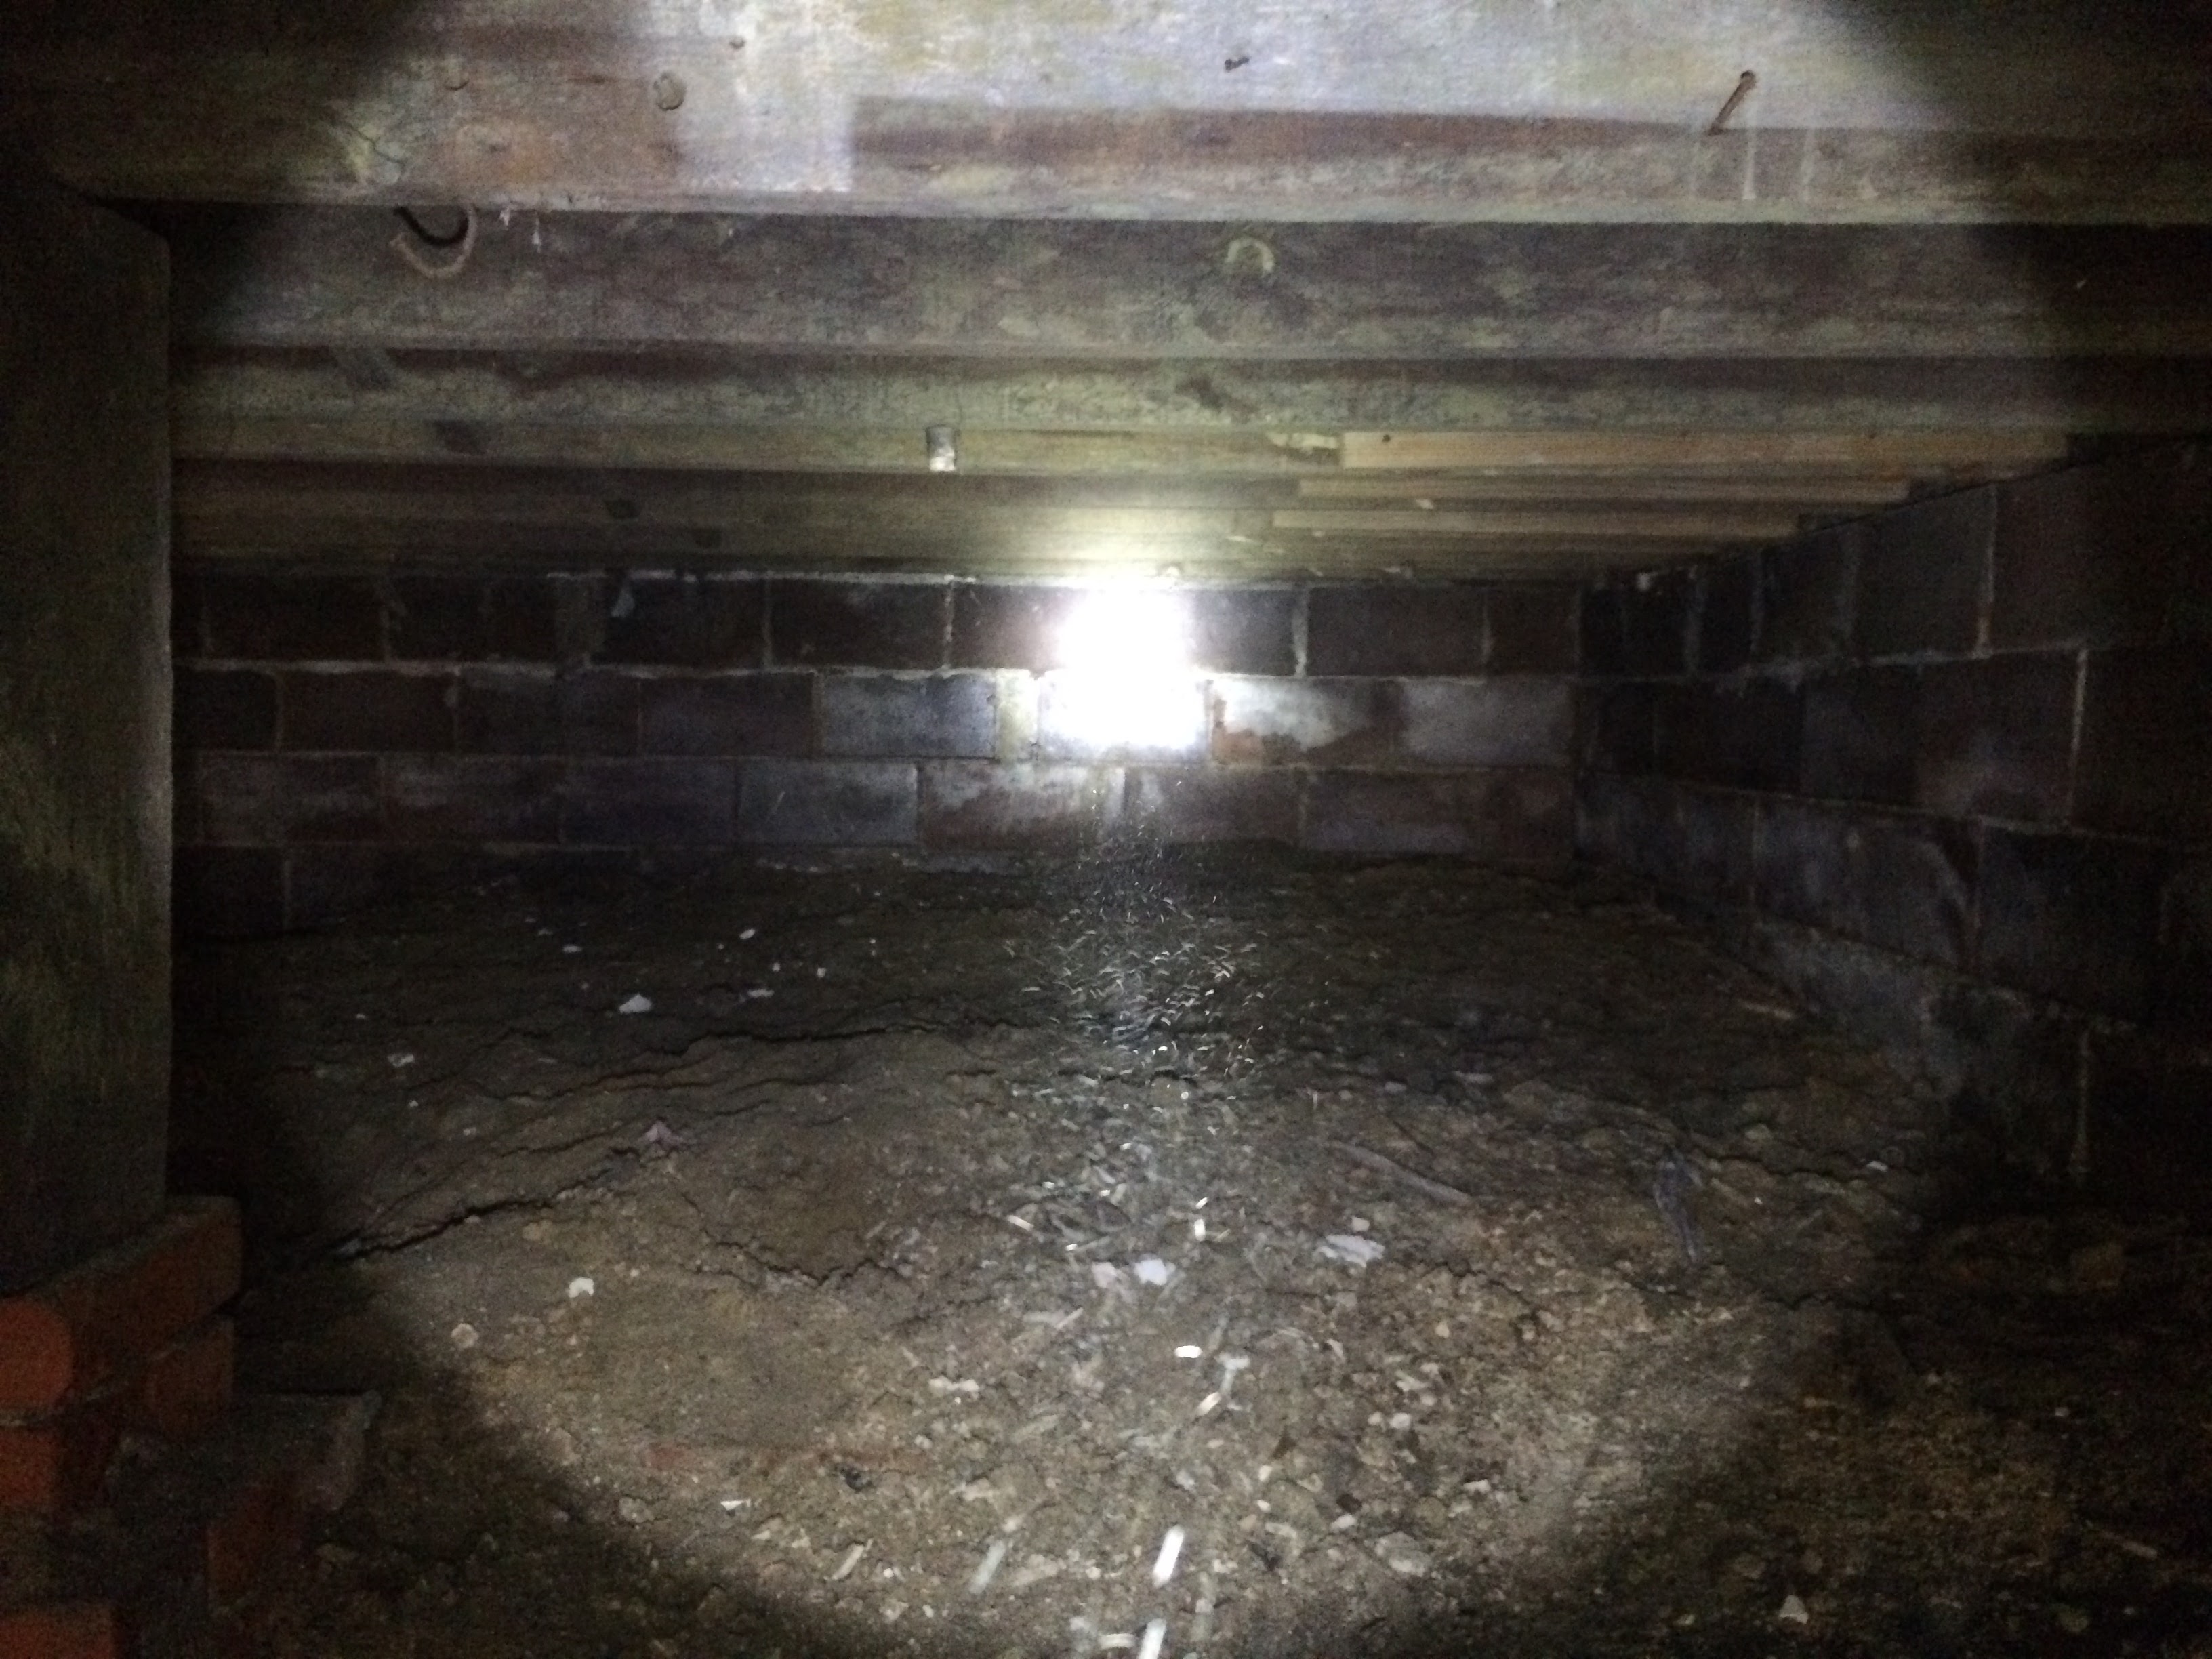
Let’s start with the initial diagnosis of where the house started. This was the tiny basement in late March. It was surprisingly wet. The steel lally column to the left is rusted through. The furnace was well past its prime.
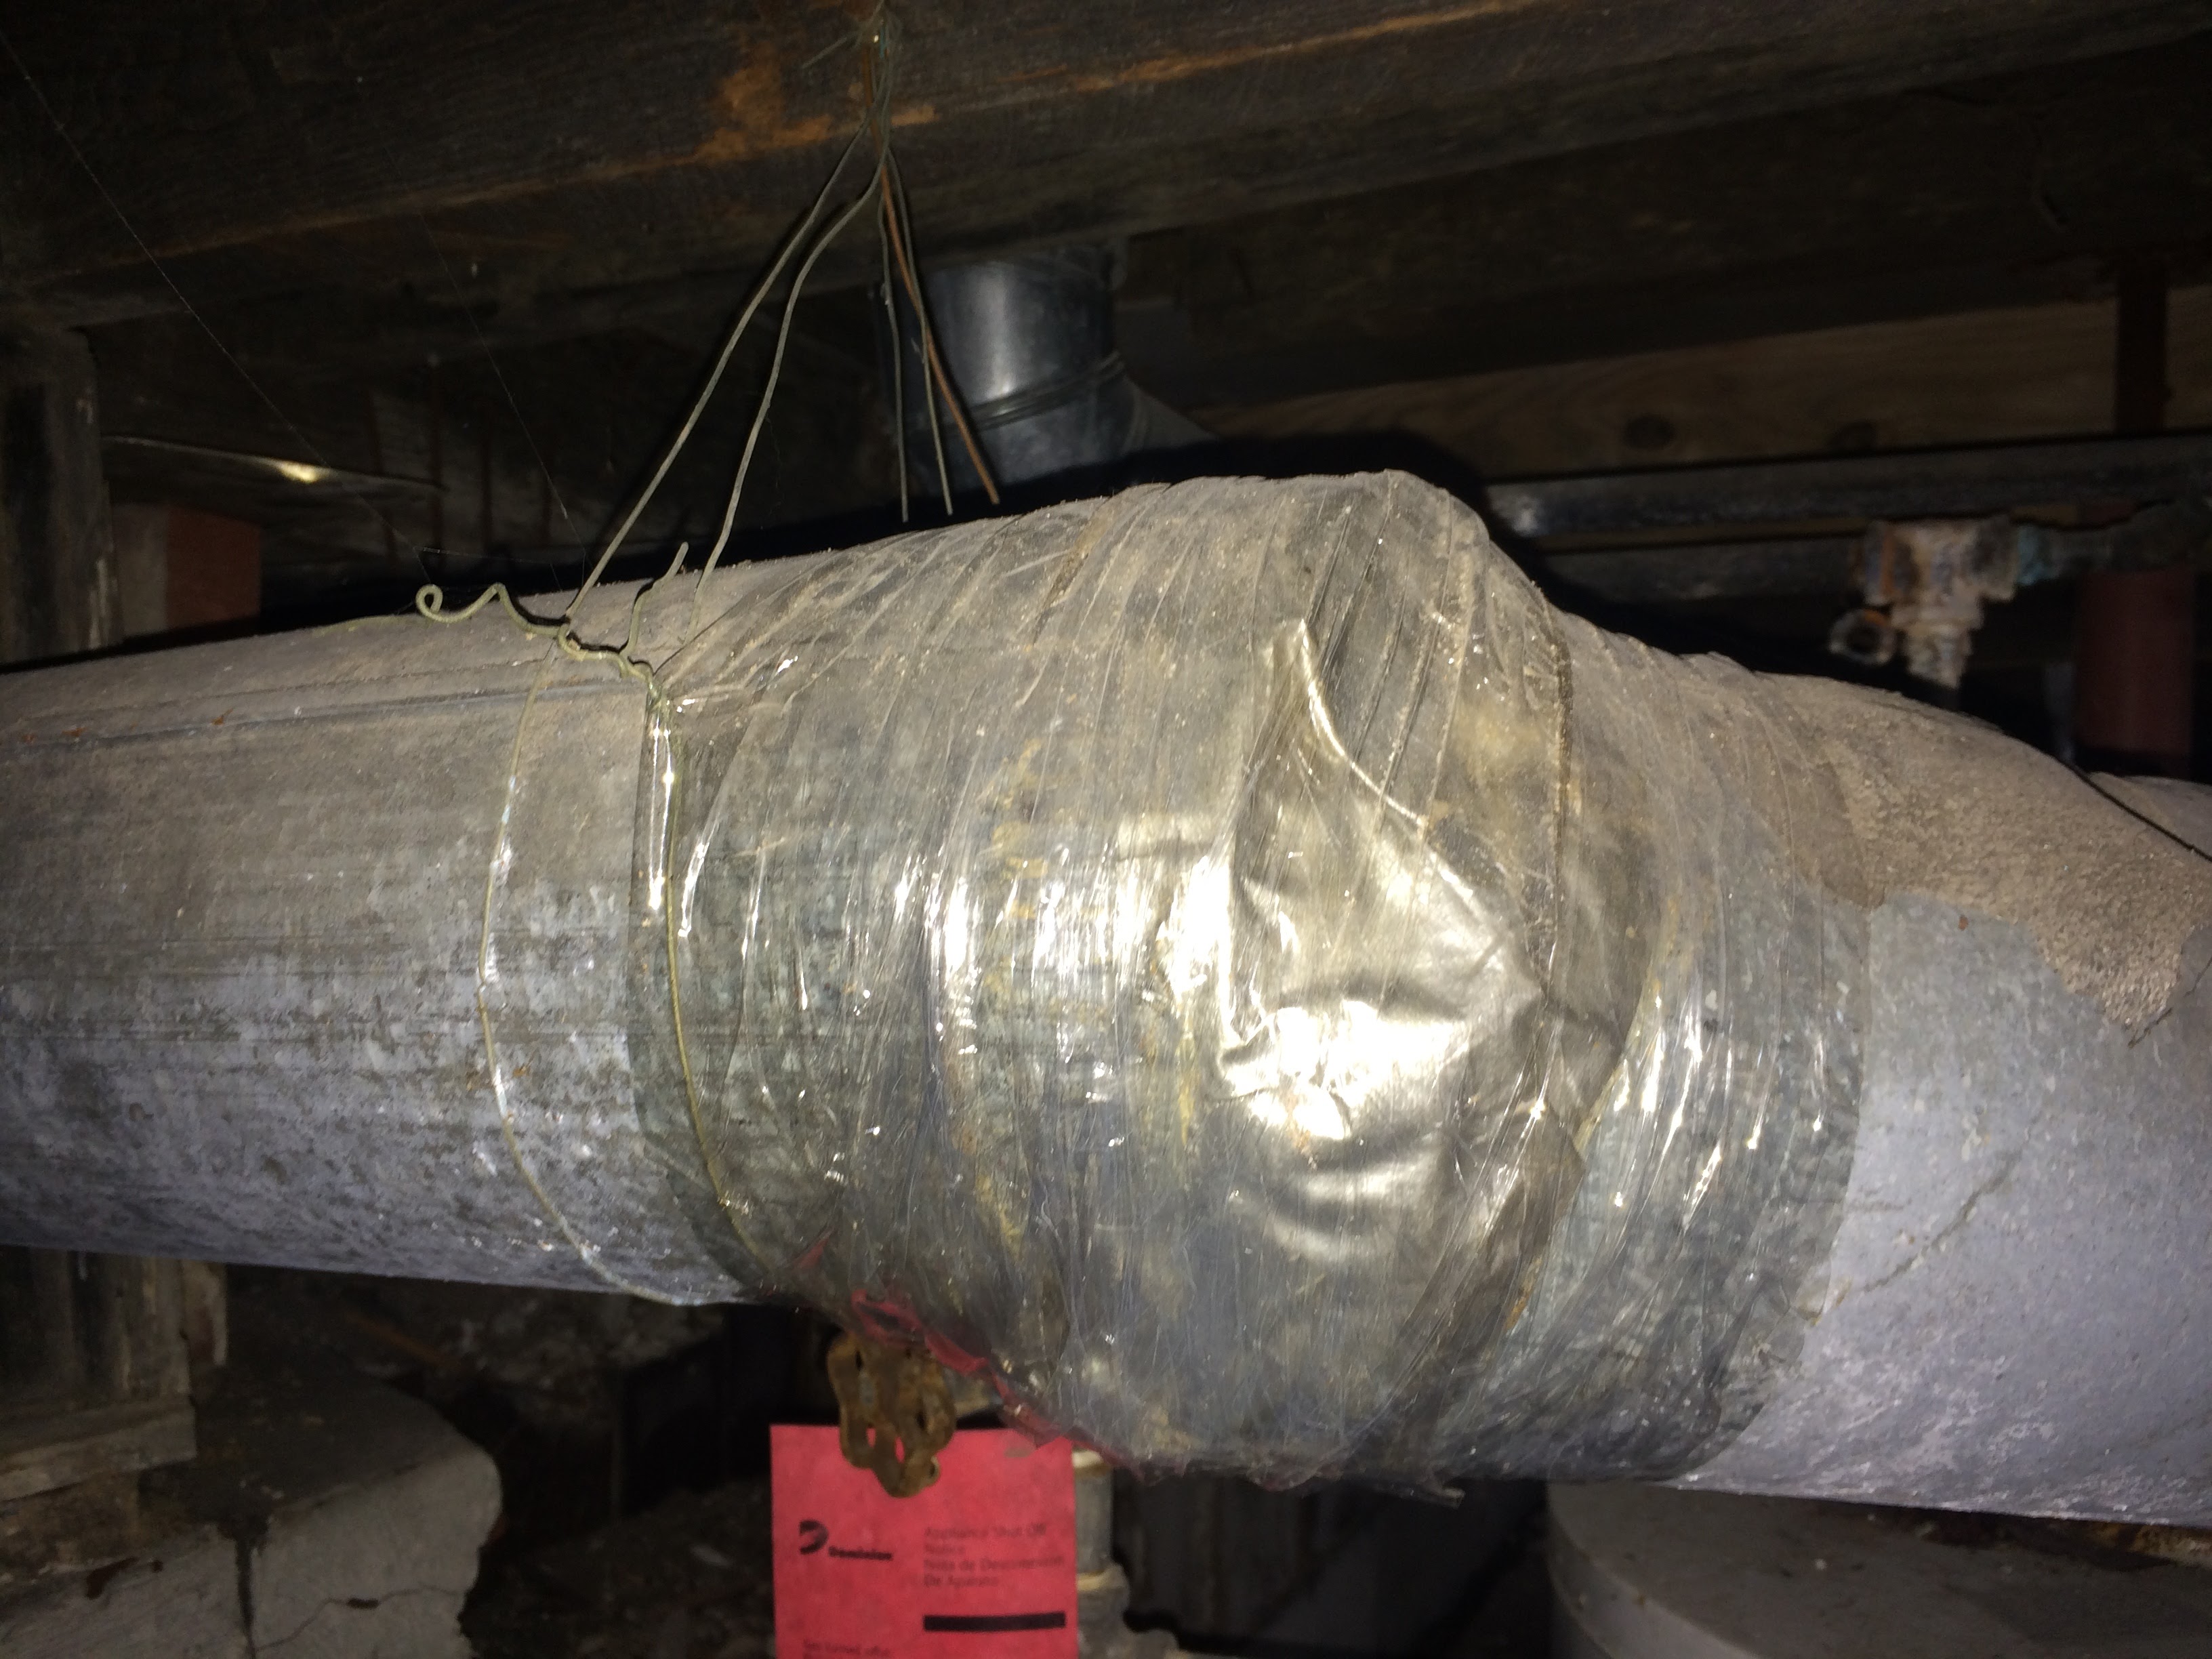
The ductwork was literally being held together with Saran Wrap. A perfect gut opportunity!
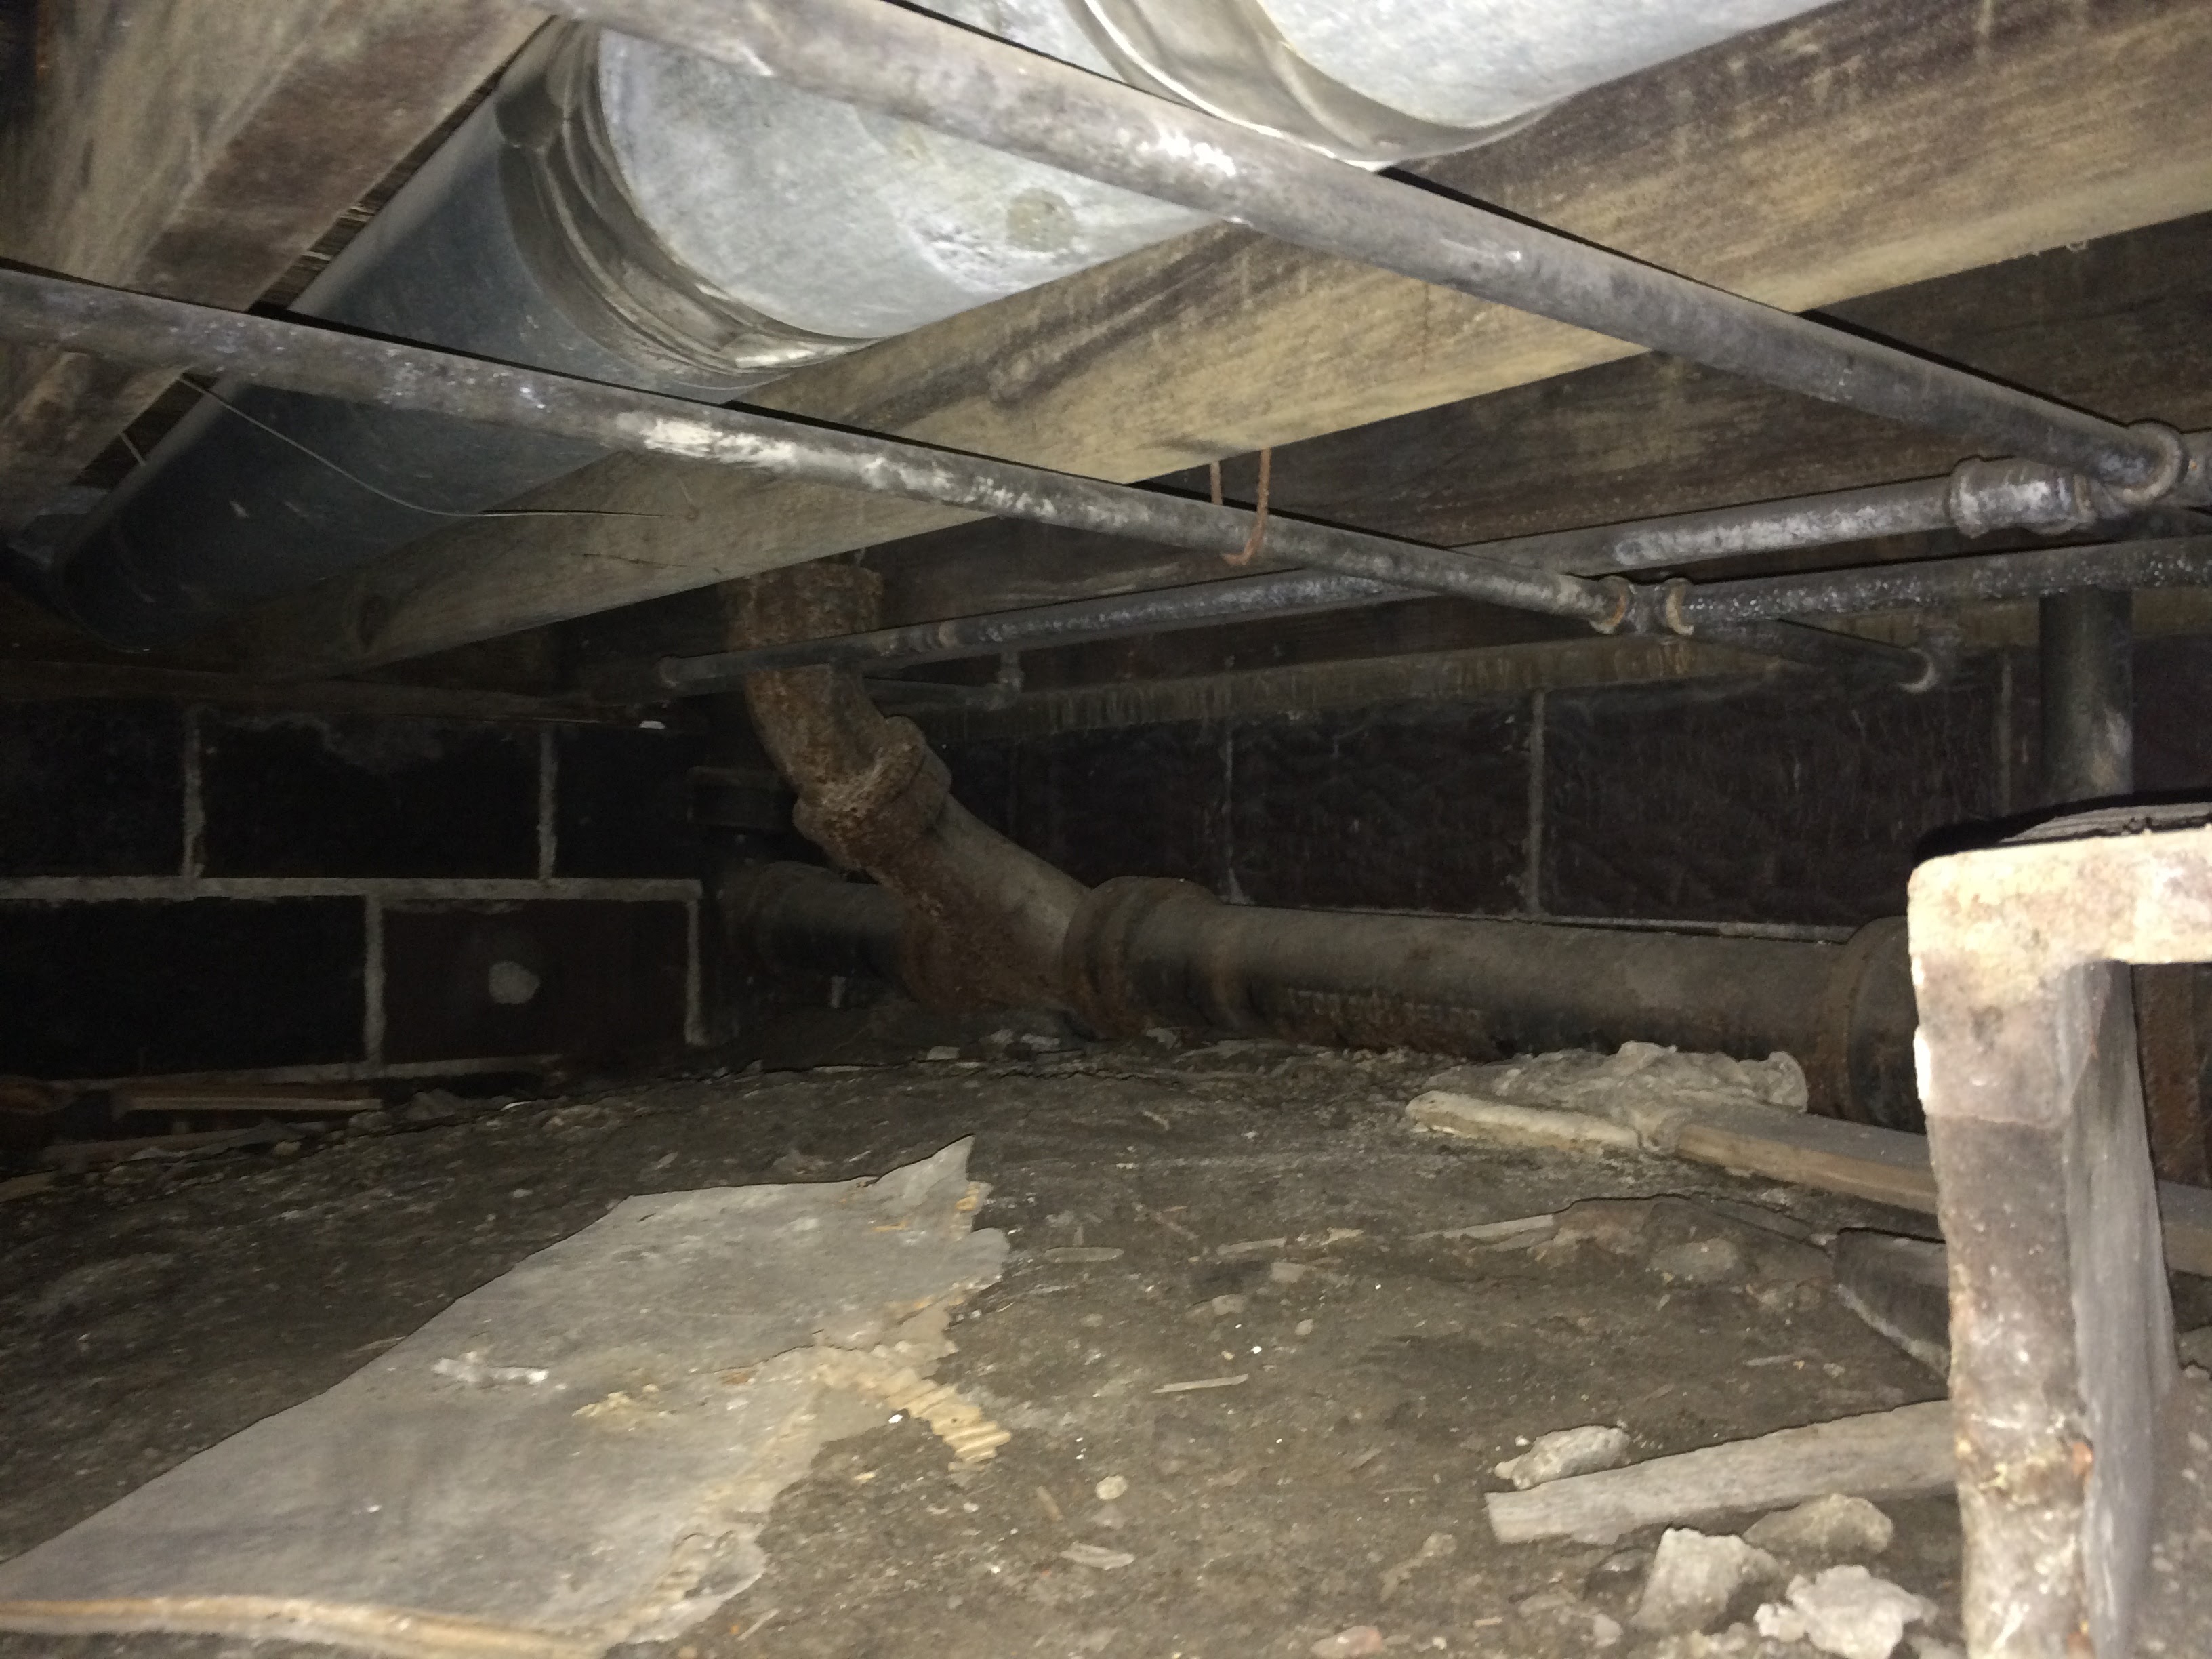
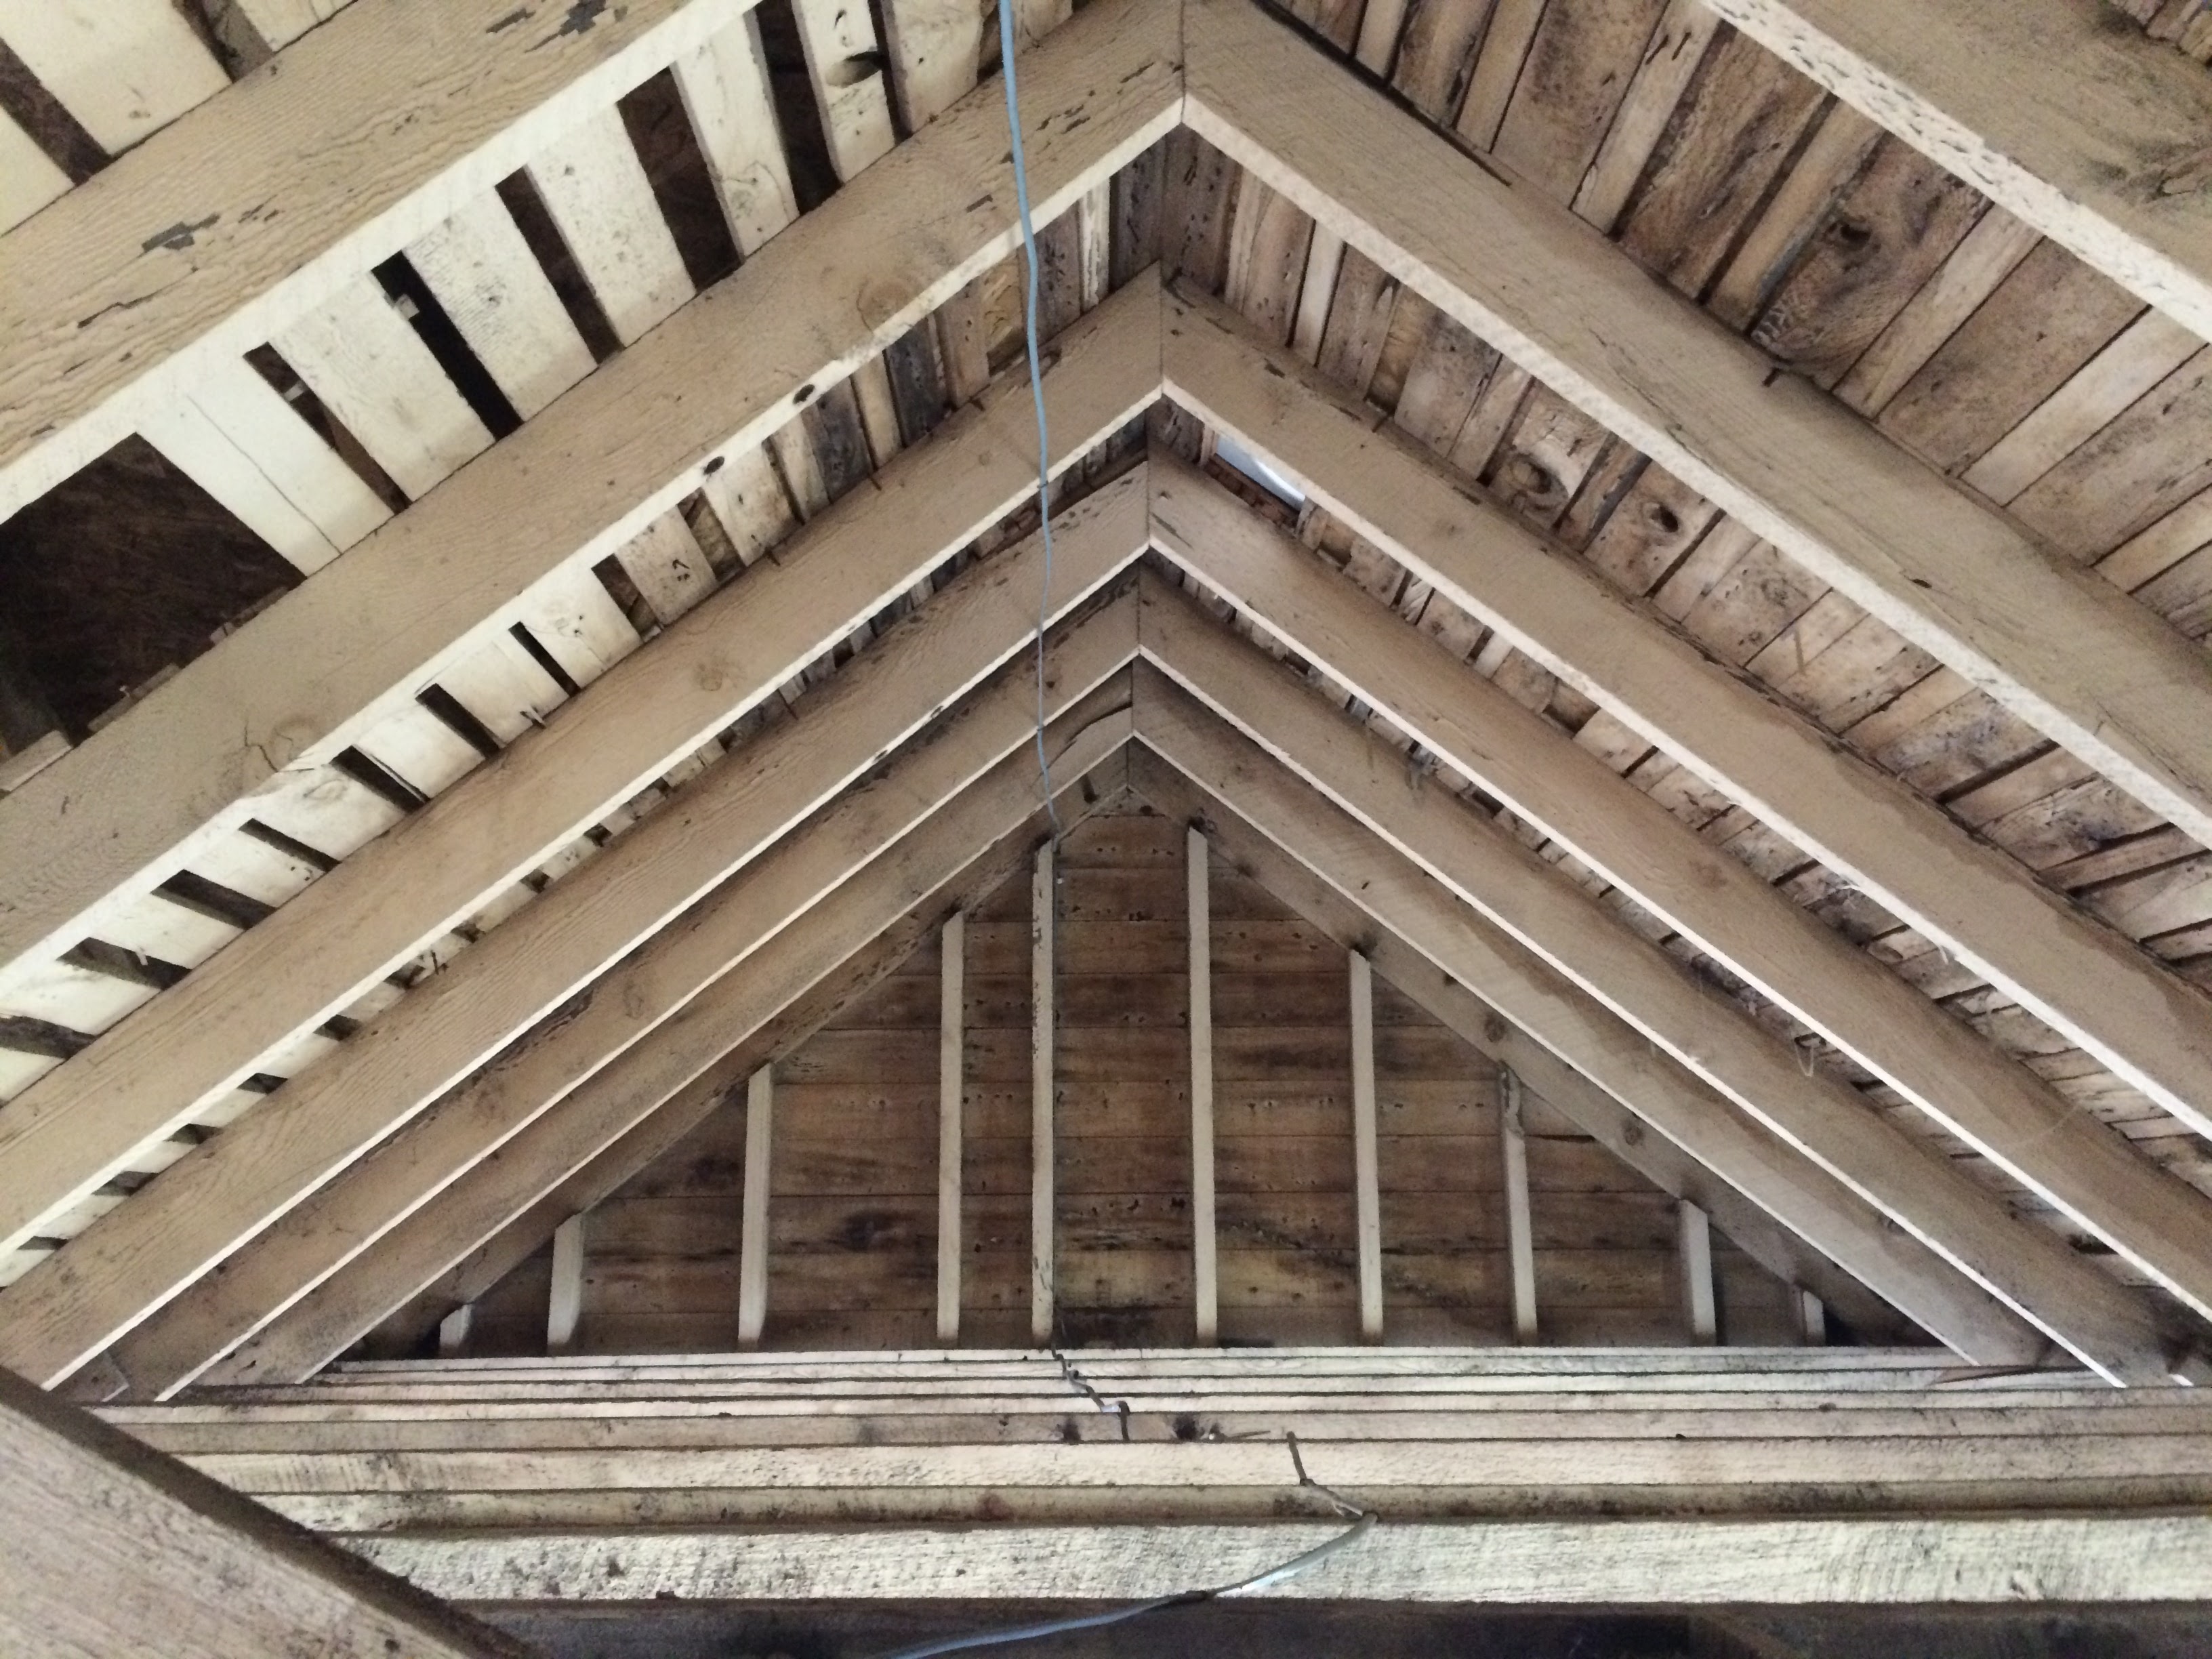
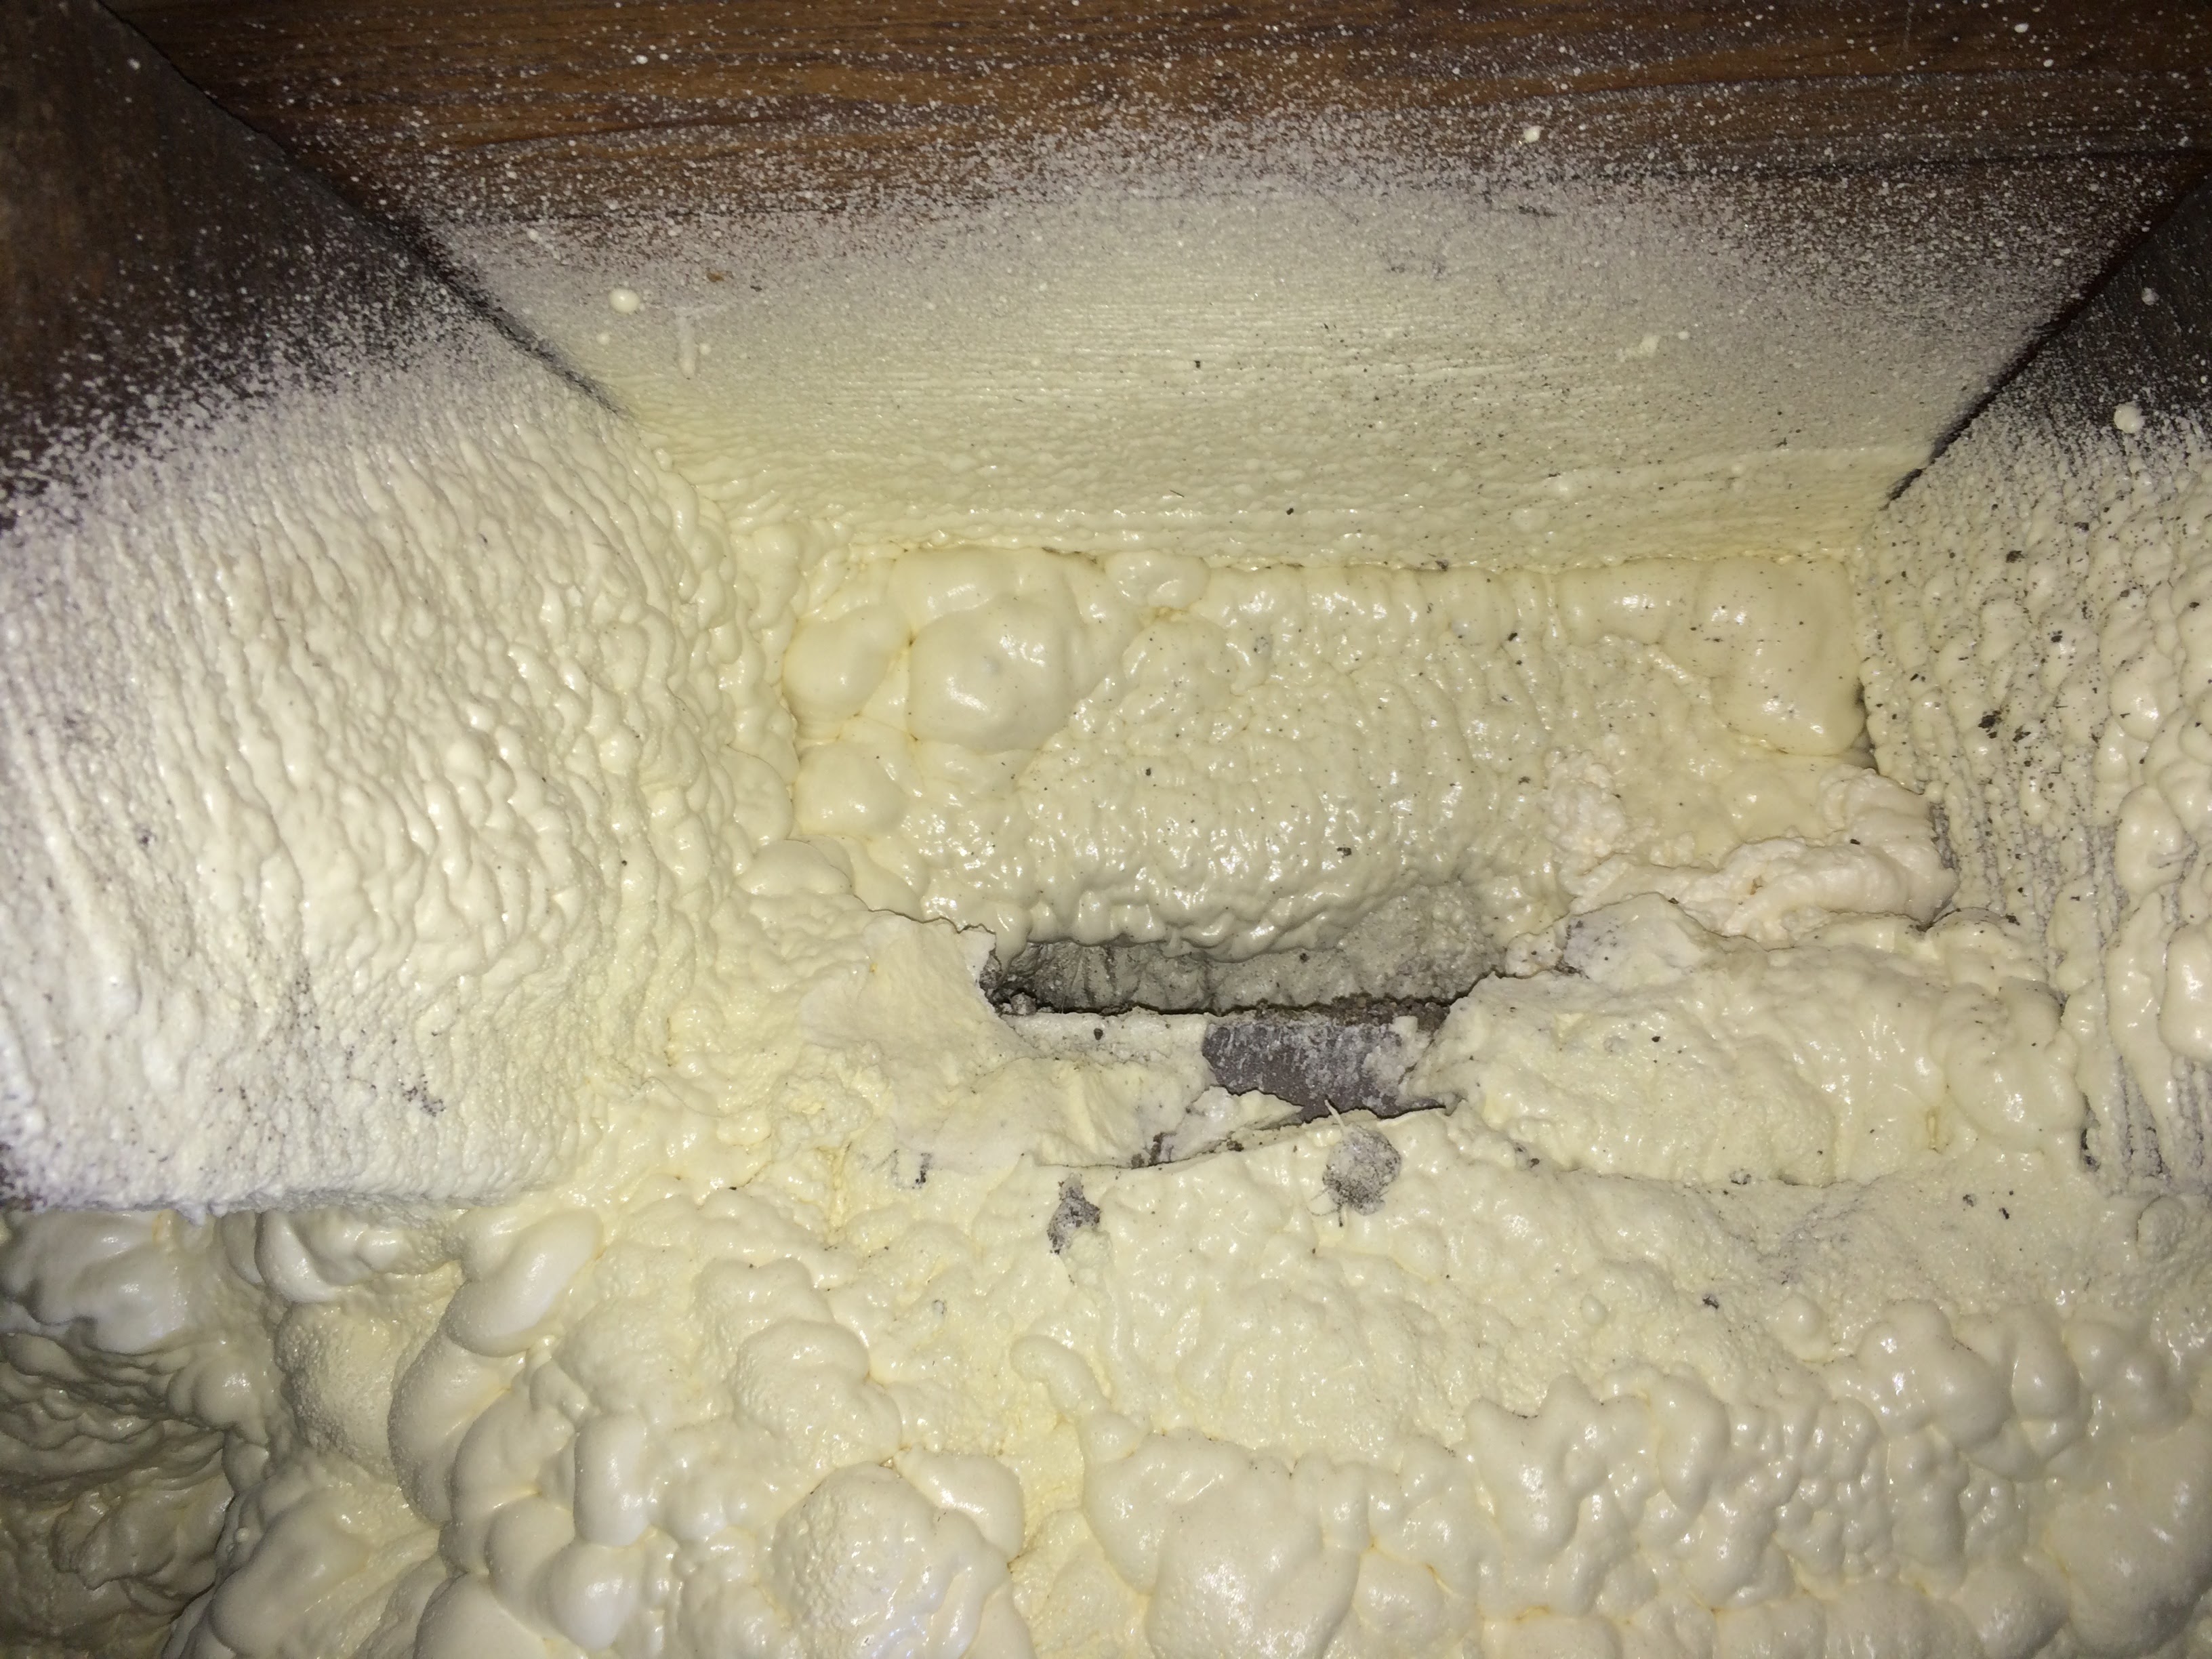
Above is one of three dirt crawlspaces. Bill Rose, the author of Water In Buildings, noted that every home he has inspected with a dirt crawlspace had moisture issues in the attic.
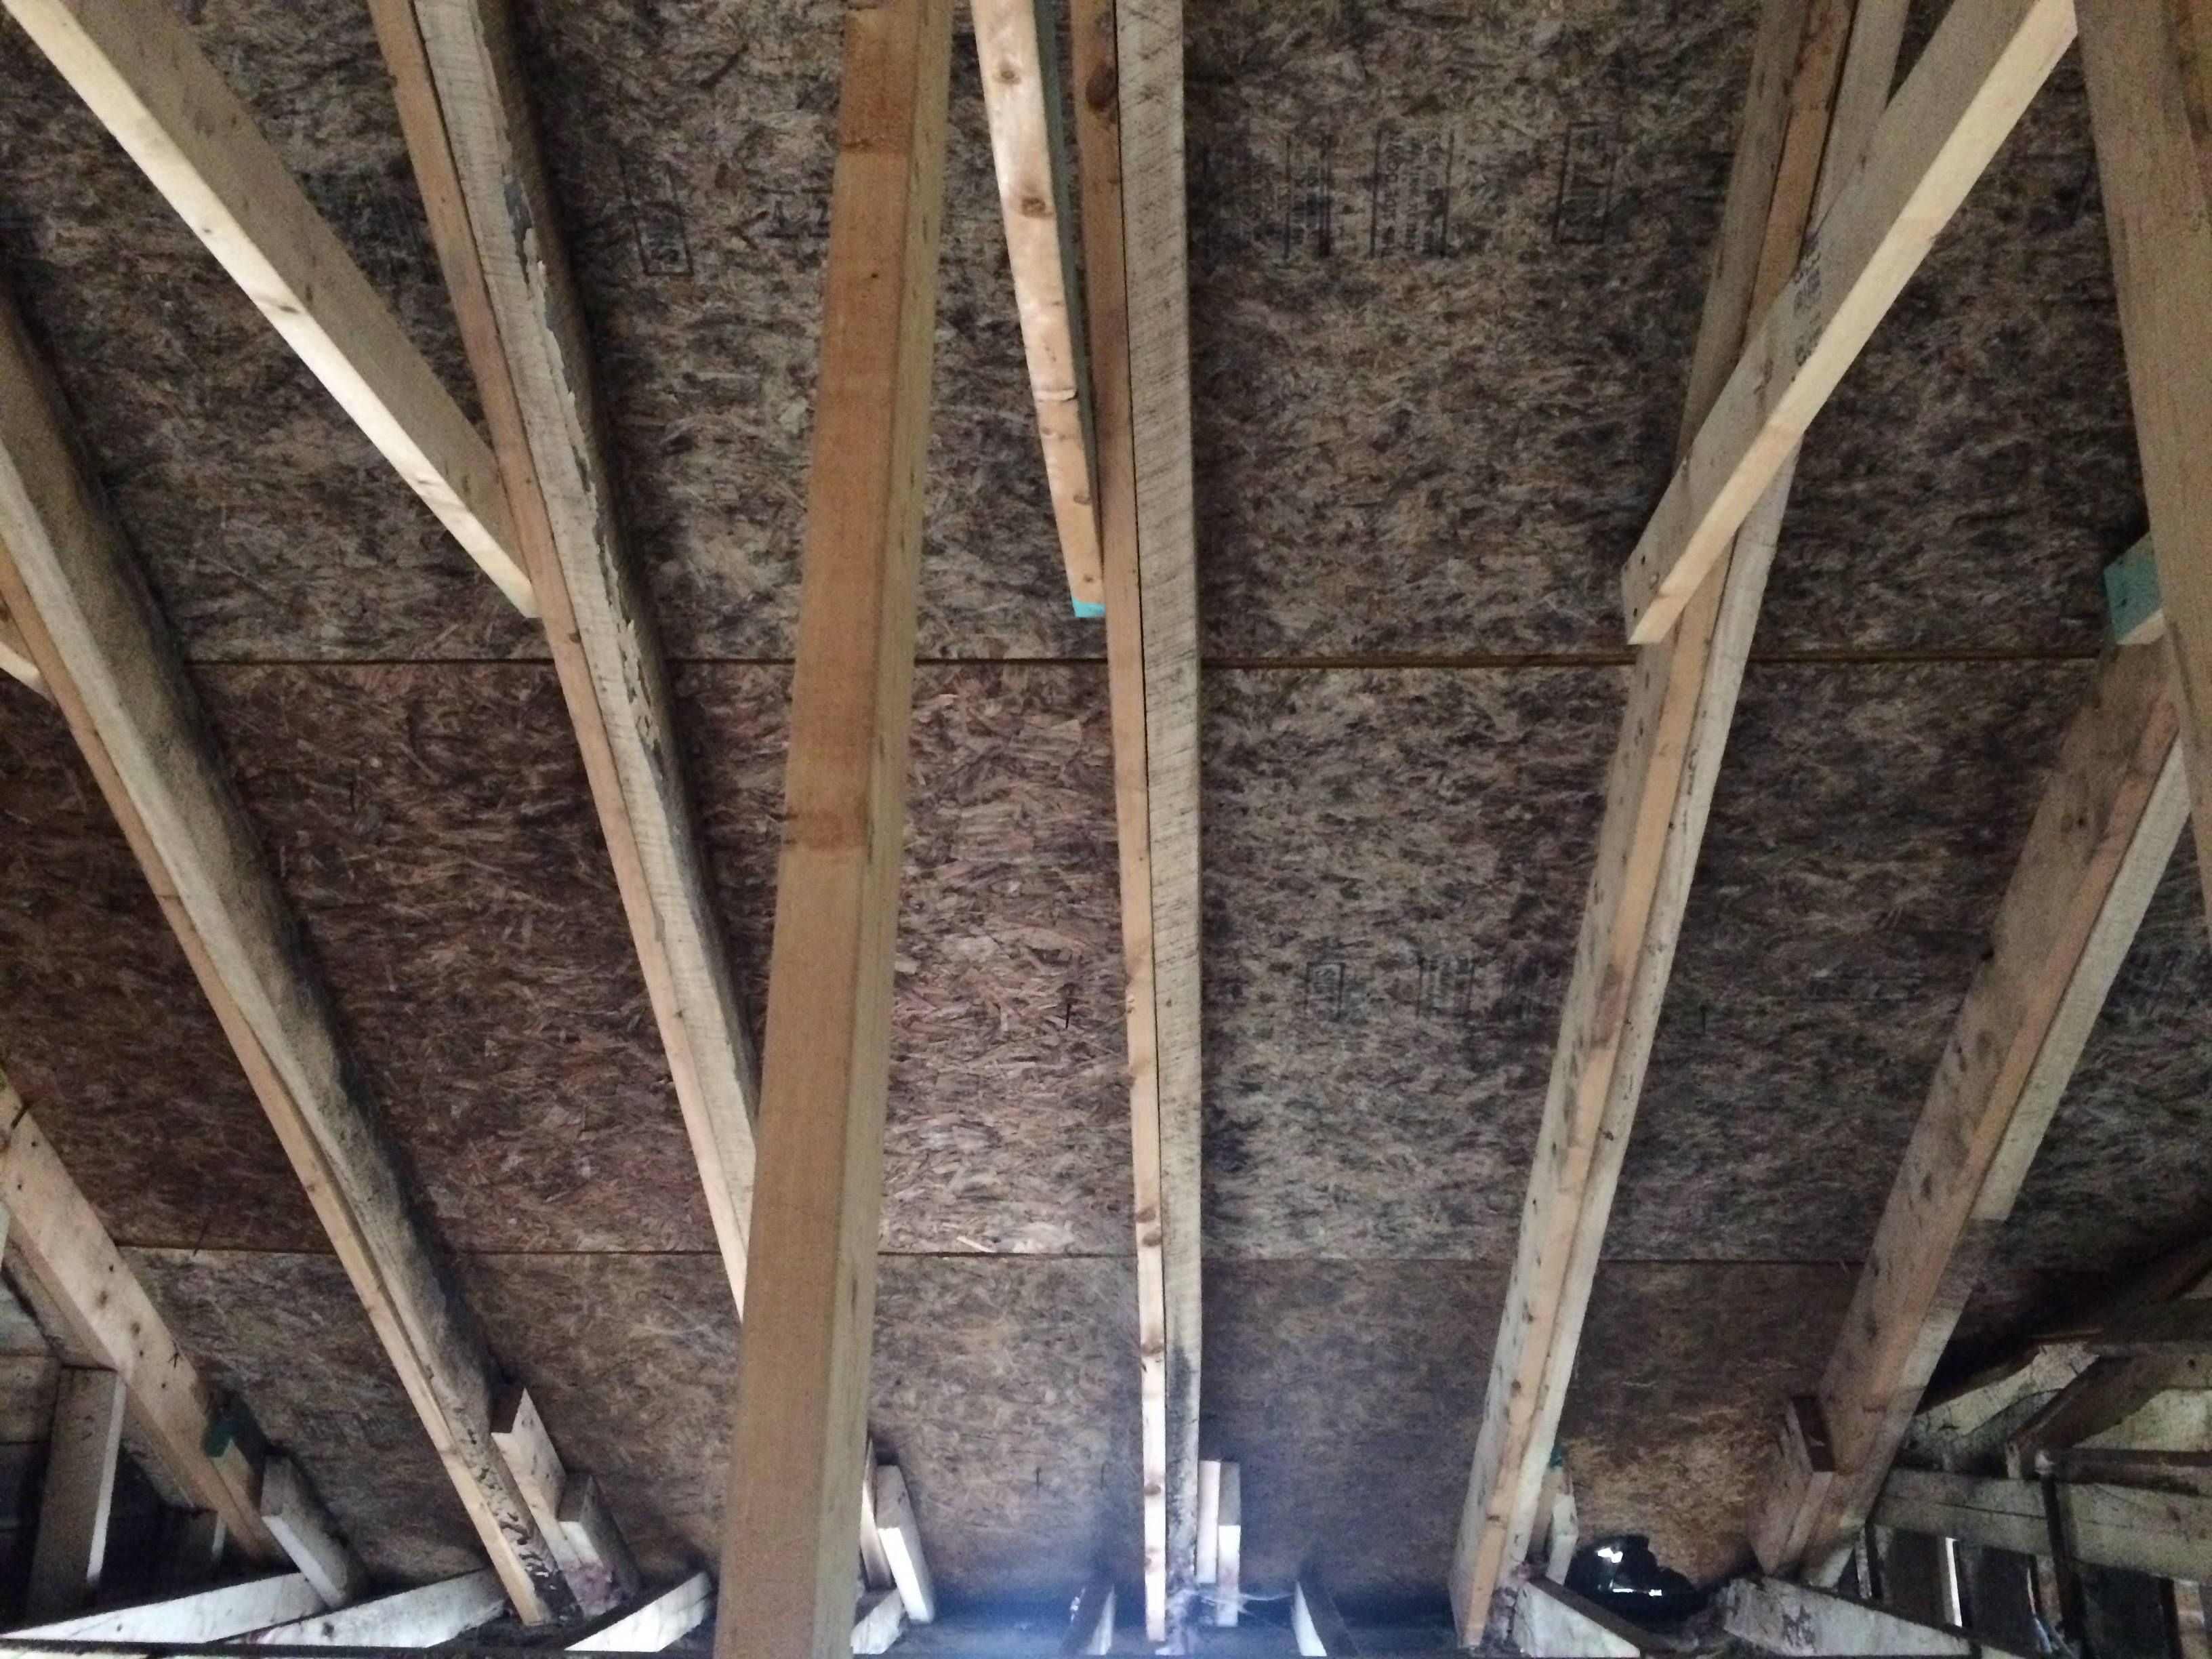
As Bill Rose predicted the roof deck had moisture issues. We must address stopping this moisture in our plan.
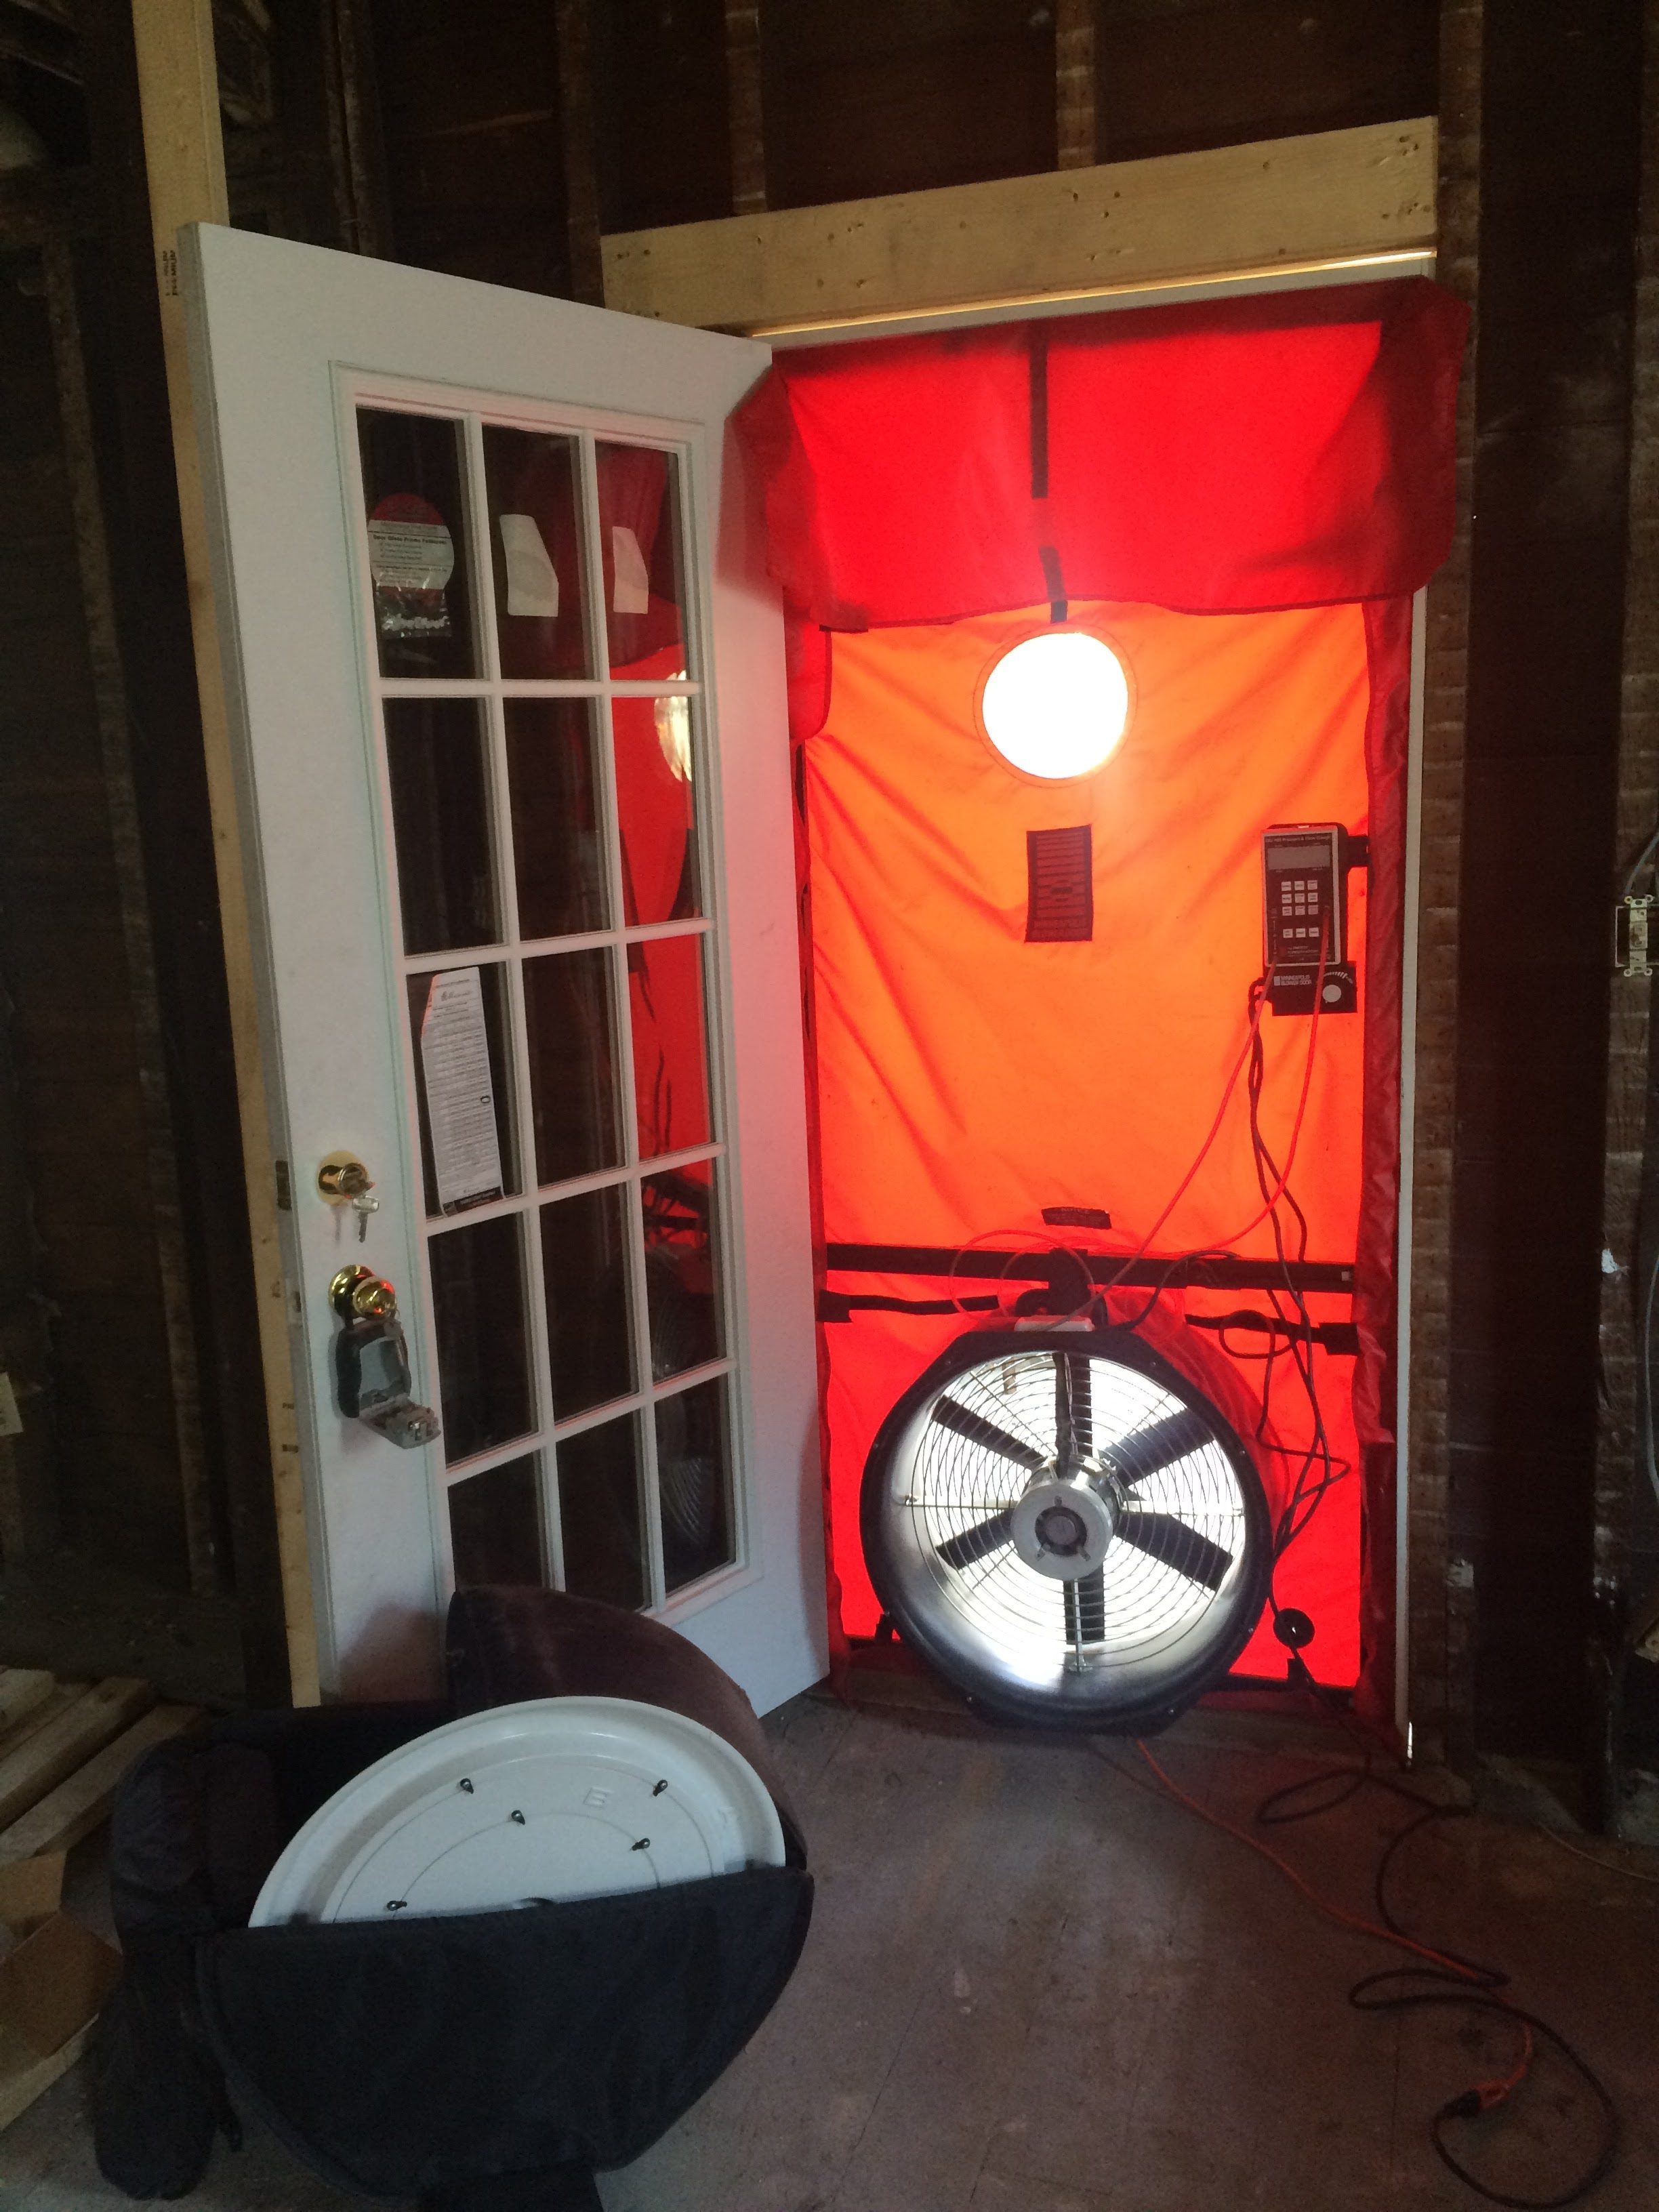
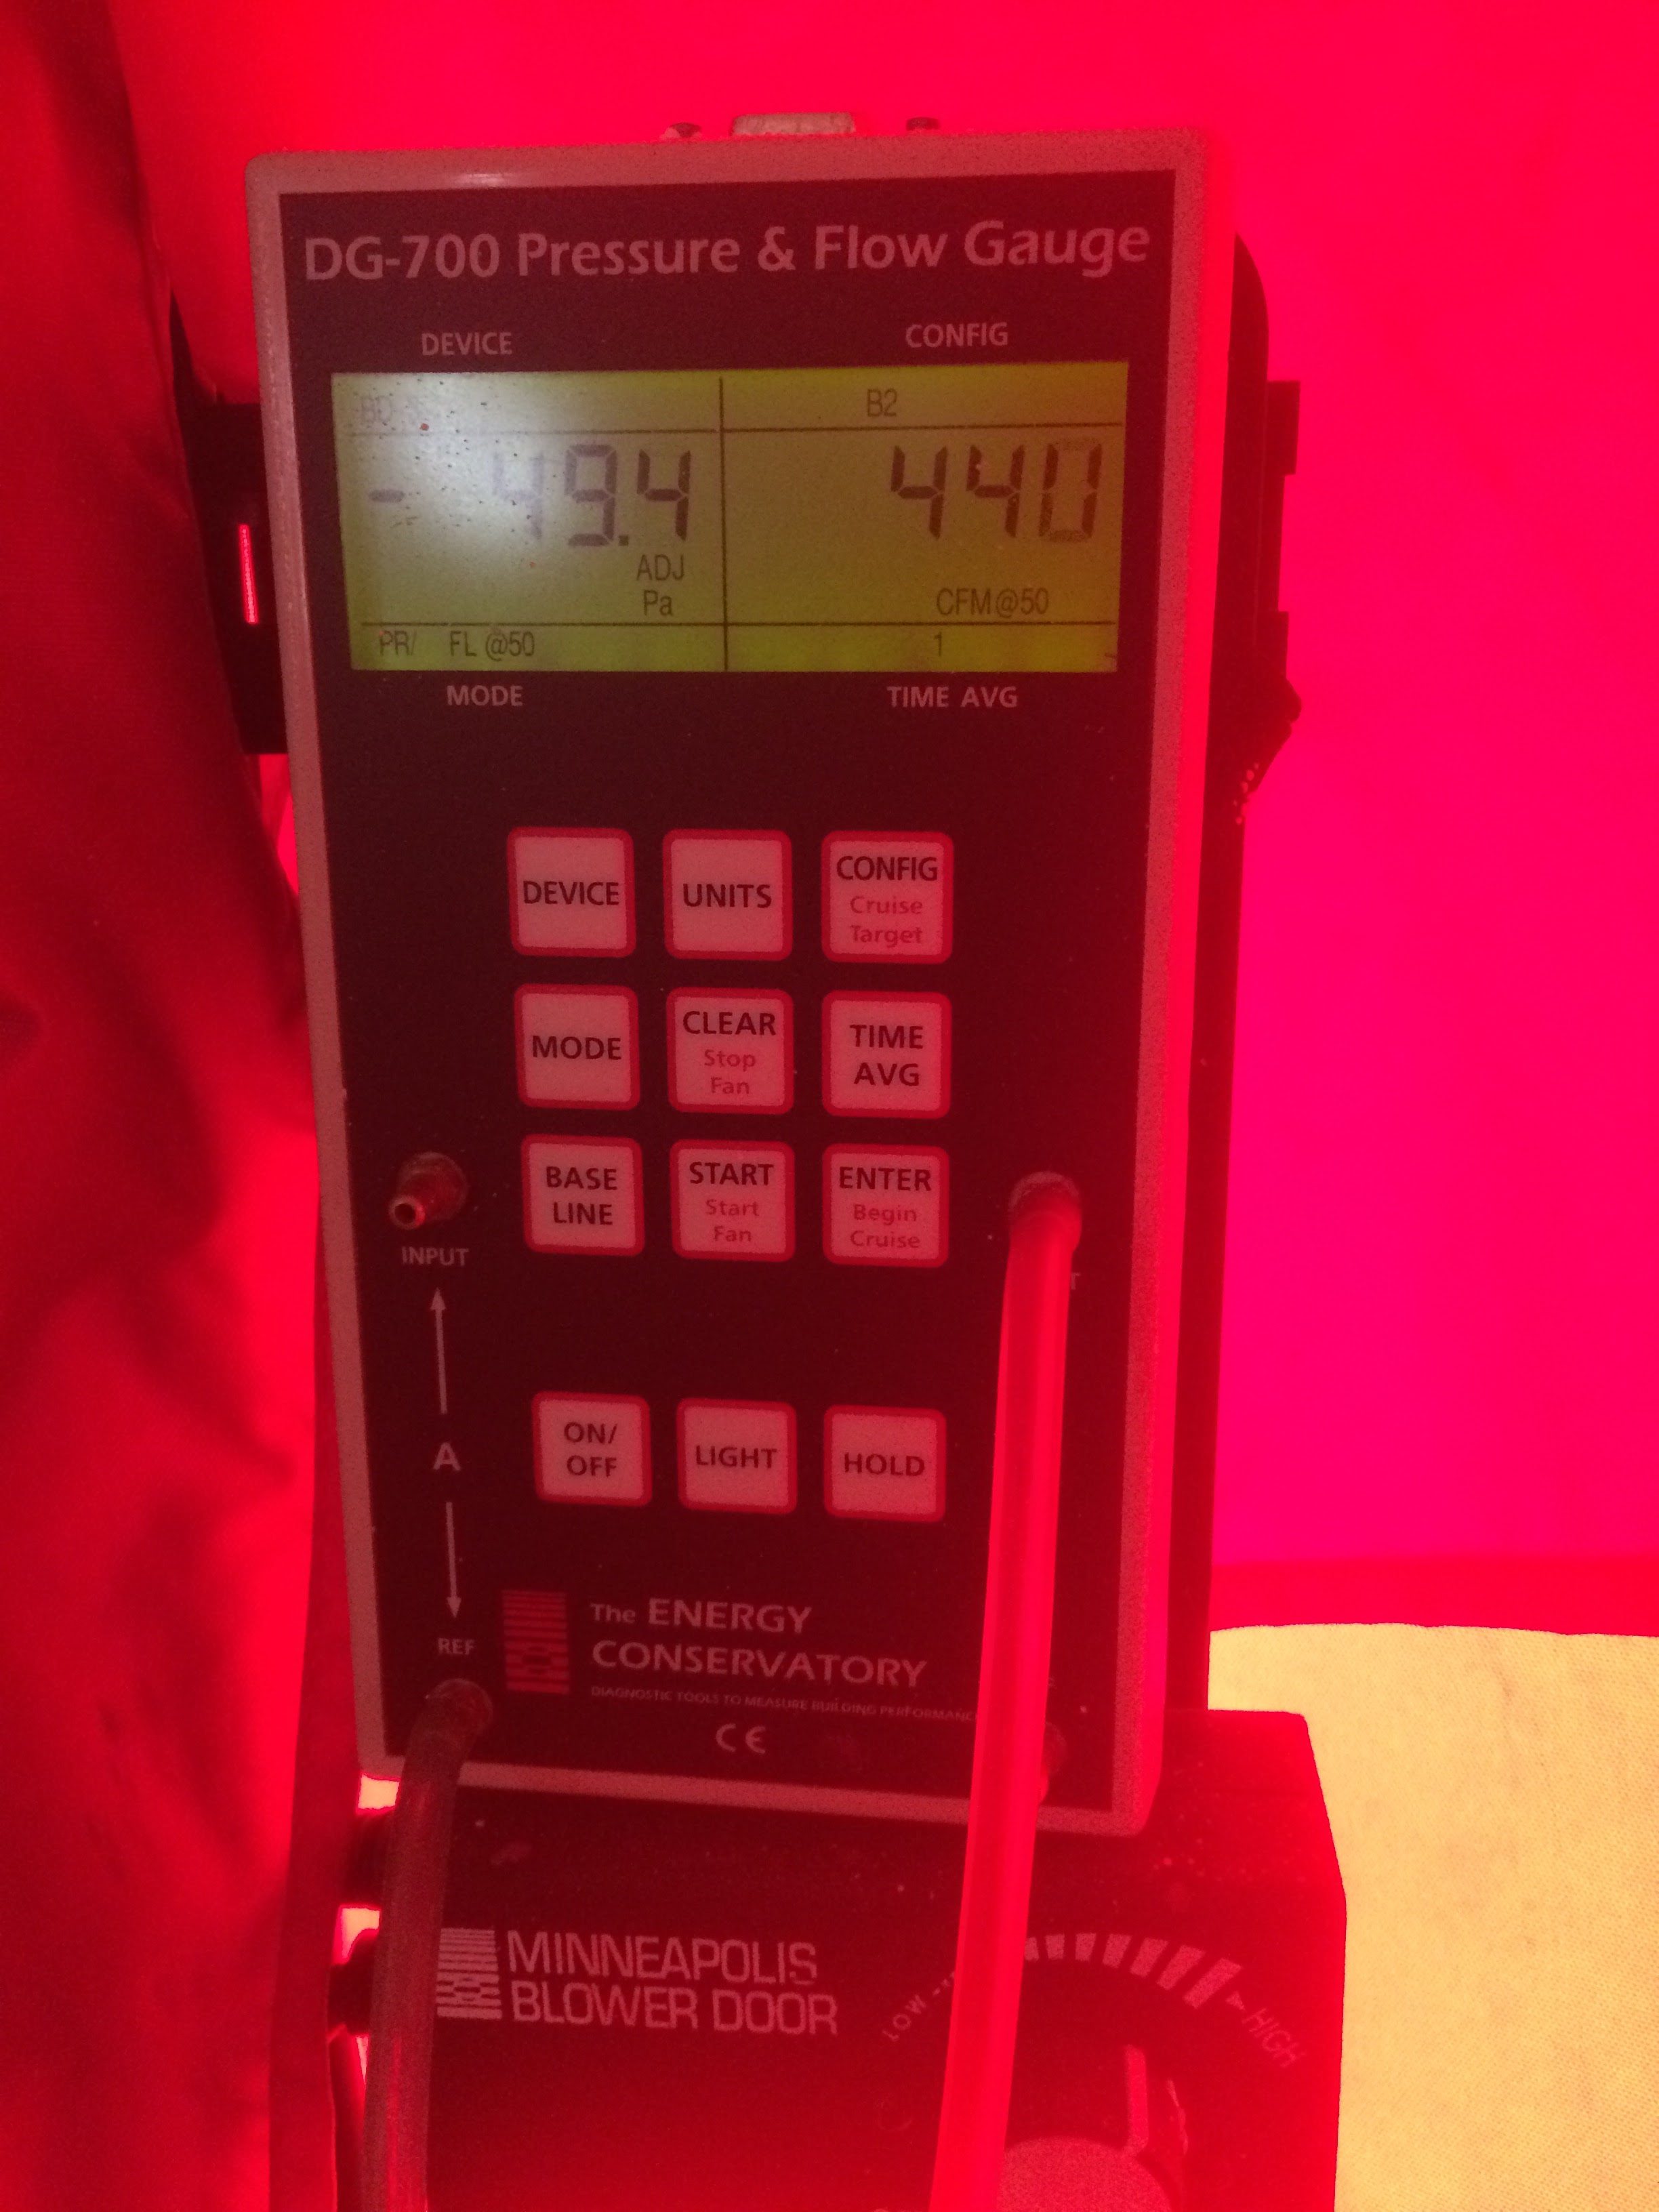
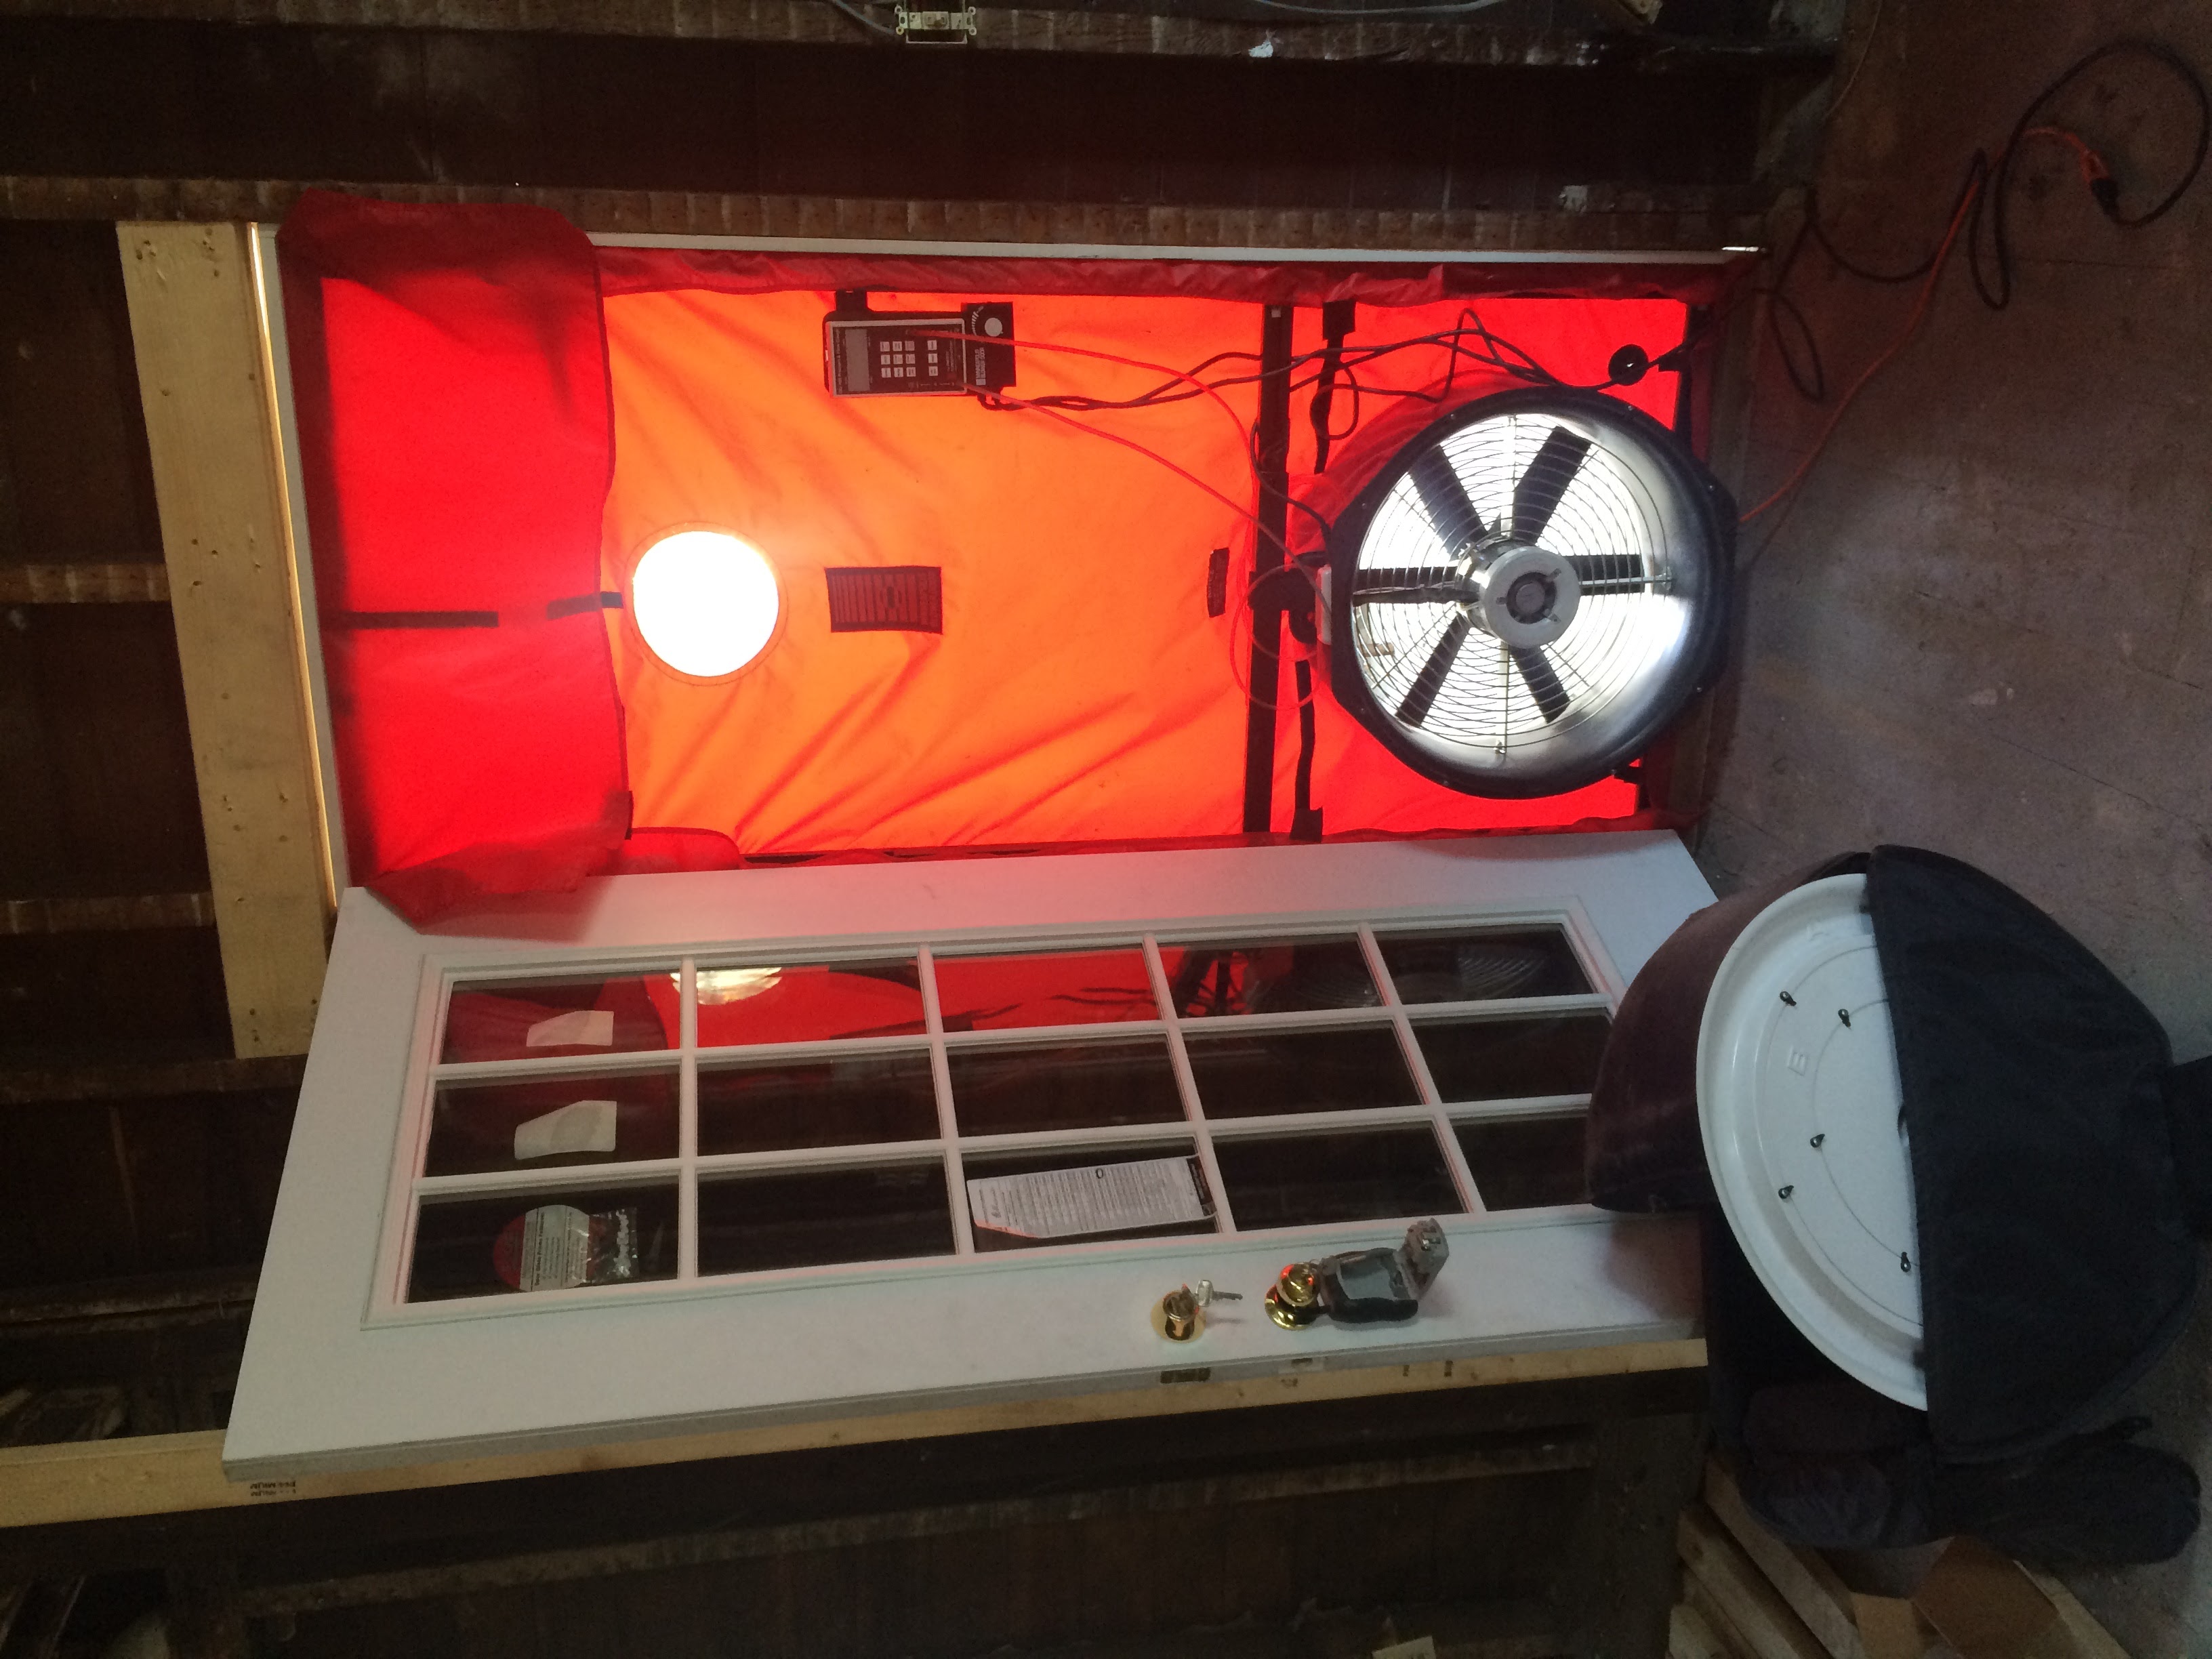
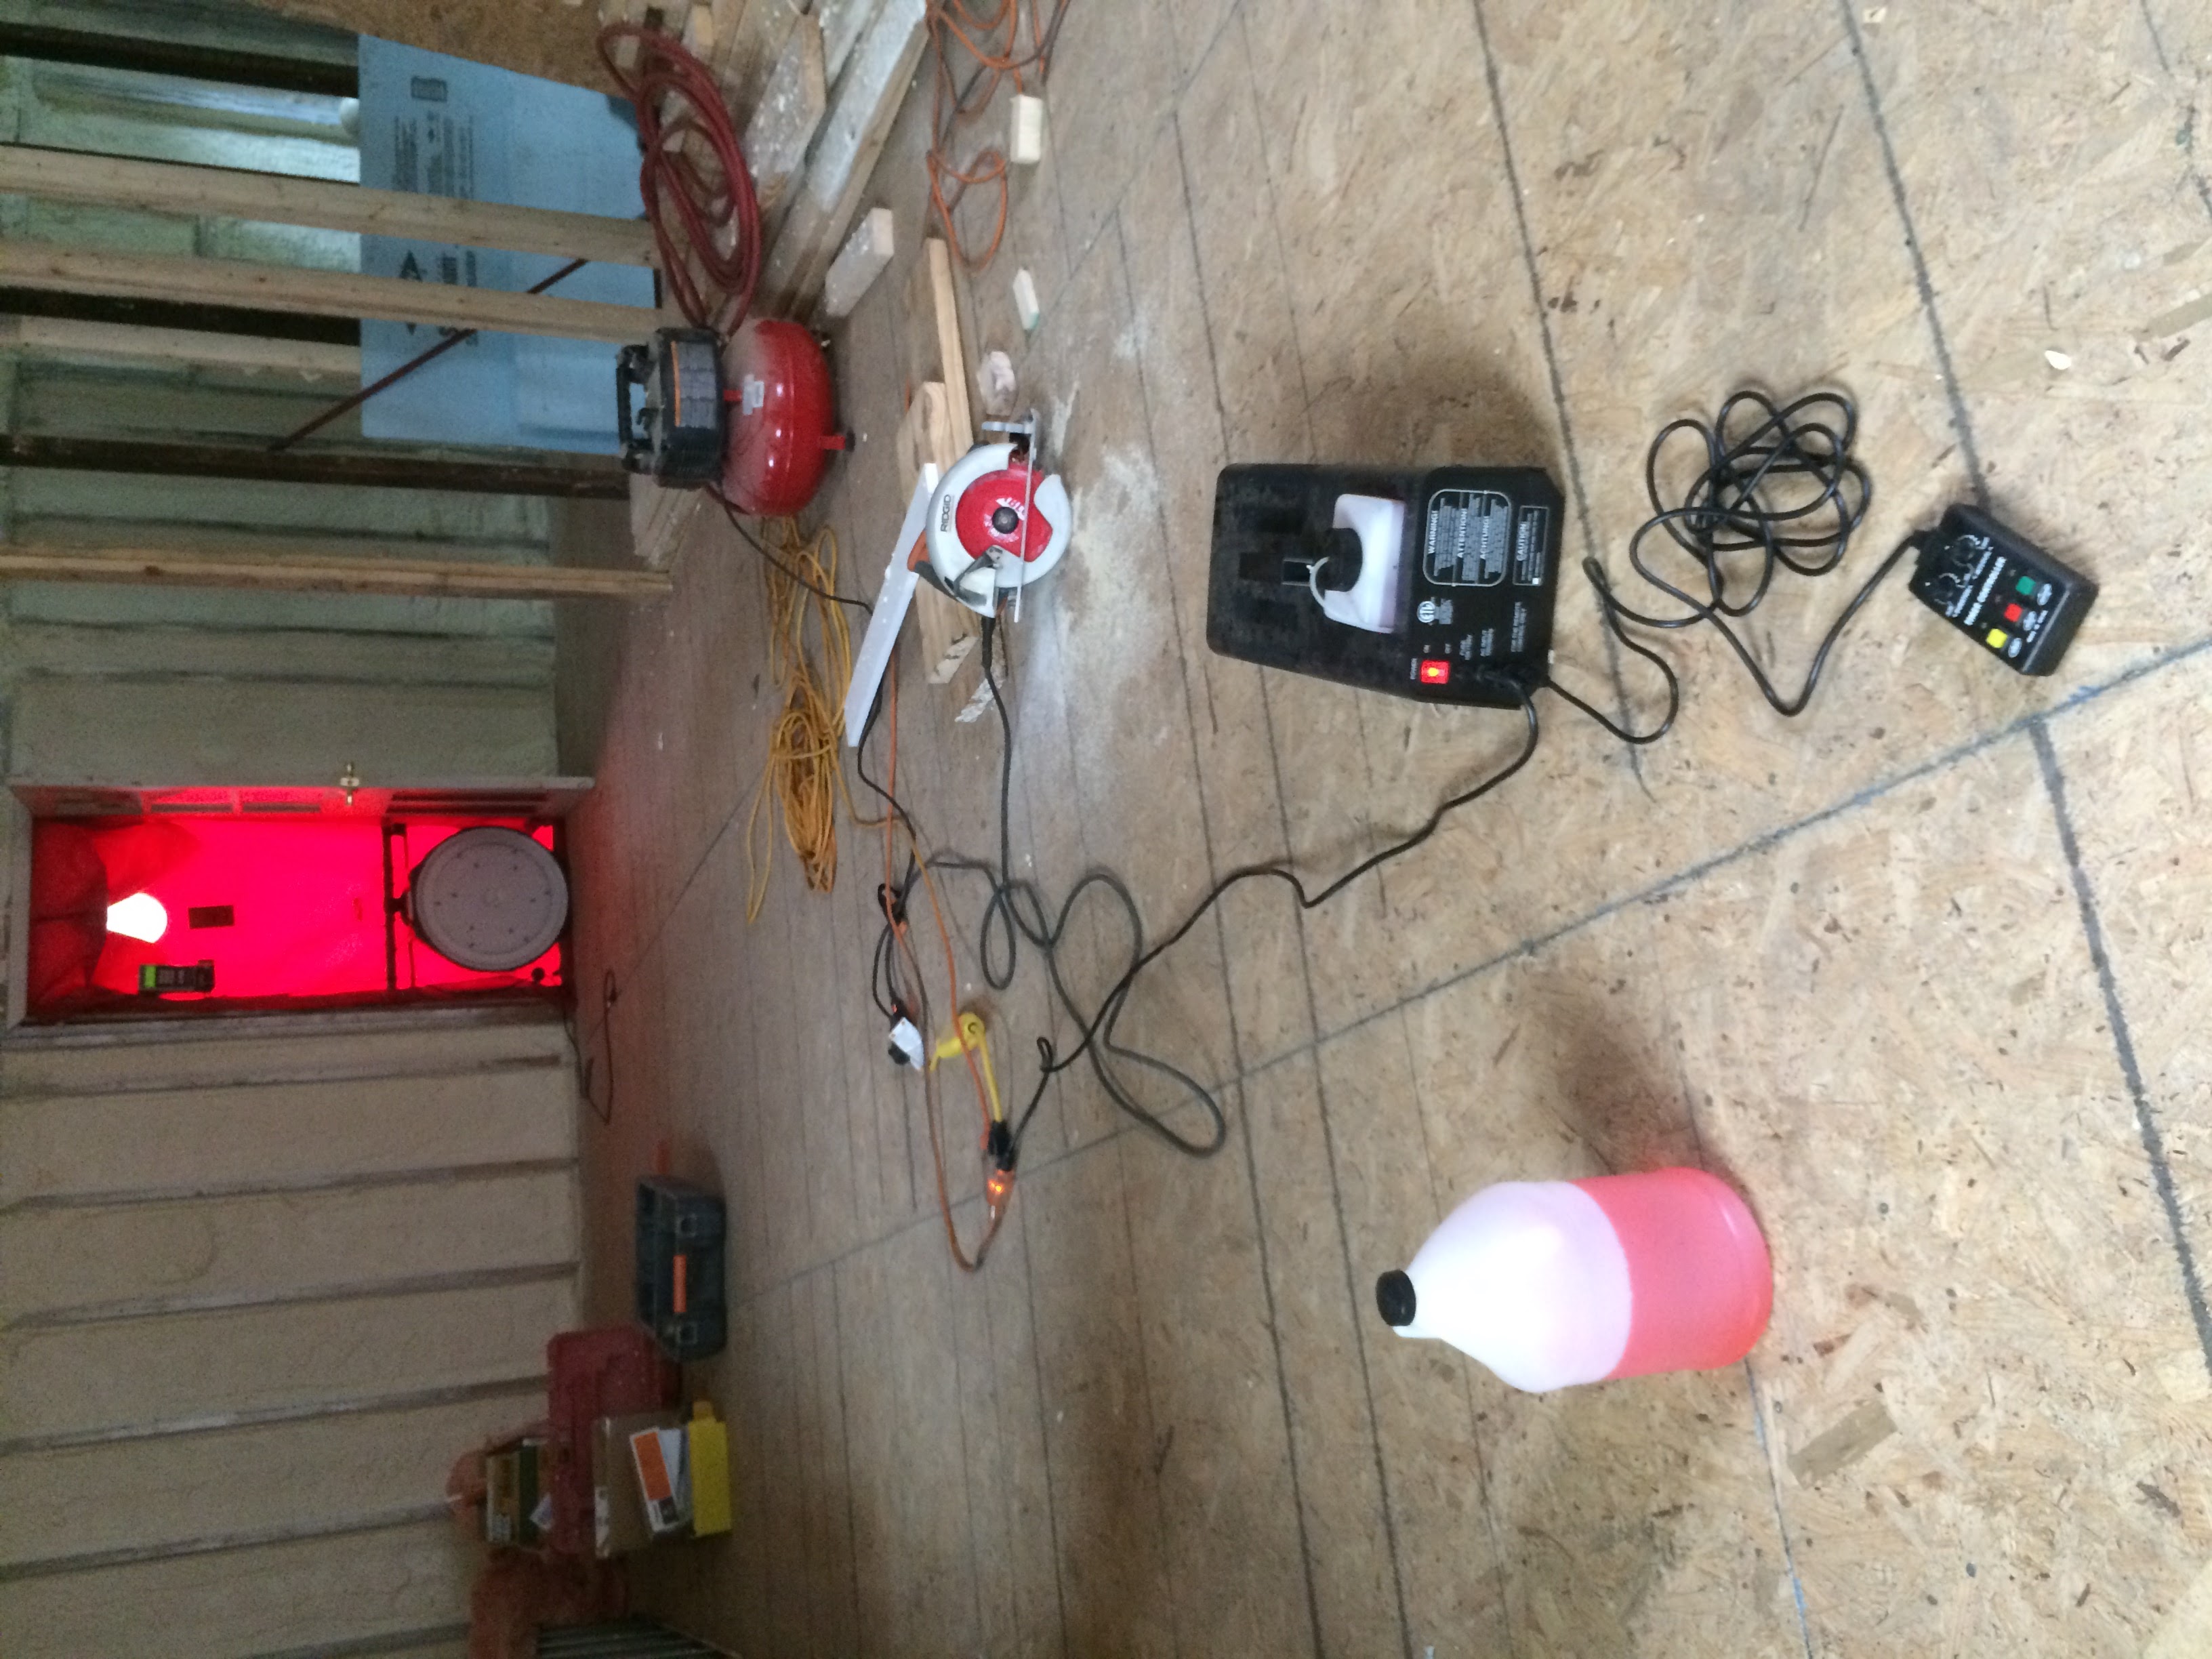
This is my blower door, which measures how much a house leaks air. Here is the gauge, the number on the left is the pressure, the number on the right is the reading (11,996).
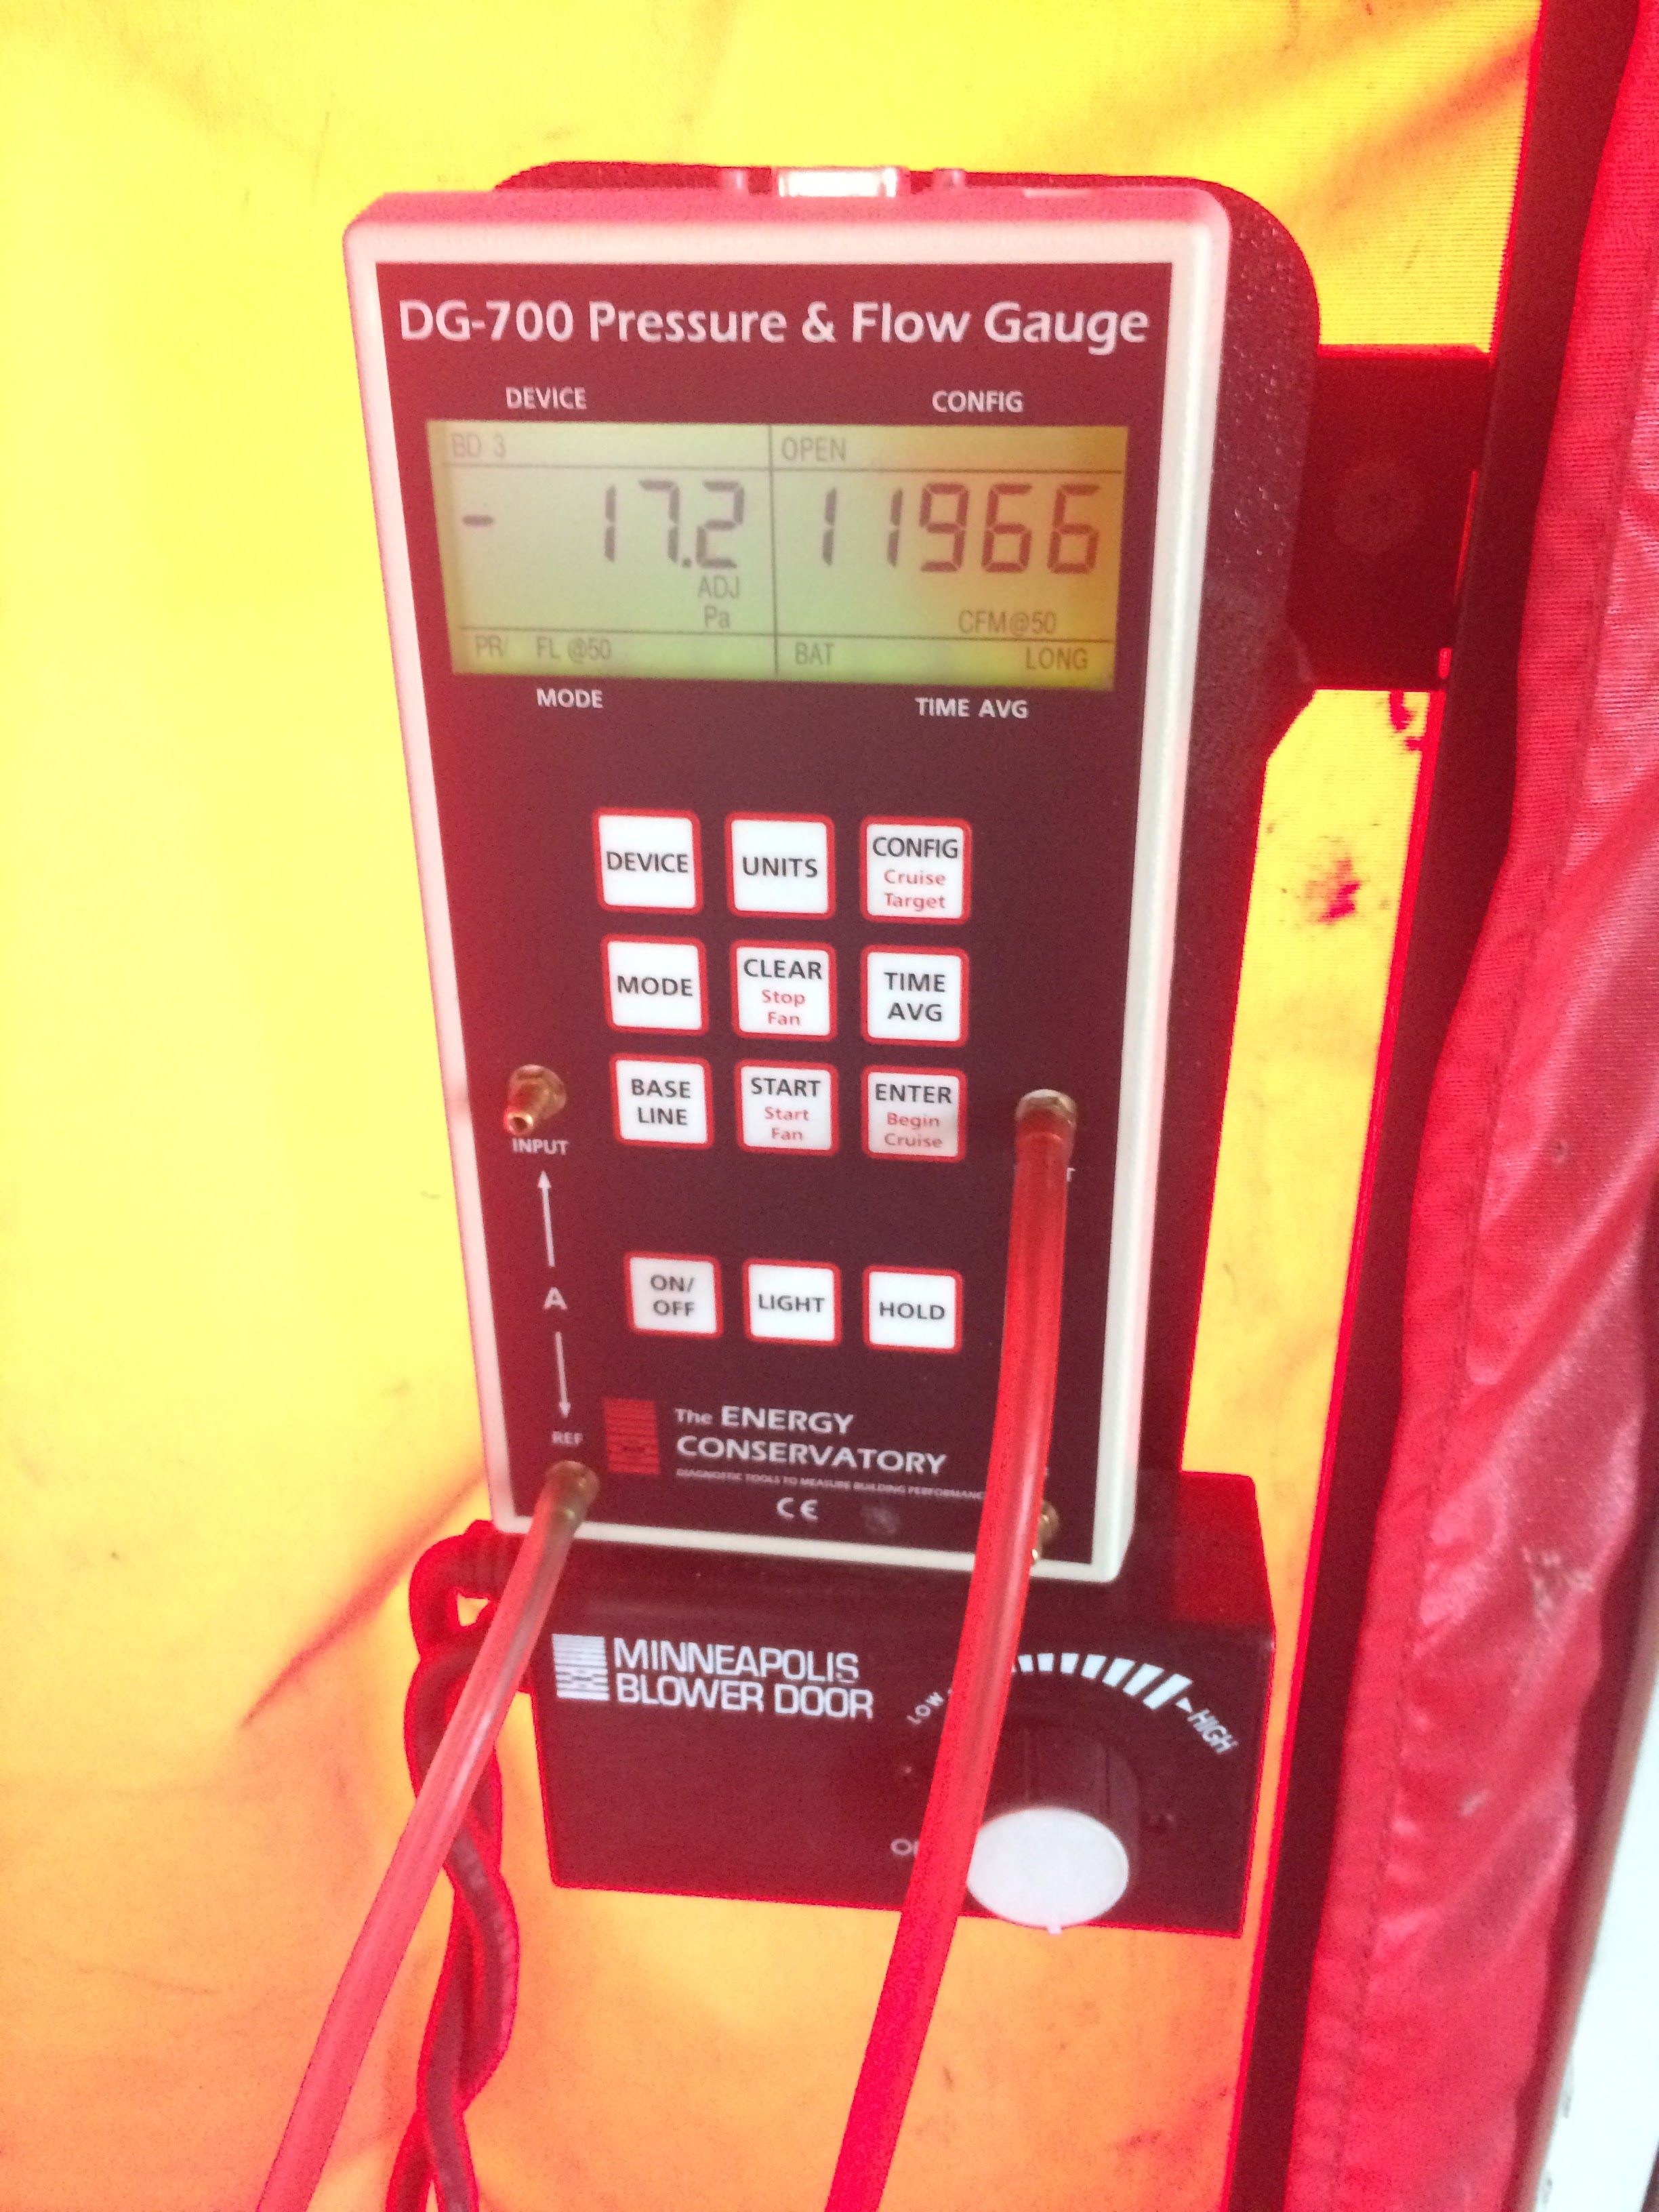
This is one of the leakiest homes I’ve tested. We’ve found that a blower door number roughly equal to square footage gives us enough control to solve client problems. That’s a 1:1 leakage to square footage ratio. This house is only 720 square feet and it’s blower door was a whopping 12,000 cfm50! (CFM50, or cubic feet per minute at 50 Pascals, is the standard unit and test pressure.)
That’s a 16:1 ratio! To be fair, the house was completely gutted which is not normal, so the real ratio was likely closer to 4:1.
The Design Challenge
This house has substantial moisture problems, it needs complete insulation and HVAC systems, and we have a limited budget. But we do have lots of volunteer labor! I wondered at times if I had bitten off more than I could chew.
The Design Process
We have developed a process that helps break these complex problems down into small bites, we call it our Comprehensive Planning Process. It mixes an energy audit with iterative energy modeling to help determine the best design given client problems, objectives, and budget. This process helps us develop a defined path to solving client problems within their budget.
My initial thought was to tackle the house with traditional weatherization tactics: air seal the attic, dense pack the walls with cellulose, and put a vapor barrier down in the basement. The likelihood of a good leakage result with this approach is low and it failed to address the pre-existing attic moisture issues. We needed to dig deeper to assemble a better plan.
Iterative Energy Modeling to the Rescue!
After trying a number of insulation options, TREAT energy modeling software led us to conclude thorough air sealing of the whole enclosure was the best option. That is code for spray foam. It would cover the moisture problems and encapsulate them thereby eliminating a remediation problem we didn’t have budget for, and solve the swiss cheese leakage issue in one pass. As long as we were sure to consistently dry the building, moisture issues should remain licked. Spray foam provided 72% greater modeled energy savings compared to the standard weatherization package! It also allowed us to confidently use very small heating equipment.
Finally, spray foam made the project drywall ready really quickly, and there was a volunteer drywall party breathing down our necks.
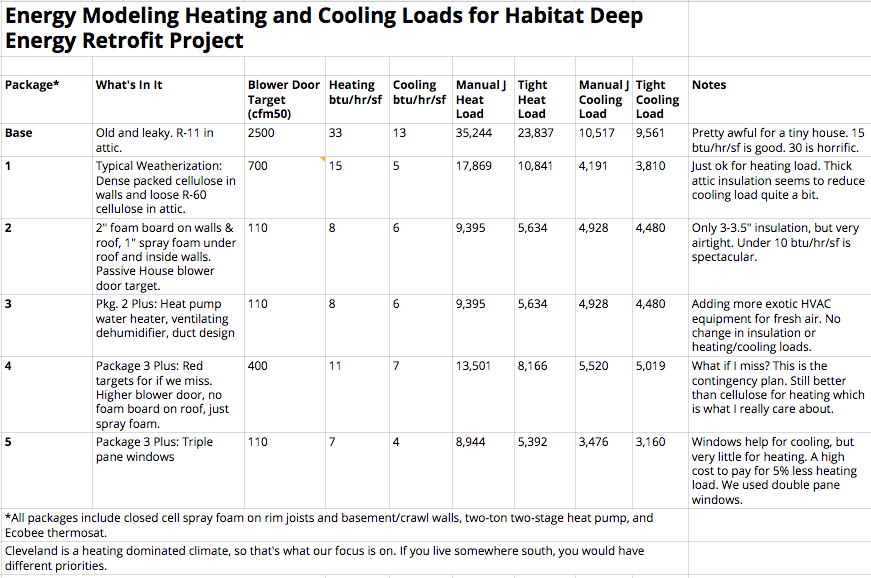
If you are a numbers geek, here are the various load calculations from our iterative energy modeling:
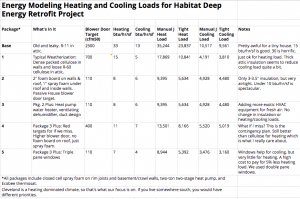
Our initial design called for 1-2 inches of spray foam inside primarily for the air sealing benefit, with rigid foam outside for insulation benefit. The rigid foam was donated by Dow and installed with volunteer labor. Our implemented package, #4, increased the roof deck spray foam and deleted the exterior foam on the roof. While this increased foam cost, it saved the complexity and time of putting foam board on the roof.
That means the 700 cfm50 target for the non-foam weatherization package would have been wildly optimistic. I would have been lucky to get this house close to 1000 using traditional methods. Too many weird leaks I couldn’t predict, much less find and fix without superhuman effort.
That wraps up the basics on the building shell work, here’s how we decided which HVAC to install.
Fresh Air and Dehumidification
We’ve been using Foobot Indoor Air Quality monitors in our work this year, and we keep seeing how critically important good dehumidification is to comfort and IAQ. Volatile Organic Compounds spike with humidity, which correlates with Dr. Richard Corsi’s work at the University of Texas. In a house this tight that had previous moisture issues, we want to be sure that we have sufficient 24/7/365 dehumidification in both heating and cooling seasons. Foobot with its monitoring and datalogging will tell us how we are doing.
Our usual choice for managing fresh air and humidity is a ventilating dehumidifier, which for this project was kindly donated by Ken Gehring of Thermastor.

A ventilating dehumidifier is a device that brings in fresh air to the duct system and dehumidifies as needed, any time of year. It then distributes it throughout the home using the duct system. Temperature of incoming fresh air can be a comfort problem. Since we will lose some of the tempering capability of an HRV/ERV, we ran extra long uninsulated duct through the basement to help temper the incoming air.
Mixed with a media filter on a central duct system, the ventilating dehumidifier lets us control humidity and particulate matter (PM2.5). By controlling humidity we control volatile organic compounds (VOCs) as well. The home should have excellent Indoor Air Quality by design.
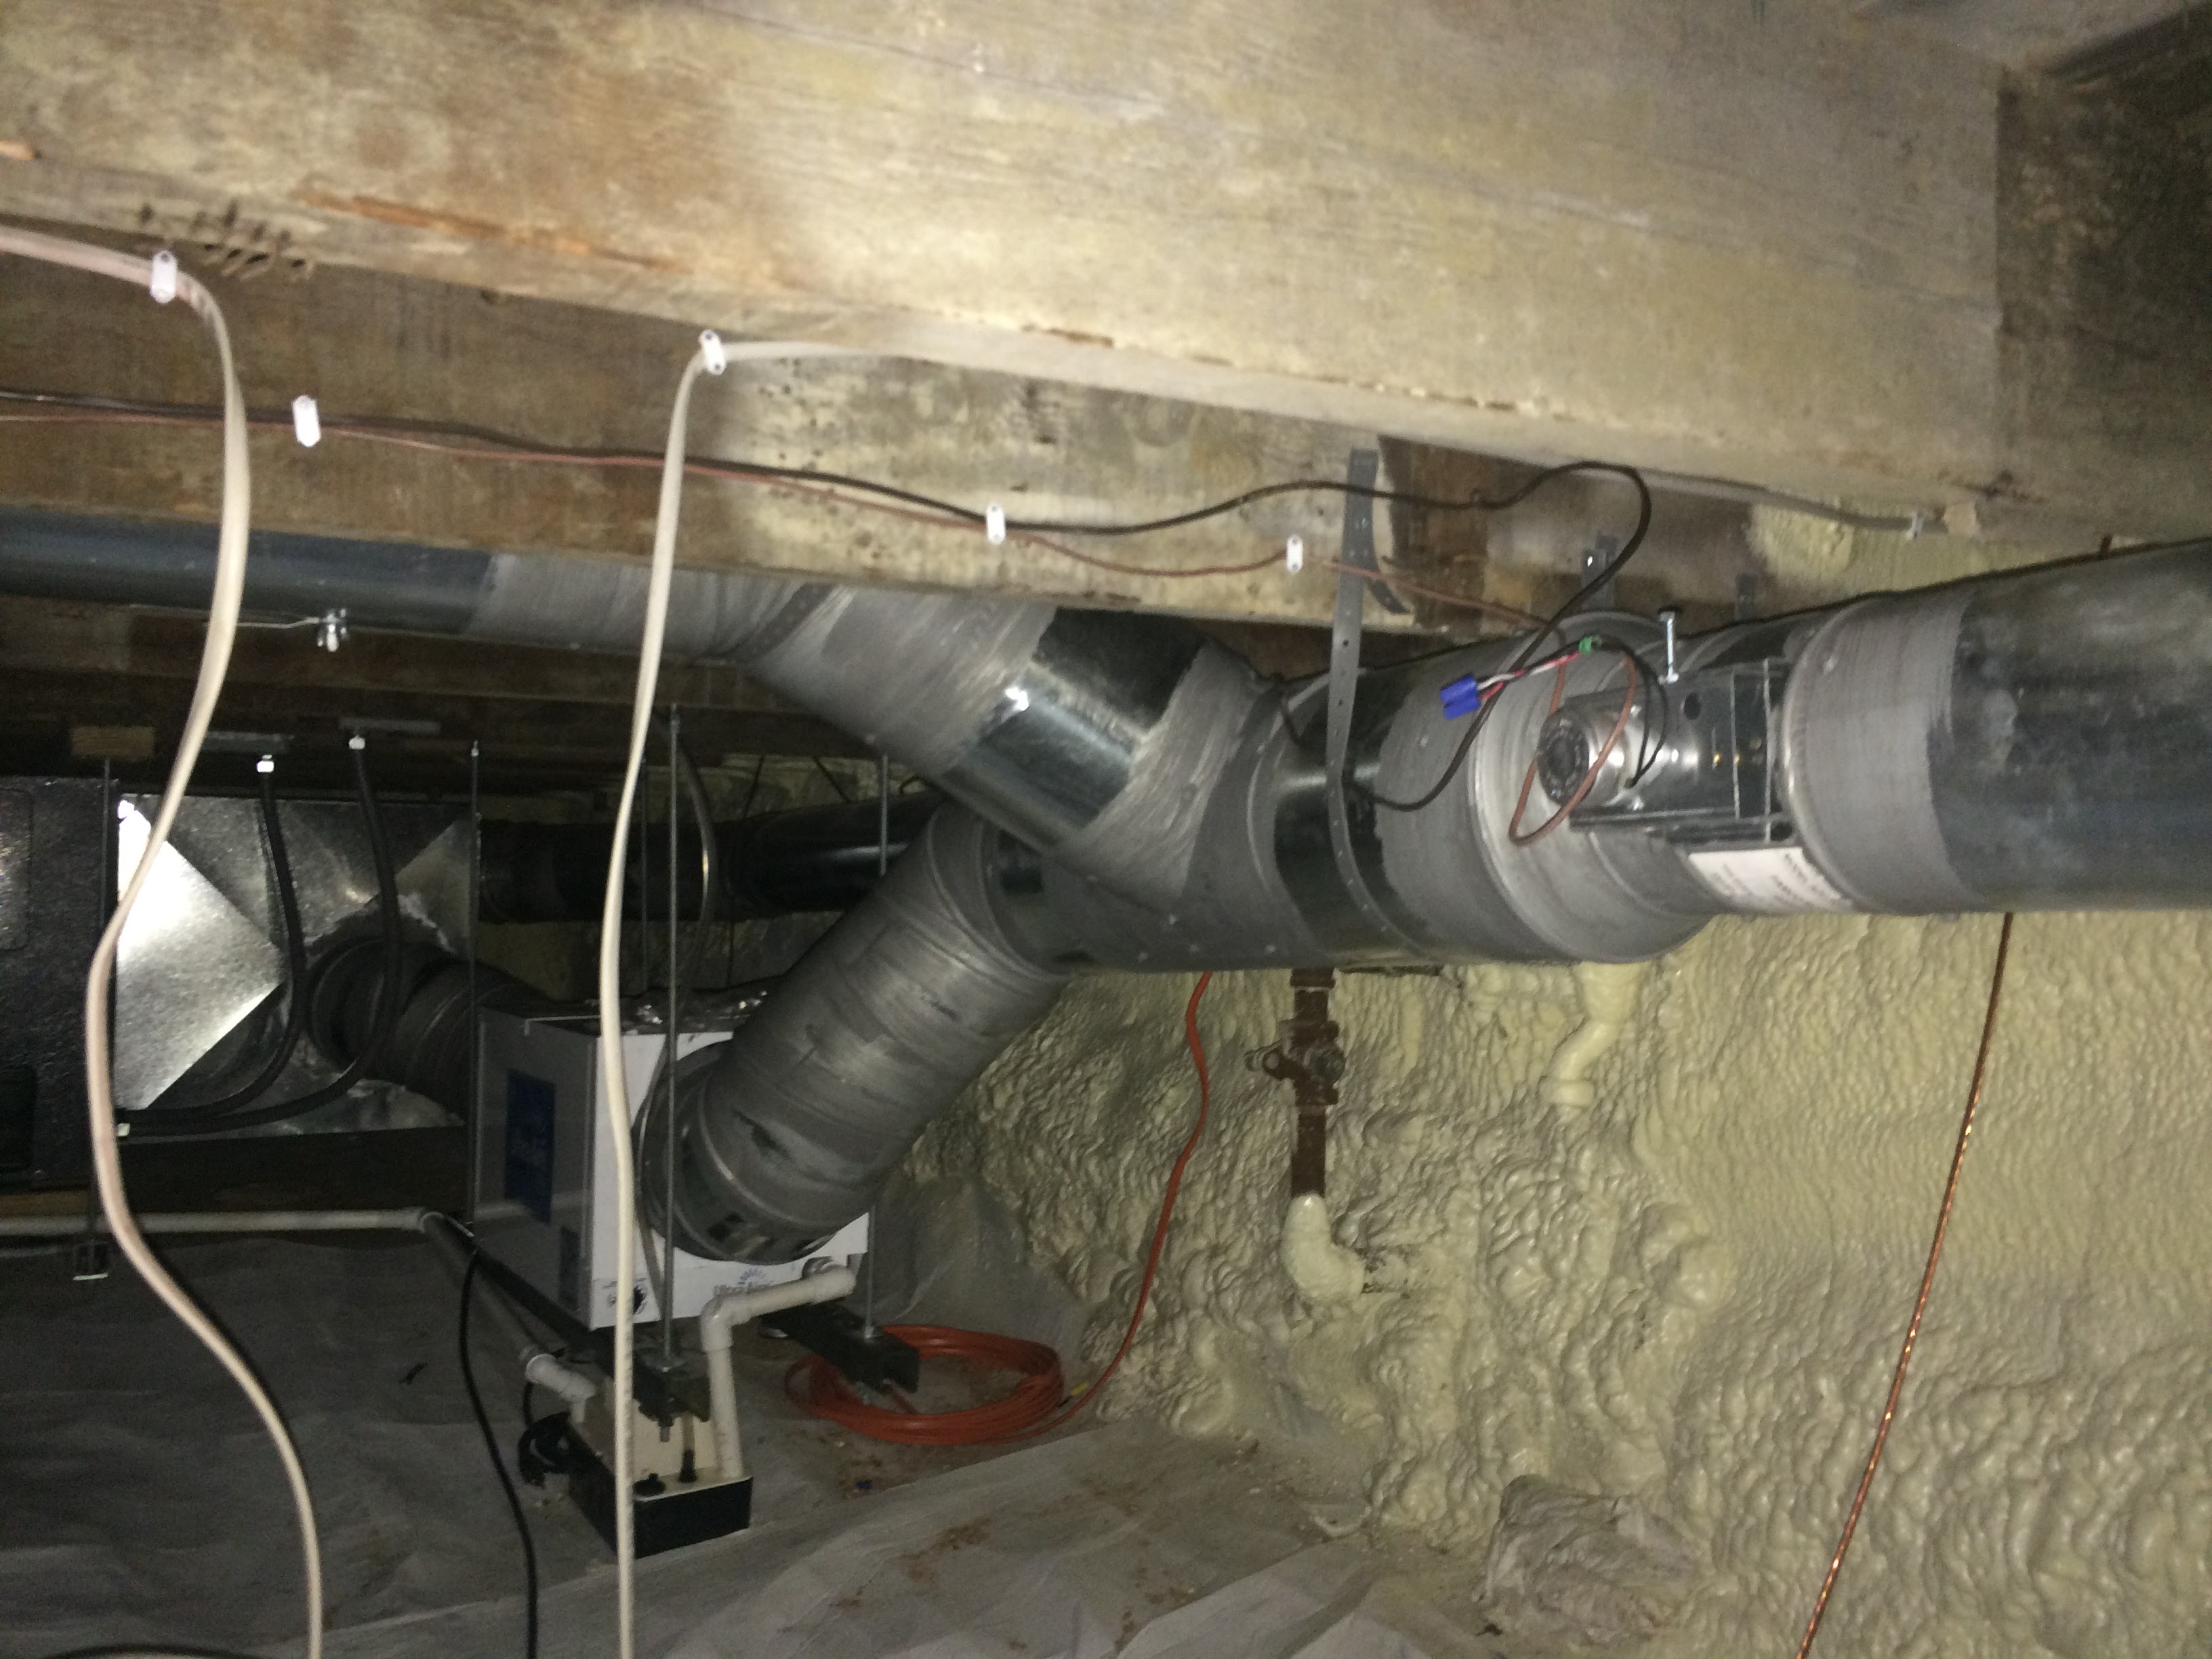
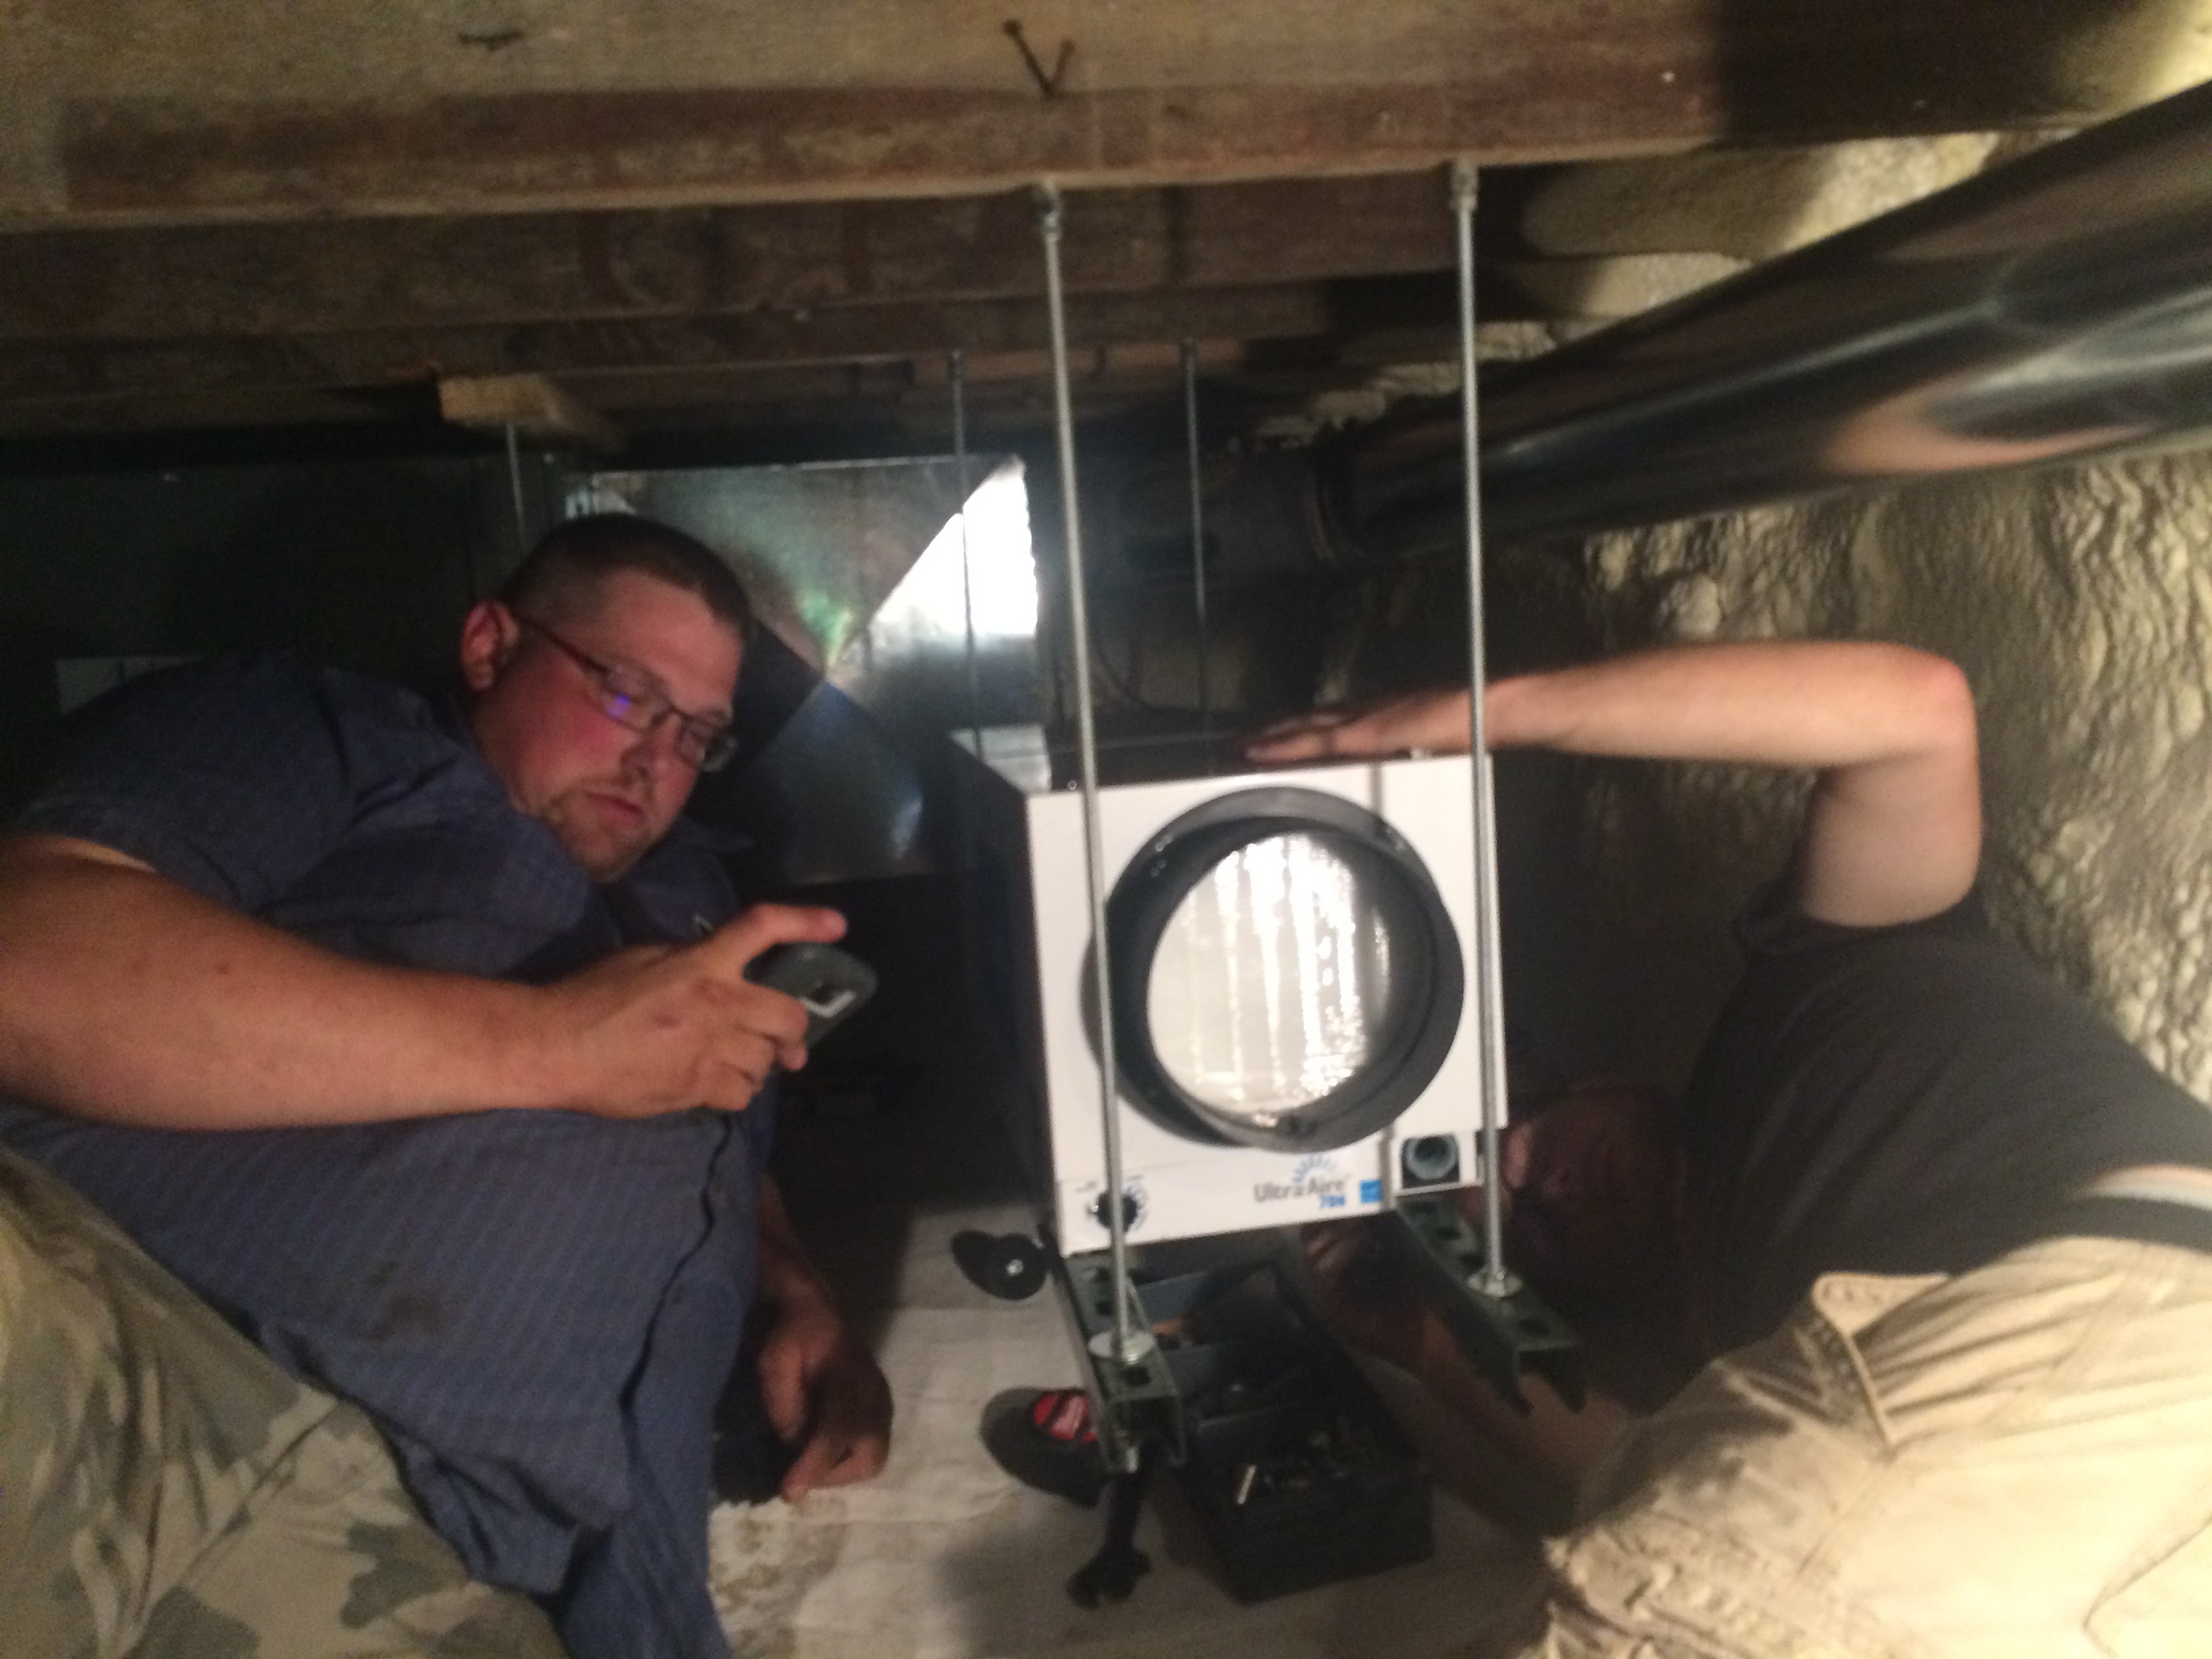
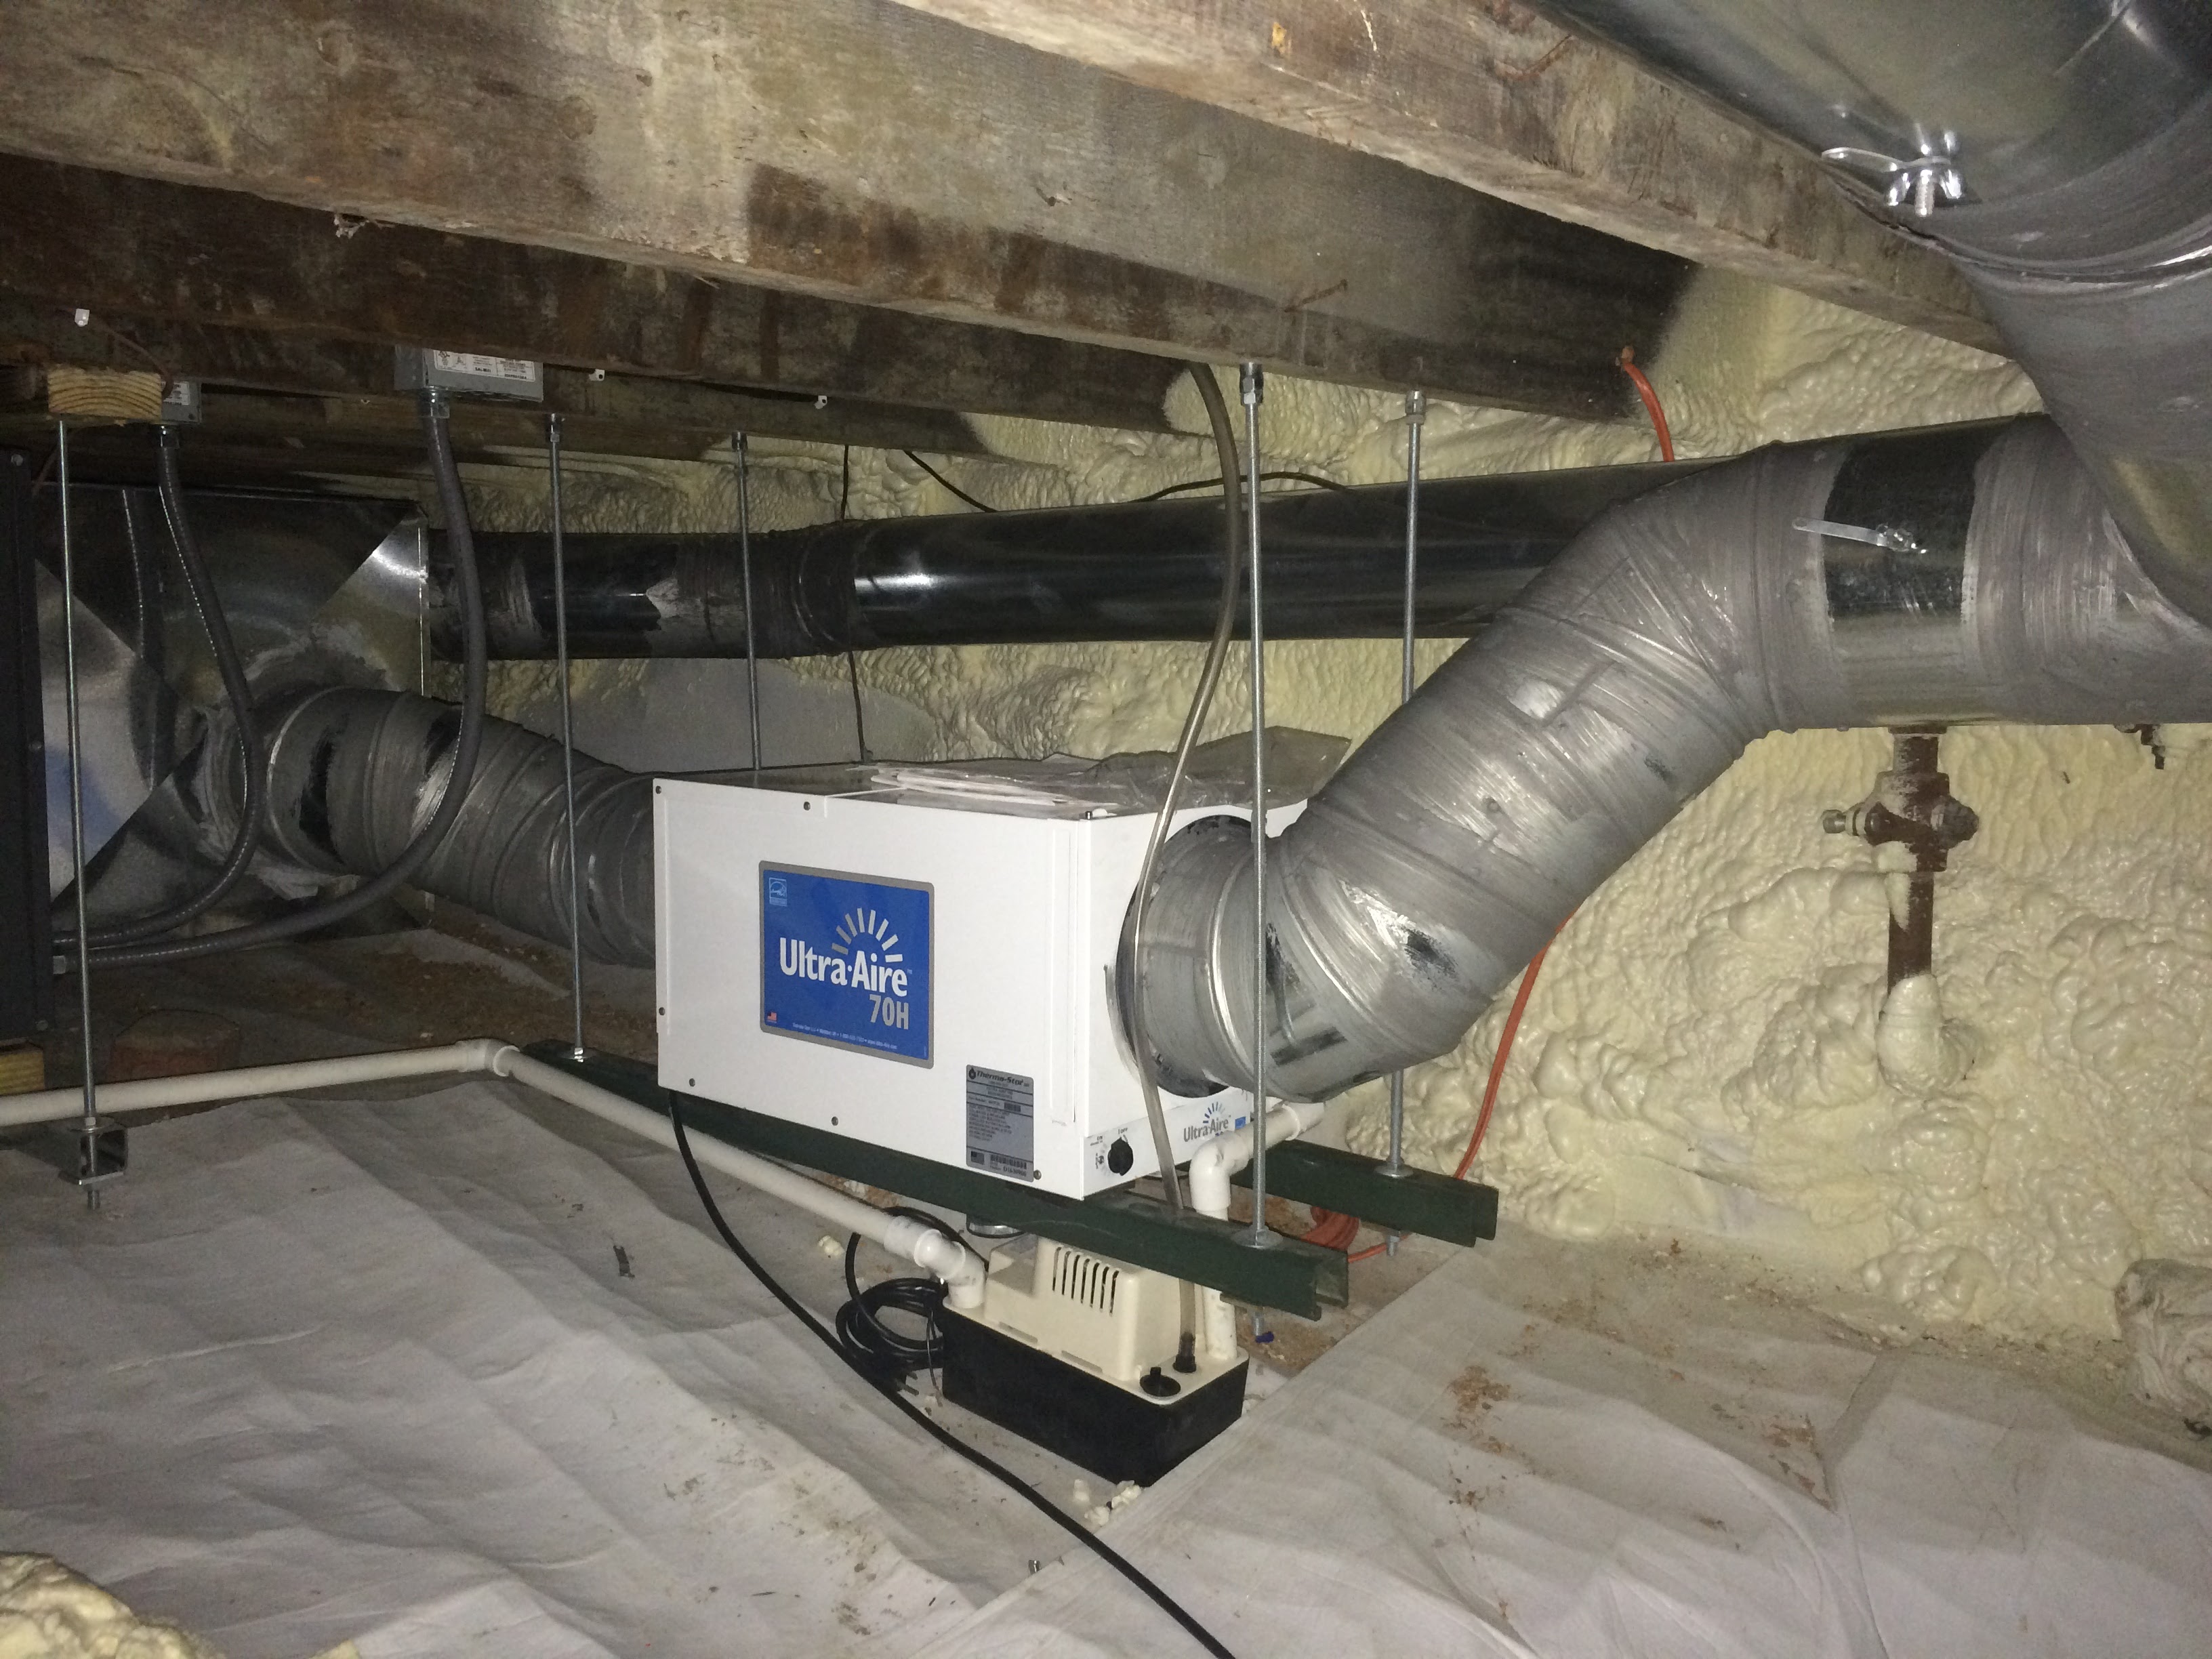
This is the ventilating dehumidifier in the basement. On the right is the intake line which is about 35’ long, kind of remarkable in a 24×30 house. (It hurt intake air flow enough I ended up regretting it and installing another device, a preview of the next part of the case study.) The wiring you see nearby is the motorized damper to open and close the outdoor intake at high and low temperatures. The “T” allows fresh outside air to go directly into the HVAC system and bypass the dehumidifier when dehumidification is not required. We have dampers everywhere so we can adjust and commission it later. There is a backflow damper between the dehumidifier and the air handler so air can’t short circuit through the dehumidifier when it’s off. Also note the foam on the basement walls and the white vapor barrier on the floor. We won’t finalize taping of the vapor barrier until mechanicals are complete.

This is the ducting option we chose for the ventilating dehumidifier. We did not do the optional check damper in the return, we did use the fresh air intake.
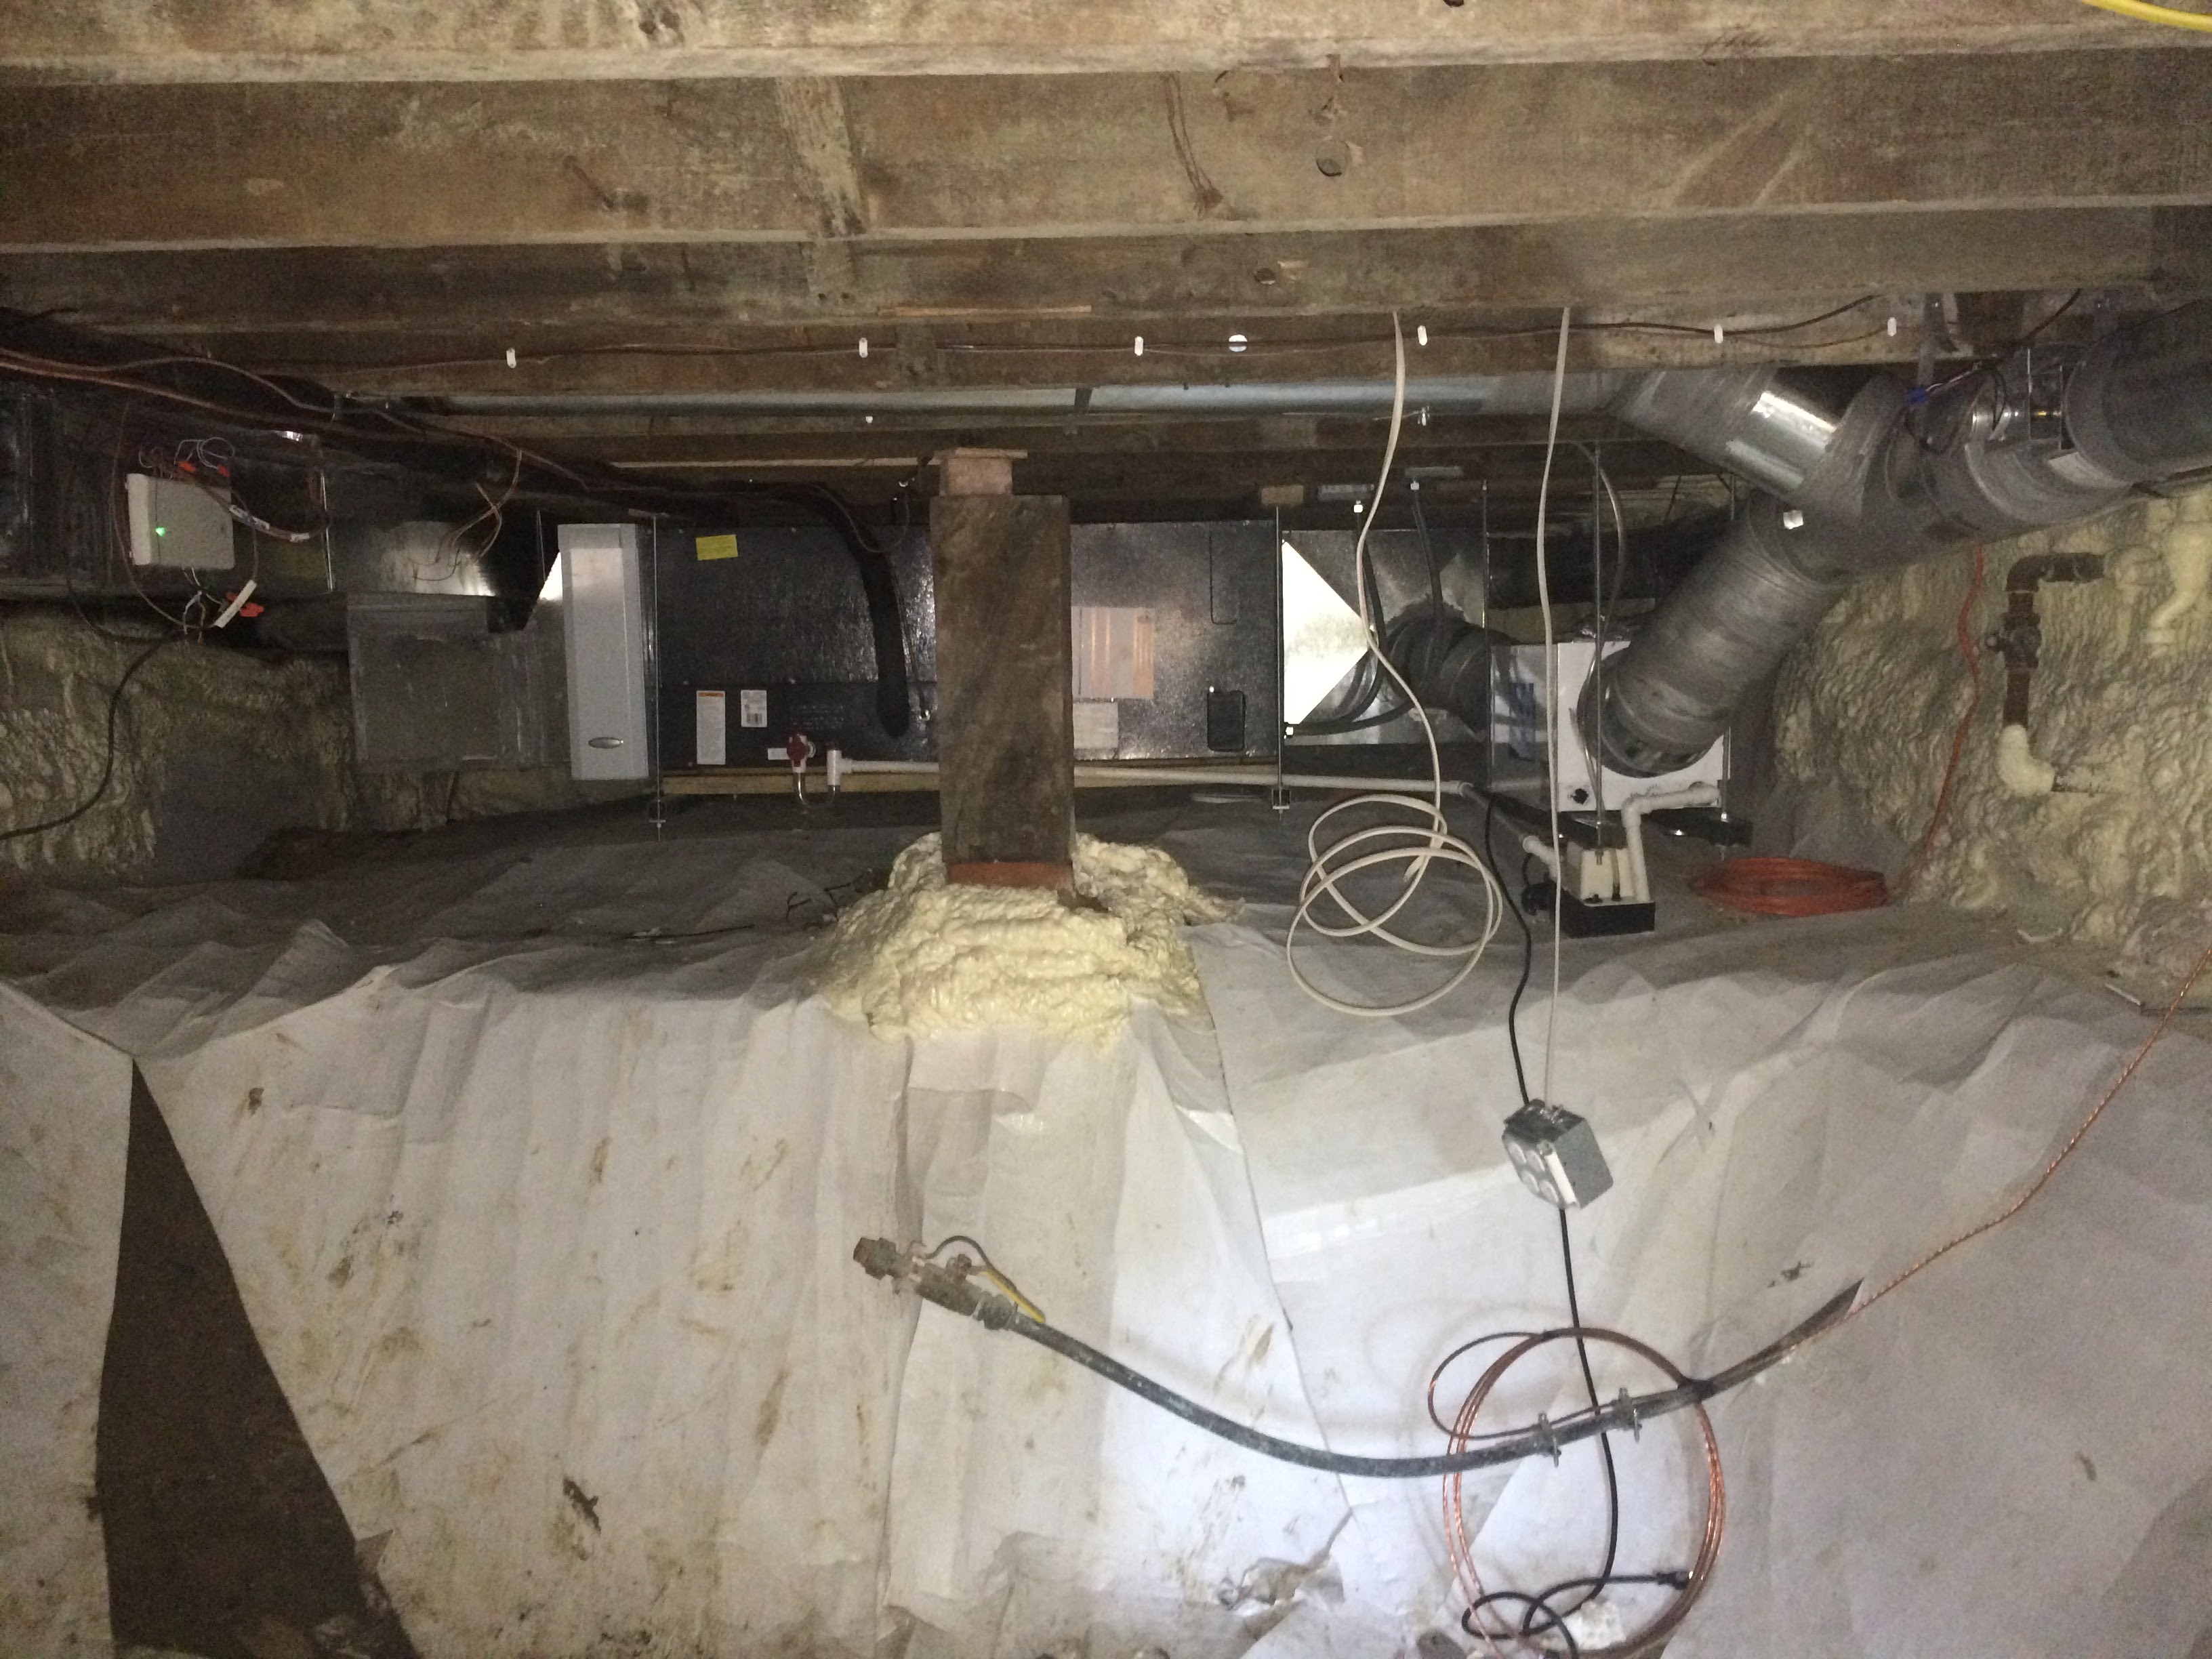
Here is a panoramic view of the basement and HVAC system:

Load Calculations Tested In the Real World
As you may have noted in the load calculations this house has a “tight load” of 8166 BTUs/hour at 5 degrees for installed Package 4. The tight load is from TREAT and is what you get when you add up loads for each floor. We find TREAT is as close as you would reasonably expect or want software to be on these load calcs. Logging equipment under worst case weather has indicated actual performance is within 10-20% of TREAT’s tighter loads. Standard load calculations, such as Manual J, have a lot of fudge factors in them and they seem to overstate load by 40-60%, particularly on well performing homes. We’ve learned these things because we’ve tracked runtime on other homes with Ecobee thermostats.
Oversizing Can Be Really Bad
The main reason for the load calcs is to match equipment output to how much heat or cool the house needs at any given moment. (See the HVAC Basics Guide or HVAC Sizing Guide for more.) We want the smallest equipment we can possibly install, while still ensuring the house can stay at 70 on a 5 degree day. We want to design the equipment to be running at low stages as much as possible, which is more efficient. Here are a few benefits of right-sized HVAC equipment:
- People are comfortable when equipment is running.
- Fresh air is pulled in through the intake vent when equipment is running.
- Filtration occurs when equipment is running.
- Dehumidification occurs when equipment is running.
- Cycling losses DON’T occur if equipment doesn’t shut off.
By slowing down the addition of heating or cooling into the house, it allows walls, ceilings, and floors to equalize in temperature better. This leads to remarkable comfort. If equipment is oversized we lose these benefits. Oversized equipment is often a root cause of comfort and moisture issues in our practice.
The limiting factor on sizing is often the HVAC manufacturers. They don’t offer choices that match well to loads of well performing smaller homes. For example, the smallest commonly available furnace is 40,000 BTUs – enough for a 2500 sf home. And while often a better fit, the smallest two stage heat pump can still be way too big on high at 24,000 BTUs. The 14,000 BTU low is still kinda high but this is compromise we need to make for this home.
Heat Pumps Are Good, Even In Cleveland!
This is our fourth all electric project, and we’ve been tracking their usage and energy costs. We’ve found air source heat pumps (as opposed to ground source/geothermal) have comparable energy costs vs. natural gas. Part of this is thanks to deleting the gas meter which costs $25/month or $300/year. Even if it’s $300 more in electricity, the cost is still the same.
We are not fans of combustion inside a home for many reasons. Carbon monoxide and other health risks, particularly in tighter homes, is at the top of the list. Heat pumps are an ideal solution.
Habitat for Humanity homeowners are typically pretty sensitive to monthly expenses, so any operating expenses we can save them are appreciated.
HVAC Equipment Choice
While I tend to lean on the highest end heat pumps (we really like Carrier’s GreenSpeed heat pumps), that didn’t fit the budget. Rob Benefiel, a tech rep for Goodman and friend, told me about a substantial discount offered to Habitat for Humanity and helped me spec the unit. This help from Goodman allowed us to install a very nice 16 SEER two stage unit for less than what a basic single stage would normally cost. I’m really excited to see how it performs.
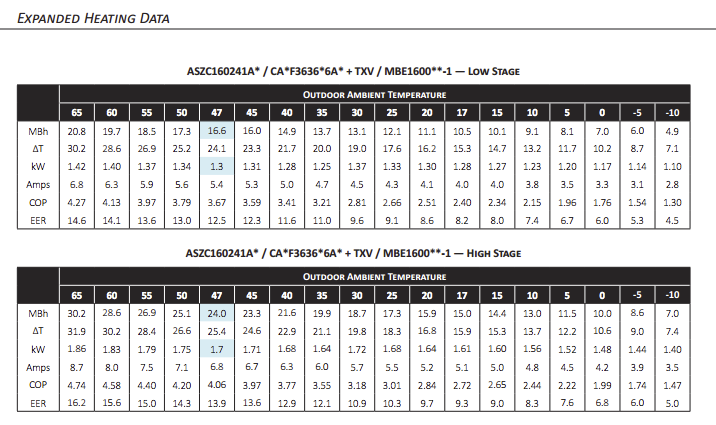
At 24,000 BTUs I expect the heat pump alone will likely handle the heating, even at 0 degrees. Sadly, it is still substantially oversized, but the other choice was mini-splits, and there was no way to get good fresh, filtered and dehumidified air with mini splits unless we installed a second duct system. That said, sizing is much closer than any furnace would be.
Breaking the Rules
With this project, we are excited to continue challenging some flat earth “dogma” in the green building world:
- Air source heat pumps don’t work in cold climates in existing homes. We have amazing client feedback and system data indicating surprising success in our climate.
- High R-Values are needed in a Deep Energy Retrofit. Our data and experience has indicated a range from R-17 to R-20 does an amazing job.
- HRV/ERV is needed to temper incoming fresh air. We’re using a ventilating dehumidifier because HRV/ERV’s don’t manage humidity well. In high humidity climates HRV/ERV introduce significant moisture loads which then must be addressed. With long duct runs and tight equipment sizing tempering shouldn’t be an issue. The ventilating dehumidifier fits the bill 100%.
- Balanced fresh air strategy is best in cold climates. With a tight house, pressurized dehumidification provides better air quality and summer drying potential than a balanced fresh air strategy.
- Mini split heat pumps are good whole home solutions. We’re using central ductwork with a standard split heat pump and providing excellent filtration, dehumidification, and central fresh air distribution. In addition, we track air quality with Foobots. What that has told us is that the approach we recommend works very well. Our prior experiments with mini splits have resulted in sub par outcomes.
If We Screw Up, It Will Be Public…
We are firm believers that measured outcomes and transparency will help build public confidence in Home Performance. We’re going to be datalogging this house with the following tools:
- Foobot Indoor Air Quality Monitor – Measures temperature, relative humidity, particulates (PM2.5) and chemical pollutants. Logs the data every minute. Thanks to Foobot for the donation.
- Curb Energy Monitor – Watching whole house energy usage.
- Ecobee EMS-02 Thermostat – This will be controlling the heat pump, fresh air damper, and the ventilating dehumidifier. It is the only data logging thermostat on the market. It logs run time and stage (very critical!), outdoor temperature, indoor temperature, set point, and indoor humidity.
- NetAtMo IAQ Weatherstation – The main unit measures barometric pressure, decibel level, carbon dioxide, temperature, and humidity. Simpler units that only measure temperature and humidity will be in the supply and return plenums, with a third being outdoors.
We embrace radical transparency – show the good and the bad for everyone to learn from. If we were in DOE’s Building America program we’d probably have a lot more sensors, but this substantial array is only $1400 retail. We’ll be publishing results on the Energy Smart Blog and JLC Online as time moves forward.
Nearing Completion
Dedication is August 28th (this part was written in mid-July), so the project is winding up. It has been challenging and satisfying! Plus we got to break some green “rules”. We love challenging conventions. I’m looking forward to doing the continuous optimization on the HVAC system to make the home as healthy, comfortable, and efficient as possible. Fortunately the new homeowner is also a science geek, so it ought to be fun!
My thanks go out to Rachel Kerns, Habitat for Humanity of Portage County’s Executive Director for gamely rolling with the punches, to the rest of the staff and board, and to the many volunteers working to deliver a safe, decent home to yet another Habitat for Humanity homeowner. Lastly, thanks to the generous manufacturers that donated or discounted products: Dow, Therma-Stor, Broan/Nutone, Foobot and Goodman!
That’s Part 1
That’s the end of the early part of the project. Getting this project working just so has been quite a bit of extra work for a number of reasons, which I’ll write about once all the adjustments are made. It will be another JLC article as well.
If you are trying to figure out how to diagnose and fix your own home, you might start by downloading Home Performance 101 to your right. Understanding how your home really works is critical to actually solving problems.
In the meantime, I’ll show a bunch more project photos!
Project Photos
Here are a few pictures from the project, see the online article for even more!
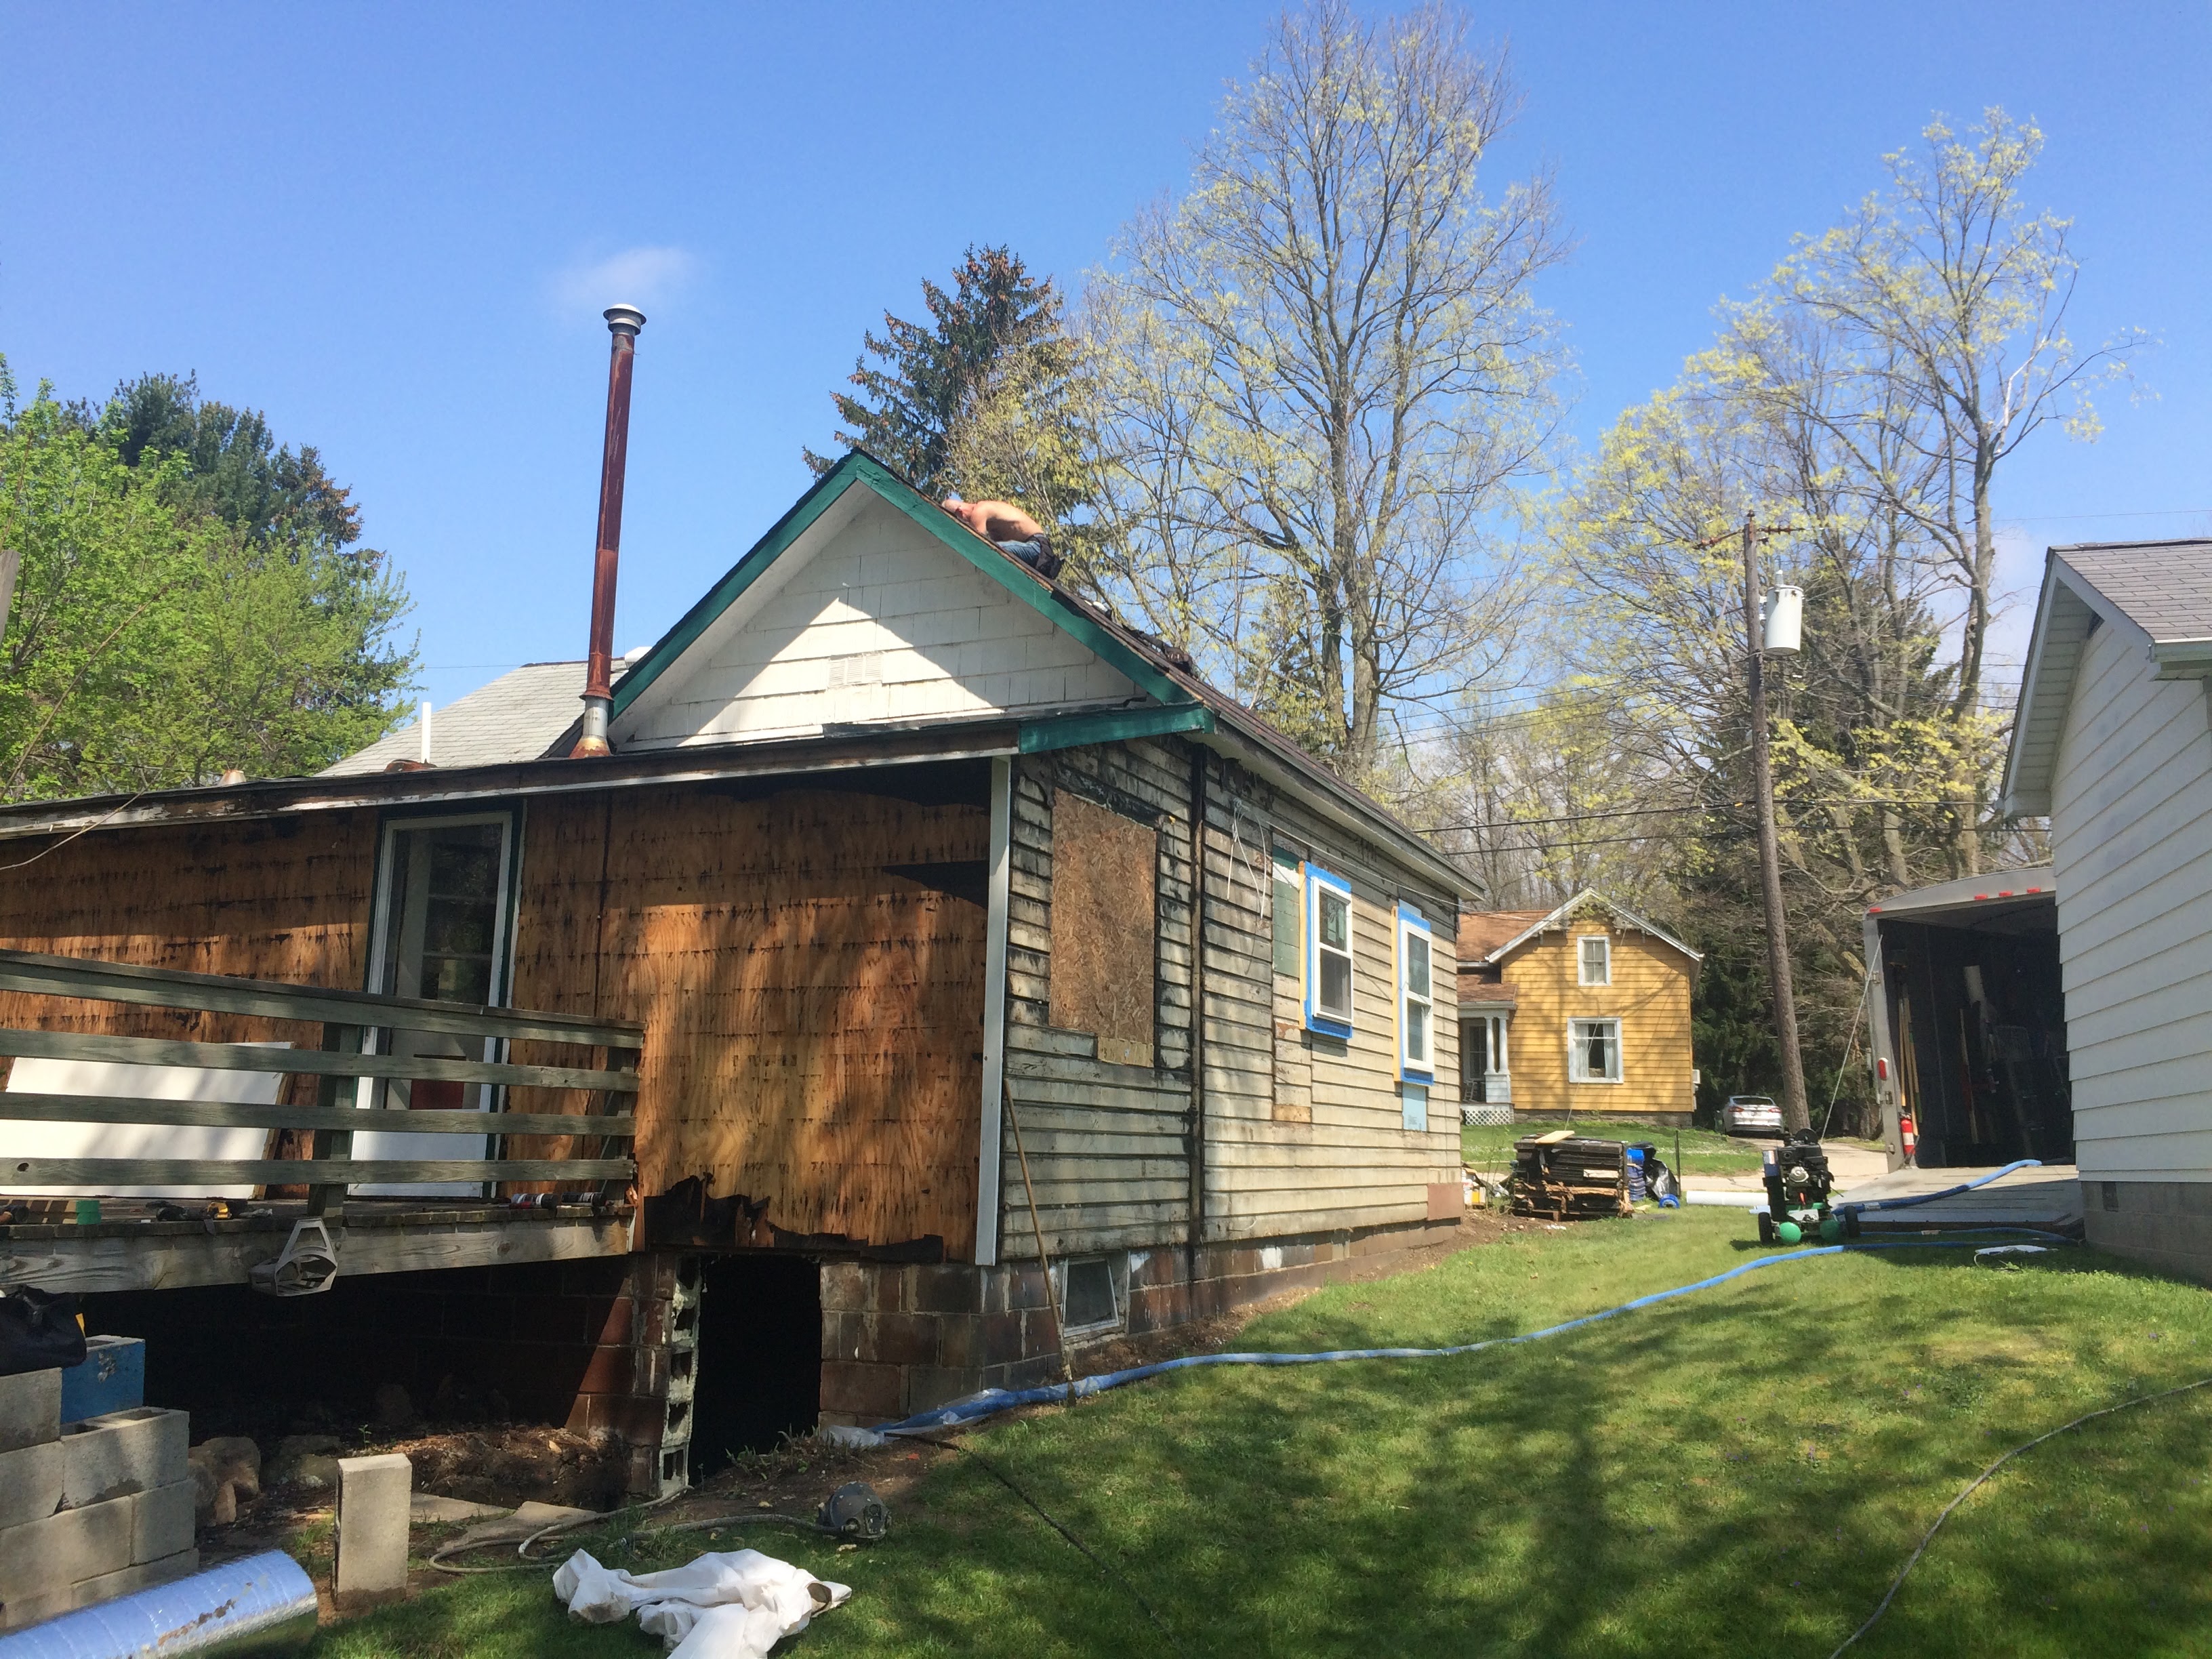
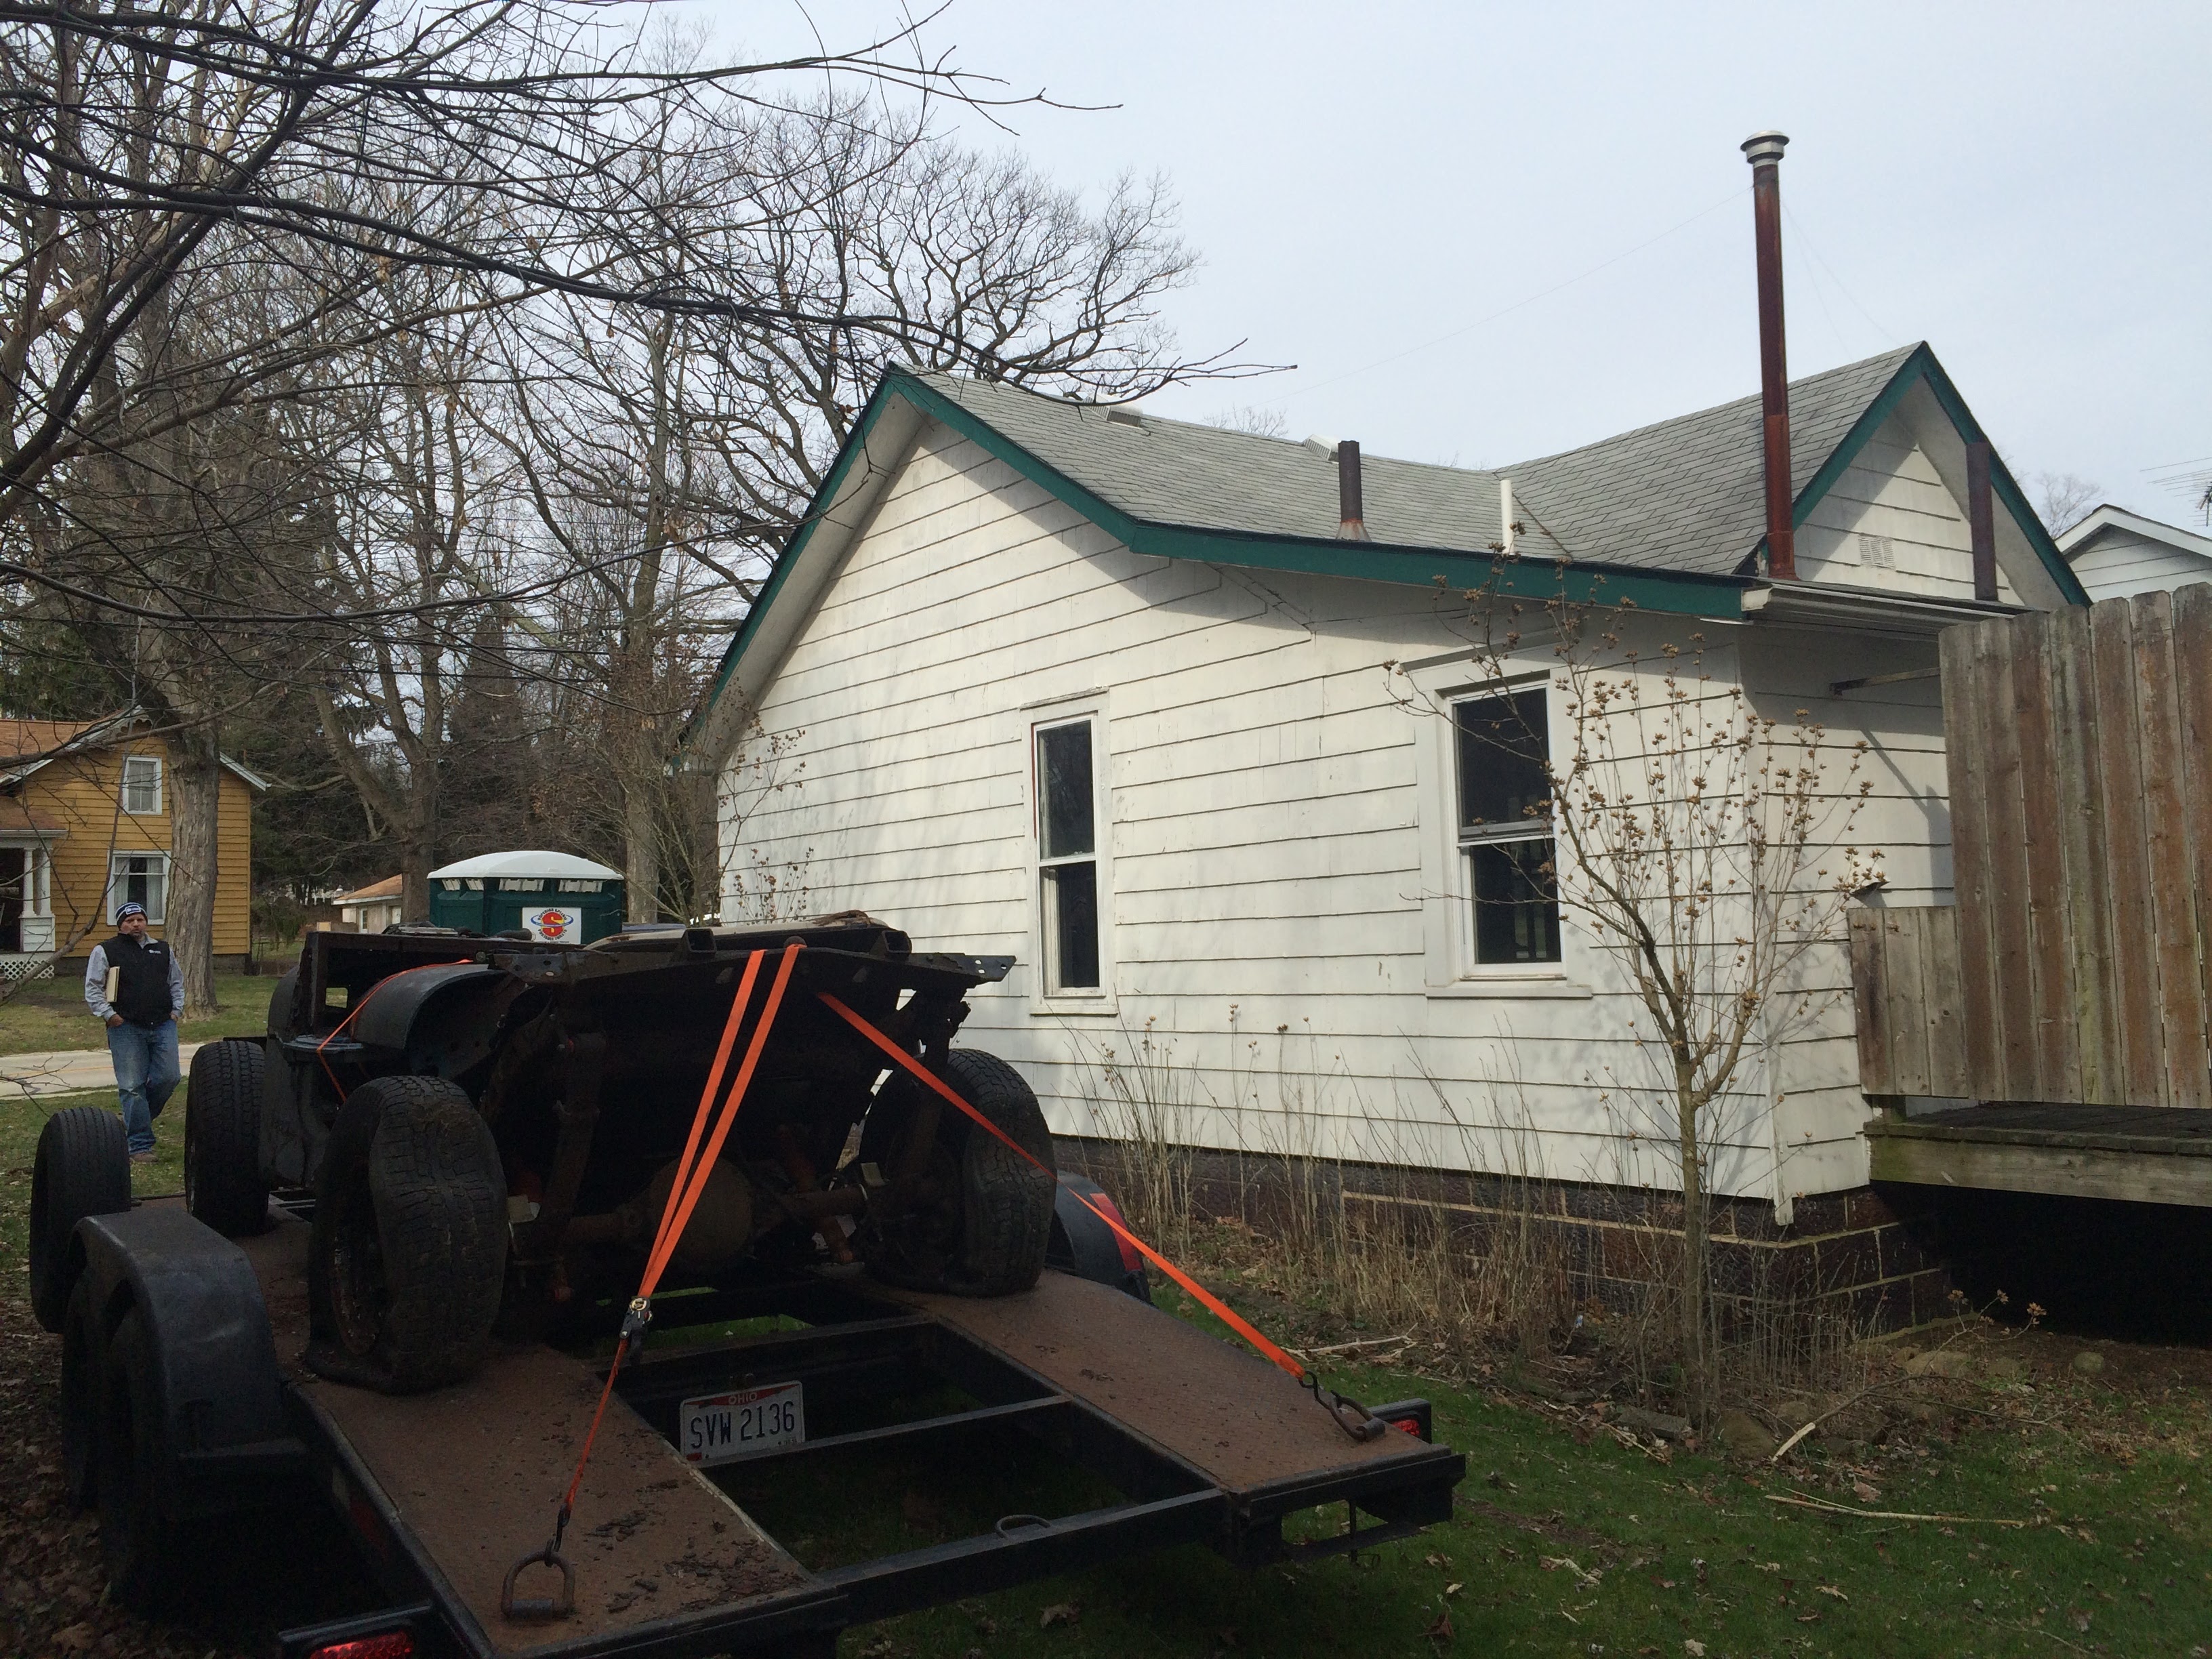
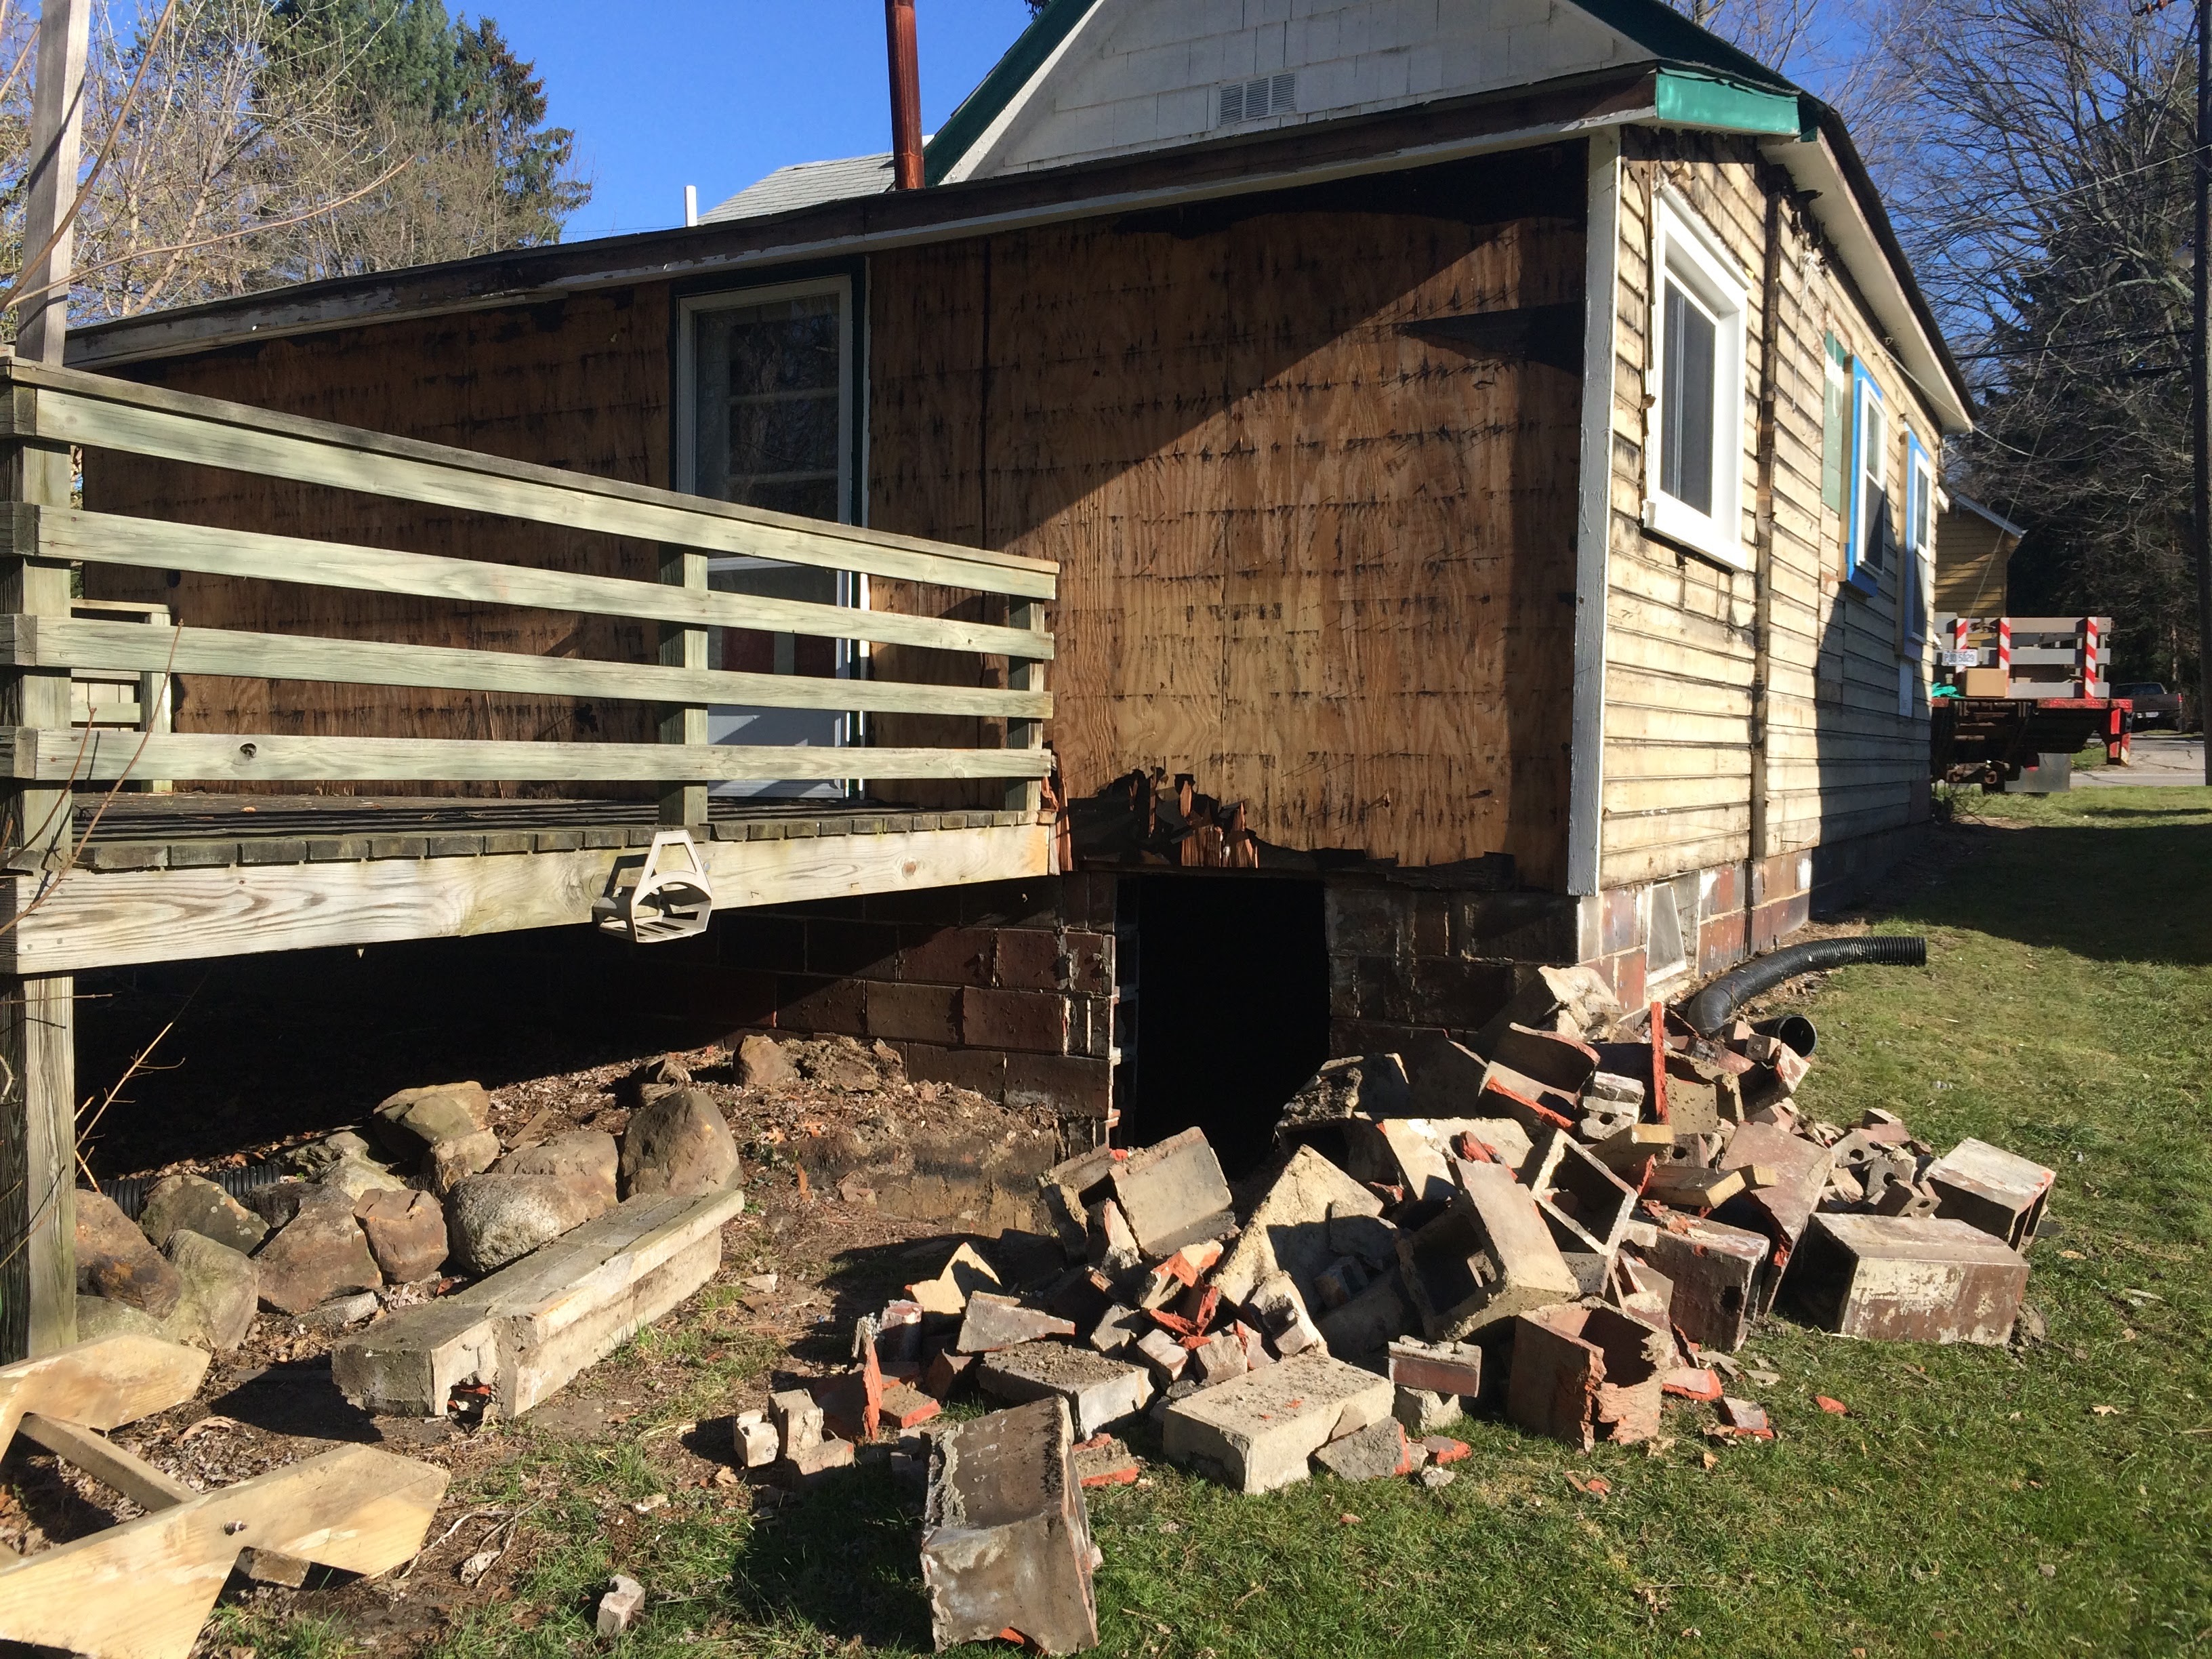
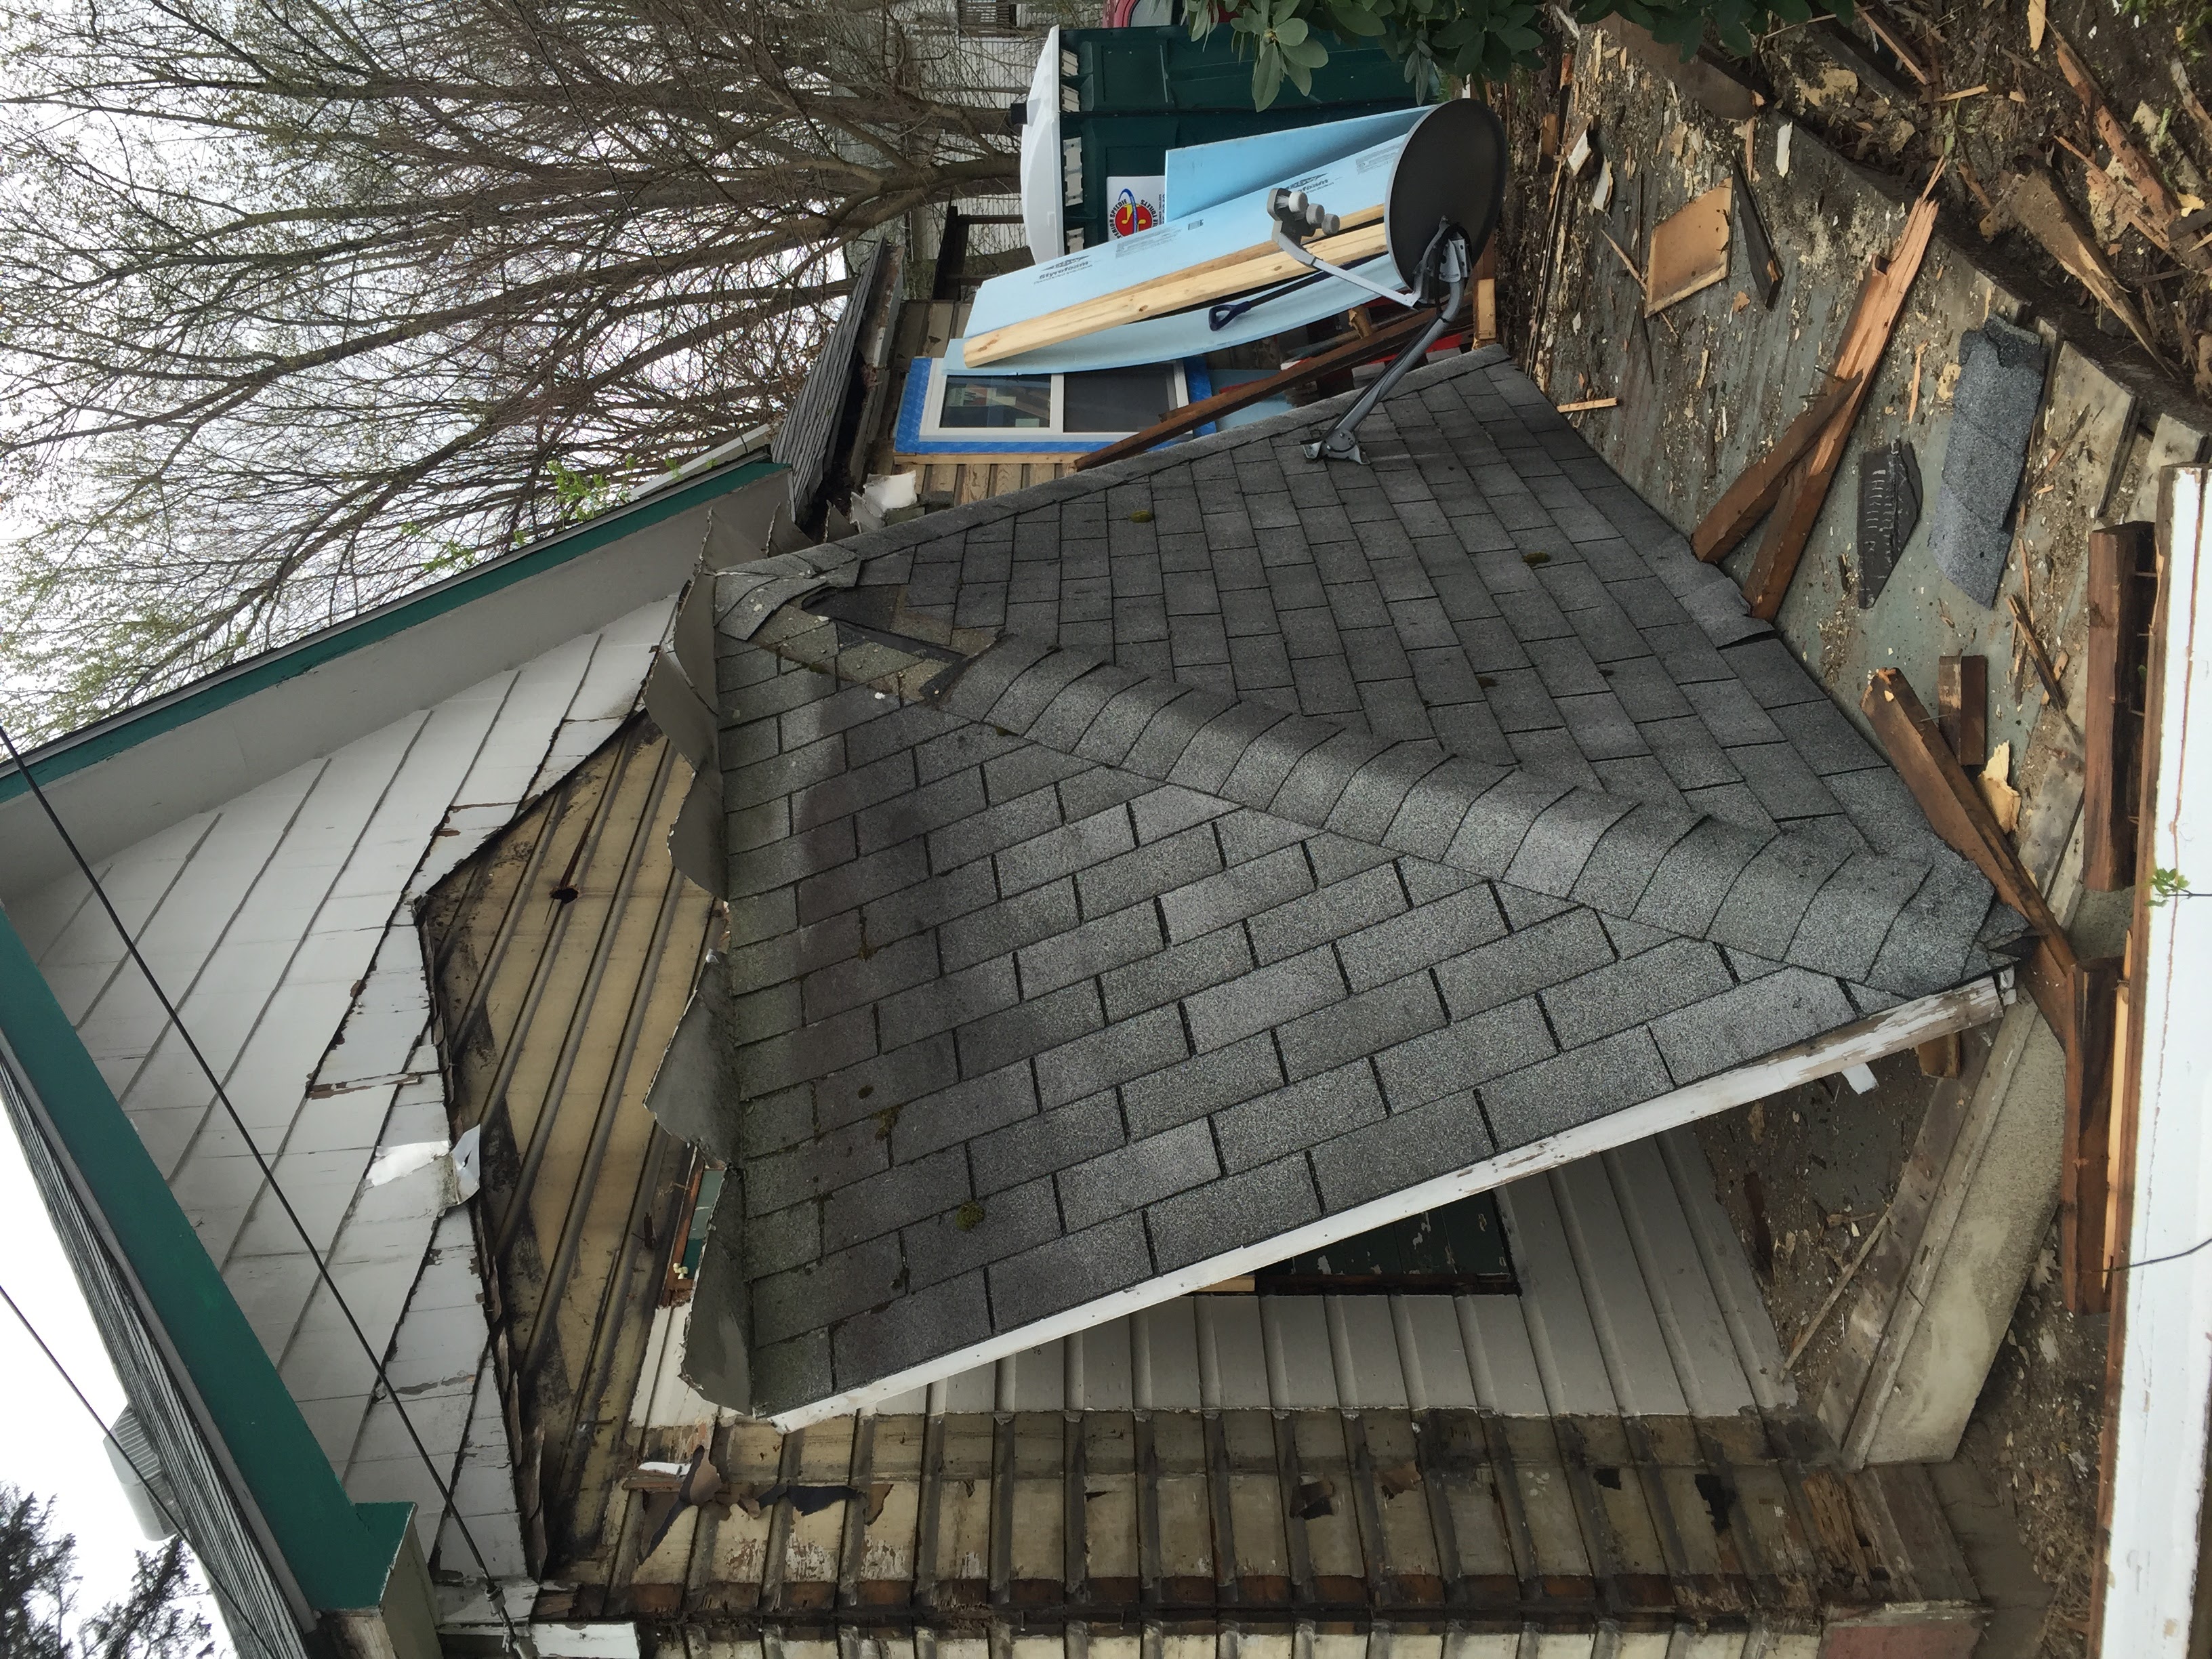
The outer layer of siding was torn off the entire house before foam board was installed. This picture was taken during the roofing job. Note the windows sticking out. They are “bucked out” in preparation for the 2” foam board wall insulation. And how about that leaning tower of B-vent flue pipe!

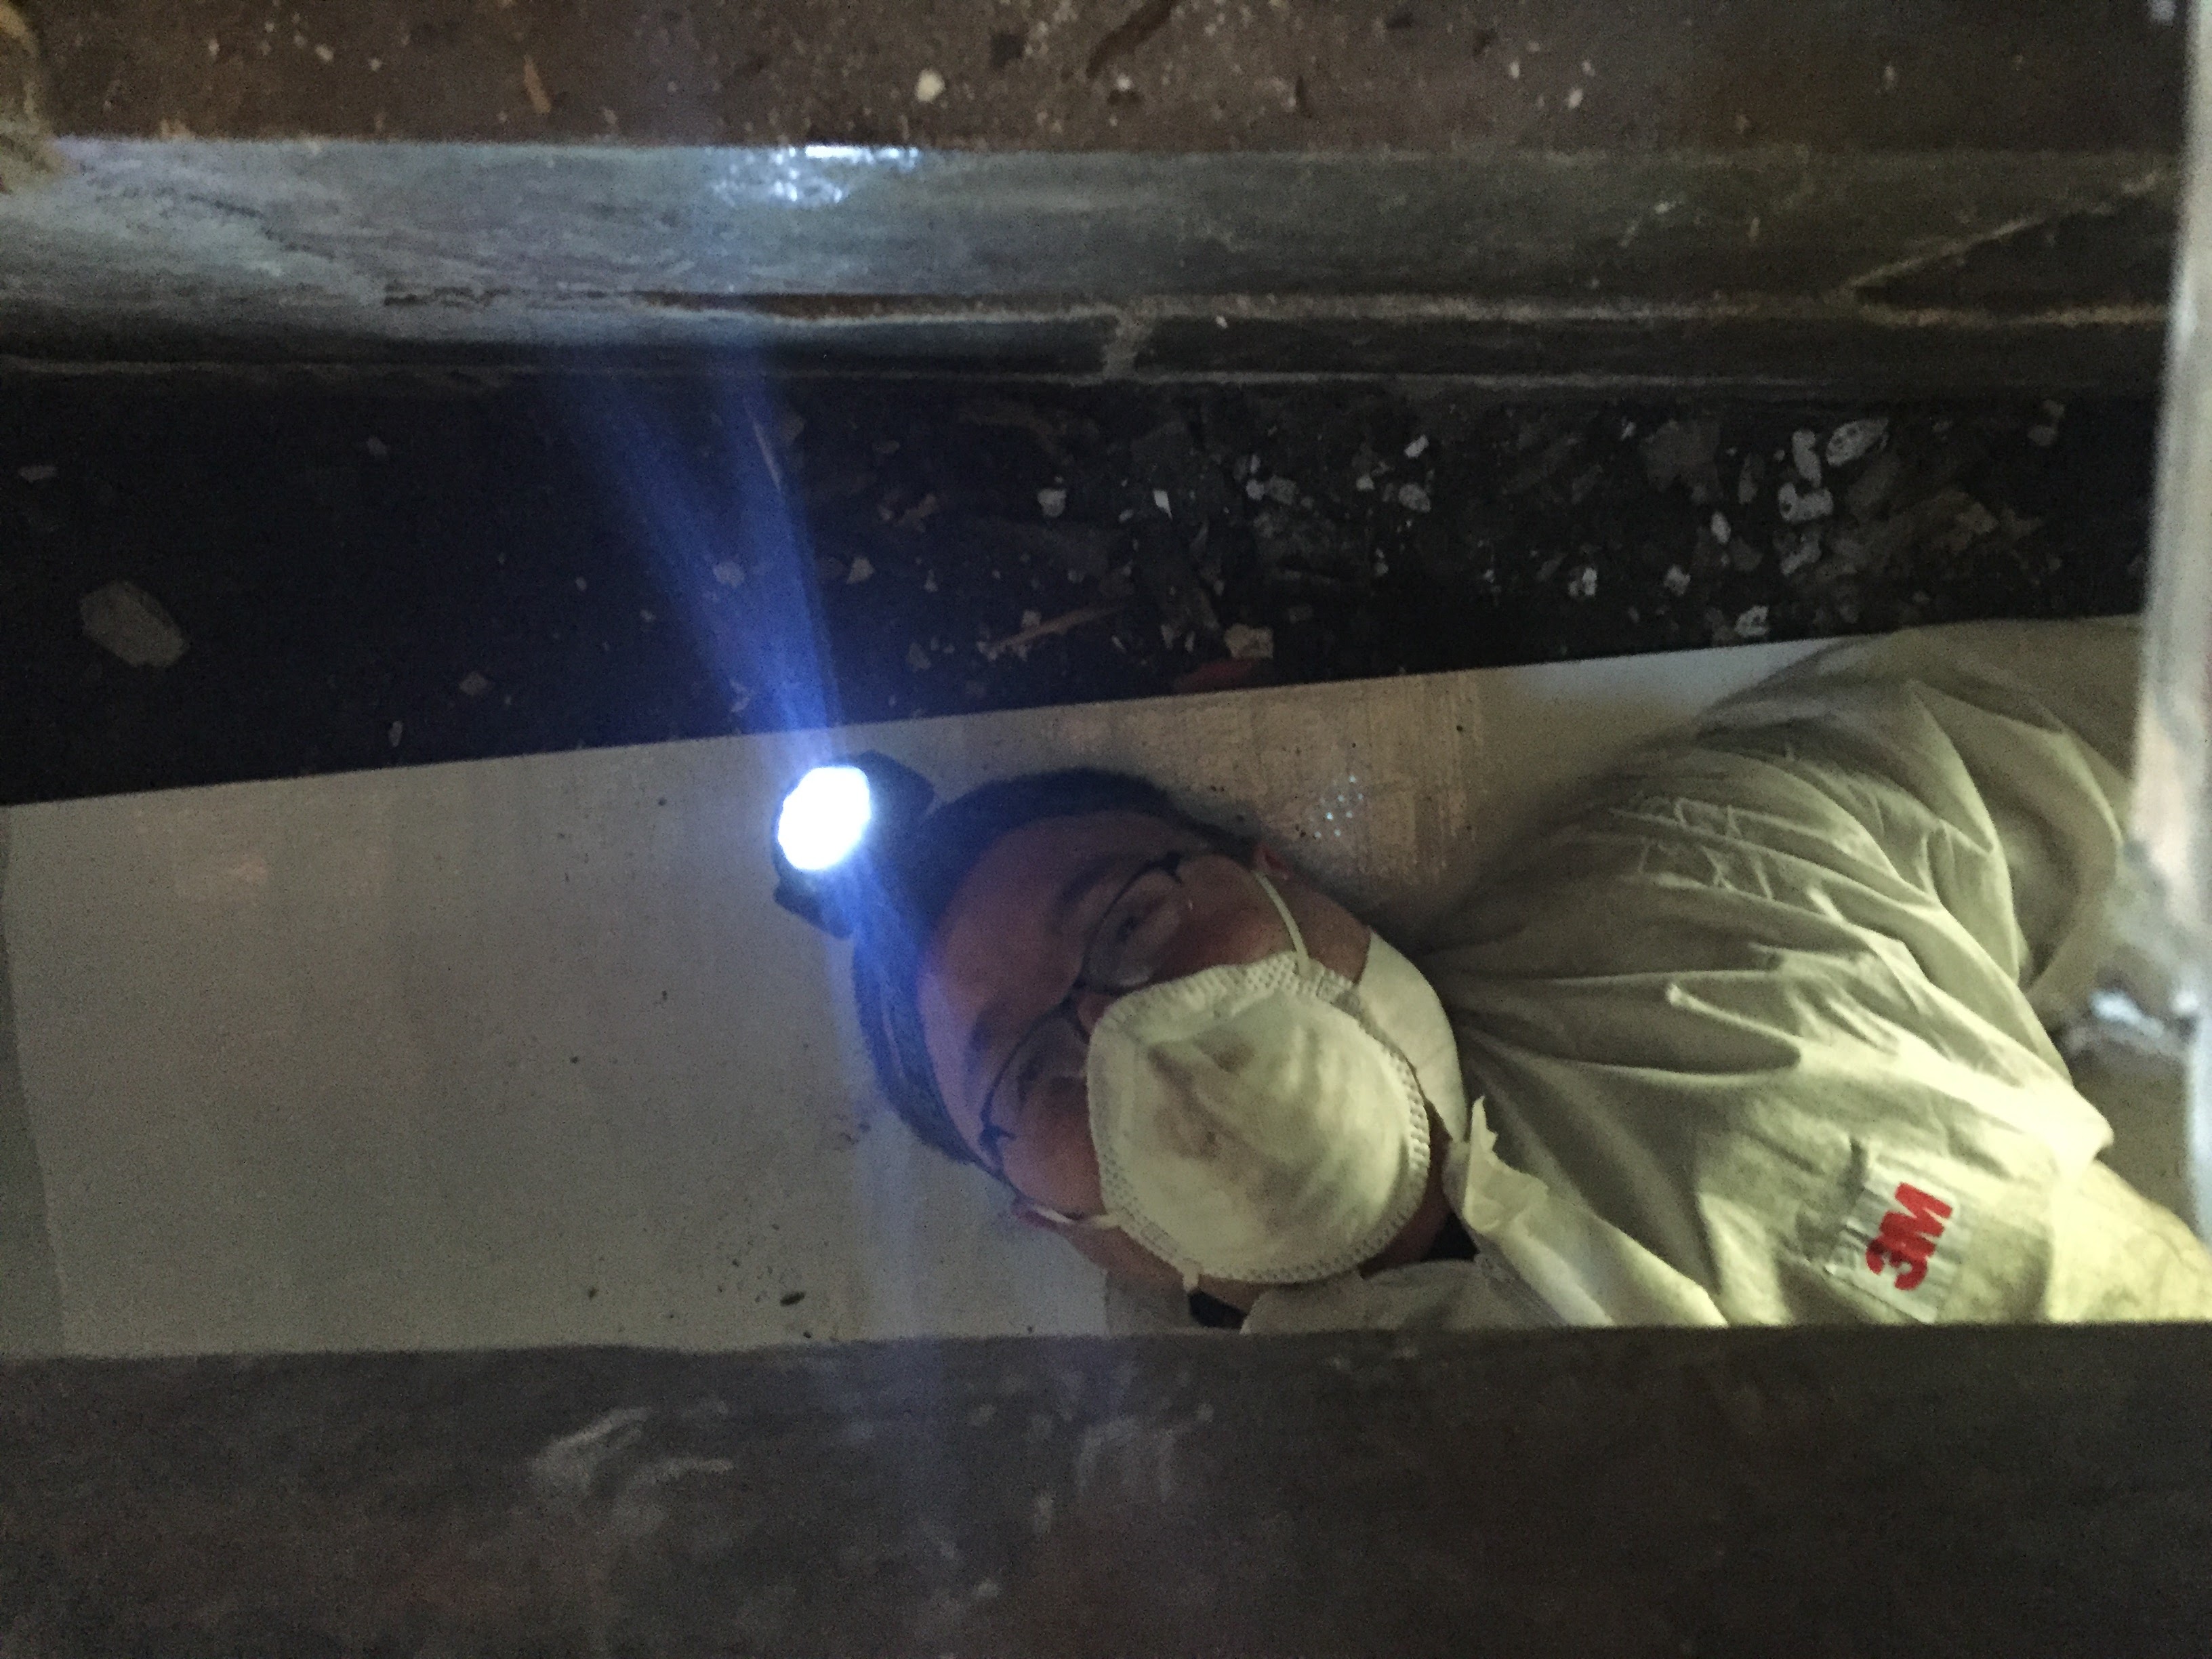
This was my first Habitat for Humanity experience, and I found the volunteers to be delightfully cheerful and helpful! This is Vanessa, a Kent State University volunteer helping clear the debris from the basement. Note the hard hat, mask, and gloves. Scott Craven, the construction manager, is very strict about safety.
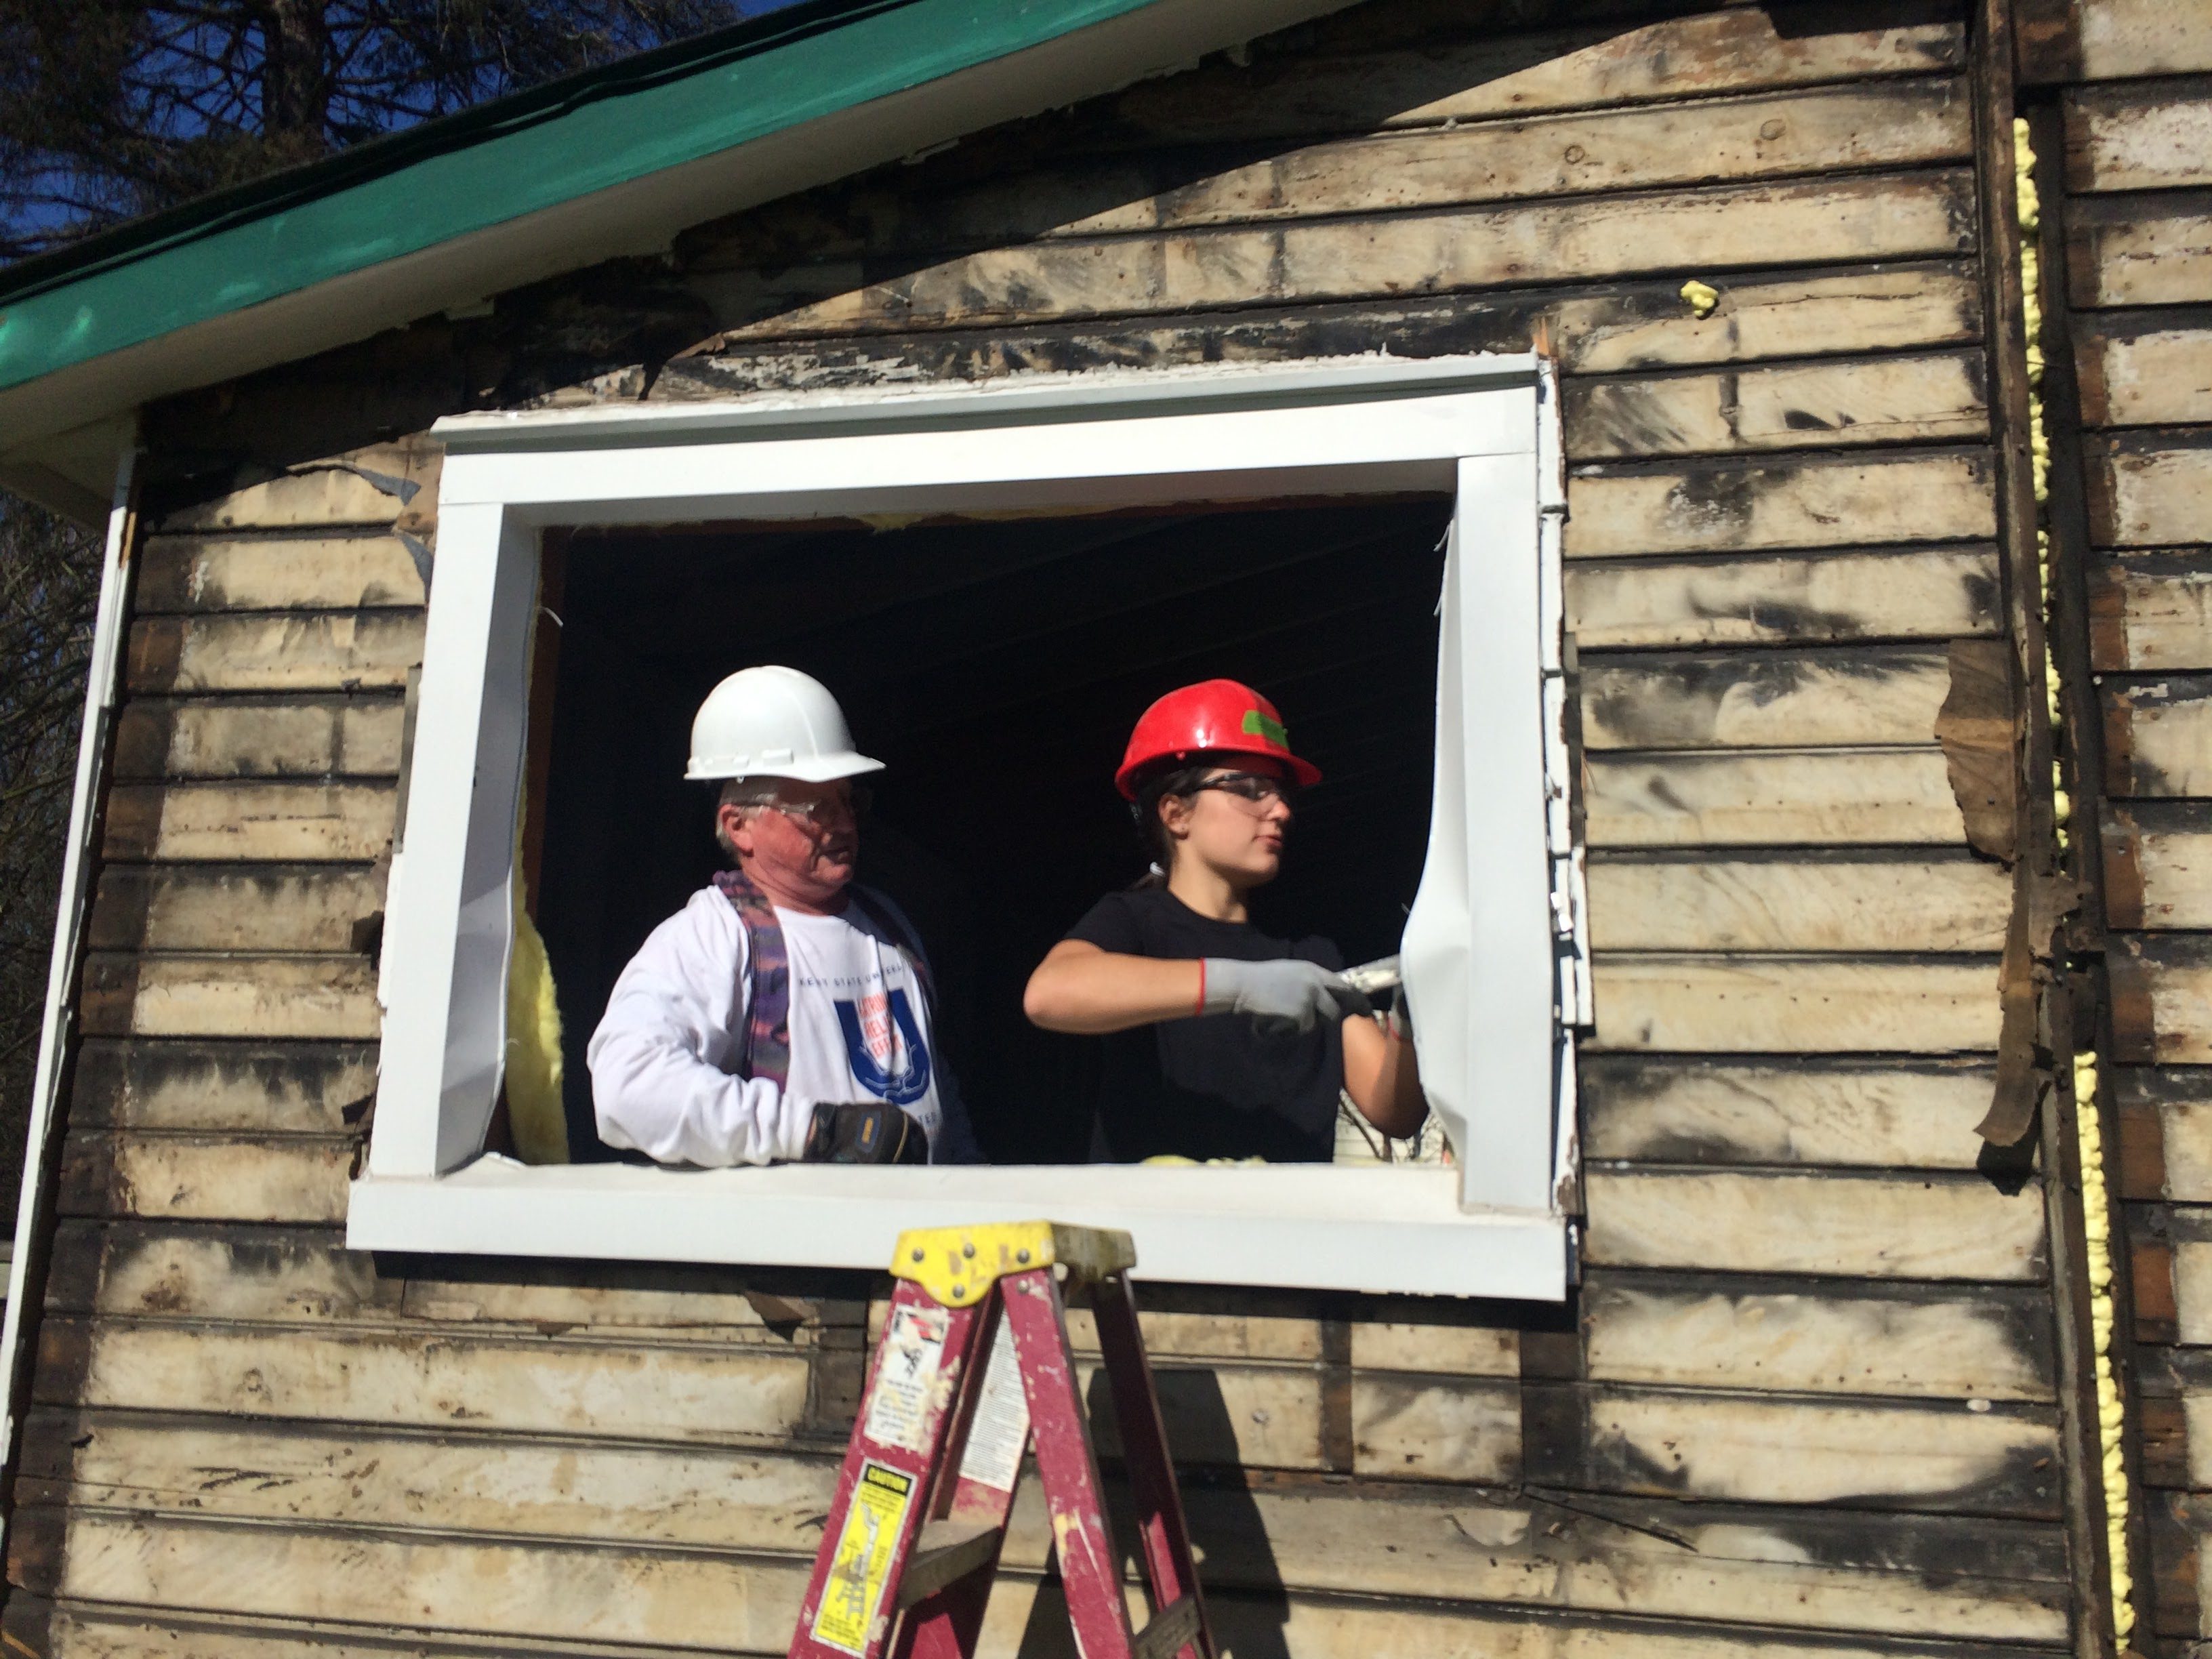
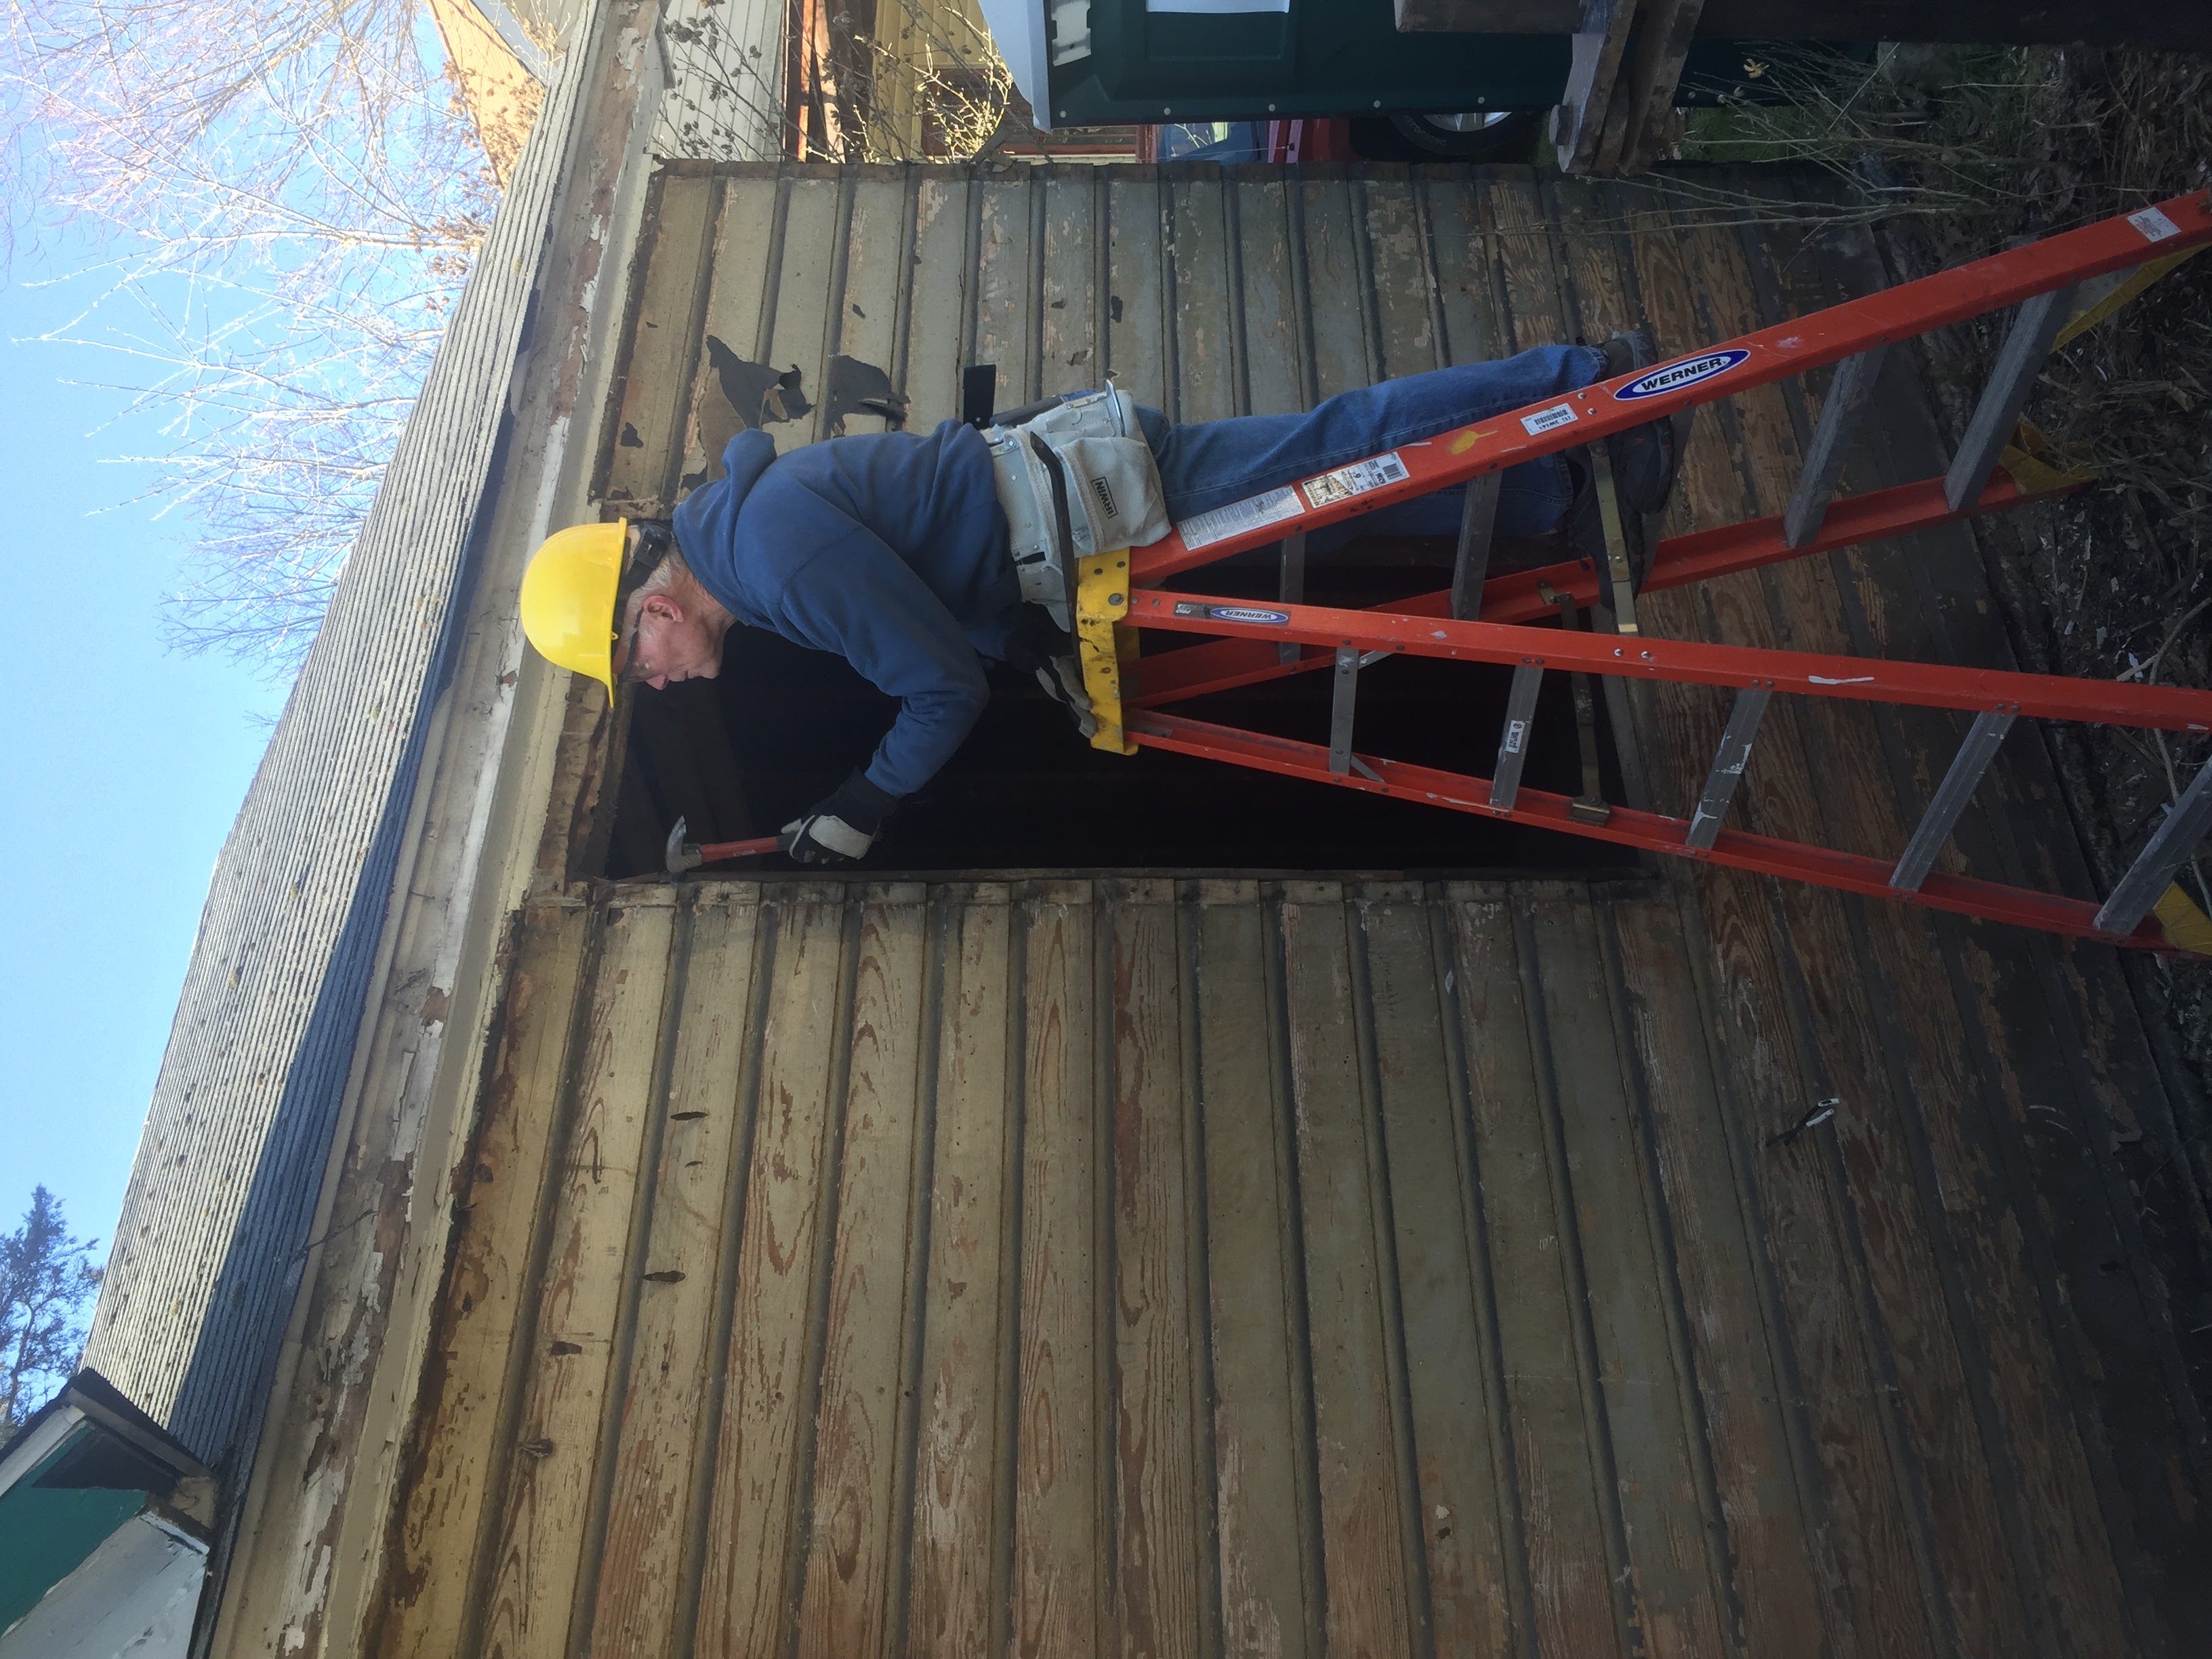
Wil on the left is helping Susan, another Kent State volunteer, to remove the old windows. A number of windows had been donated but did not match all of the sizes of the current ones. Thanks to volunteer labor the window openings were resized and bucked out to handle the increased wall thickness that will occur when foam board is applied to the exterior.
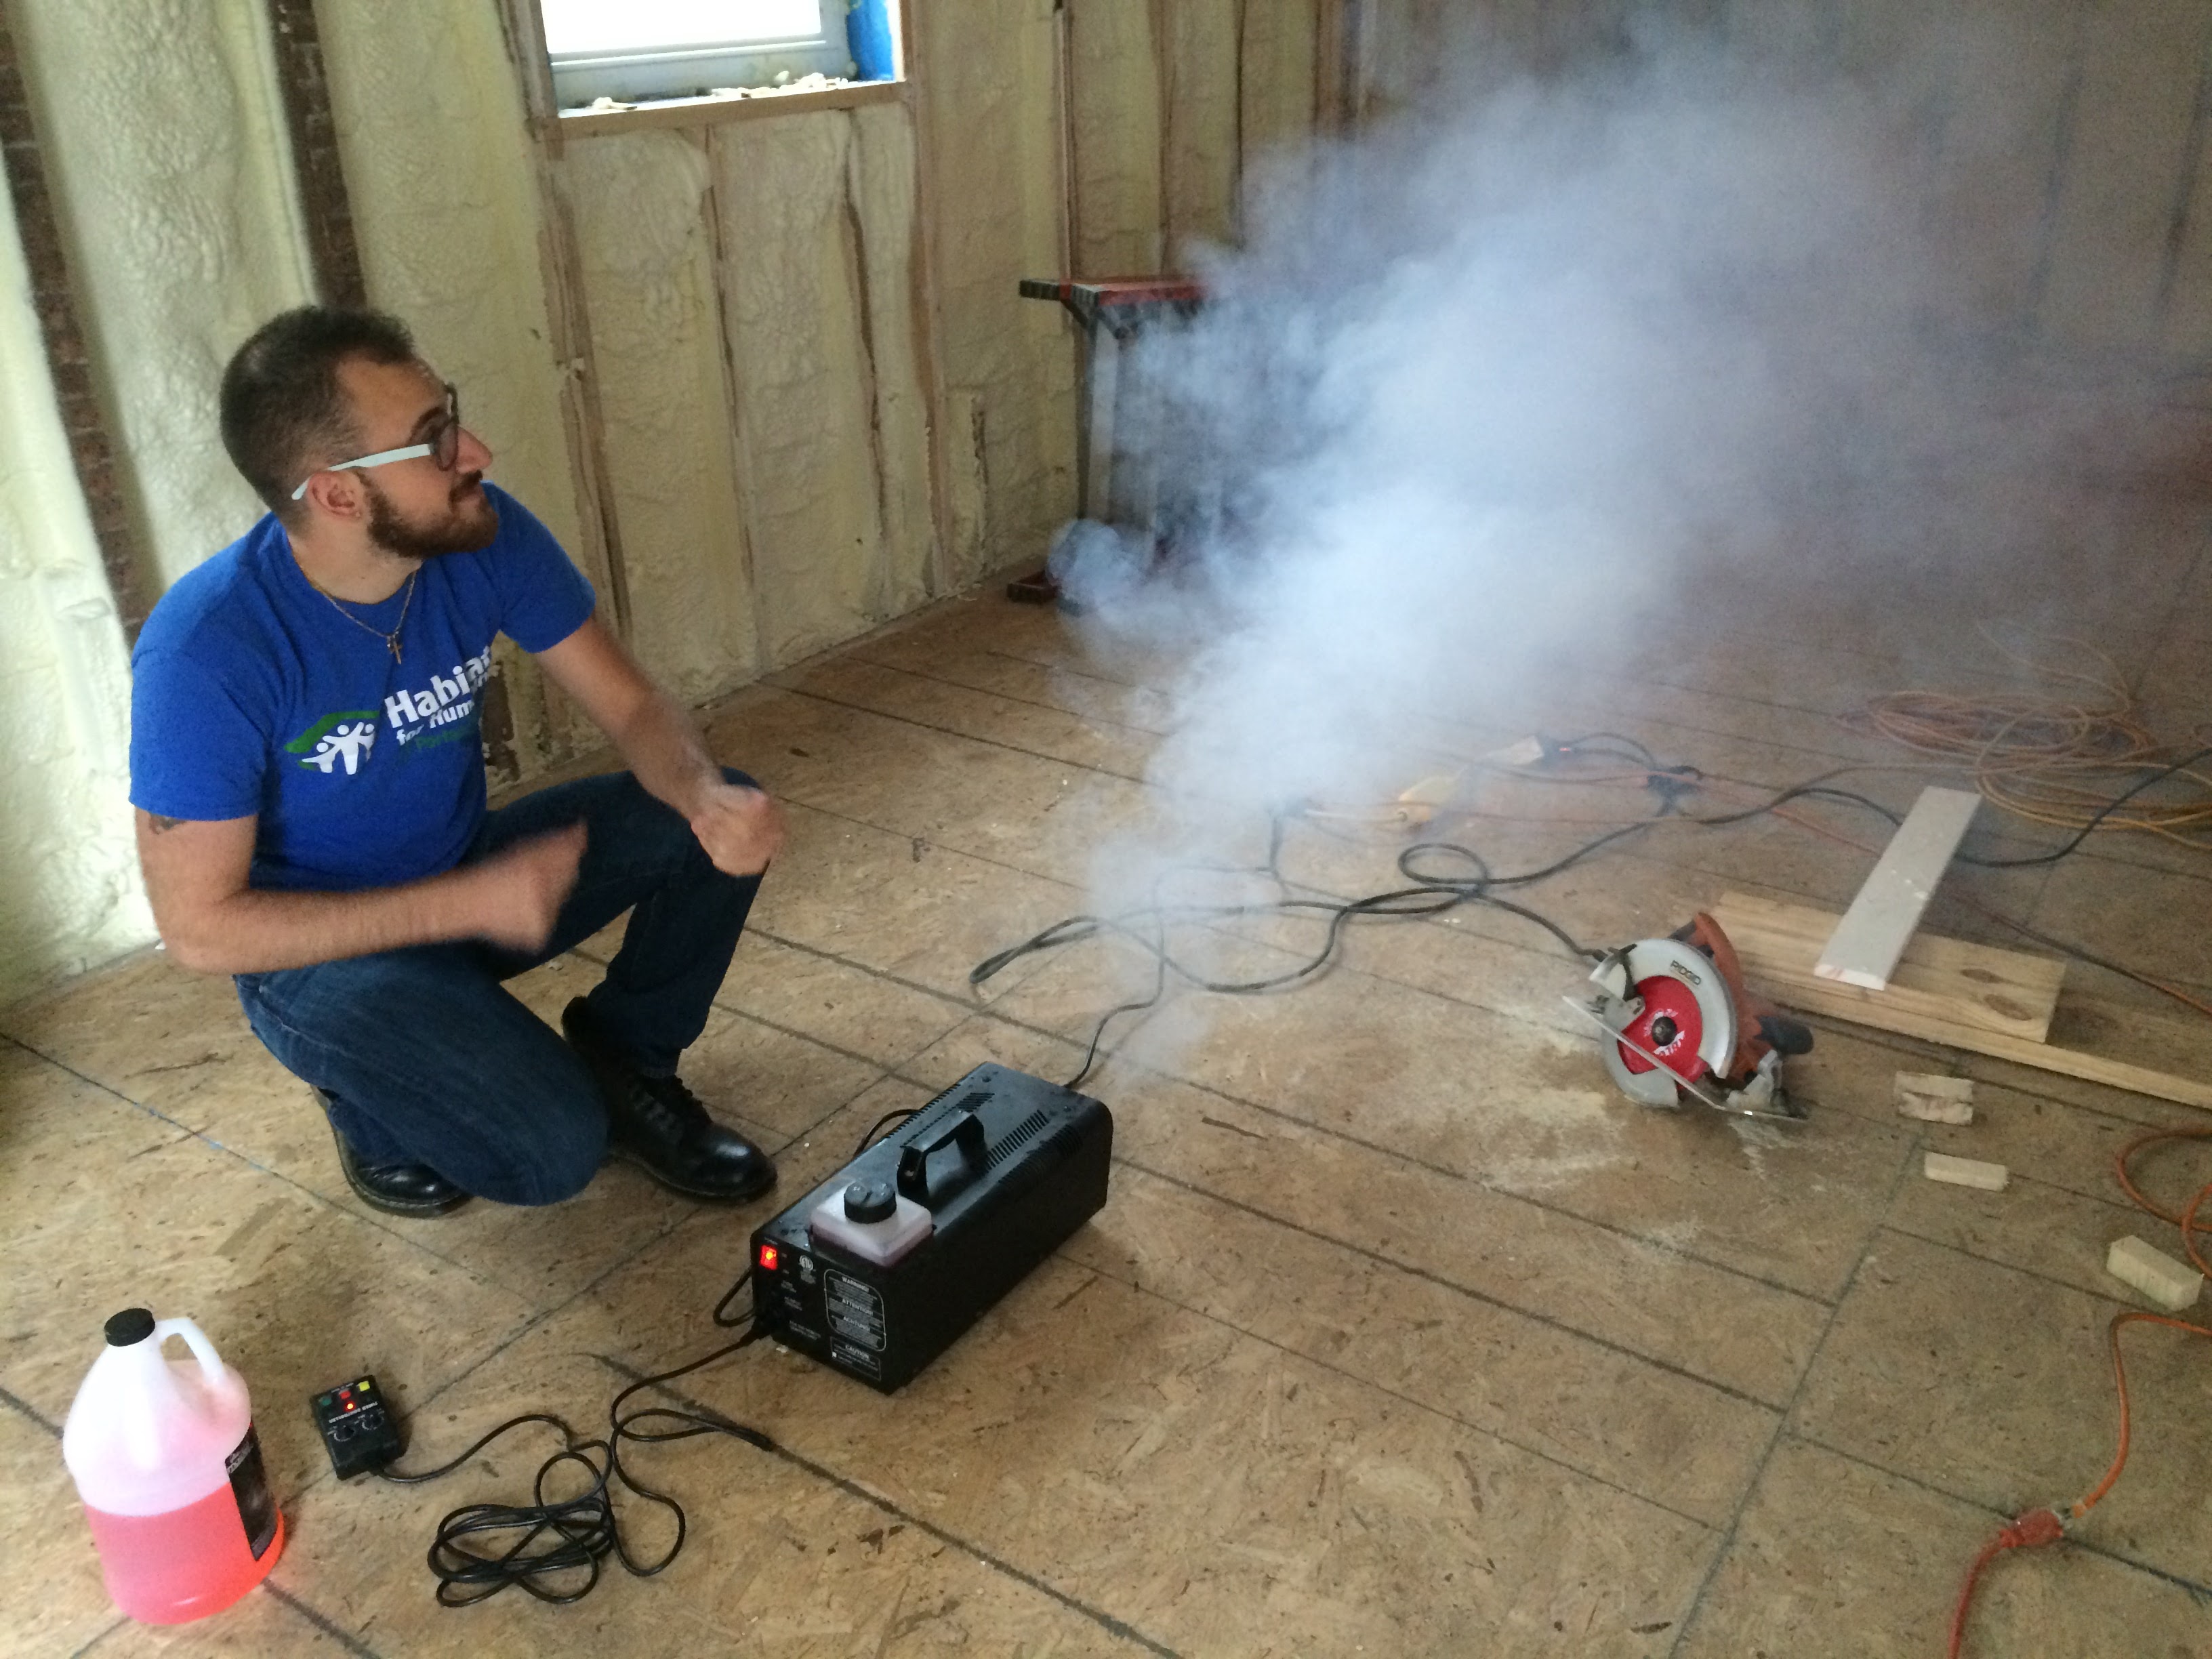
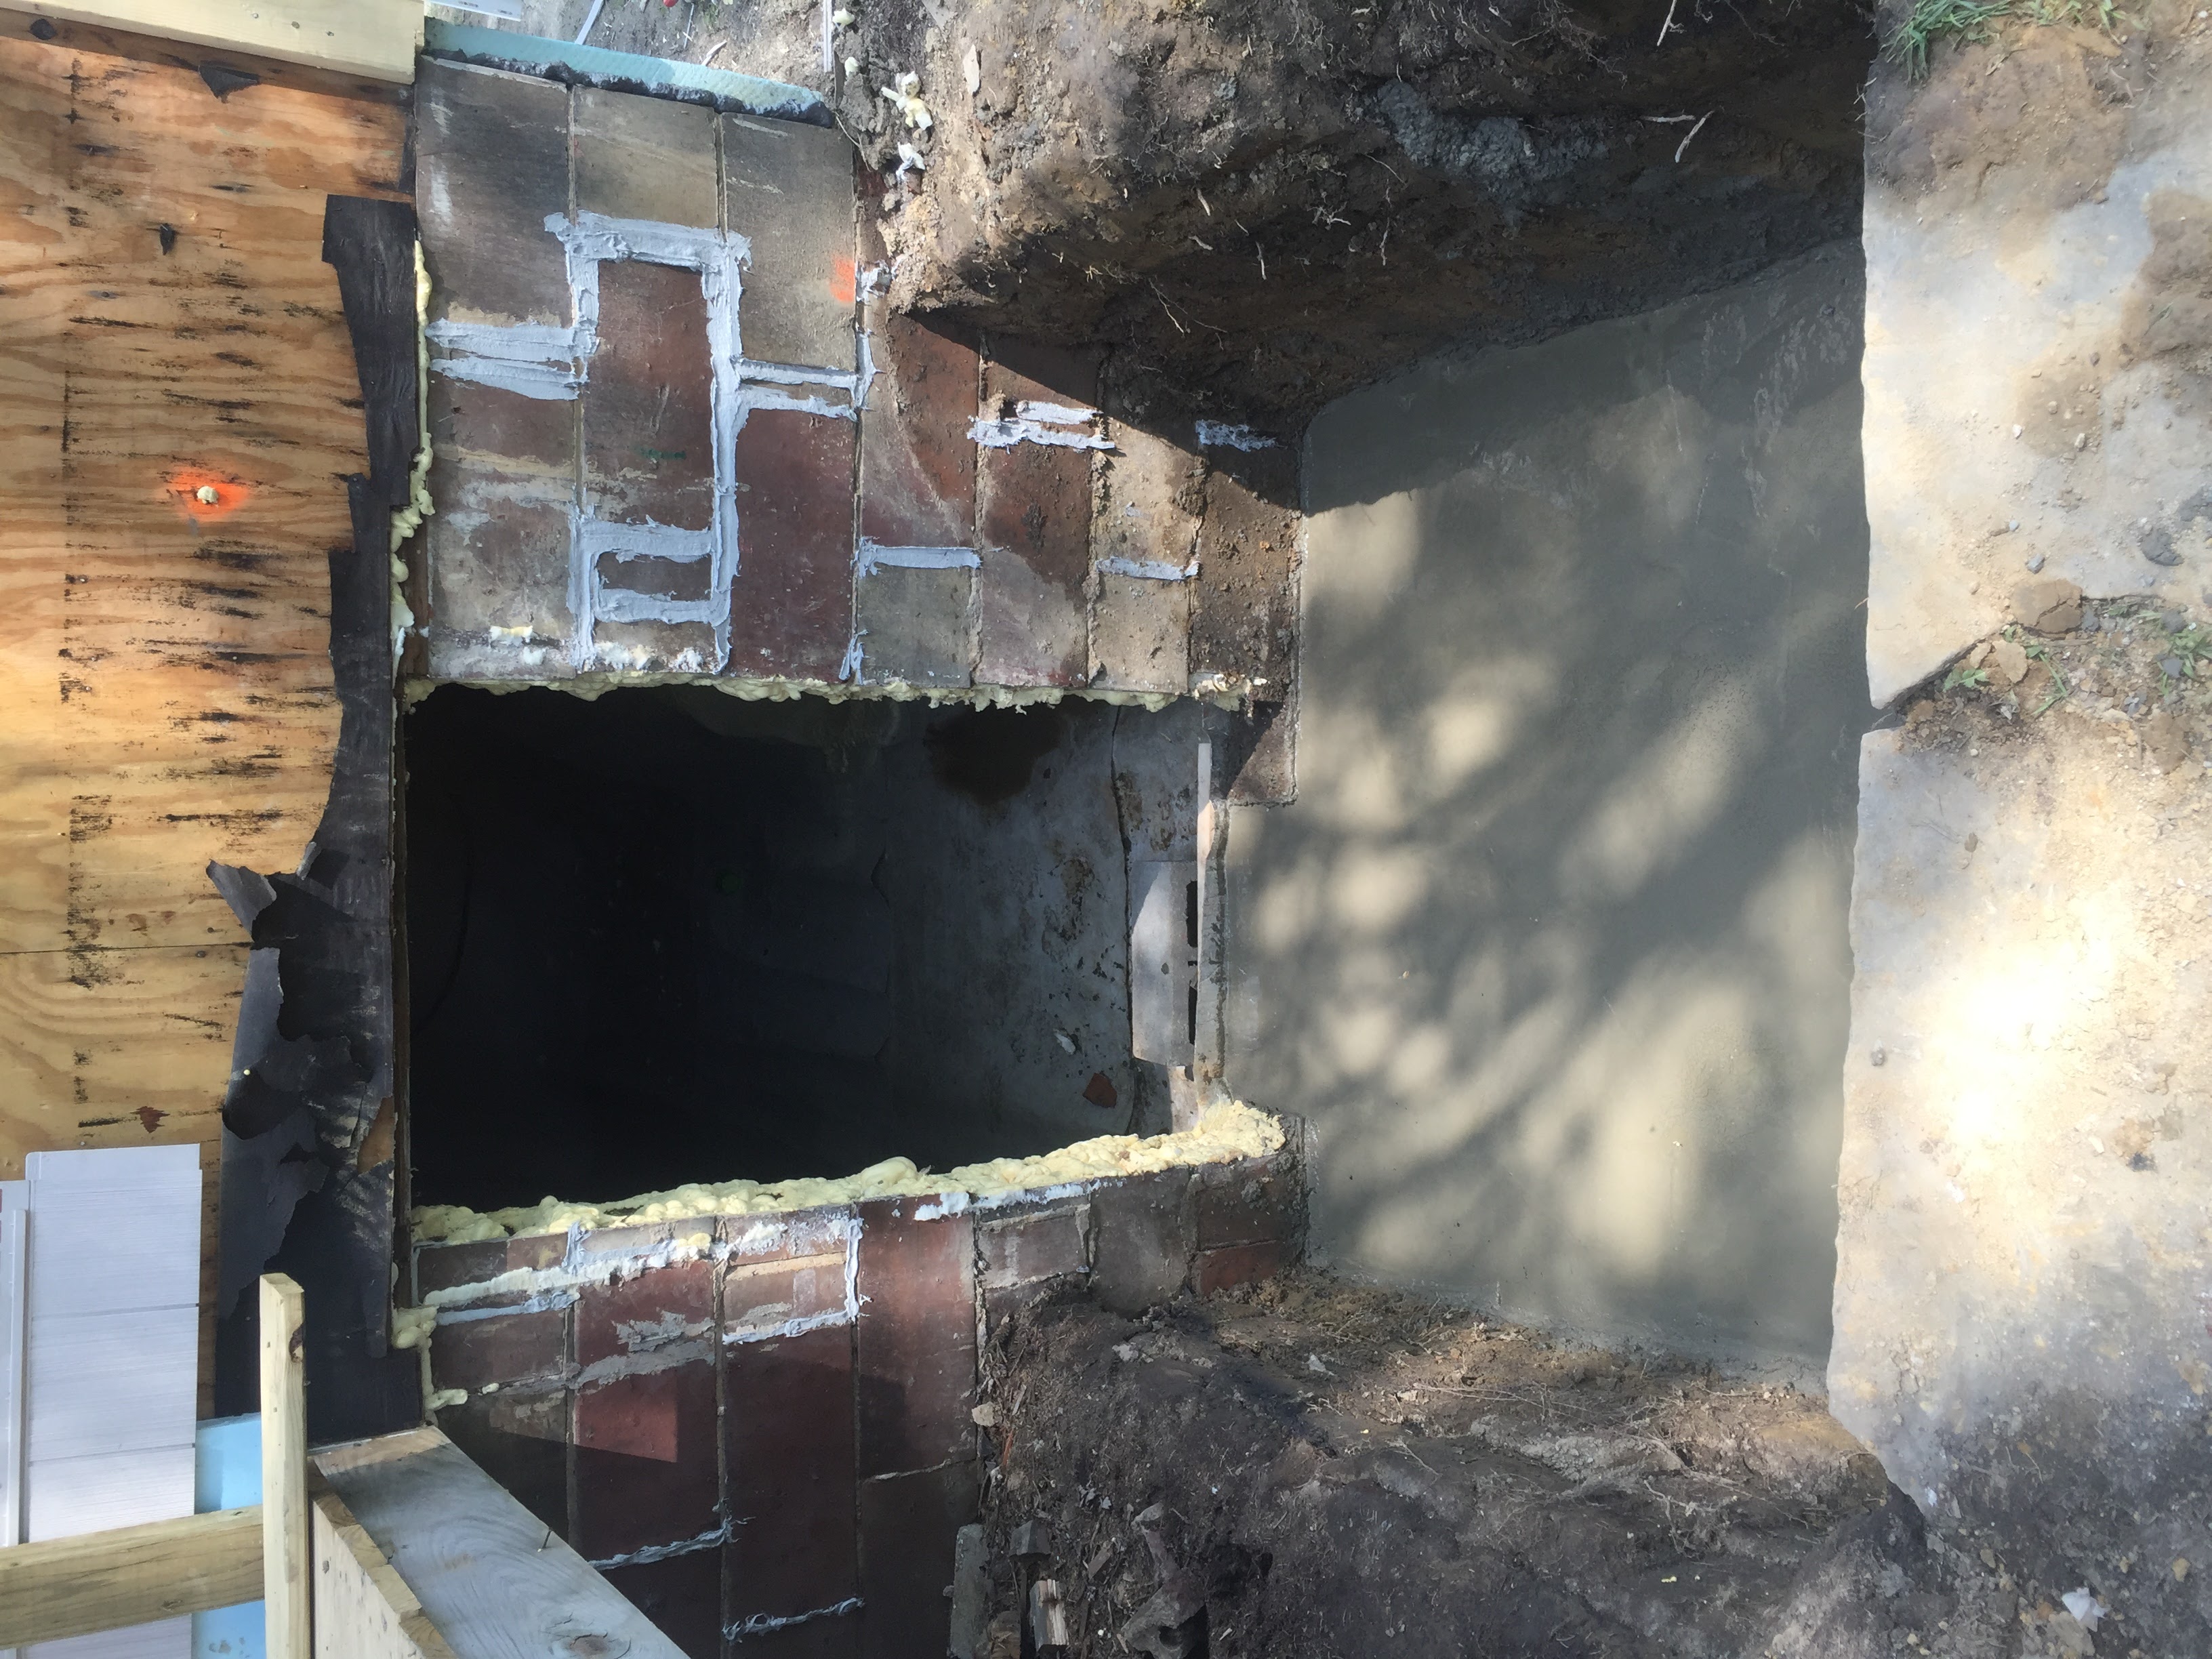
Also evident here, the first round air sealing in the gap on the right between sections of the house. Frustratingly, it is still a small air leakage point – even after multiple rounds of air sealing and testing with smoke. It’s part of why I missed my aggressive leakage target.
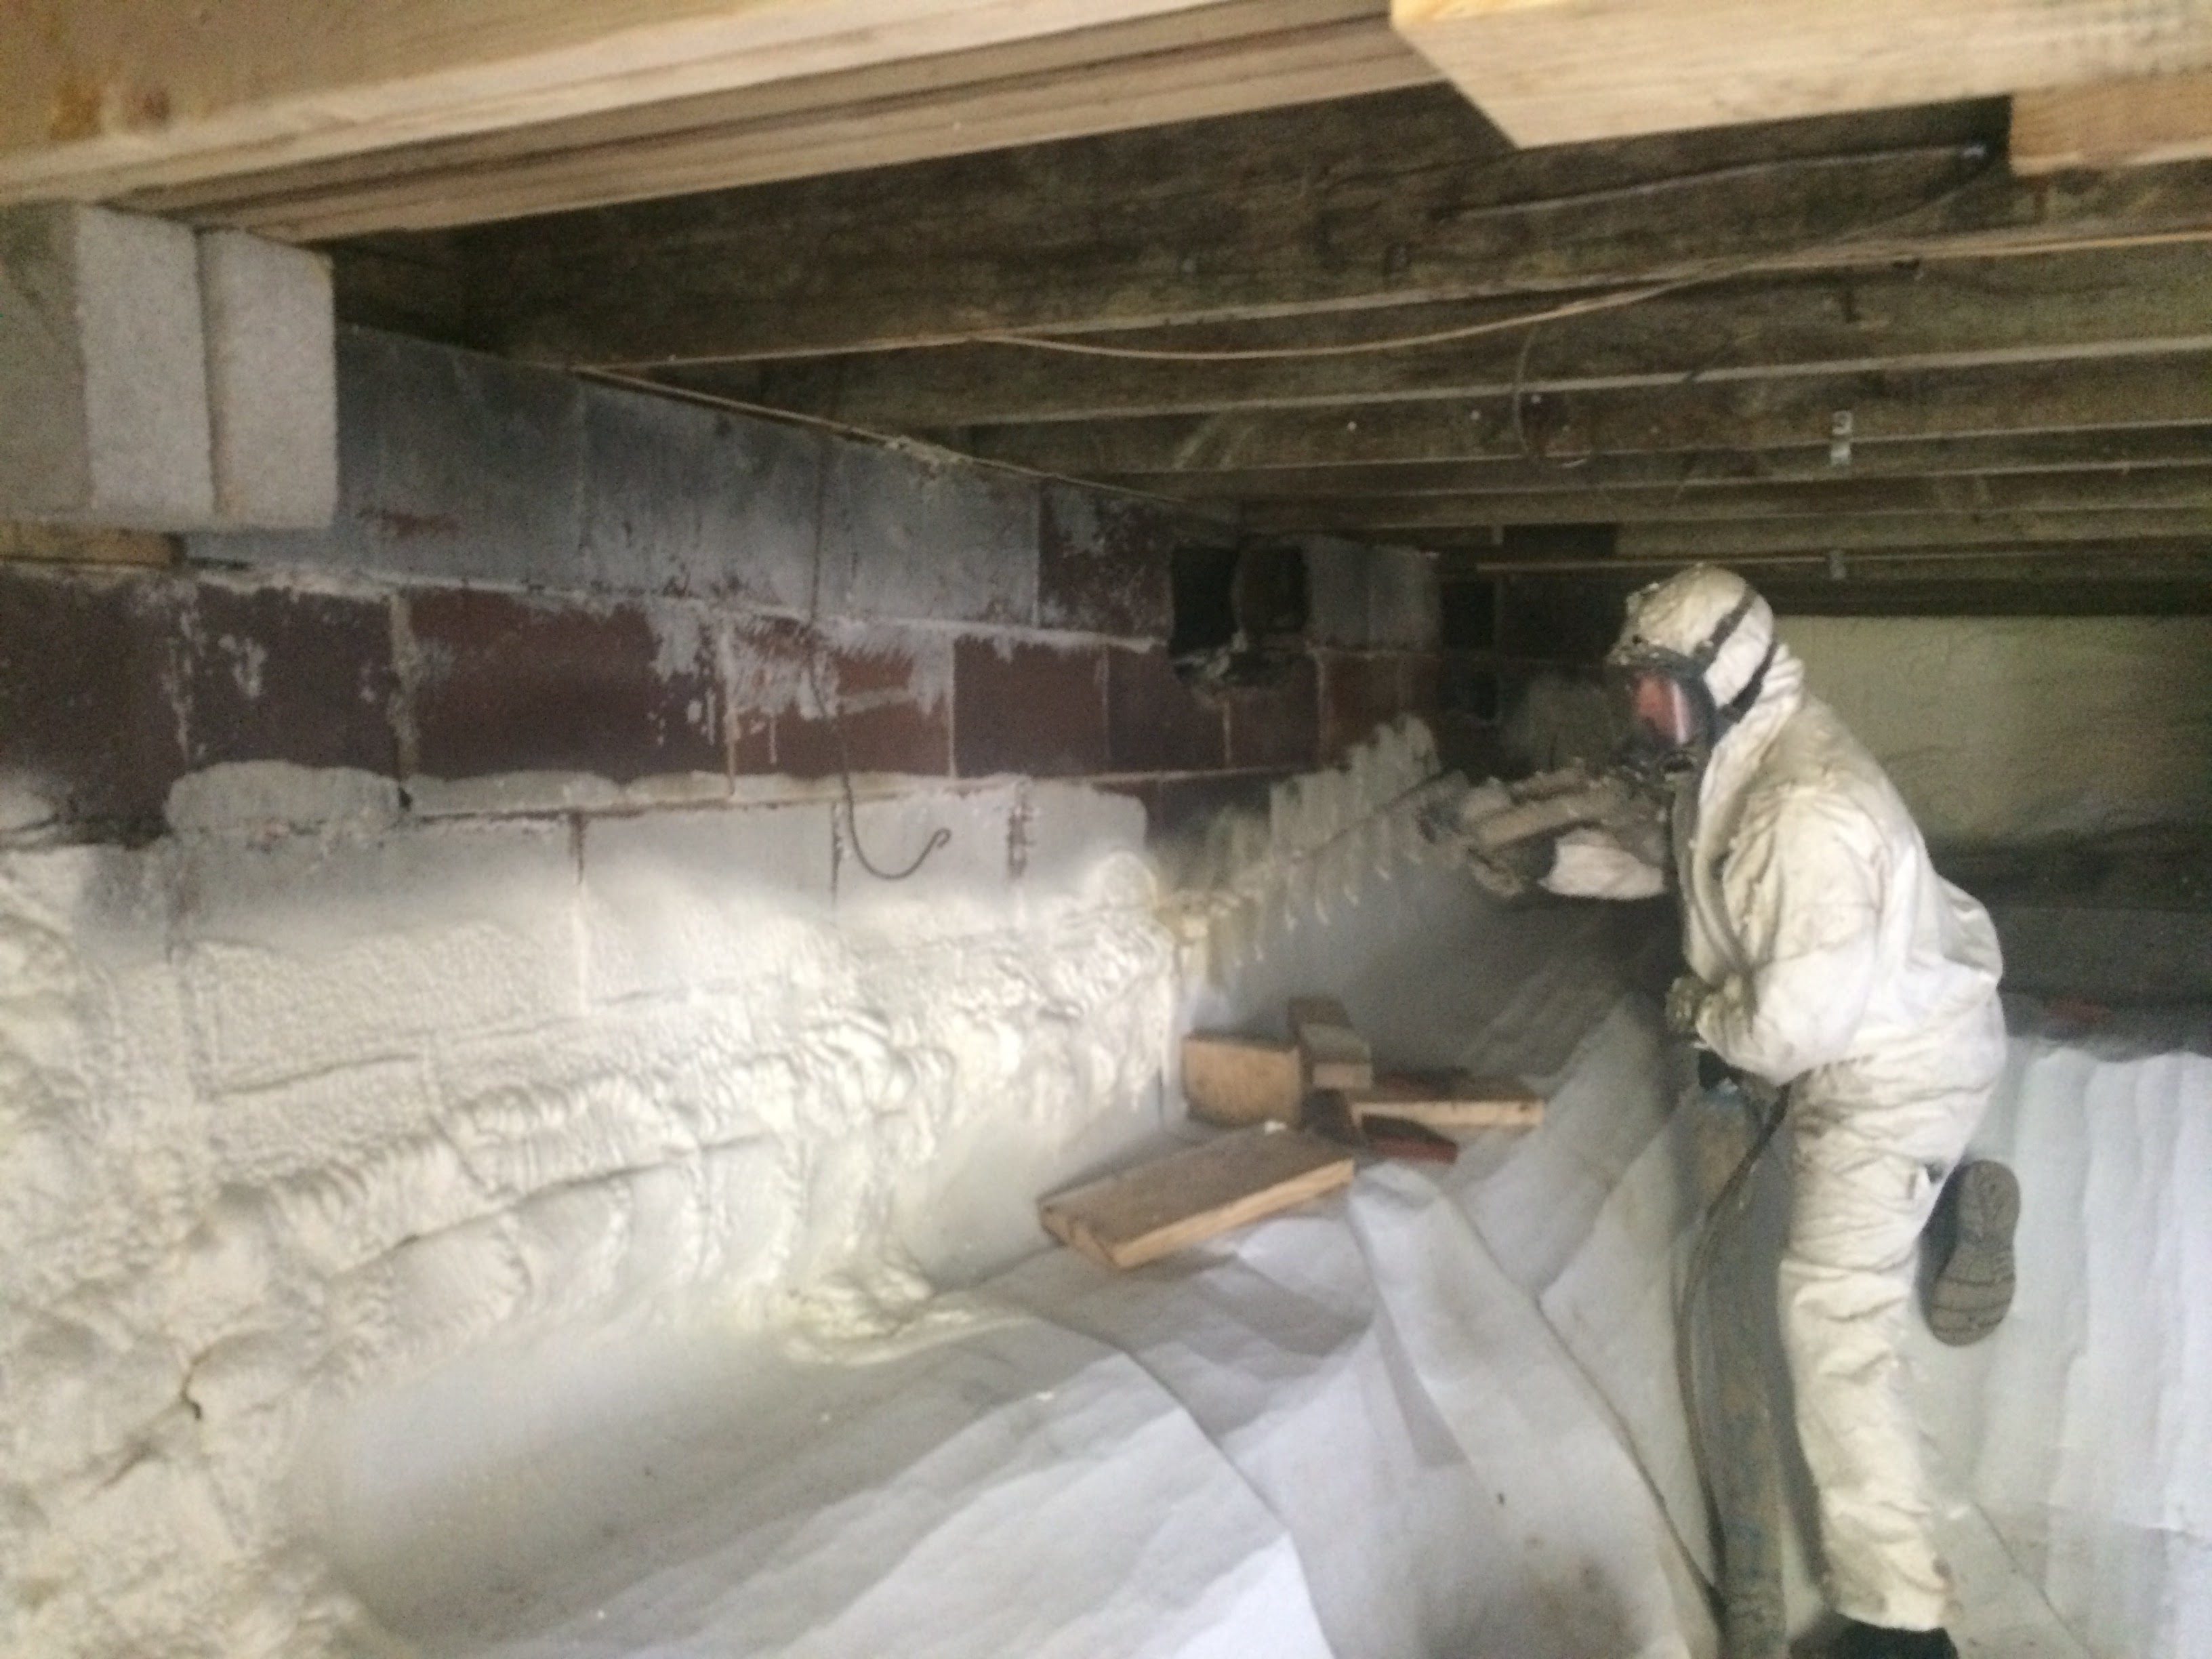
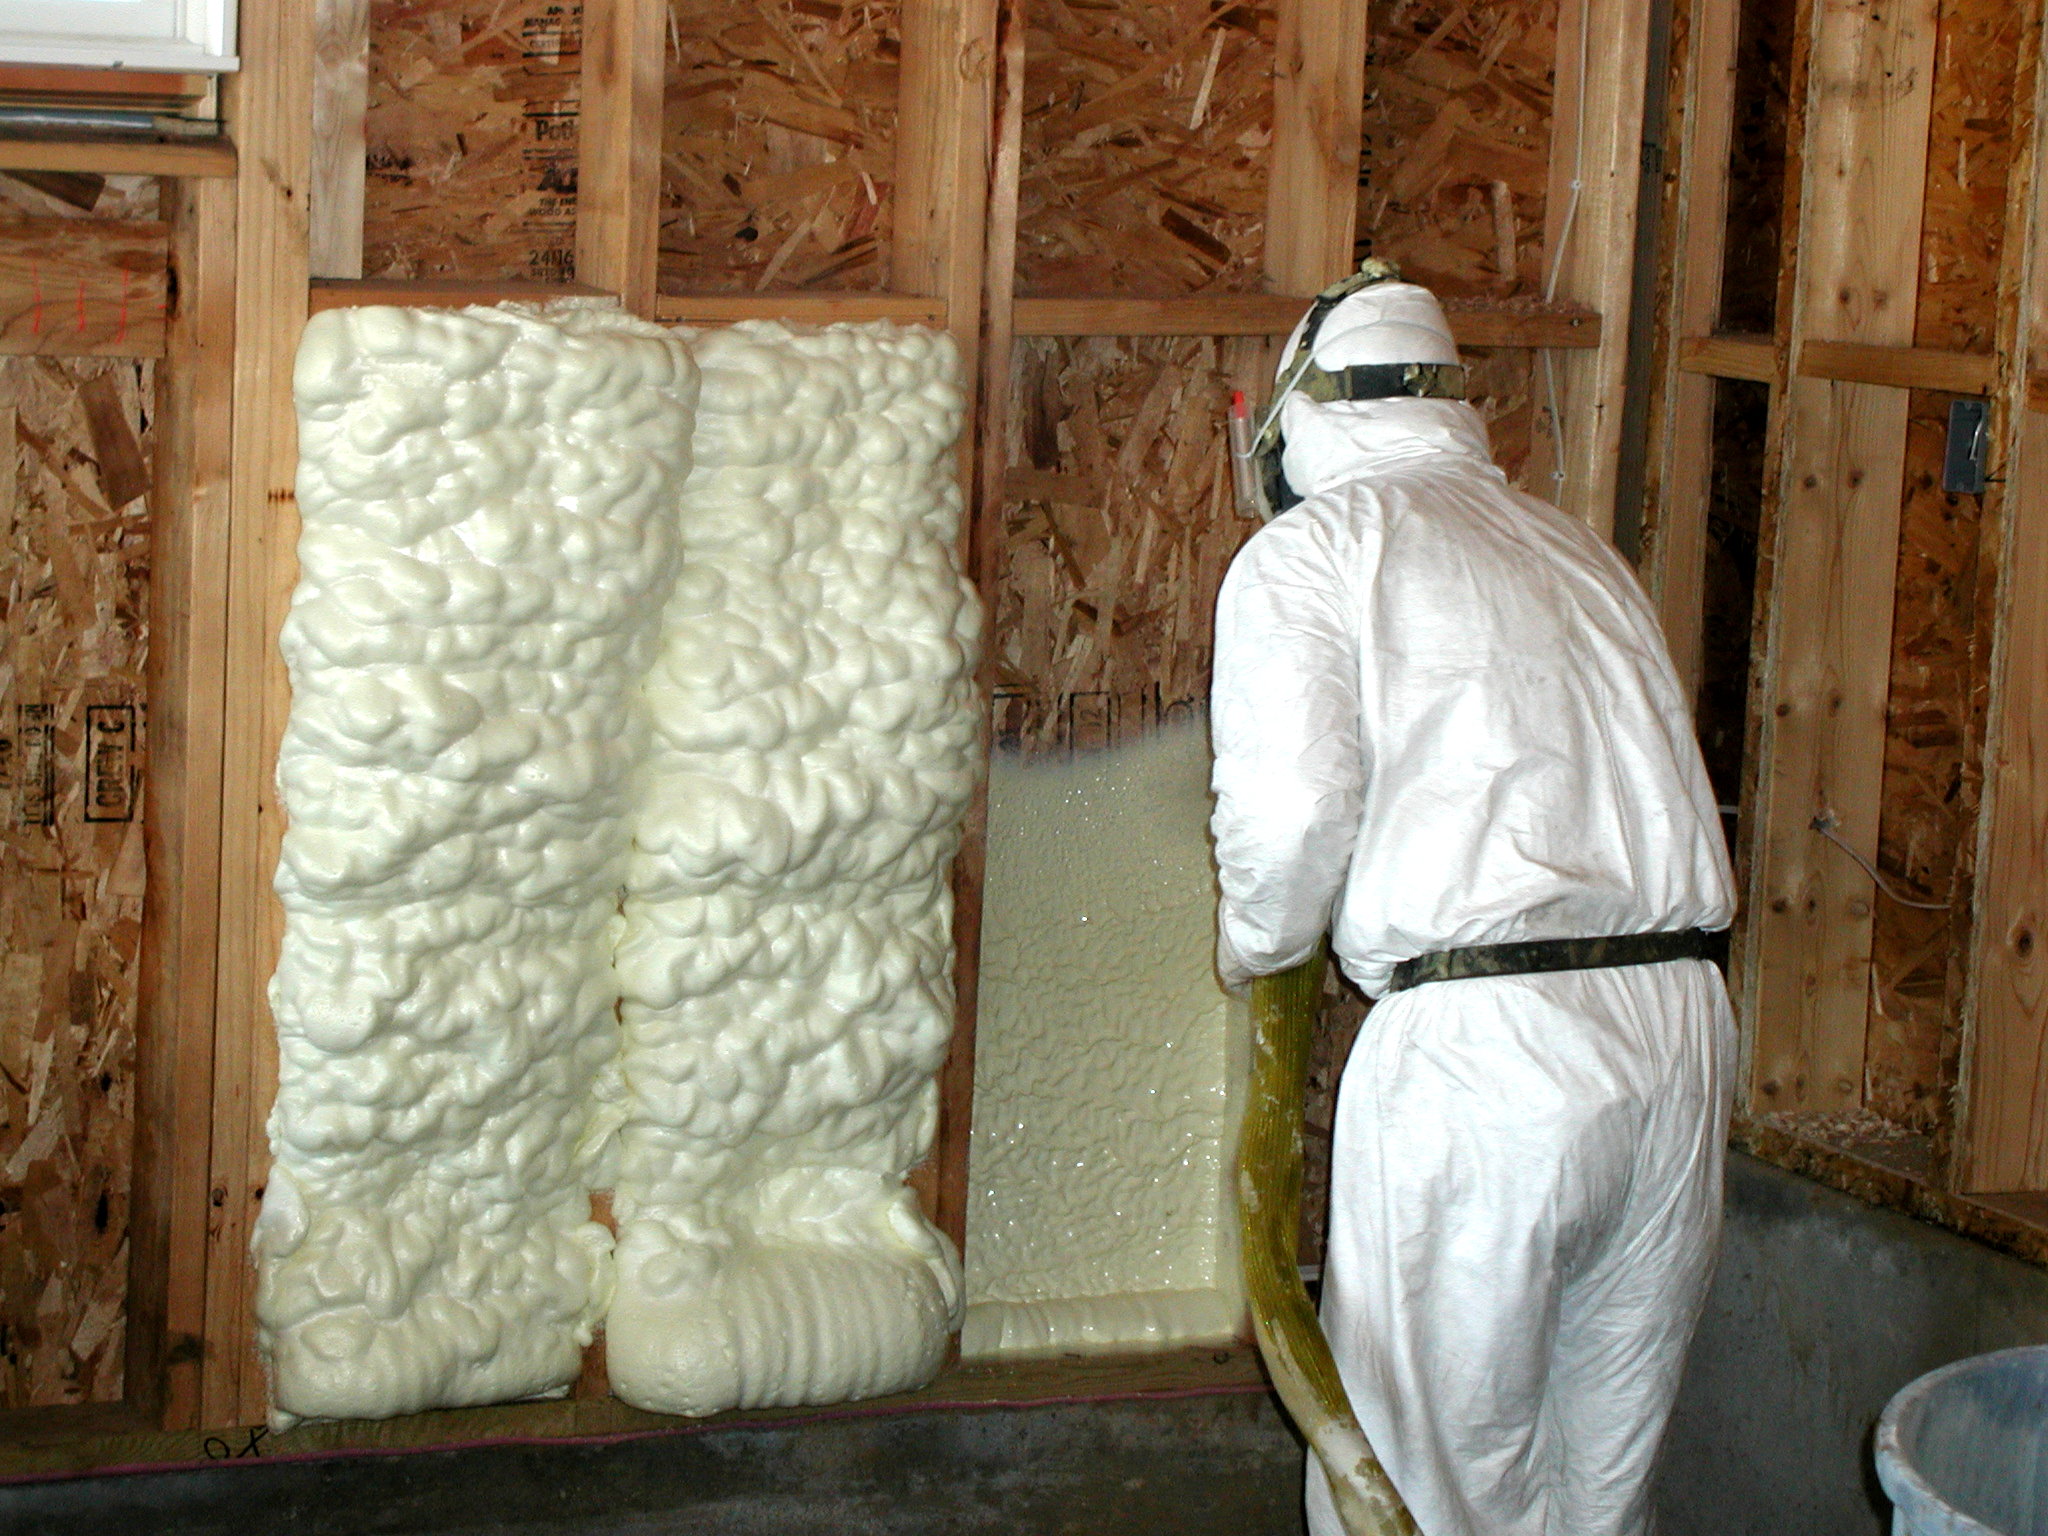
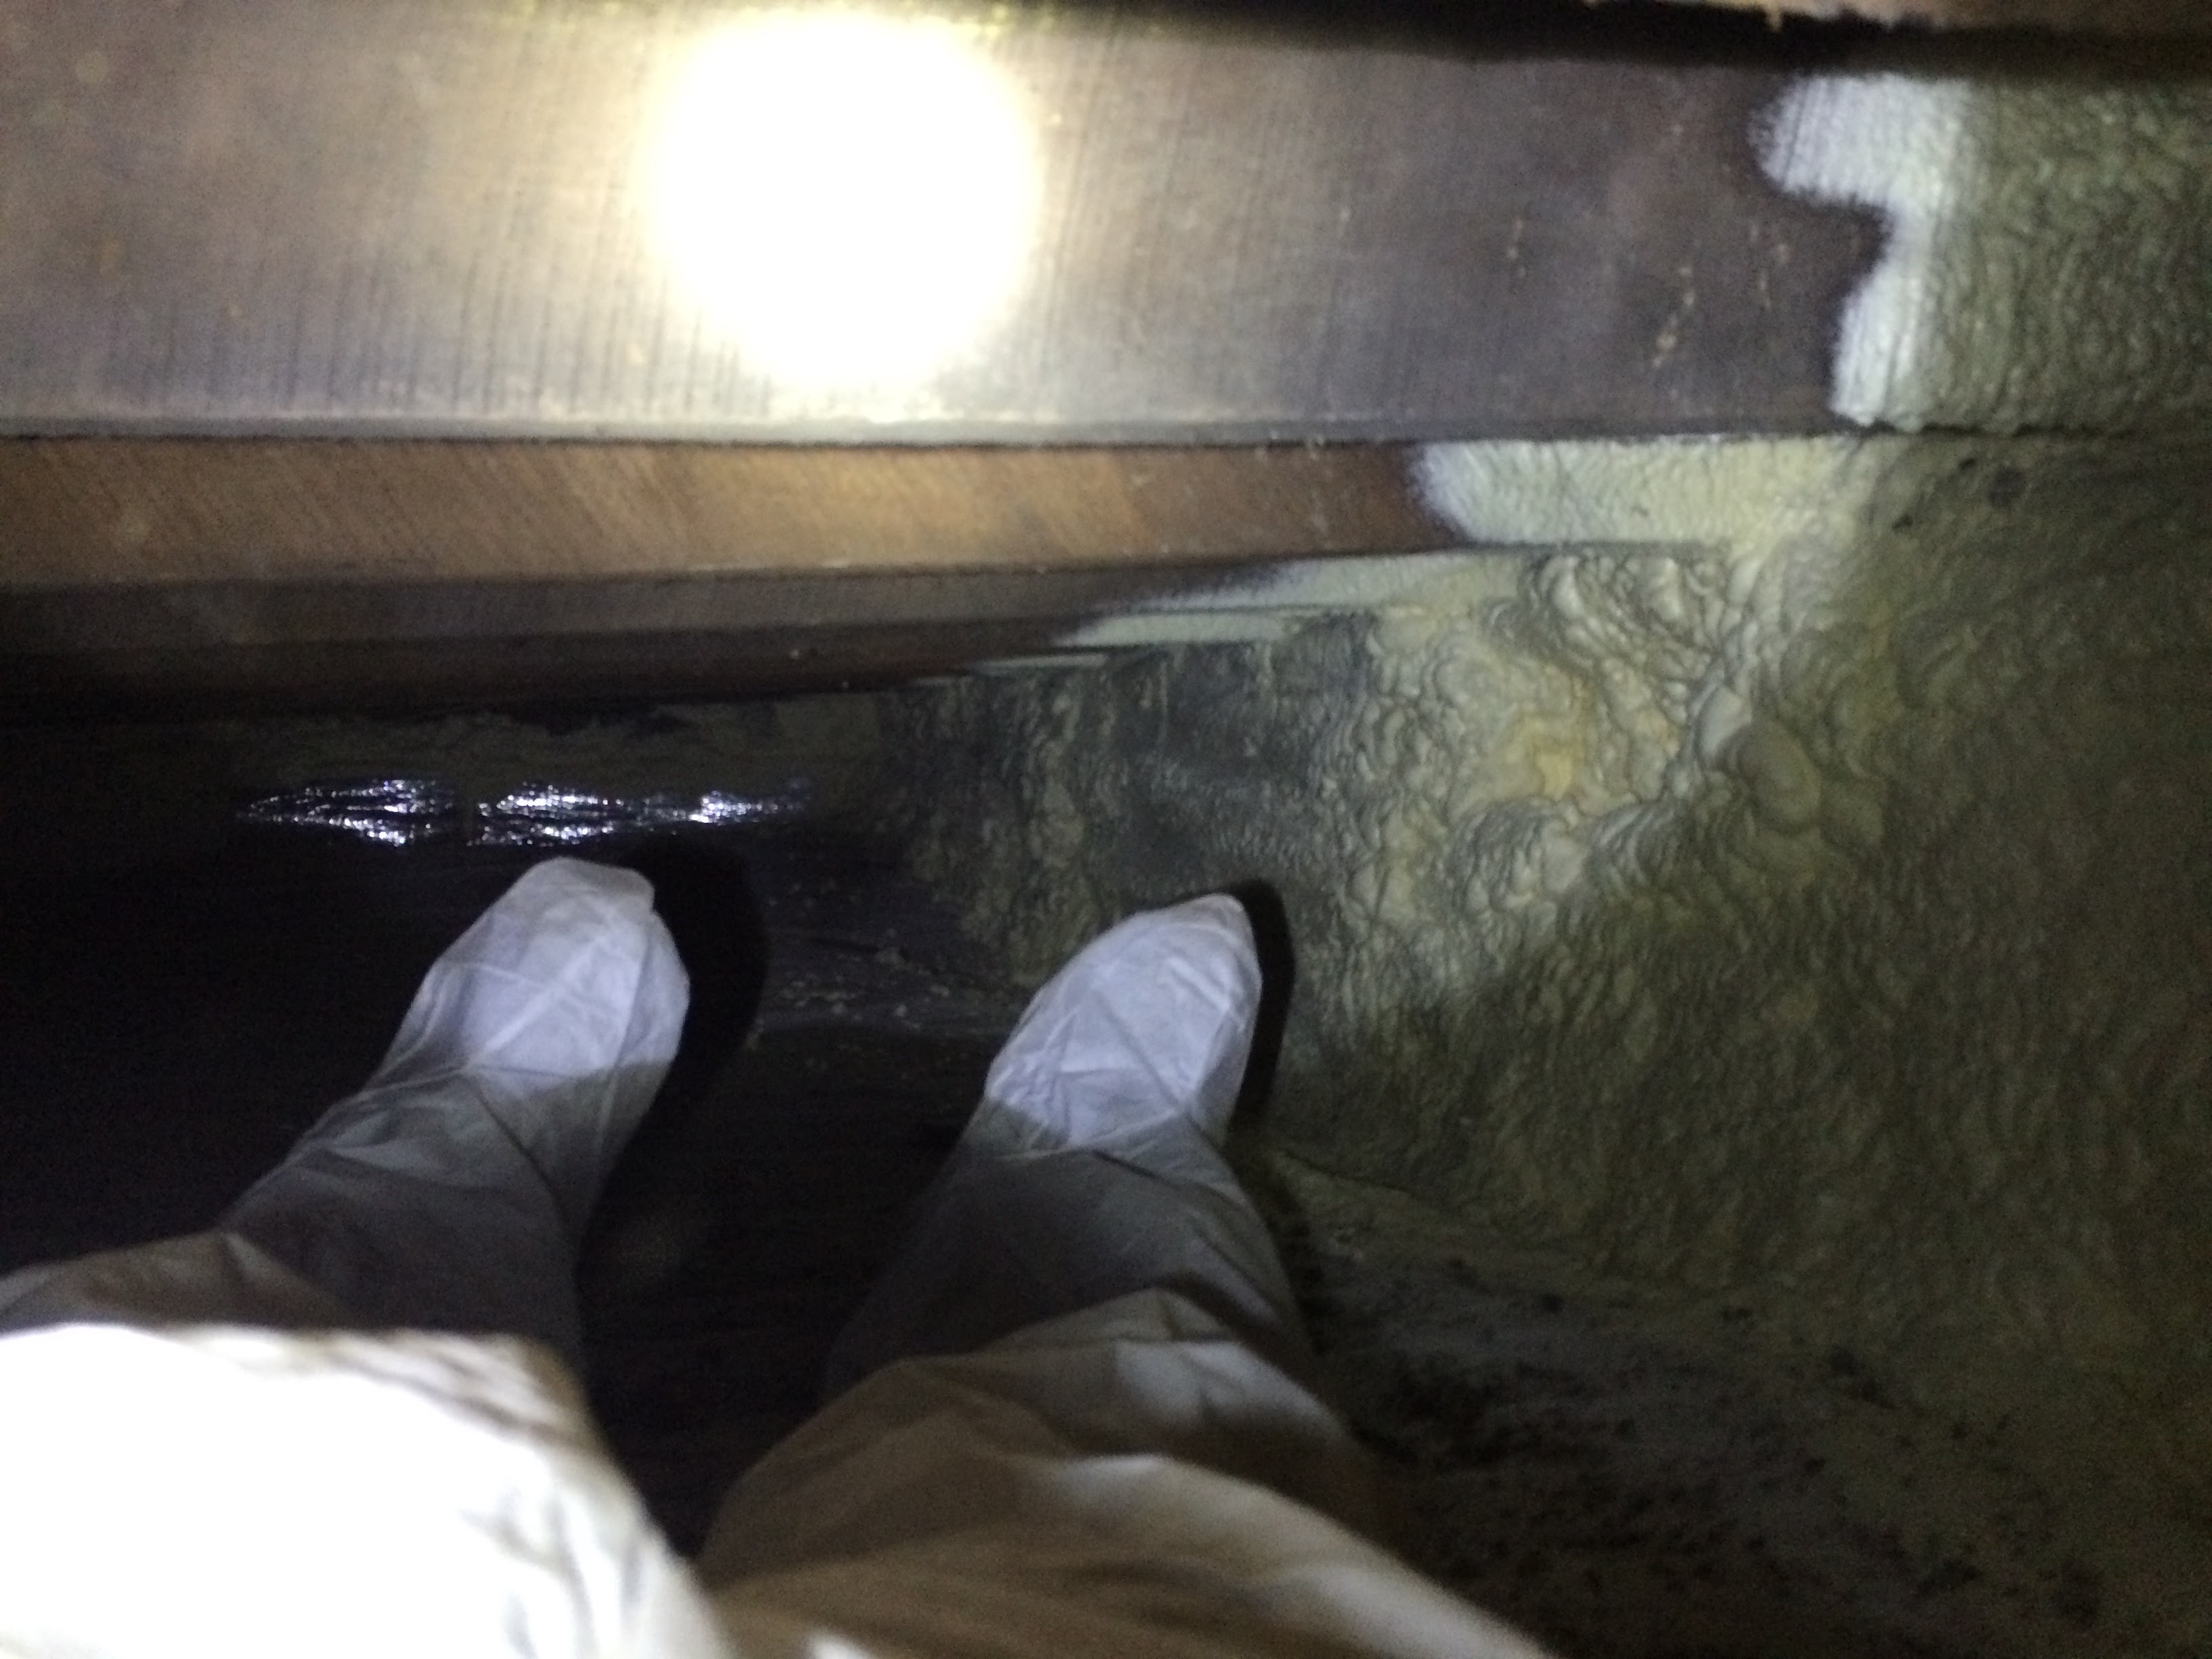
Gary Smith of Affordable Foam applying closed cell foam. Here he is in the basement sealing the vapor barrier to the interior wall.
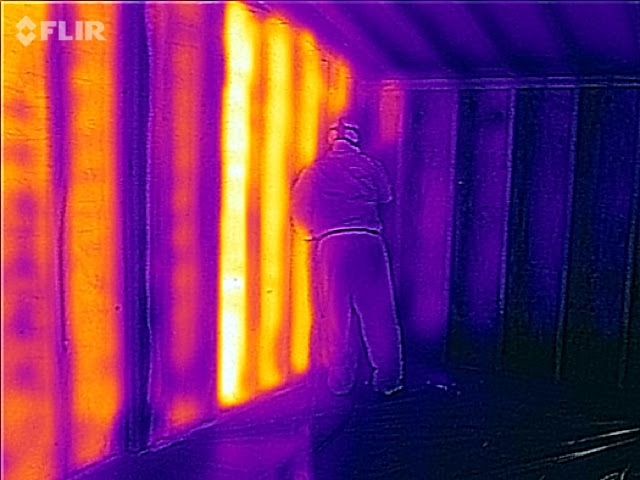
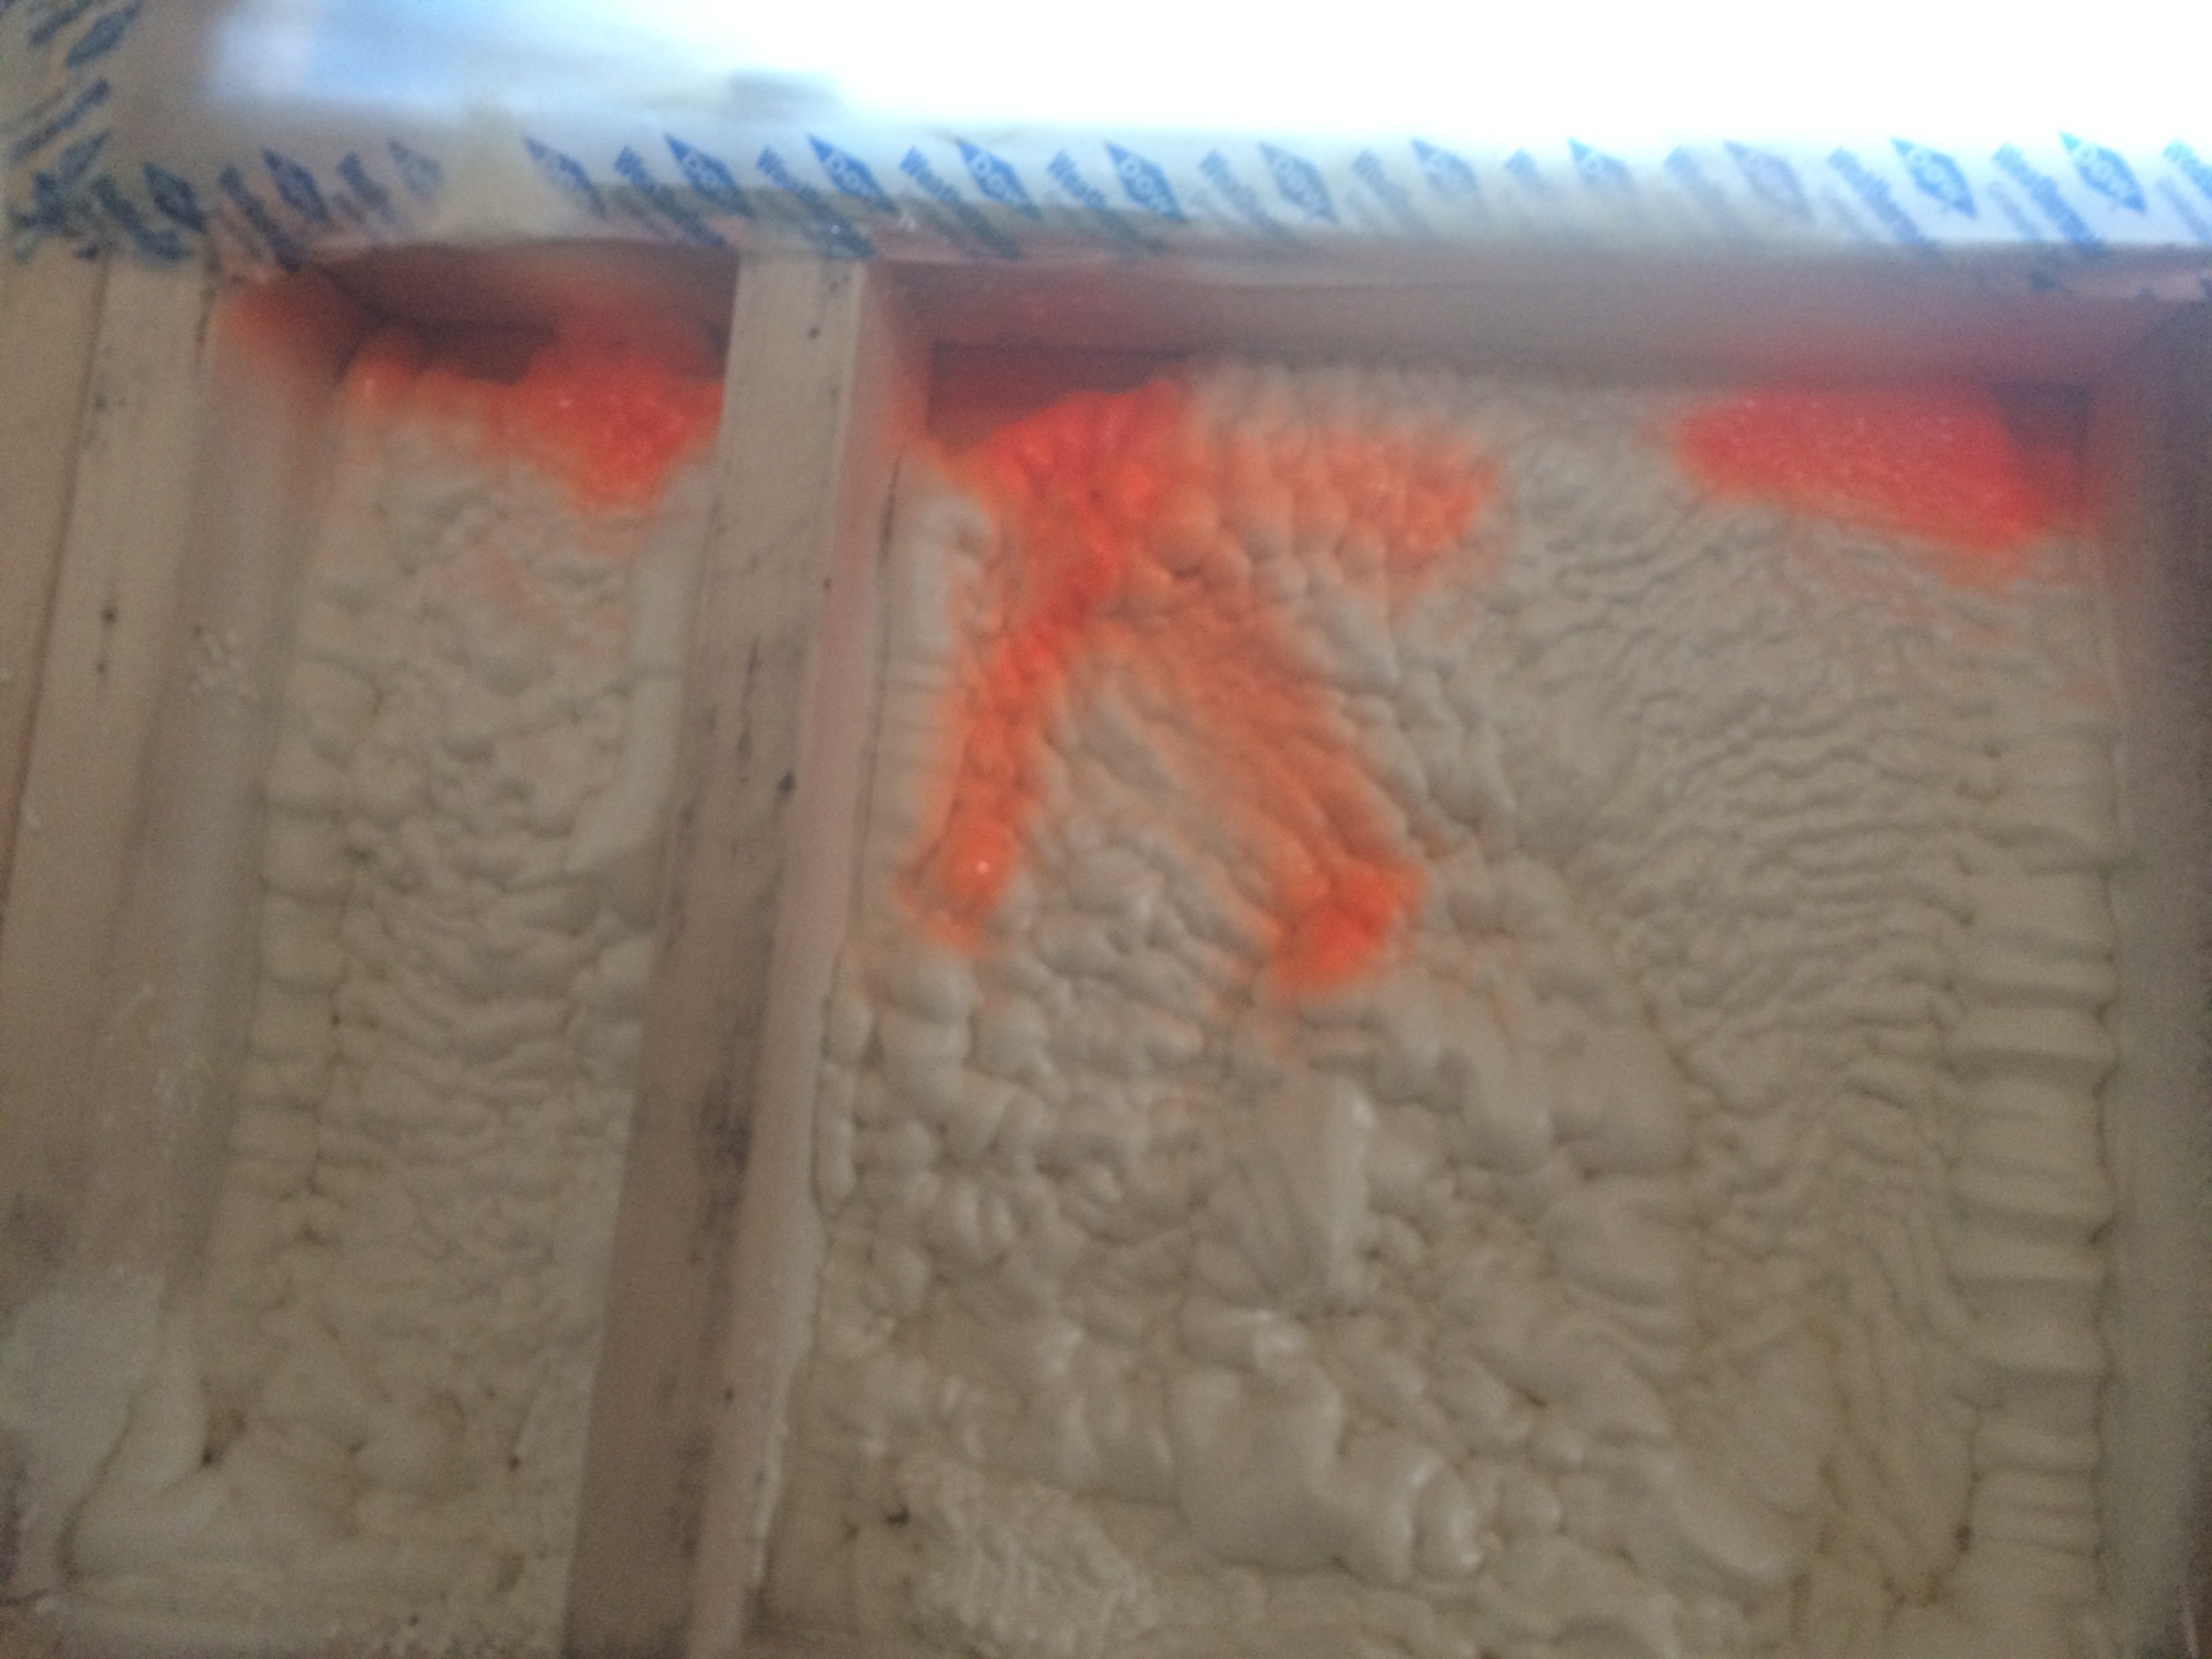
Spray foam is mesmerizing in infrared. Yellow is warm. As the foam catalyzes, it spikes to over 200 degrees, then cools.
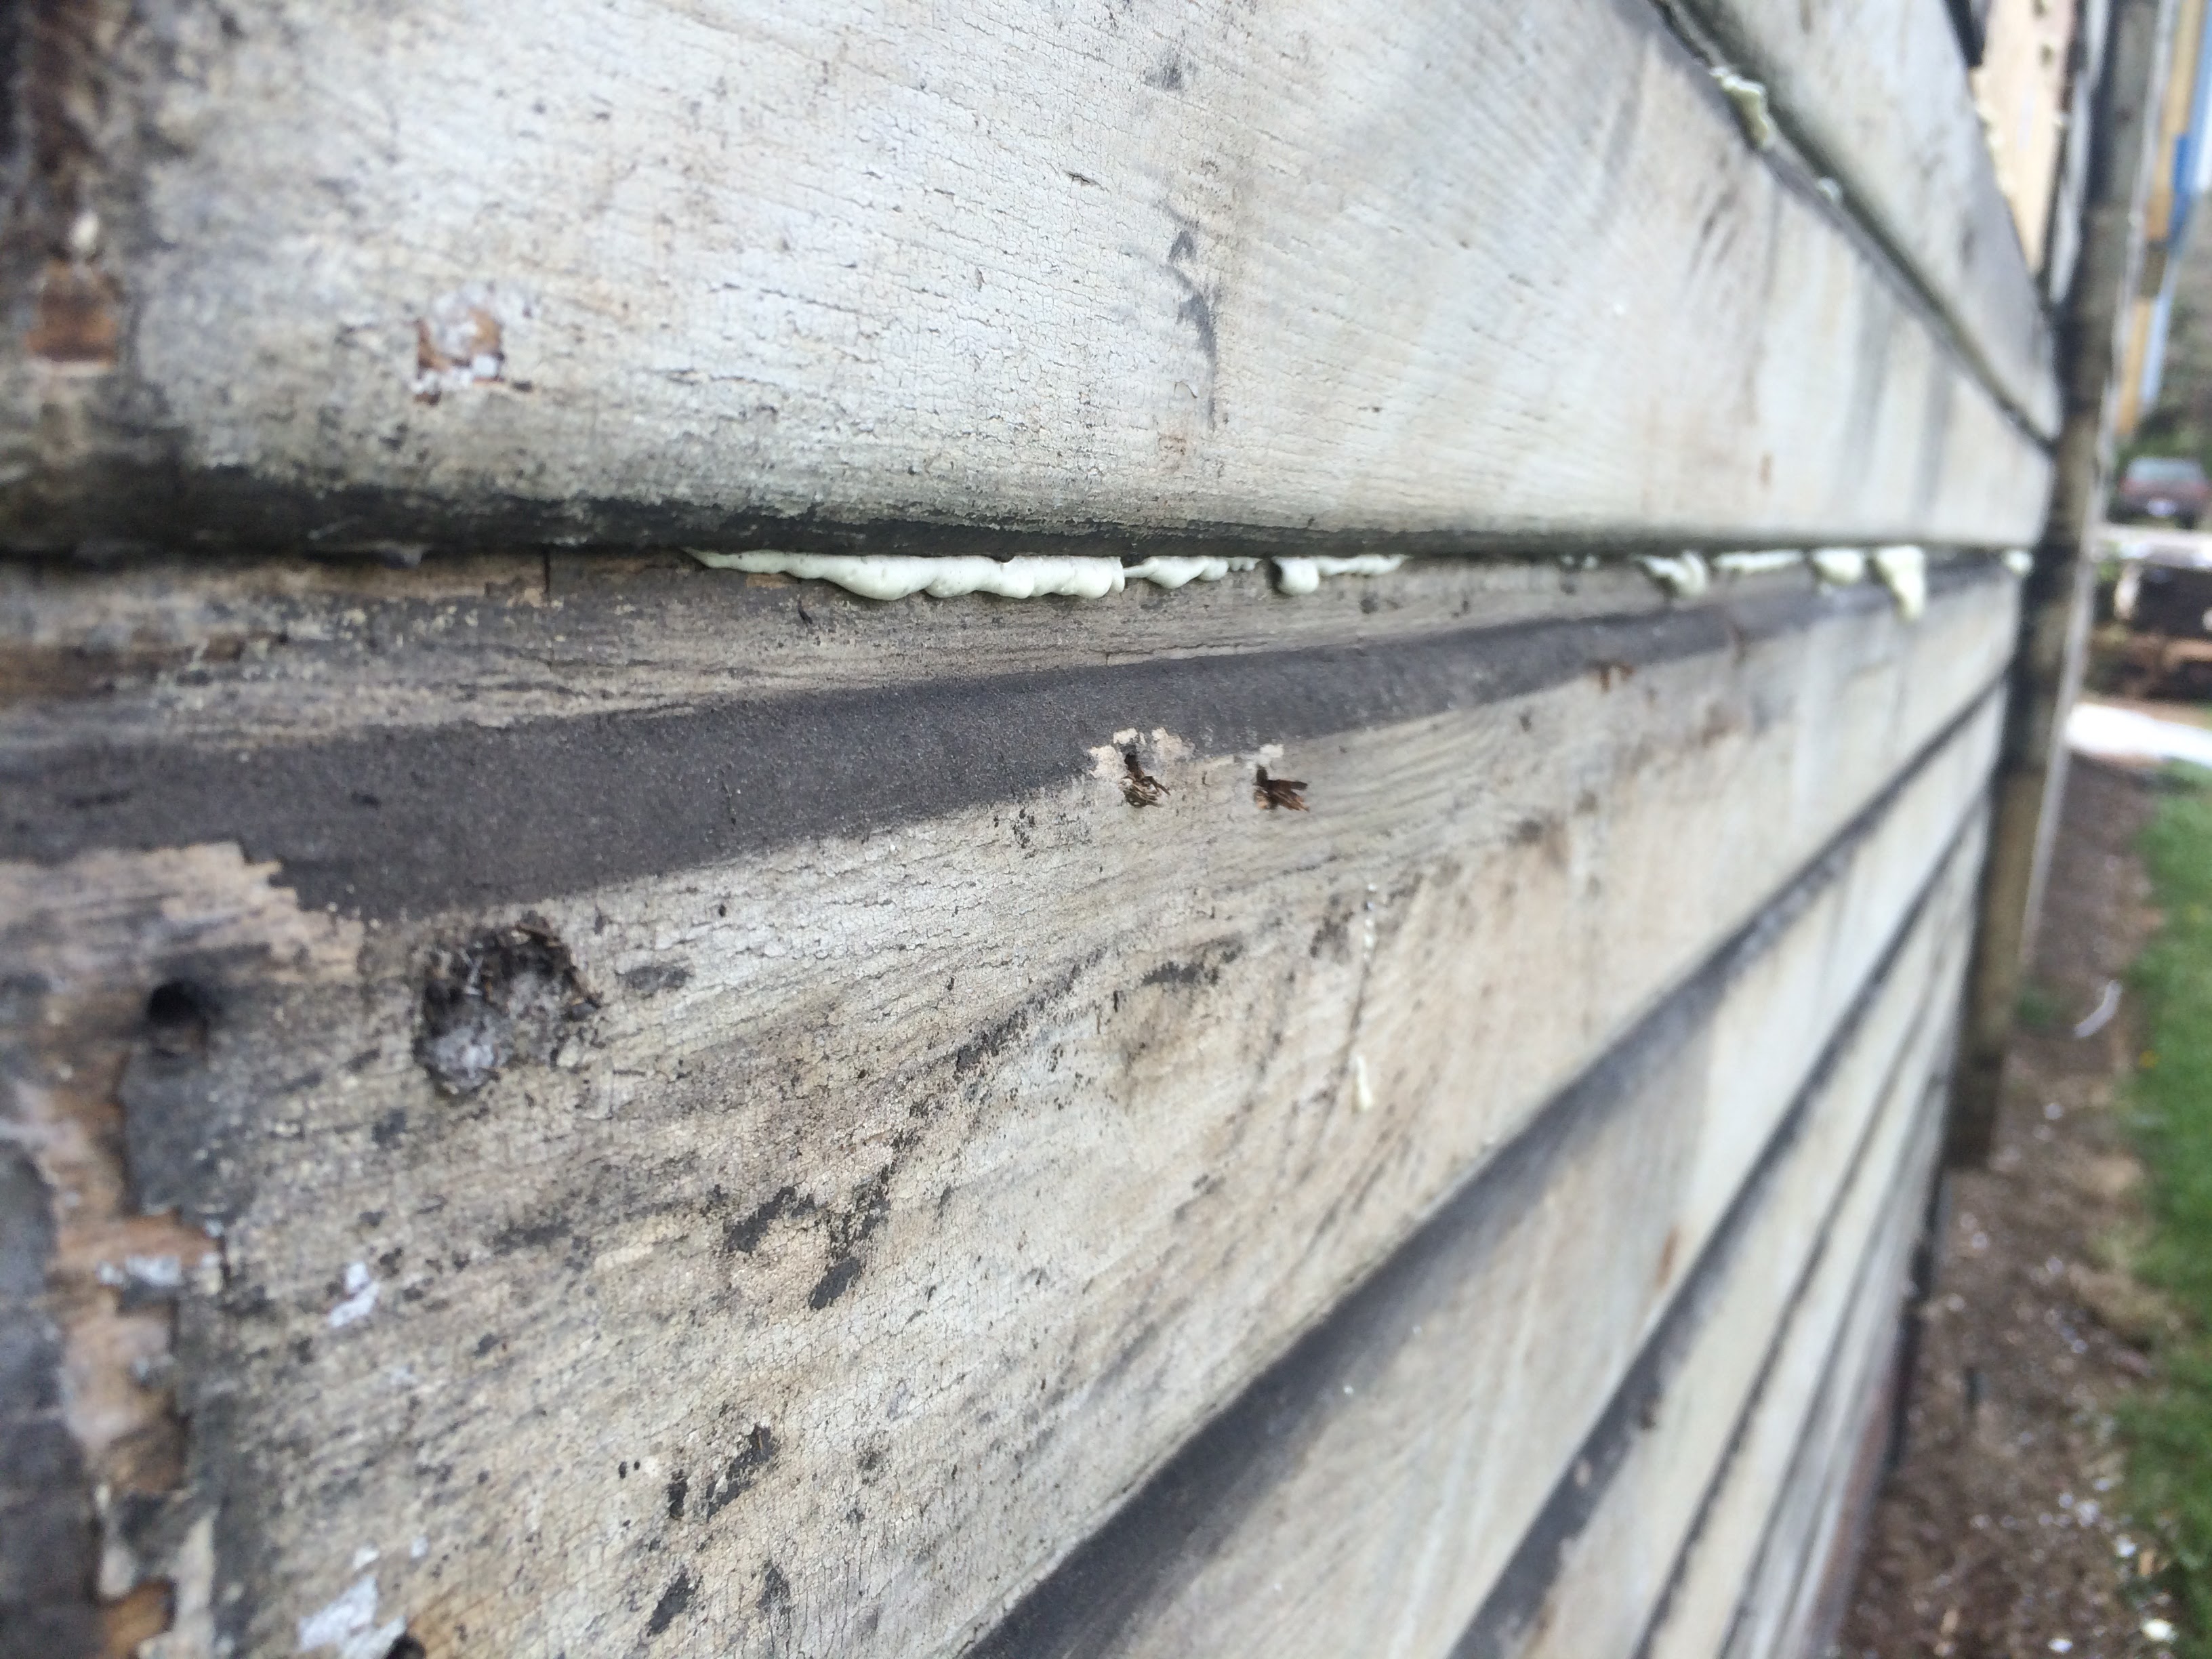
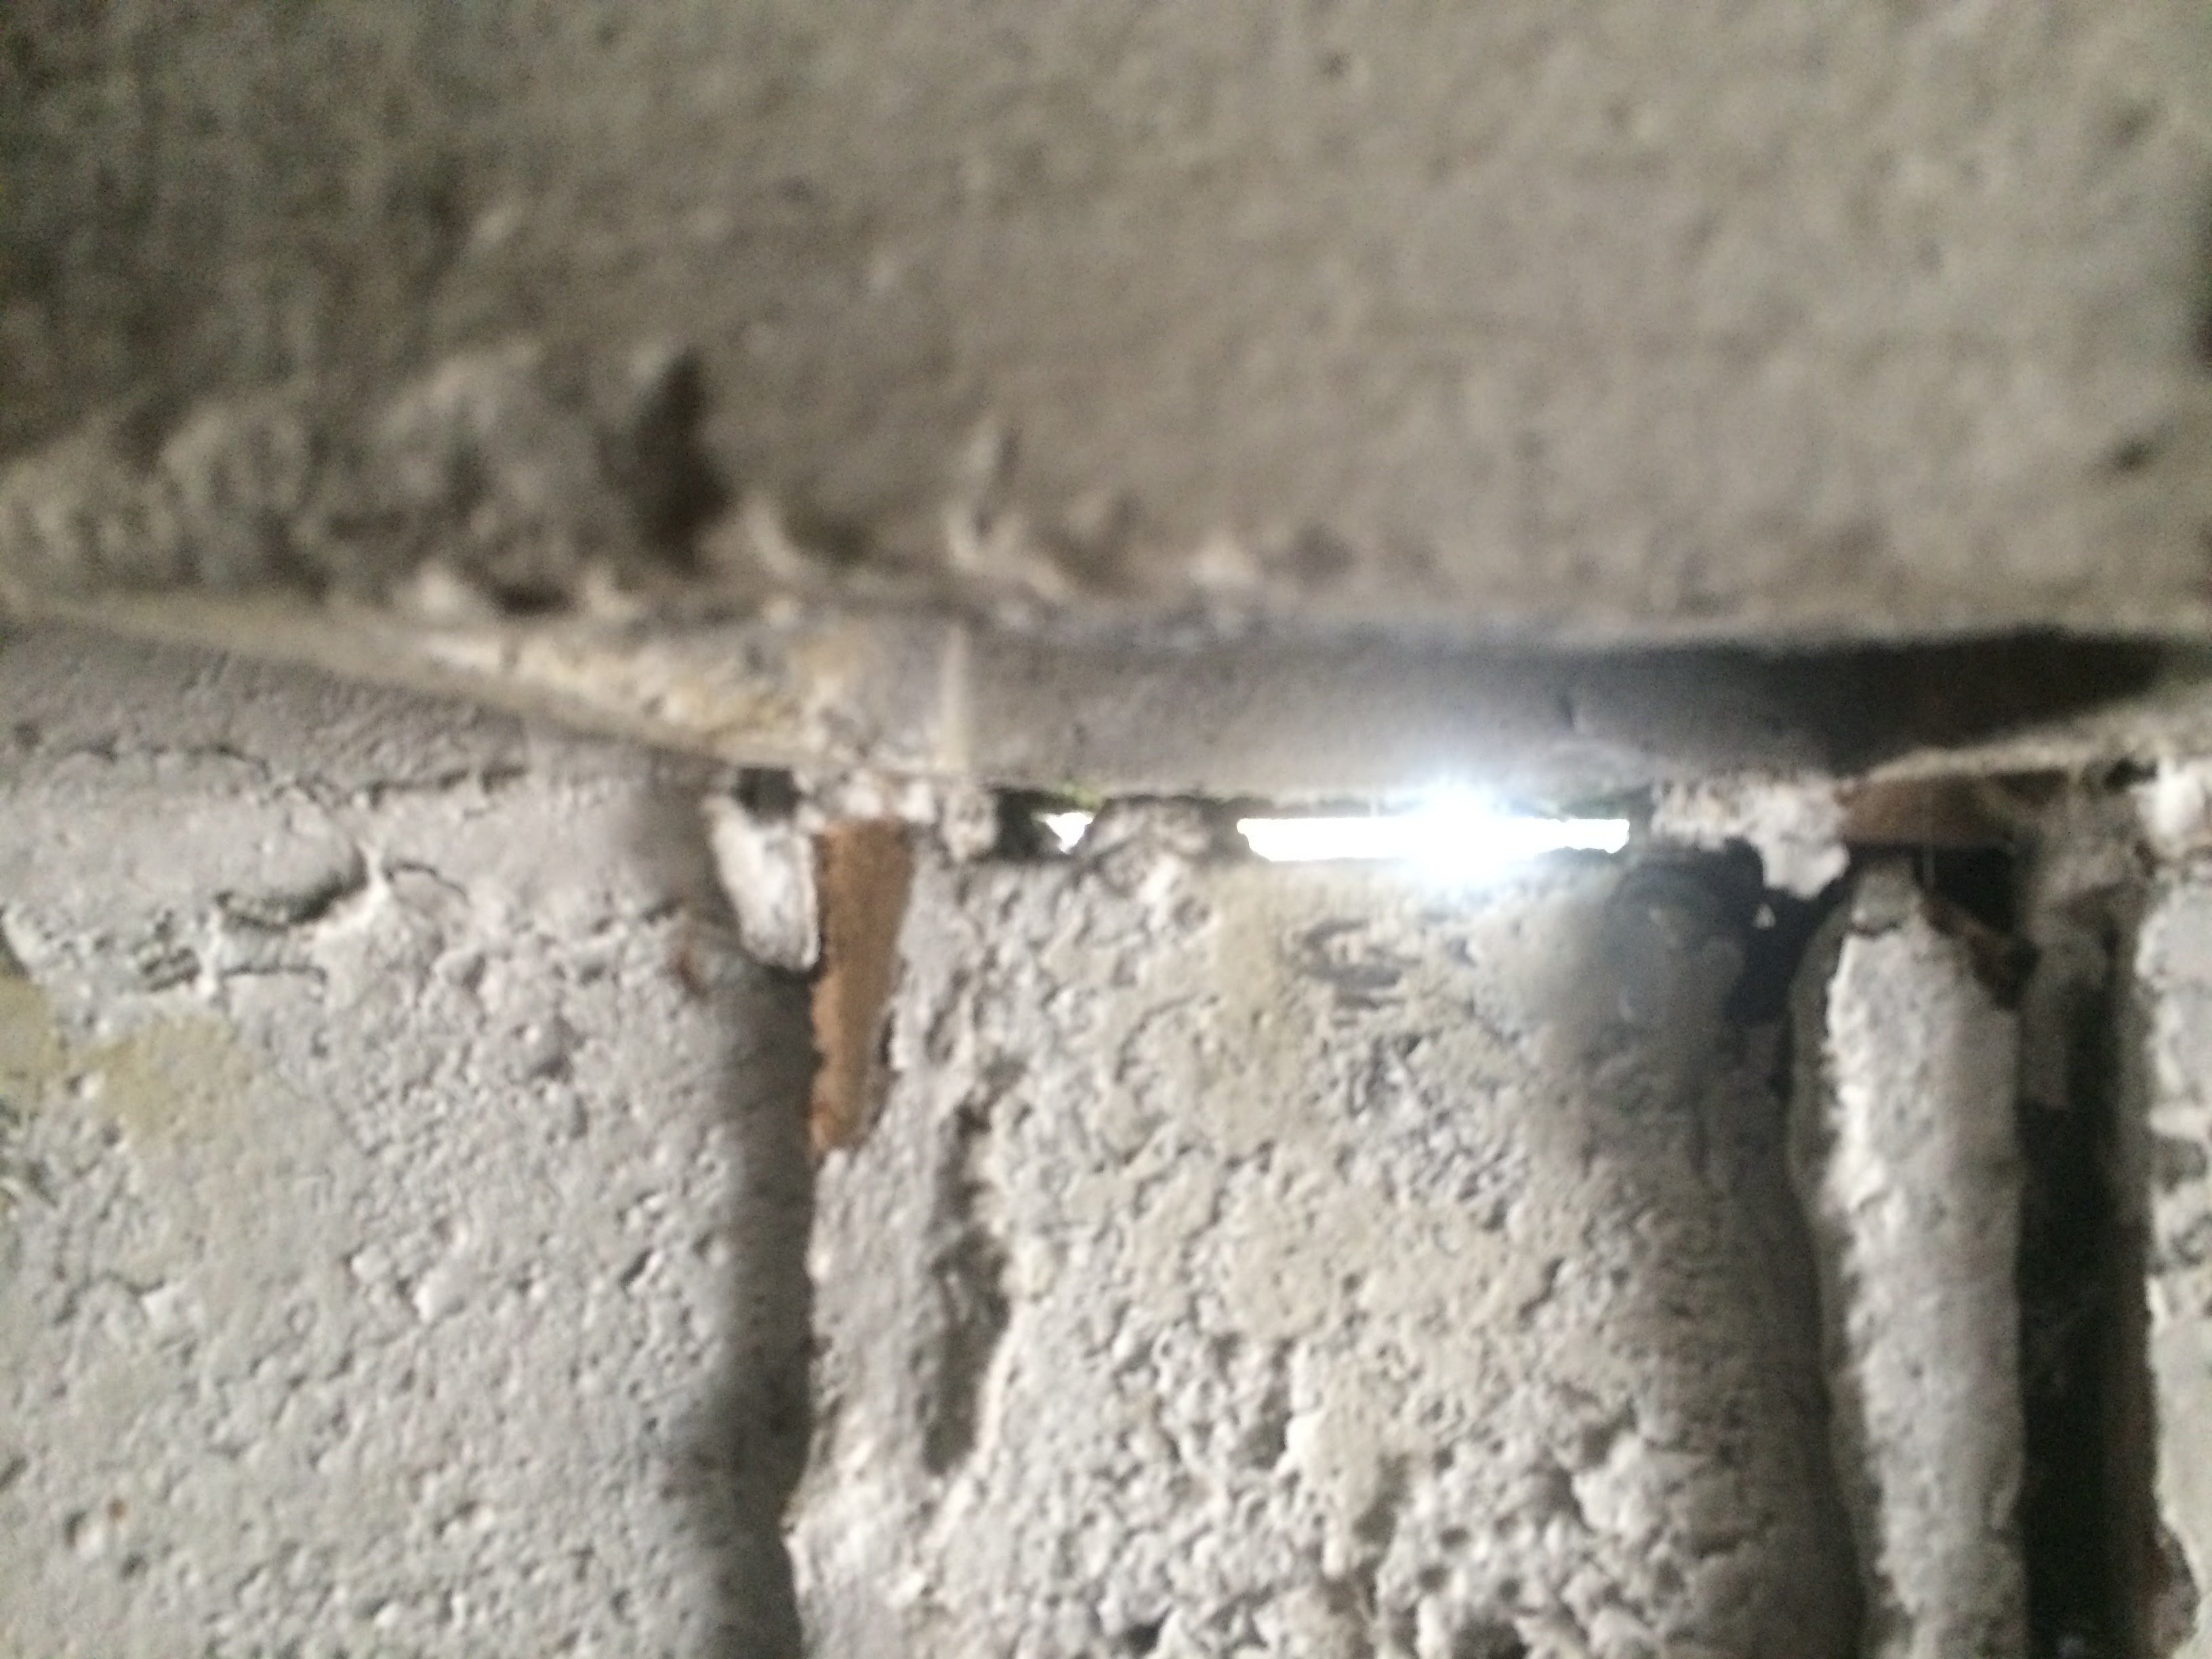
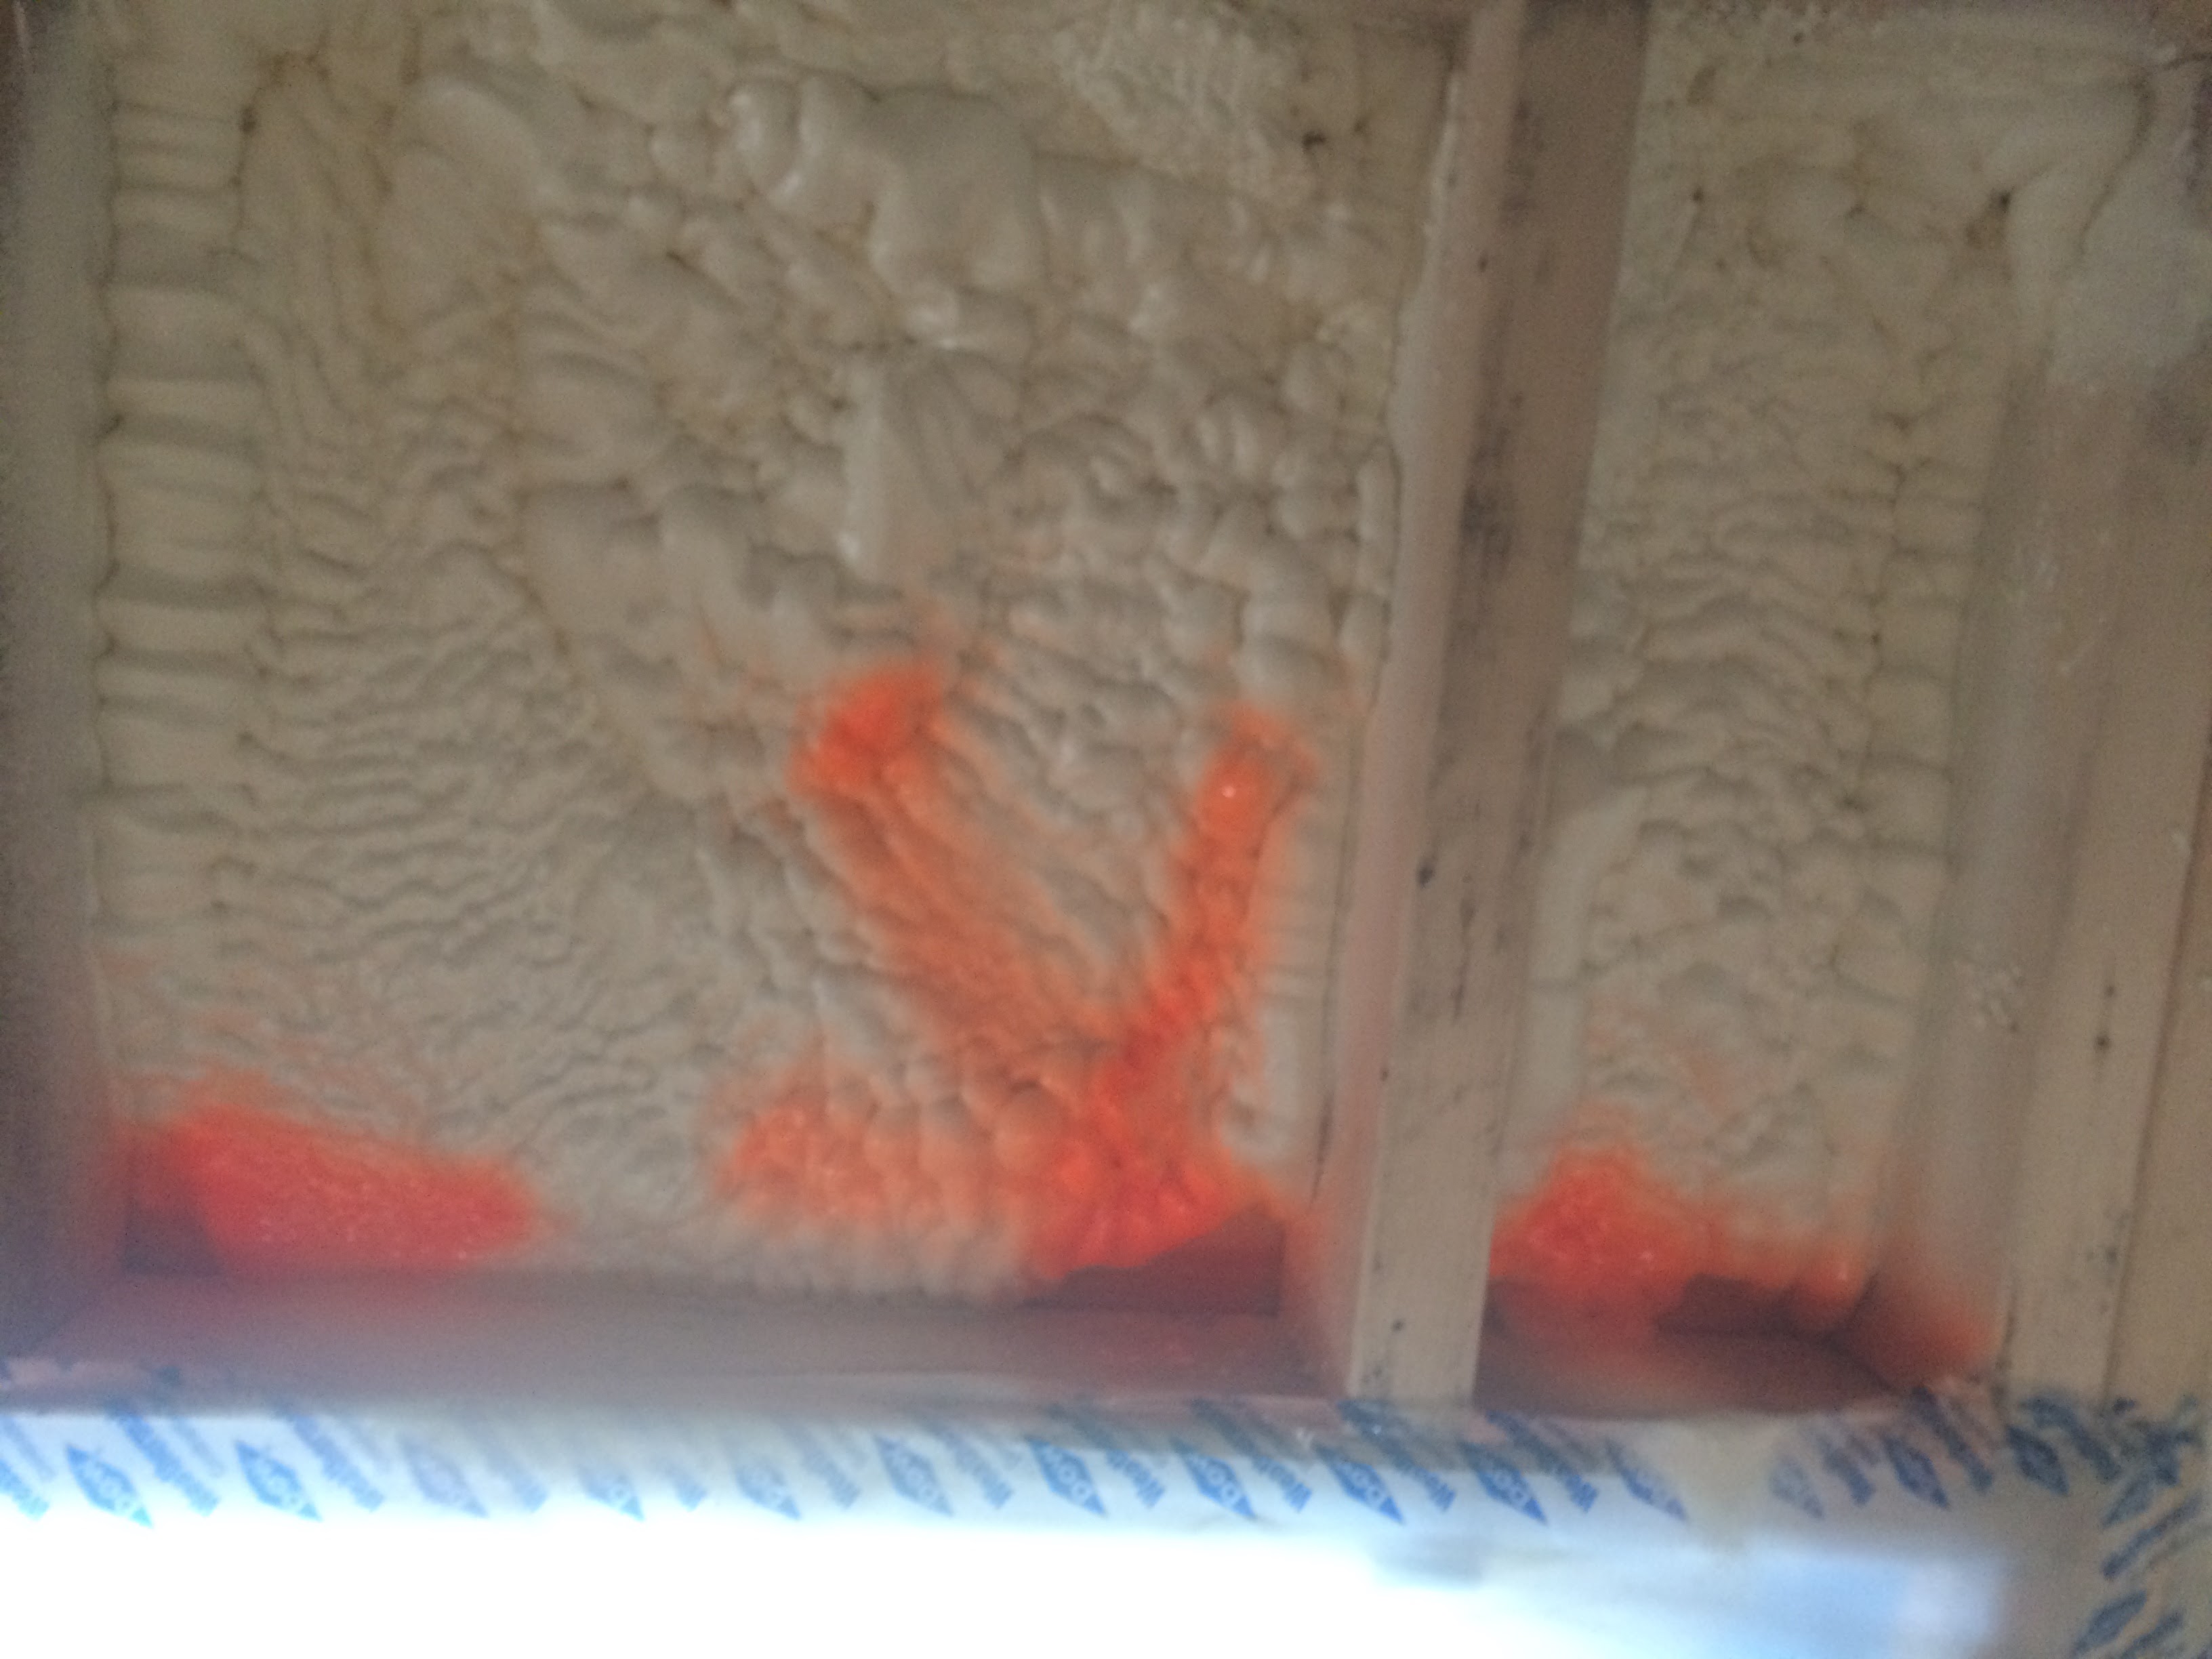
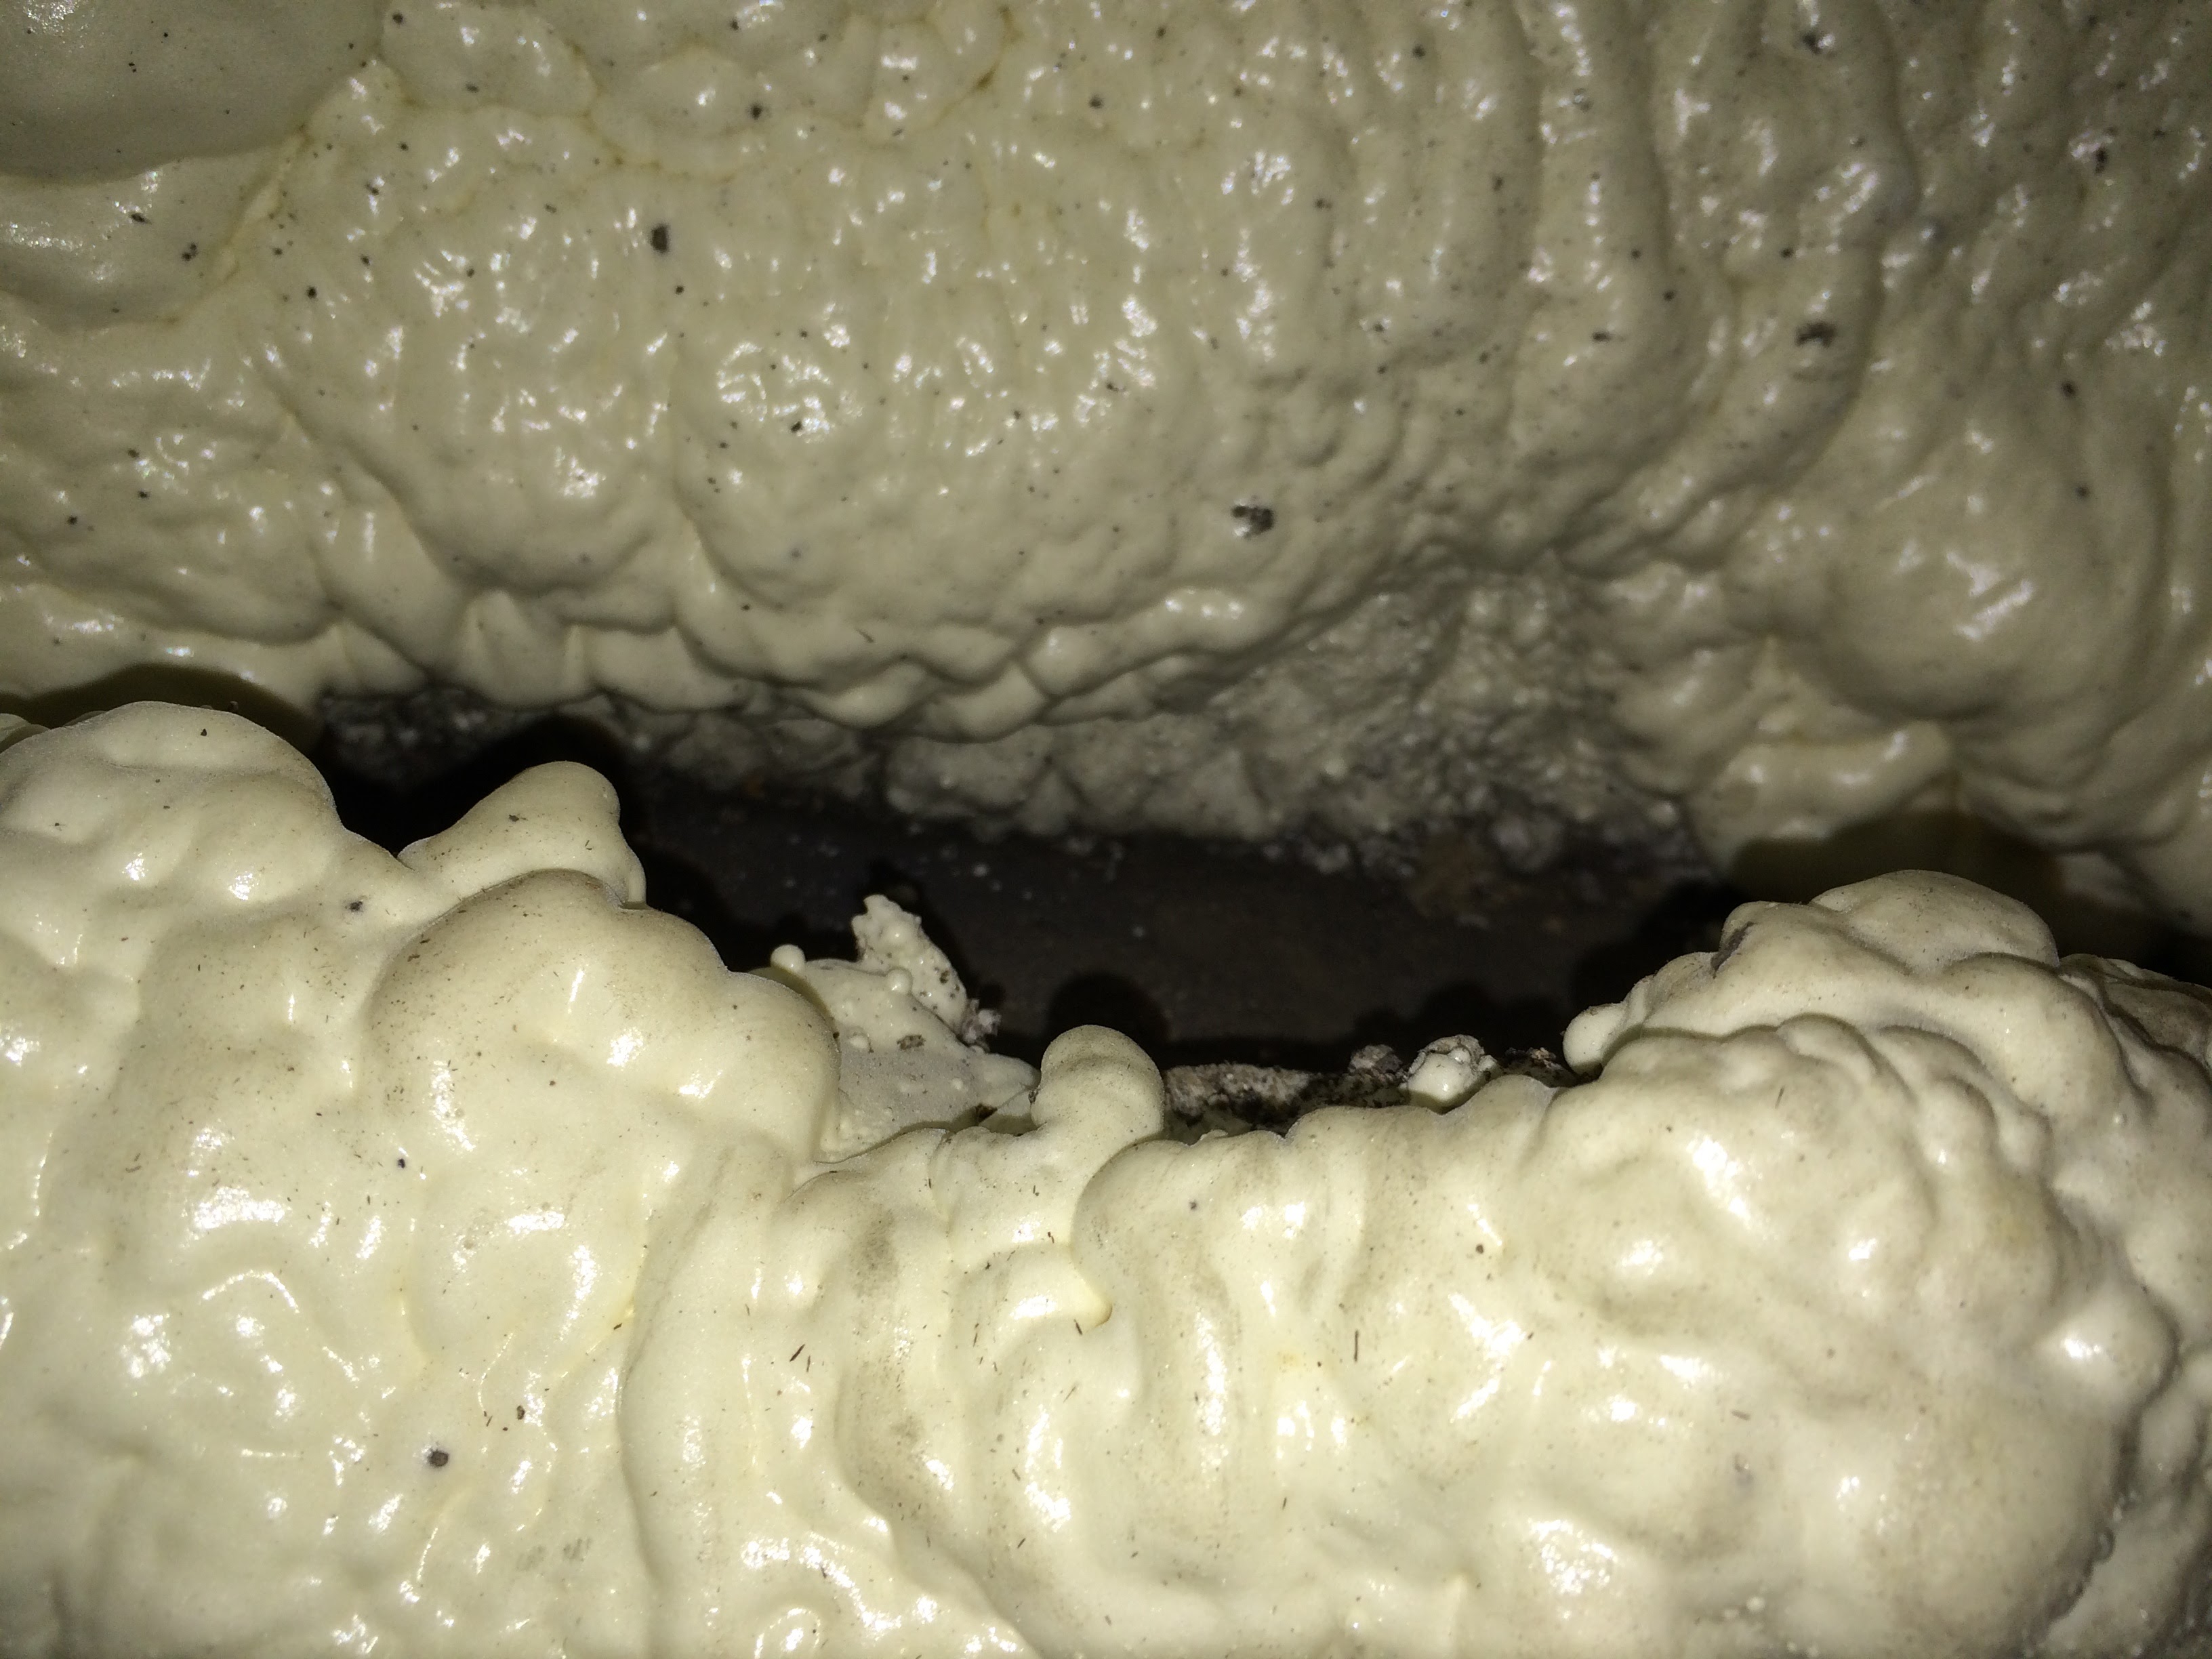
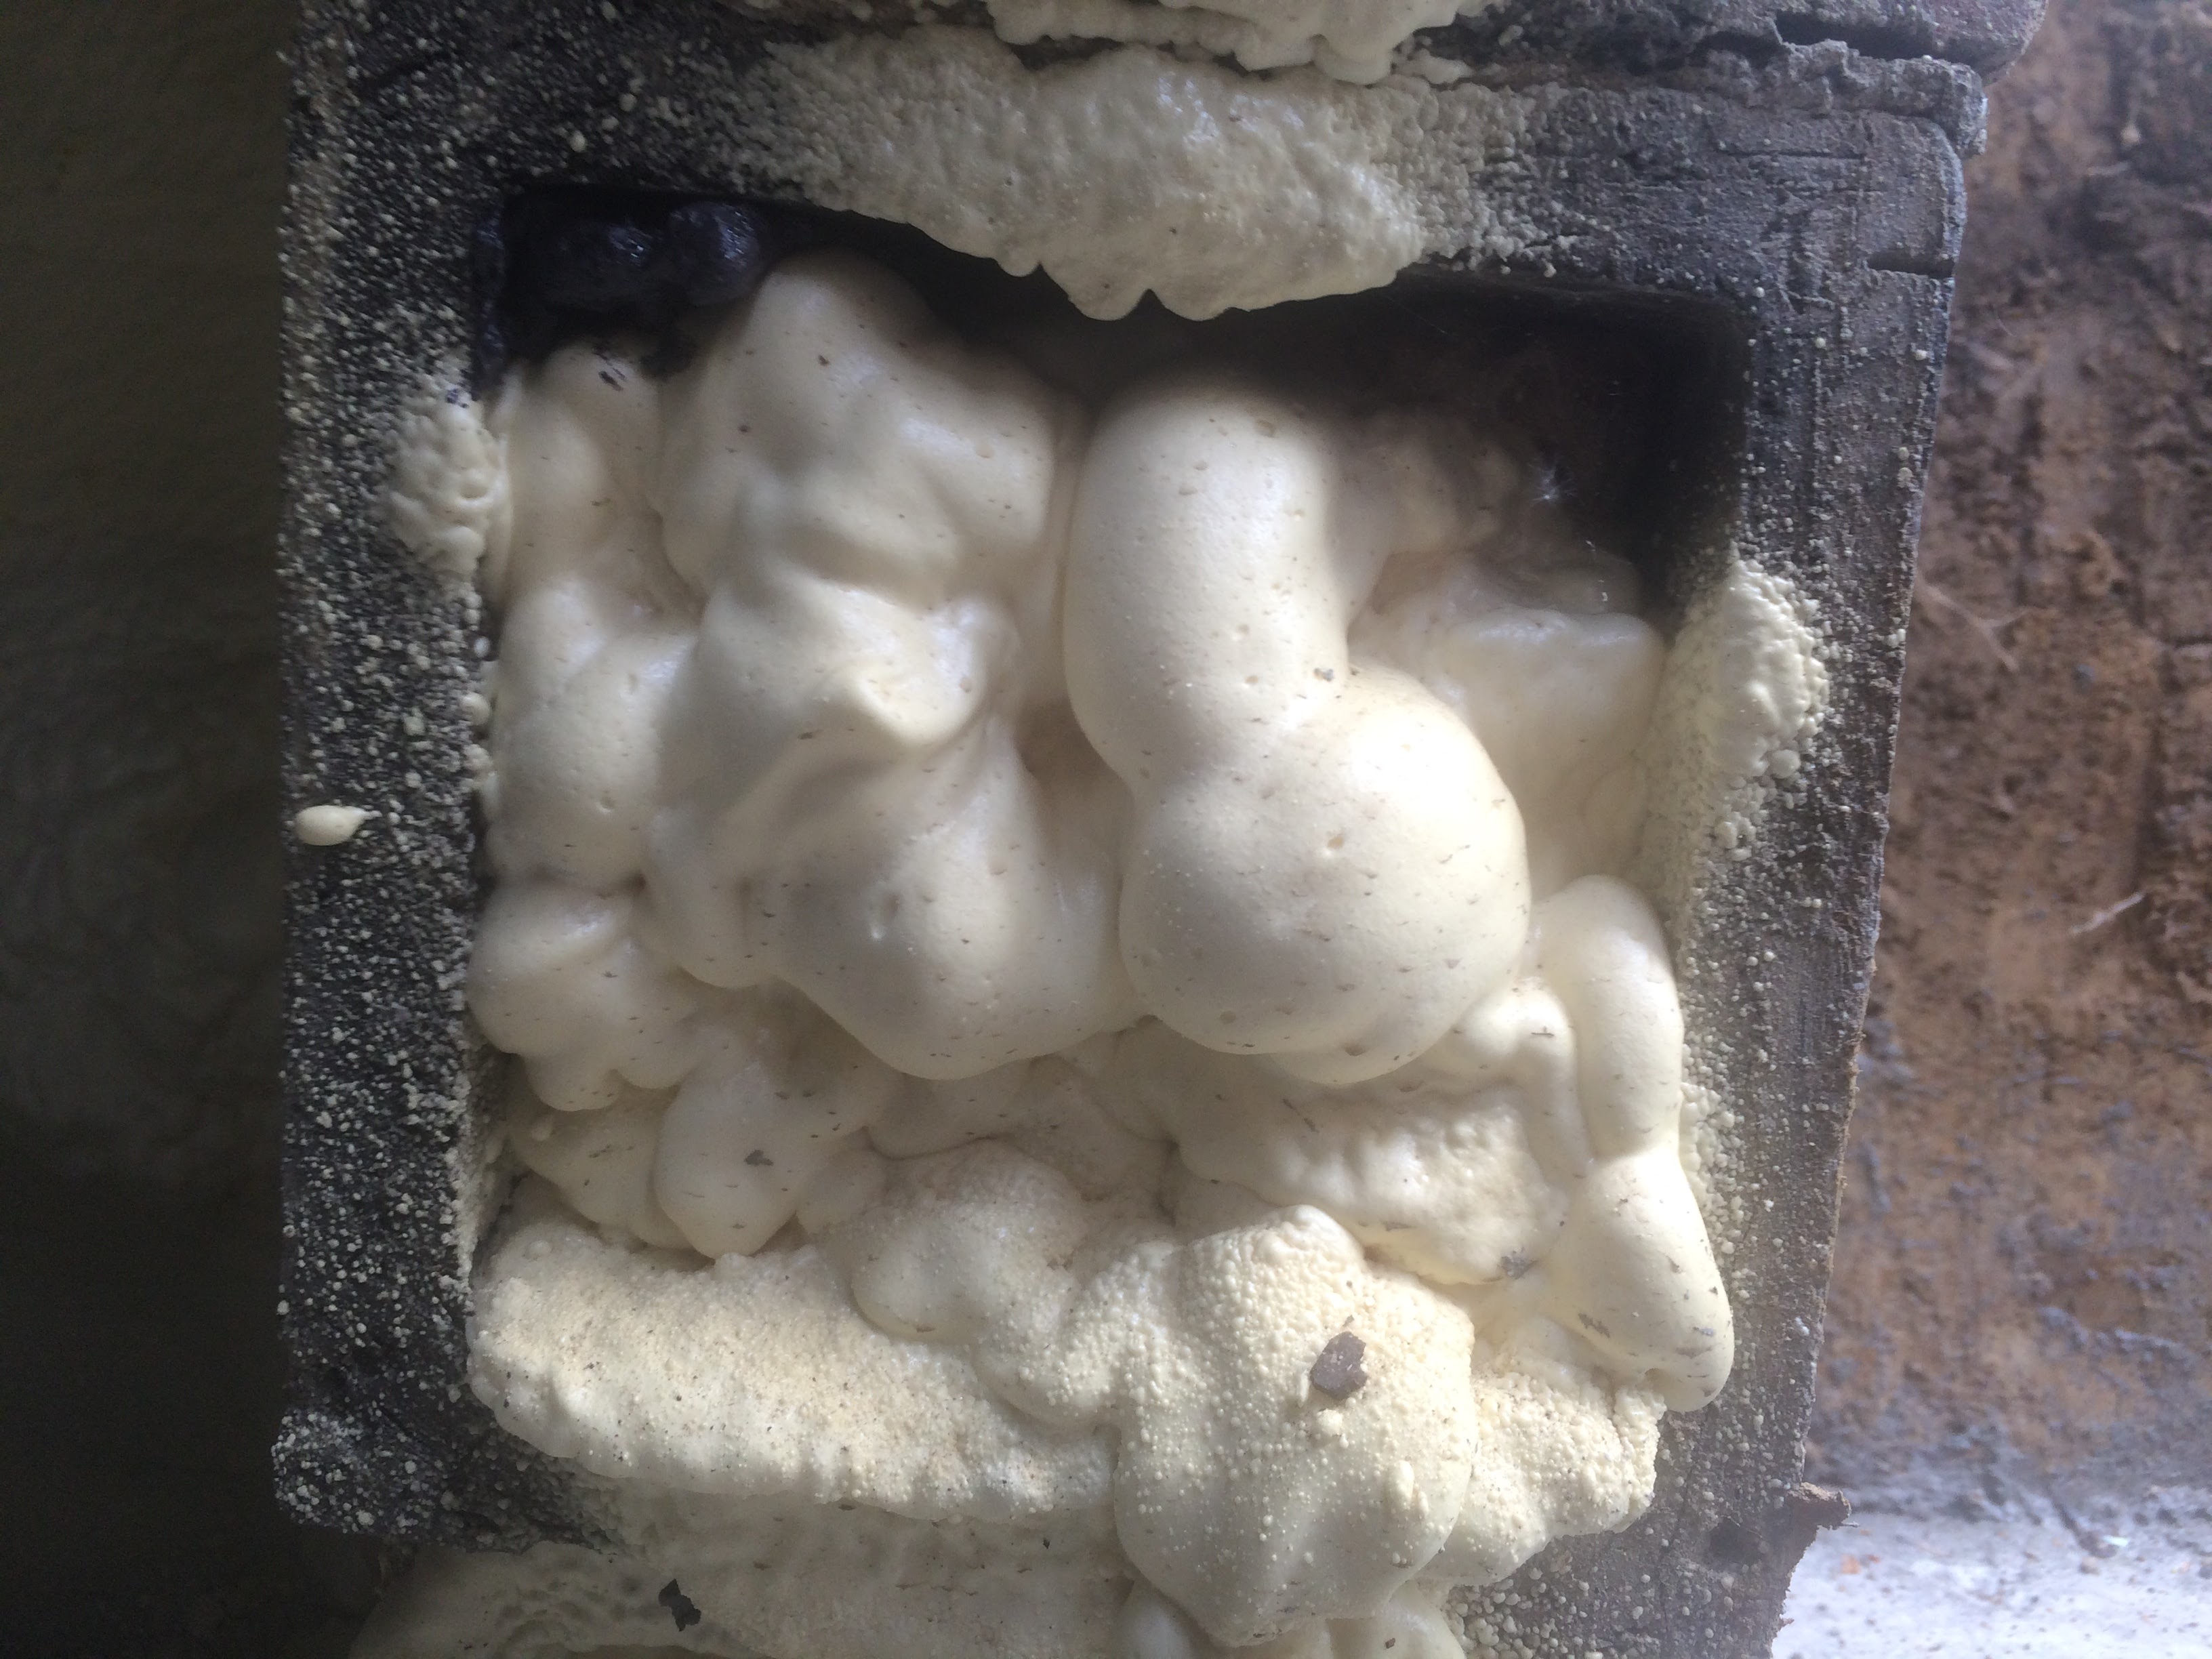
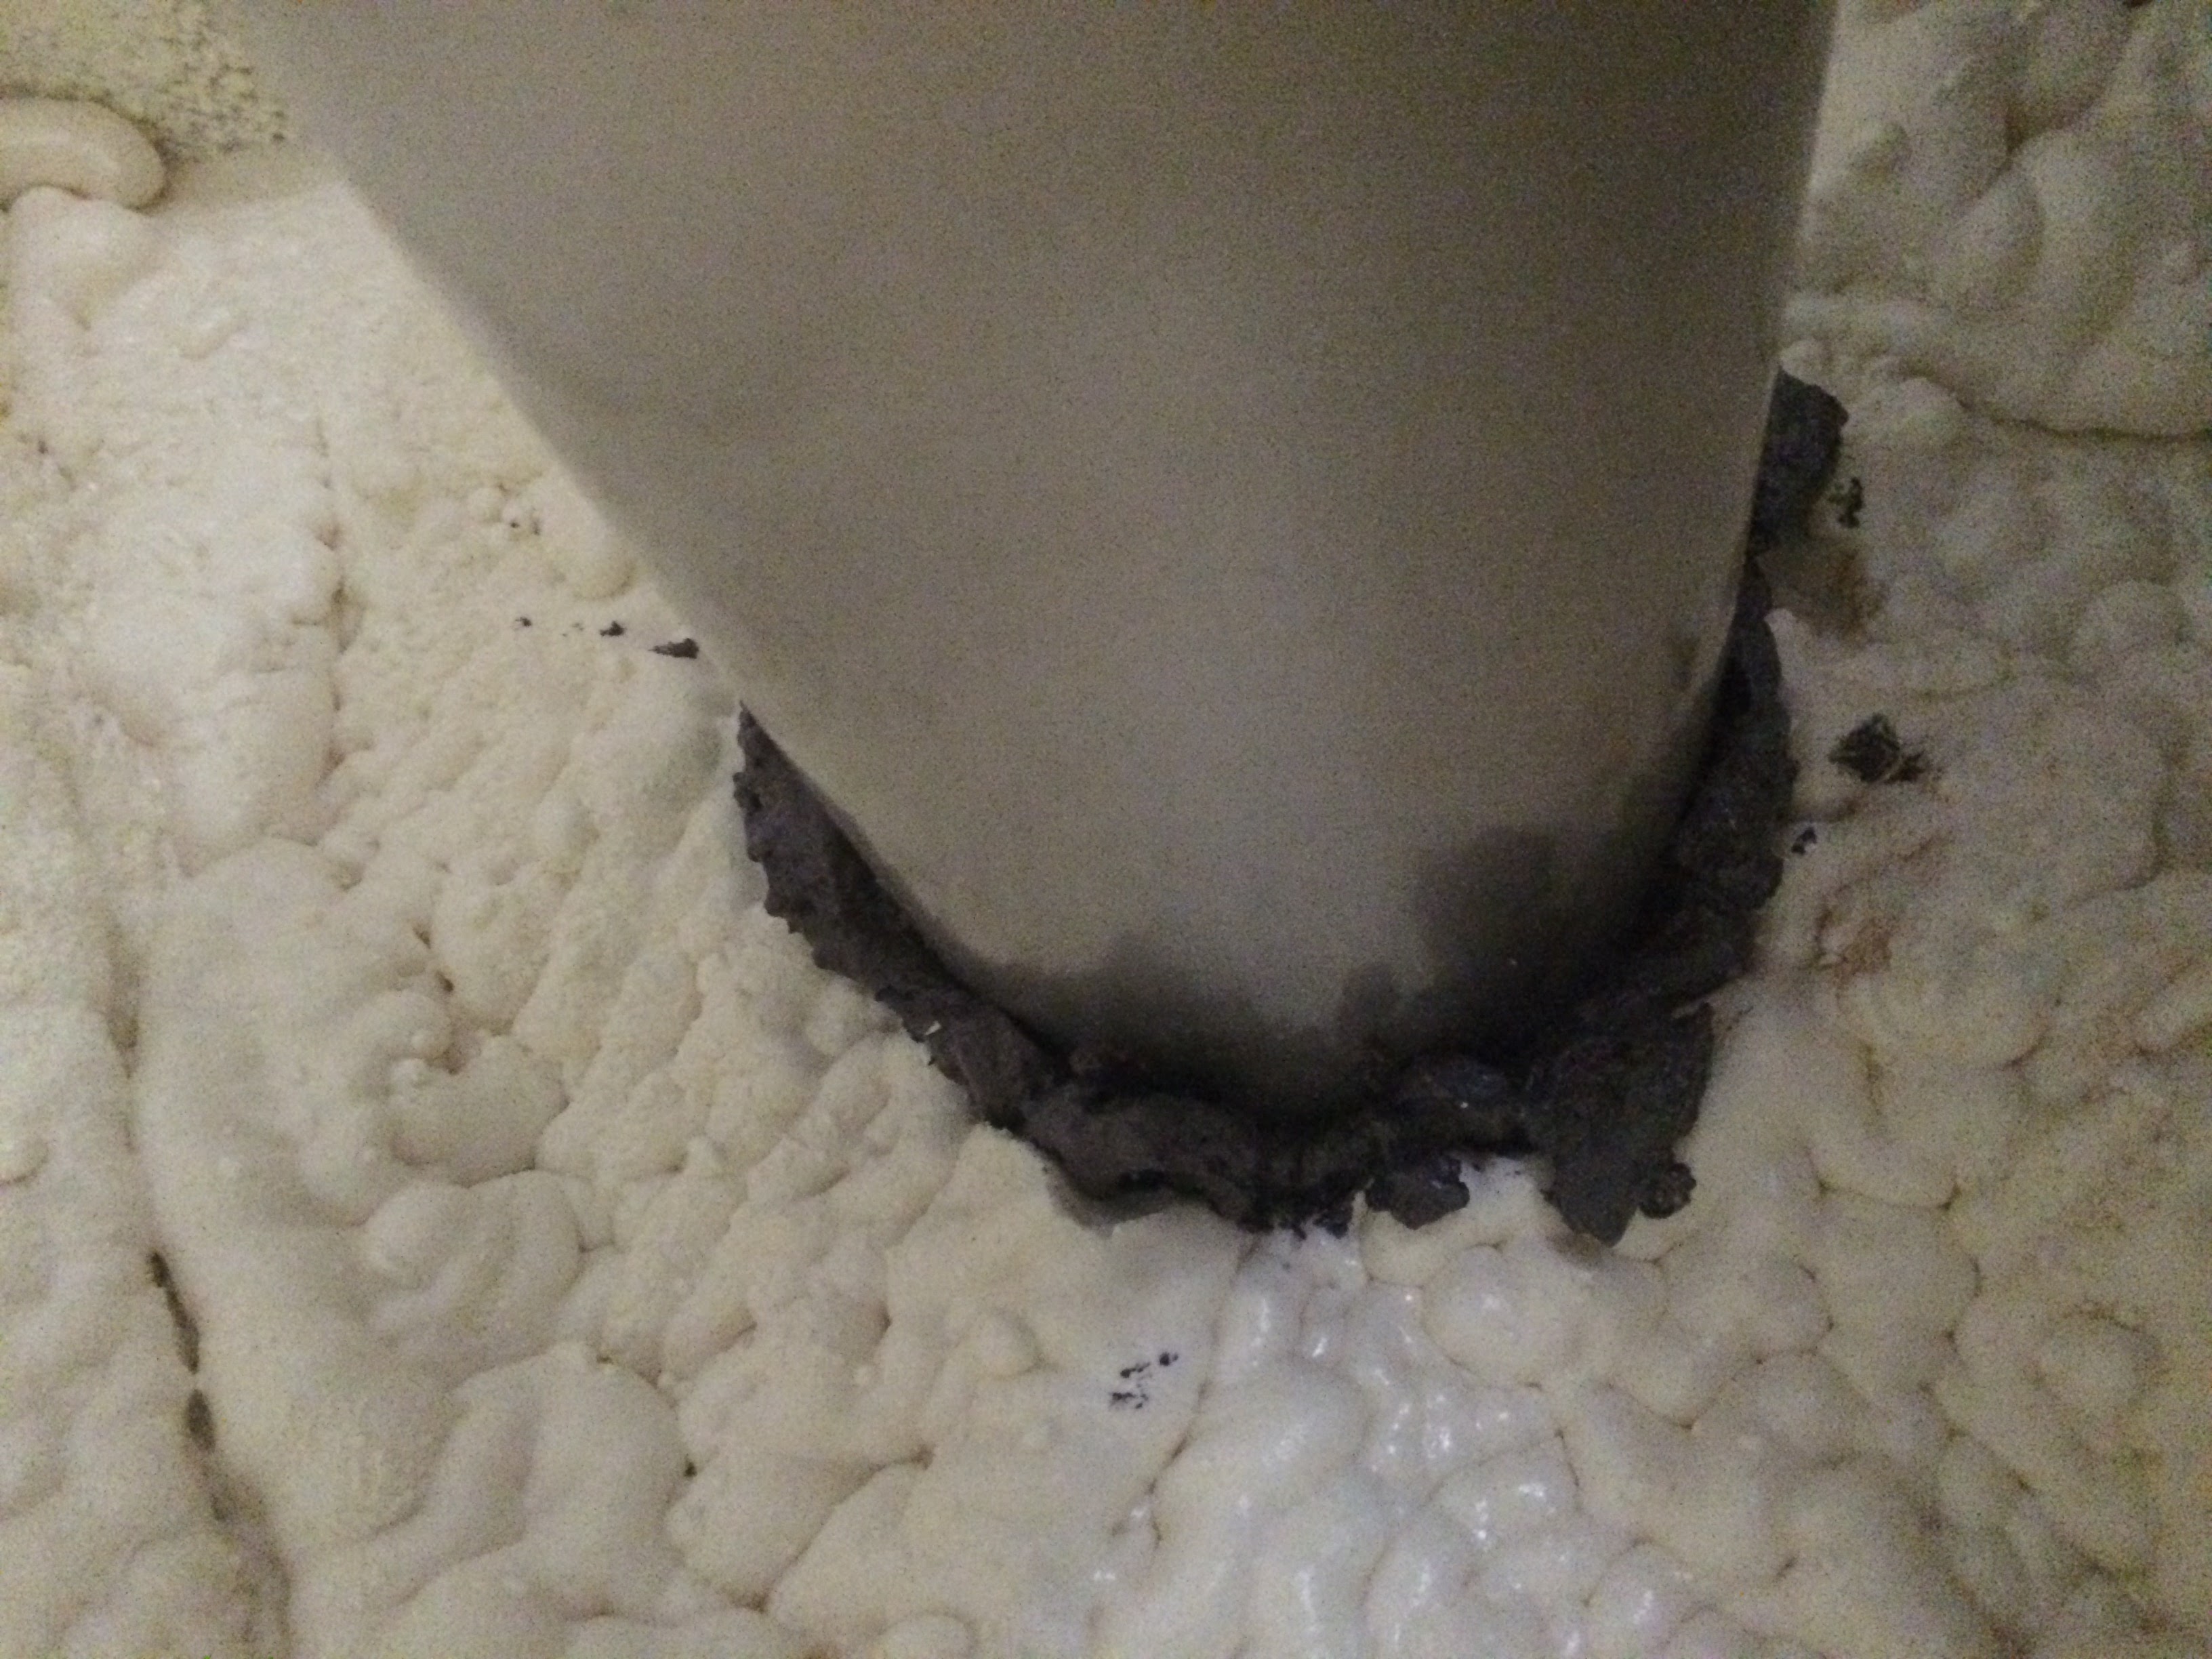
Old houses leak. Lots of the leakage is through gaps in the siding. Note the spray foam peeking out between pieces of siding. This is one of the reasons we like spray foam so much for existing homes – it seals the stuff you can’t even see. Dense packed cellulose does a pretty good job, but in gut rehabs foam is often the better choice.
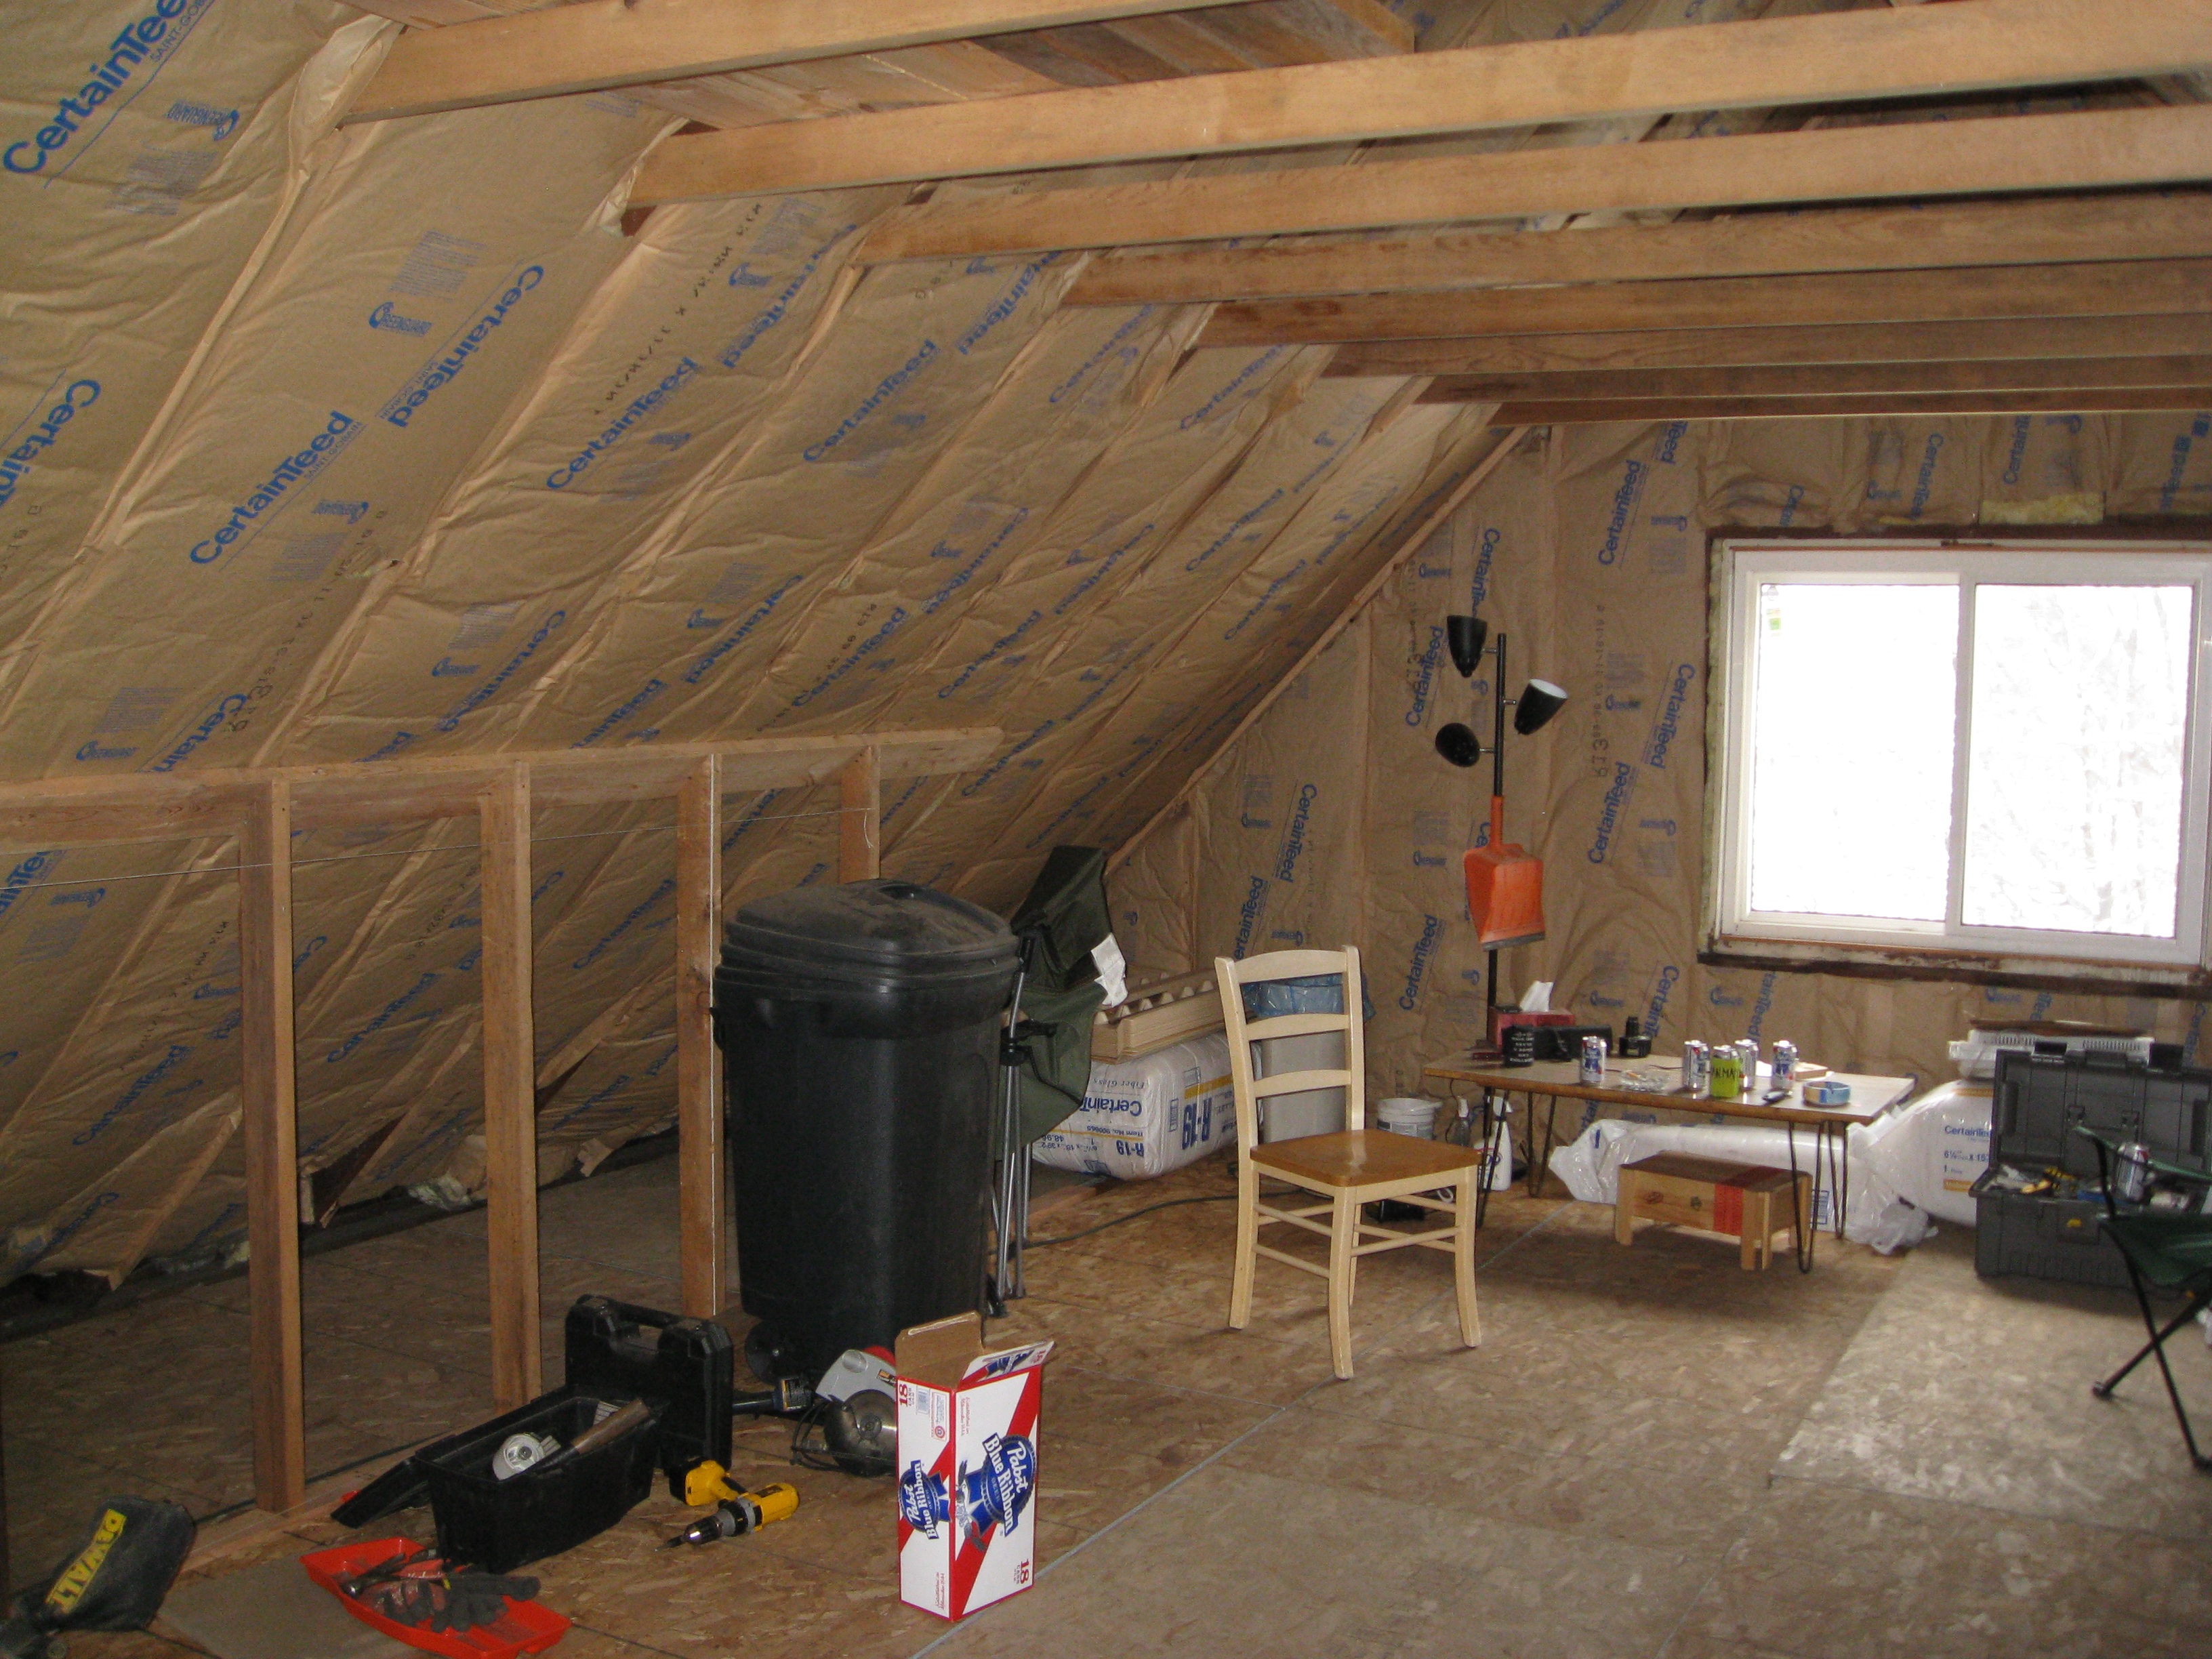
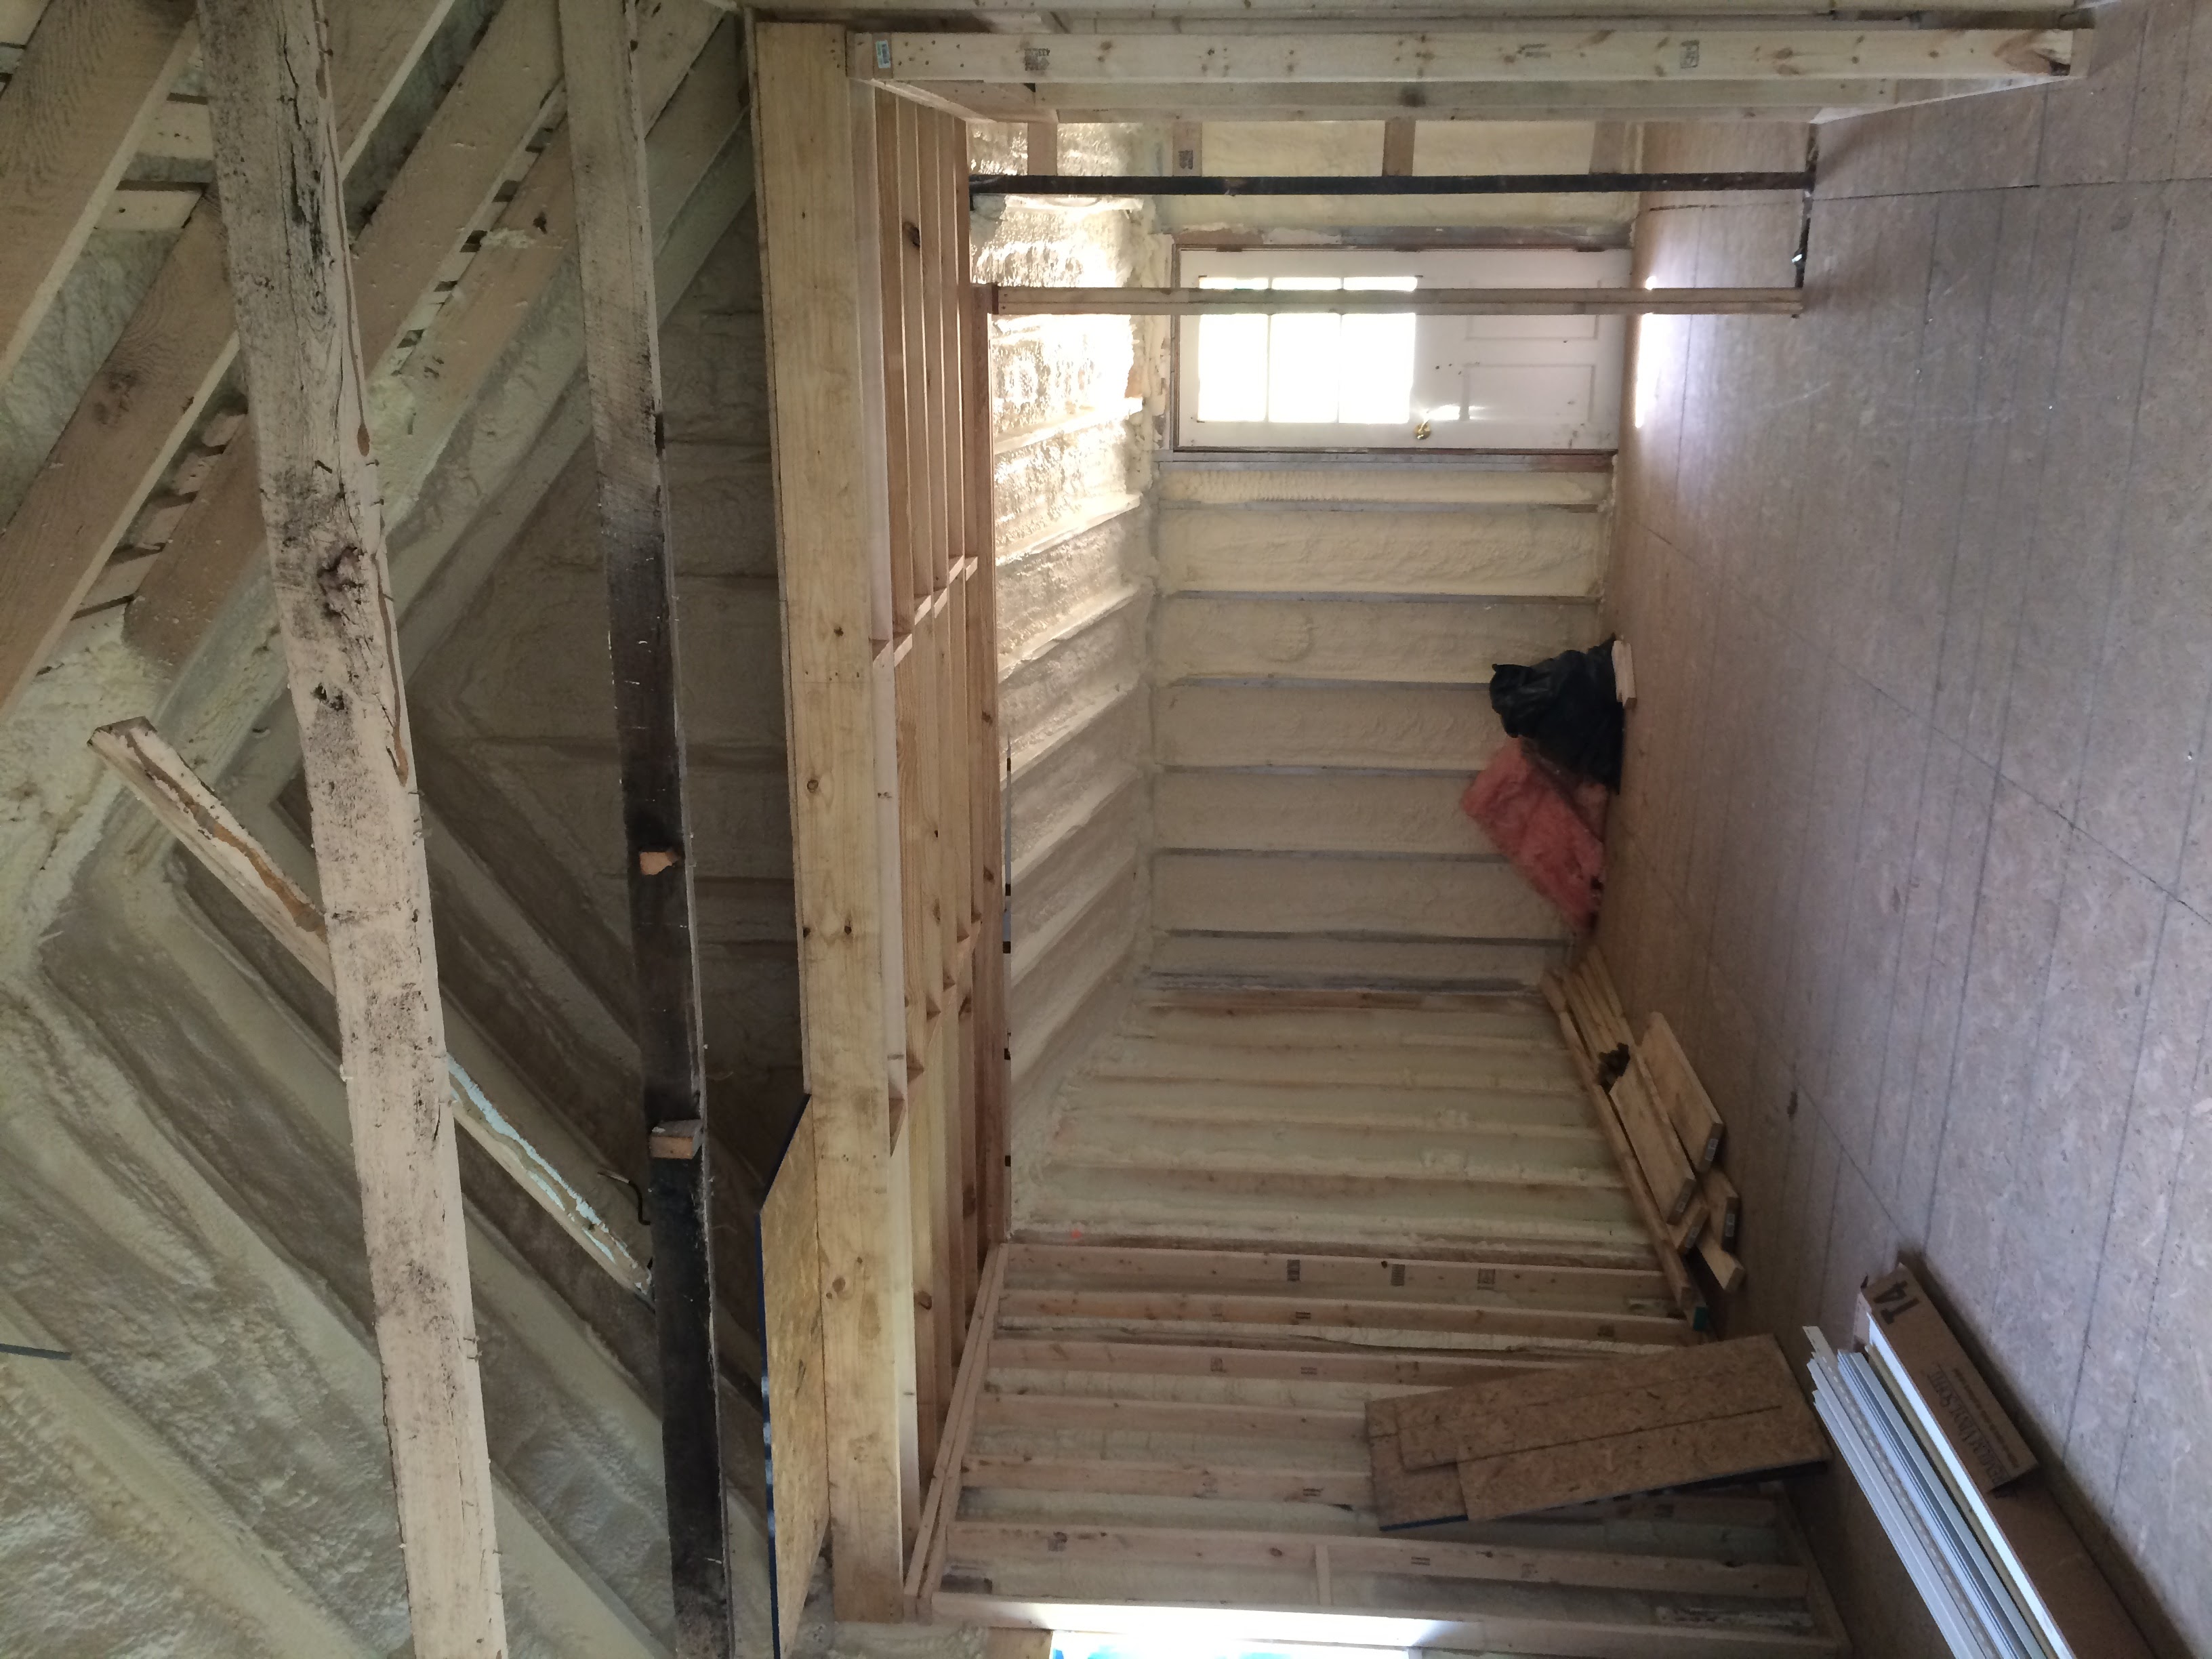
Foaming the Roof
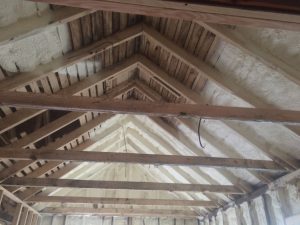
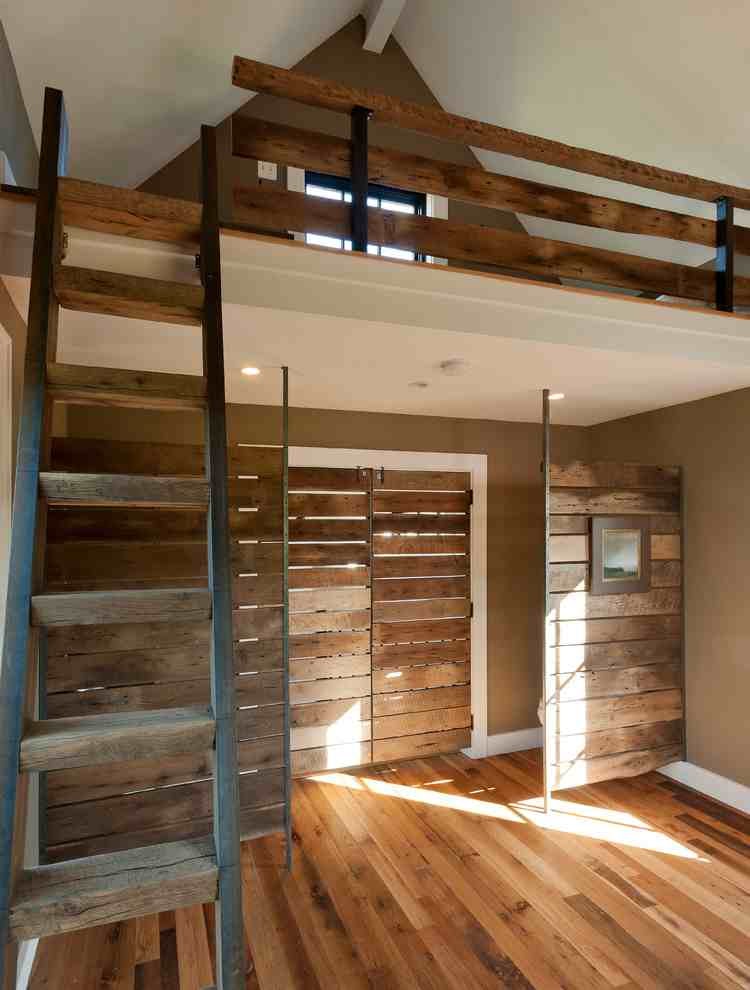
Most Habitat retrofit projects use cellulose. They insulate attic flats to above R-50. Here we opted to spray 3-4 inches of foam below the roof deck because it provided a number of specific benefits. First, the building was a sieve, so the air sealing benefit was crucial to the project’s success. Second, cathedralizing this small space makes it feel like an artist’s studio instead of a shoe box. Third, there were signs of mold, which needs air to spread. This mitigated a potential air quality risk while avoiding moisture remediation. And fourth, applying insulation to the outside would have been complex and time consuming. When I walk into the space it feels fresher, and much, much larger. I compare it to a tent in a Harry Potter novel. Jacob, the son of the soon-to-be homeowner said it looks small on the outside, but is really big inside. Mission accomplished!
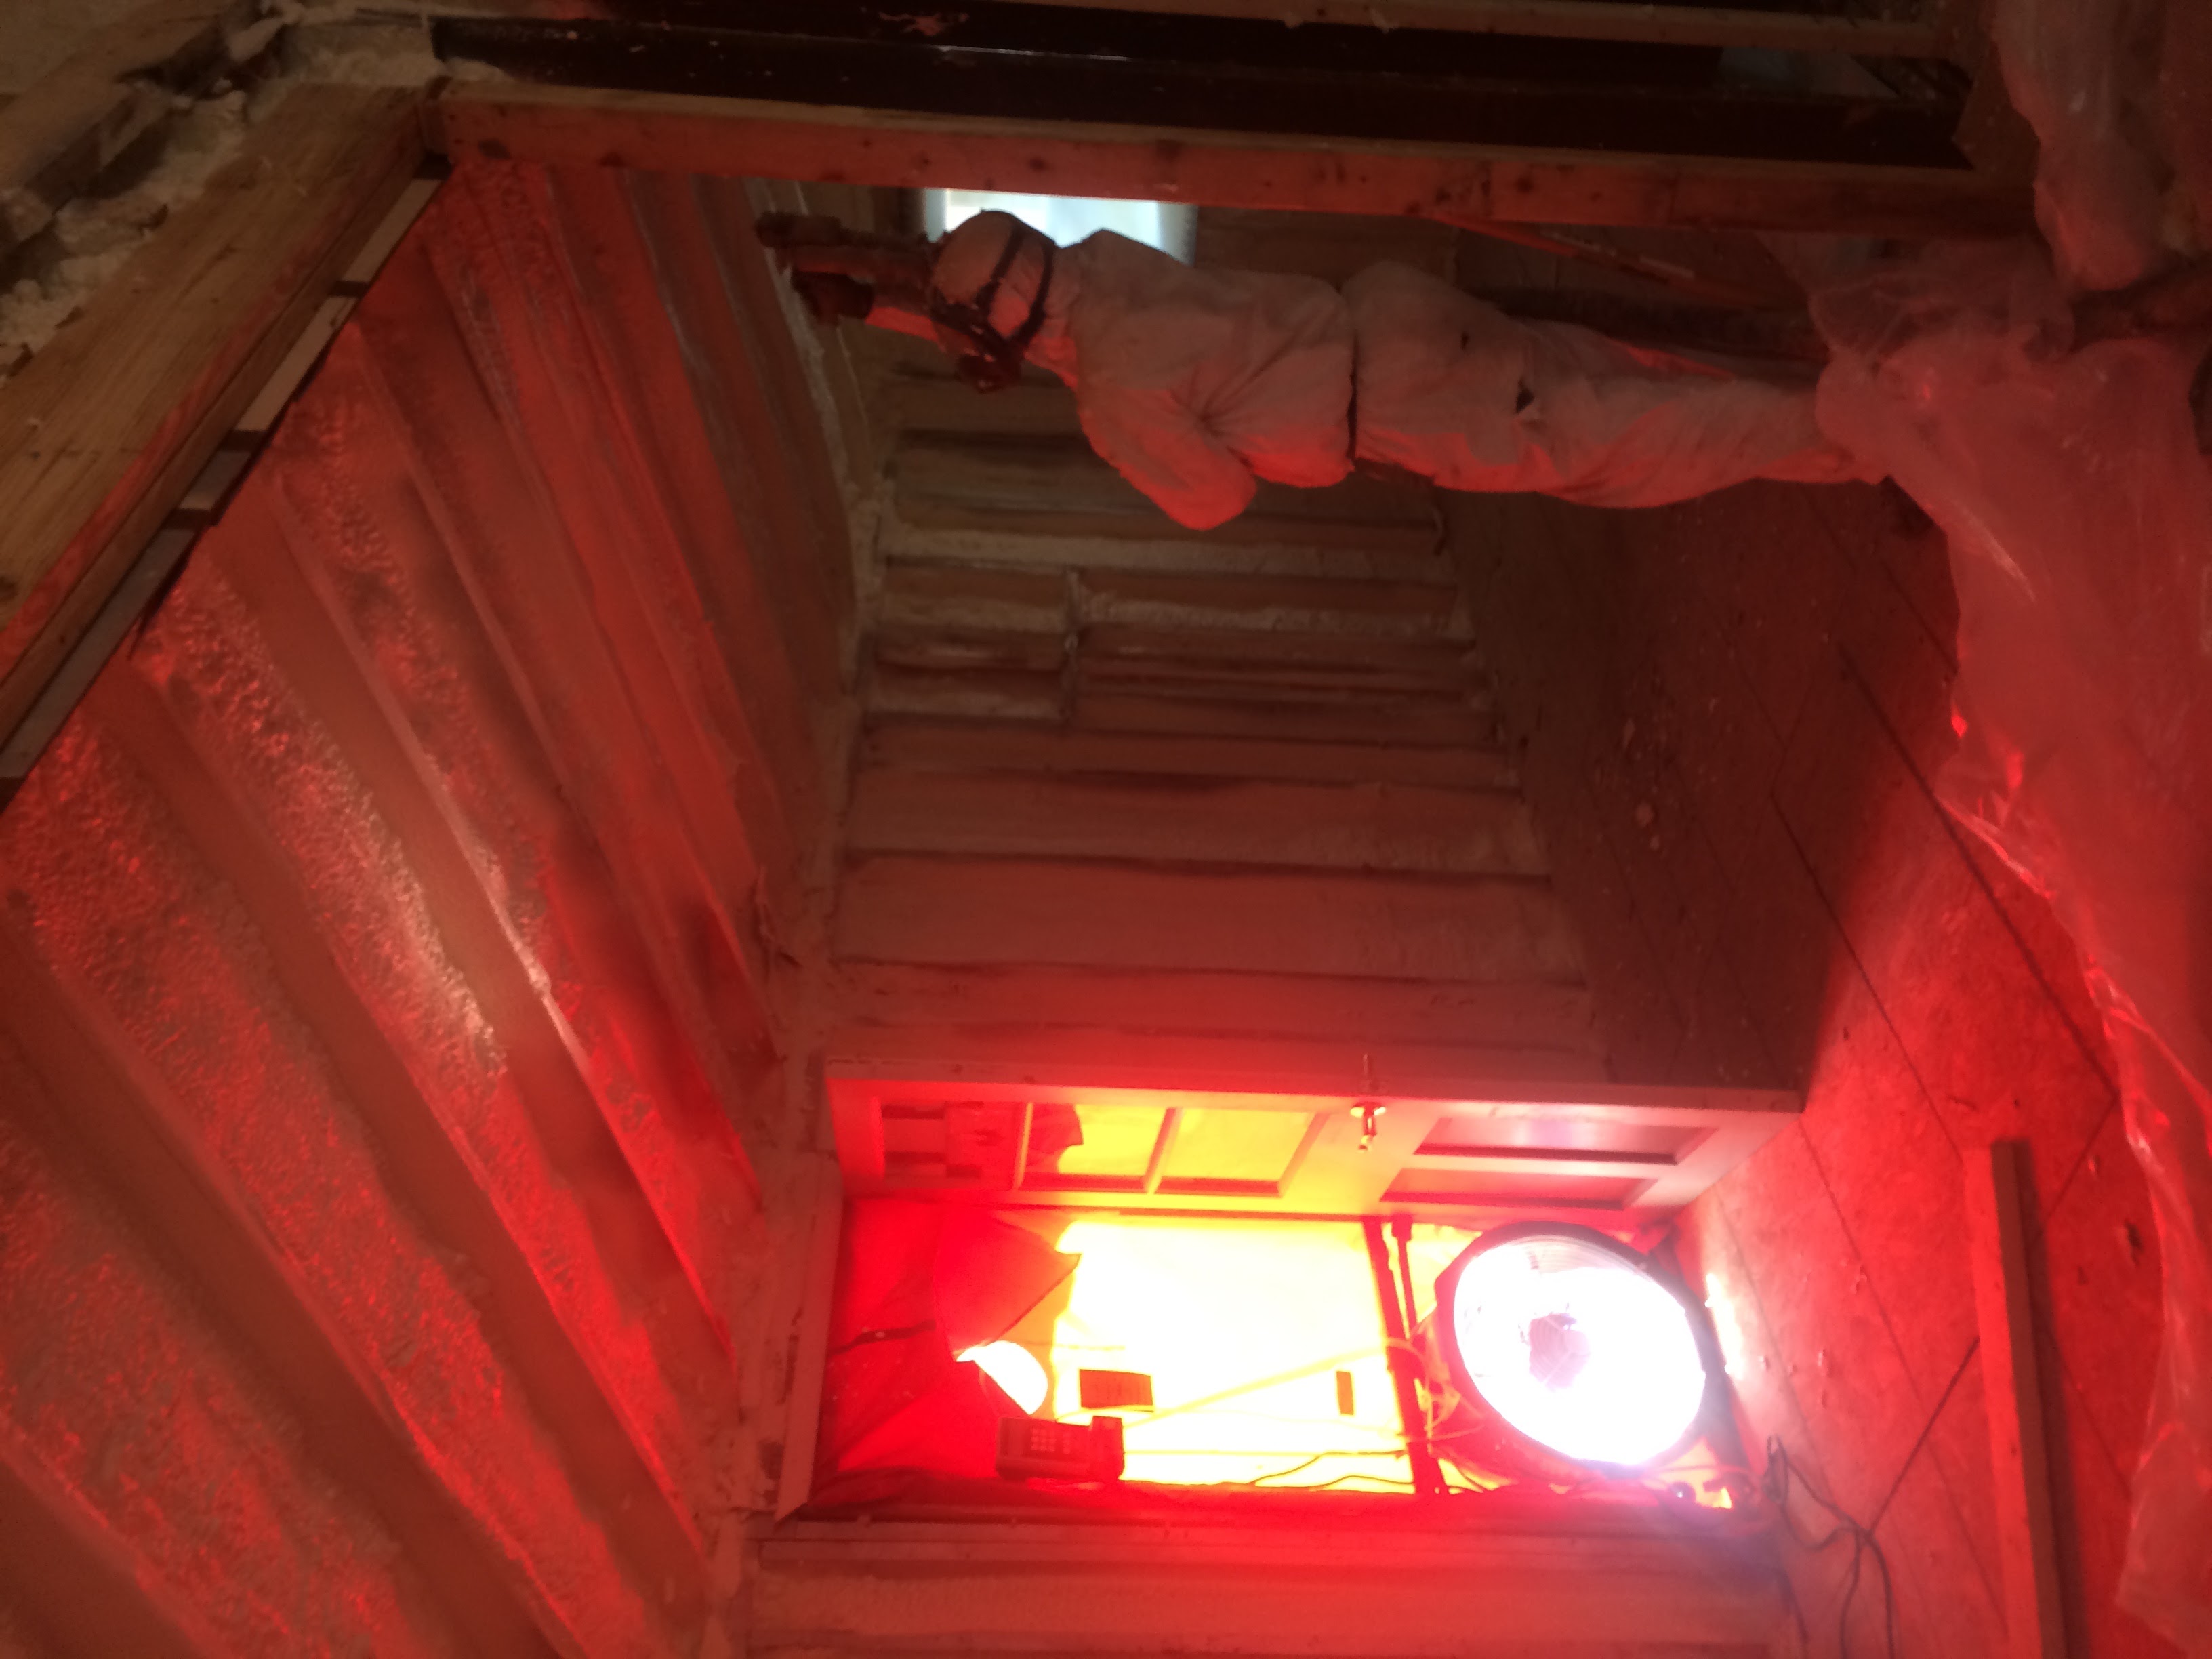
I drive bad foam installers a bit nuts with fluorescent spray paint, but these guys appreciate my marking places they missed. It’s really hard to see well in a suit and mask so we use bright paint so that when it’s covered, it’s sealed. Turnabout was fair play on this project. I sprayed most of the basement and Gary got to “Natepick” me and gleefully mark my misses. Spraying foam well is a magical combination of art and science.
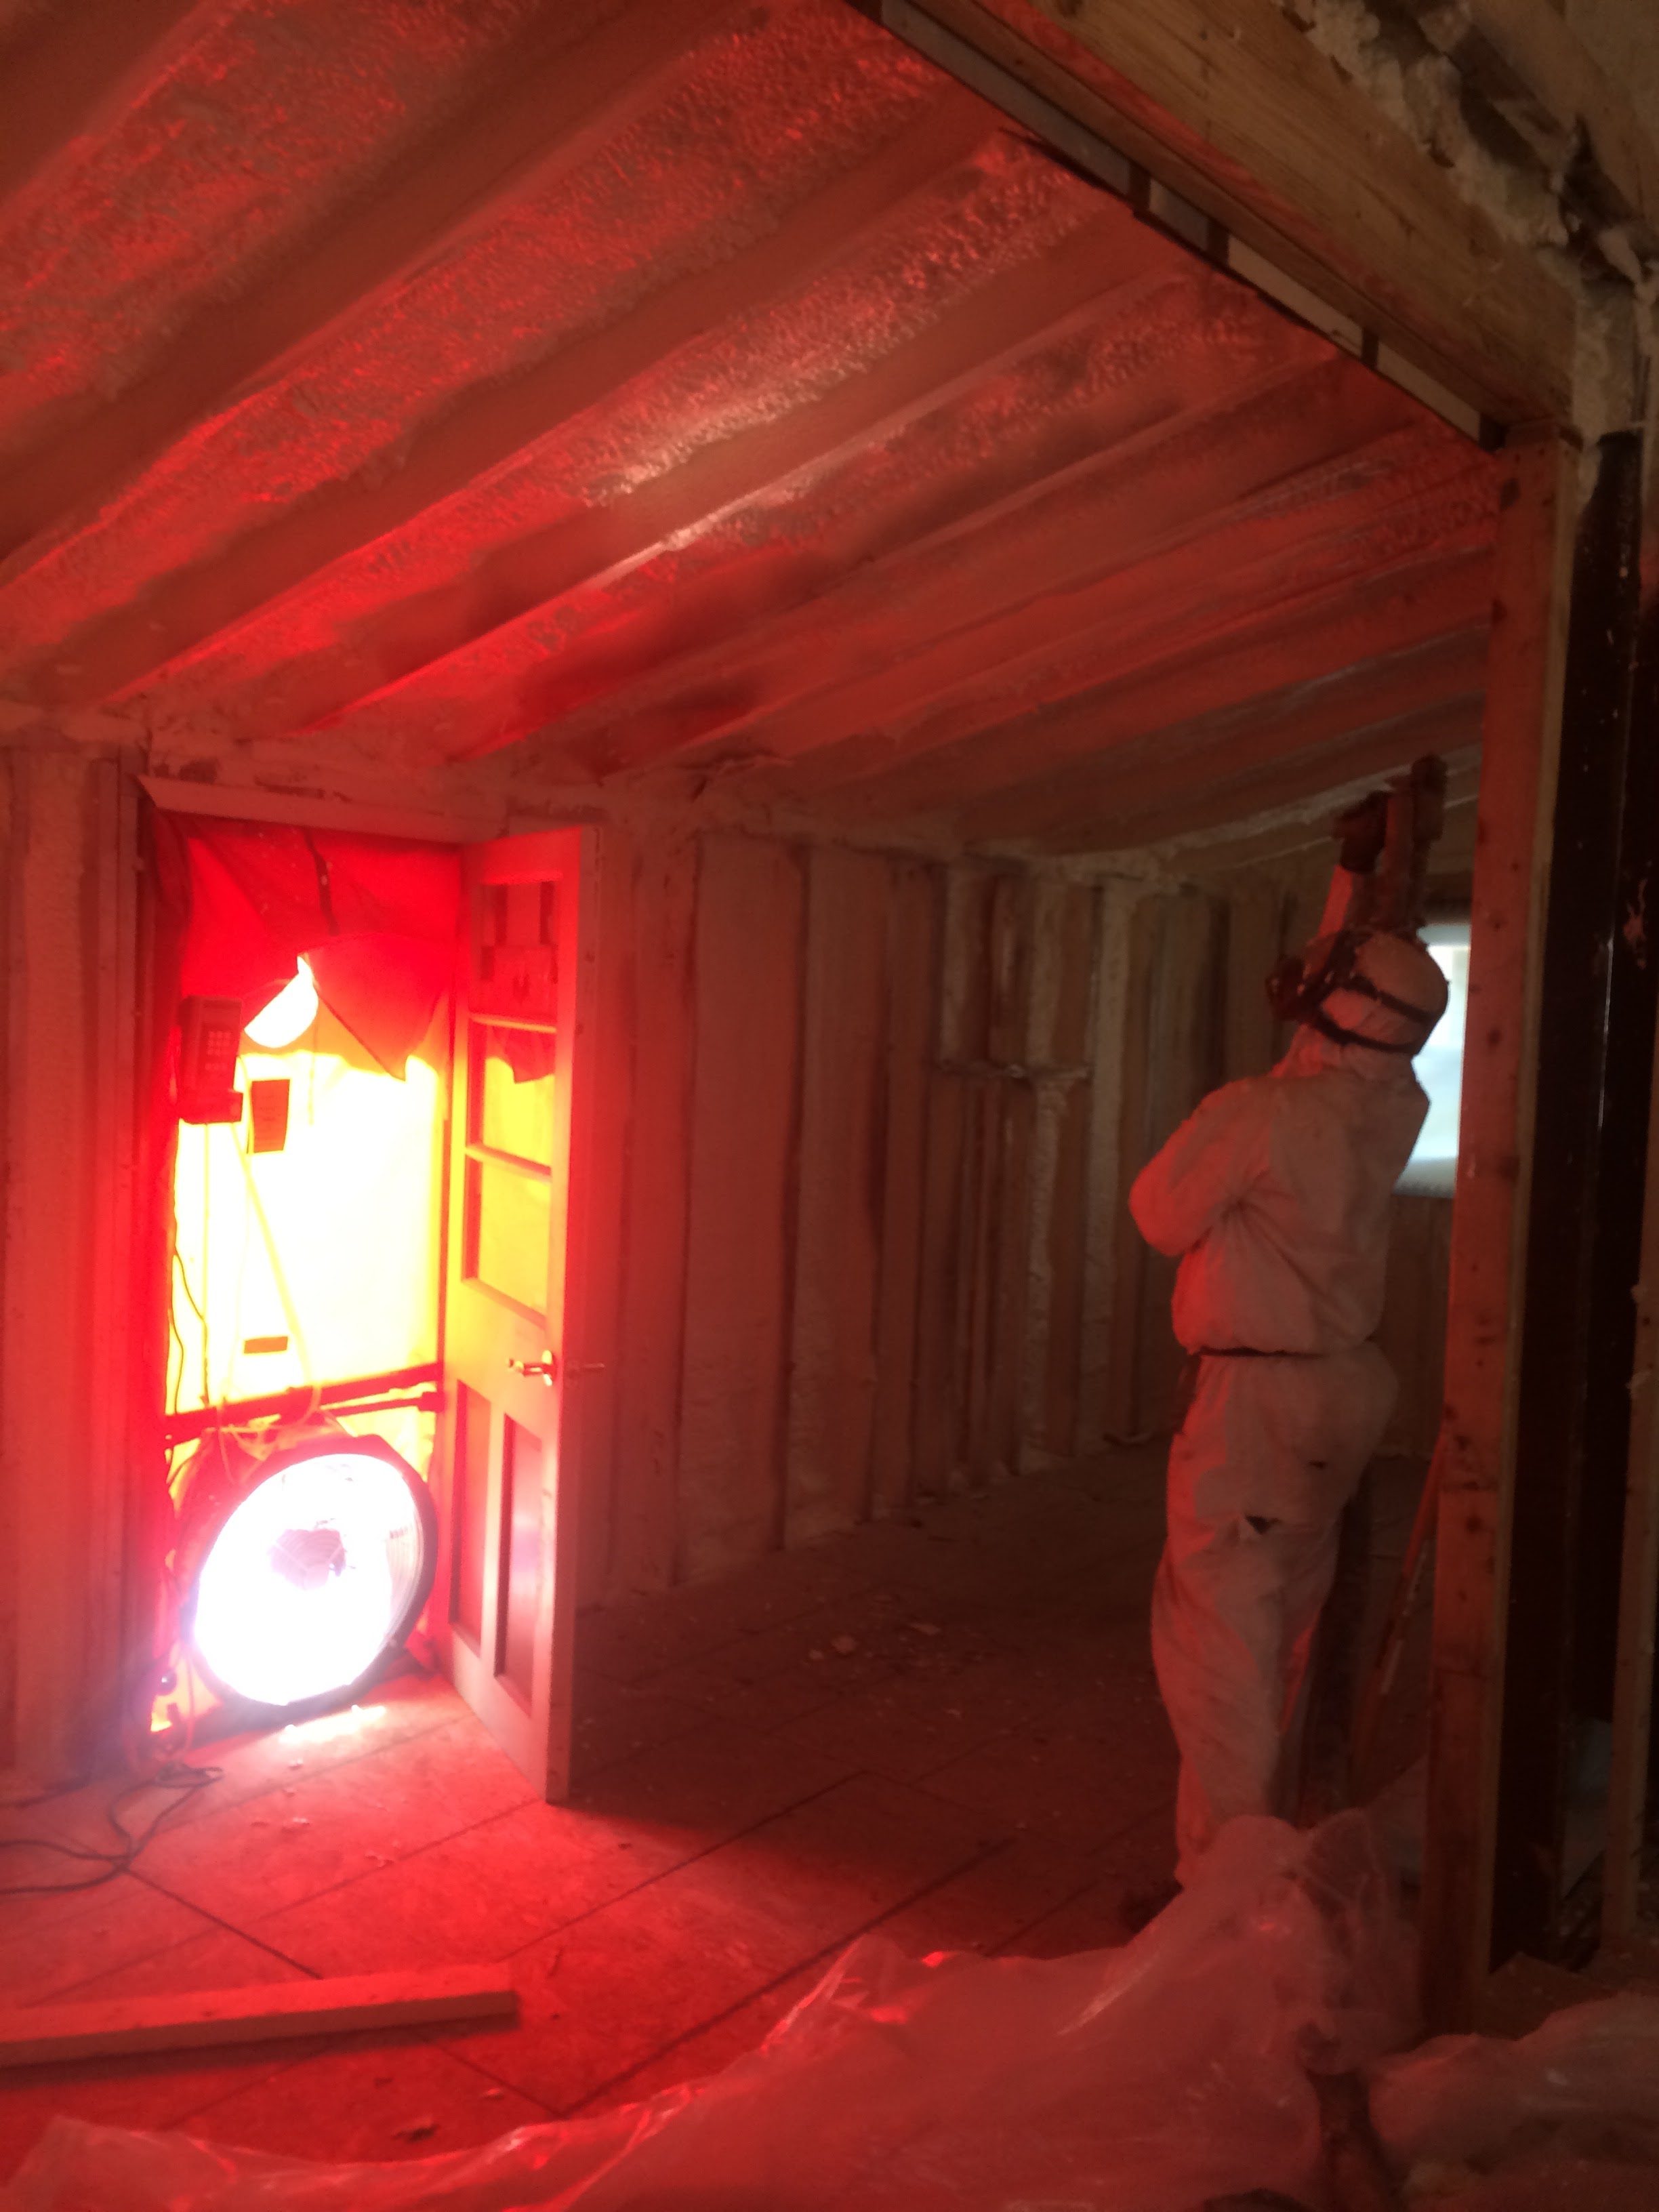
I like to run my blower door during foam applications, blowing air into the house (pressurization) and blowing the fumes out of the house. I ran my Air Advice Indoor Air Quality monitor during a spray foam job and it didn’t indicate a jump in chemical pollutants, so it appears to be effective. In this case it was a bit close and my red door shroud got stippled with foam. This shed roof would have been difficult to get adequate insulation into with any method other than spray foam, and putting rigid on the exterior would have blown our timeframe.
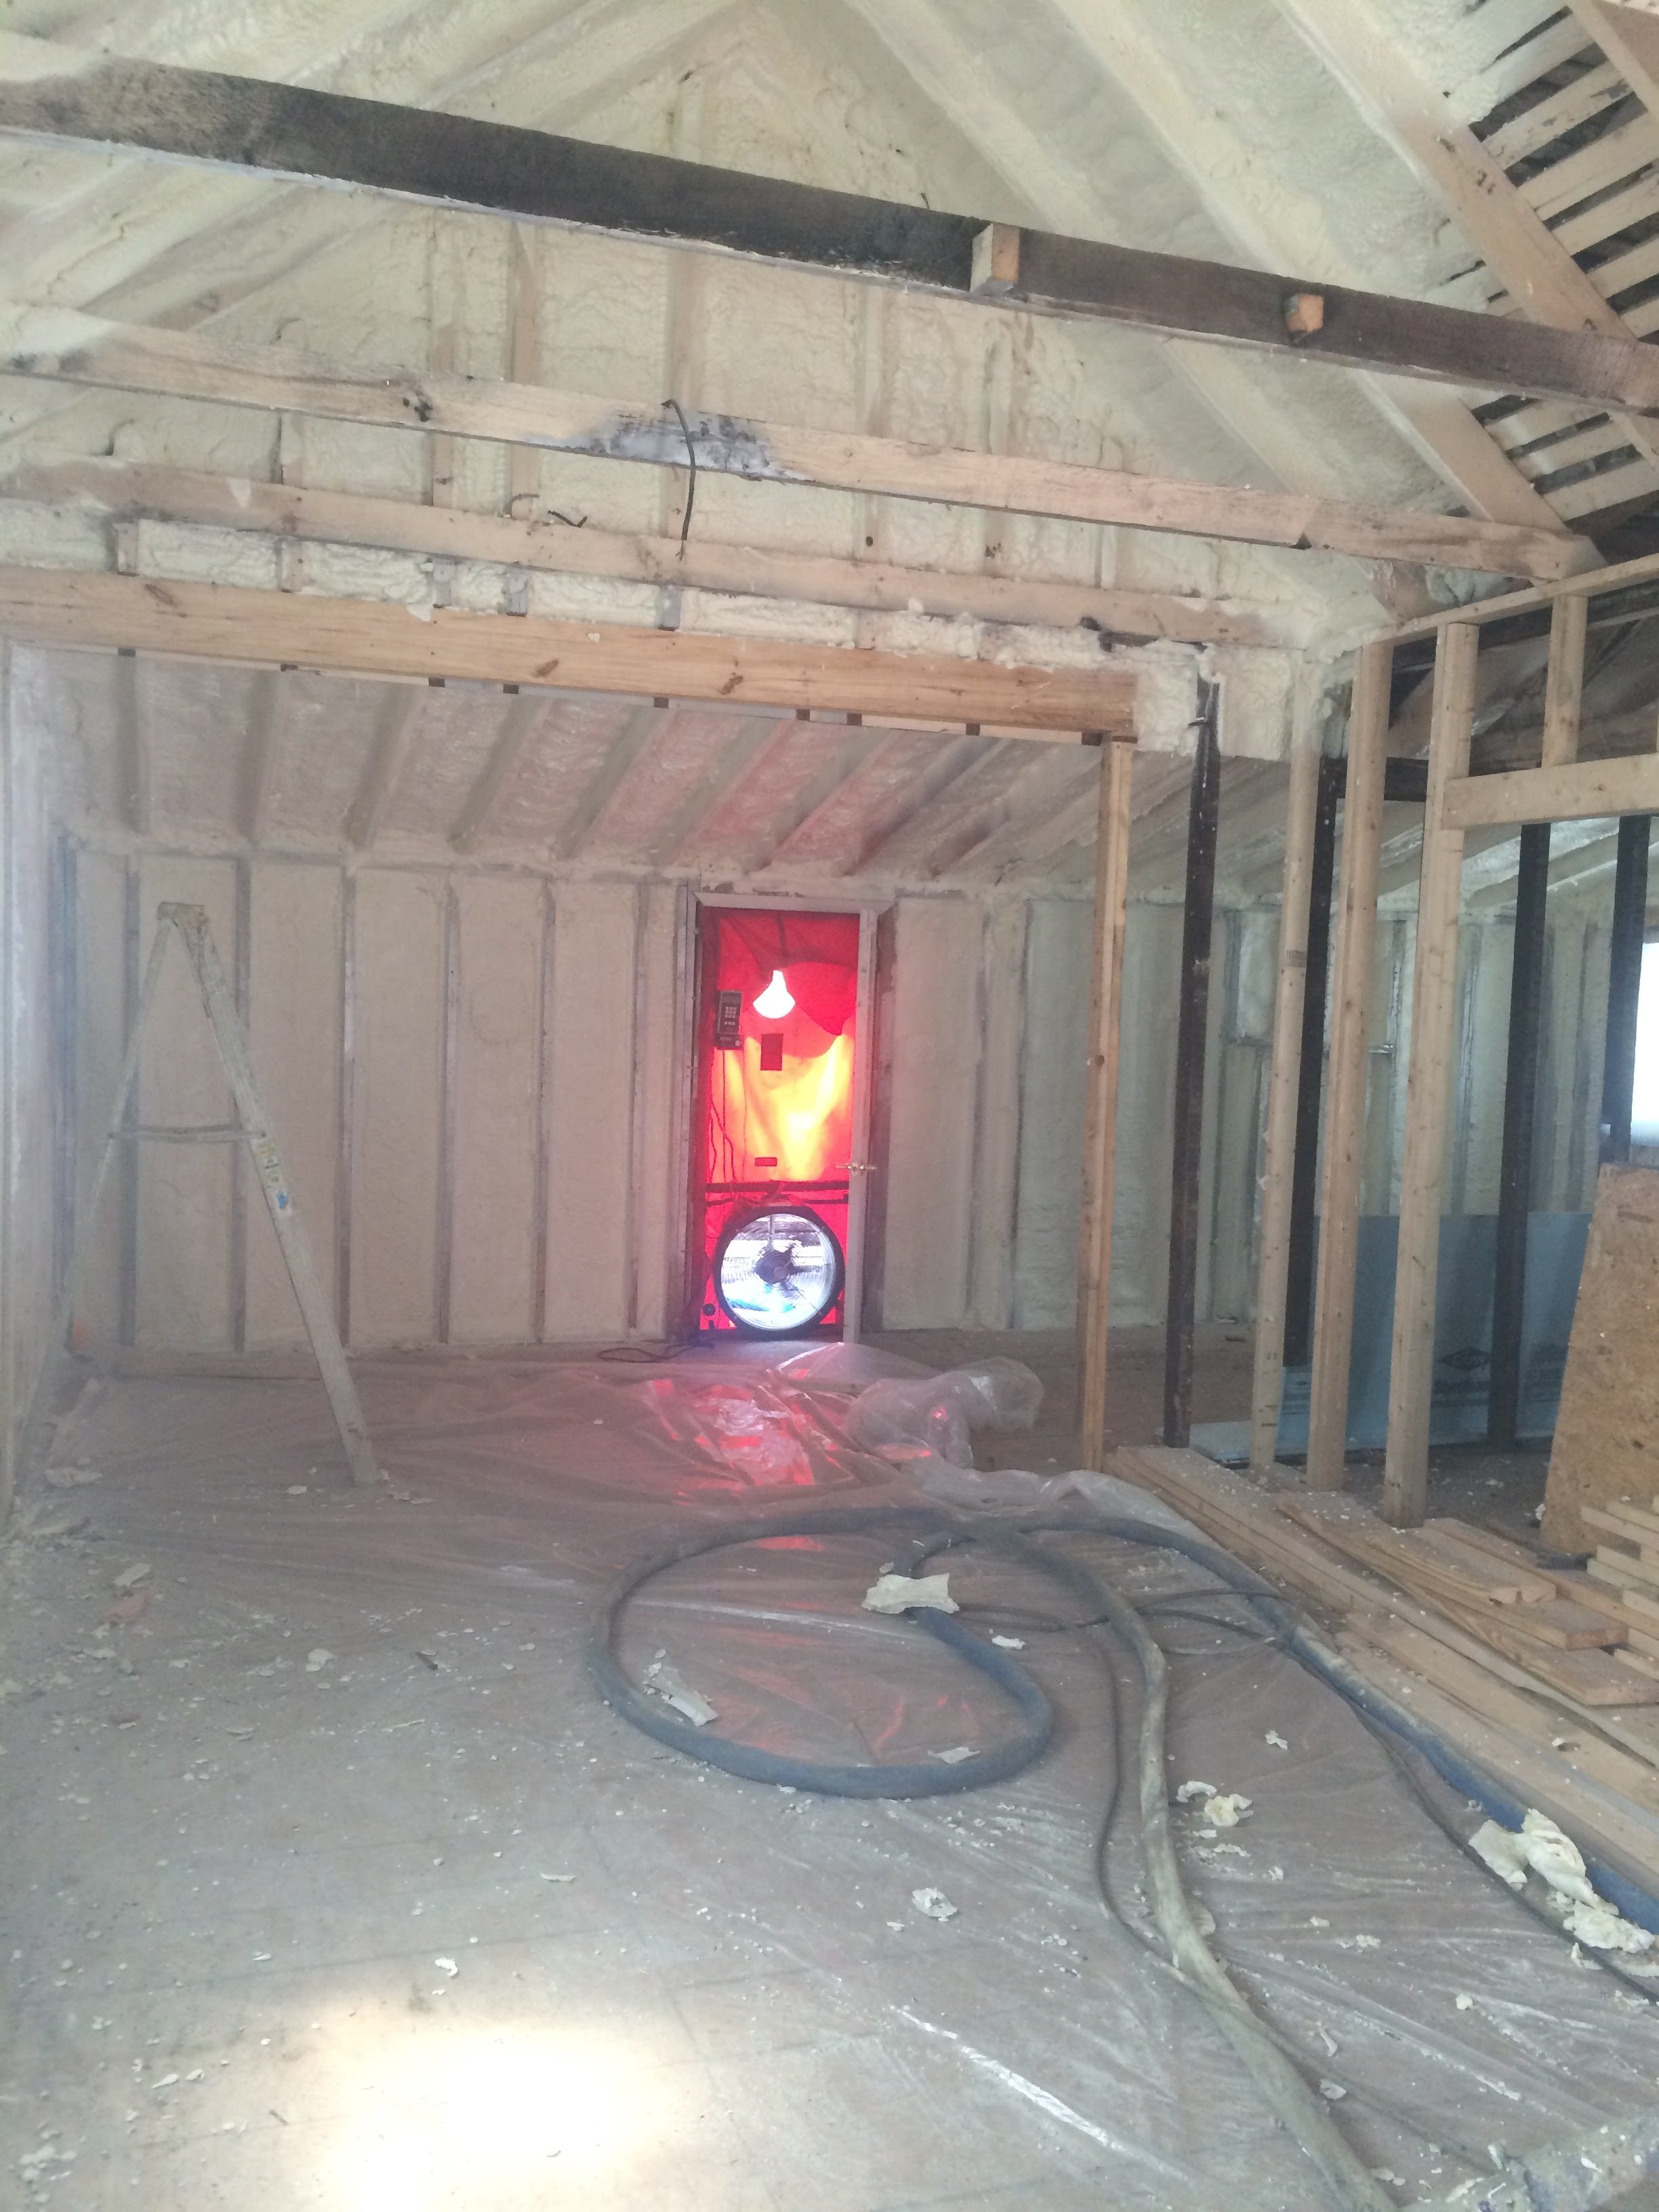
This is a cool little house. Neat angles. The spray foam is complete. Only quality control work is left.
After about 20 hours of air sealing post spray foam, the blower door number was down from 12,000 to 440 cfm50. That’s a 96% reduction. Although this seems great, I felt some disappointment as my wishful Passive House target of 110 was just too difficult to achieve given our budget and time allotted. Still, at this point it may have been the tightest home in my county by raw leakage.
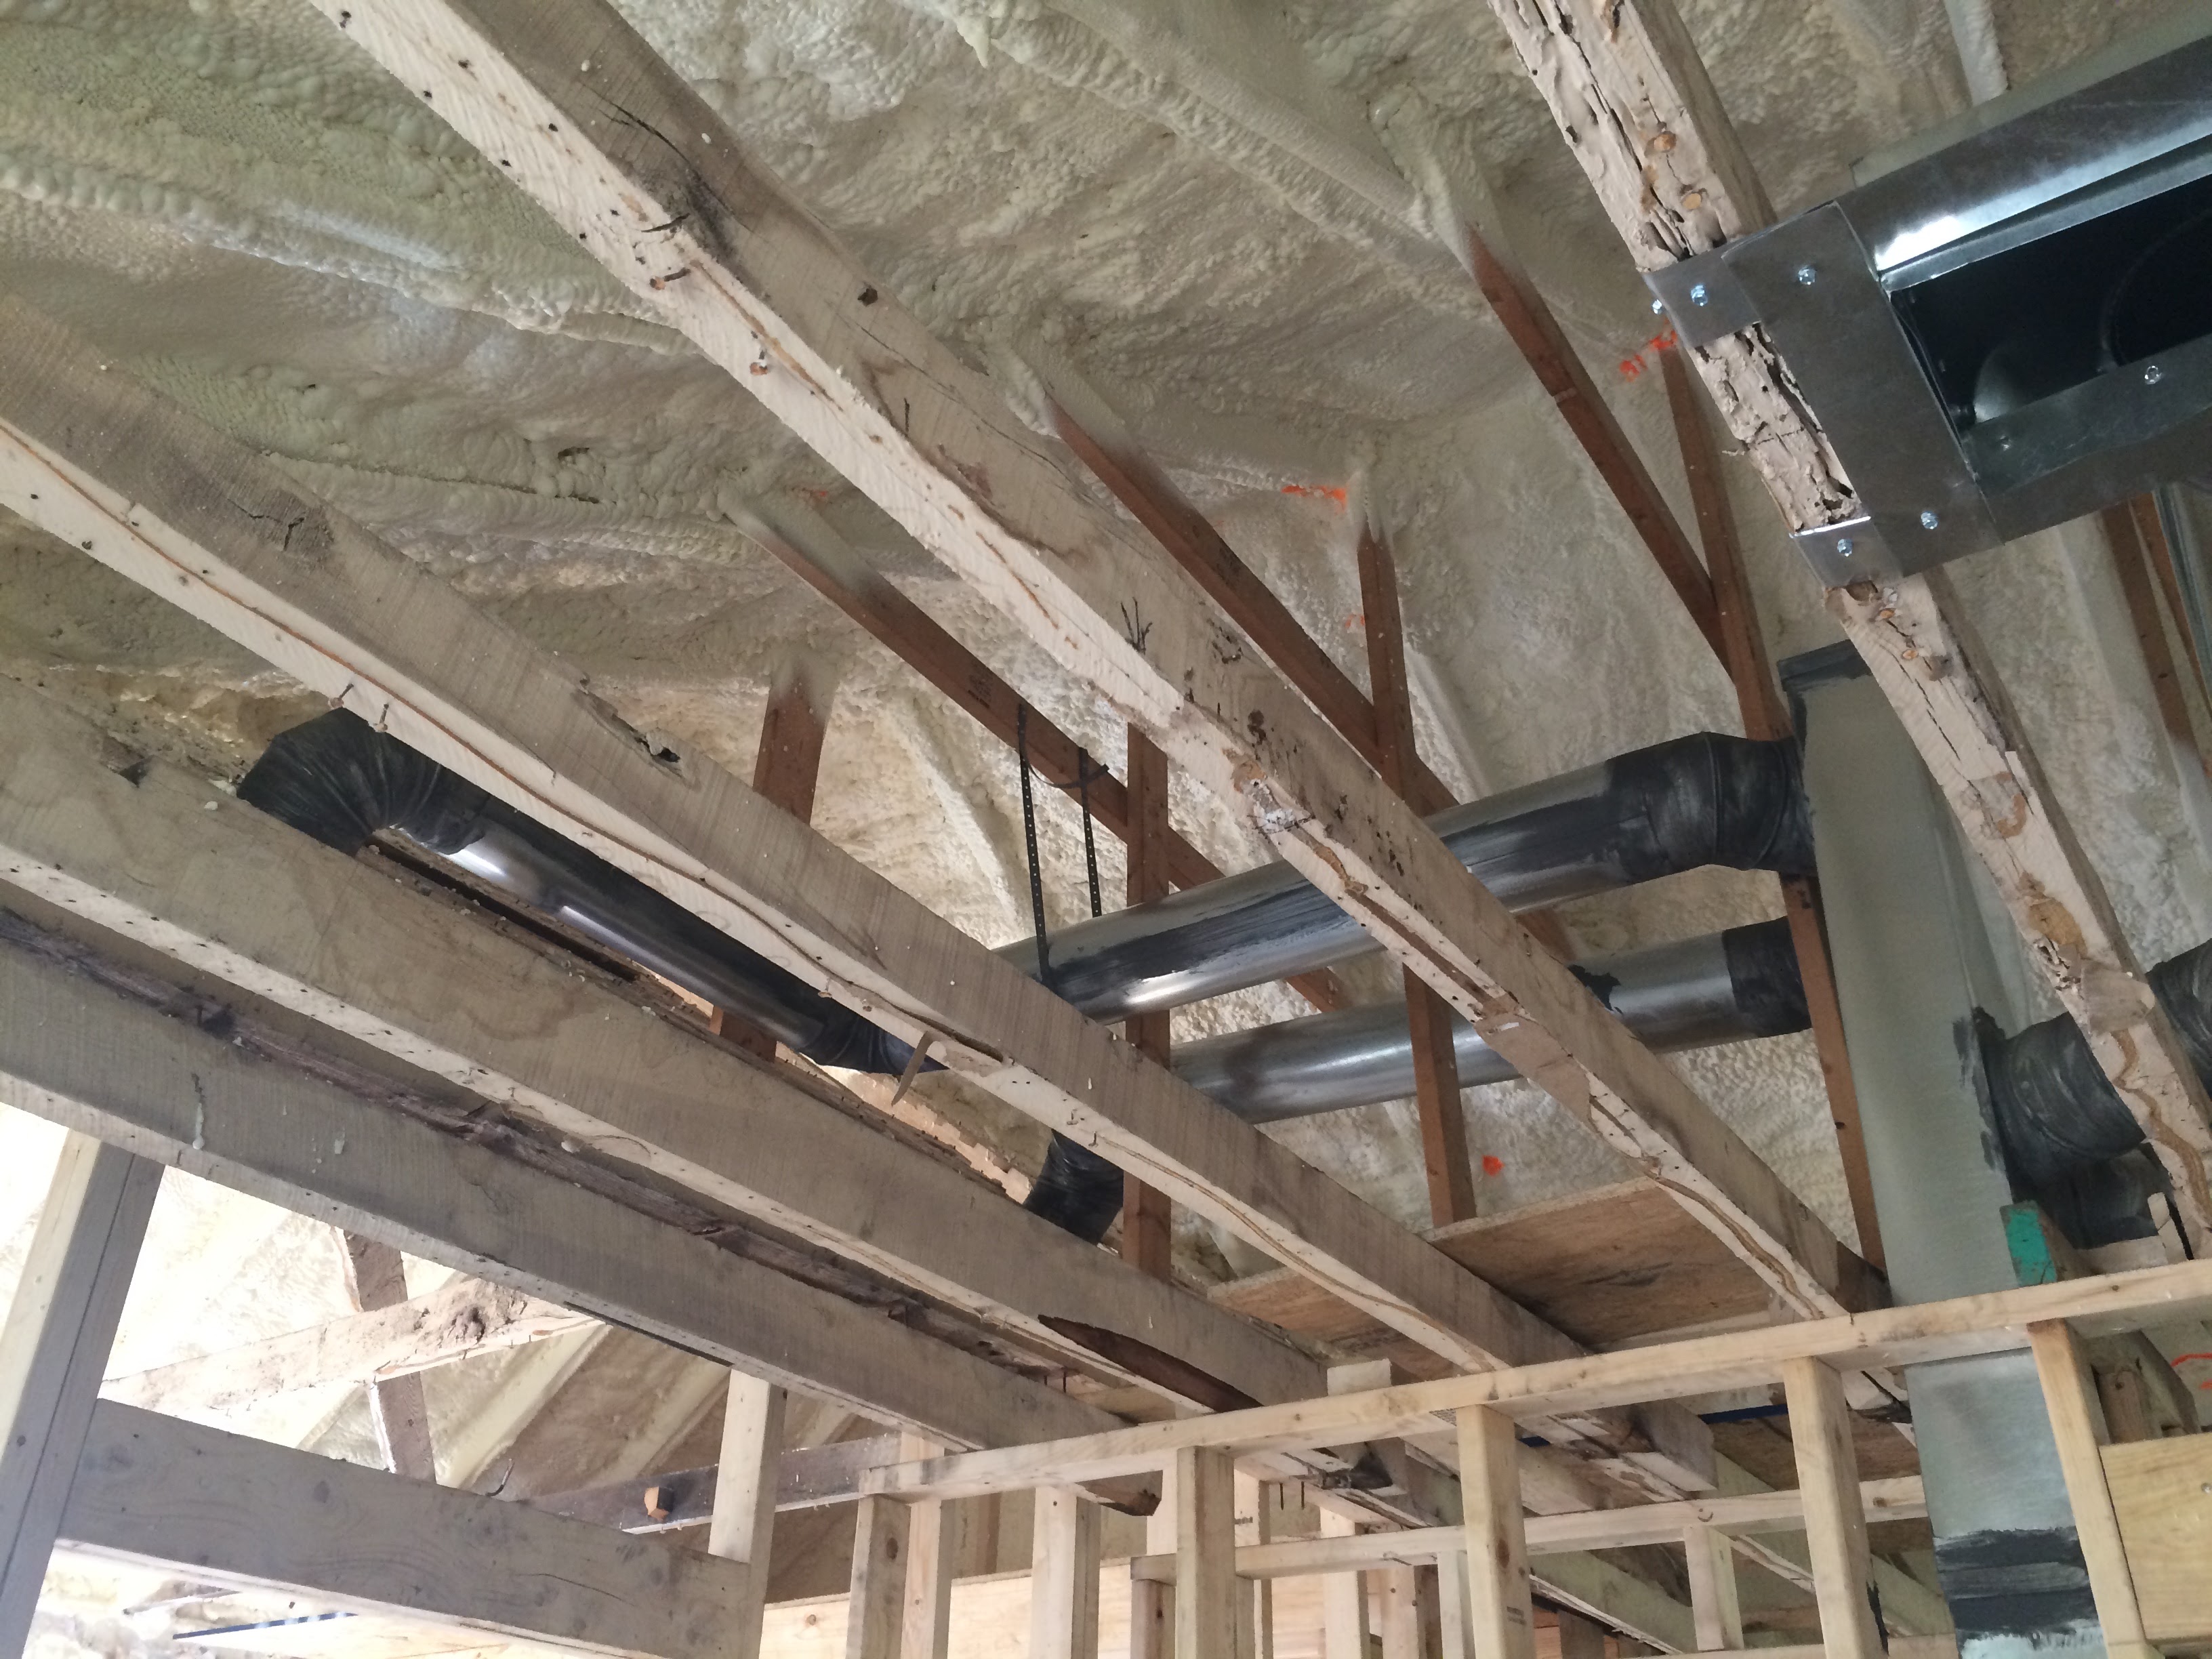
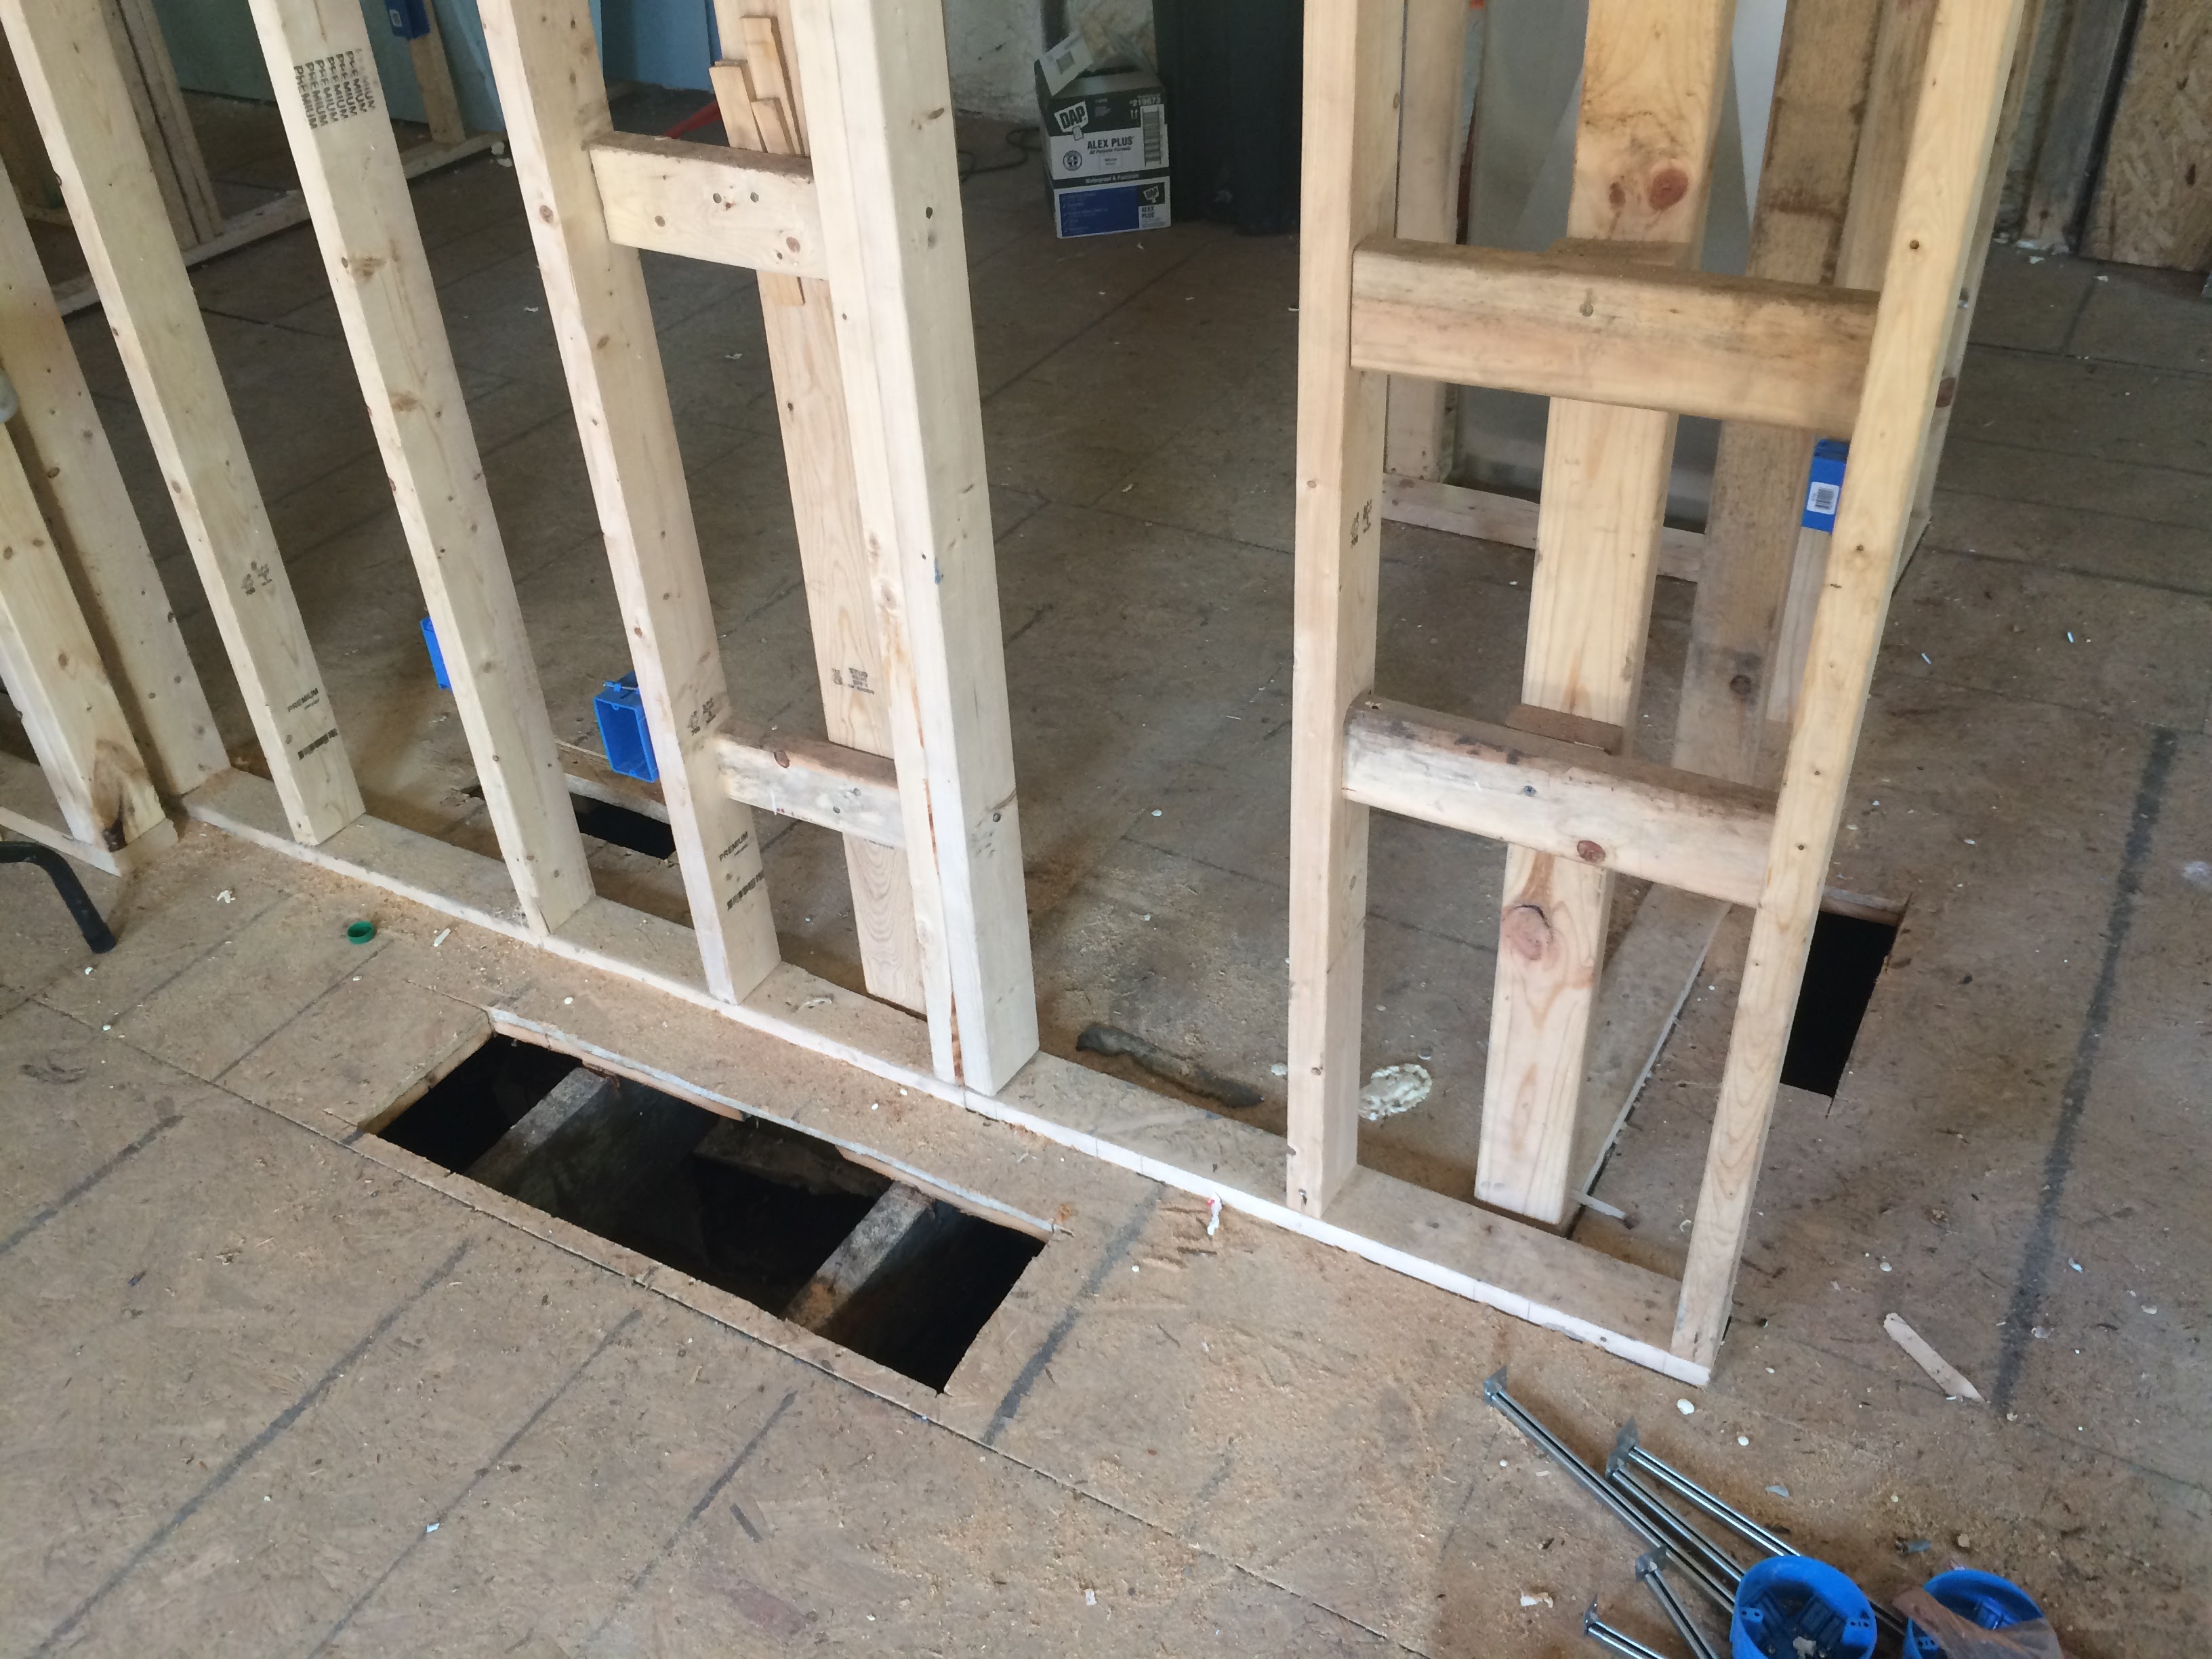
Since the roof deck was getting foamed we opted to run the main supply trunk through the small attic over the bedrooms. Normally ductwork in attics is like screen doors for submarines – a bad idea. Since we will have such tight control over humidity in this home, and the attic is inside the thermal enclosure, we’re likely to avoid condensation on the ducts. The vertical trunk comes out of the tiny crawlspace under the bedrooms, the two lines going left are supplies for the living room. Upper right is a bedroom supply vent. Very neat work from Burton Sheet Metal.

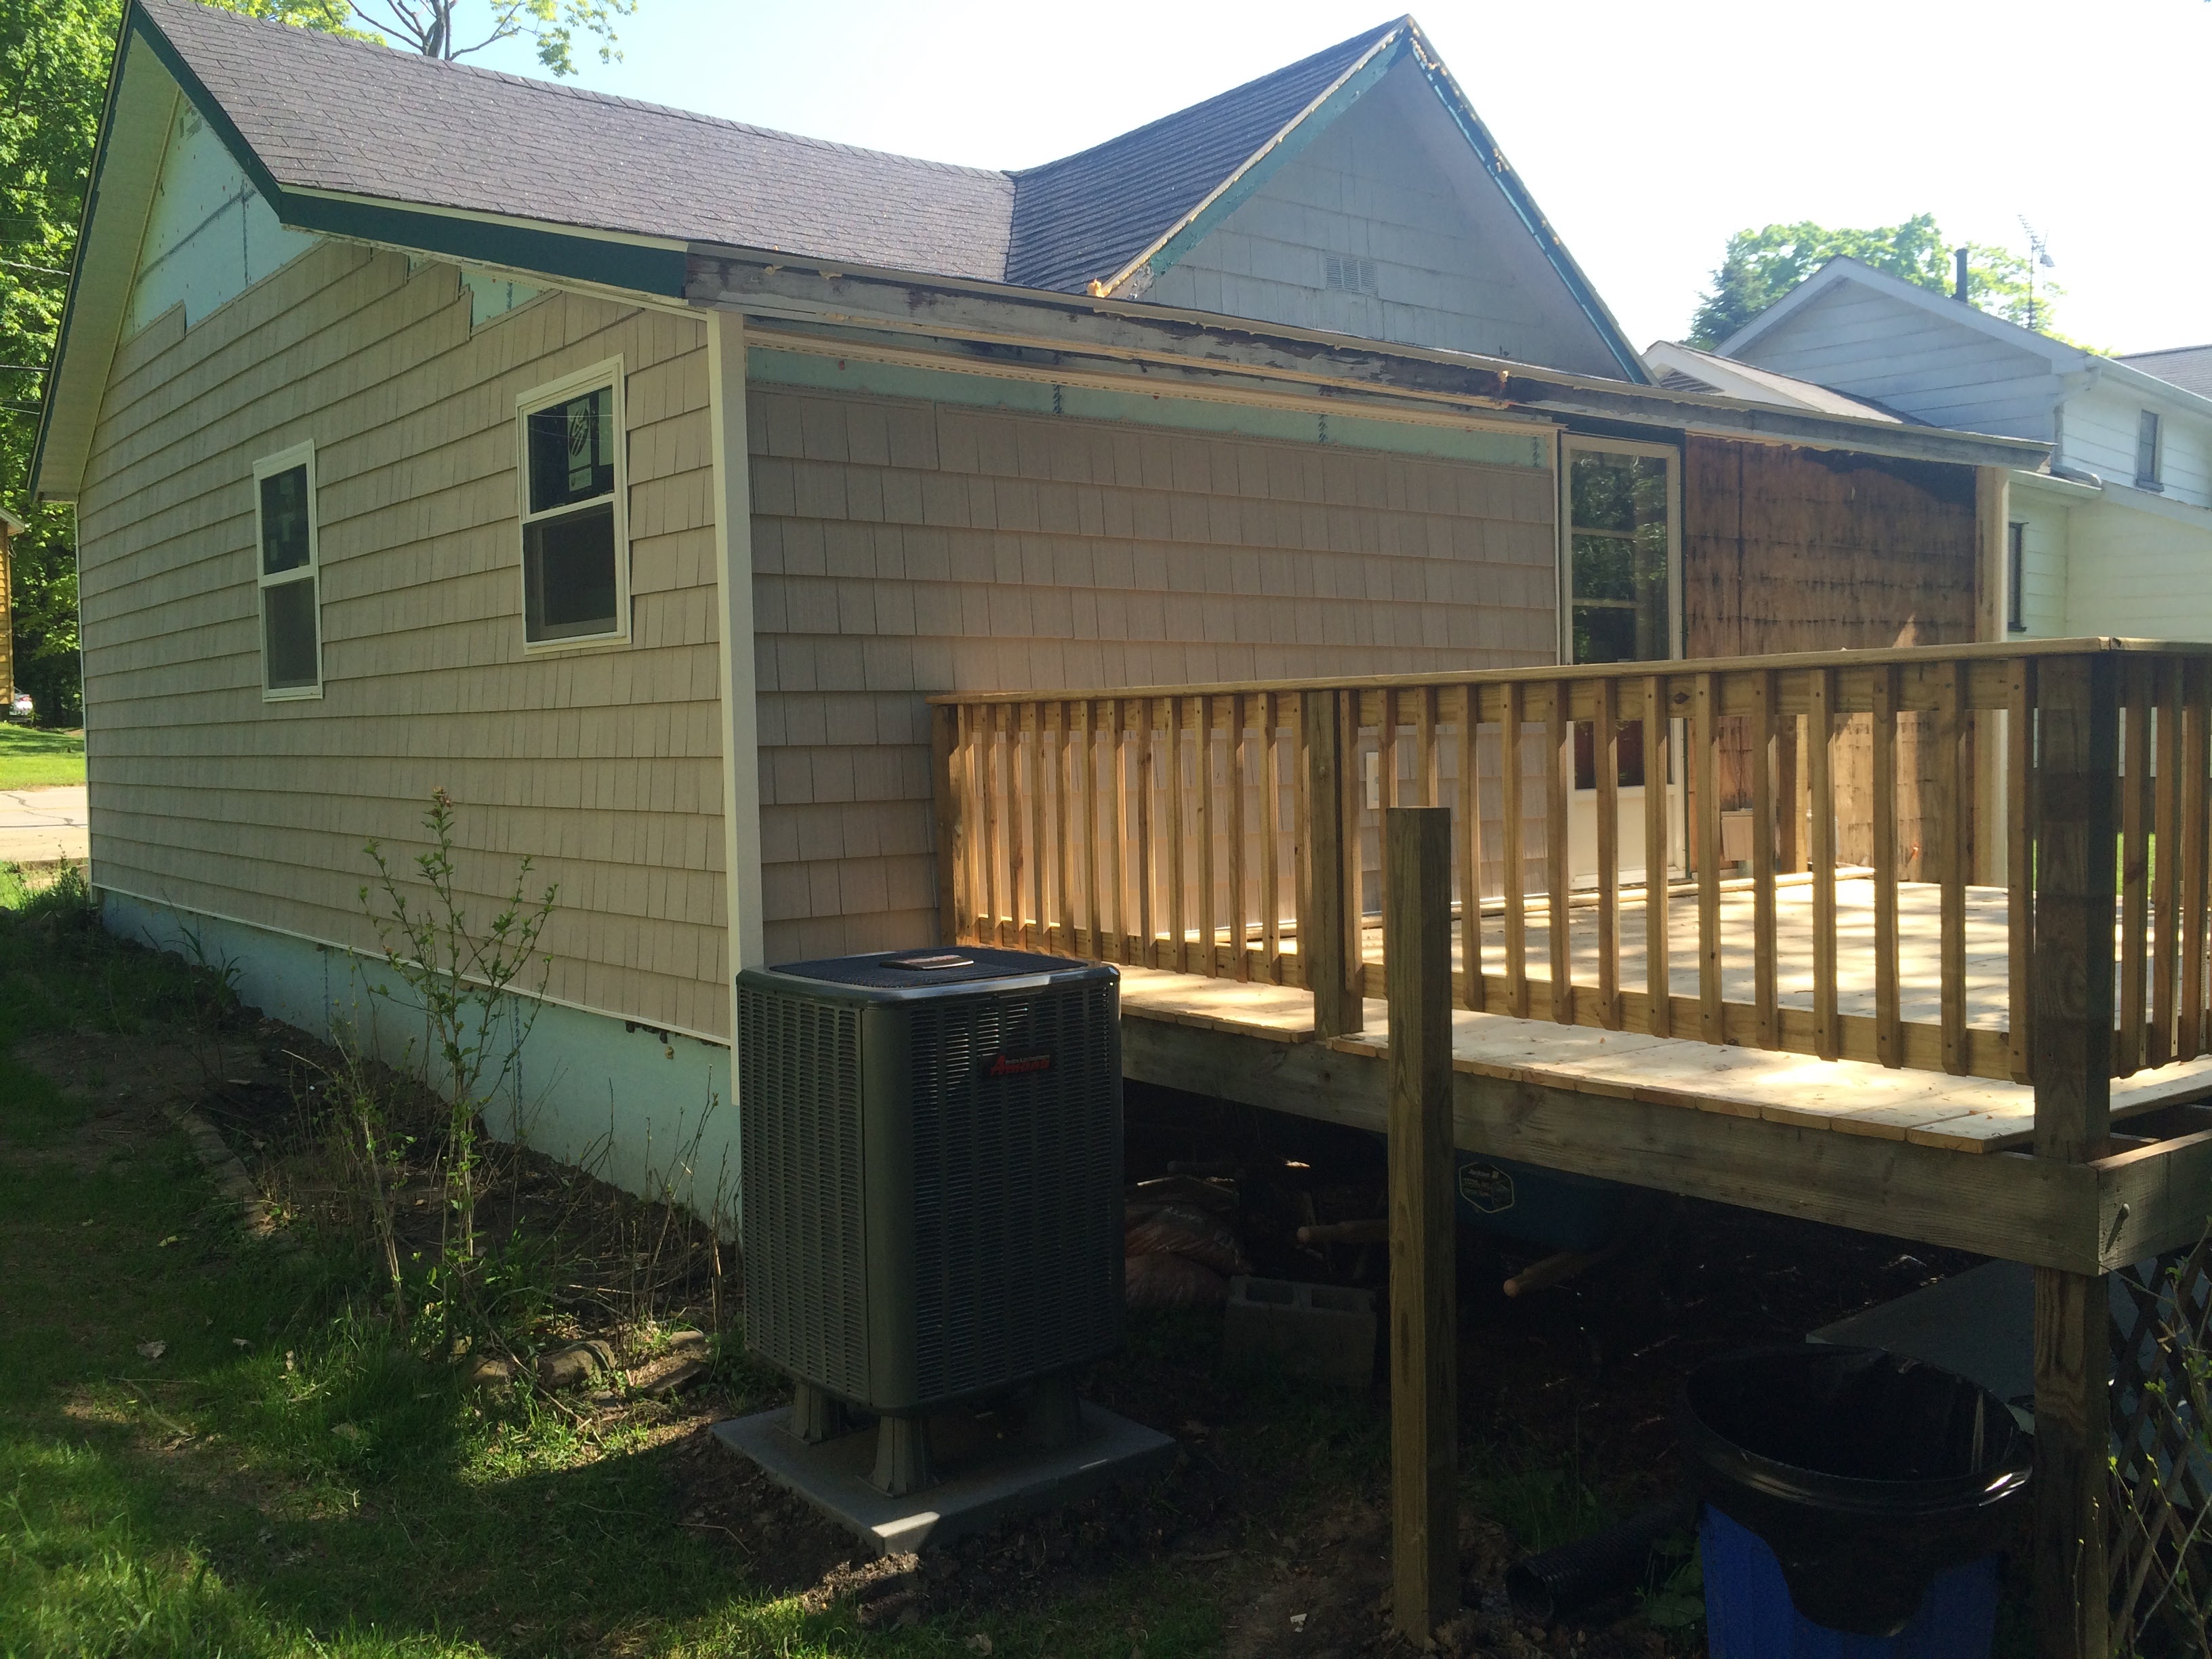
It’s a cute little house. Here the exterior foam board and new siding is going up.
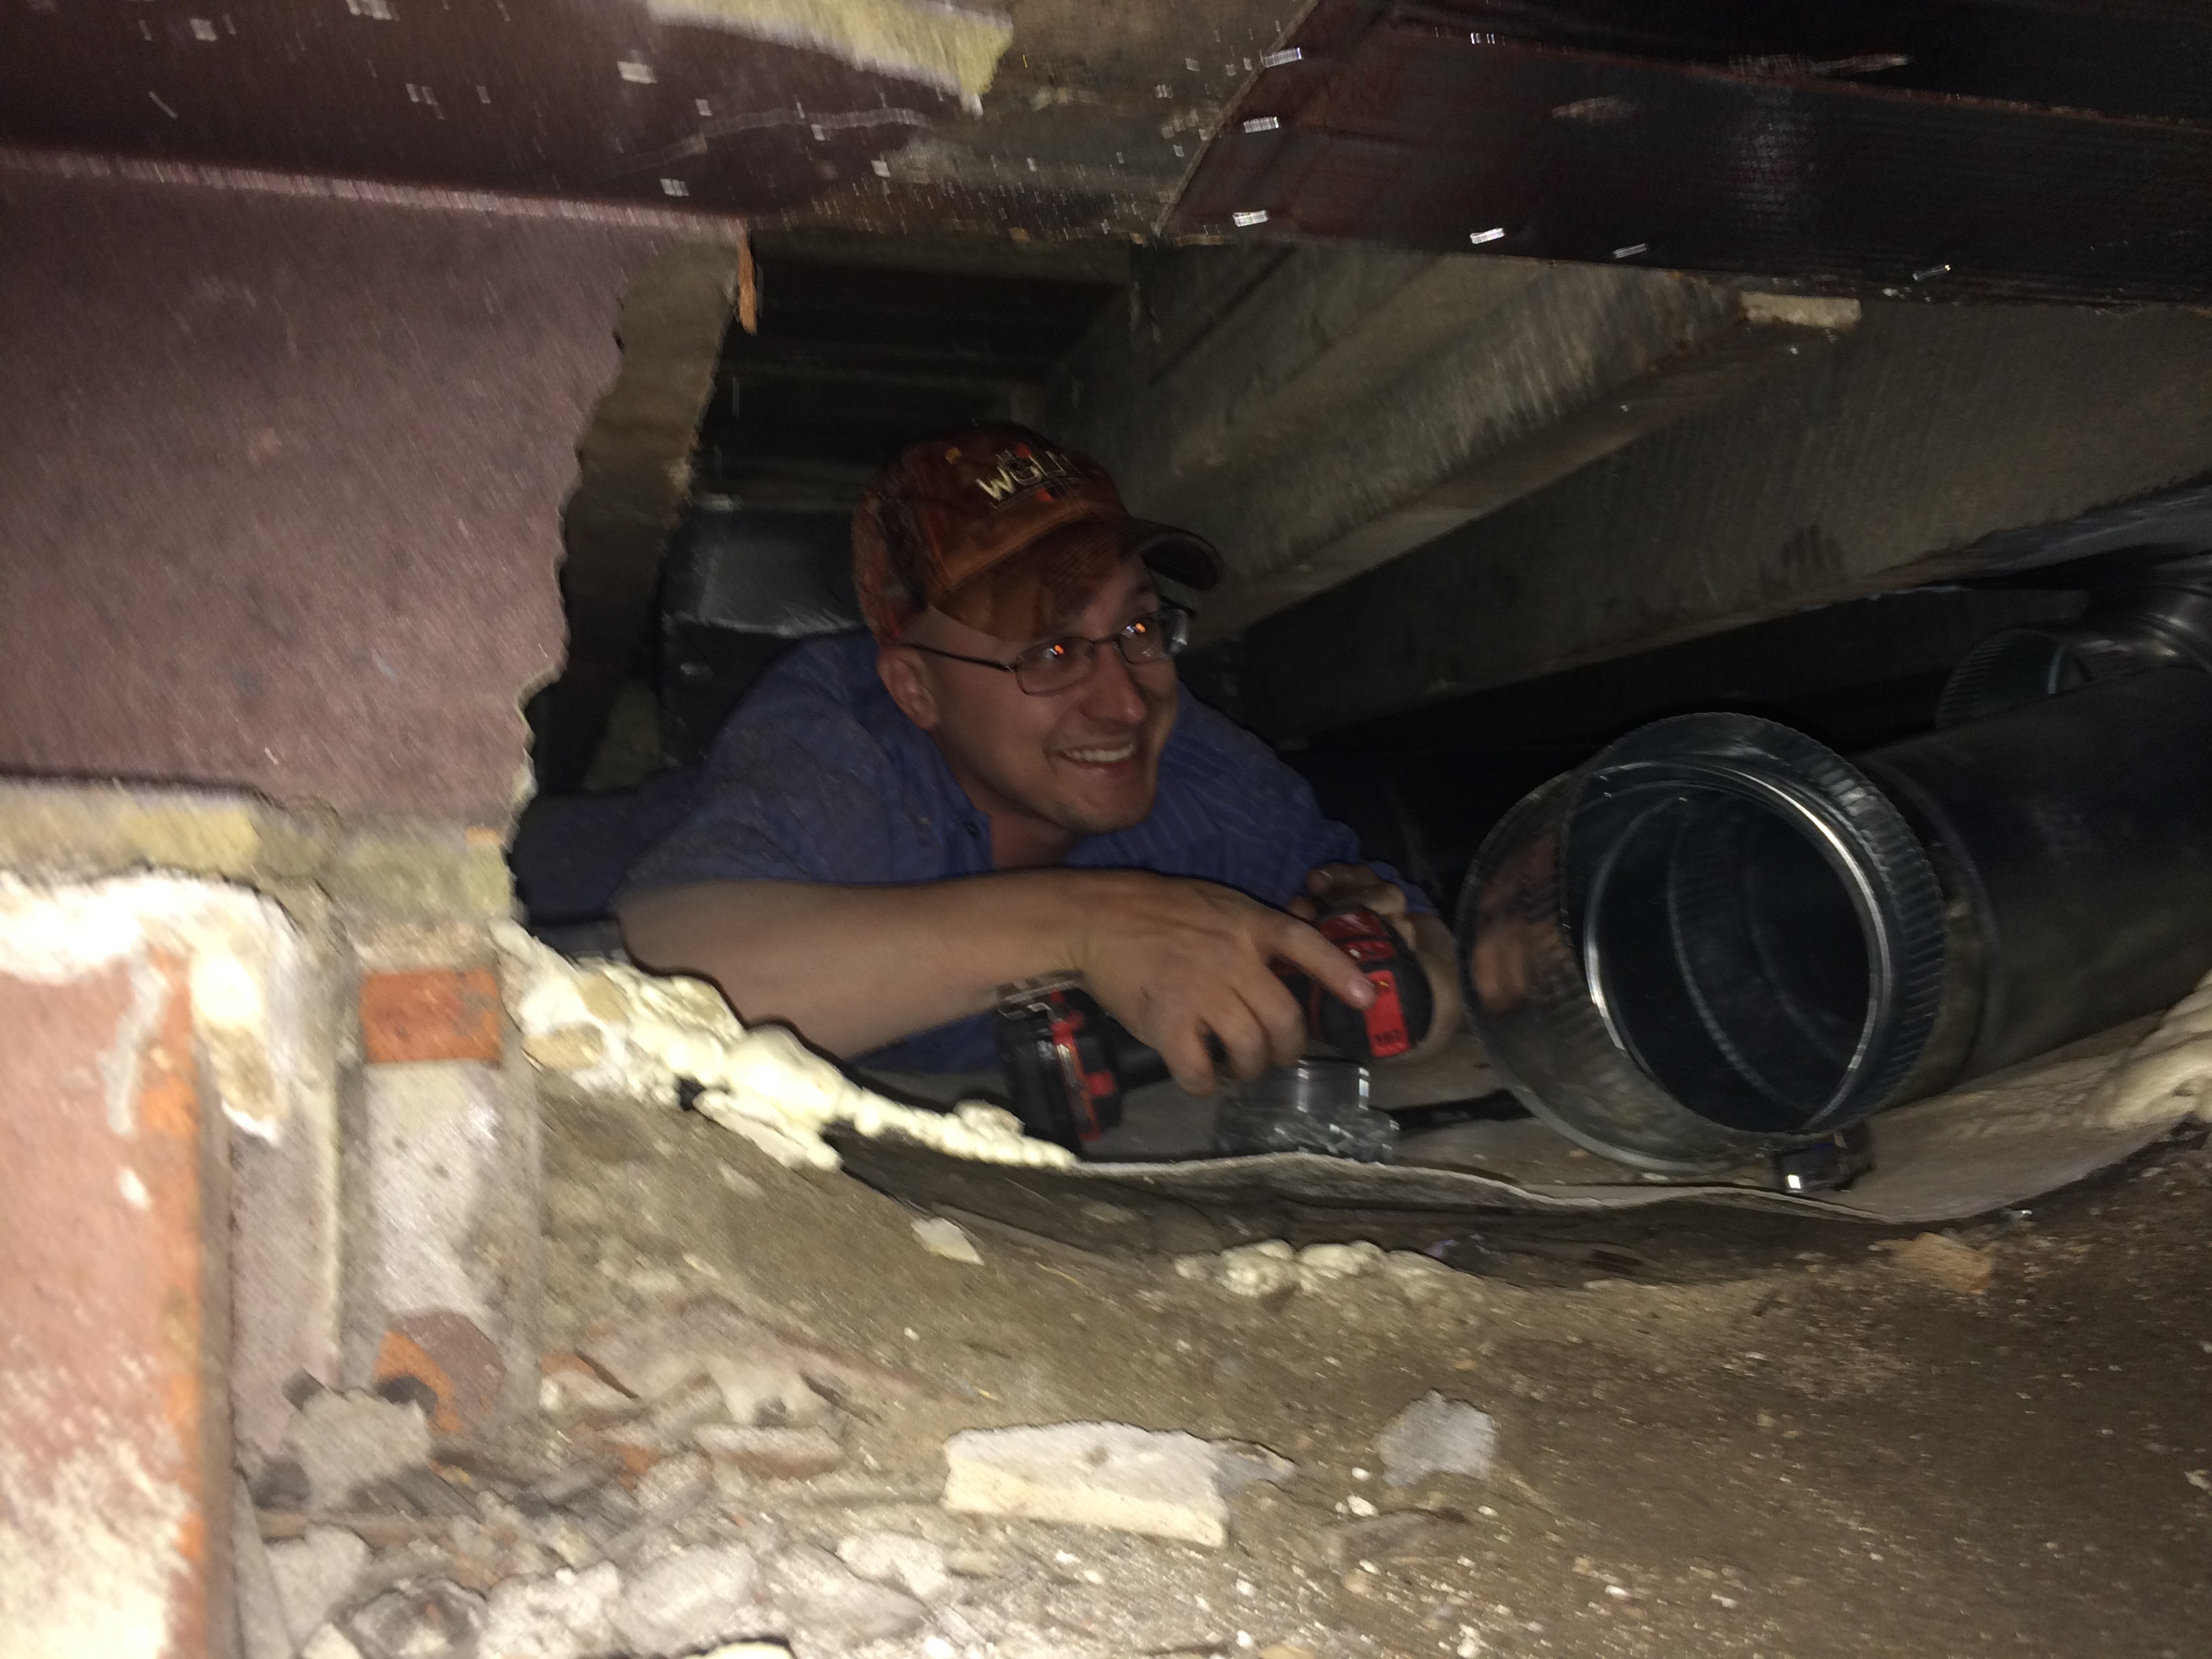
Bryan Favazzo of Burton Sheet Metal in the very small crawlspace under the bedrooms installing ductwork. He’s always smiling! These guys did great work!

Hanging a tricky piece of drywall in the kitchen. Six hard hats! (Seven including mine.) Amazing volunteers!

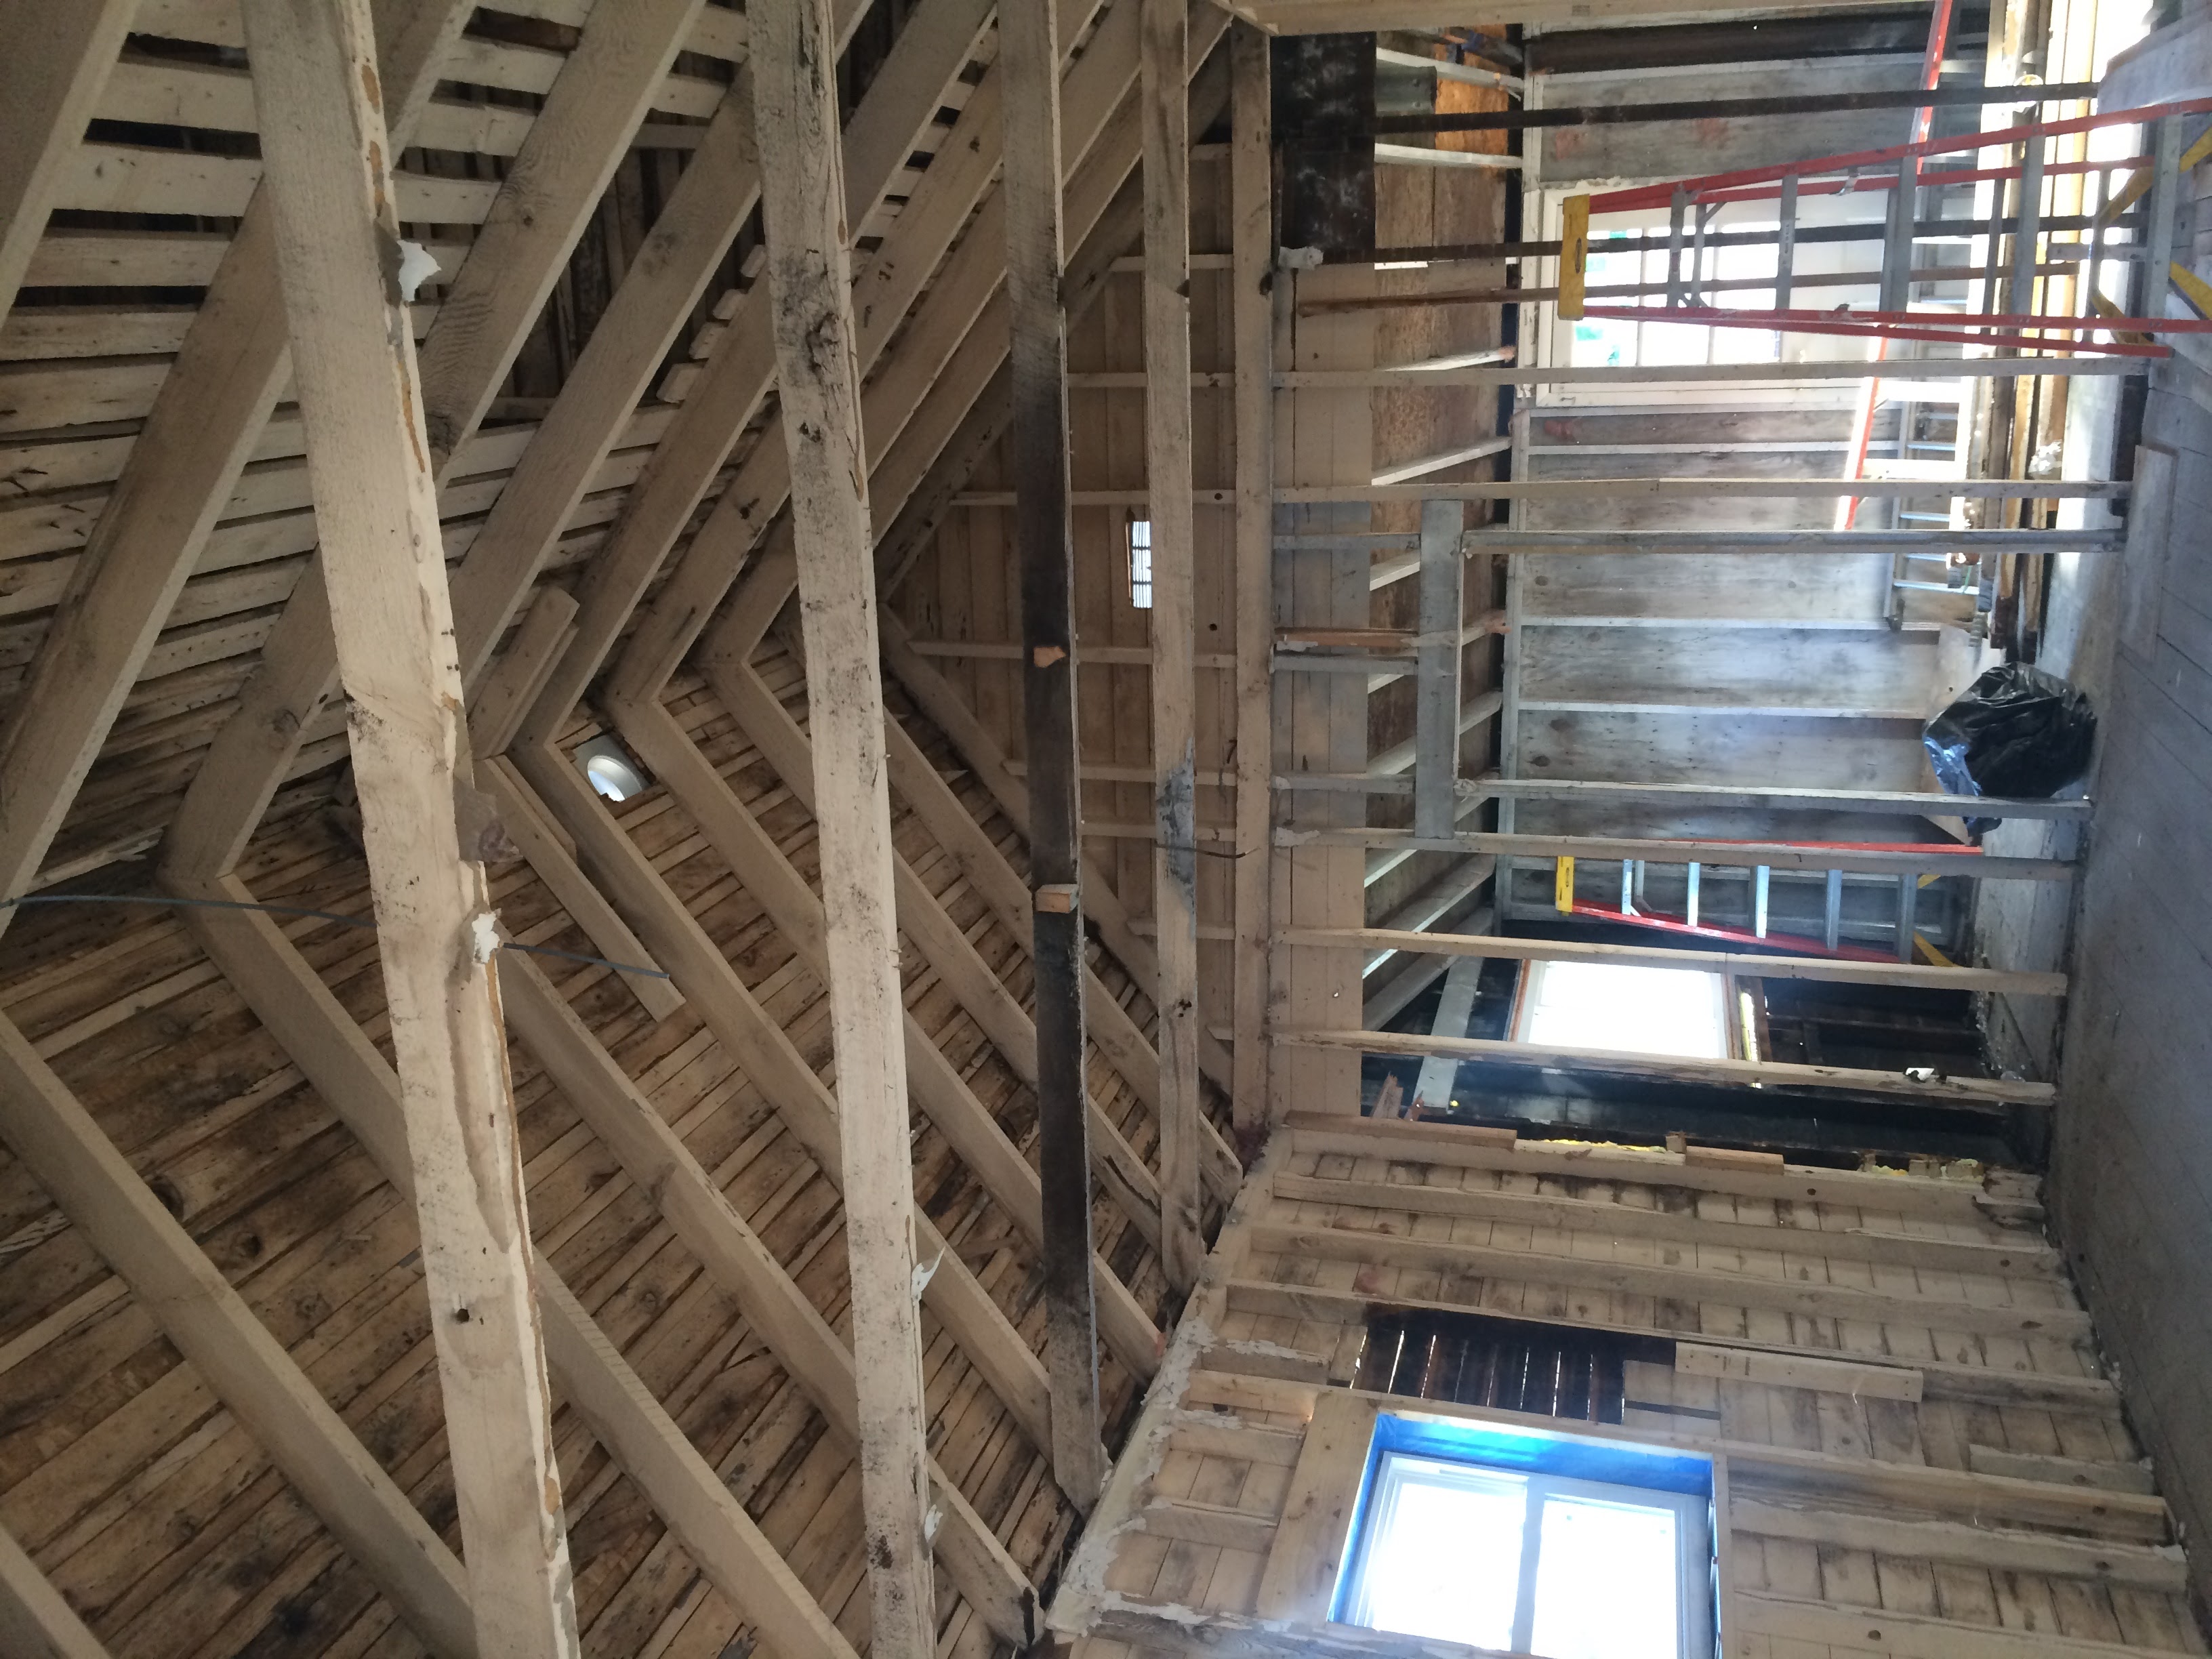
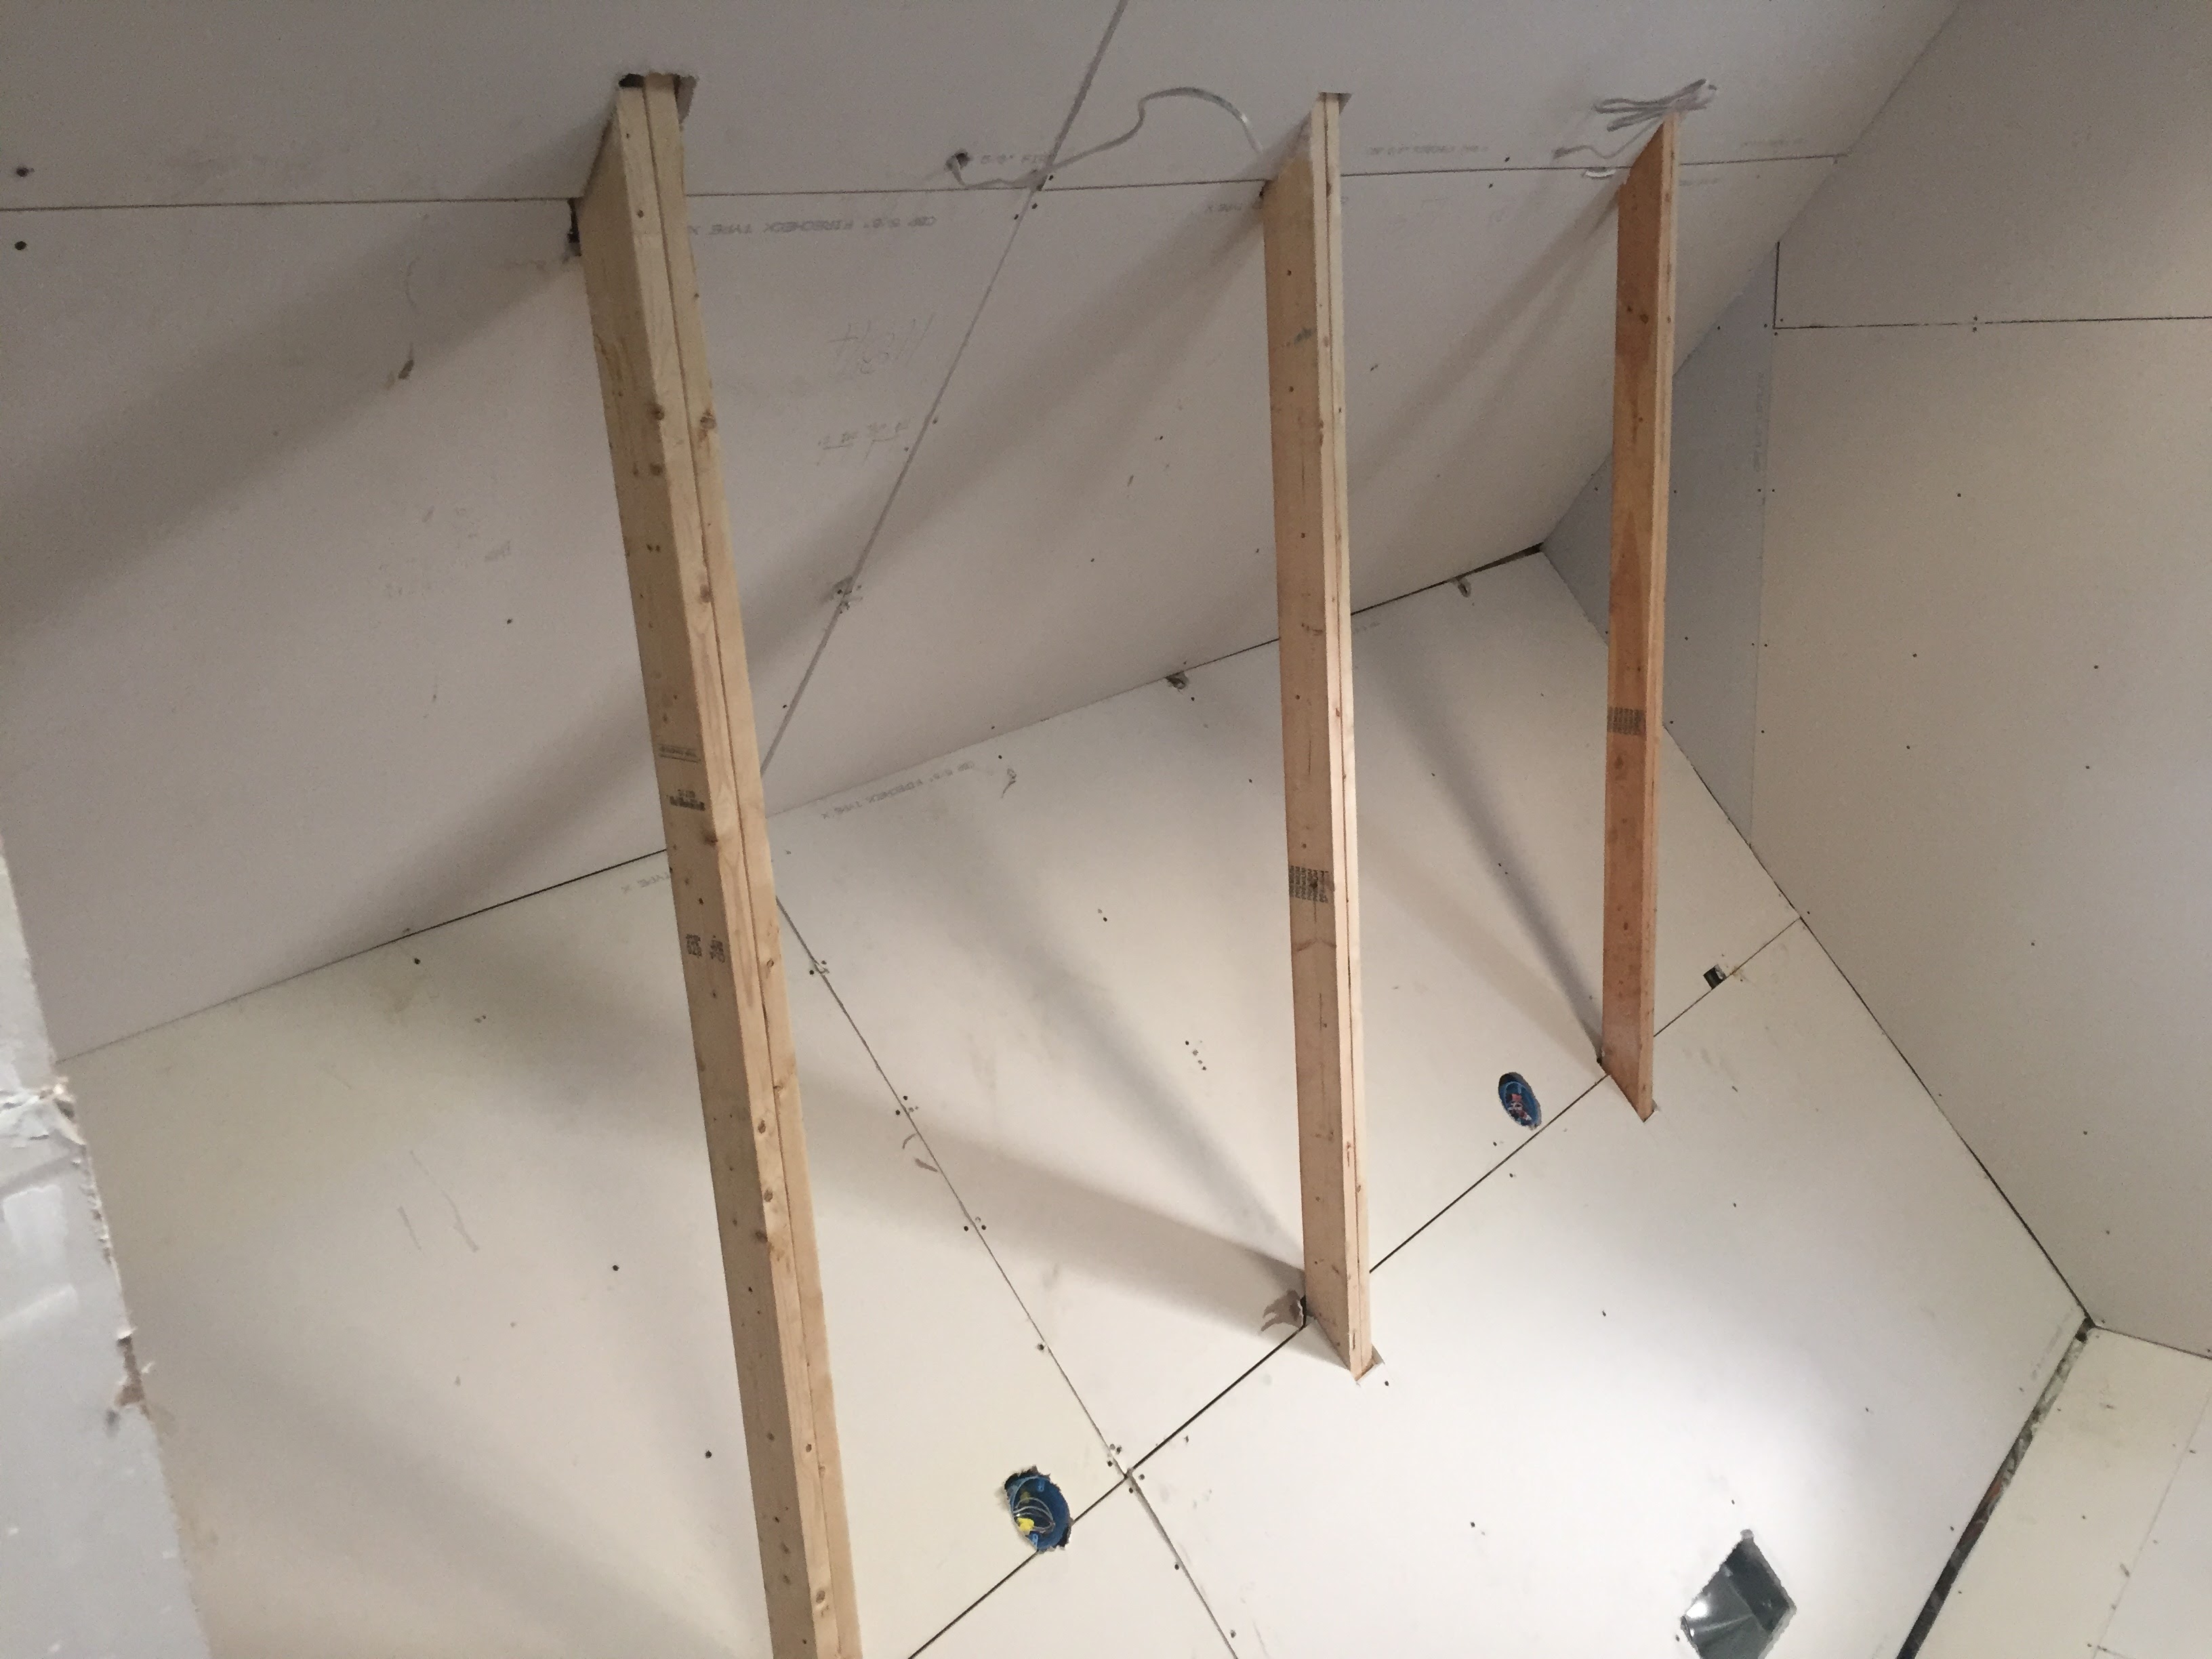
This isn’t the easiest drywall hanging job. New, higher cross braces are installed. Despite the main room being only 13×20, it feels huge! It’s 13’ at the peak.
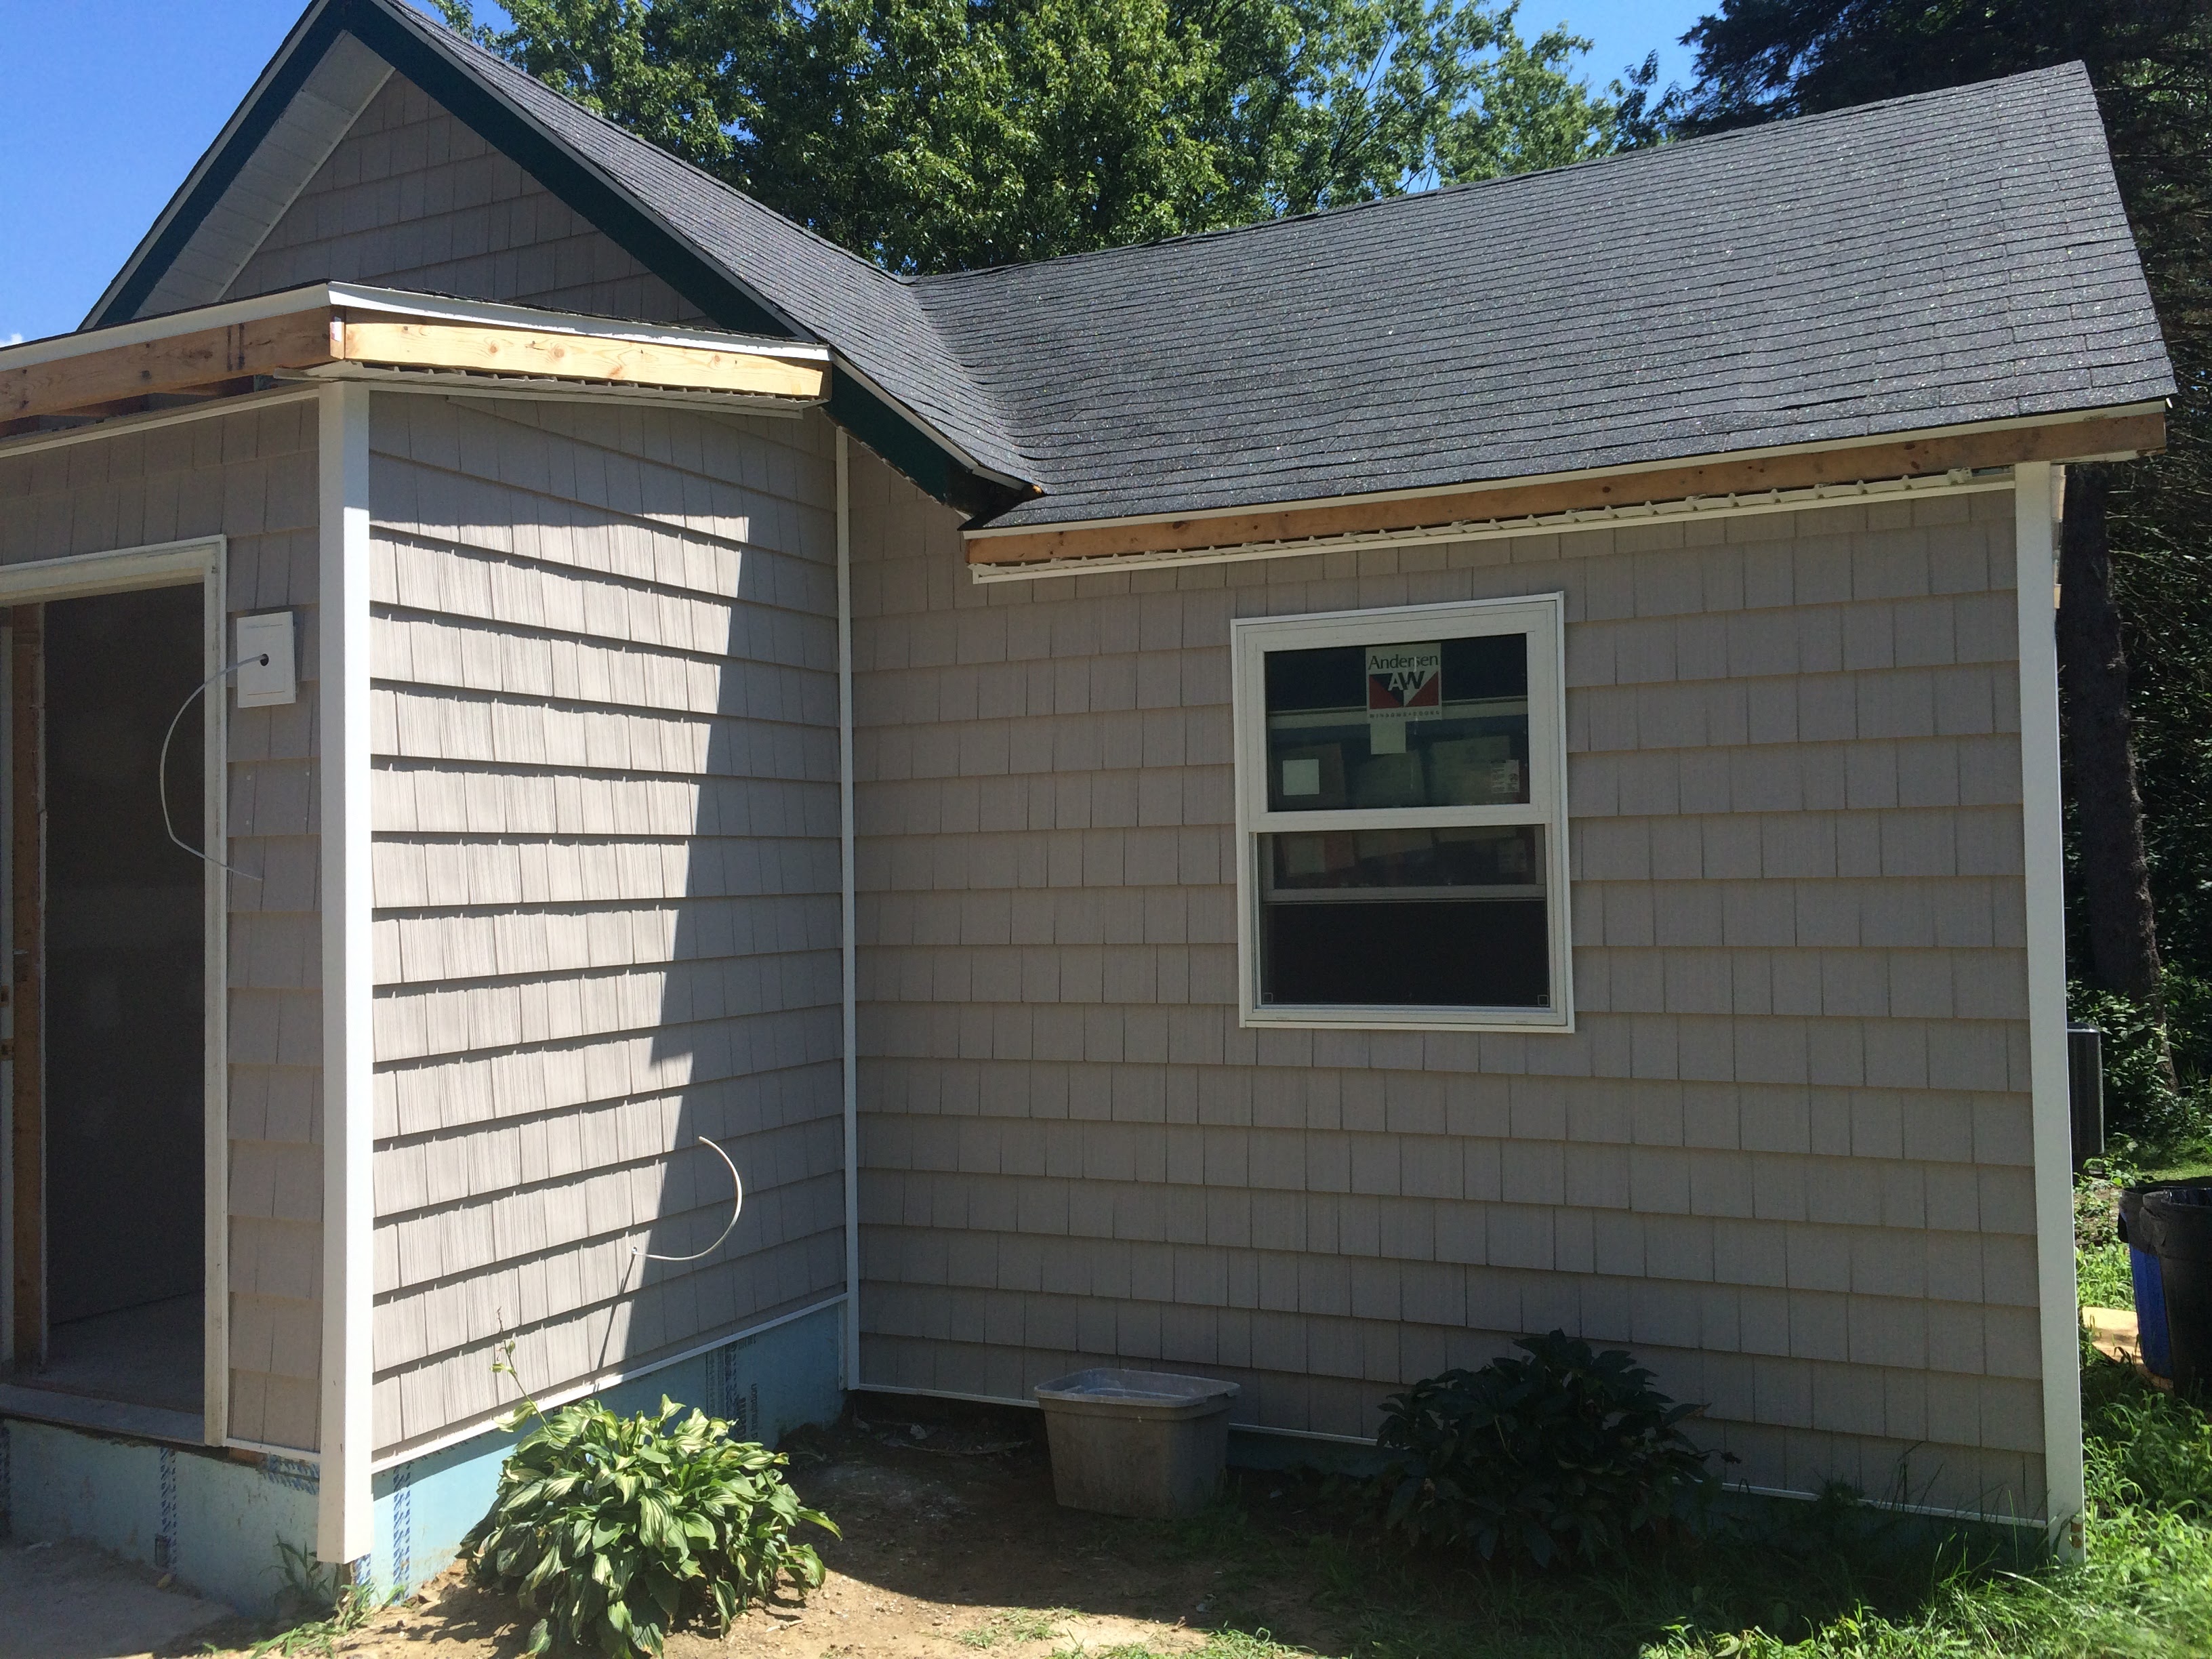
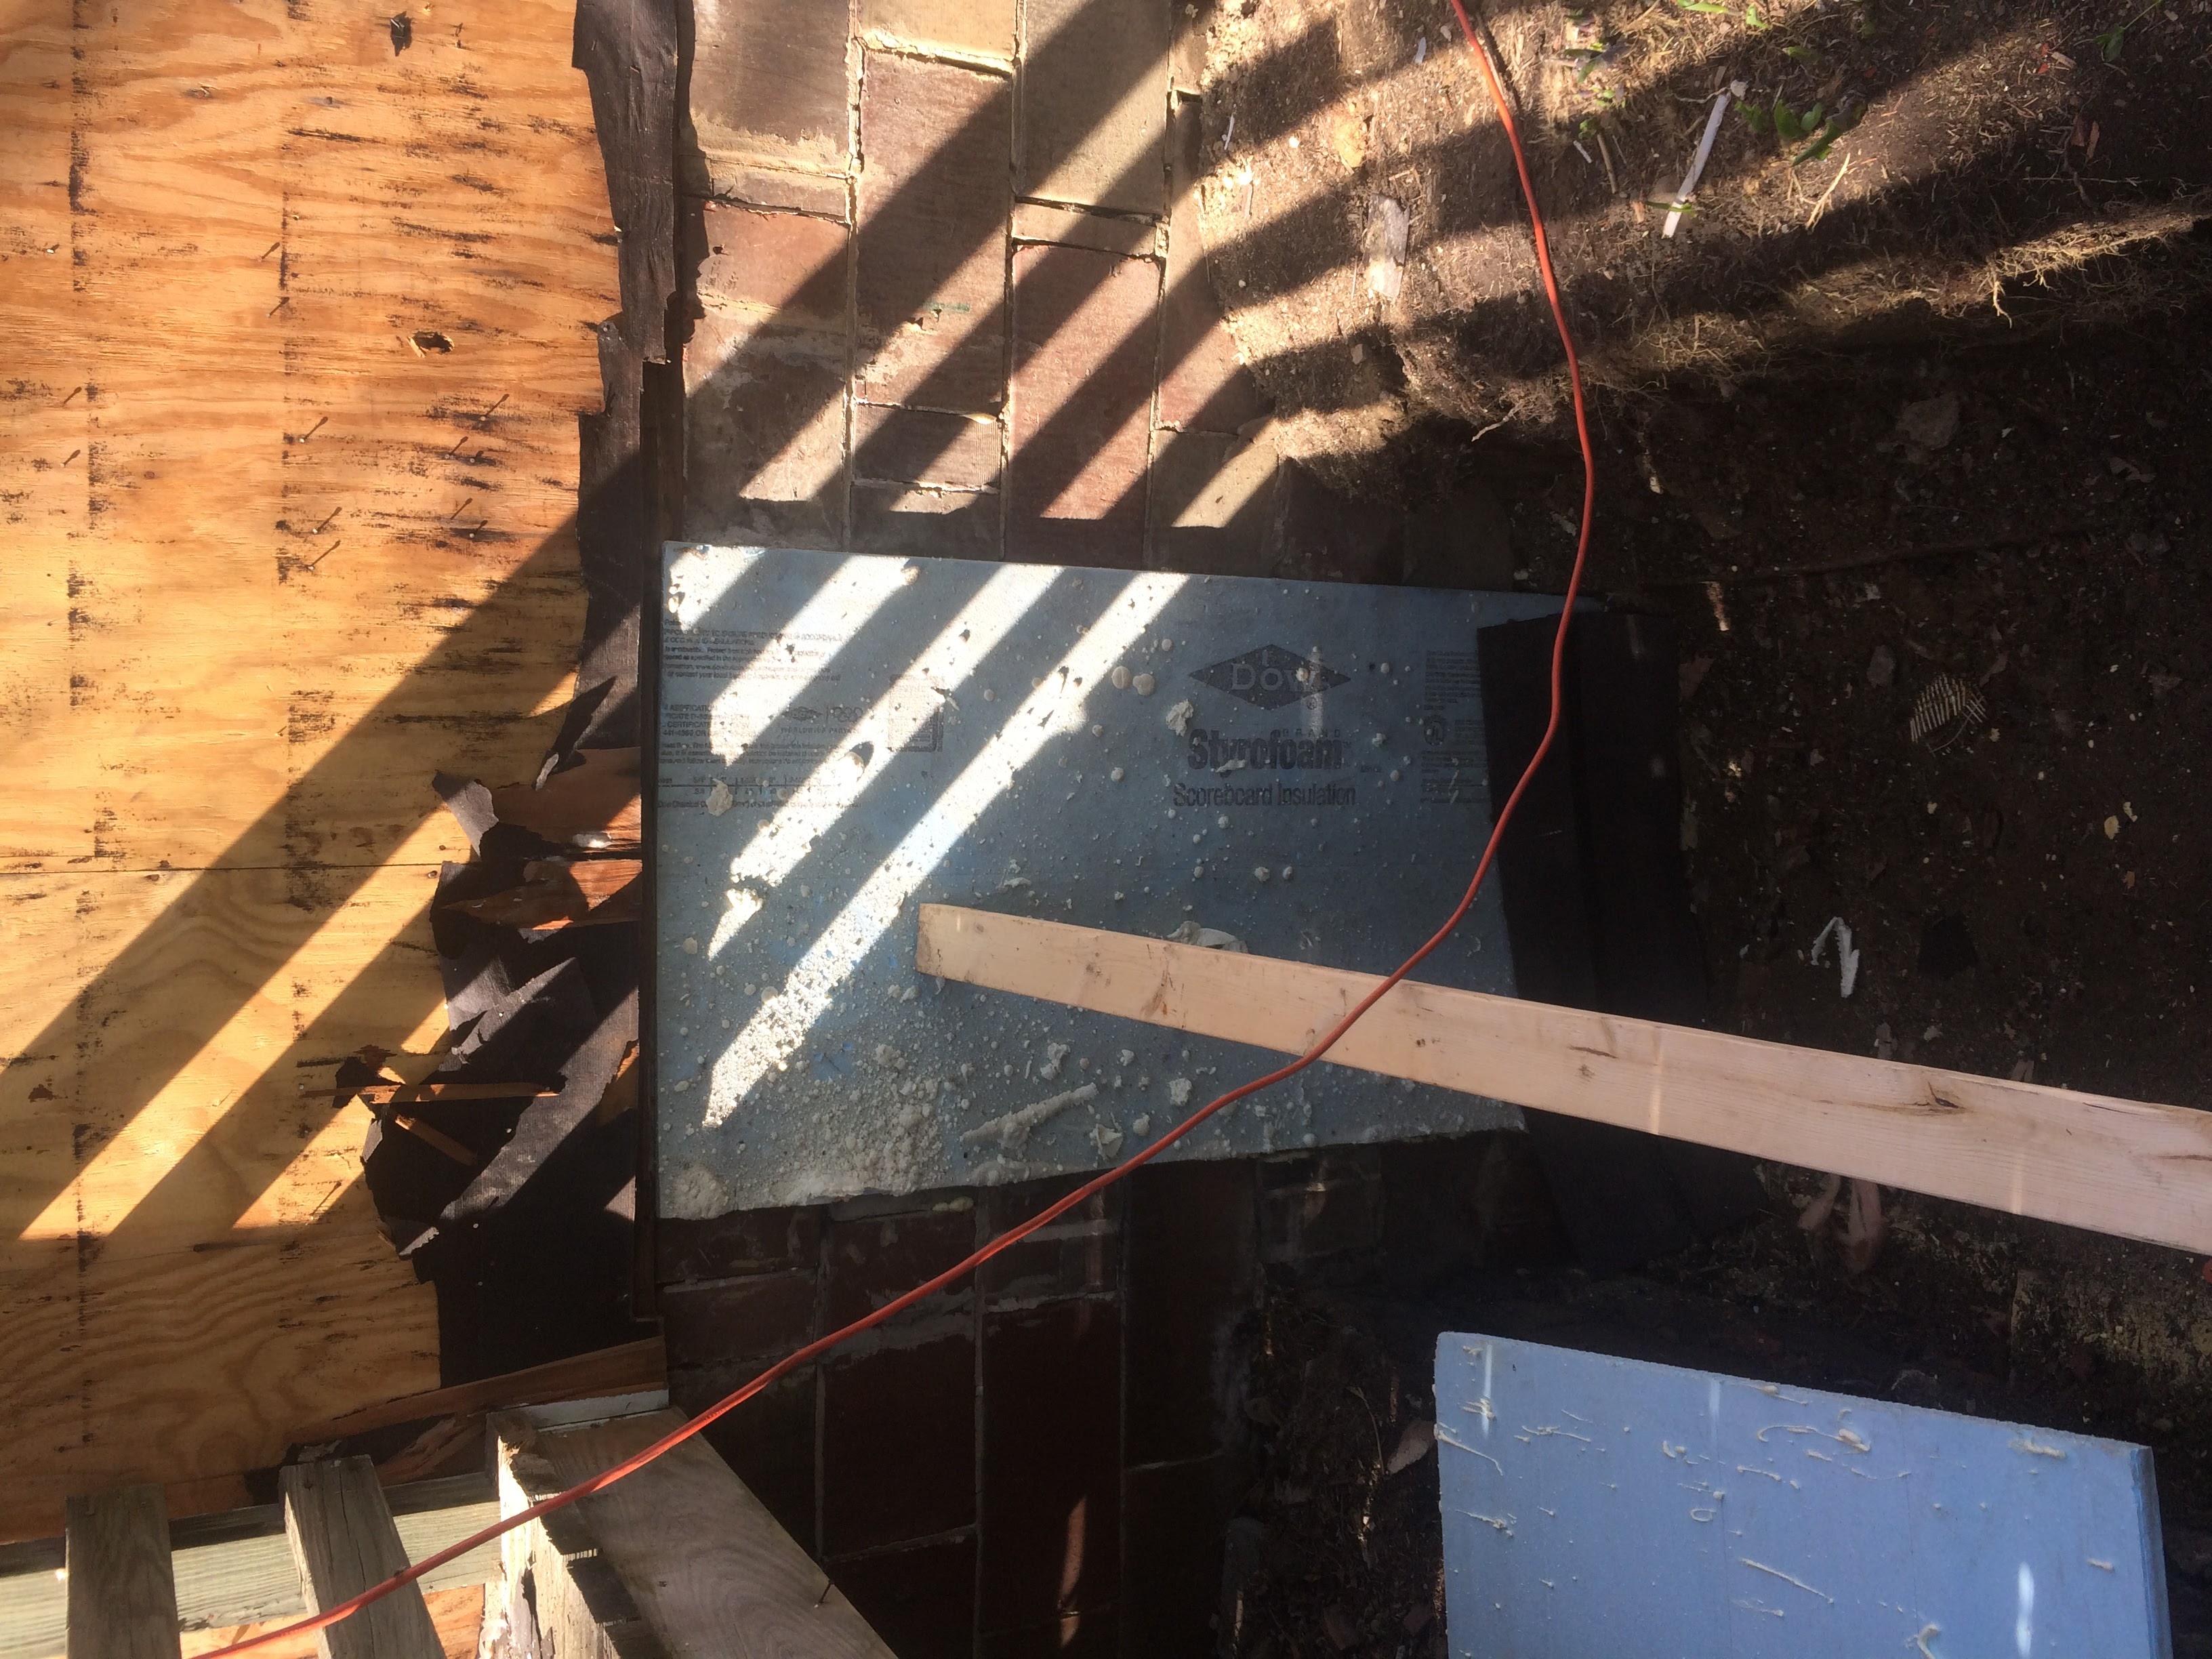
At the time of writing (7/29), this is what the exterior looks like. Siding is nearly complete. It has a new mudroom in front. Outside it’s down to fascia work and covering the foundation. Inside its drywall finishing and installing kitchen and bath fixtures.
Still Want More?
The full album of over 1000 pictures is here. Or check out the extended blog series on JLC Online.
Detailed Numbers
Gas Use Before N/A
Predicted Use After 0
Actual Use After 0
Electric Use Before N/A
Predicted Use After 9503 kWh
Actual Use After Too soon
Load Calc Heating/Cooling
- Before Heating 23,837 BTU/hr
- Before Cooling 9,561
- Predicted Heating 8,166
- Predicted Cooling 5,019
- After Heating N/A
- After Cooling N/A
Energy Use
Electric
- 1 year before N/A
- 2 years before N/A
- 3 years before N/A
- 1 year after N/A
- 2 years after N/A
Natural gas
- 1 year before N/A
- 2 years before N/A
- 3 years before N/A
- 1 year after 0
- 2 years after 0
Duct Leakage
- Before N/A
- Predicted N/A
- After N/A
IAQ Measurements
- Before N/A
- Predicted N/A
- After N/A
Zonal Testing
Not completed


Year Built 1890
Square Footage 720
Energy Use Index*
Before 165.7 (est.)
Target 45.2
After Too soon
Air Leakage (cfm50)
Start 11,996
Target 400
End 700