Ed achieved tightness levels well beyond current codes.
The HVAC contractors recommended two furnaces. We recommended one. One worked.
The HVAC contractors recommended two furnaces. We recommended one. One worked.
Background
Ed and Anjelica Kisiel of EKA Build, had an energy audit from us on their own home. They reached out for help on a new 4800 square foot home they were building to learn how to make it as tight as possible and put in the right HVAC system to make the home very comfortable as well as efficient (a furnace and heat pump in this case).
My partner handled the duct design, which figures out which size ducts go where. He also handled the load calculation for the home, which figures out what size furnace and air conditioner/heat pump is needed. I handled training Ed on how to air seal the house to very high levels. Here in Cleveland, Energy Star and other super tight homes aren’t nearly as common as they are in other areas of the country.
In the end, Ed knocked my socks off and beat the leakage target by 50%! The HVAC company Ed normally uses wanted to install two furnaces with a total of 180,000 BTUs of heat (that’s A LOT). We specified a 60,000 BTU furnace, but compromised with an 80,000 BTU furnace so Ed could sleep a little better at night. A 3 ton (36,000 BTU) heat pump was installed on top of the furnace to handle cooling, but also heating in cool weather. That same size air conditioner is probably in your home. I’ve seen 3 ton ACs in 1500 square foot homes, this home is more than three times that size!
The tiny HVAC system worked. The house is unusually efficient.
Photo Album
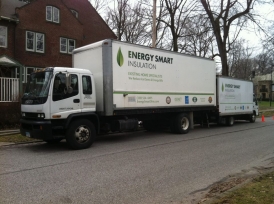
See a bunch of project photos here.
Problems
- Wanted to up air sealing game
- Better comfort for EKA Build clients desired, fewer hot/cold spots
- Duct design optimized to handle zoning if desired in the future
Results
- House is very airtight, about 1.6 ACH50, better than any code or standard except Passive House. Remarkable for a first attempt!
- HVAC size 55% smaller than heating and air contractor suggested.
- Home heats and cools well with one small HVAC system, not two.
- Easily upgradeable to a zone system, if manual balancing is insufficient.
- Indoor Air Quality is excellent thanks to fresh air and continuous filtration.
Client Feedback
This was the bummer of this project. We didn’t set expectations of adjustments being needed after construction or that there would be an additional cost involved. It required a site visit to adjust, and the homeowner wasn’t willing to pay for it. So sadly we don’t have positive feedback on this one, which led to it feeling pretty unsatisfying. So far, the equipment has kept up even on hot days, and energy use is quite low, which is a partial success. Ed’s next house has a small furnace with a heat pump and attention to air sealing, so that’s progress.
Upgrades
-
Air Sealing and Insulation
- 20 cases of caulk used to air seal the house
- Fiberglass batts in walls
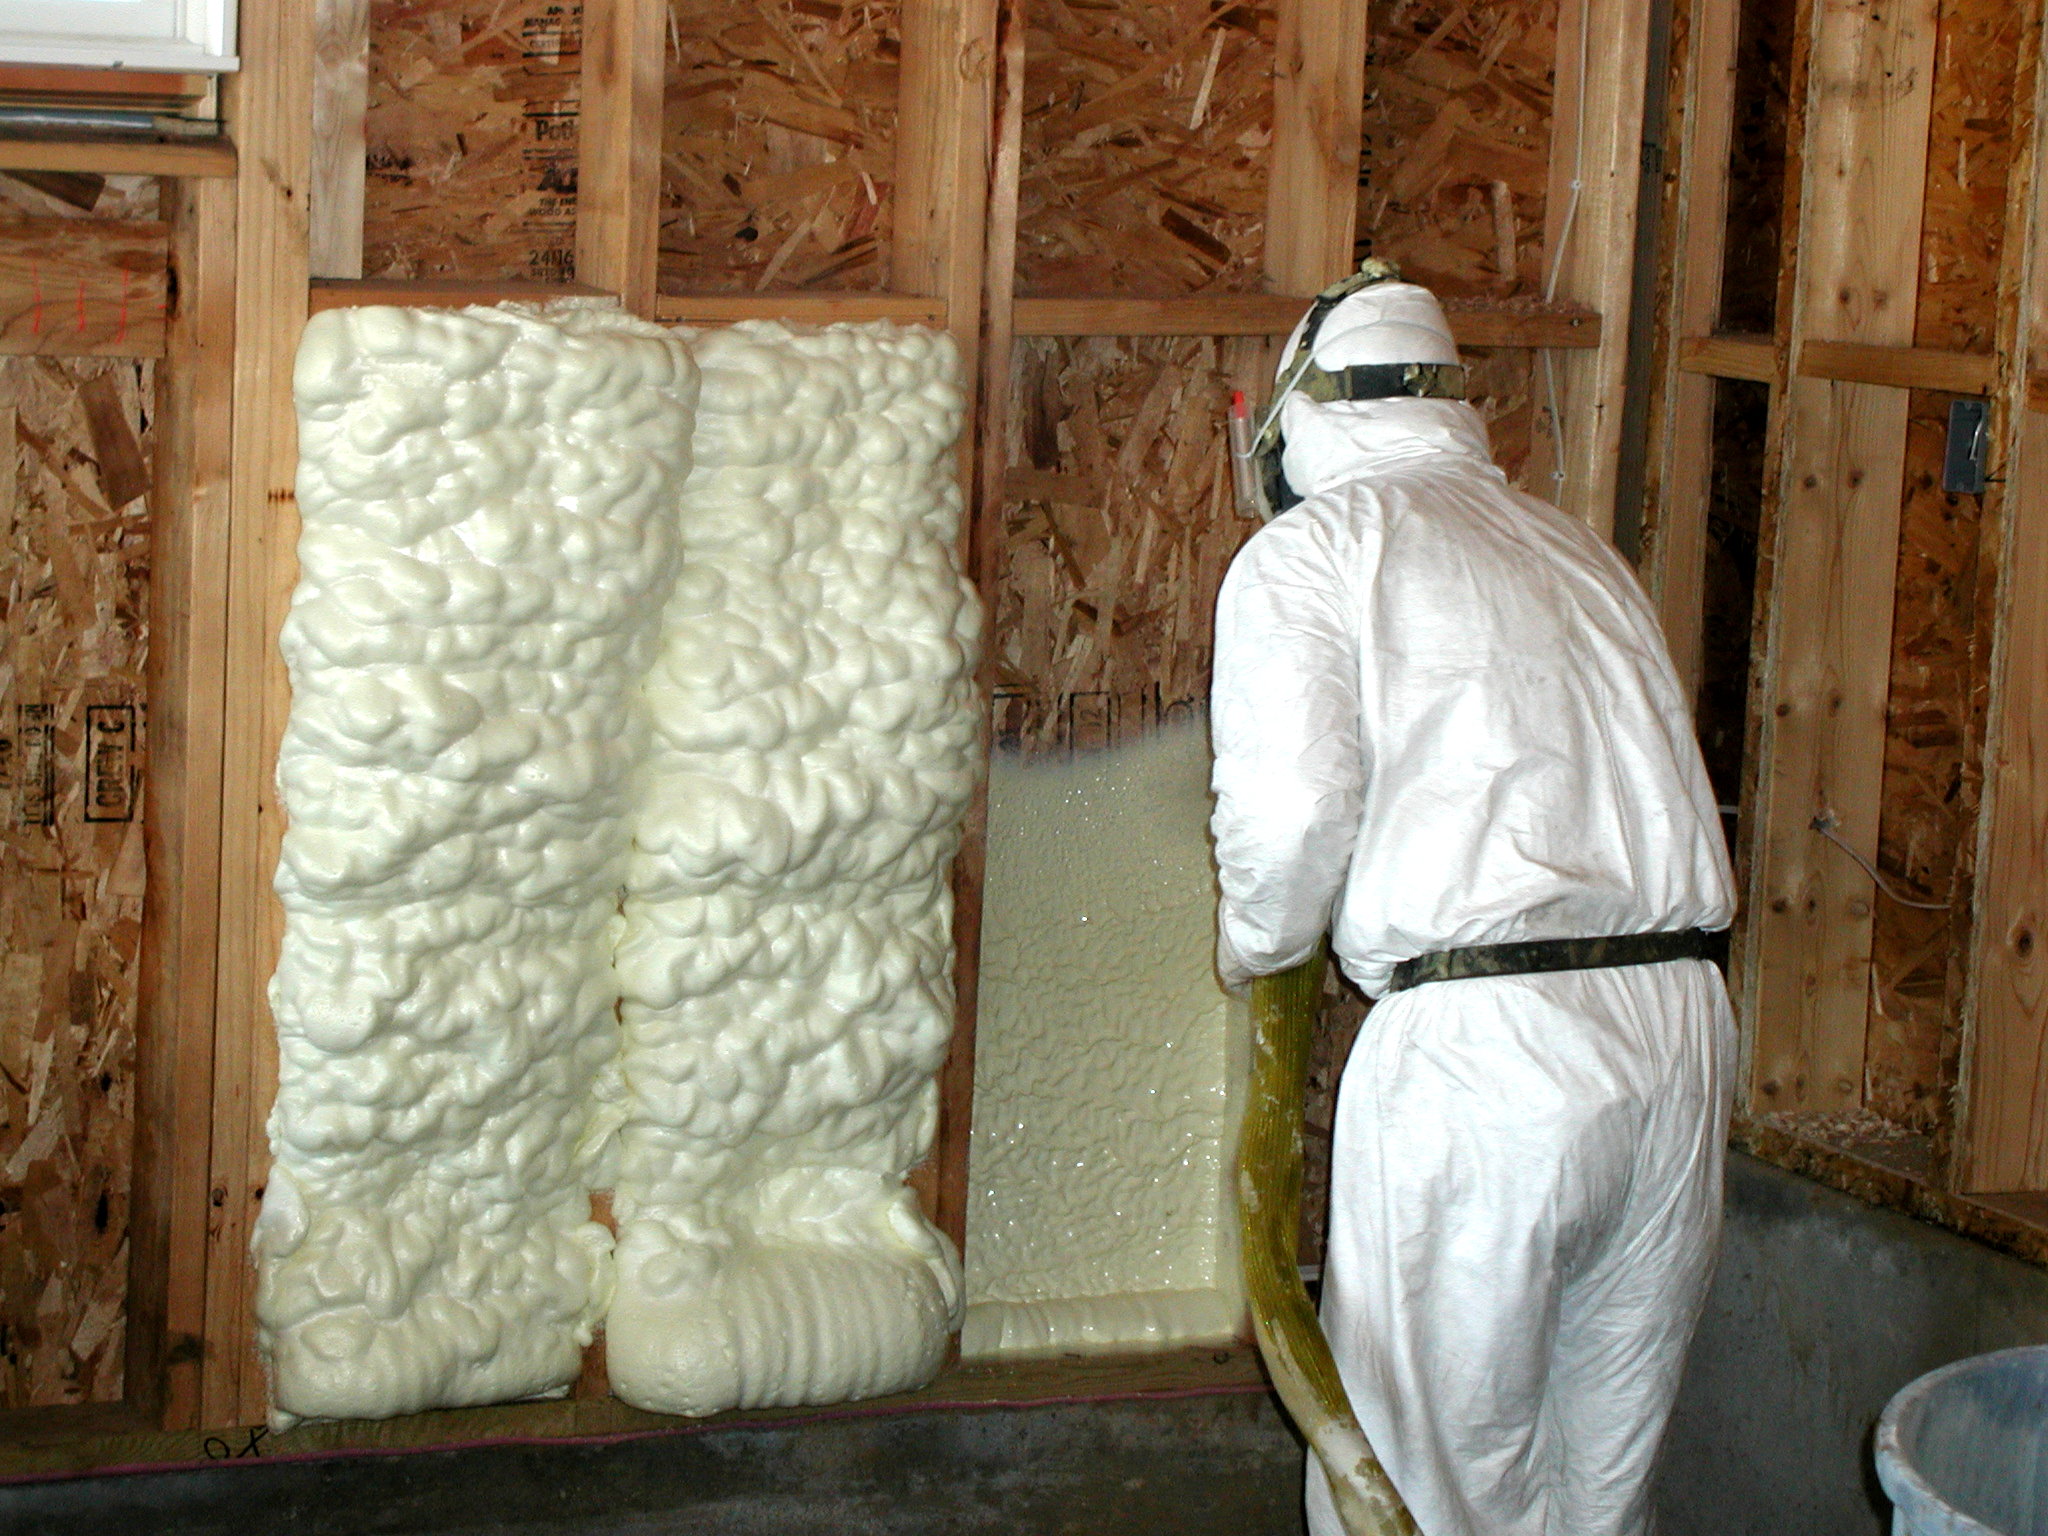
- Spray foam in rim joists and tricky to air seal areas of attic and bonus room
- Blown fiberglass in attic
-
HVAC
- 80,000 BTU modulating furnace
- 36,000 BTU five stage heat pump/air conditioner
- Fresh air intake duct
- Duct design will handle zoning system without driving pressure inside ductwork too high
Full Story
This was our first new home. We specialize in solving problems in existing homes. It was quite a journey with a decent result, but my partner and I did find the process substantially more frustrating than our other work. We think the biggest factor is that homeowners expect their new home to be perfect. Meanwhile, our usual clients have lived in their homes for a while and have problems to solve in their imperfect homes. This can lead a new homeowner to discount the importance (and the cost) of getting details right and a little work after the fact to optimize the HVAC system.
That is on us, we did a poor job setting expectations since it was our first time doing a new house. We normally work only with the homeowner(s), where in this case the builder was our primary contact.
Ed Kisiel, the builder, was meticulous in tackling air sealing this house, and it showed at the final blower door test. He was pretty nervous about the small furnace, and actually lost sleep over it. Since he could control the air leakage, he did a heck of a job tightening this house. His air sealing made the furnace size more than safe. He also did an amazing job riding the insulation and HVAC crews to do their job as specified. That’s hard work.
The Project – HVAC
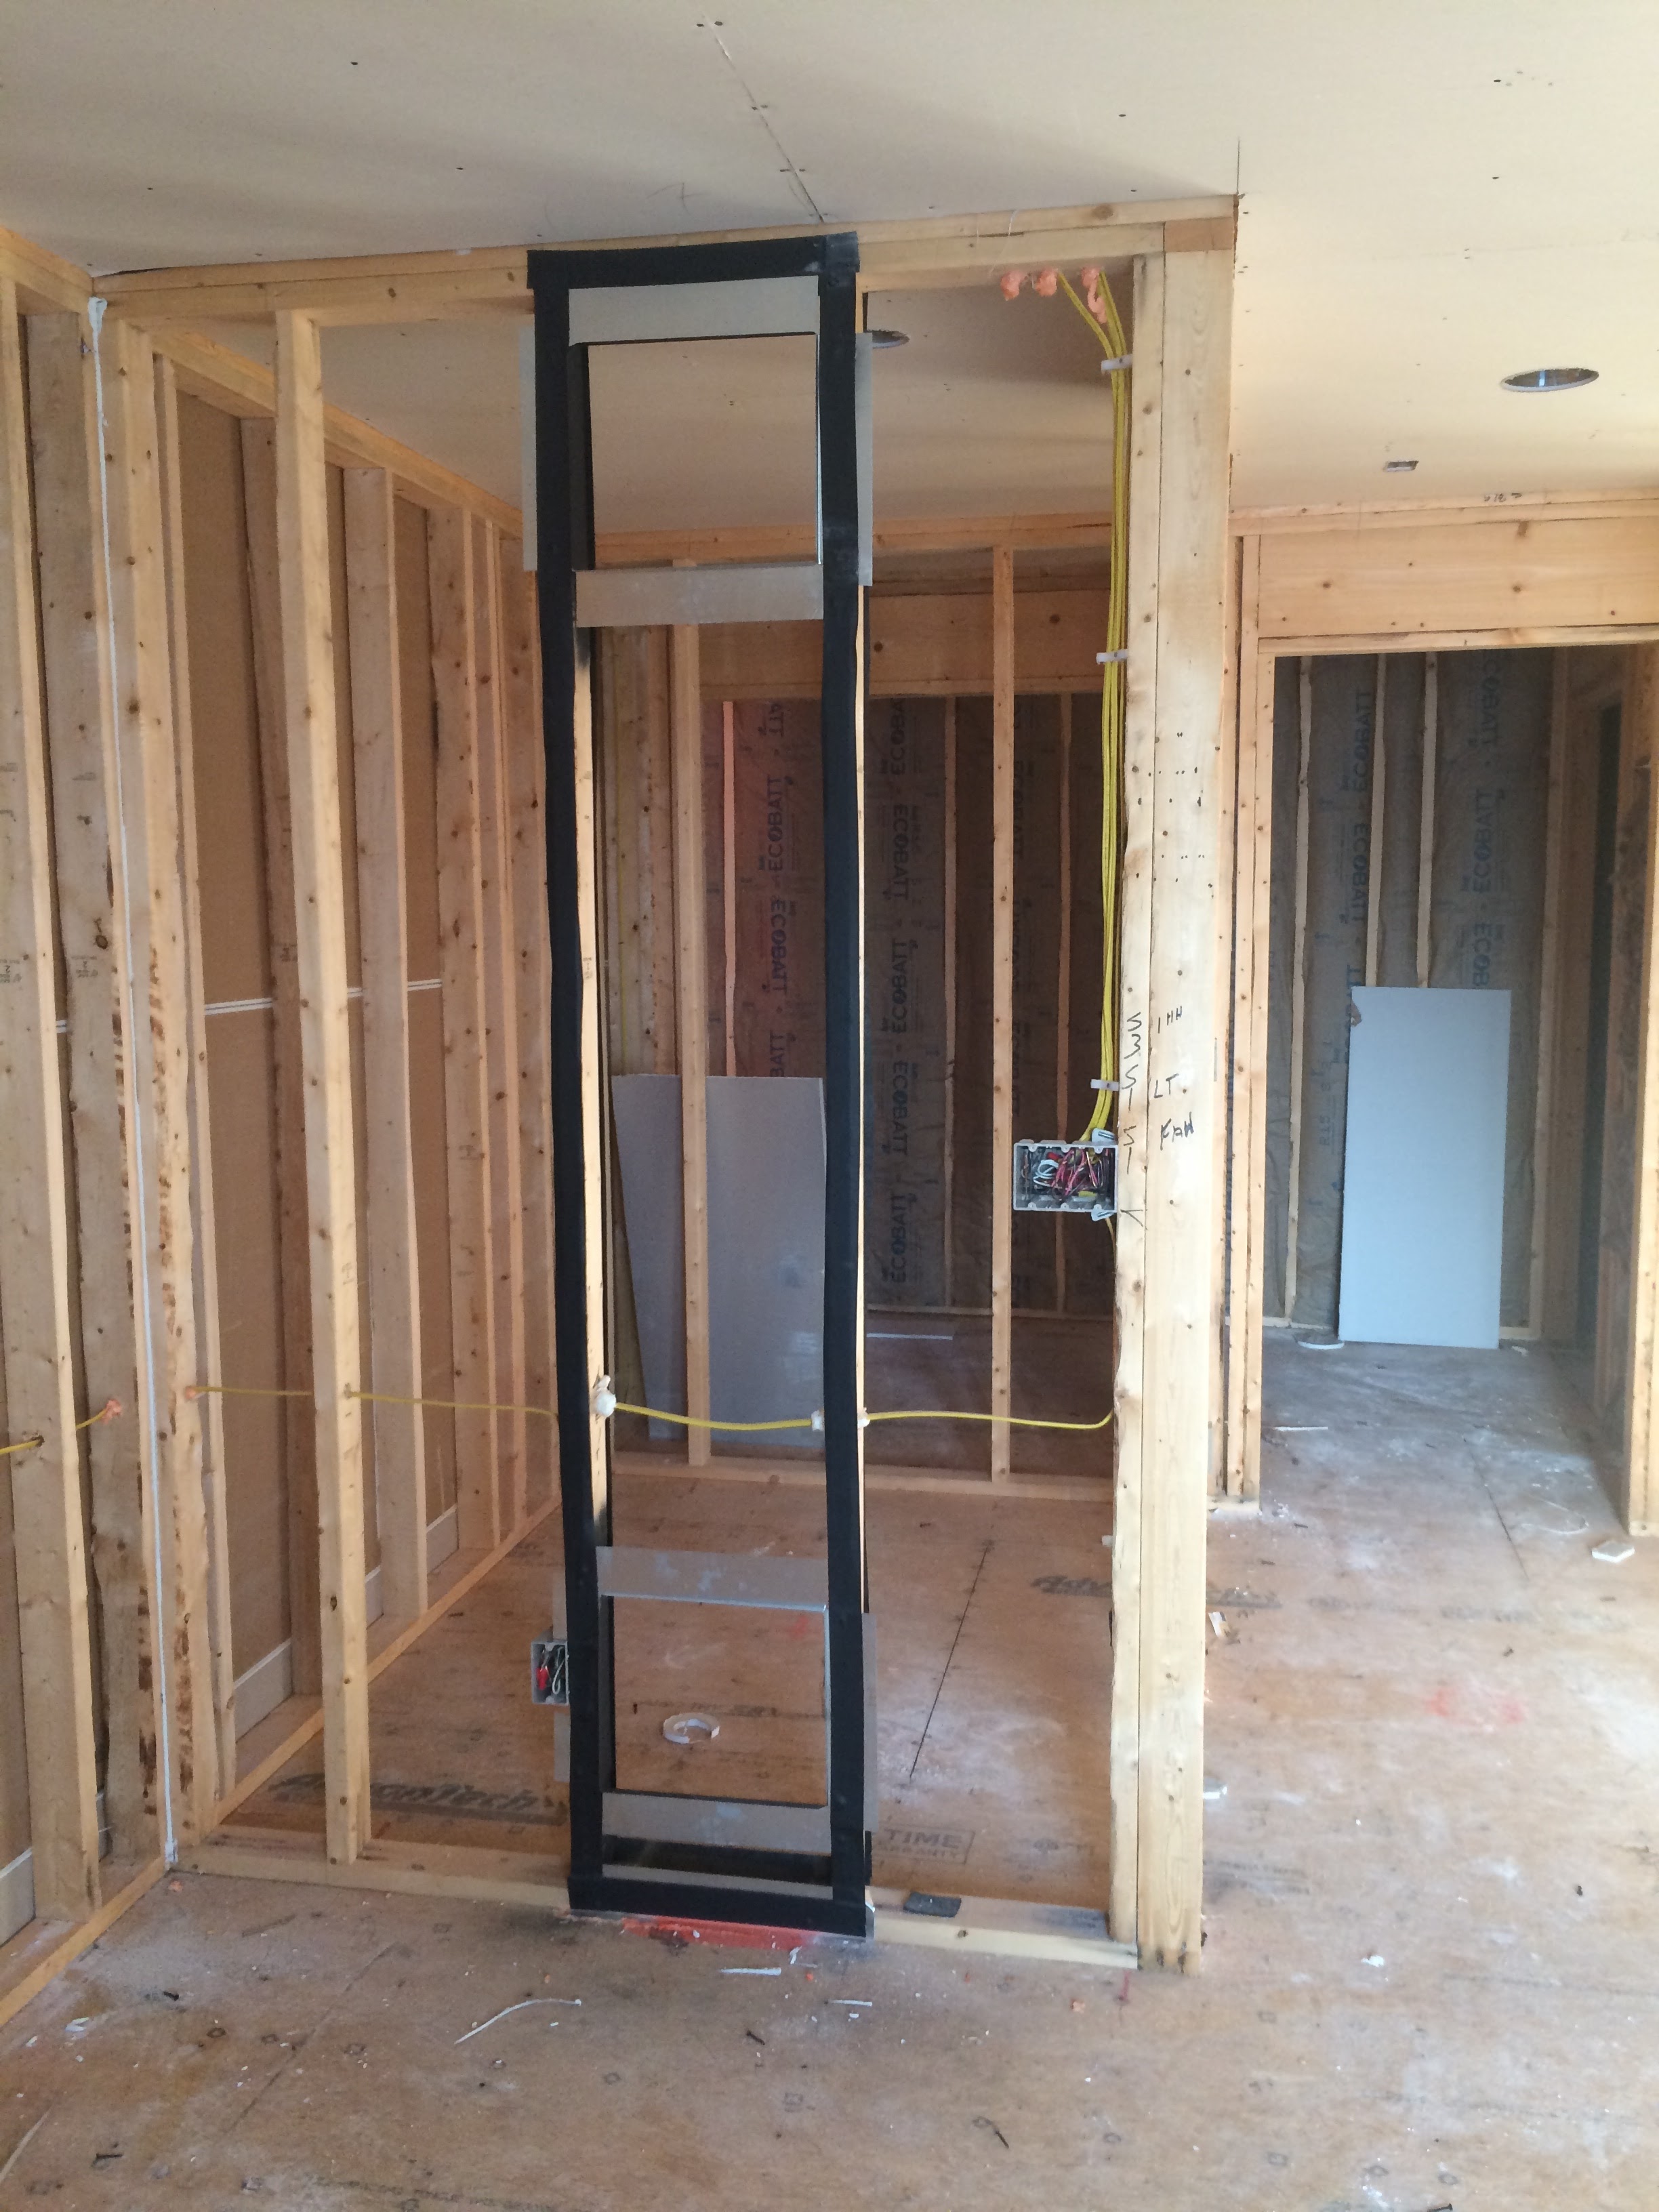
It seems fitting to start with a picture of the laughably small furnace:
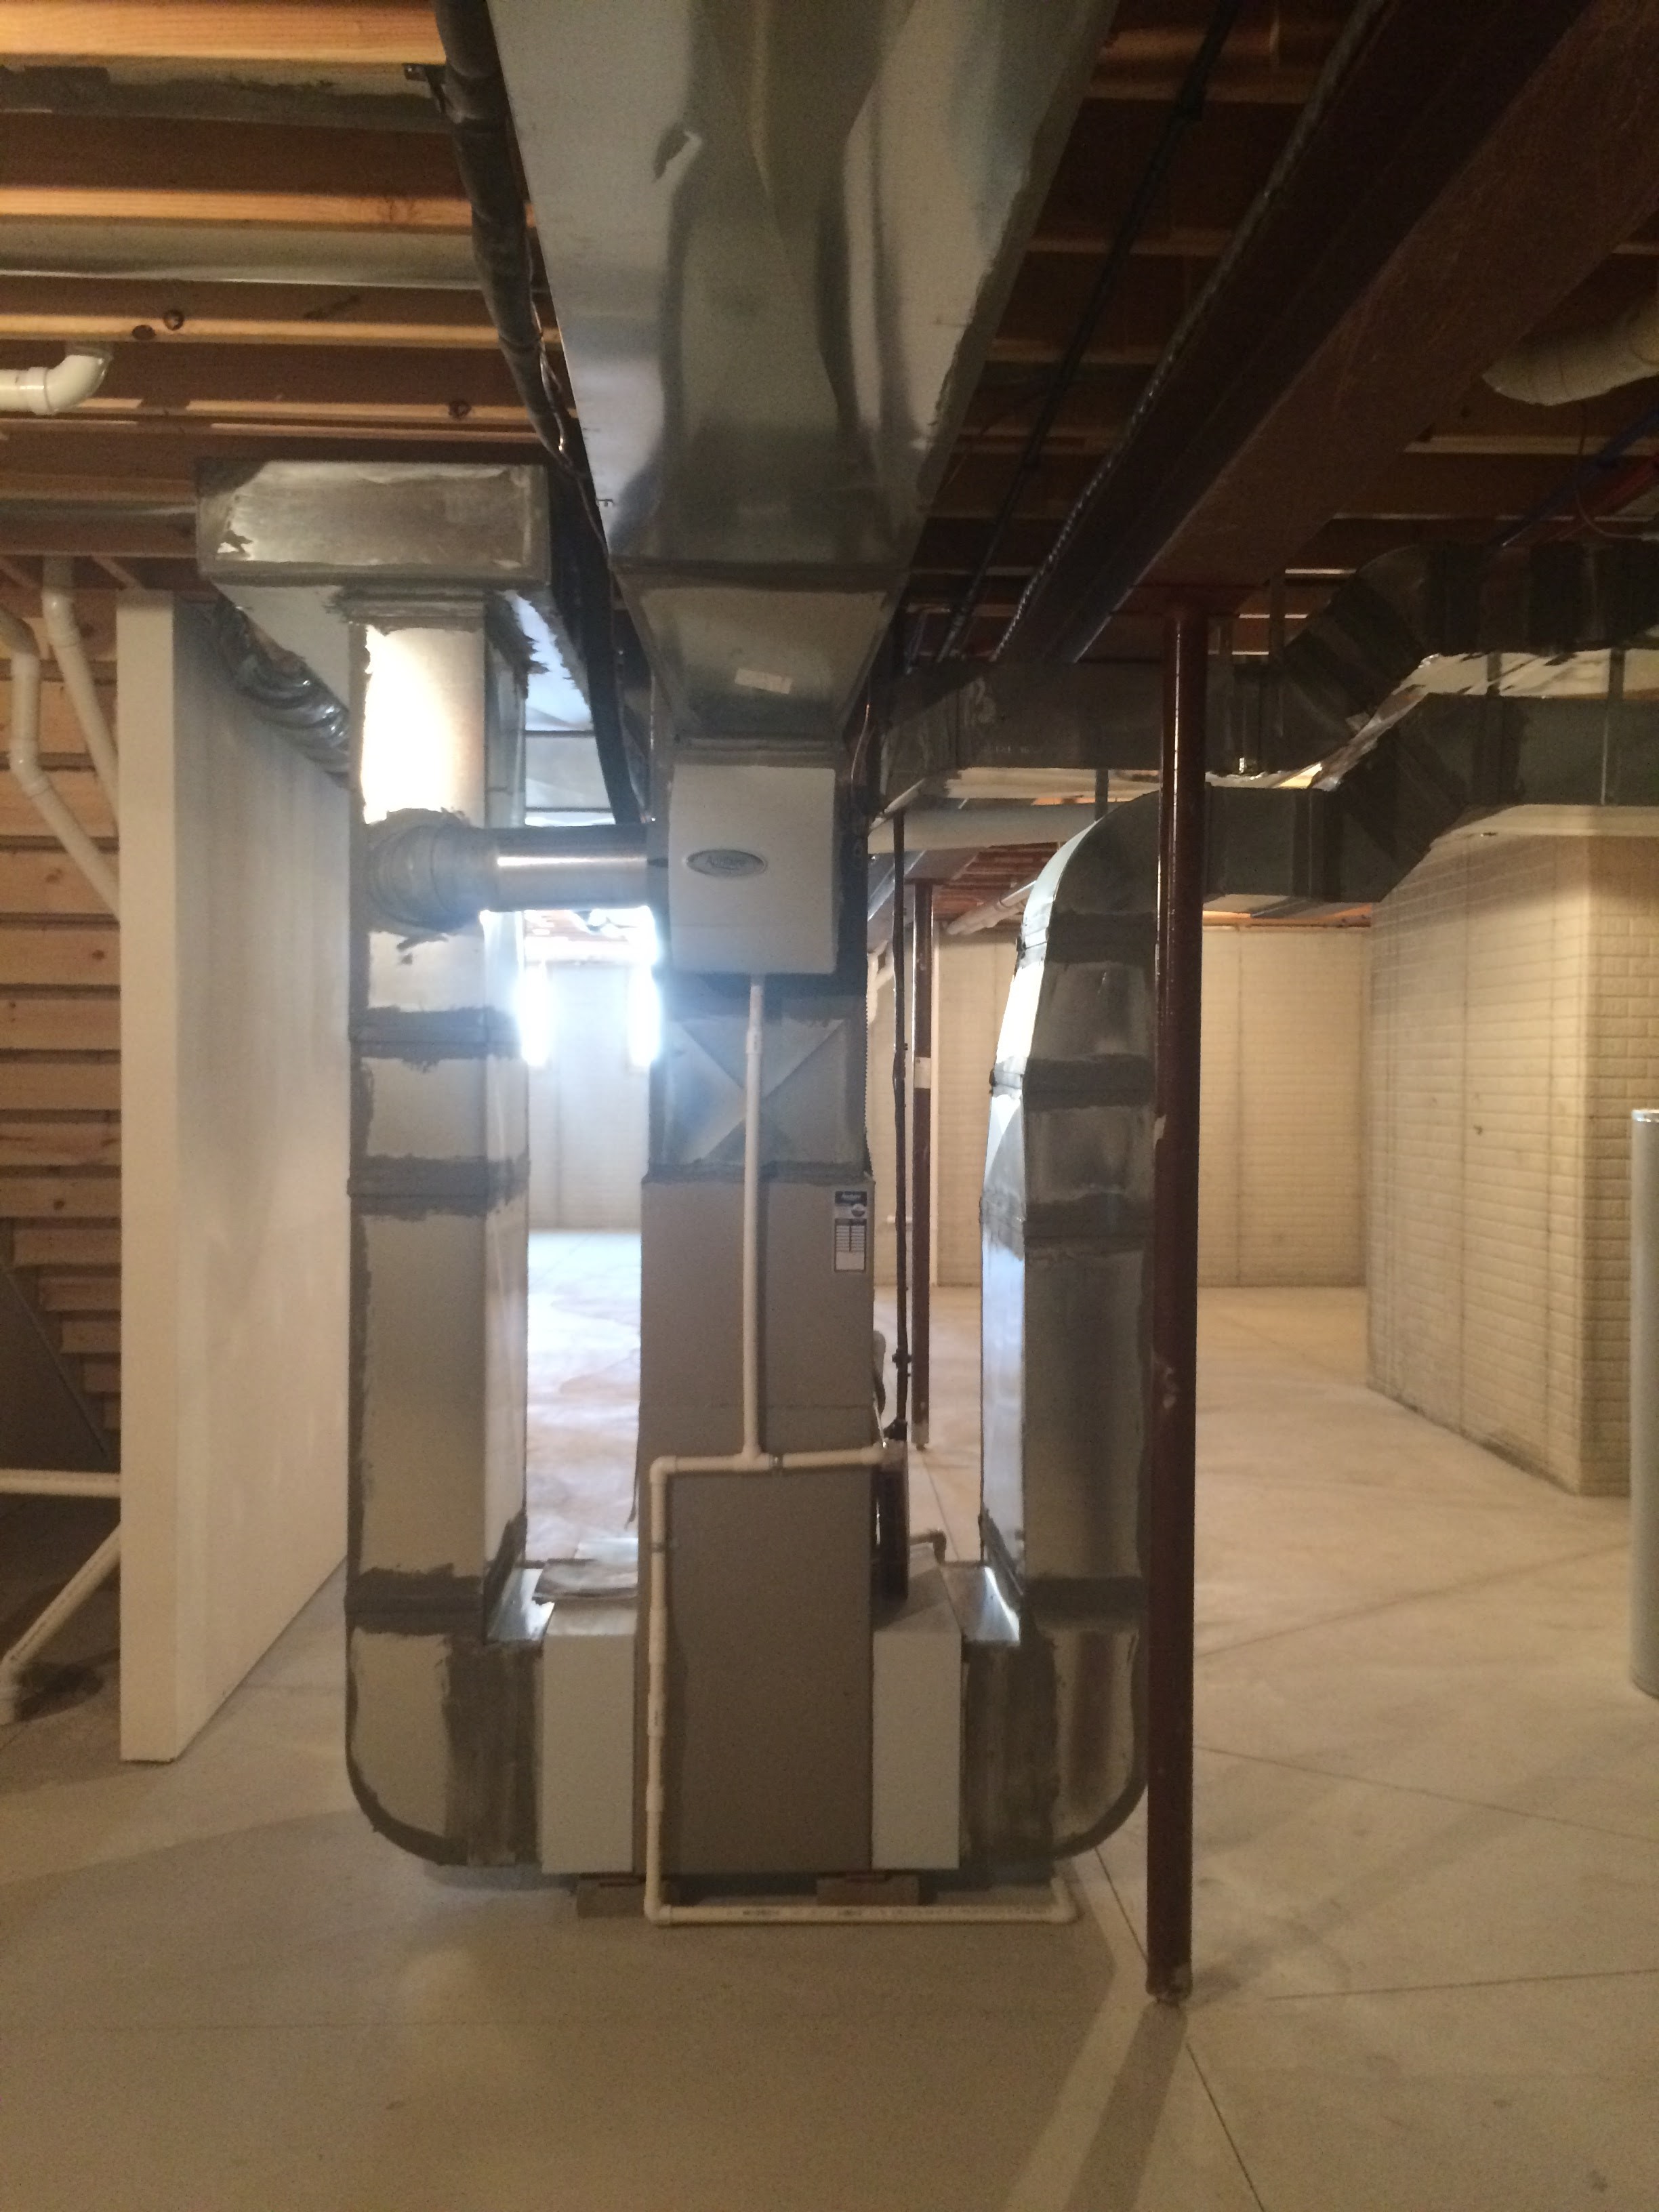
The furnace is the narrow box in the center. The ducts on either side are the return ducts from different parts of the house. Having two return plenums means lower pressure inside the ductwork, which means quieter flow and less energy use. Alex, the homeowner, did comment that even on high he couldn’t hear the fan.
Ed has this same size 80,000 BTU furnace in his 2000 square foot home, this house is 4800 square feet. I’ve seen this size furnace in 1500 square foot homes! Ed originally called me because he struggles to get his house to heat evenly. A smaller furnace and/or heat pump was the primary answer. Smaller is better. At least in this house, it’s small!
(I realize this talk of furnace sizes is confusing, be sure to read the free HVAC chapter of my upcoming book and its companion the HVAC Sizing chapter ($5.99). All will become clear.)
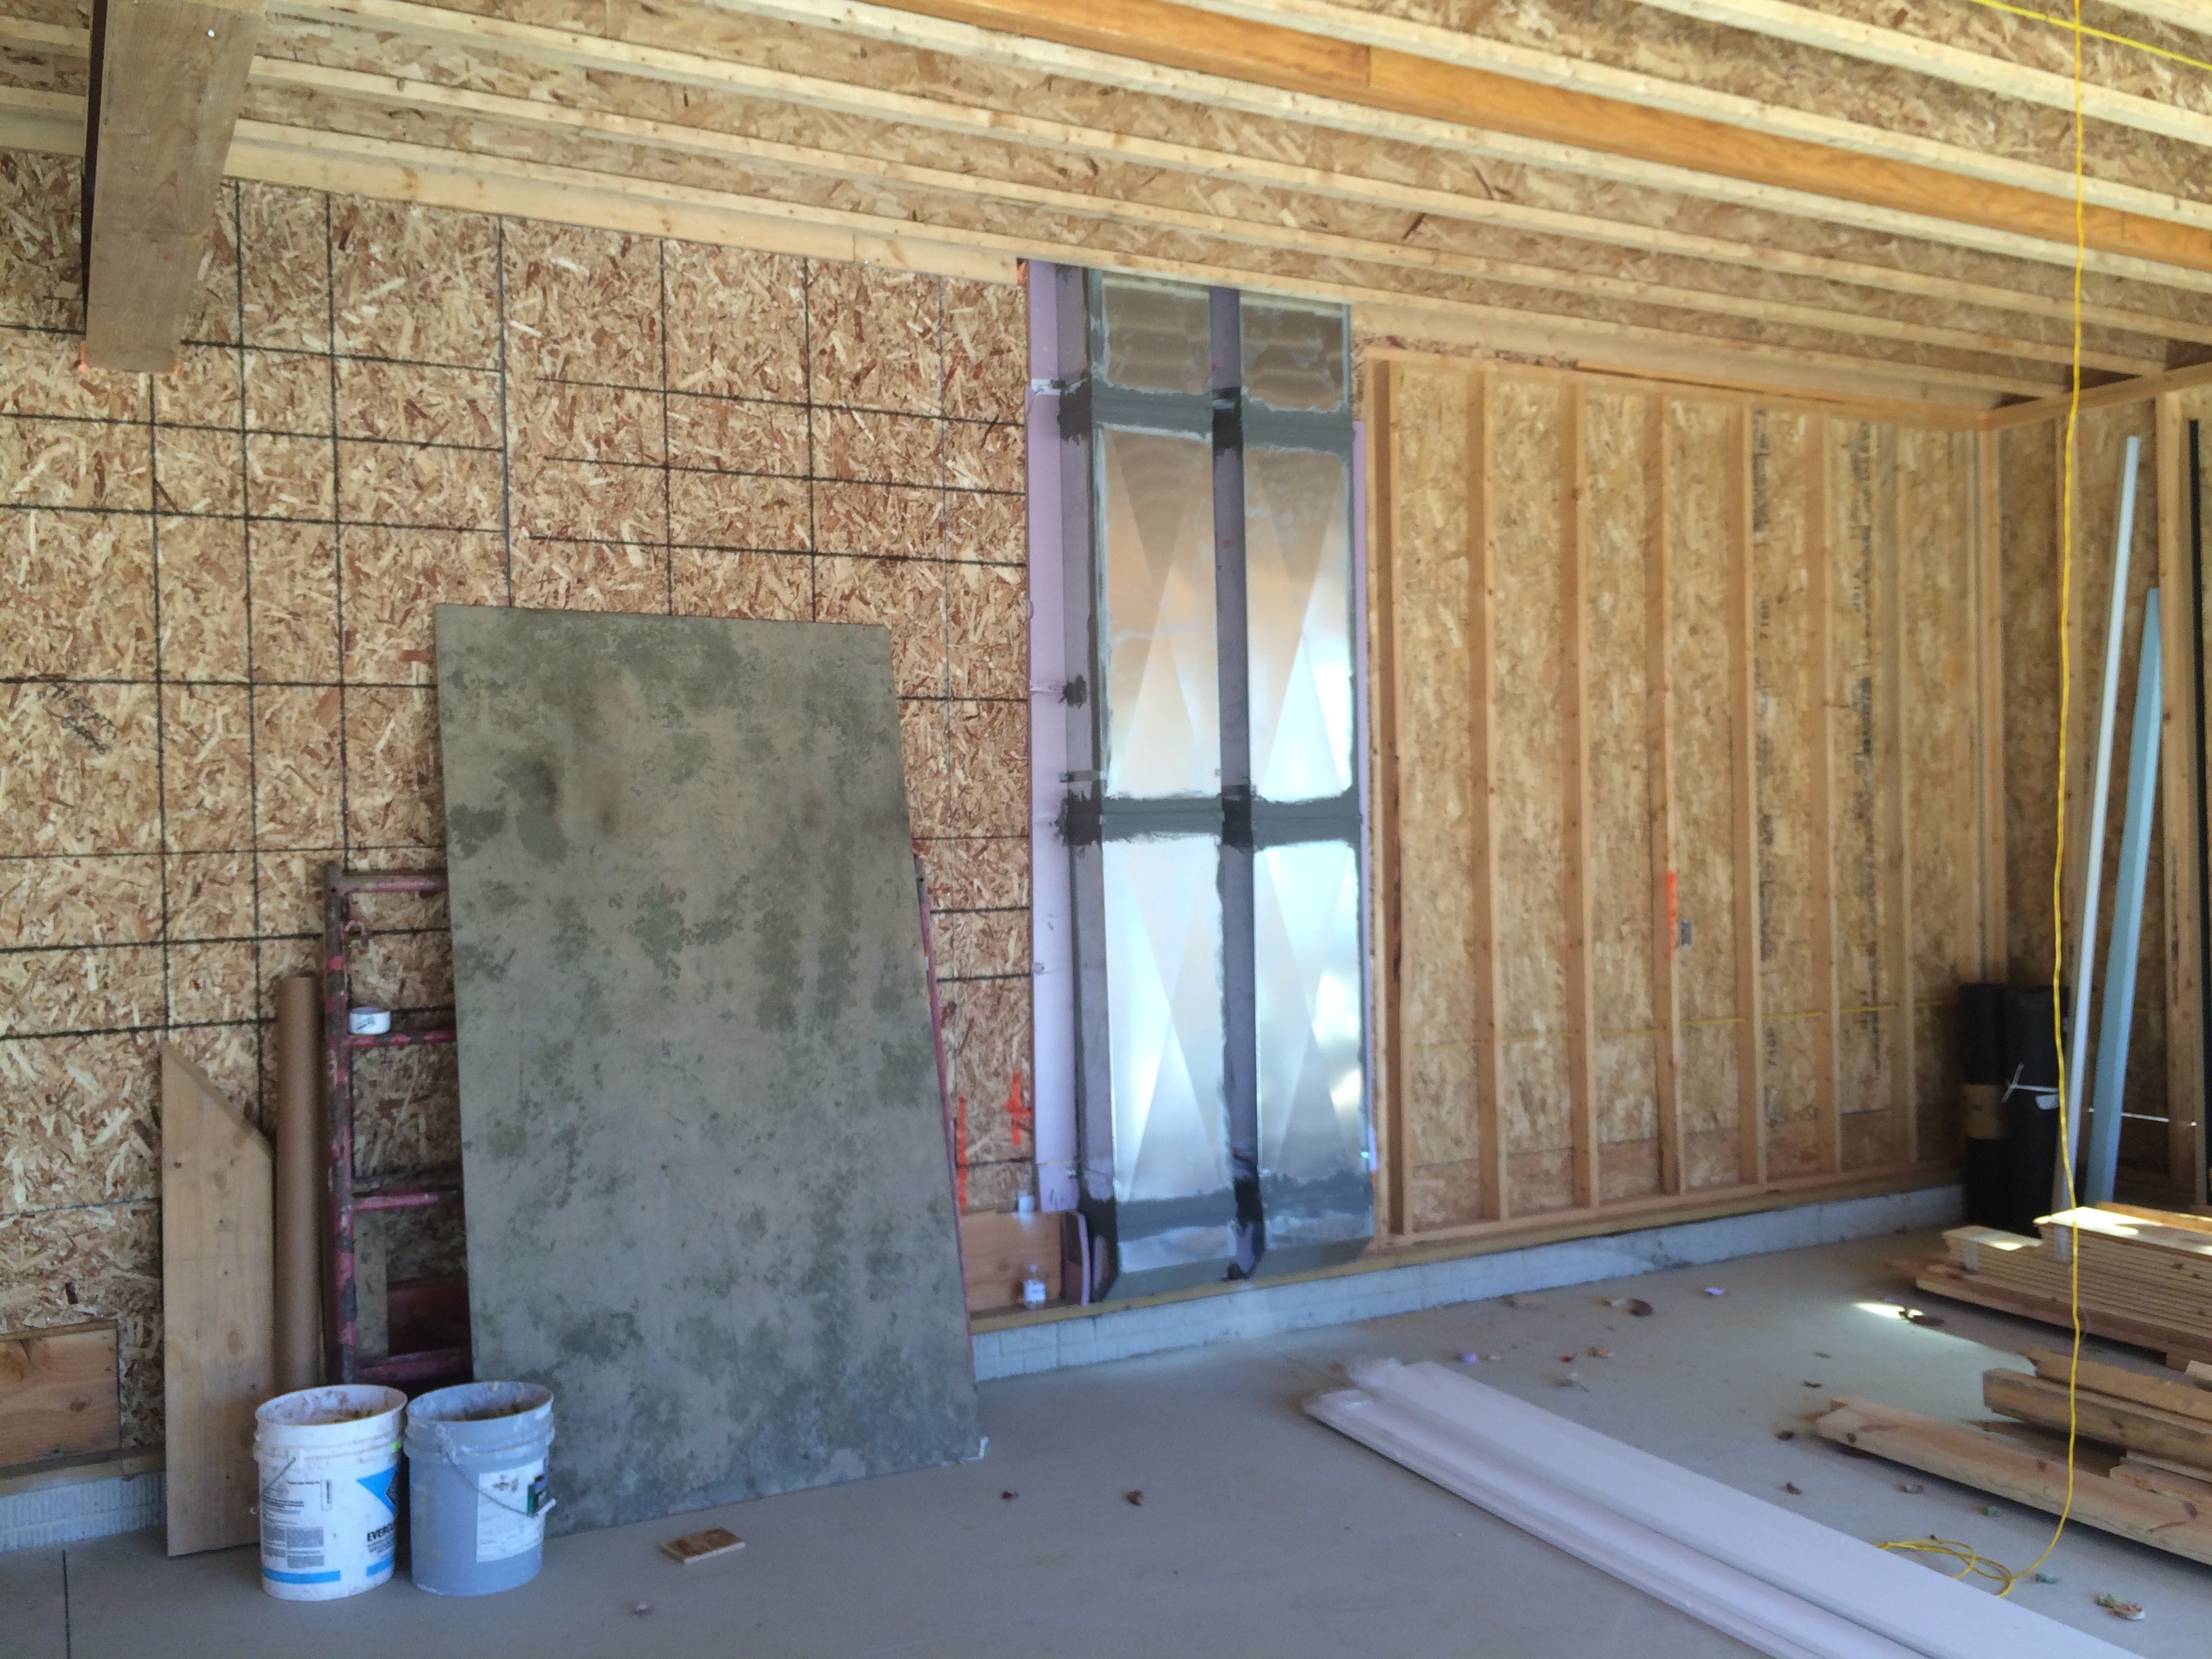
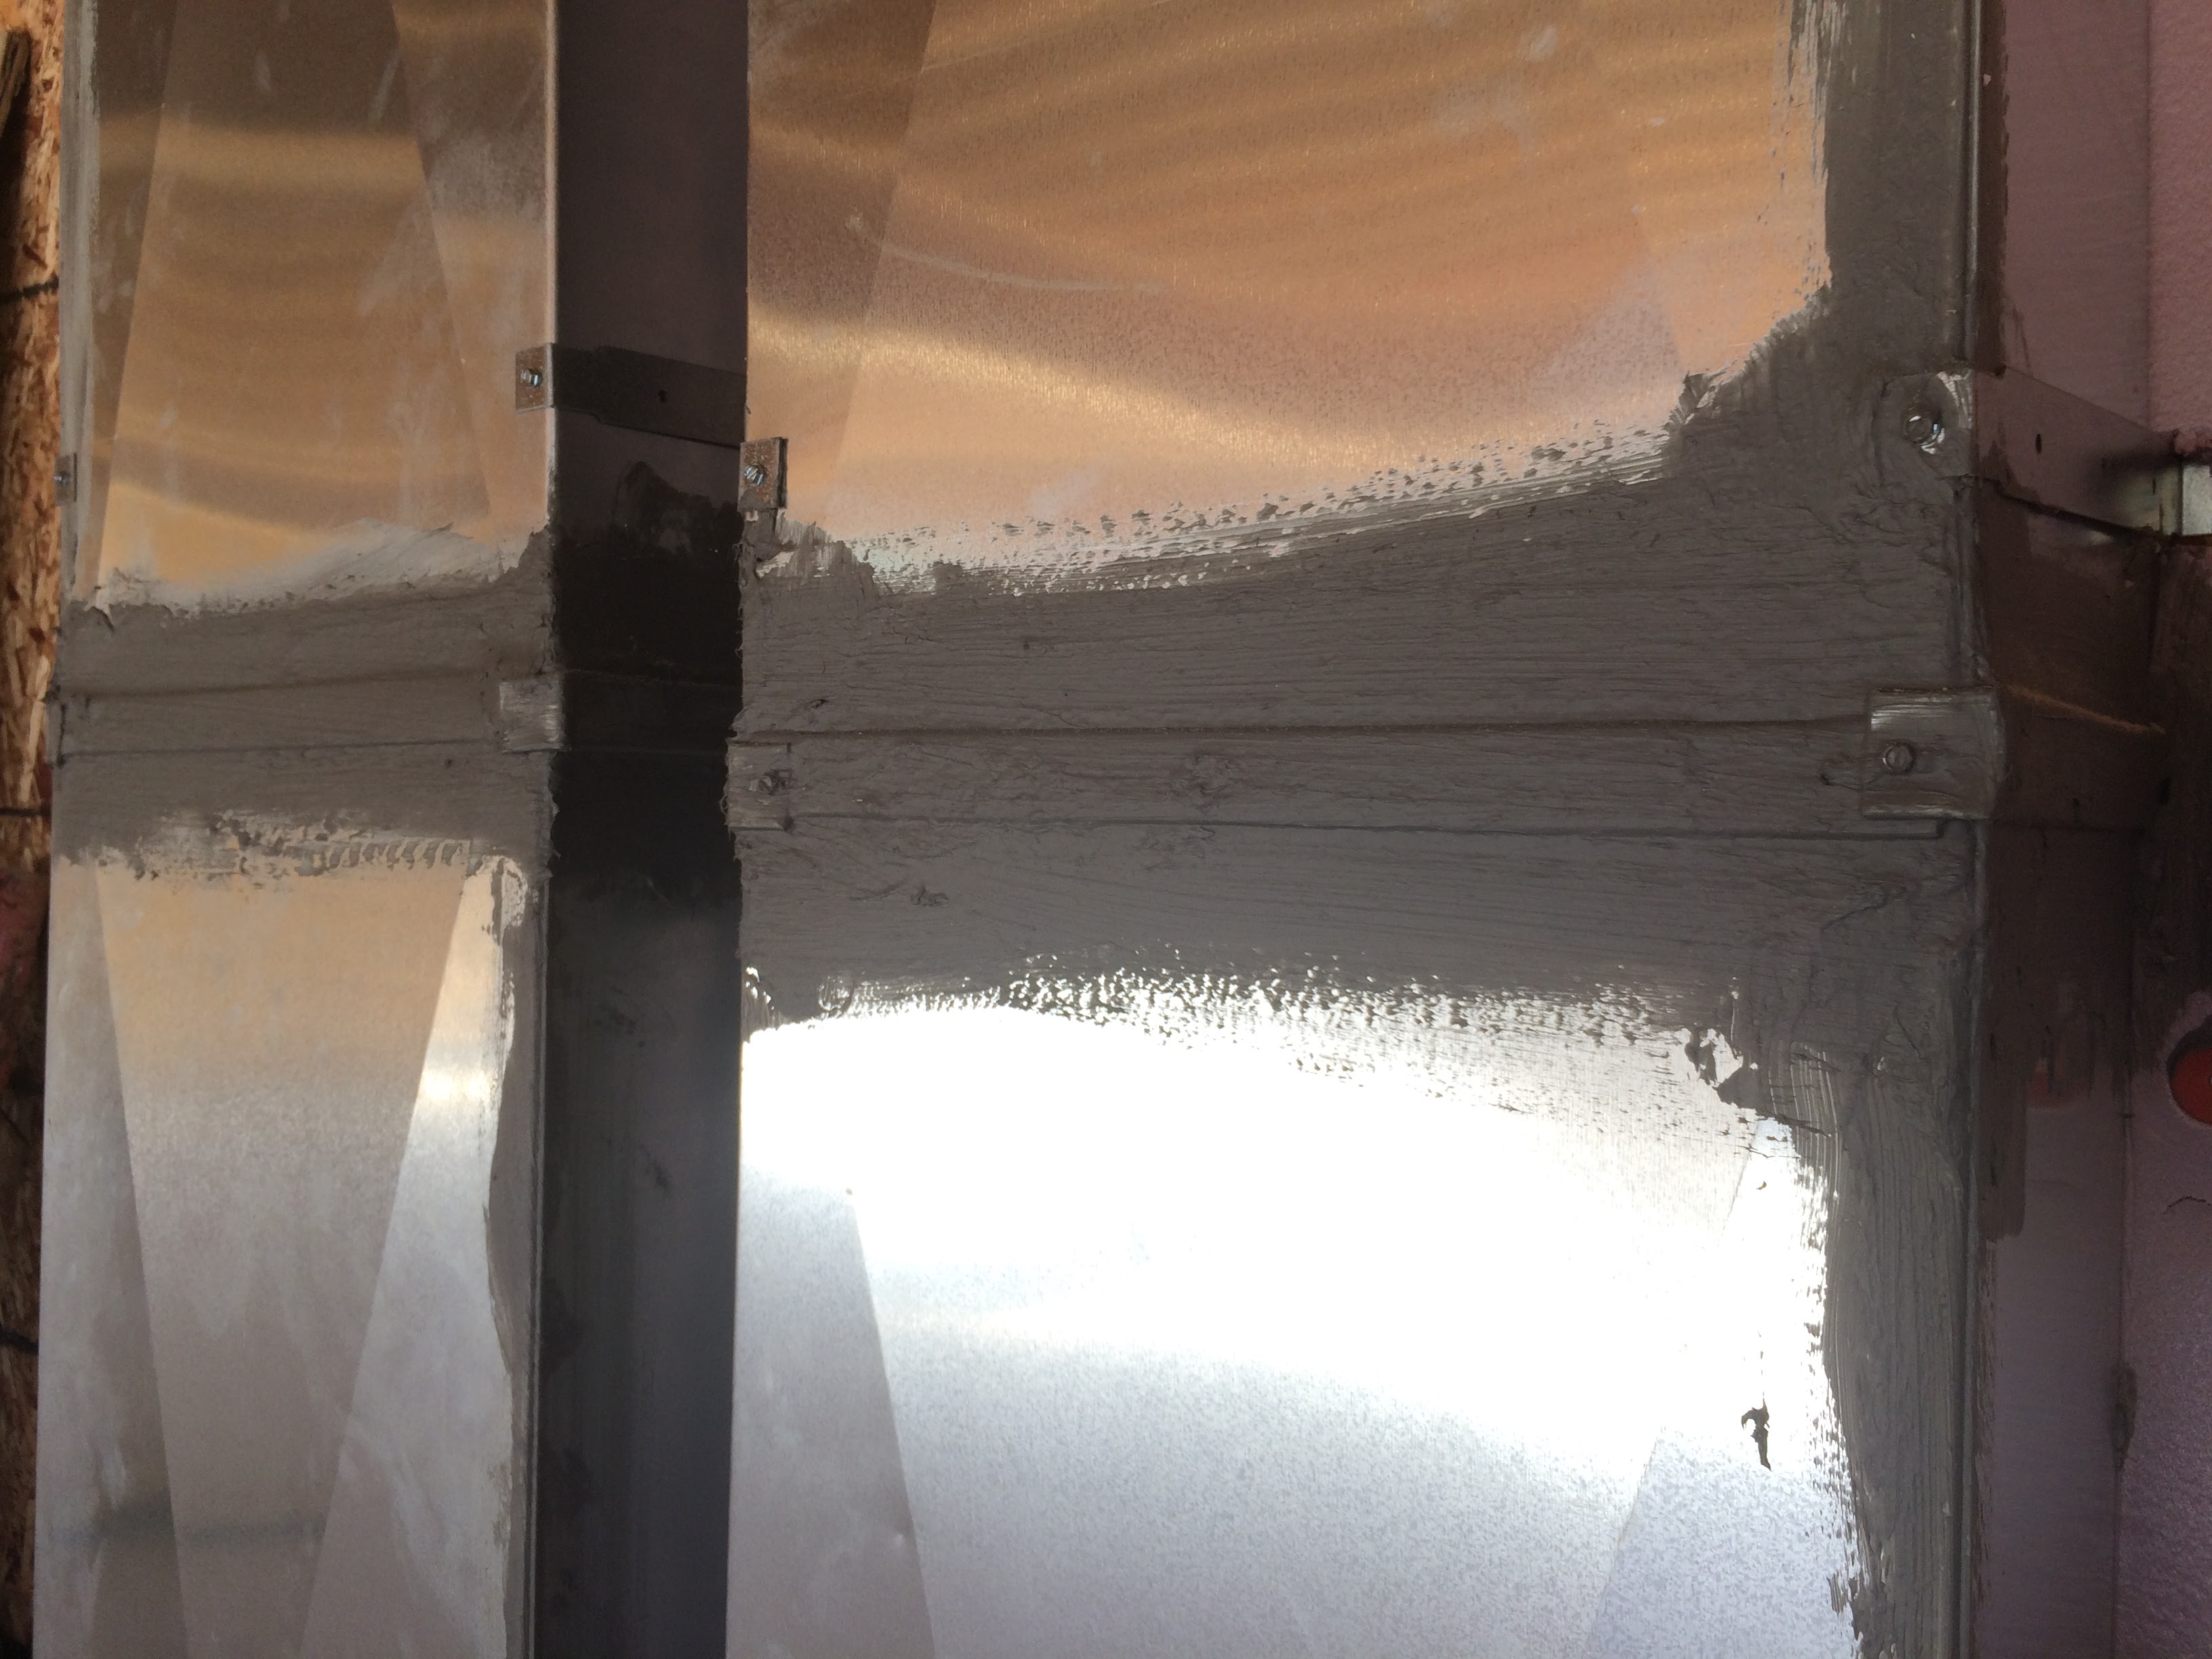
This is ductwork in the garage, which is a big no-no. Ductwork is not supposed to be outside the insulated space of the home, or thermal enclosure. These ducts are going to the bonus room over the garage, which was a big heating and cooling concern. Note the gray lines on the ductwork, that is mastic. Mastic is a thick glue used for sealing ducts. Here is a close up of the “nickel thick” mastic:
These ducts were later spray foamed with closed cell foam before drywall was installed, which makes having them in the garage ok.
The bonus room ended up cooler than the rest of the second floor when the air conditioning was on, so the fears were unfounded thanks to excellent air sealing and insulation from Ed.
My partner sized the ductwork so that zoning could easily be installed later. We had already pushed for a higher HVAC budget, this single system actually cost more than the two furnaces & air conditioners this HVAC company normally installed in homes this size. High end equipment ain’t cheap.
Twilight Zone(s)
If Alex decides that adequate comfort isn’t possible without zoning, the house is set up to have first floor, second floor, and bonus room zones.
Doing this is tricky. Most times when a zoning system is retrofitted, it only uses about half of the duct system in a home. This is a problem because it drives the pressure inside the ducts very high. High pressure inside the ducts (aka static pressure) leads to all sorts of problems like fans failing in a few years, heat exchangers cracking, and more. High static pressure can drastically reduce the life of HVAC equipment. To combat this, you have to install additional ductwork so that even if only one zone is running, the static pressure is low enough that the furnace and heat pump live to a ripe old age.
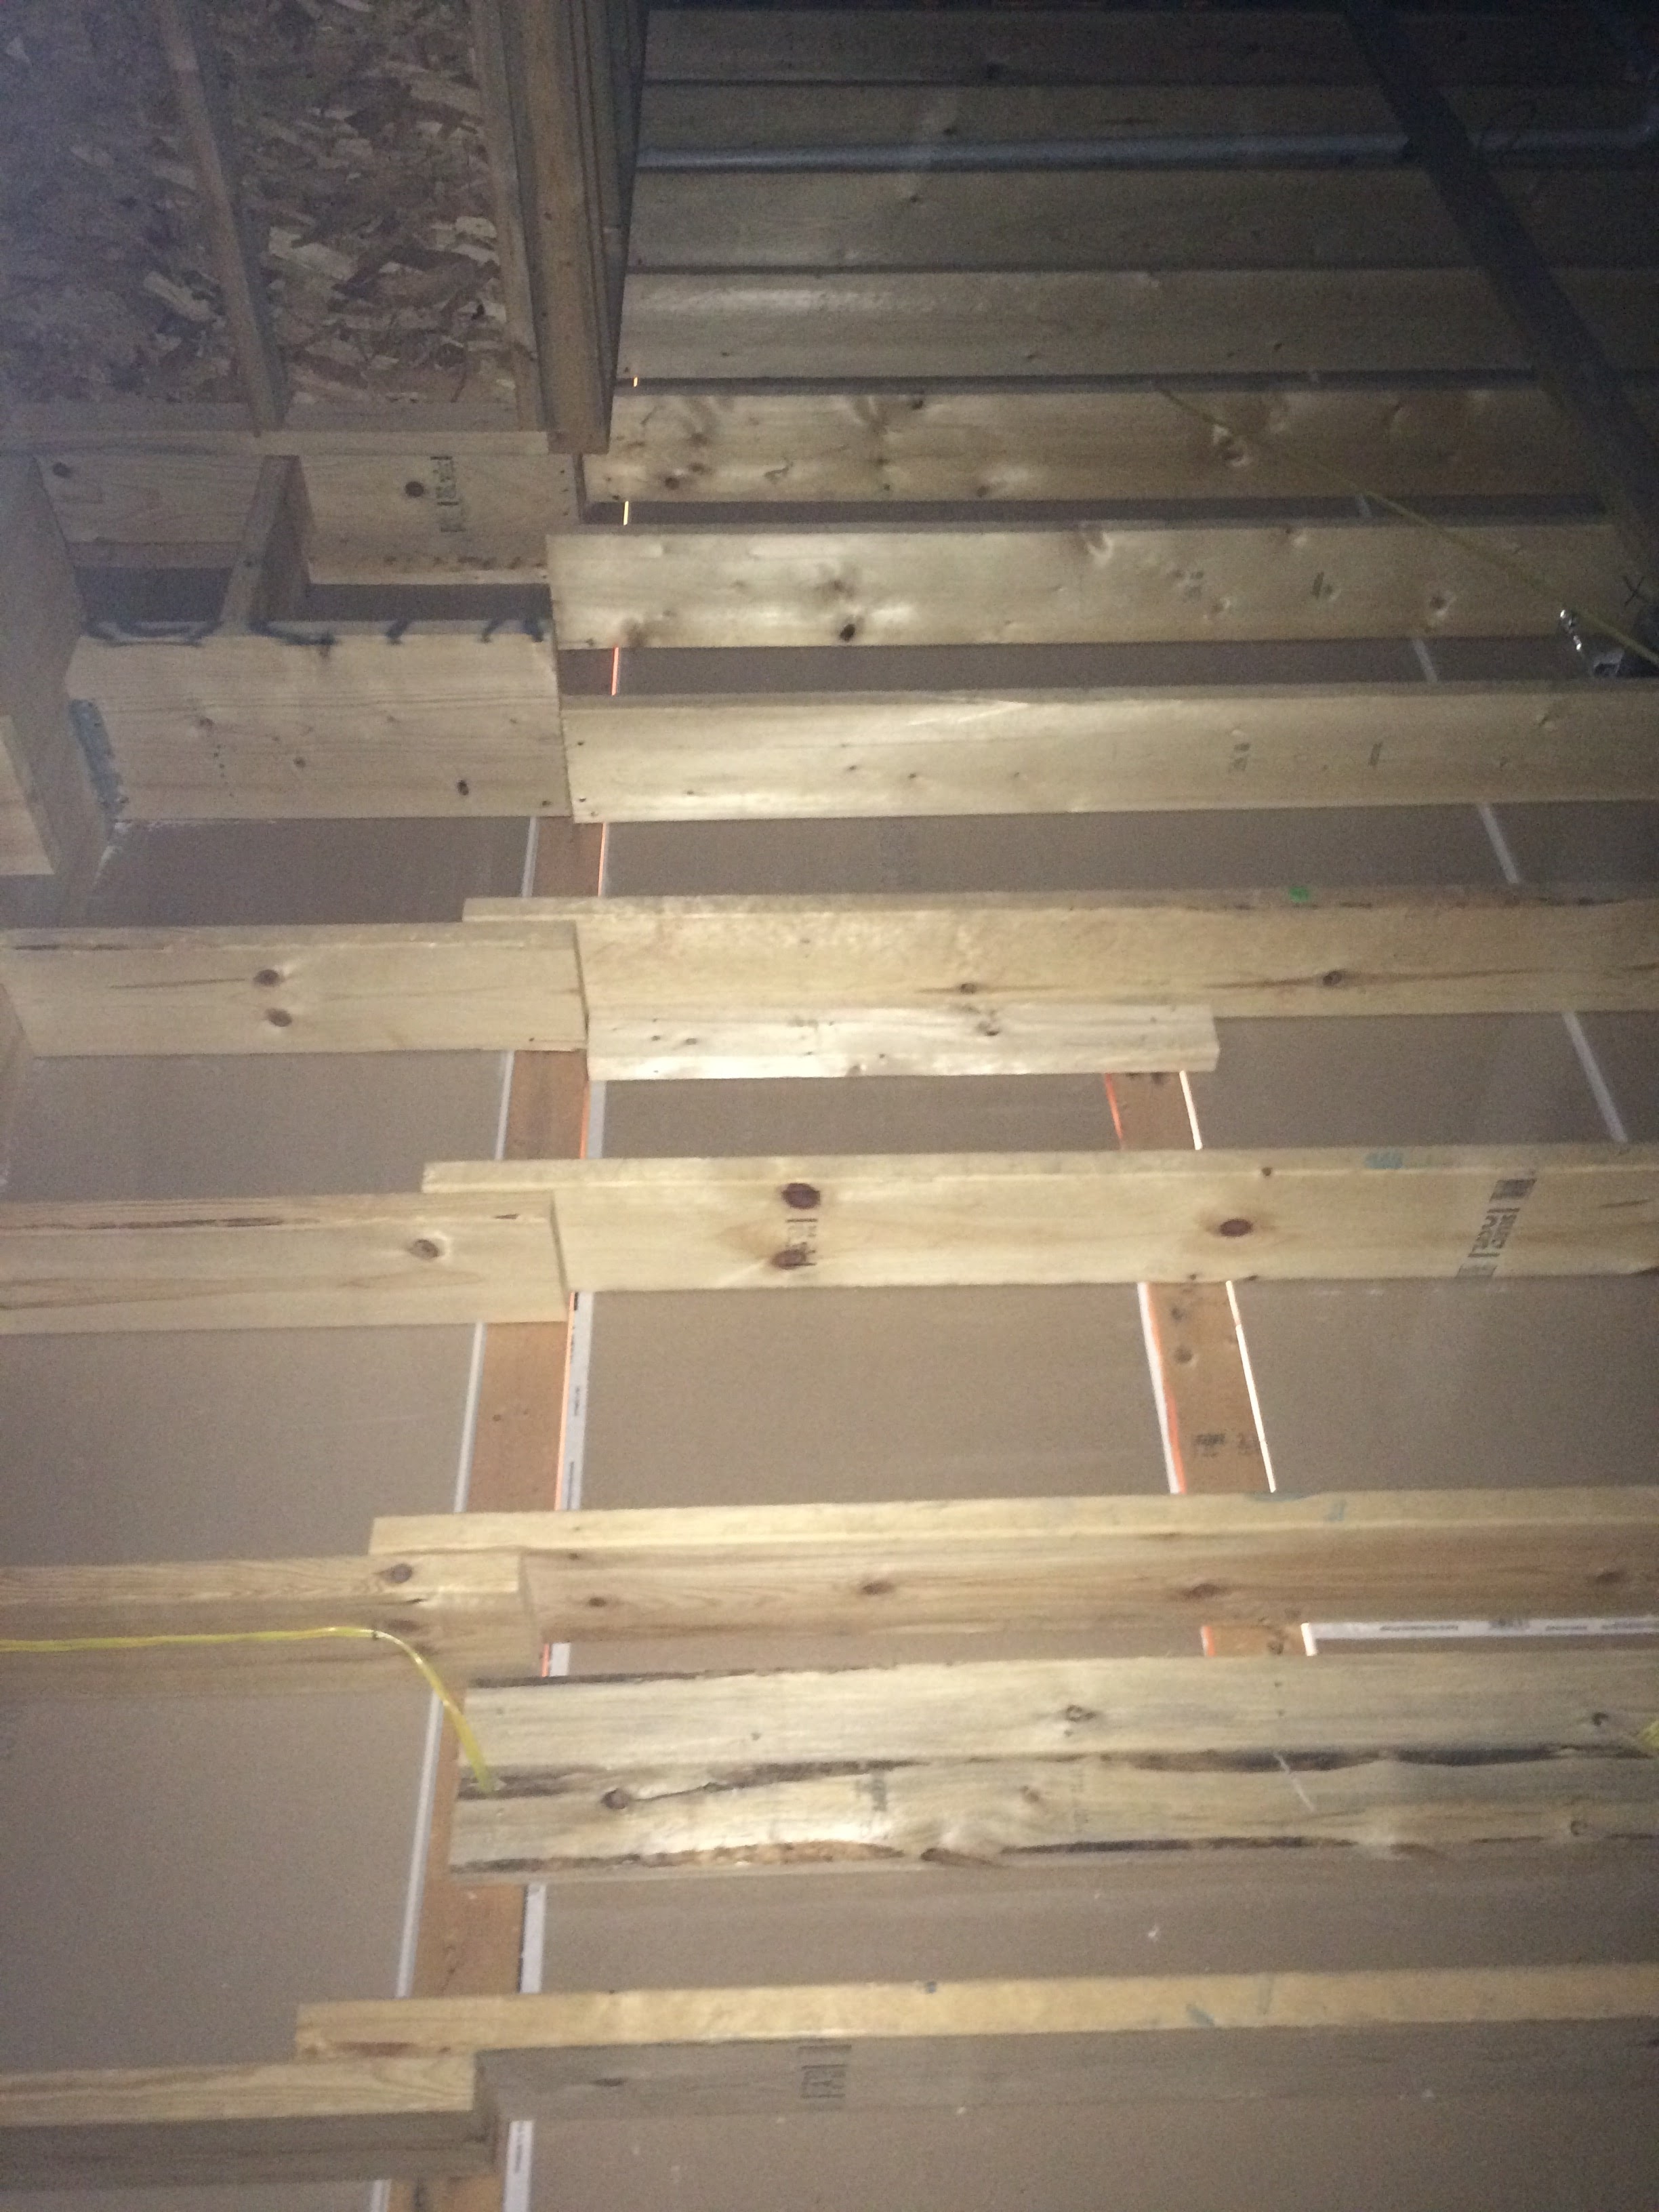
This is what oversized ductwork looks like. This is a future return duct in a wall cavity. (Yes, fellow advanced energy geeks, I realize this isn’t 100% kosher, but inspectors here don’t flag it, so it continues. It should be hard duct.)
Note how there is a large hole at the bottom and at the top. This helps ensure that there is enough return airflow if only the first floor zone is calling for heat or cool. Also note the black weatherstripping around the cavity, that should help seal it from sucking return air from the wall cavities next to it. We didn’t do duct blaster testing (which looks for leakage inside a duct system), so I don’t know how leaky it is. Probably middling.
Regardless, if zoning is ever installed, the furnace should still last 20 years. If this duct design hadn’t been done, the furnace might die in 5-10 years instead. Yep, it’s that big of a deal.
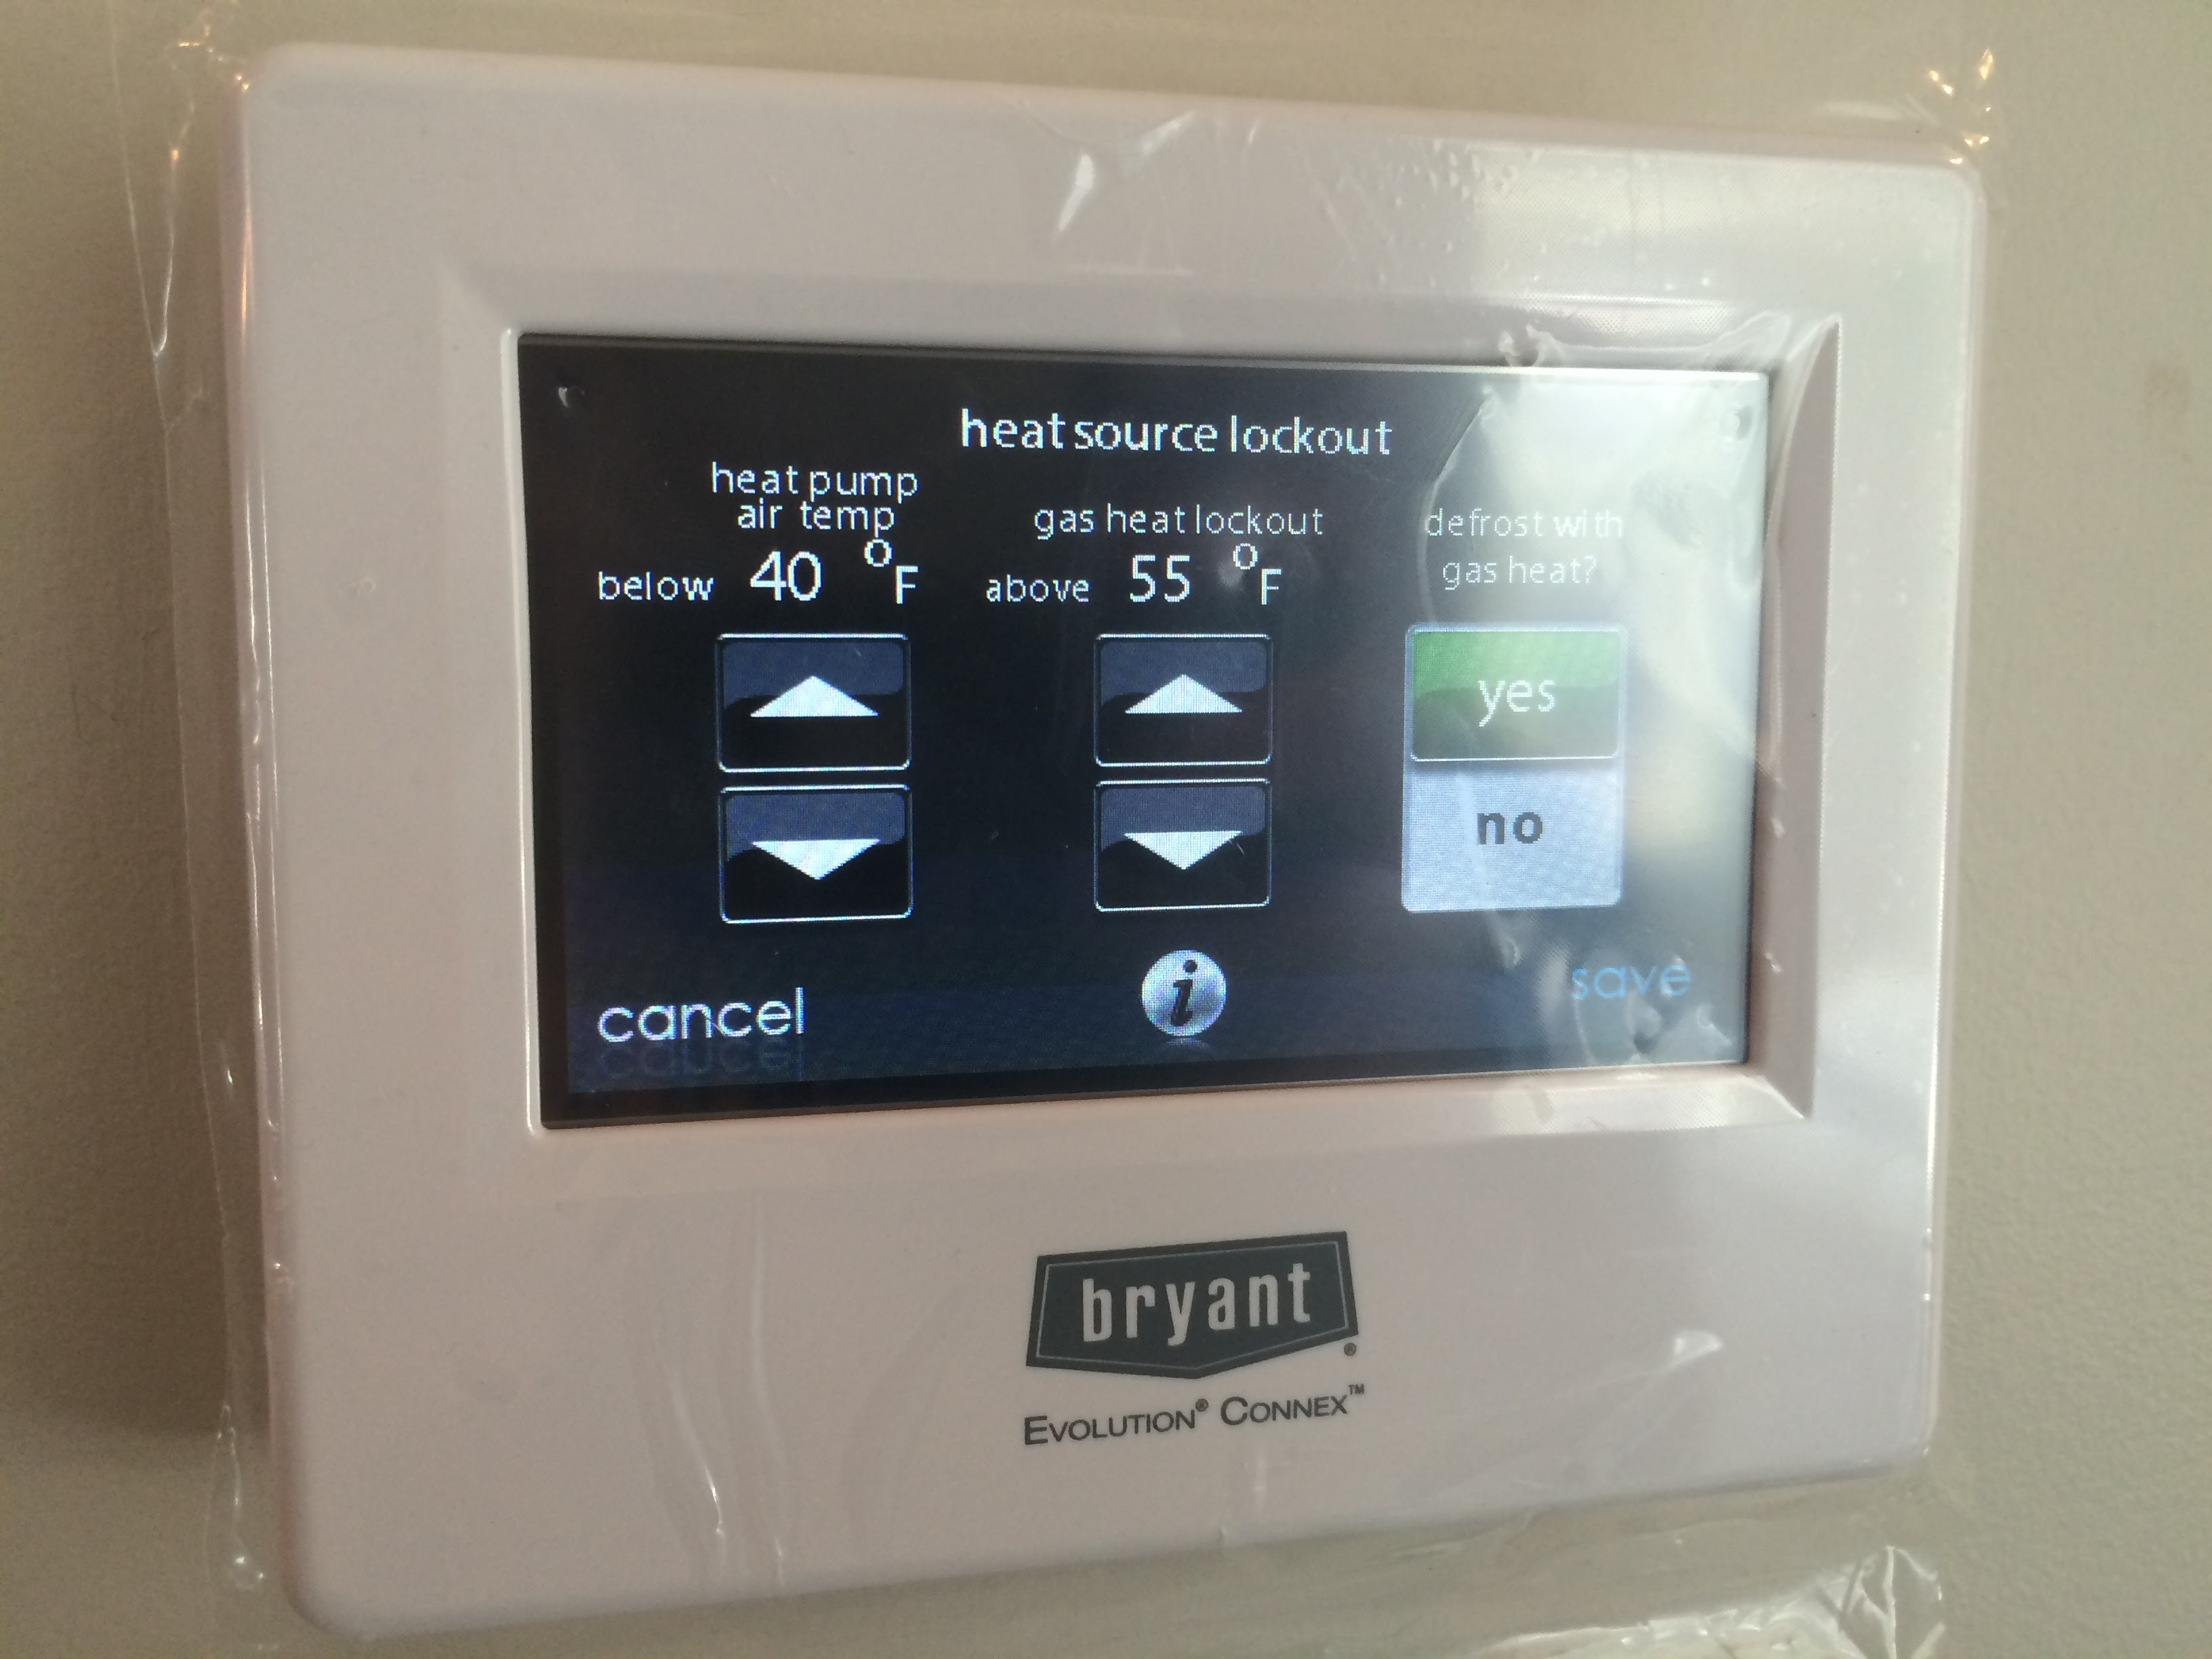
The thermostats on the high end Bryant/Carrier furnaces & heat pumps are remarkable. This photo was on the final blower door testing day. I set up the thermostat as a freebie. This screen lets you set when the heat pump can’t be used anymore and you switch to the gas furnace. Since gas is really cheap right now, I set the changeover at 40 degrees, although the house would likely heat down to 25 or 30 with the heat pump.
Verbally, Alex told us that he vastly preferred the heat pump heat to the gas heat, it felt more even. We agree, and this is one of a number of reasons we like to install straight heat pumps without a furnace in any client’s home that will let us. Four (almost five) so far. I call them “Homes of the Future.” They have no gas meters.
From limited initial data, it looks like Alex’s 4800 square foot house is going to use about ½ the energy to heat it that my 2200 square foot house uses. That’s about ¼ the use per square foot of my house. (Yes, I’m the shoemaker with barefoot kids, plus a 181 year old house.) Tight construction makes a huge difference!
Air Sealing Visit 1 – Pre-Drywall
From what I saw, Ed is a spectacularly good builder, he is actually an engineer by trade. I would gladly have him build my home. His dad started the business and he recently took it over. Ed proudly walked me through details like the I-Beams in the basement that are welded to the poles, which give the house additional strength. That detail is rarely executed. I also met his masonry contractor, Ron Bengough of Becco Excavating who recently build a ridiculously tight geothermal home in Medina. I was impressed.
I say all that to say this: Ed knows his stuff, but he wasn’t knowledgeable about how to air seal, or just how small he can make HVAC. That’s ok, it’s teachable, and that was my job. He knows a heck of a lot more than my partner and I in many other areas.
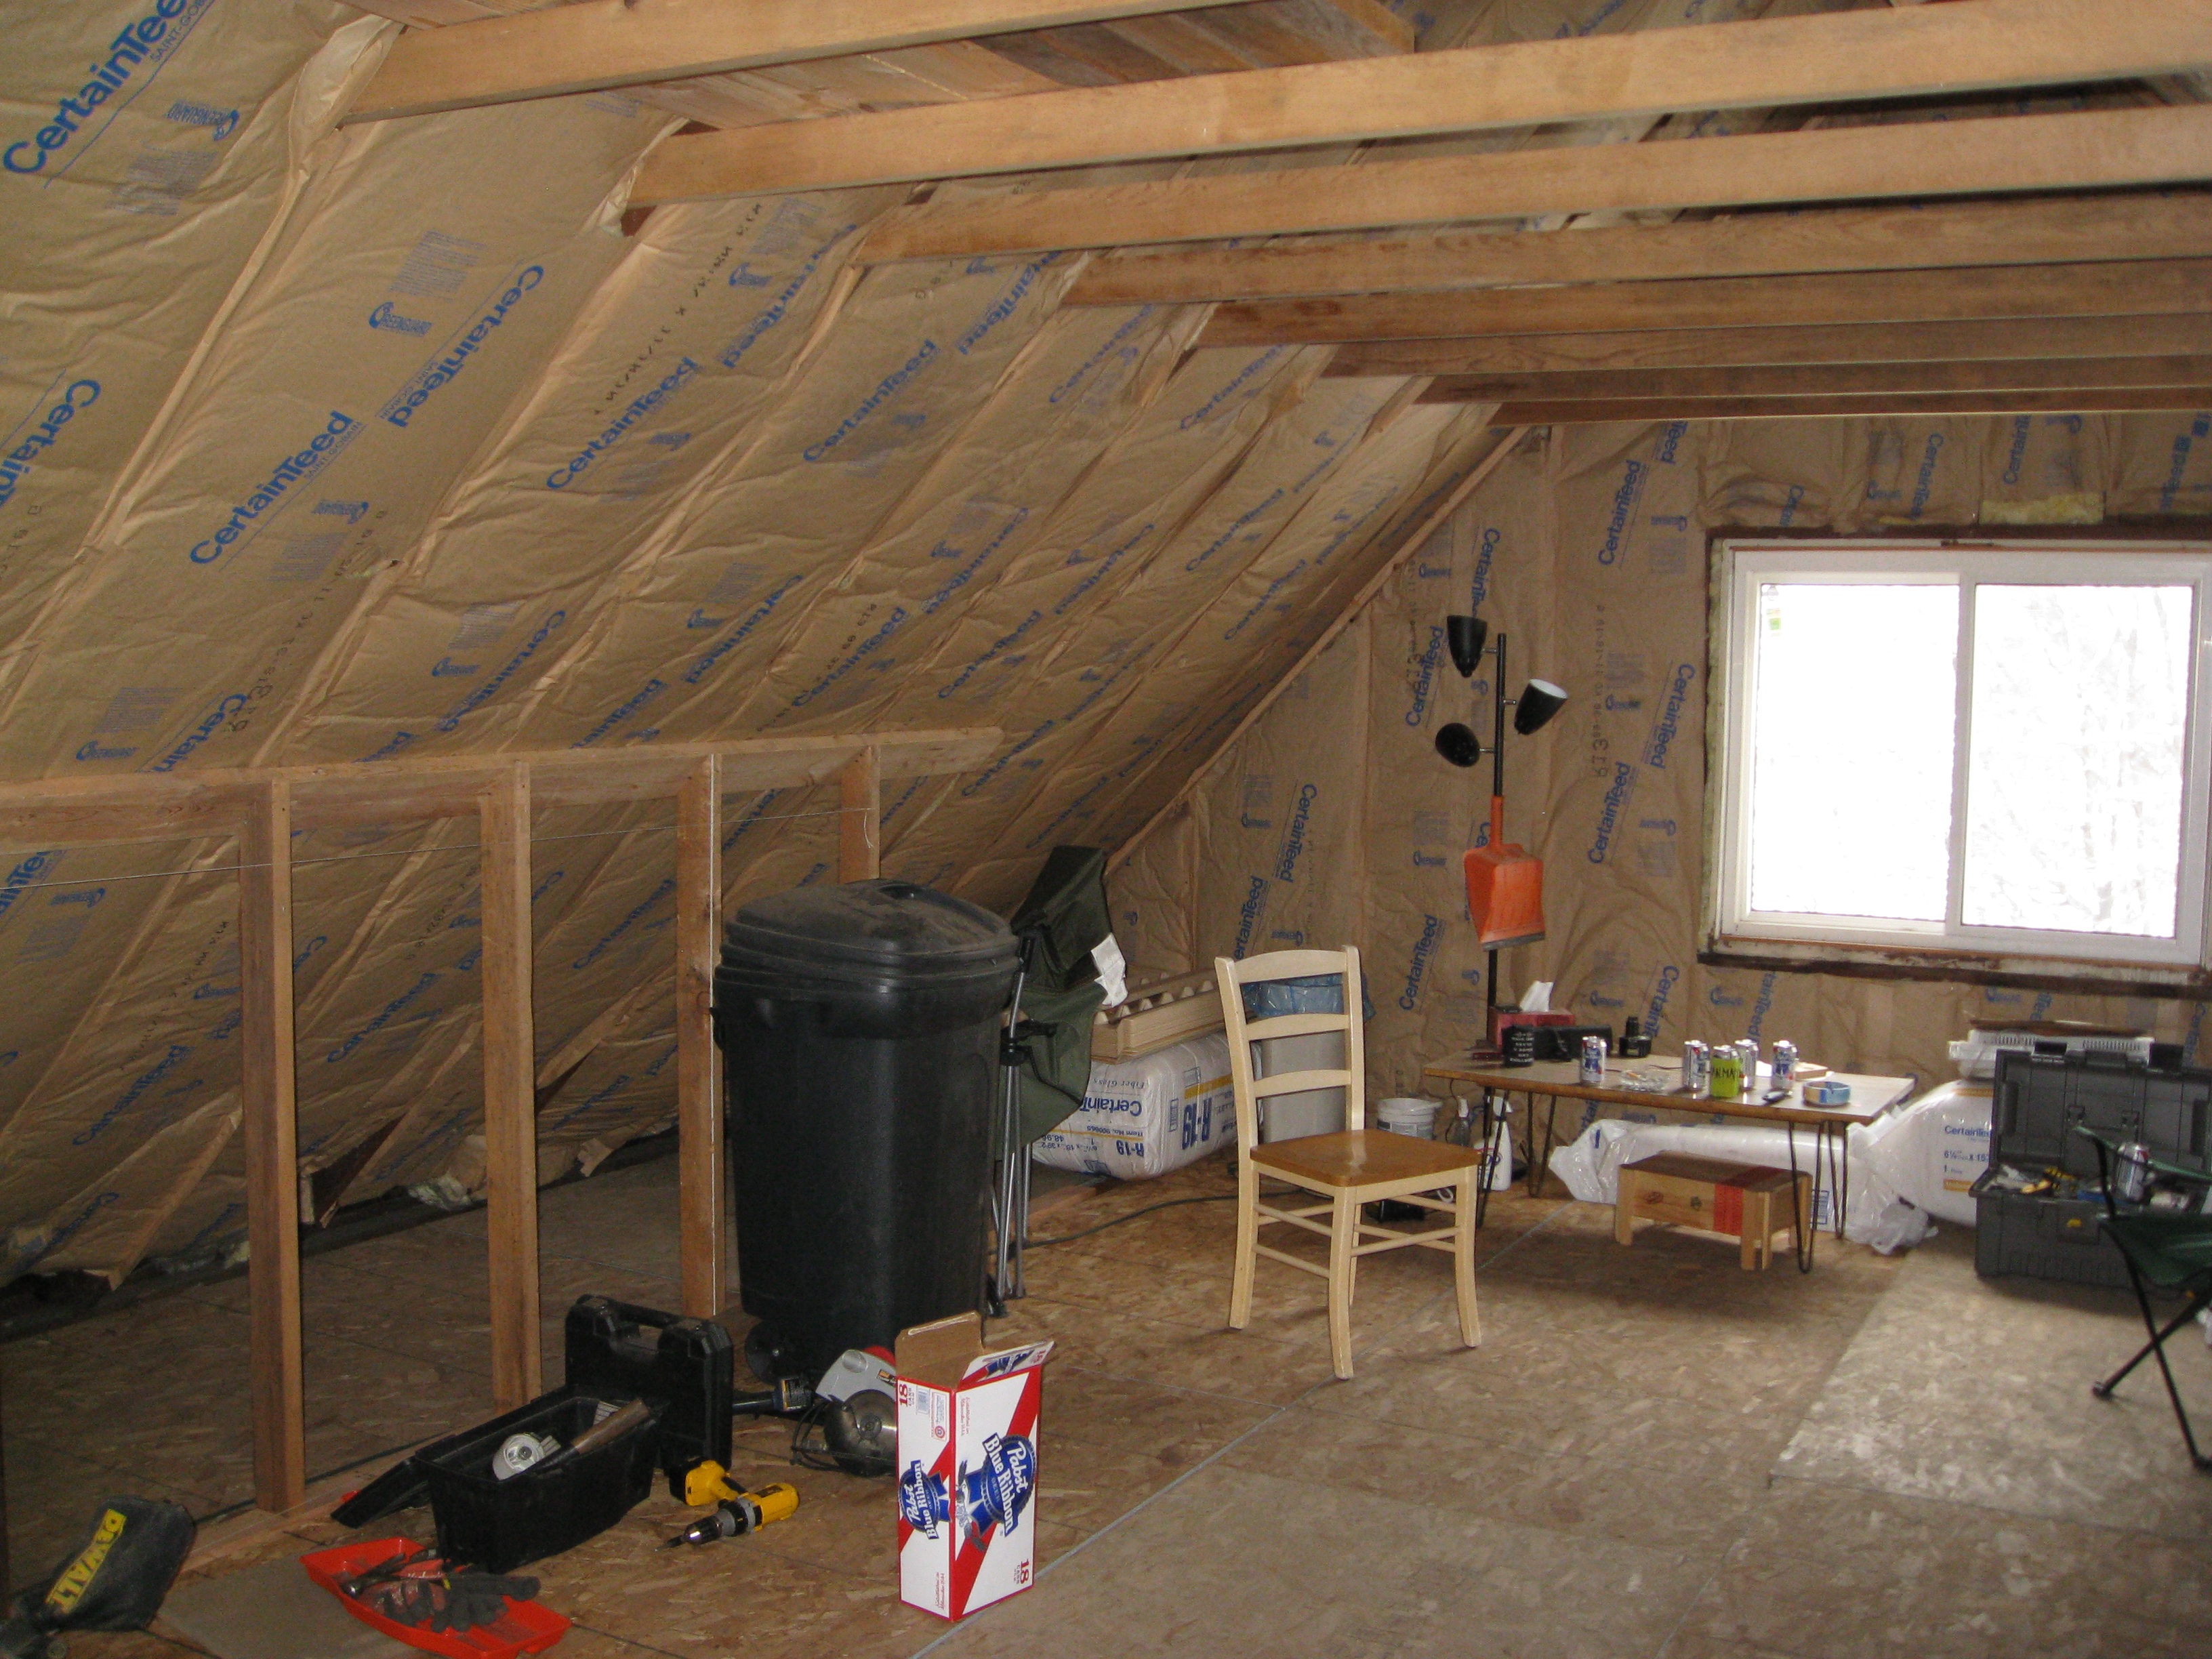
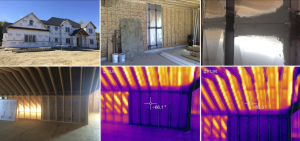
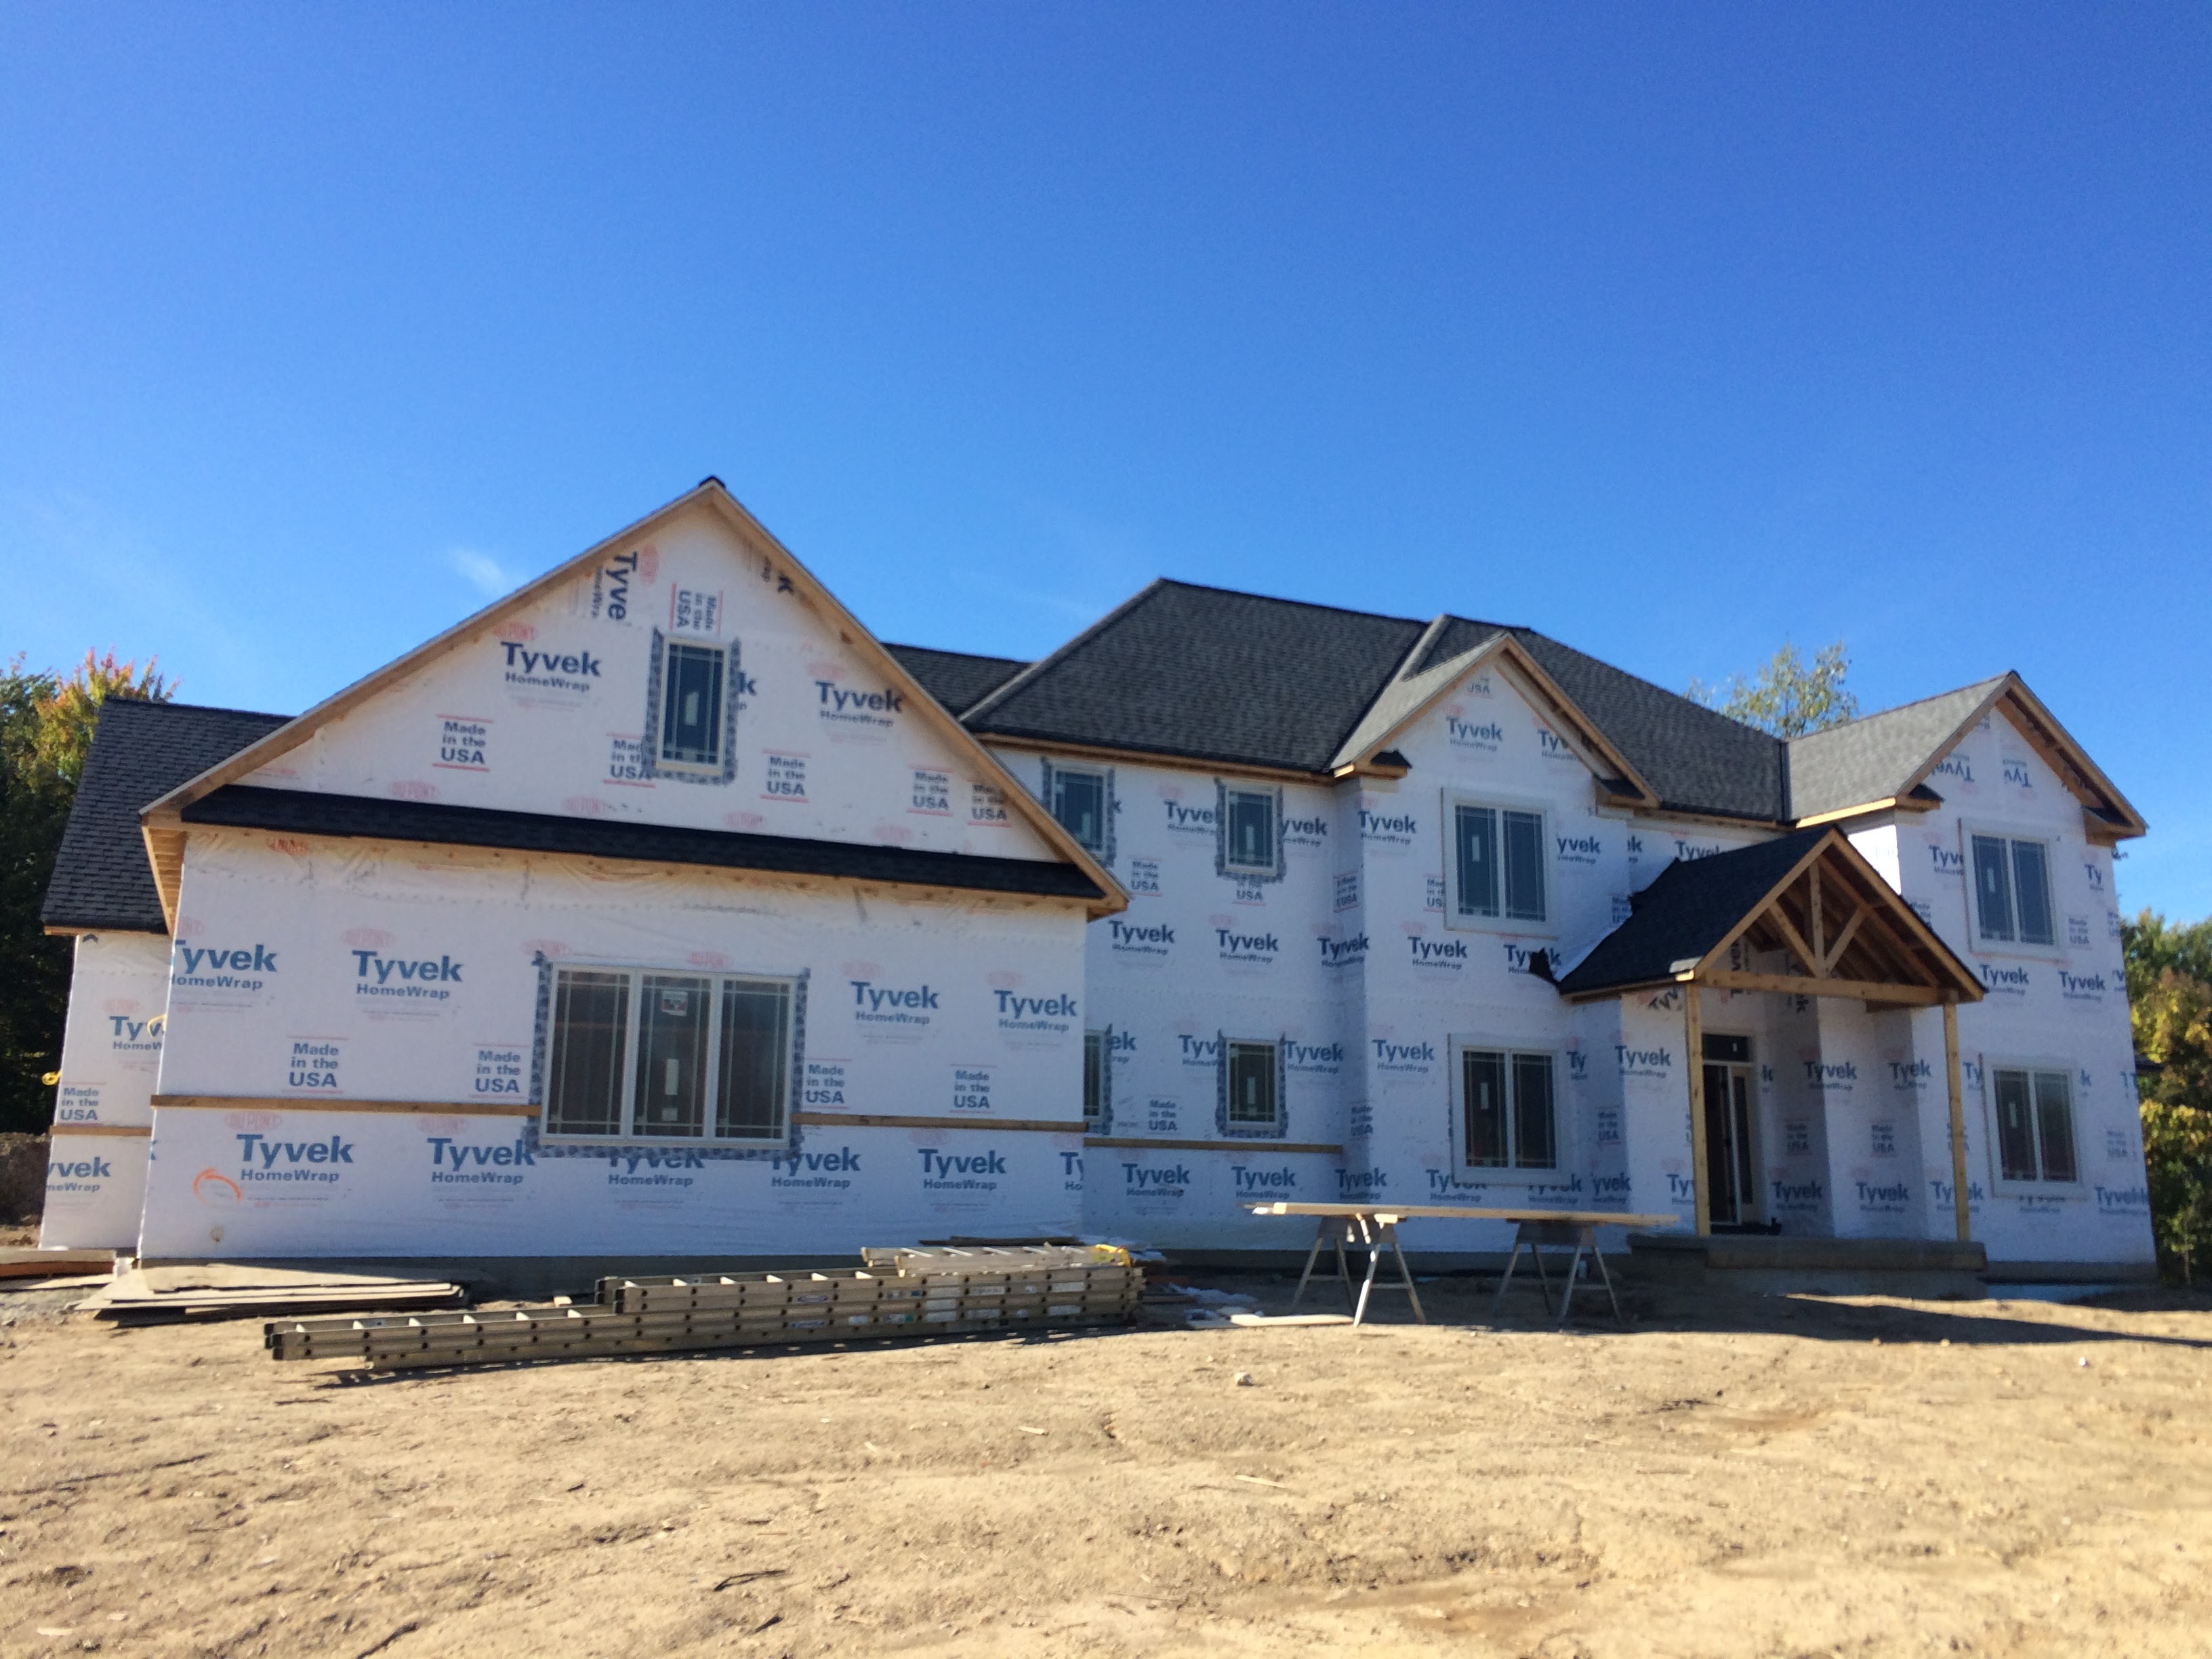
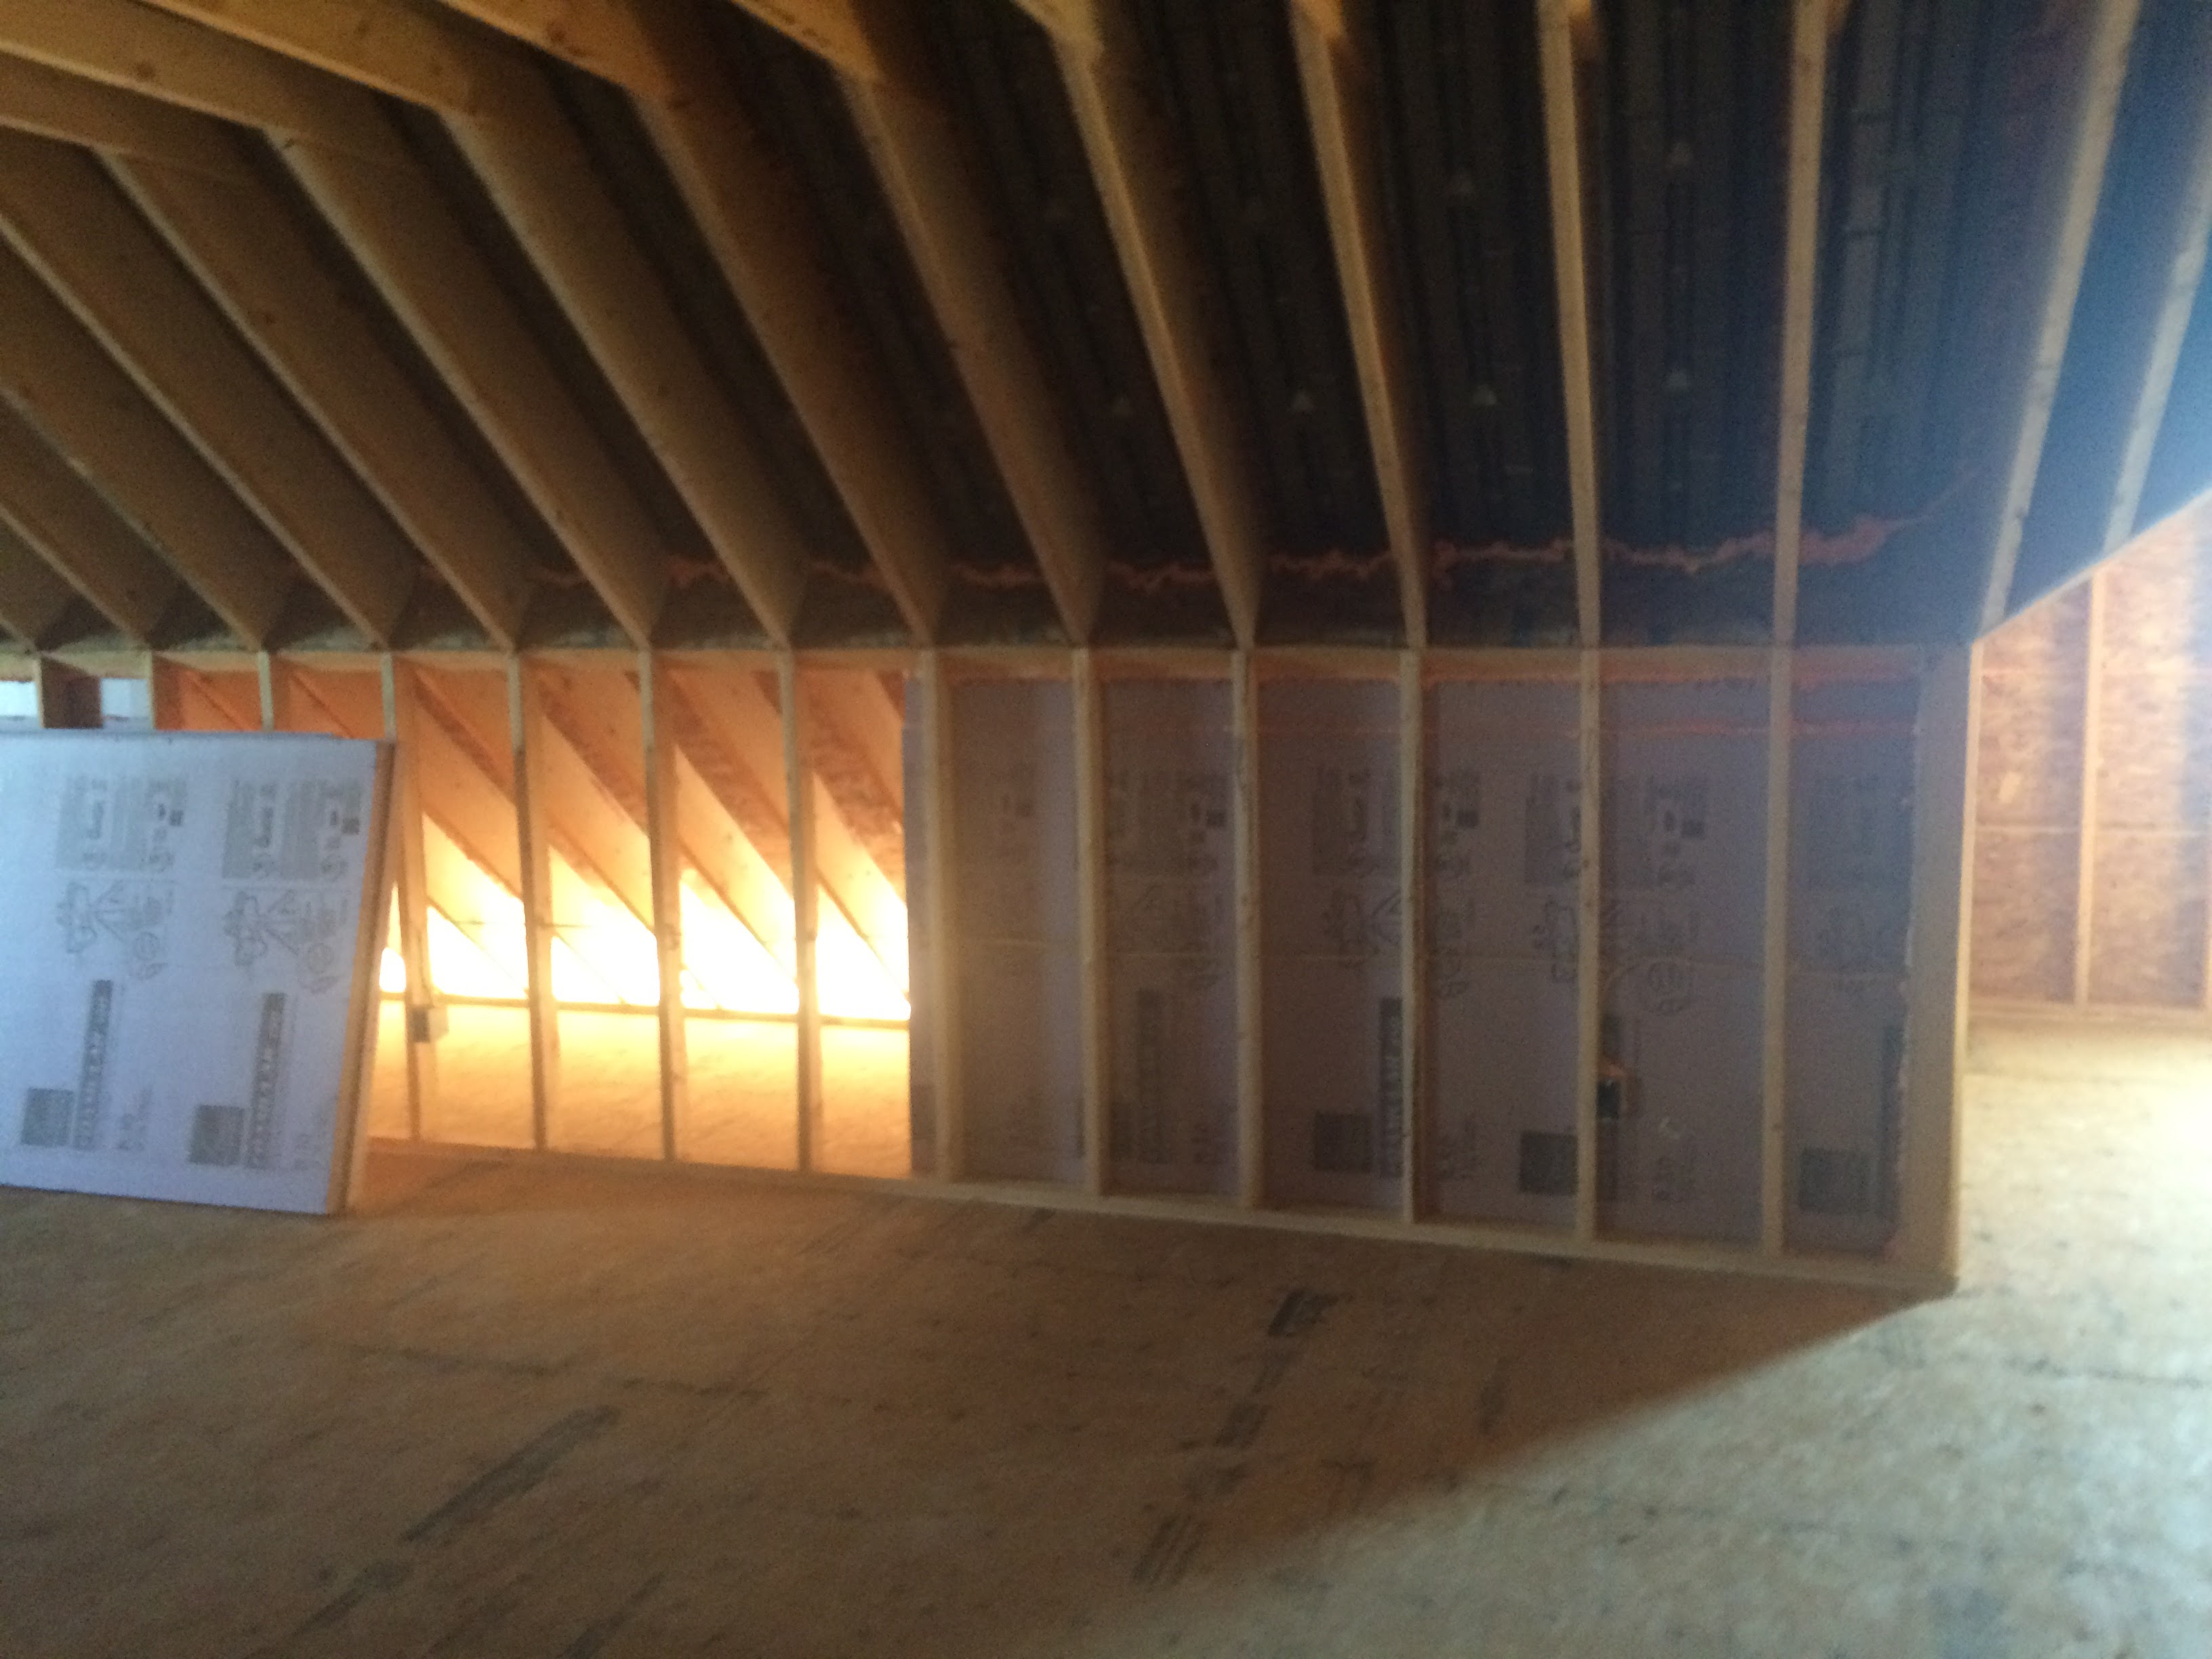
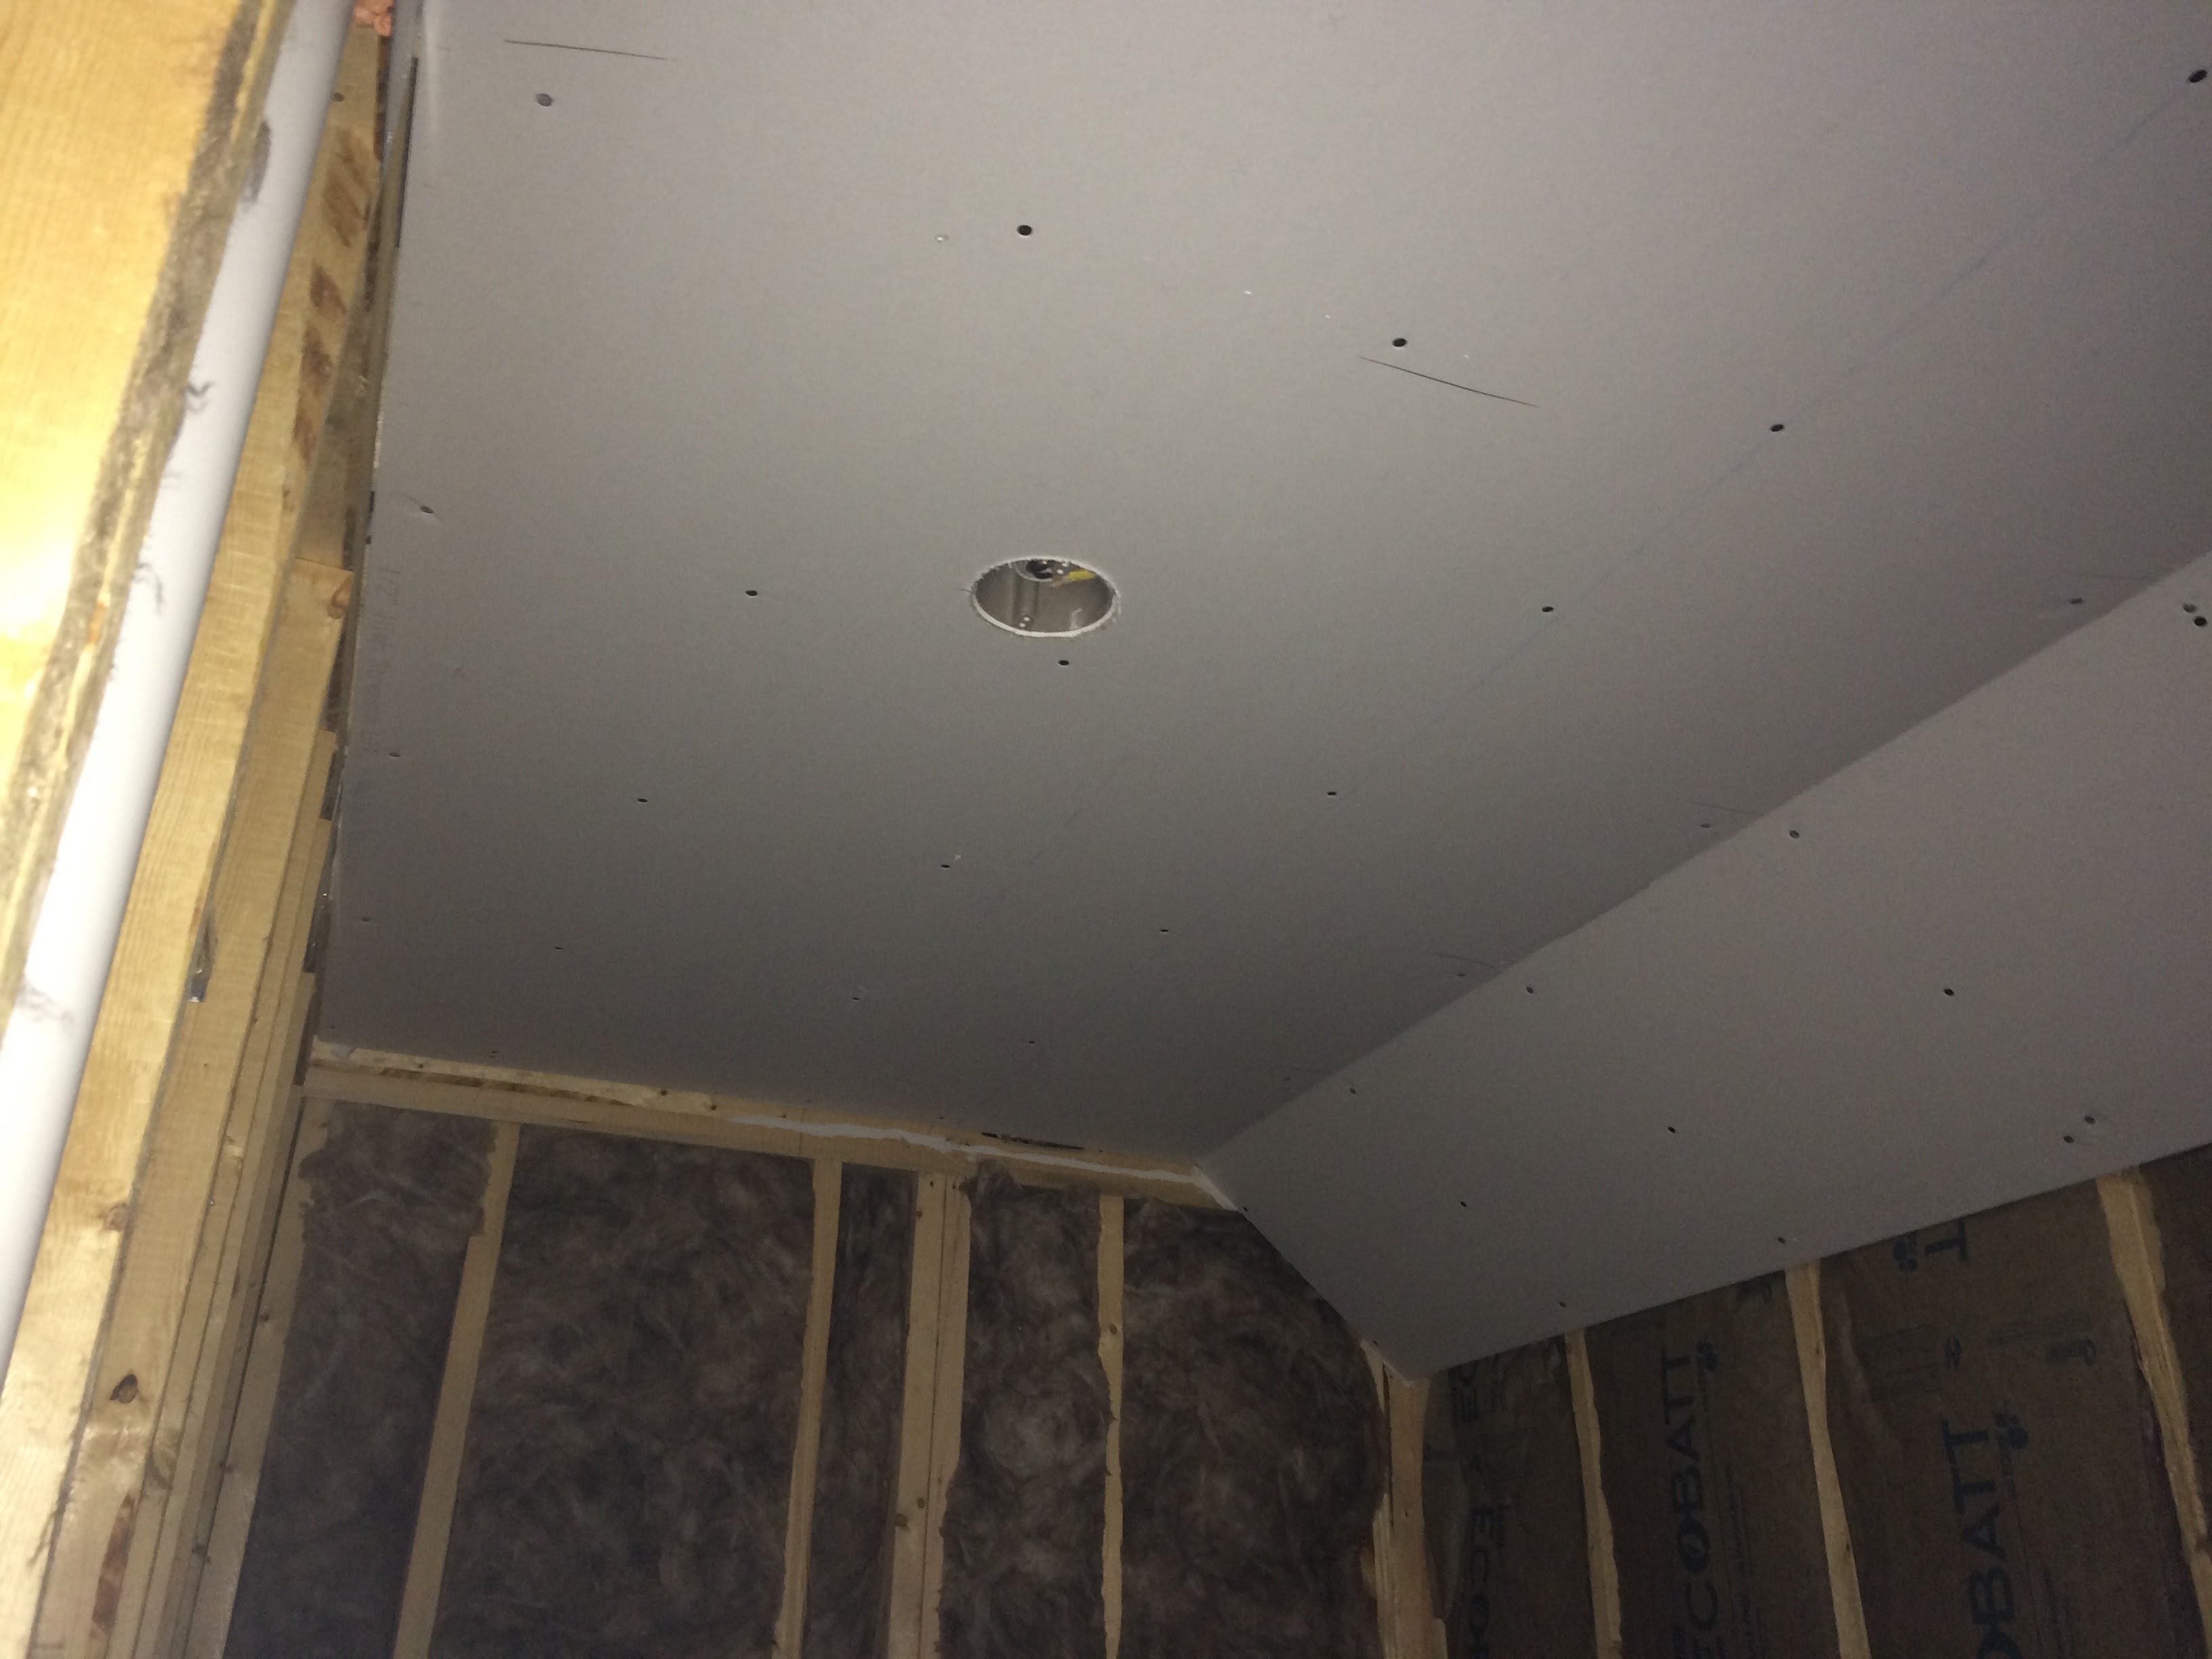
The first visit was before drywall, so no blower door testing, the house looked as the case study picture does:
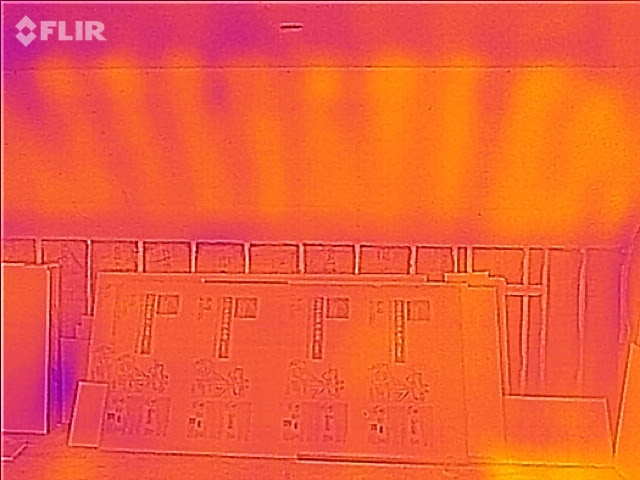
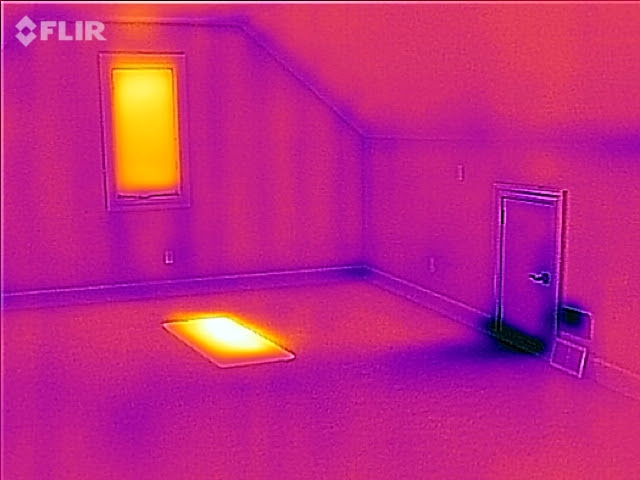
Ed and I walked around, and I pointed out various tricky spots. There was an odd sloped ceiling in the master closet that required spray foaming. The little bump outs on either side of the front door were particularly tricky. The ducts behind the knee walls in the bonus room needed special attention. It was an interesting lesson to give, and the pictures are so boring that I’m not even including them, with this exception:
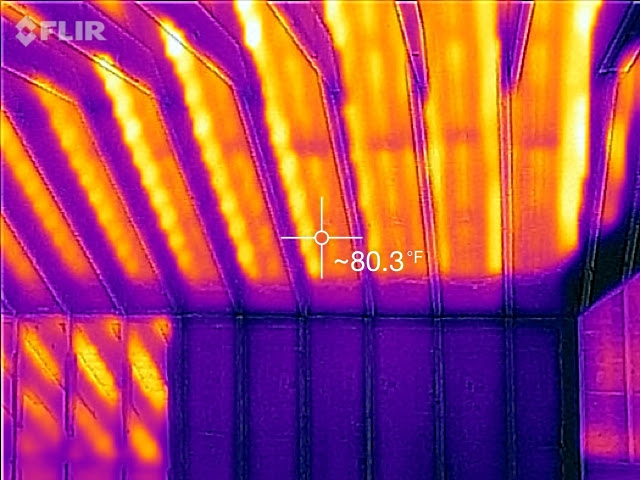
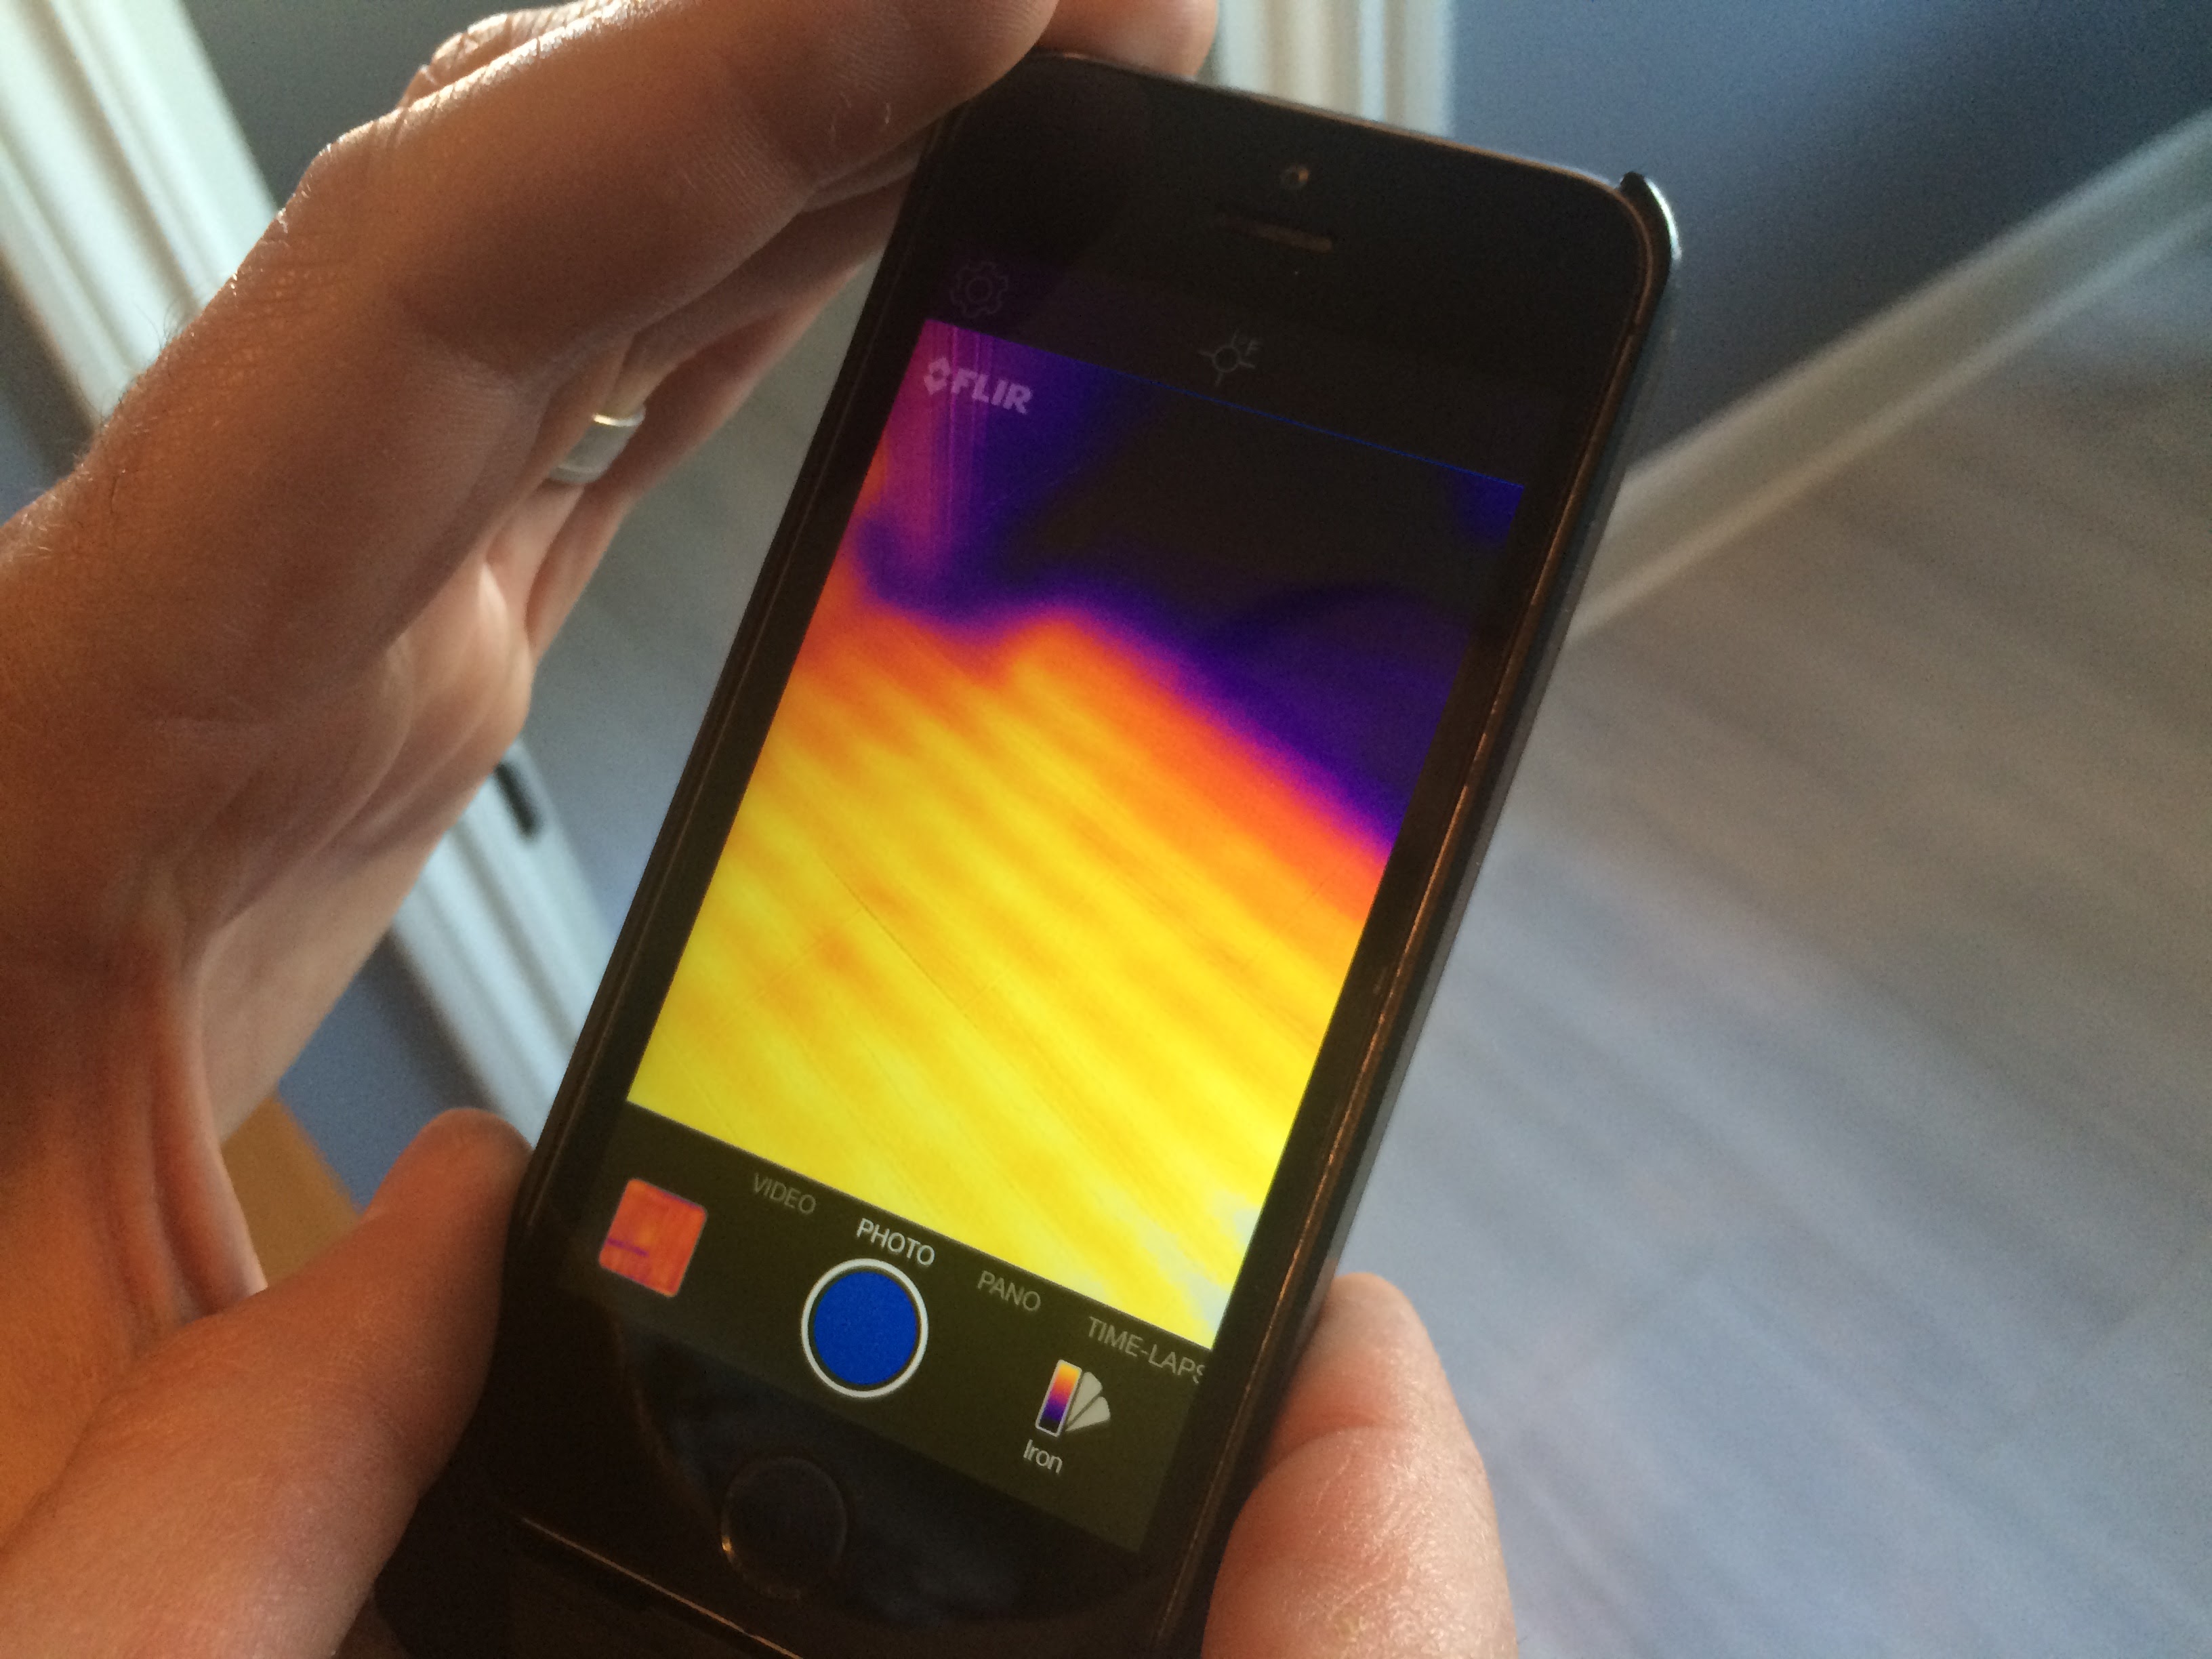
This is an infrared picture in the bonus room over the garage. Yellow/white is warm. It was an October afternoon, about 70 degrees outside after a cool morning. The roof deck was 80 degrees or so. Note the dark spot, which is cooler. That’s a piece of 1” foam board which is R-5. Here’s what this picture looks like in real life:
Note the foam board on the corner. There is fiberglass stuffed above the fiberglass which got spray foamed later, this whole roof deck did. Here’s what the temperature of the foam board was:
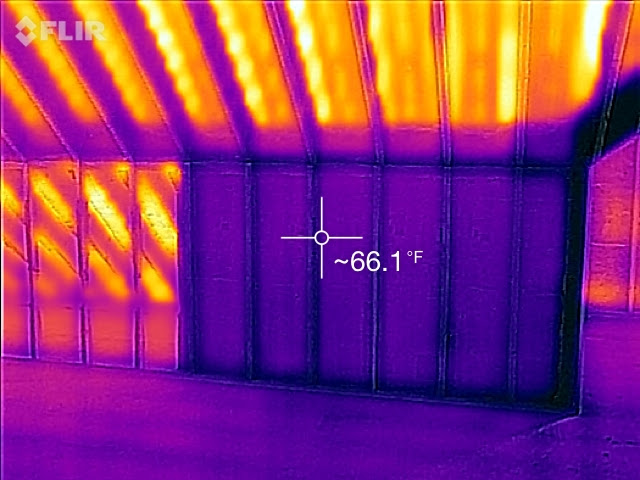
66 degrees vs. 80 for a lousy R-5, which is like a T-shirt compared to the R-38 parka this house got in the attic. A good lesson in how a little R-value goes a long way, particularly with good air sealing.
My first visit led to Ed getting his dad and a few friends together for a caulking party. Over the course of a few days they used up 20 (?!) cases of caulk. A Herculean effort that paid serious dividends later.
Air Sealing Visit 2 – Mid-Drywall
The second visit was mid-drywall. We could actually run the blower door, which looks like this:
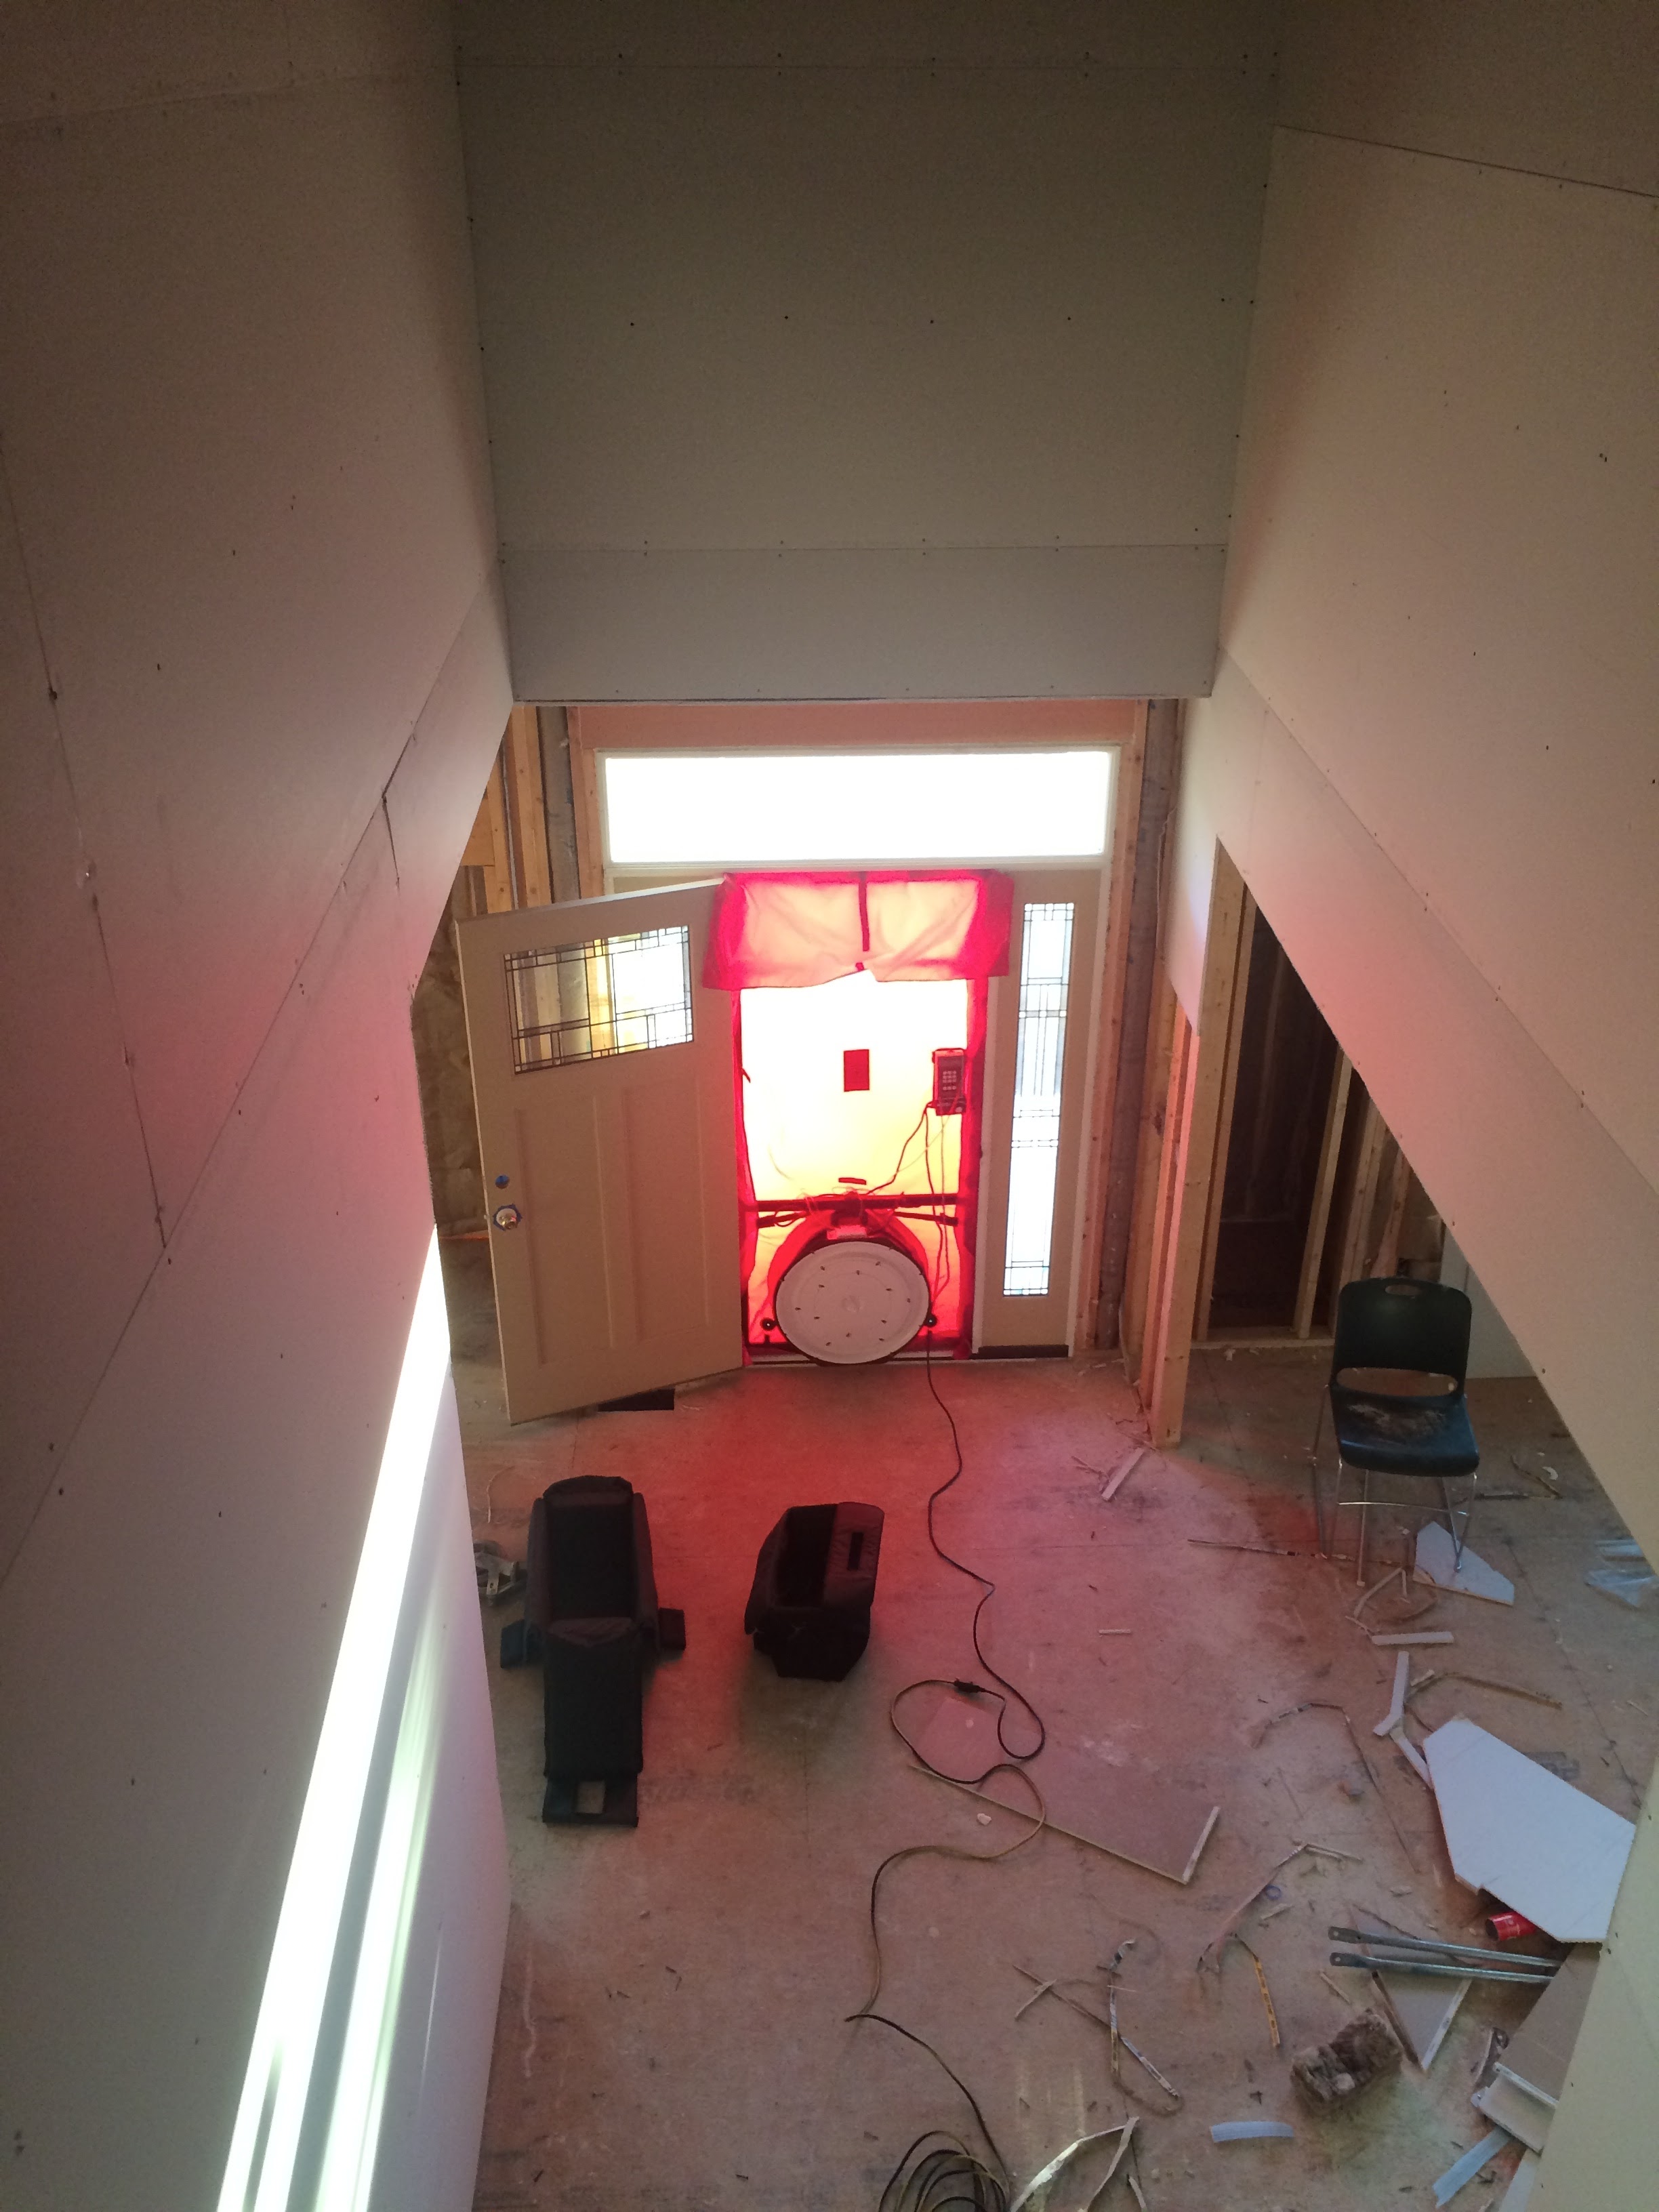
It’s the red thingie in the front door. The round white part is the large fan that measures air leakage. Here’s what we got:
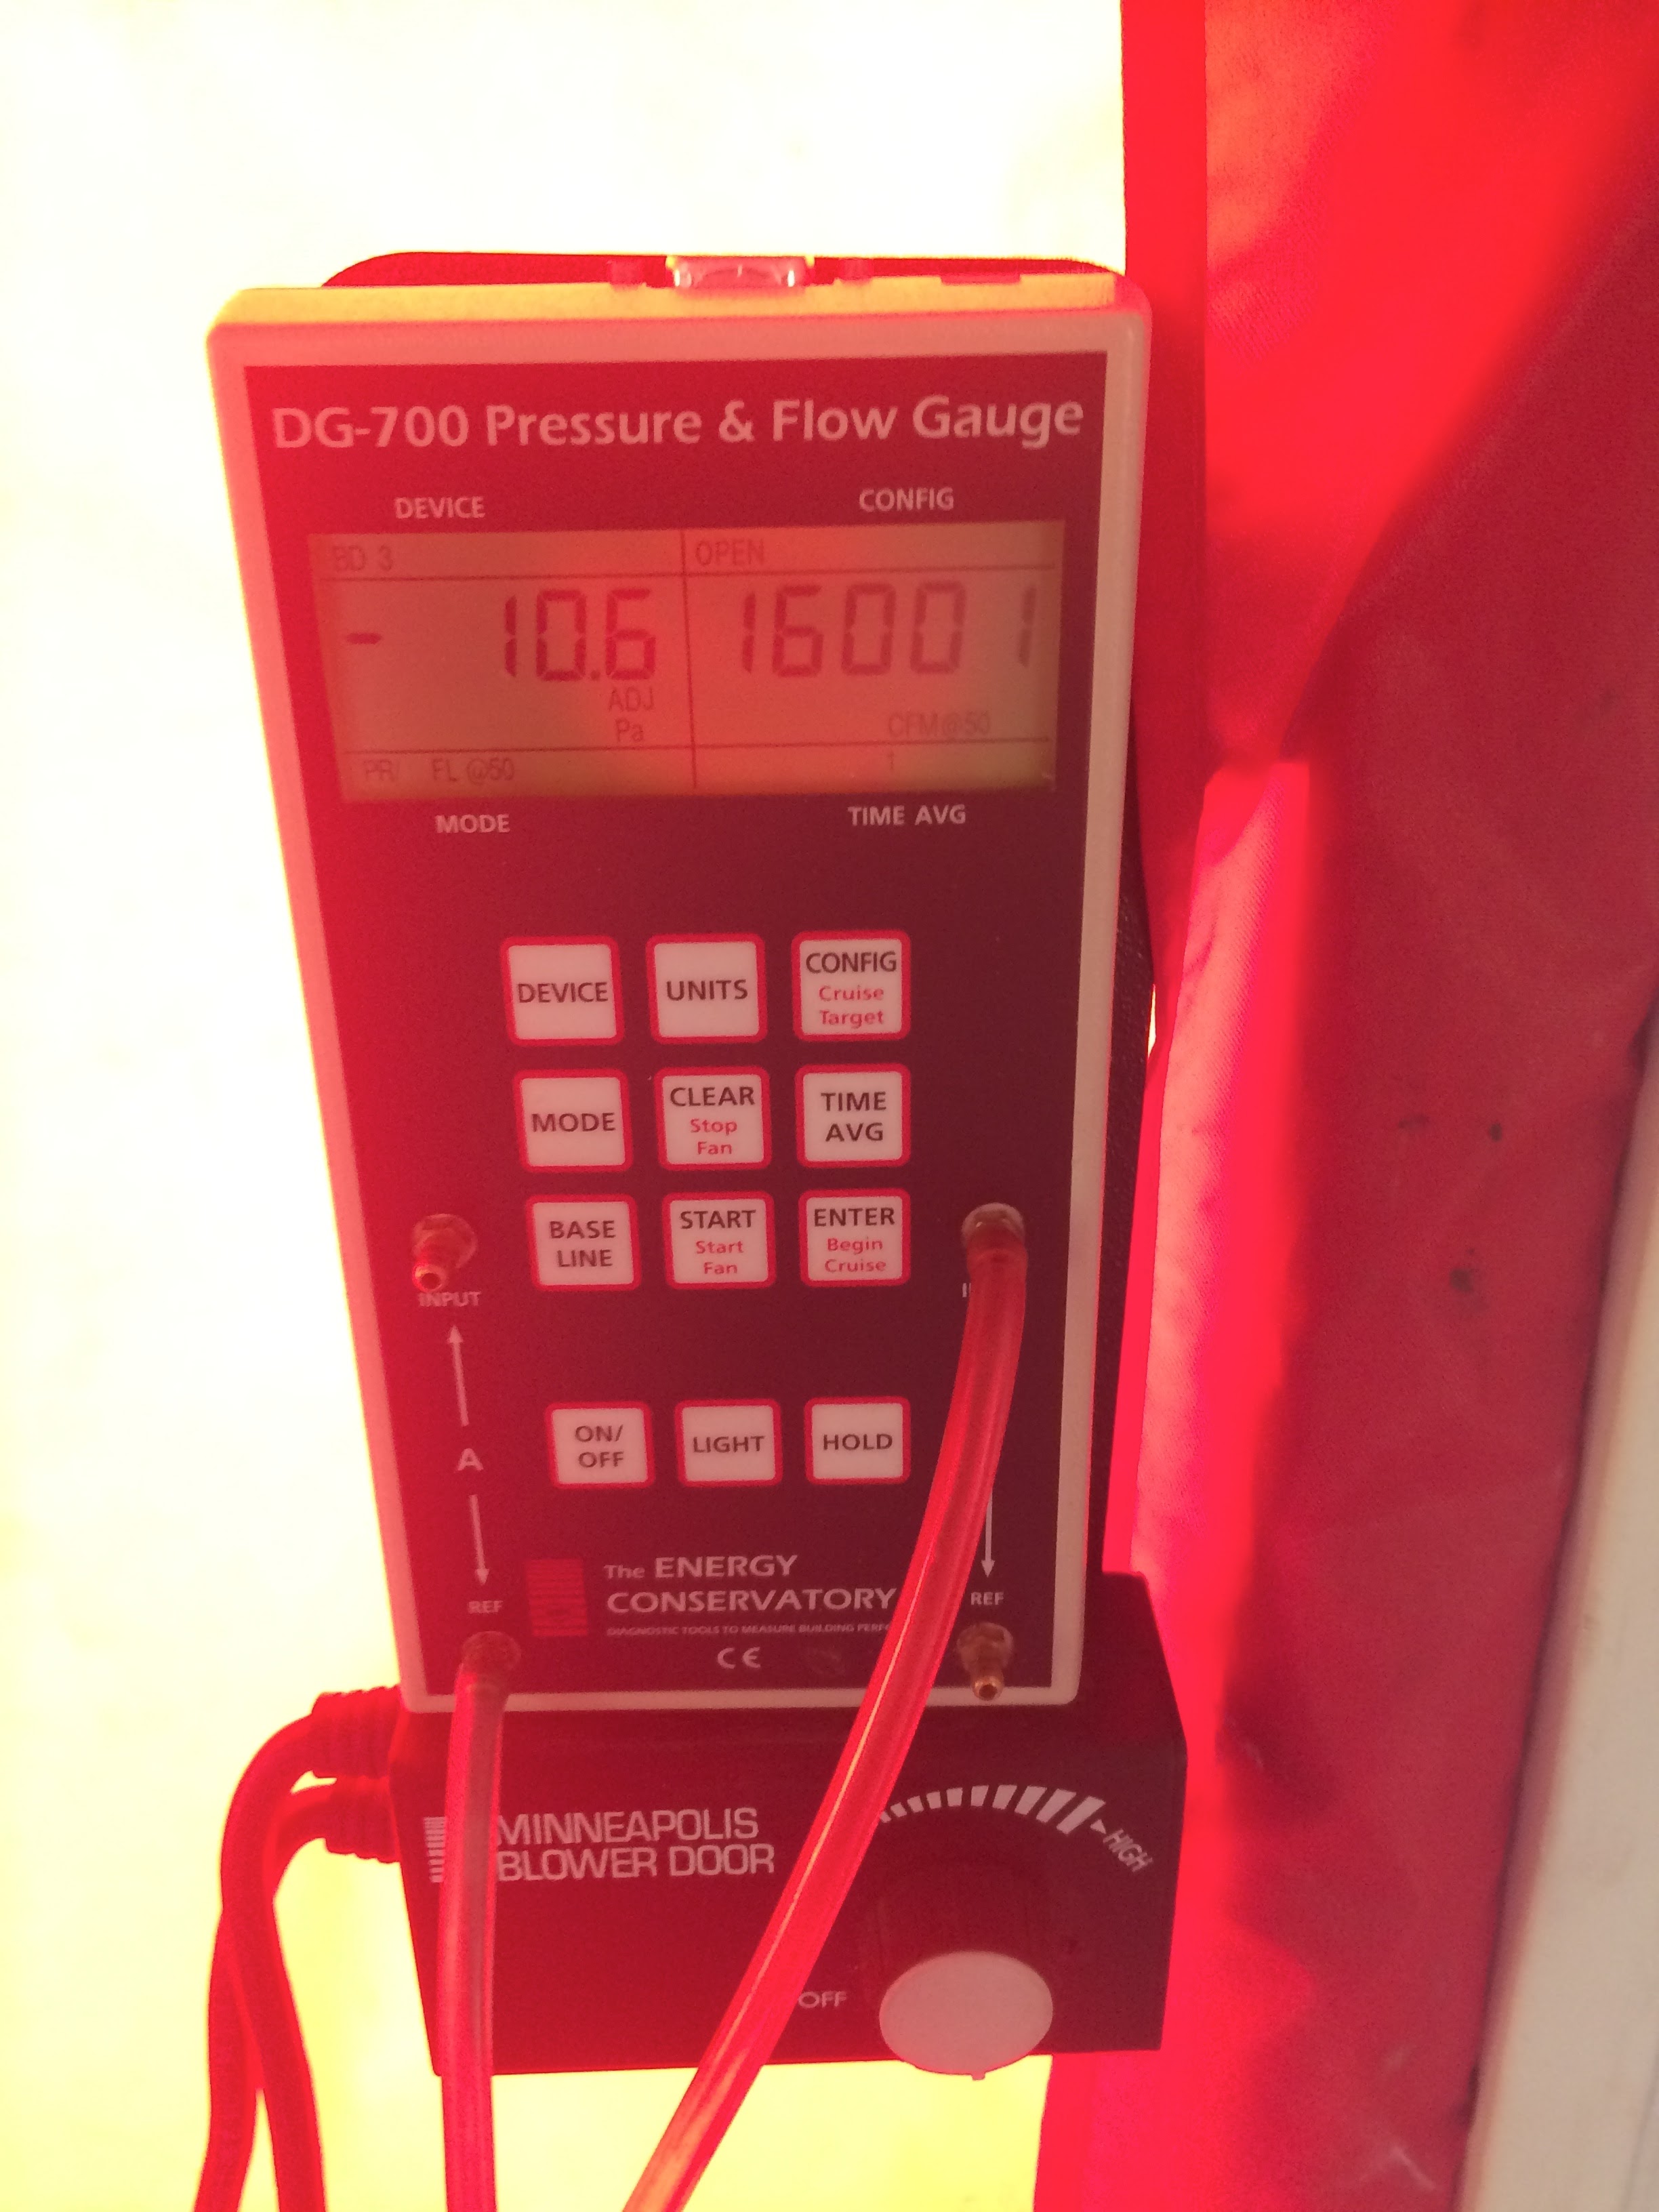
Yeow!! 16,000 is at the upper limit of what my blower door will even measure. It freaked Ed out and caused him another sleepless night, poor guy.
For reference, we consider a house to be in decent shape when it’s blower door number is equal to its square footage. So this 4800 square foot house would be decent if it had a 4800 blower door number. (Big houses actually need to be handicapped, so 3500 is probably a more realistic number for this house, but I digress.)
Currently, this house was running about three times my “decent” number, which is similar to older homes in Shaker Heights.
That’s bad, isn’t it? Well, no. The drywall was up, for the most part, but it wasn’t finished. There were a bunch of gaps at the edges and between pieces of drywall. So actually, this 16,000 number is pretty remarkable. I was surprised I even got a reading, above 16,000 the blower door stops extrapolating and the gauge goes blank. Let’s take a look at a few things we found:

This infrared shot is in the master closet that I thought was tricky. On the right note how it’s yellow (warm). That’s because there is spray foam above there. The blue hole at the center top is a recessed light. The general blue area on the left is the main attic which didn’t have any insulation yet. Here’s what it looks like IRL.
The electrician on this job was very particular, Ed said if someone bends a wire differently he’ll notice and be upset, take a look at his workmanship:
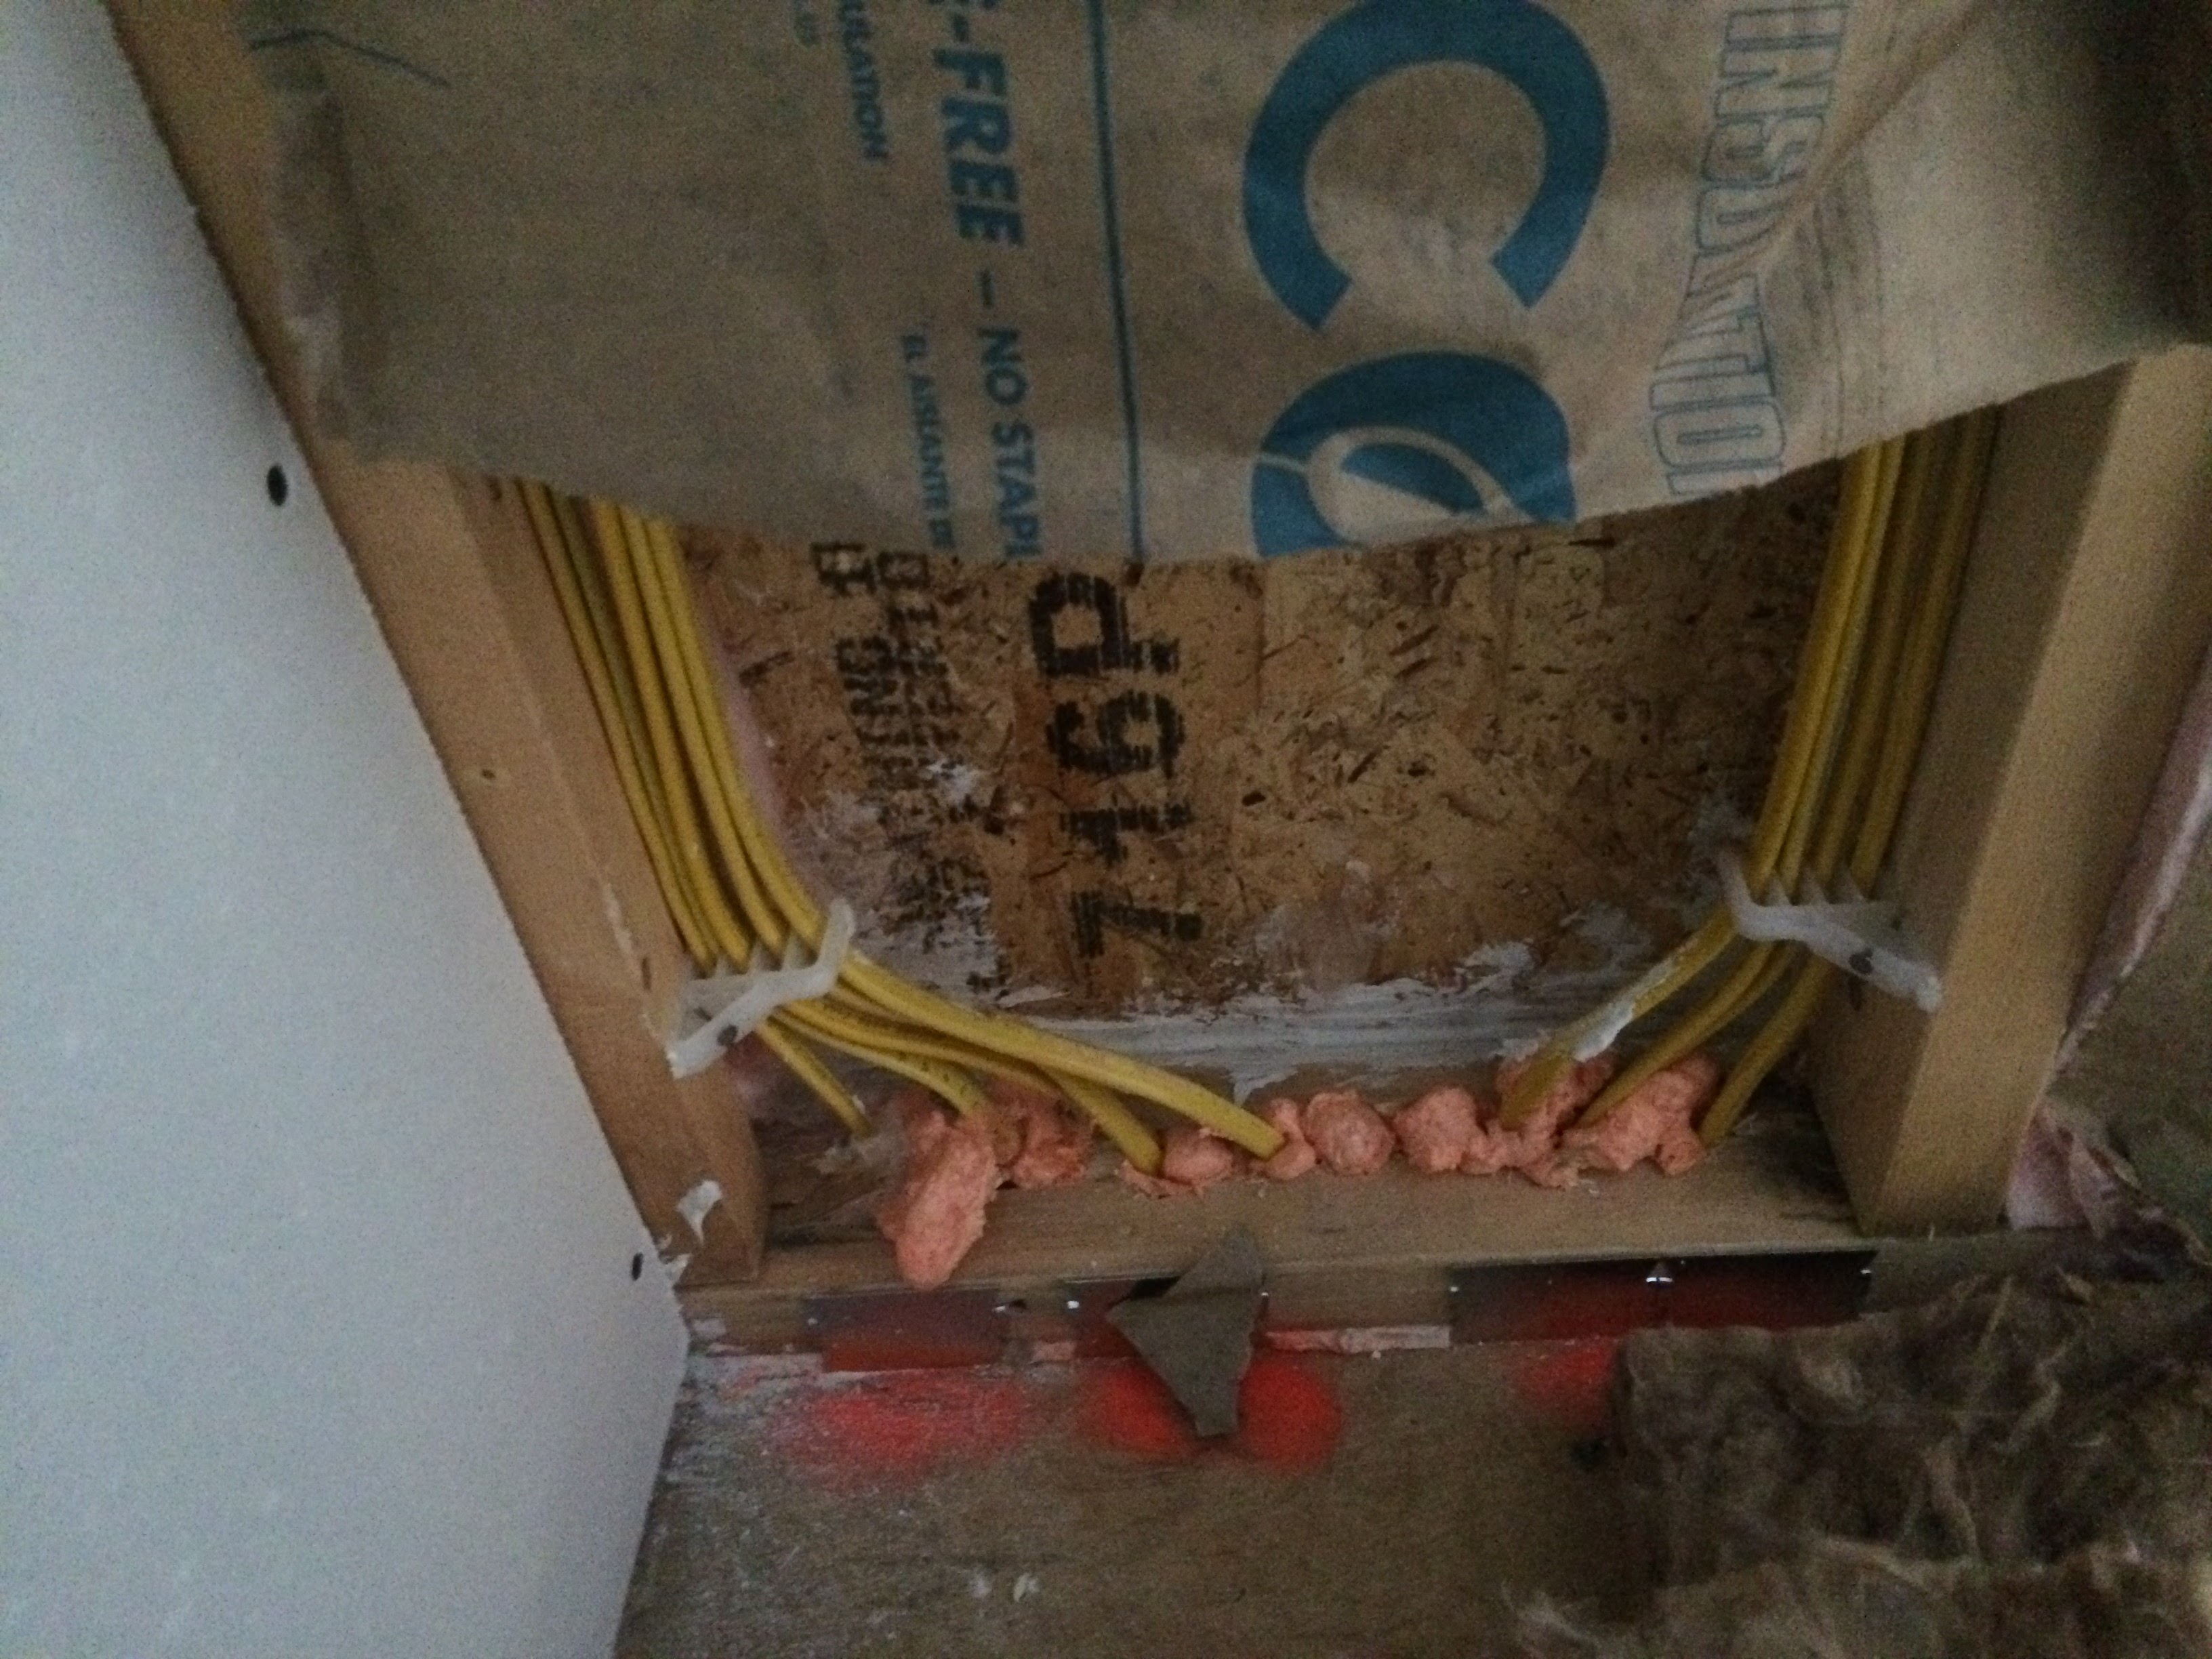
Very neat work. Ed sealed the holes for the wires, and note the white caulk at the bottom of the wall. Or did he…
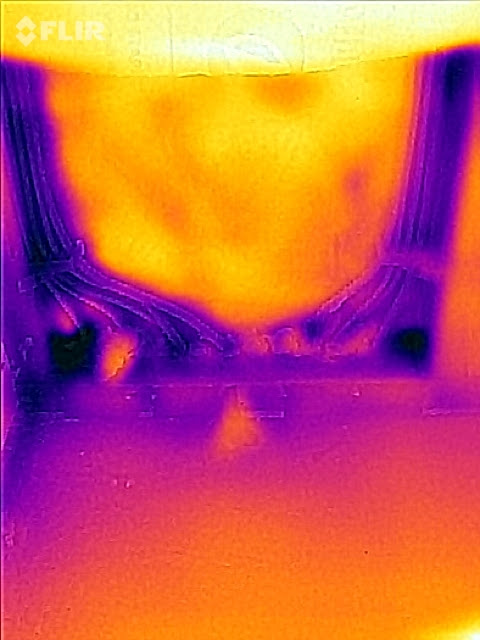
This is the same spot in infrared. Blue is bad, that means a leak. The wire holes are pretty well sealed, as is the caulk you could see. The corners are still a bit leaky since the wiring went in first so Ed couldn’t caulk there. For a spot with this much going on, this is very good.
This is part of the bonus room over the garage. Coincidentally, there’s a piece of foam board leaning there, but unlike last time it’s not doing anything. The drywall is up on the ceiling, and there is foam board behind the insulation in the walls, here’s what it looks like in infrared:
The big thing to note is the sloped ceiling. You can see the studs showing up pink (slightly cool), while between the studs is yellow (warm). That spot got spray foamed. The studs have a lower R-value, so they are a bit cooler. At the bottom left is an air leak, probably cold air from the nearby hatch. Generally, though, this is a boring infrared picture. Not much going on. And that’s what we want!
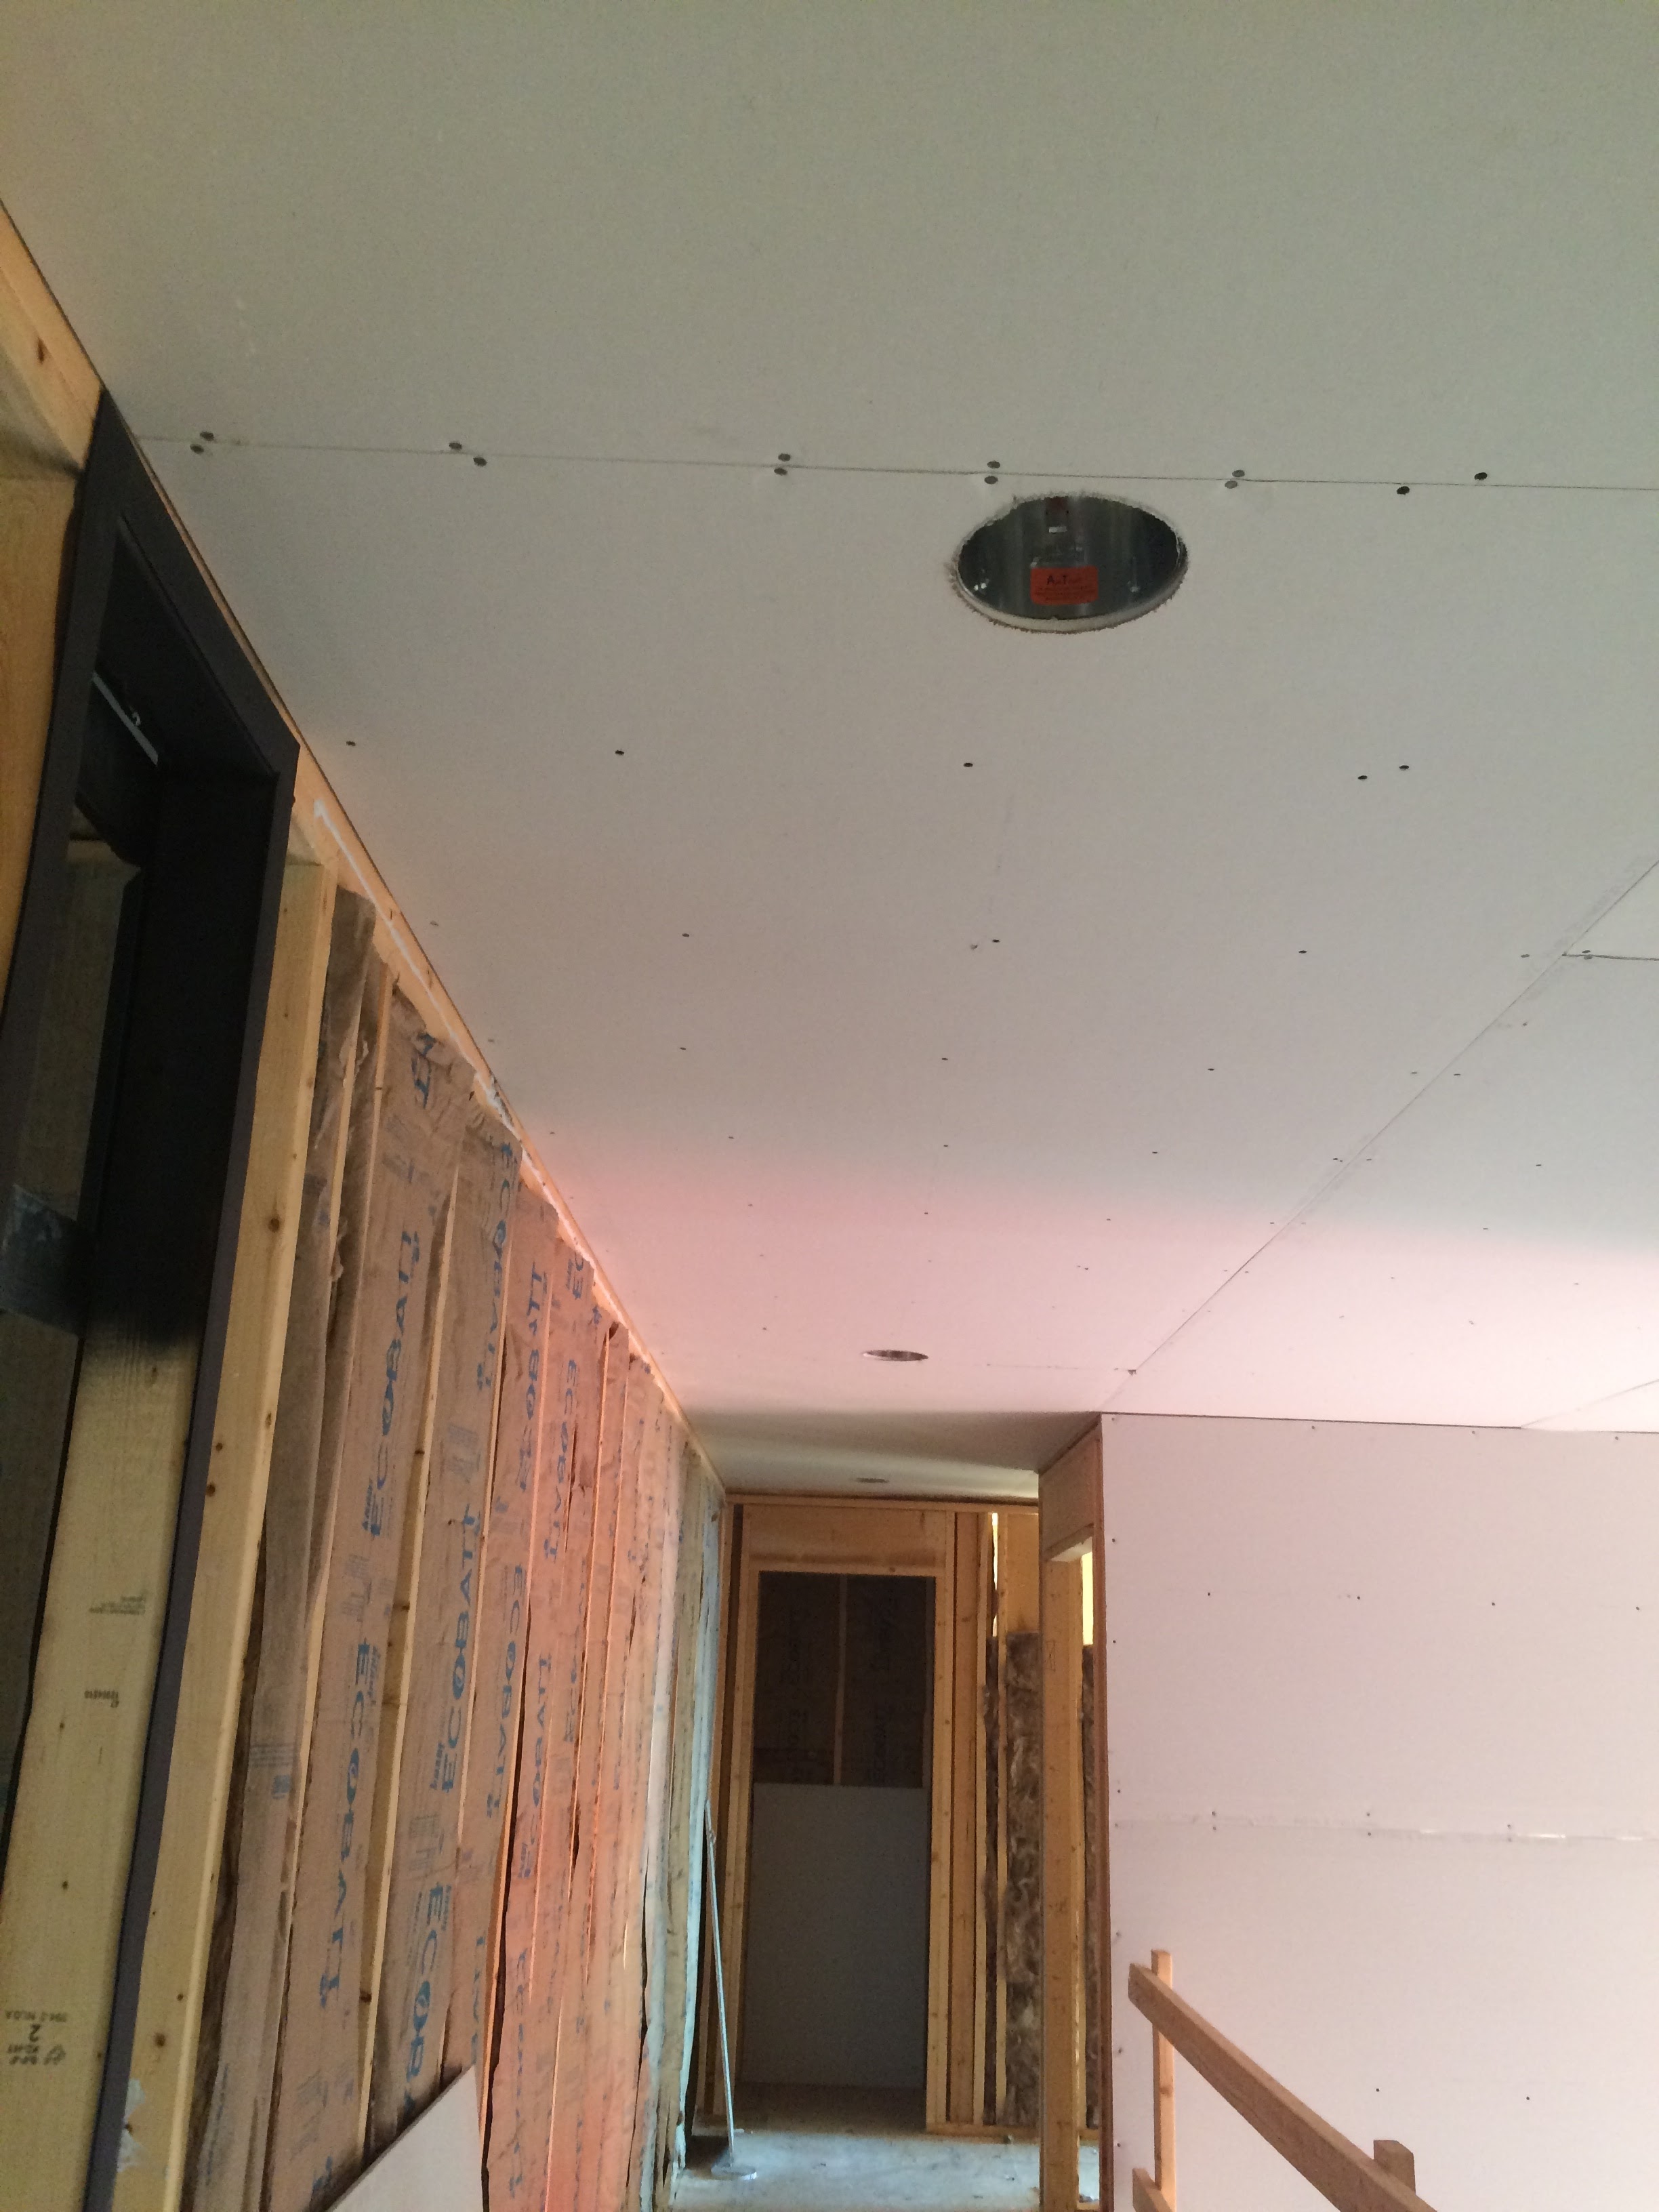
This is the last picture set from this stage. It’s in the foyer. The wall is on the left is insulated for sound. Note the caulk between the top plates (the boards at the top of the wall). That was Ed again. Just above the caulk, note the small gap between the wood and the drywall, then look at the infrared picture:
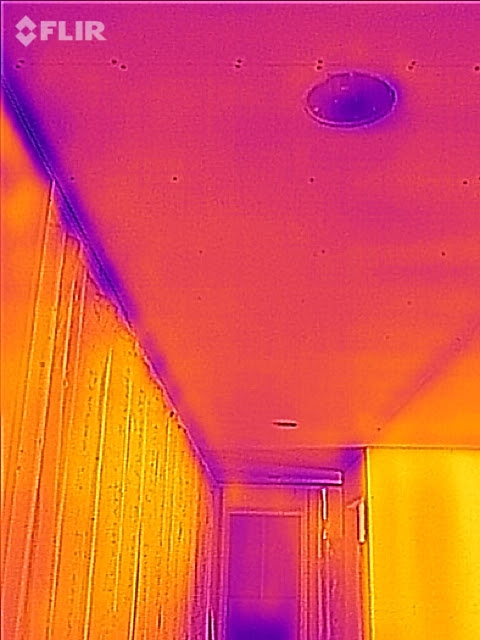
That gap is leaking quite a bit. So is the recessed light. The temperature differences were smaller here because the blower door had been sucking cold air into the house for awhile, and it wasn’t as warm in the house. Hence the blues aren’t as vibrant as they were. Infrared cameras work best when there is a large temperature difference, and we were losing it at this point.
Air Sealing Visit 3 – End of Construction
At this point, the house was almost done. Carpet was about to go in, cleaning was beginning. It was the moment of truth for the blower door test. Ed was sweating bullets. His target was 3000 points (we were at 16,000 last time), this would leave us a bunch of safety factor with the 80,000 BTU furnace. The stretch target was 2000. Here’s how he did:
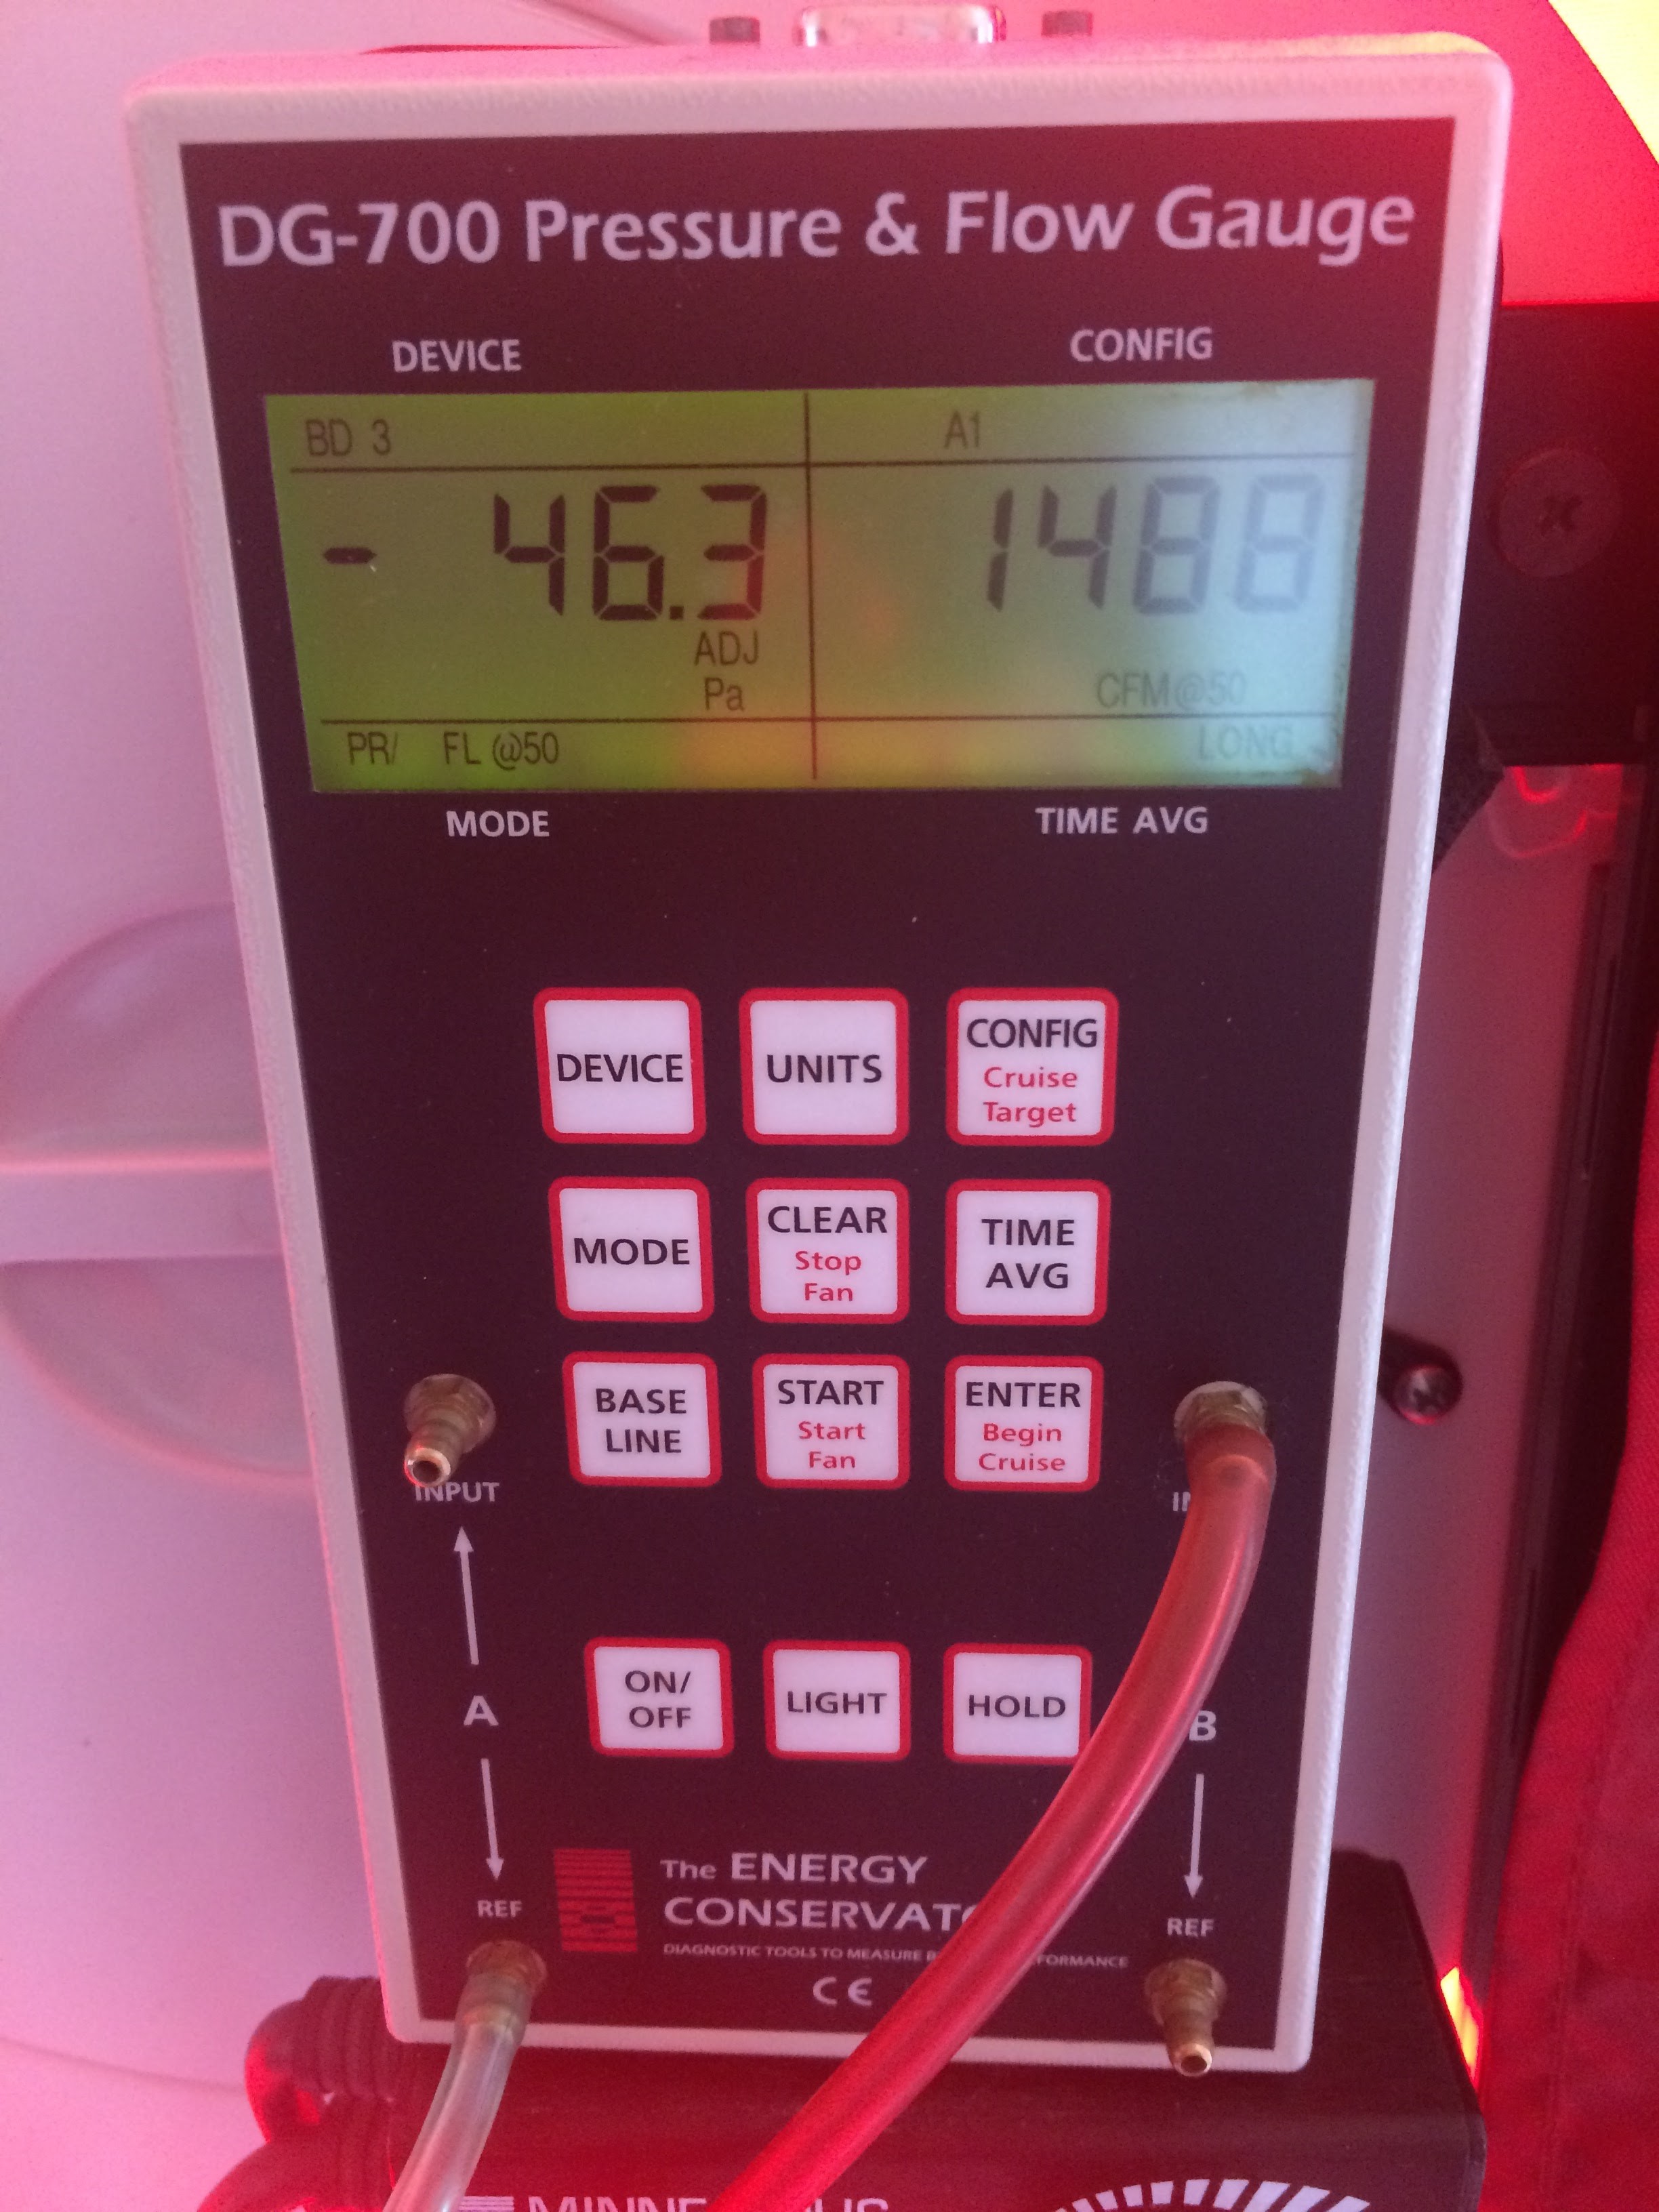
Holy cow! I was flabbergasted that he got a number under 1500. This is astonishing for a house this big. For my energy geek readers, this is a 1.6 ACH50, most codes are a 5 ACH50, some are a 3. (ACH50 is the blower door number times 60 divided by the cubic footage of the house, it’s one way to compare homes of different sizes and shapes.) This is pretty freaking good.
The best standard is the German Passive House standard, which is 0.6 ACH50. Fairly extreme lengths are required to get there, probably adding a good bit to the cost of this home, likely $100K+. Instead, it’s a conventional home with good air sealing that doesn’t fall all that short. Martin Holladay on Green Building Advisor calls this a Pretty Good House.
There was a major missed opportunity on this home, though: top plates. Those are the tops of the walls. Here’s what they looked like:
Note the 2x4s. Those are the top plates. Drywall touching wood is not an air seal. It’s best to seal these up with two part closed cell spray foam in my opinion. Here’s what that looks like on another client home (the 1970s Two Story.)
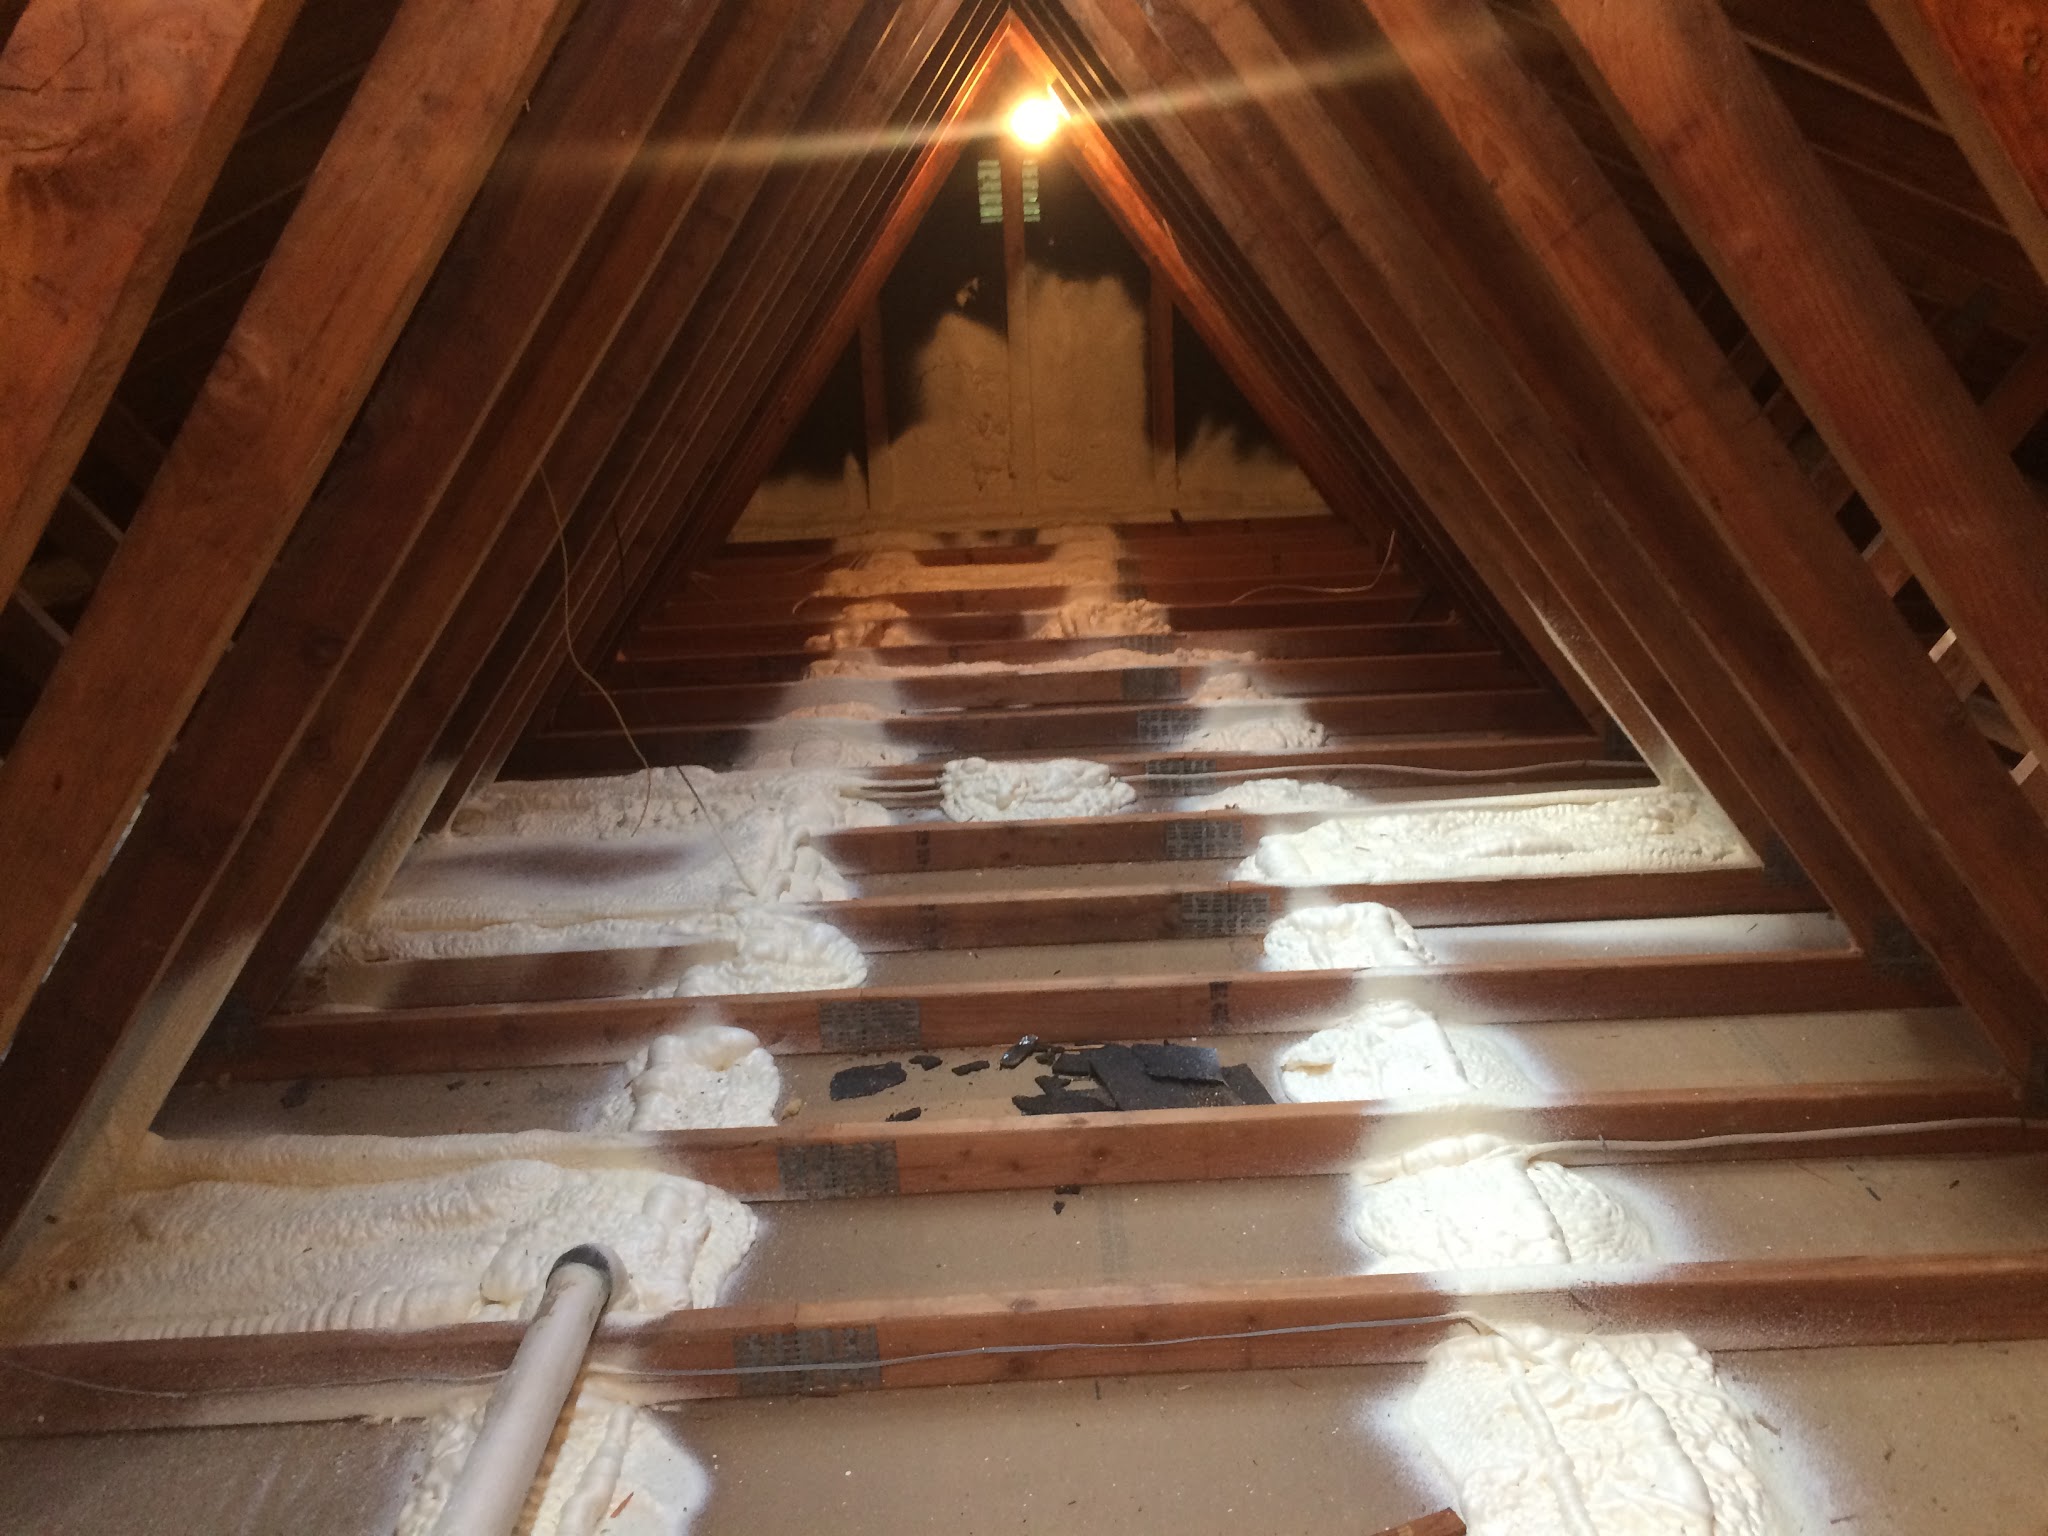
Sadly, the insulation crew was way over budget on this project, and they rushed. They didn’t seal top plates, they just blew attic insulation in. That’s a real bummer because that is likely another 400-700 points of leakage, which could have pushed this house close to Passive House tightness levels.
Alas, even Super Ed who had done such a good job of staying on top of contractors couldn’t catch this one. It’s a big reason I like to be on site as work is getting done, it’s much easier to fix stuff when the crew is there than either drag them back or worse, try and air seal after blowing insulation. Imagine finding those top plates with 16” of fiberglass on top…
Here’s what leaky top plates look like:

This is the corner of a room, you can see the windows on the left and a light fixture at the top right. Note the tops of the walls, those should be boring, very little temperature difference. They’re not. Top plates aren’t sealed. It’s a bummer.
Let’s look at the final weaknesses I noted which were very minor, then I have something cool (actually warm) to show you.
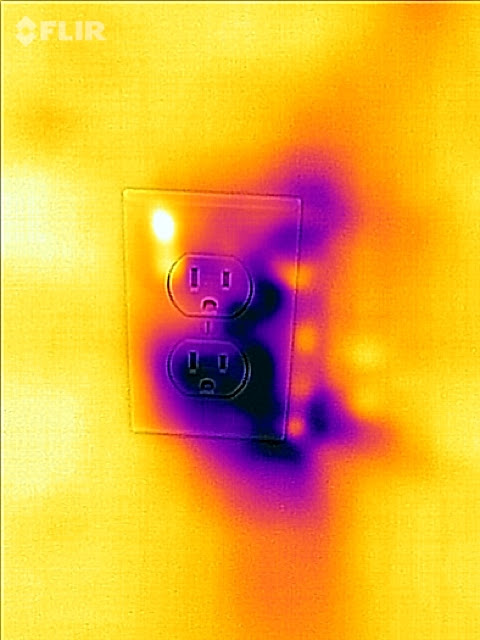
This is a classic leaky outlet. It could be a joint that didn’t get caulked or a hole drilled to the exterior that let this cold air in. There were only a few that were problematic.
Let’s check out the bonus room, which was the source of much weeping and knashing of teeth:

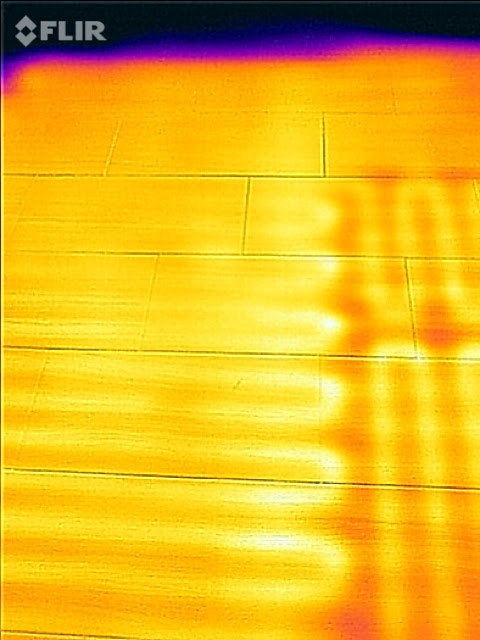
It’s a lovely space, isn’t it? Note the light spot on the carpet where the sun is shining on it and the hatch, here it is in infrared:
The bottoms of hatch doors (and doors in general) are a real booger to seal well. That was the miss here. Right next to the hatch is the return air vent, there’s a miss near there somewhere. Knowing how low the blower door number on this home is, I’m not super concerned about either of them. The other hatch was much tighter in this room.
Note the spot on the floor where the sun is shining – pretty cool, huh? I like how defined the edges are.
The other thing to note is that aside from the hatch, duct, and sun spot, this is a seriously boring infrared picture. Very few temperature differences. You can see the studs in the walls a little bit, but not much else. Ed did a heck of a job making sure this room was sealed up and insulated!
Something Cool
We’ve come to be big fans of electric radiant floors. They’re inexpensive to install and are very helpful in bathrooms where we tend to be cold, wet, and naked. In other words, we need a little extra heat. The master bath of this home has this feature, here’s what it looks like:
This answers the question to what lies beneath…
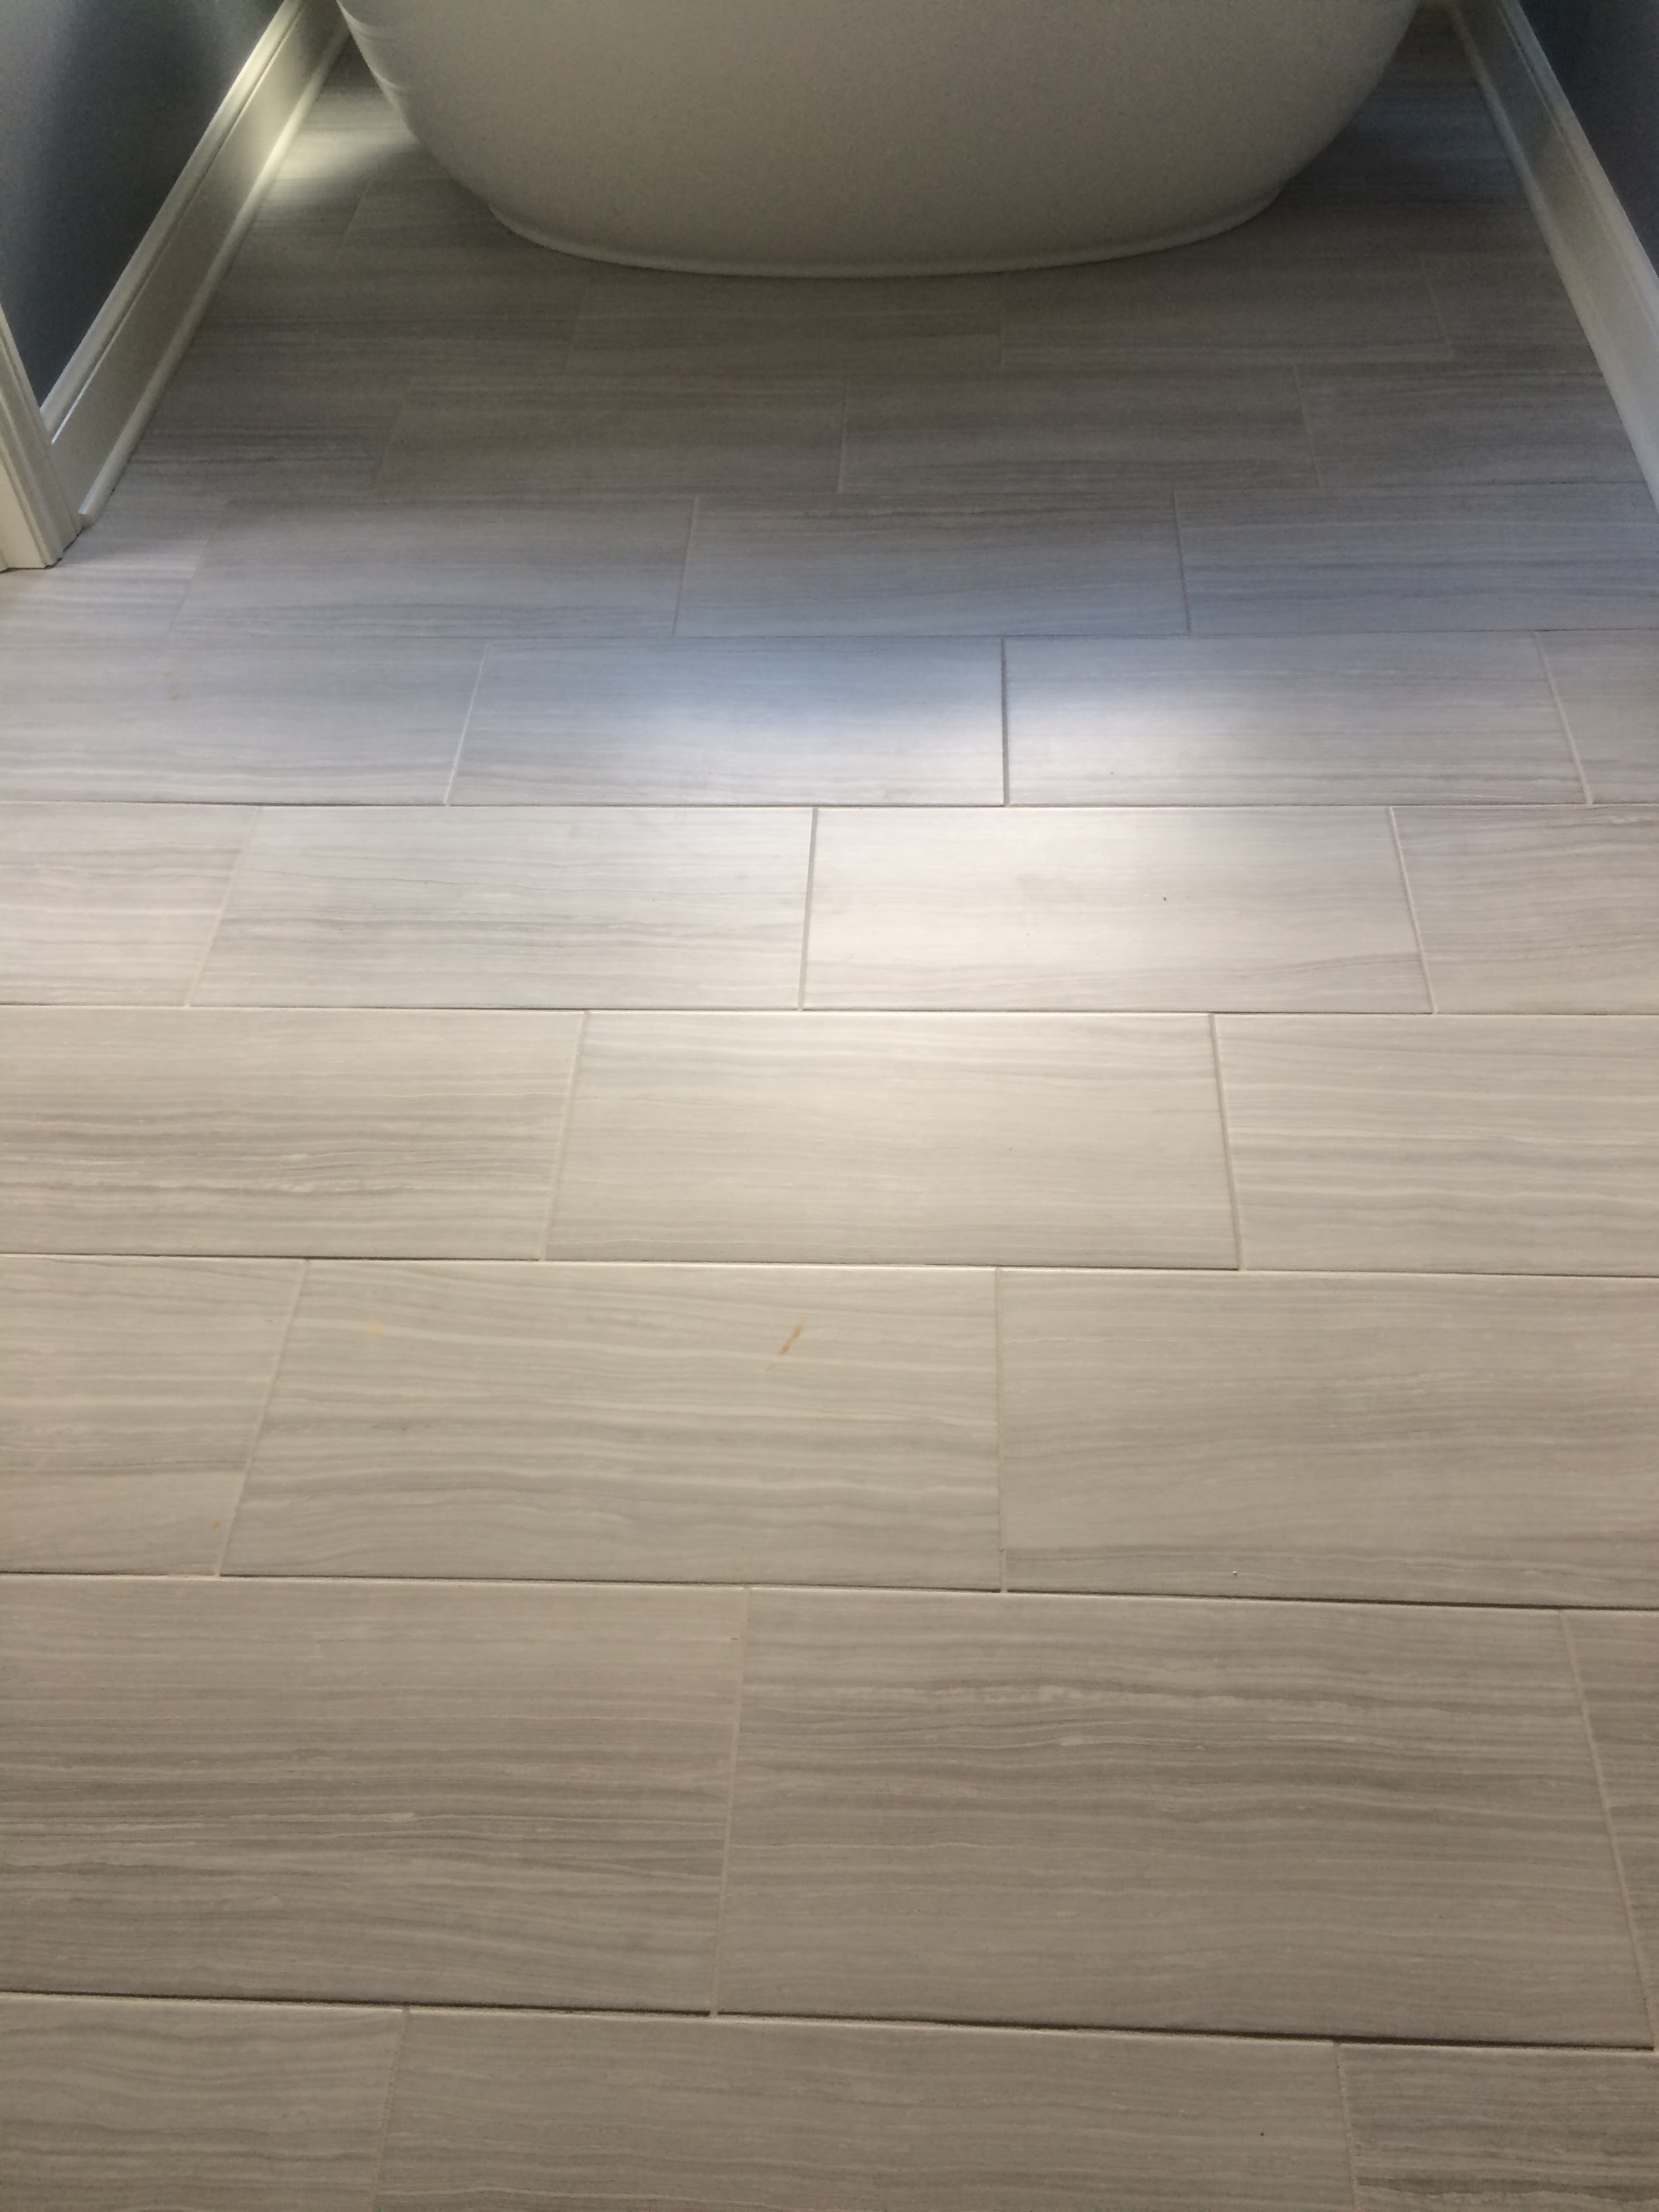
This is the regular view of that same spot, cool, huh?
Here’s the master tub. And here’s that spot in infrared:
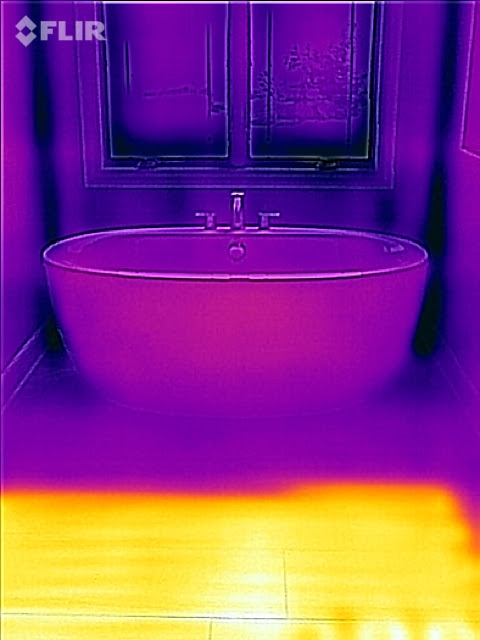
The heated floor stops just before the tub. Note the side of the tub is just a little warm, though. This is a great example of radiant energy. Radiant energy only goes in one direction and gets absorbed when it hits most things. Sunlight and fire are great examples. We humans love radiant heat, and that’s exactly what this is. Warm tile that radiates heat into our bodies as we step out of the tub or shower feels really good.
You can set the timer to warm the room up a degree or two in the morning when you get up rather than heating the entire house up. Electric radiant floors are cool. I mean warm.
One Last Cool Thing
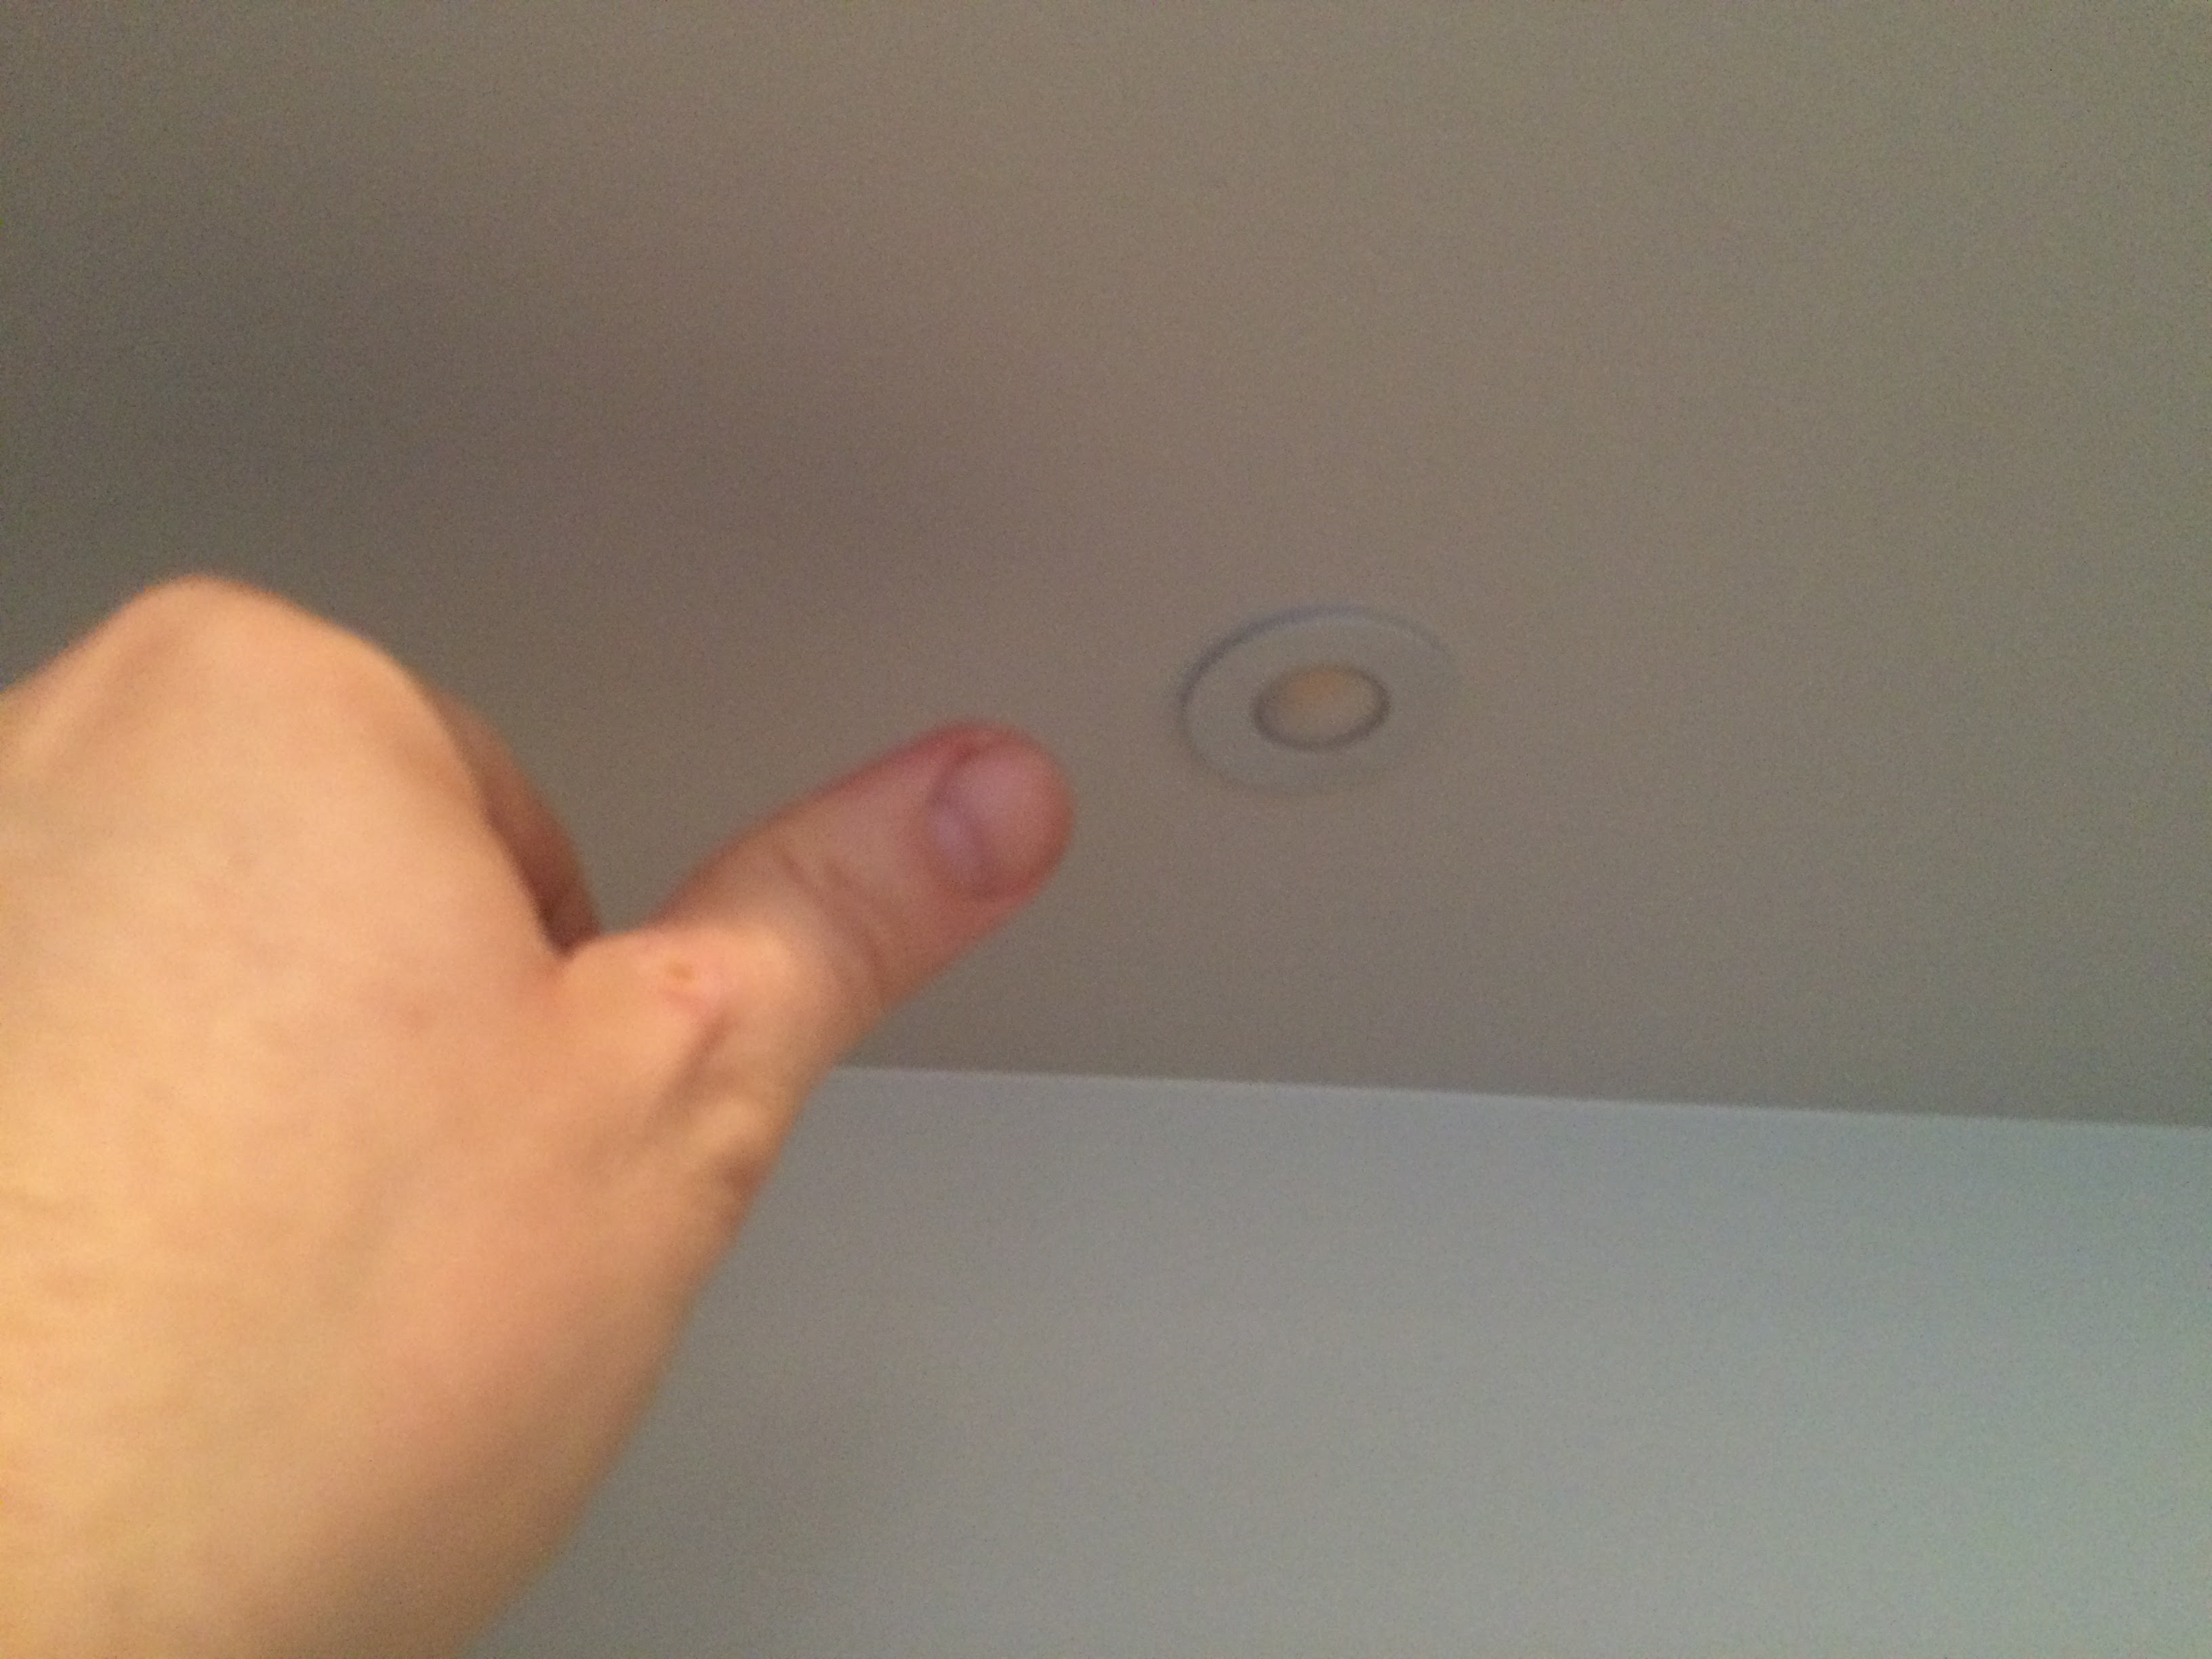
In one last bit of kudos for Ed, he put this little LED light into an art nook and I thought it was really cool:
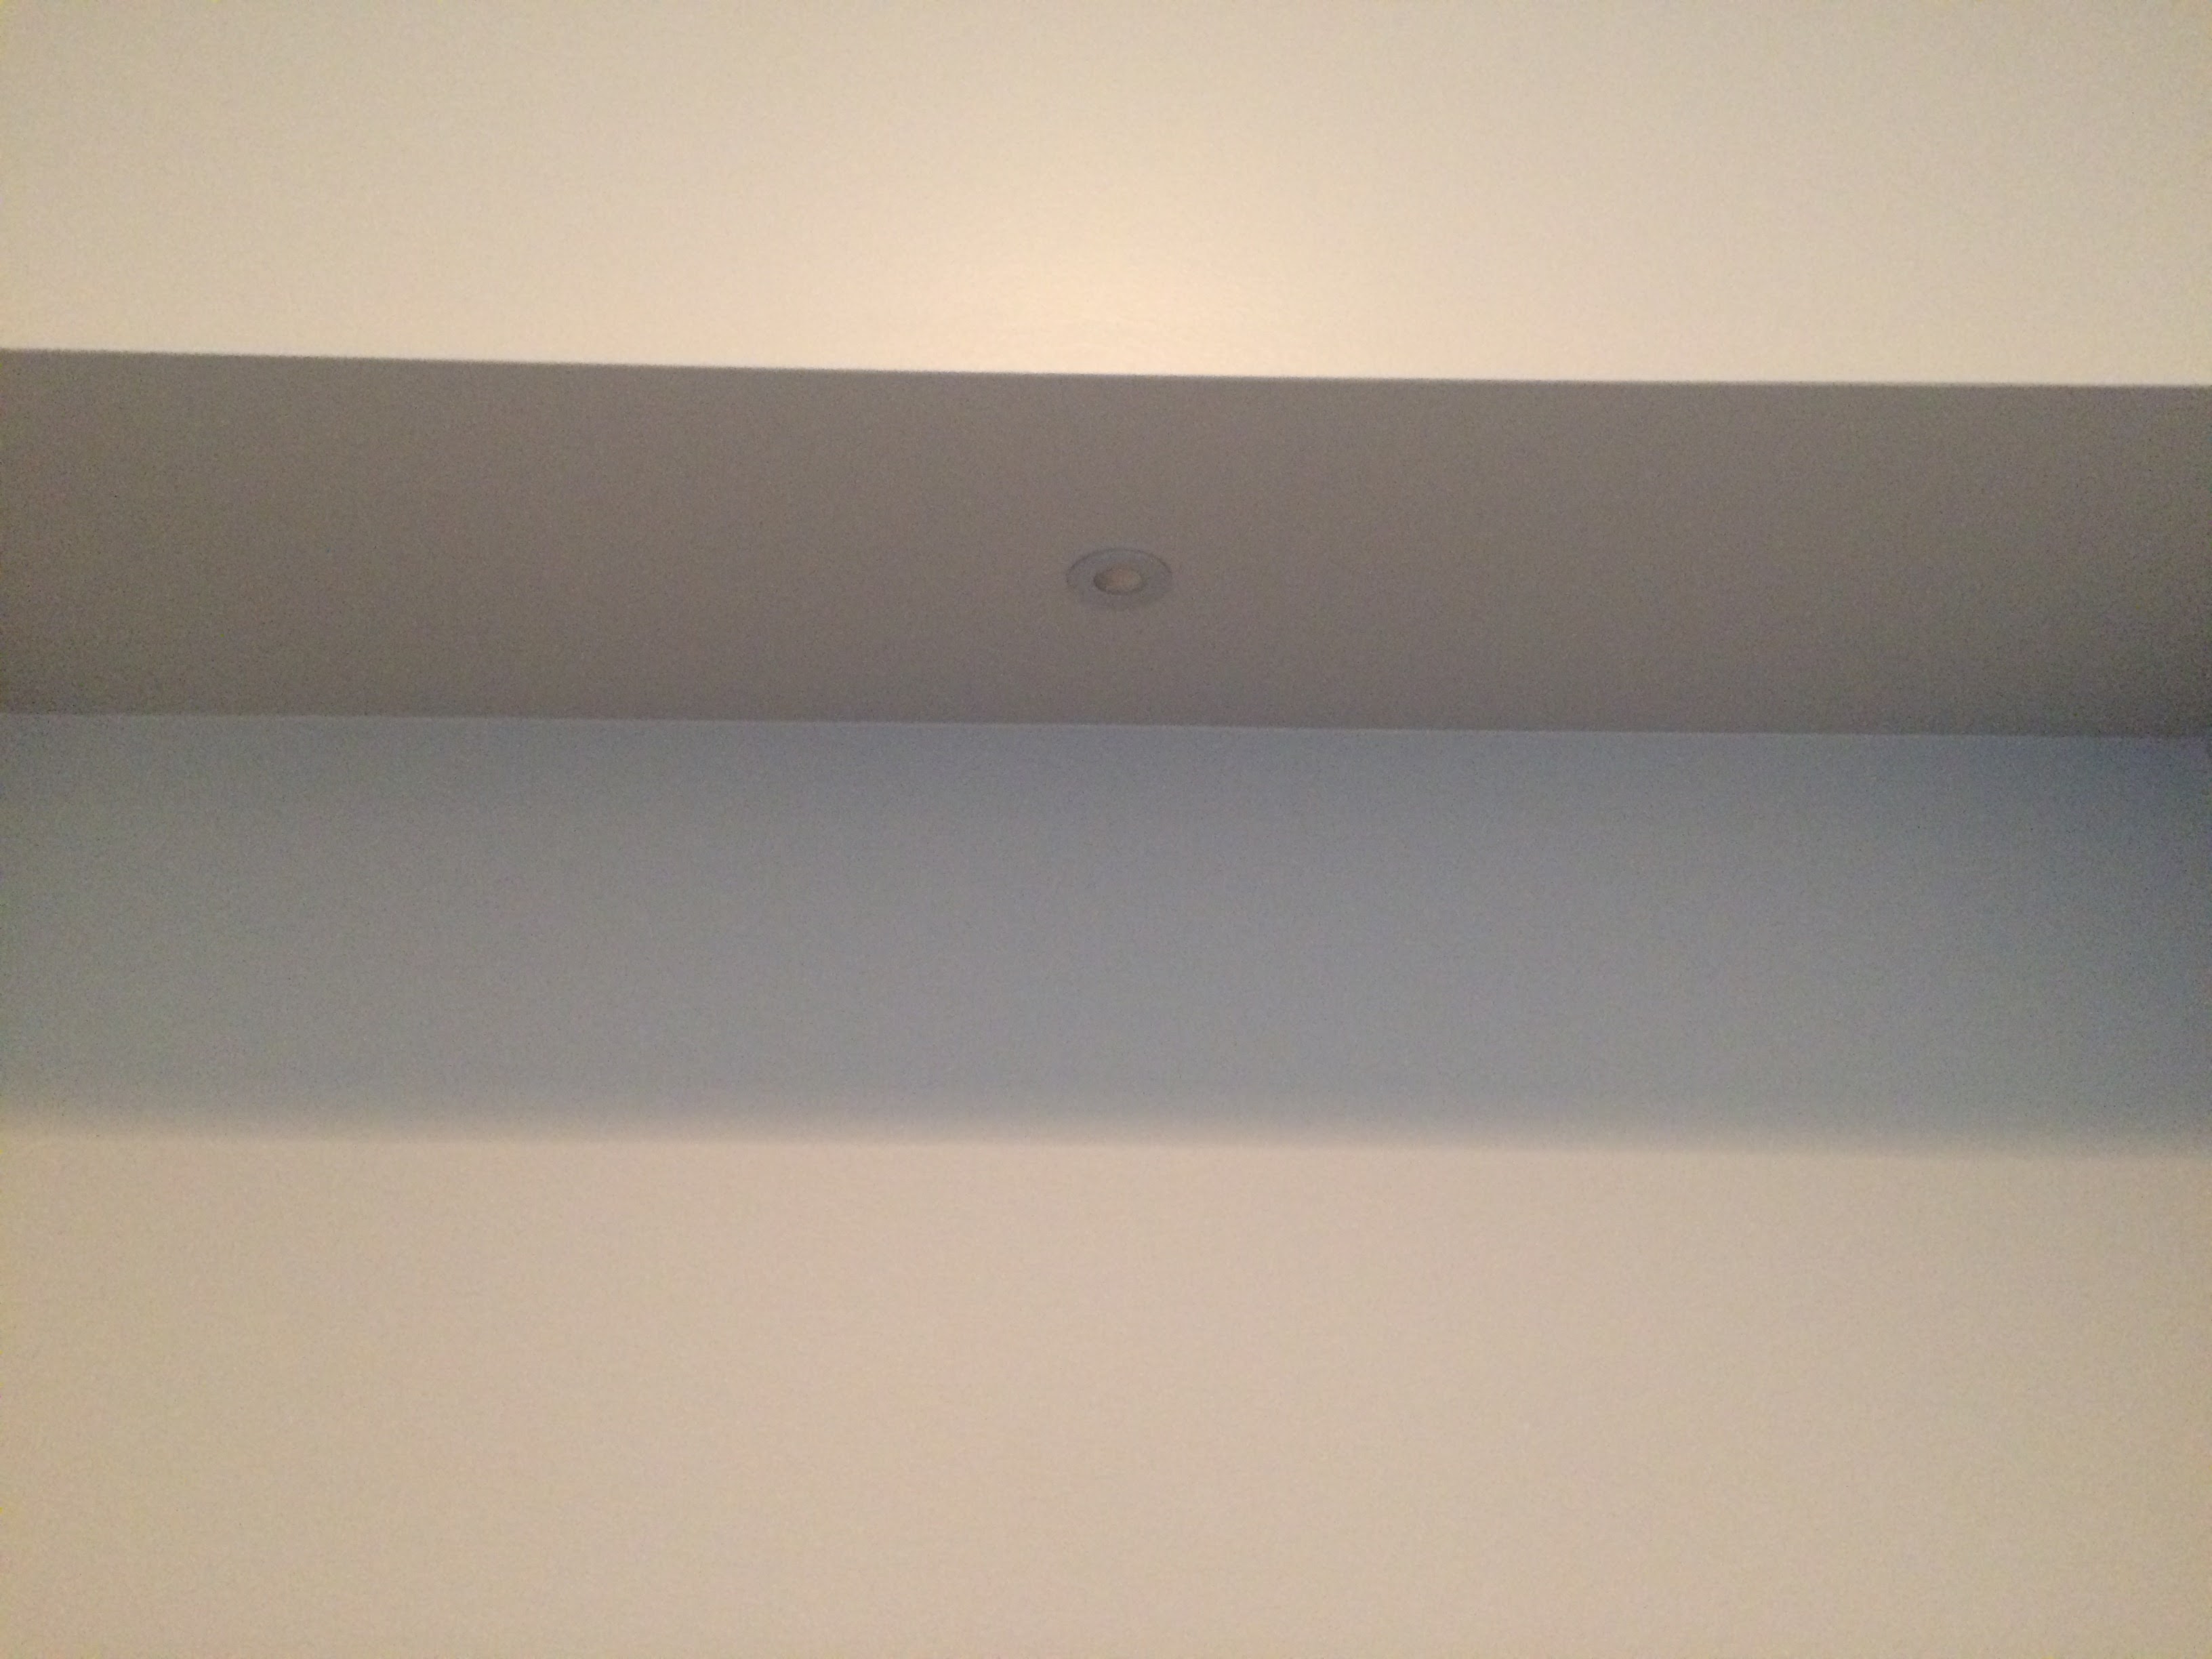
The tiny circle is the light. He hid the power supply behind an access hole in a closet nearby. I love the little touches like this. To give you an idea of scale, here’s my thumb.
My hat is off to Ed, he sweats the small stuff and builds a nice house.
Conclusion – Strangely Unsatisfying
In the end, my partner and I found this project to be substantially less satisfying than the retrofit projects we typically do, and after some thought we came up with a mix of likely root causes to that:
- New Homes Are Perfect, Right? Existing homes always have problems to fix. Assuming new homes are perfect is an unrealistic expectation that leads to disappointment. (A surprising number of our clients have homes built in the last 20-25 years, those are effectively new homes.)
- Homeowner Relationship Wasn’t Rock Solid. The owner of this home was almost extraneous to the process. My partner chatted with him a little and I met Alex at the final blower door test, but it wasn’t the robust relationship we usually have.
- Split Incentives. Home buyers typically don’t want to pay more for green features. They expect them to be included, just as perfect comfort is assumed. That means part (or all) of the cost of the upgrades comes out of the builder’s profits, but then the homeowners enjoy the benefits. The one paying for the benefits doesn’t get to enjoy them. In economics, this is called a split incentive and it leads to poor results.
- It Still Ain’t Perfect. After the project was complete, the comfort in the home still wasn’t perfect. The bonus room, which was expected to be very hot in summer, was the coldest space in the house, but the rest of the second floor was hot. It was a problem of balancing where the airflow in each duct needed to be adjusted. The homeowner thought that service should be included, but it wasn’t part of what we agreed on with Ed – we did the equipment specification, air sealing training, and blower door testing. Optimization after the fact was extra.
- Everyone Felt a Little Disappointed. Ed got an earful from the homeowner that the comfort was imperfect, yet he had a lot of extra time and effort into this project. That stinks for Ed. Ed also had to drag the HVAC contractor back out, who said the only solution was to put in a bigger unit. Alex the owner felt the house wasn’t just so yet. And we had put so much extra time into this project without pay that we were frustrated, not to mention we didn’t get the fabulous feedback that we carefully cultivate on other projects. We all felt a bit flat.
The real root problem was that we hadn’t done a new home before, so we didn’t have a carefully orchestrated process that does a good job of setting expectations while keeping the process nice and smooth. We also didn’t know what to charge for it, which meant we charged too little. When you charge too little, your time and advice is not as well respected. Such is life, that’s the learning curve as you figure a new product out.
My suspicion is that Alex played with the dampers and got the house balanced a bit better, and is no longer dissatisfied, but I’m not sure.
As much as we enjoy fixing existing homes, we’ll likely keep our focus there. Existing homes have problems to solve and we enjoy solving them, as you can see from the other case studies. Overall, though, this house is remarkably tight, stays remarkably dry, and is on path to shockingly low heating and cooling costs. I’m also thrilled that one more builder knows how to build tight and isn’t afraid to install small HVAC. I expect we’ll hear back from Alex and get the scoop at some point. =)
Detailed Numbers
Gas Use Before N/A
Predicted Use After 42.7 therm (energy model was balanced heavily towards the heat pump)
Actual Use After Too soon to tell
Normalized Use
Realization Range (actual/normalized)
Electric Use Before N/A
Predicted Use After 16,881 kWh
Actual Use After Too soon to tell
Normalized Use
Heating and Cooling Costs Predicted $1900
Heating and Cooling Costs Actual $N/A (too soon to tell)
Load Calc Heating/Cooling
- Before Heating N/A BTU/hr
- Before Cooling N/A BTU/hr
- Predicted Heating 45,582 BTU/hr
- Predicted Cooling 16,833 BTU/hr
- After Heating
- After Cooling
Energy Use
Electric
- 1 year before
- 2 years before
- 3 years before
- 1 year after
- 2 years after
Natural gas
- 1 year before
- 2 years before
- 3 years before
- 1 year after
- 2 years after
Duct Leakage
- Before N/A
- Predicted N/A
- After N/A
IAQ measurements
- Before N/A
- Predicted N/A
- After N/A
Zonal Testing
Not completed
Year Built 2016
Square Footage 4800
Energy Use Index*
Before N/A
Target 13
After Too soon
Air Leakage (cfm50)
Start N/A
Target 3000
End 1480
*EUI is a measure of a home’s energy use per square foot. A 0 means it makes all the power it uses, such as with solar. Below 50 is very good. 100 is a bit piggish.