He shivered all over in winter.
He sweltered upstairs in summer.
He sweltered upstairs in summer.
Summary
Kevan bought this house right next to the Towpath in the Cuyahoga Valley National Park. He’s a huge fan of the outdoors, so he’s in heaven with the location. His intention is to dig in here and be buried in the cemetery that is literally next door. Unfortunately, he found the house to be drafty and cold, and damp. The discomfort lead him to feel a bit “meh” about the house, even though he loves the location.
The house has two stories with a walkup attic. It was wildly leaky and utterly uncontrollable, which means it’s drafty. The basement was still damp even after an interior waterproofing job. He also wanted to prepare the current attic to be converted to a studio.
With the first phases of the project complete, Kevan is liking the house much better! The third floor is ready for action, the house is much drier, and the back porch with new windows provides a great view of the backyard. The second floor comfort is only up from a 4/10 to an 8/10, so there’s a bit more work to do there, if Kevan decides to.
Problems to Solve
- Second floor is frigid in winter. Also very hot in summer, 3-7 degrees cooler/warmer than first floor.
- Ice on the inside of the second floor windows on cold days.
- Frigid basement. Recent interior waterproofing job, but still damp.
- General comfort is poor, leading to a “meh” feeling about the house. I found the house very drafty.
Results
- Remarkable 75% reduction in air leakage.
- Third floor can now be finished and used, likely adding $20-30K in resale value.
- Back porch is now part of the house with a great view and very good comfort, also adding resale value.
- Basement is now dry and warm. Before, the waterproofer said in 40 years he hadn’t seen so many spiders before. (Spiders are a sign of excess moisture.)
- Still some ice on windows, old single pane windows are still prone.
- First floor comfort is excellent. No longer drafty, very little difference in temperature from room to room.
- Second floor comfort up from a 4 to an 8 in summer. Deficient duct work is the next thing to tackle.
Client Feedback
After Phase 1 Attic and Basement Foam: “Comfort levels on 1st floor last summer were the same, but I think I had it cranked up 1-2 degrees lower at times, and had to use fans all over the second floor. This summer I don’t need any fans on the second floor.”
After Phase 2 Back Porch Foam: “The porch was 72 degrees this morning (windows closed at midnight after extensive vacuuming of porch, from rafters to carpet). Could not be happier!” (It had fallen to 66 in similar weather a few days earlier.)
After Continuous Optimization with an Ecobee Thermostat: “Woke up this morning and am very comfortable at an eight. It is 73 in the bedroom with 39% humidity. Downstairs it is 67° with 41% humidity. The porch was 70°.” (Those large temperature differences are due to insufficient ductwork.)
His heartfelt and humorous reaction to this case study:
It is a testament to your work and to our project with this home. I found it fascinating. Very informative about all sorts of things I had forgotten. I am more glad that we did all those things that I have taken for granted nowadays. It is not just an upgrade or insulation job. It was a mission that involved so much thoughtfulness, creativity, science, pragmatic wisdom (and folly with the basement coverings!), and dedication from you!
I love seeing it all chronicled here, and written so nicely. It is a geek’s diary that tells a story that I love! I treasure this document. Who else is going to read this? This is better than what I would have obsessively written had I been the one to direct all the work! It is a joy. I really appreciate that you wrote all this out. I will re-read it. I will have my great-grandchildren read it to their children after I am buried next door (in a foam insulated casket!).
Upgrades
-
Air Sealing and Insulation
- Attic – 3.5” closed cell spray foam on roof decks. Bath fan vented outdoors.
- Porch – Leaky windows changed to triple pane. 3.5” foam on roof deck. Now part of the house.
- Basement – 2” closed cell foam on rim joists and walls. Dryer and bath fan vented correctly. New dehumidifier.
-
HVAC
- Ecobee EMS-02 datalogging thermostat
- Heat Pump Water Heater
Photo Album
See a bunch of project photos here.
Full Story
I like this project because it’s still a bit imperfect. Second floor comfort isn’t quite up to my standards. This is after a massive (and effective) air sealing effort put on by a spray foam contractor, a fabulous house painter, and new windows. Close, but not quite. It illustrates how interconnected a house is – often all the systems need to be adjusted to get a 10/10 outcome.
What’s still off, you ask? The second floor simply doesn’t have enough duct work to it. The furnace and air conditioner just can’t pump enough heat or cool up there. We suspected this might remain a problem when we began the project, duct modifications were included in Package 2, which is the next one above the Budget Package 1 which was executed. The house was so leaky, we couldn’t know if the ductwork would remain a problem until we sealed it up first. It’s still a problem, albeit a much smaller one. There’s another issue behind it as well, which I’ll touch on shortly.
Background and Diagnosis
The night I came for the initial consultation was a cold one. Kevan had the heat blasting at 74 degrees, and I left my coat on. I felt a cold breeze against my ankles. The house was pretty messed up.
Kevan had really decided to dig in, and he’d already had a driveway put in, as well as a fairly high end new furnace and air conditioner installed. He’d also laboriously planted a number of arbor vitaes next to the house in an artistic fashion. The arbor vitaes show his passion and sense of humor, he was a delightful client to work with.
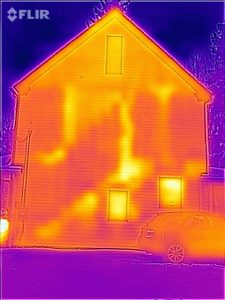
The house turned out to be a leaky wreck (no surprise to anyone). I took this really cool infrared picture that shows the stairways leaking like sieves up the outside wall:
Yellow is warm, purple is cold. Note all the yellow above and below the stairs to the second floor, and again some leaks up the attic stairs. Also note that the attic walls are warmer than the first and second floor walls. No bueno. You don’t get really good shots like this often!
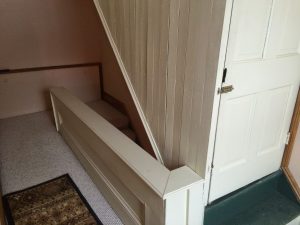
Here’s what this looks like inside the house:
These are the two stairways, I’m on the second floor here. Also note the huge hatch in the back of the picture, that gives access to the plumbing of the second floor bath. The hatch was really leaky, about 32% connected to the outdoors.
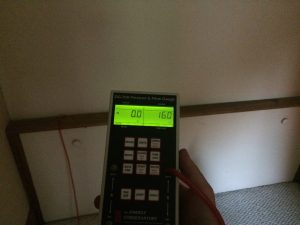
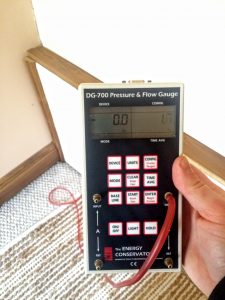
We try to stay under 10% for old houses, under 5% for newer ones. To check this, we use a really simple technique called zonal pressure diagnostics (ZPD). It sounds fancy, but basically with the blower door on we throw a hose into the space we want to test. The house is being depressurized at 50 Pascals (standard test pressure). To find leakage to outdoors you divide whatever pressure you get in the space by 50. Here’s what we started with:
Yeow! 16/50 is 32% connected to outdoors. If it’s all the way inside it should read 0. If it’s all the way outside it should read 50. Here’s what happened after the project:
1.7/50 is 3.4% connected to the outdoors. That’s a win, and these pipes are very unlikely to freeze.
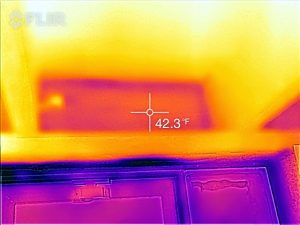
The basement was crazy wet still, two dehumidifiers were running their brains out, and it was icy cold down there. A cold basement means a cold floor on the first floor, so making it warm is key to comfort. The basement was also plenty leaky, here’s another infrared shot:
The basement windows are leaky (in purple), but pay more attention to the 42.3 degrees. Note the “picture frame” of cold air there. This is the top of the basement wall, it’s what usually leaks the most in the basement. Totally true for this one. In winter it makes the basement cold, in summer it lets in humid outdoor air and makes the basement damp and dank.
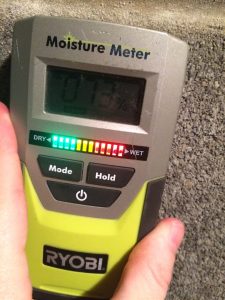
Even in January, the basement was still wet, it should be bone dry by then:
73%! It should be under 20, maybe under 10. Keep in mind, this is after an interior waterproofing job. It shows why our preferred (and sadly more expensive method) is exterior waterproofing where you dig up around the foundation and give the water someplace to go. Kevan did have part of the driveway regraded after this so rainwater didn’t sit against the foundation. Yep, we have to think on a lot of levels.
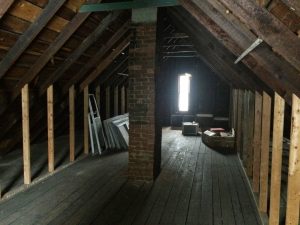
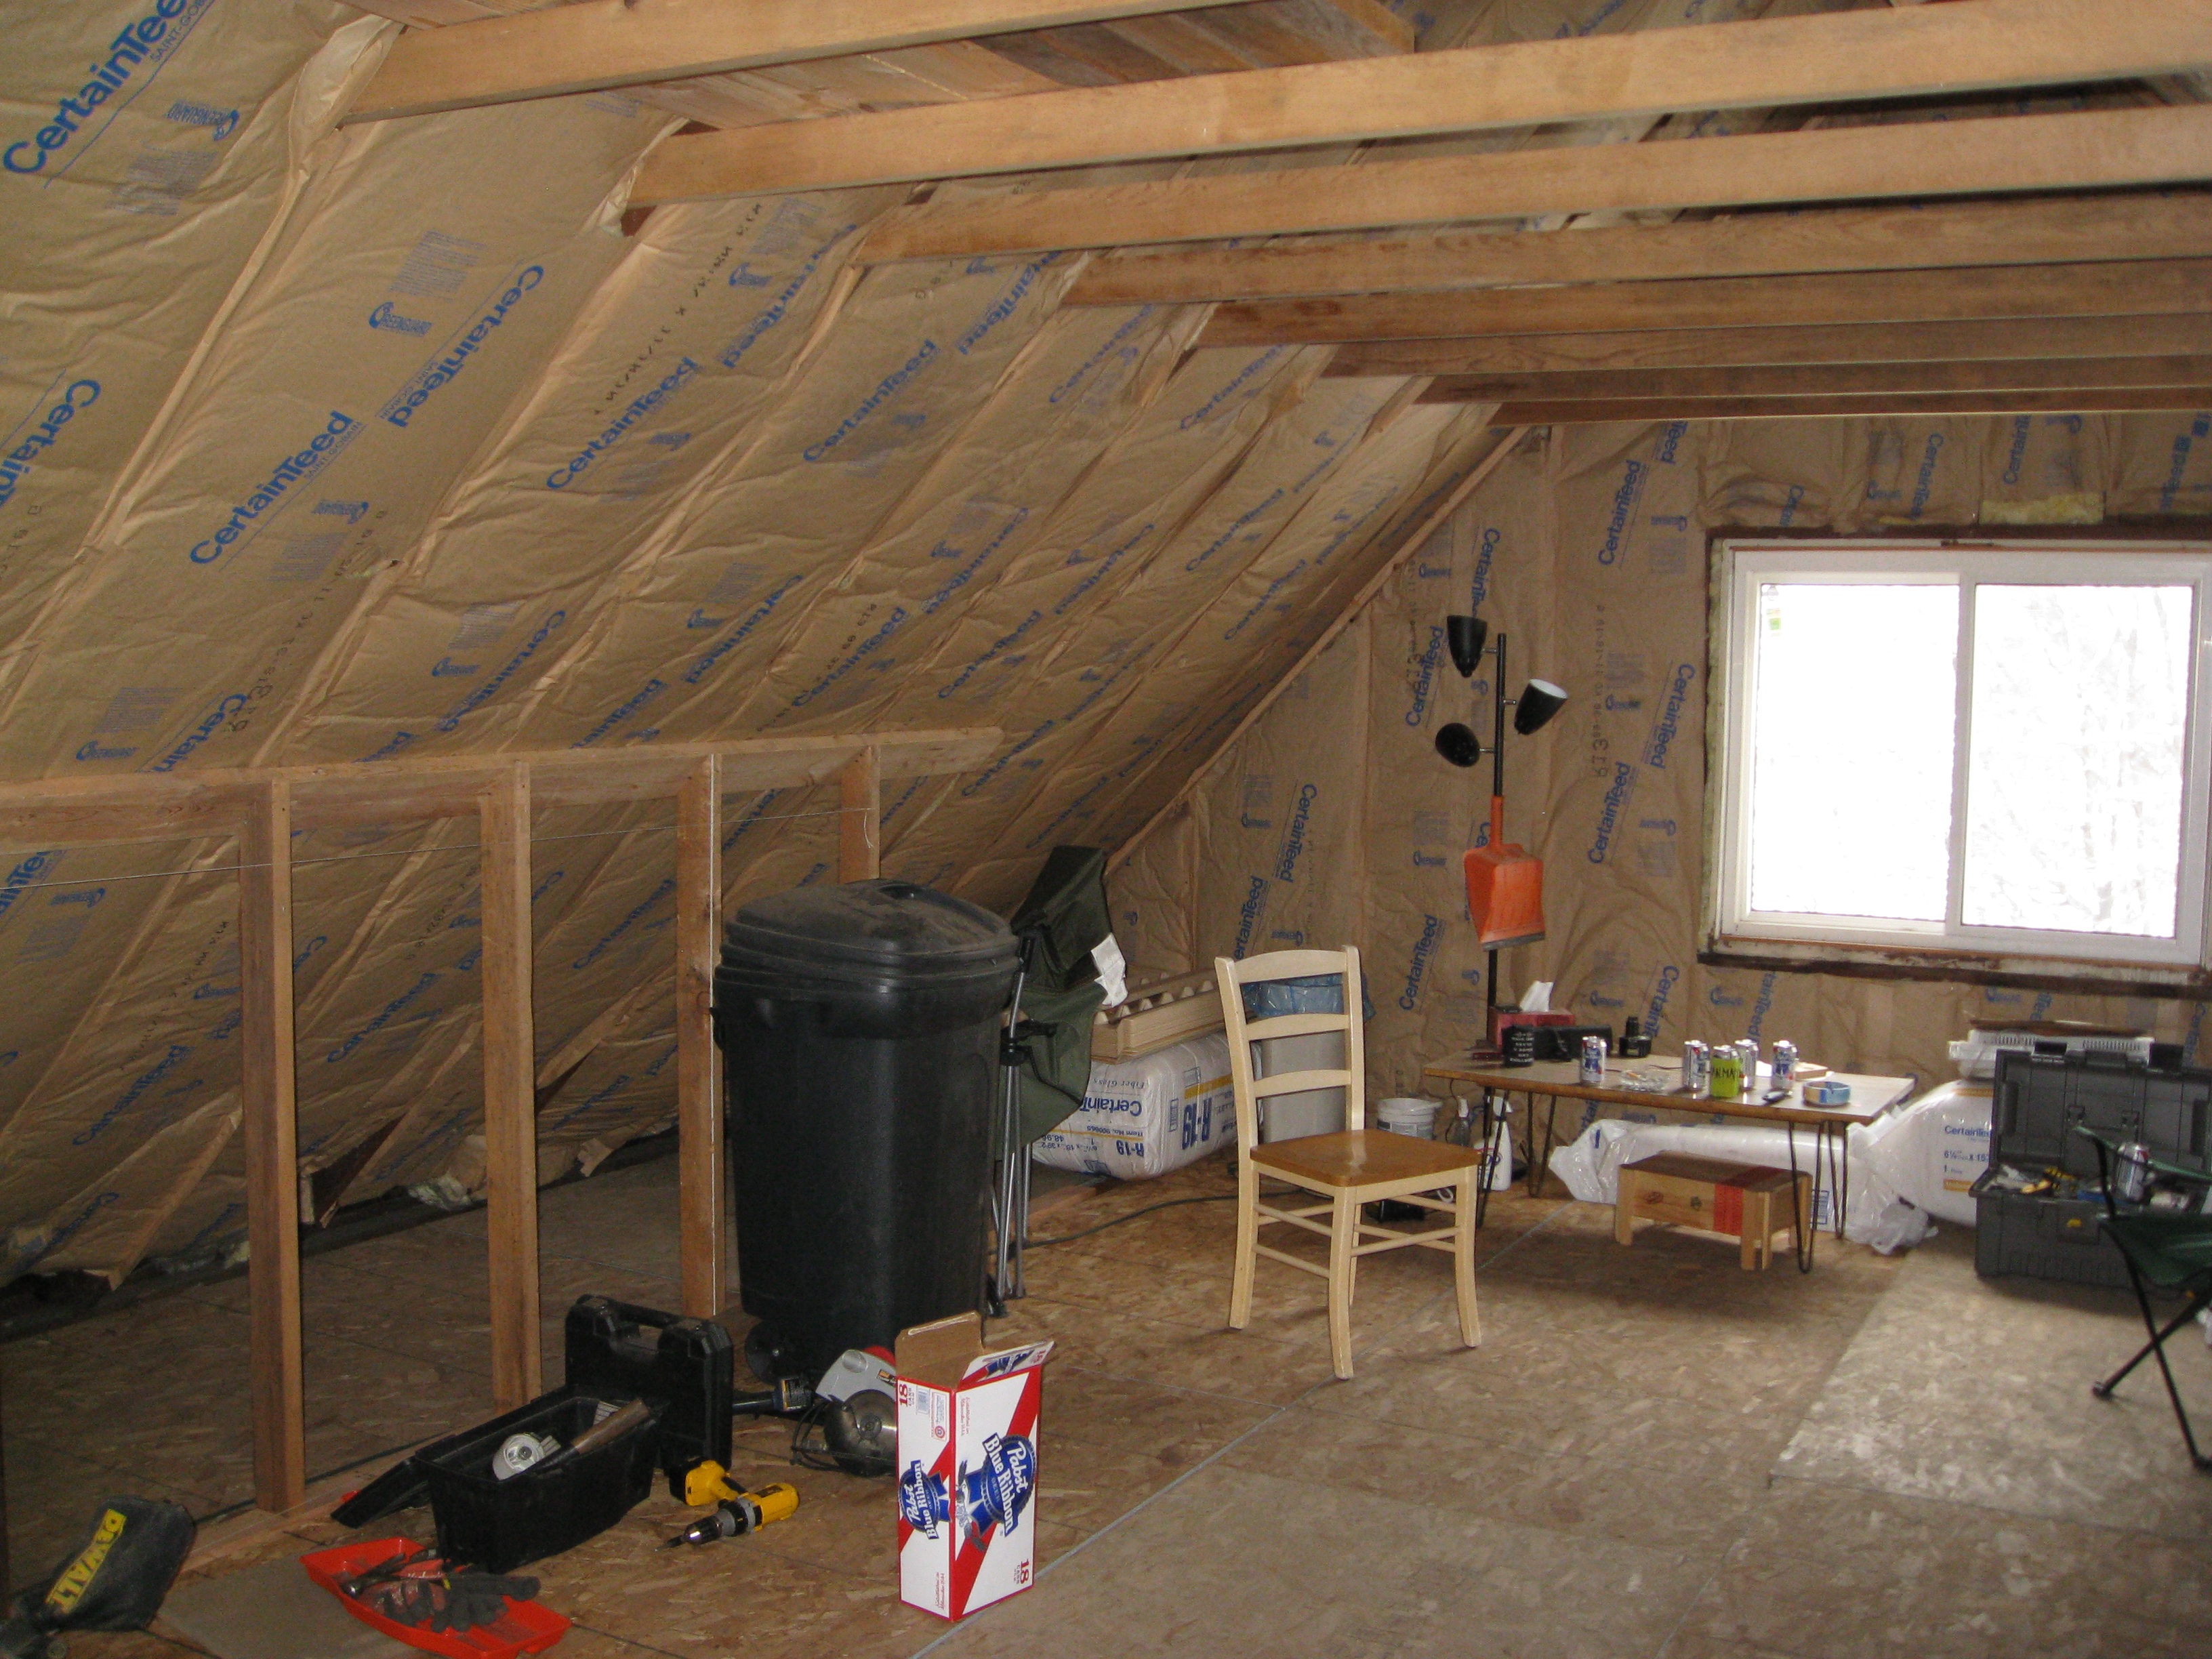
Speaking of dank, the attic was pretty gross. There had been a lot of rave parties up there with critters. It was a crappy scene. This is 100% normal, by the way, and a big part of why we strongly recommend removing existing insulation. That stuff is gross. Here’s the attic before:
There was also a classic and major moisture issue: the bath fan dumped into the attic.
With an old house like this, the wood may handle this moisture without rotting (old, slow growth wood doesn’t have a lot of pulp aka mold food, it’s mostly sap), in a newer house this causes mold problems very often.
As you can see, there was a fair amount of work to do. Let’s get into what we did.
The Project
Nobody likes preparation, but preparation makes or breaks the results. Clayton McCune, who was my foreman as an insulation contractor, helps me out on a lot of projects tackling things like insulation removal, installing new bath fans, building hatches, and the like. He and his brother Cameron did the nasty job of removing the attic insulation. The attic smelled a lot better, you don’t realize there was a stink until it’s gone.
Clayton, and also my friend and fellow auditor Walter Money noted that the roof was sagging from lack of support. (I like to have multiple sets of eyes on a project, I just can’t see everything.) The floor in the attic was sagging several inches in the center. The roof was going to need to handle a lot of additional weight because the snow would actually stay on it. We needed to shore it up. (Closed cell spray foam also has a substantial strengthening effect, it ties things together.) We brought in a structural engineer, but sadly he didn’t tell us anything we didn’t know.
Clay removed the old knee wall supports (the short walls on each side) and put in a bottom plate for the walls to spread the weight out. Also note the cross braces at ceiling height. And of course, no more smelly, nasty insulation!
Basement Preparation & Spray Foam
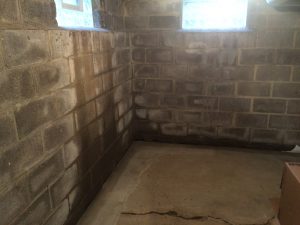
In one of my dumber moves, we ripped off the fiberglass board that goes up the wall in the basement as part of the interior waterproofing job. I spoke to the waterproofer and got an earful. It did show some interesting things, though. The point of an interior waterproofing job is to give the water someplace to drain to, then use a sump pump to take it away. What it doesn’t do is stop that moisture from coming through the block wall where it can evaporate into the house and run the heck out of a dehumidifier. Check out this picture, particularly note under the left window:
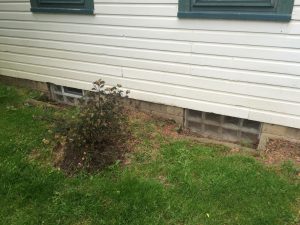
That wall is still quite wet. And water just comes in below the window. The root problem there is that the grade outside the house lets the water run against the house, and there isn’t a cover on this window well, so the water just moseys on in. The waterproofing job (note the new concrete against the walls) provides a drain, but doesn’t stop the water from coming in. Here’s what that window looks like on the outside, it’s the left one:
As you tighten a home, moisture tends to build up inside. When homes are loose, they dry out in winter better than tight ones. Dampness can lead to microbial growth. Keeping higher performance homes dry is critical. I get a bit anal retentive about this because I care about the health of my clients. Kevan and I spent a lot of time figuring out how to manage the moisture in this house, it’s largely solved at this point.
This is partway through the basement project, it’s the same corner from further back. Note the dehumidifier. I was freaked out by how wet the basement walls were. I was afraid the foam wouldn’t stick well. I limited the foam to the above grade parts that were drier. Note the one spot on the left where the spray foam goes all the way to the floor, that was the test for adhesion. It was fine, my fears were unfounded in this case.
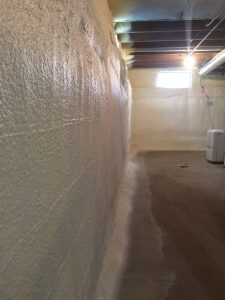
Here’s what it looks like completed, nice and smooth:
The spray foam on the basement walls ended up replacing the fiberglass panels. The foam still helps direct the moisture in the walls down into the drain. It has two additional benefits, too. First it prevents most of the water vapor from evaporating into the basement, reducing how much dehumidification has to be done. Second, it stops much of the cold in the winter from coming into the basement (technically it prevents heat from escaping.) A warmer basement means it’s easier to keep dry (dehumidifiers work better at higher temperatures) and the floor of the first floor is warmer, making it comfortable to walk around barefoot or in socks. Everything is interconnected!
Foaming the Attic
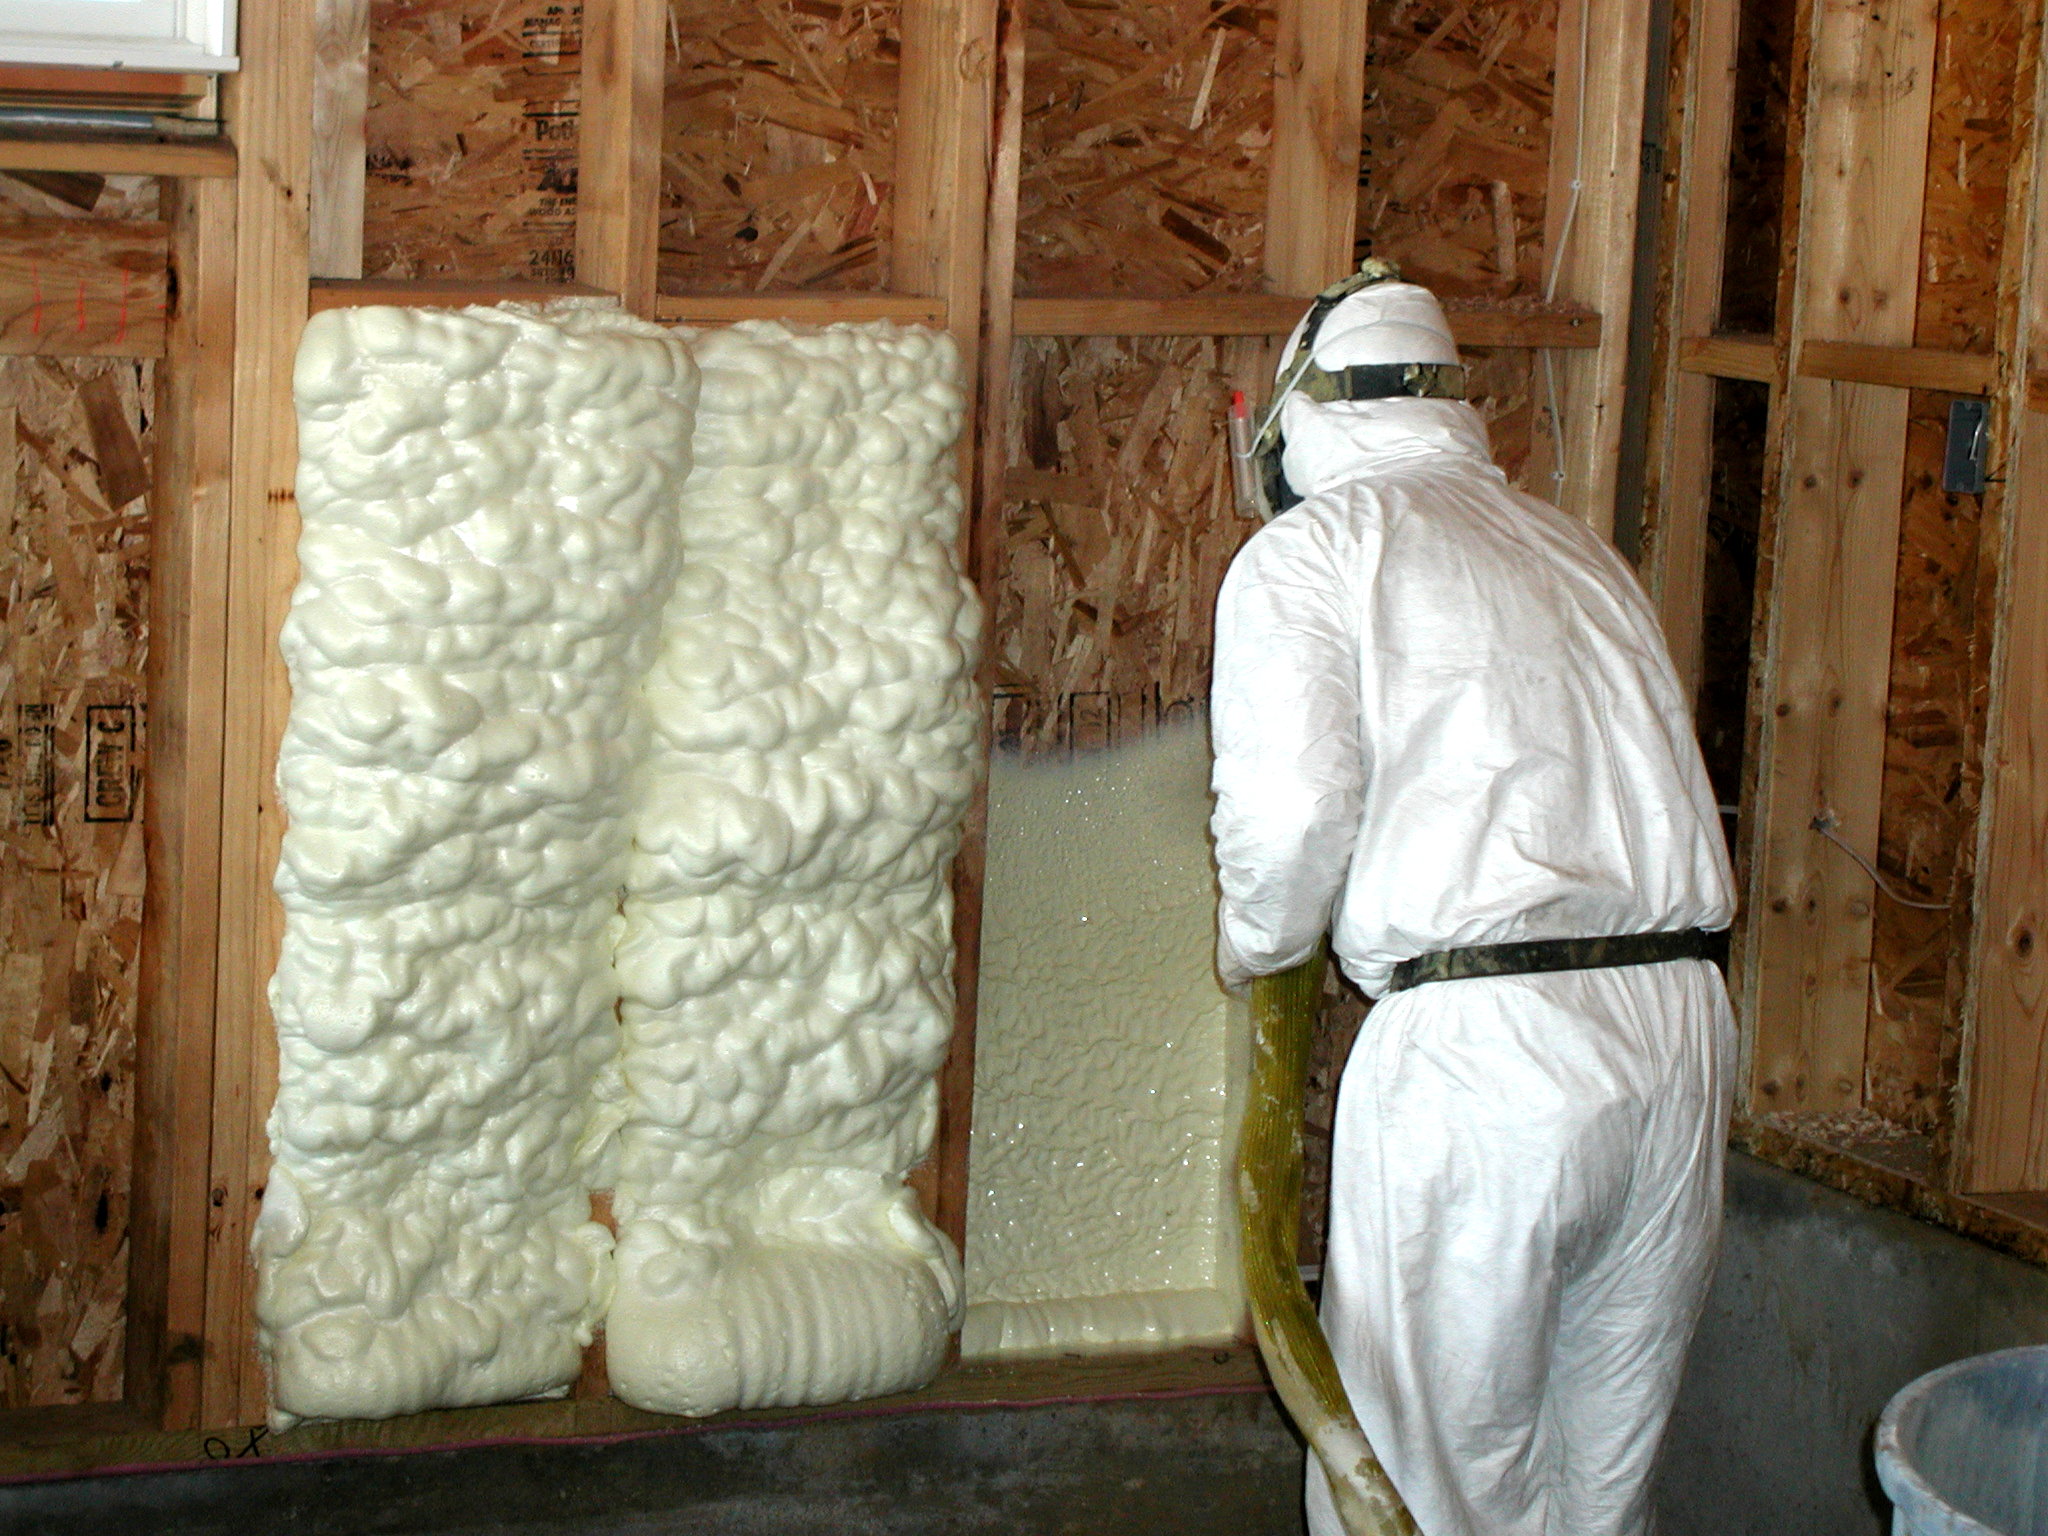
I wasn’t a fan of spray foam for a long time, primarily because as a contractor I couldn’t do it. That has changed. This project was tailor made for spray foam. We generally aren’t fans of open cell foam in our cold climate, it tends to let moisture through it, absorbing part of it. That makes us nervous. Closed cell spray foam doesn’t have these issues, once it’s a few inches thick it effectively stops moisture, both vapor and liquid. It’s not a particularly healthy product, so we ask clients and their pets to leave during the foam project and for 24 hours afterwards. Foam largely cures within 24 hours after application, not unlike spray paint.
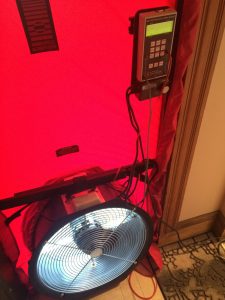
I use my blower door to blow air into the house, which blows it back out open windows near the foam application. When pressurizing the house with the blower door like this, we’ve found with Indoor Air Quality testing that volatile organic compound levels (VOCs) aren’t elevated any more than what happens when we sleep in a closed up bedroom.
This was my first project with Gary Smith and Donny Oney of Affordable Foam out of Medina. I found them very fun to work with and ridiculously hard workers. This was partway through the attic insulation install which happened on a warm summer day.
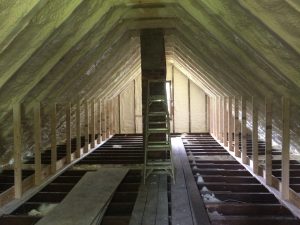
Here’s what that same spot looks like in infrared. The bottom is foamed, the top is warm from the sun hitting the roof where it doesn’t have insulation on it. When the attic is finished out as a studio, it’s likely to add $20-30K to the value of the home from increased square footage. Here’s the completed attic insulation:
Add a few tubular skylights and some new duct work, and this will be a cozy, well-lit space. The attic and basement were complete at this point. Hats off to Affordable Foam, too, I couldn’t find ANY misses in the basement and the ones I found in the attic were what they call “Natepicking.” No misses of any substance. Compared to some other projects I’d done earlier, this was a breath of fresh air. I wasn’t spending days after the job making things right.
Uh Oh, the Water Heater
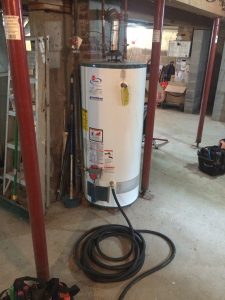
You know how I said everything is interconnected? Here’s an example. I warn every client that has a standard gas water heater that it may need to be replaced. Here’s the story, starting with a picture of the old water heater getting drained:
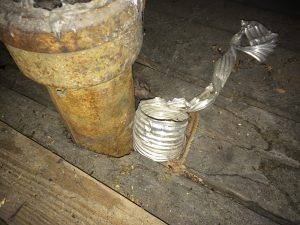
This is what’s called a natural draft water heater. I hate them: they make my life hard, can hurt my clients and also cost them money. They rely on warm air rising to vent the combustion gases out of the house – a natural draft. They need to find air from somewhere inside the house to burn, usually from leaks in the basement. The trouble is you may eliminate the supply of air it can burn when you tighten the house. The water heater looks for the next easiest place to get air from. Often it’s down the same flue/chimney that’s supposed to exhaust heat up. See a problem? The “out” door can’t also be the “in” door. When a water heater sucks air to burn down the chimney, it’s called backdrafting. It can lead to carbon monoxide poisoning, which you may have heard of. It has this nasty side effect called death. Not something to play with. About half of my clients have water heaters that backdraft, or fail, once the air sealing project is complete.
On this house, the water heater backdrafted. Here is the video I shot for Kevan showing it. It shows how air from the water heater flue is blowing into the house when the dryer is on. I tried it with the dryer off, same problem. It had to be replaced for safety reasons. At that point, nothing will be using the chimney, neither the furnace nor the water heater.
There’s a good part to this, though. The third floor is going to need duct work to heat and cool it if Kevan doesn’t want to install another HVAC system. It’s a pain in the tuckus to run ducts inside an existing home. If the chimney is removed, the hole can be used for ducts. Again, everything is interconnected.
We opted to use something called a heat pump water heater. They pull heat from the air around them to heat the water. (Again, a warm basement is a good thing, which we have now.) They are all electric, so we can put them anywhere (as long as there is enough air around them to pull heat from.) We opted to move the water heater under the back porch with the well water equipment. It also opened up the basement a bit. Central Heating and Air installed it. Here it is:
That was phase one of the project, but there was more to come…
The Back Porch
Kevan wanted to bring the back porch into the house. From a Building Science perspective, this is a great idea because the basement of the house extends under the back porch. As it was, the porch was outdoors, but the basement below was indoors. That leads to all sorts of wacky problems, usually comfort and moisture related. With the porch inside, these problems can be addressed, and were.
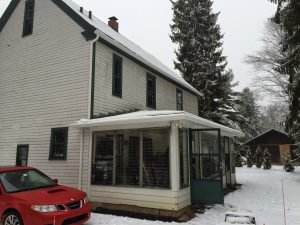
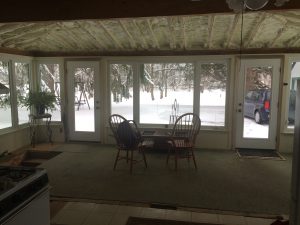
This is the back porch as it was. Note the jalousie windows that look like slats on the back of an 80s Camaro. Yes, that’s their actual name, and they are indeed loose, they leak like sieves! Kevan had really nice triple paned windows installed. Even before foam it was pretty comfy.
I mentioned earlier that the painter and window guy contributed to air sealing the house. The painter caulked and sealed the snot out of the siding, reducing leakage. The windows also made a huge difference. 1300 points of the 6000 point air leakage reduction on this house I had nothing to do with: the painter and new windows did it. I wish I knew how much each one contributed, but I didn’t test for it.
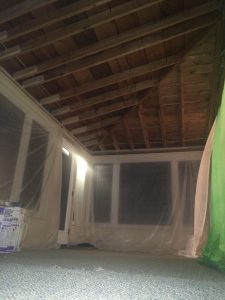
I had suggested to Kevan that rather than keep the low ceiling, he drywall right to the roof joists, making the room feel bigger. That’s a luxury spray foam affords. Here it is almost ready for foam:
And here it is after foam, with a lovely view of the backyard straight from the kitchen:
Just because I can’t resist the cuteness, my daughter stopped by with me during the back porch work, she’s carrying a piece of my blower door:
Continuous Optimization
The spray foam in the back porch ended the first two phases of the project, we achieved a remarkable 75% reduction in air leakage thanks to foam, the back porch windows, and an anal retentive painter.
This is when what we call “Continuous Optimization” begins. (Shout out to Linda Wigington for coining it.) We just made a ton of changes to the house, so how it gets operated needs to change a bit. For example, we generally don’t recommend changing the temperature when you leave for work. It doesn’t save much in high performance homes but can cause comfort complaints. We also need to figure out how to manage humidity in the house so we don’t allow conditions where mold can proliferate. There are a lot of little things that need to be tweaked so the house can be as good as possible for the homeowner. After all, we want every project to be a case study.
Like I said earlier, the comfort on the second floor still wasn’t perfect. Kevan had purchased a new furnace and air conditioner a few months before I showed up. Unfortunately, they both were too big, which means they only run for a few minutes before shutting off. Some rooms suffer, usually ones that are a long way from the furnace, lose heat faster, or don’t have enough duct work to them. That describes how the second floor was.
I had been pounding on Kevan to get him to install an Ecobee thermostat from the beginning of the project. He finally relented when I told him if he wanted better comfort with the house as it was, I needed this tool to help.
The Ecobee that we like (which is not the consumer Ecobee 3, by the way) gives us a huge amount of control of exactly how the equipment operates. They also do what’s called “datalogging”. They record a bunch of readings over time, including indoor and outdoor temperature, indoor relative humidity, furnace stage and runtime, and fan runtime. With it, we can optimize the equipment as well as possible for comfort. Kevan acquiesced and got one installed:
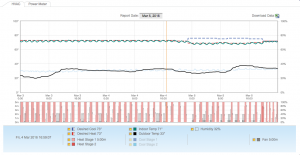
Now we could see how the equipment was running and adjust it. Most importantly, we could force the furnace and air conditioner (which both have two stages) to run in low stage, which heats or cools more slowly. Slow is good. And we could see if it was doing it. Here’s what that looks like:
This is the Ecobee report. The green line is indoor temperature. It still goes up and down faster than I’d like, but it’s much better than before. I would prefer the line barely move. The red dashed line is the set point. It’s a bit tough to see, but the grey line is indoor humidity. The black line is the outdoor temp. On the bottom the red bars are when the furnace was on, the black bars are when the furnace fan was on.
This shows a few 20-30 degree days and that low stage on the furnace only ran 20-50% of the time to keep the house warm. A size down for the furnace (or two) would be a good idea.
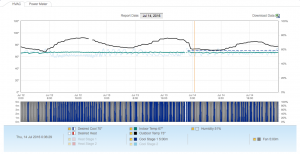
We already knew this because part of our process includes a load calculation, which figures out exactly how much heat or cool it takes to keep a home comfortable, even at extreme temperatures. Both the furnace and air conditioner are both about twice as large as they should be. Here’s what it looks like in summer:
These are some of the hottest summer days of 2016 (and there were a lot of them!) Note the blue bars, which are low stage air conditioning. Even on the hottest days, low stage shut off. That’s bad for comfort and dehumidification. The AC is also twice as large as it needs to be.
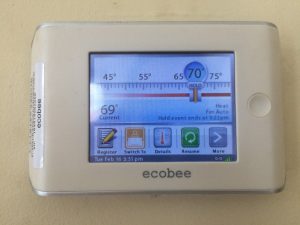
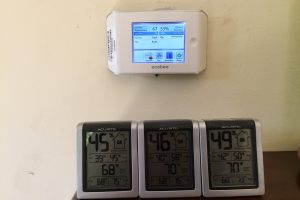
We really struggled to control humidity, running the furnace fan less helped a lot. We had been running it more because it helps filter the air inside the house, which is better for health. When we ran it less, we consistently got below 60% relative humidity, which is when bad things really start to happen. Much of the time we are under 50% now. Before we figured that out, Kevan noticed that his temperature and humidity monitors did not seem to be agreeing. In a testament to just how geeky I end up making our clients, he sent me this picture:
We were calibrating the sensors to see how they compared to one another. I had to fess up at this point, I had gamed his thermostat to make it read 2 degrees lower than it actually was. This was in the hopes of saving a little energy without him knowing it. So the thermostat actually means 69 degrees, not 67, putting it in the middle of the other monitors. He doesn’t have a high end calibrated monitor, so I’m not sure which humidity sensor works best, but I would lean towards the Ecobee. That means the monitors are reading 4-8% low. Now that we know that, we can better understand what’s going on in the house. That’s calibration.
Without the Ecobee and Kevan’s careful measurements, we wouldn’t have figured this out. We pushed his comfort level from a 7.5 to an 8 doing this. Still not a 9, but we’re getting there… It’s all part of continuous commissioning. Like I say, even when the project is done, it’s not truly done.
I’ll close with a picture of Kevan standing in the back door of his gorgeous new porch/sitting area:
What’s Next?
Now that the chimney isn’t doing anything, it could be removed and the space used for ductwork to the second and third floors so both of them can be truly comfortable. 8/10 just isn’t good enough in my book, I want at least a 9. The question becomes one of desire and budget: does it bother Kevan enough to spend the money it takes to solve this? Who knows?
The key is, the house is far more comfortable than it used to be, we addressed a number of moisture issues, so it’s healthier too, we added two new living spaces, and it should still use less energy. We predicted $226 less/year. Thanks to last winter phoning it in, we don’t know how close we are on that estimate yet, but we do track. If this winter is tough, we’ll find out if our prediction holds!
My Head Is Spinning
If I’d just read all that, my head would be spinning too. As you can see, our projects are pretty complex and multifaceted. We have to deal with a lot of interconnections. Don’t fear, we break it down into small steps as we go. (That’s for us, too, we need time to solve the puzzle.) For starters, all you need is a list of the stuff that drives you nuts about your house.
Our process begins with an initial consultation where we’ll sit down, make a prioritized list you want to solve, teach you some Building Science, and do some blower door testing. That’s the only thing you have to think about now, all this other stuff happens one step at a time, and we’re with you all the way. We only work in the Cleveland Ohio area for now, but hope to expand in coming years.
Before that initial consult, though, we highly recommend you do some reading. Start with our free Home Performance 101 guidebook – you can get it just to your right.
Detailed Numbers
Gas Use Before 1509 therms *est. from partial year
Predicted Use After 1174 therms
Actual Use After N/A
Electric Use Before 7000 kWh *est.
Predicted Use After 7637 kWh
Actual Use After N/A
$ Energy Savings Predicted $226/year
$ Energy Savings Actual N/A
Duct Leakage
- Before N/A
- Predicted N/A
- After N/A
IAQ measurements
- Before N/A
- Predicted N/A
- After N/A
Load Calc Heating/Cooling
- Before Heating 59,355 BTU/hr
- Before Cooling 23,705 BTU/hr
- Predicted Heating 44,666 BTU/hr
- Predicted Cooling 18,588 BTU/hr
- After Heating Need a really cold day to find out
- After Cooling 18,000-ish from Ecobee
Zonal Testing
- Master Bedroom
- Before 17/50 (34%)
- After 6.5/50 (13%)
- Attic
- Before N/A
- During project 10.1/50 (20.2%)
- After 1.7/50 pa (3.4%)
- Plumbing Chase
- Before 20/50 (40%)
- During 13.2/50 (26.4%)
- After 1.7/50 (3.4%)


