The office was unusable, it hit the 50s on cold days.
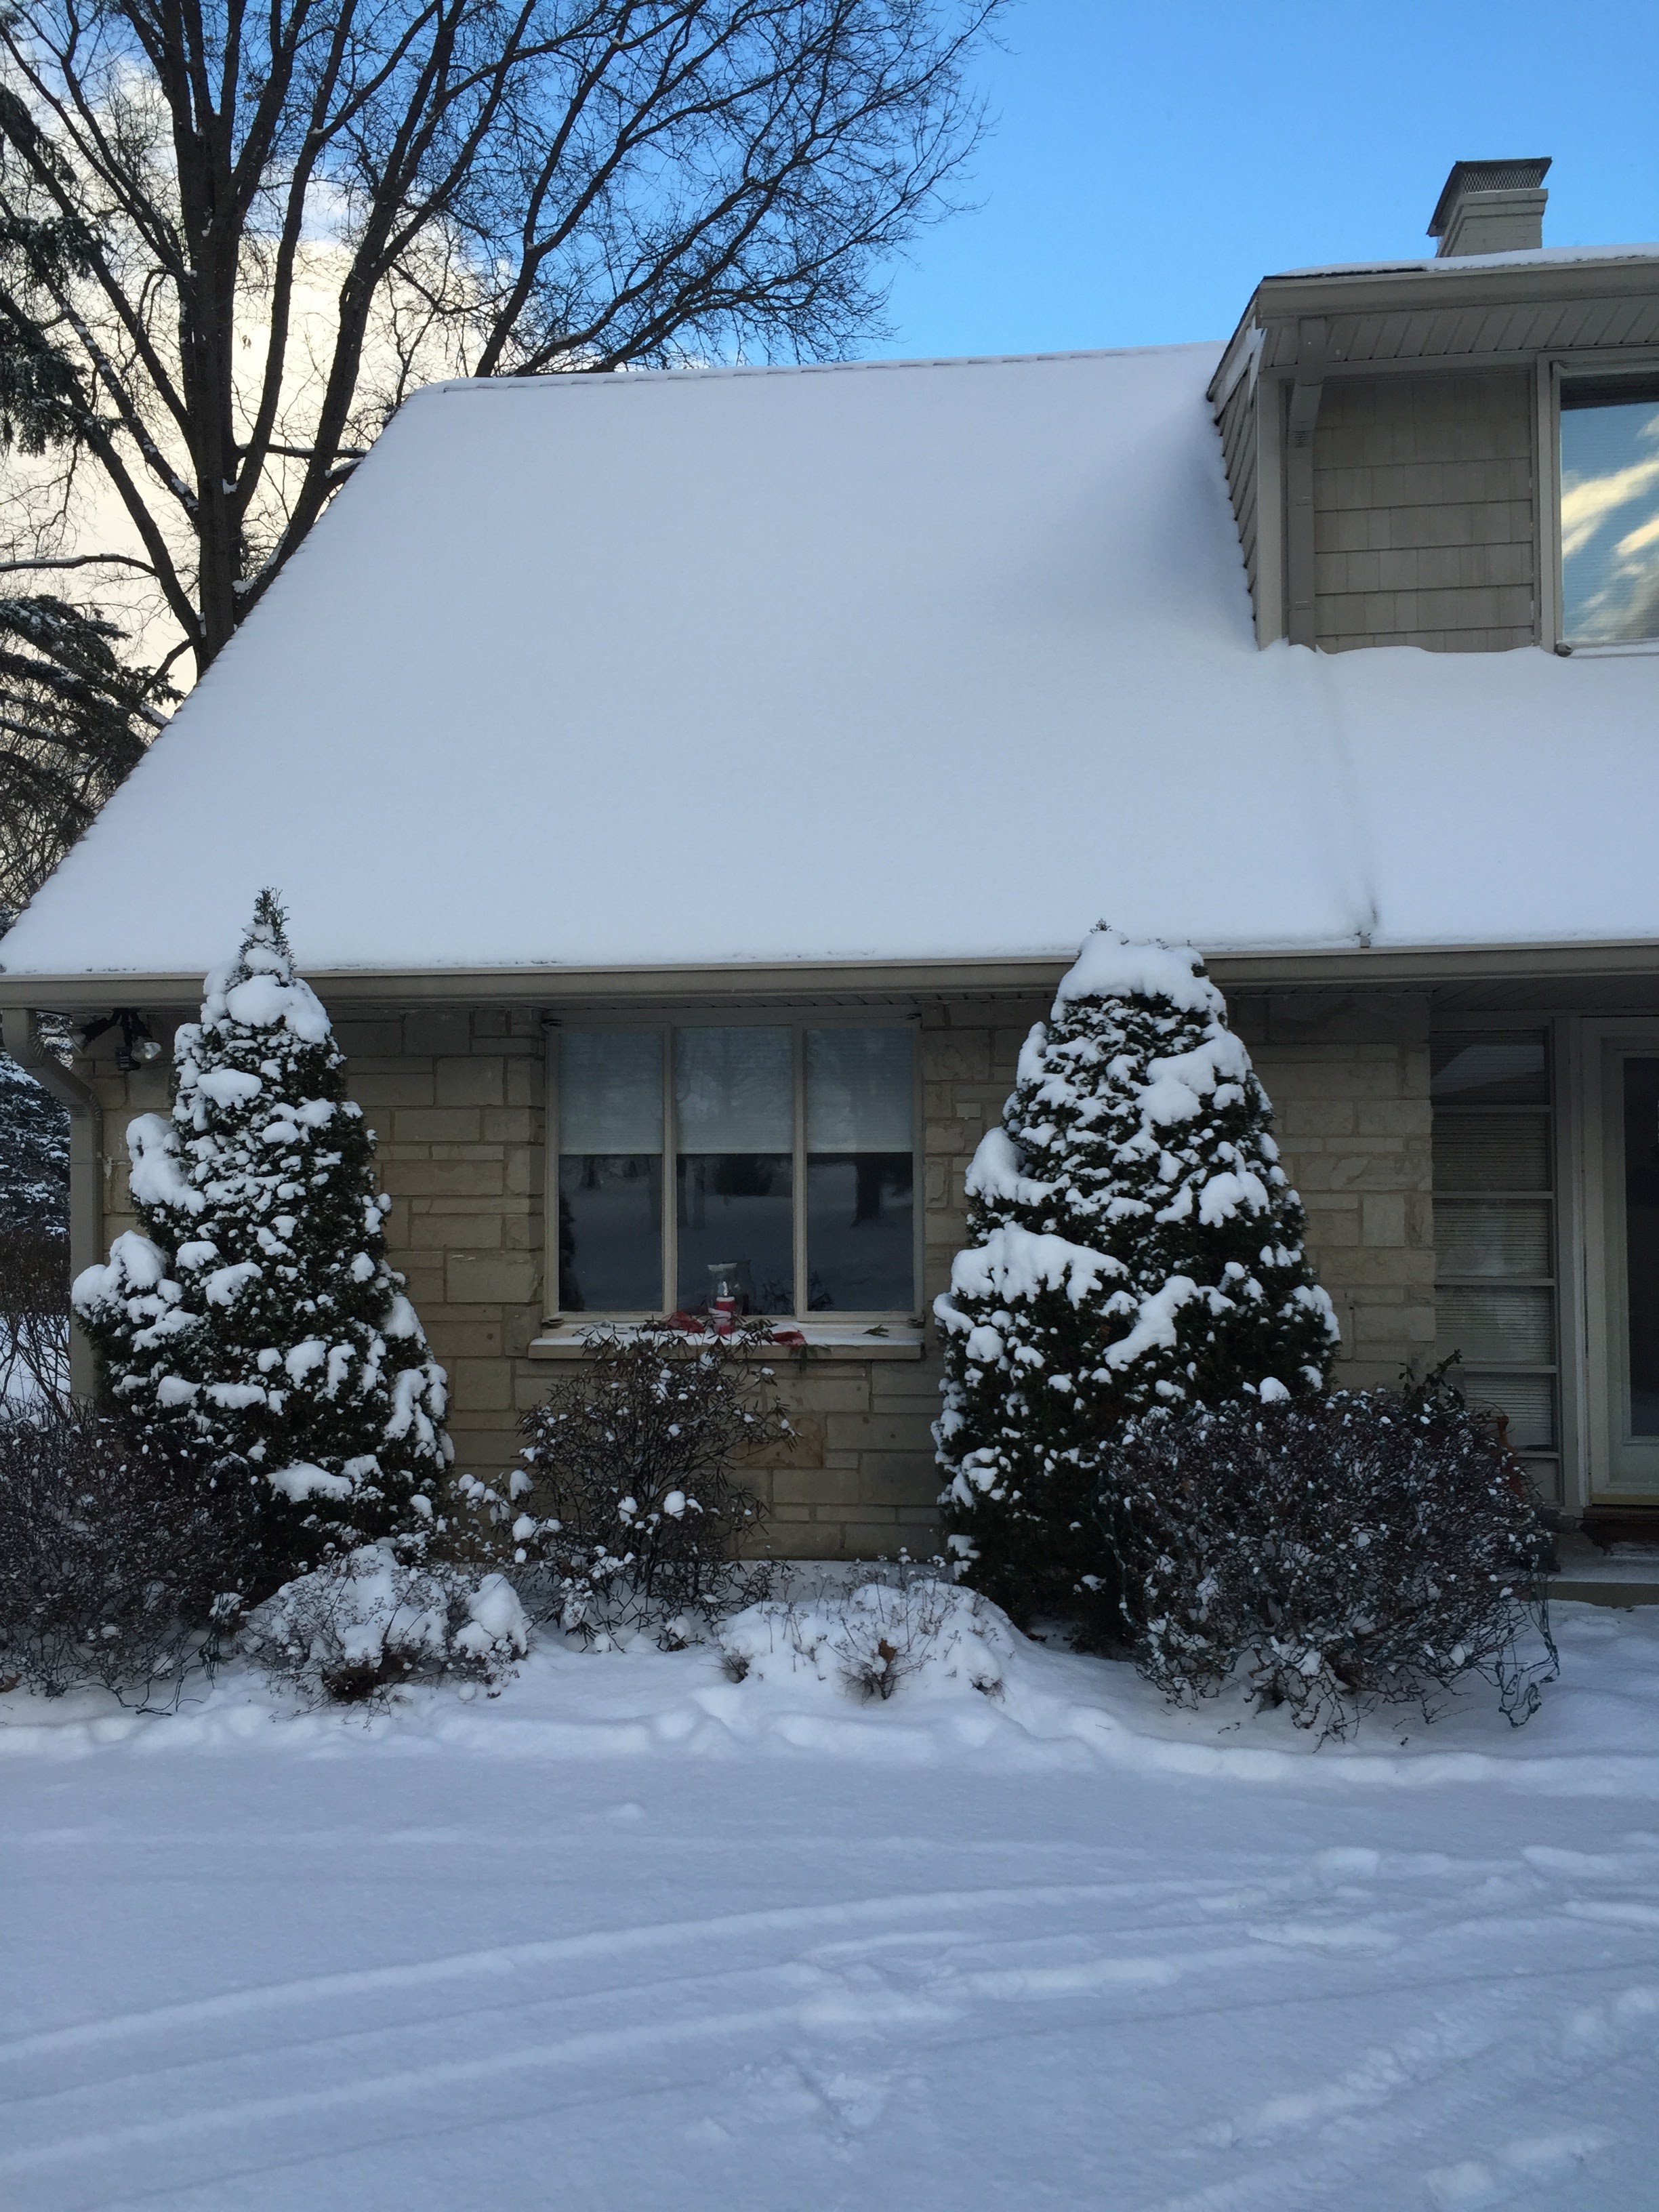
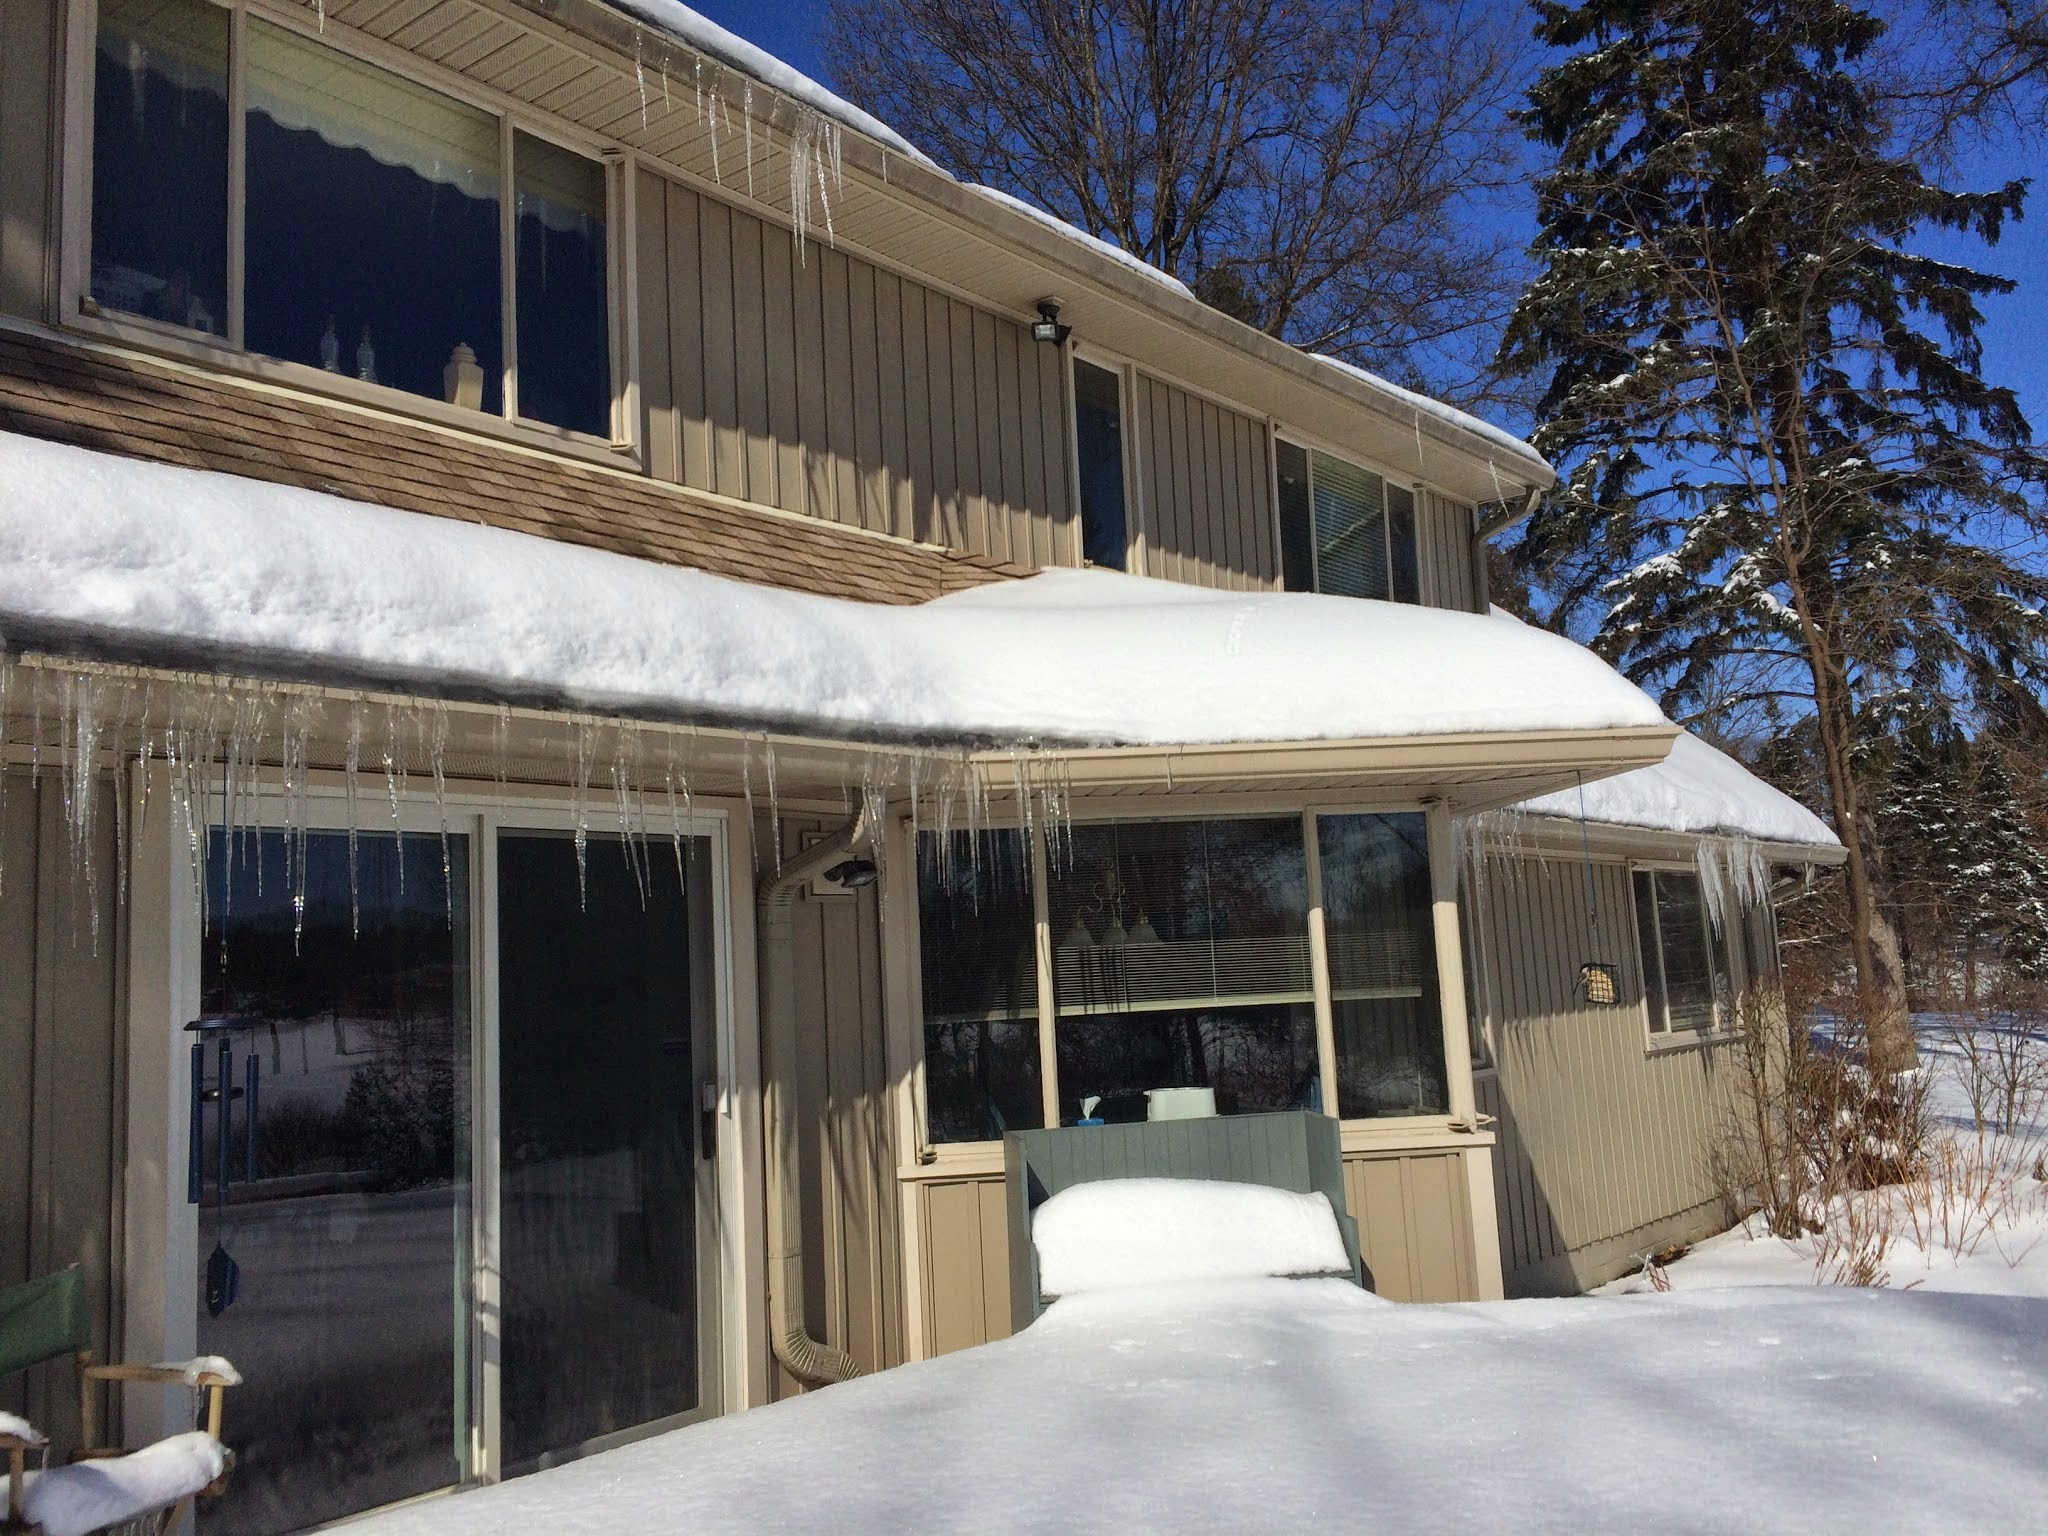
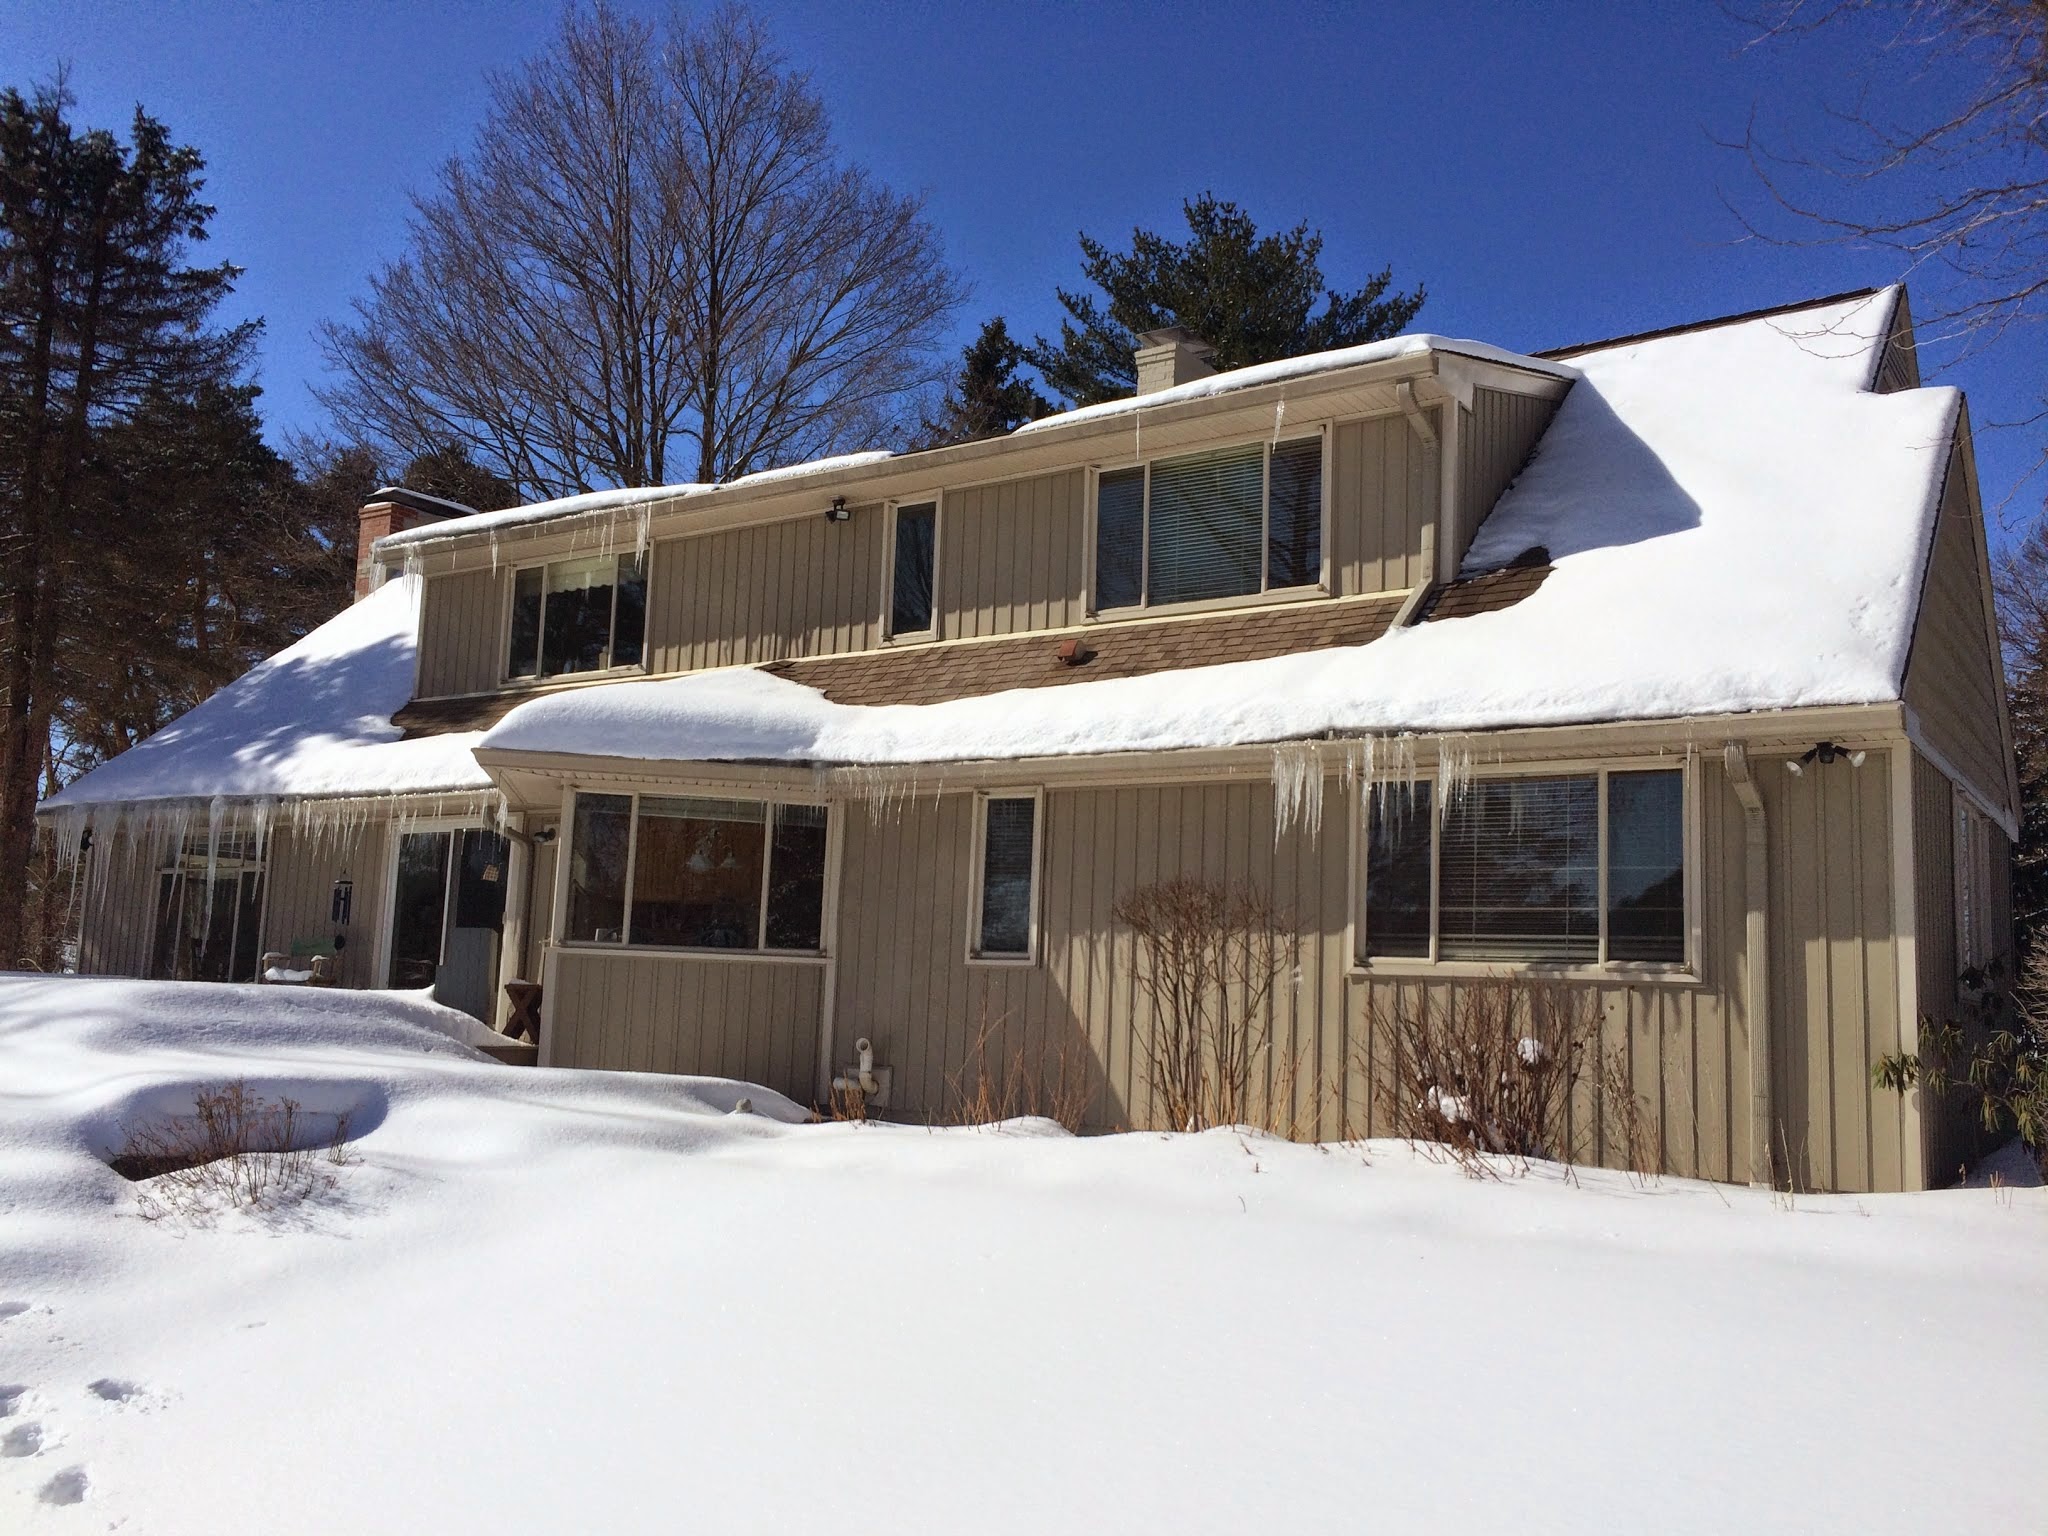
The whole house was miserable in winter, and it grew wicked icicles.
Background
Carlton and his wife Elaine bought this house to retire in. The house is on a truly amazing lot that backs up to a lovely lake. I seem to consistently have clients with envy-inducing backyards, and this is a great example. Unfortunately, they found it was so uncomfortable that they didn’t want to spend time here. Carlton works largely from home, but his office dipped into the 50s on cold days. He found himself working elsewhere in the home. Some adjustments were necessary.
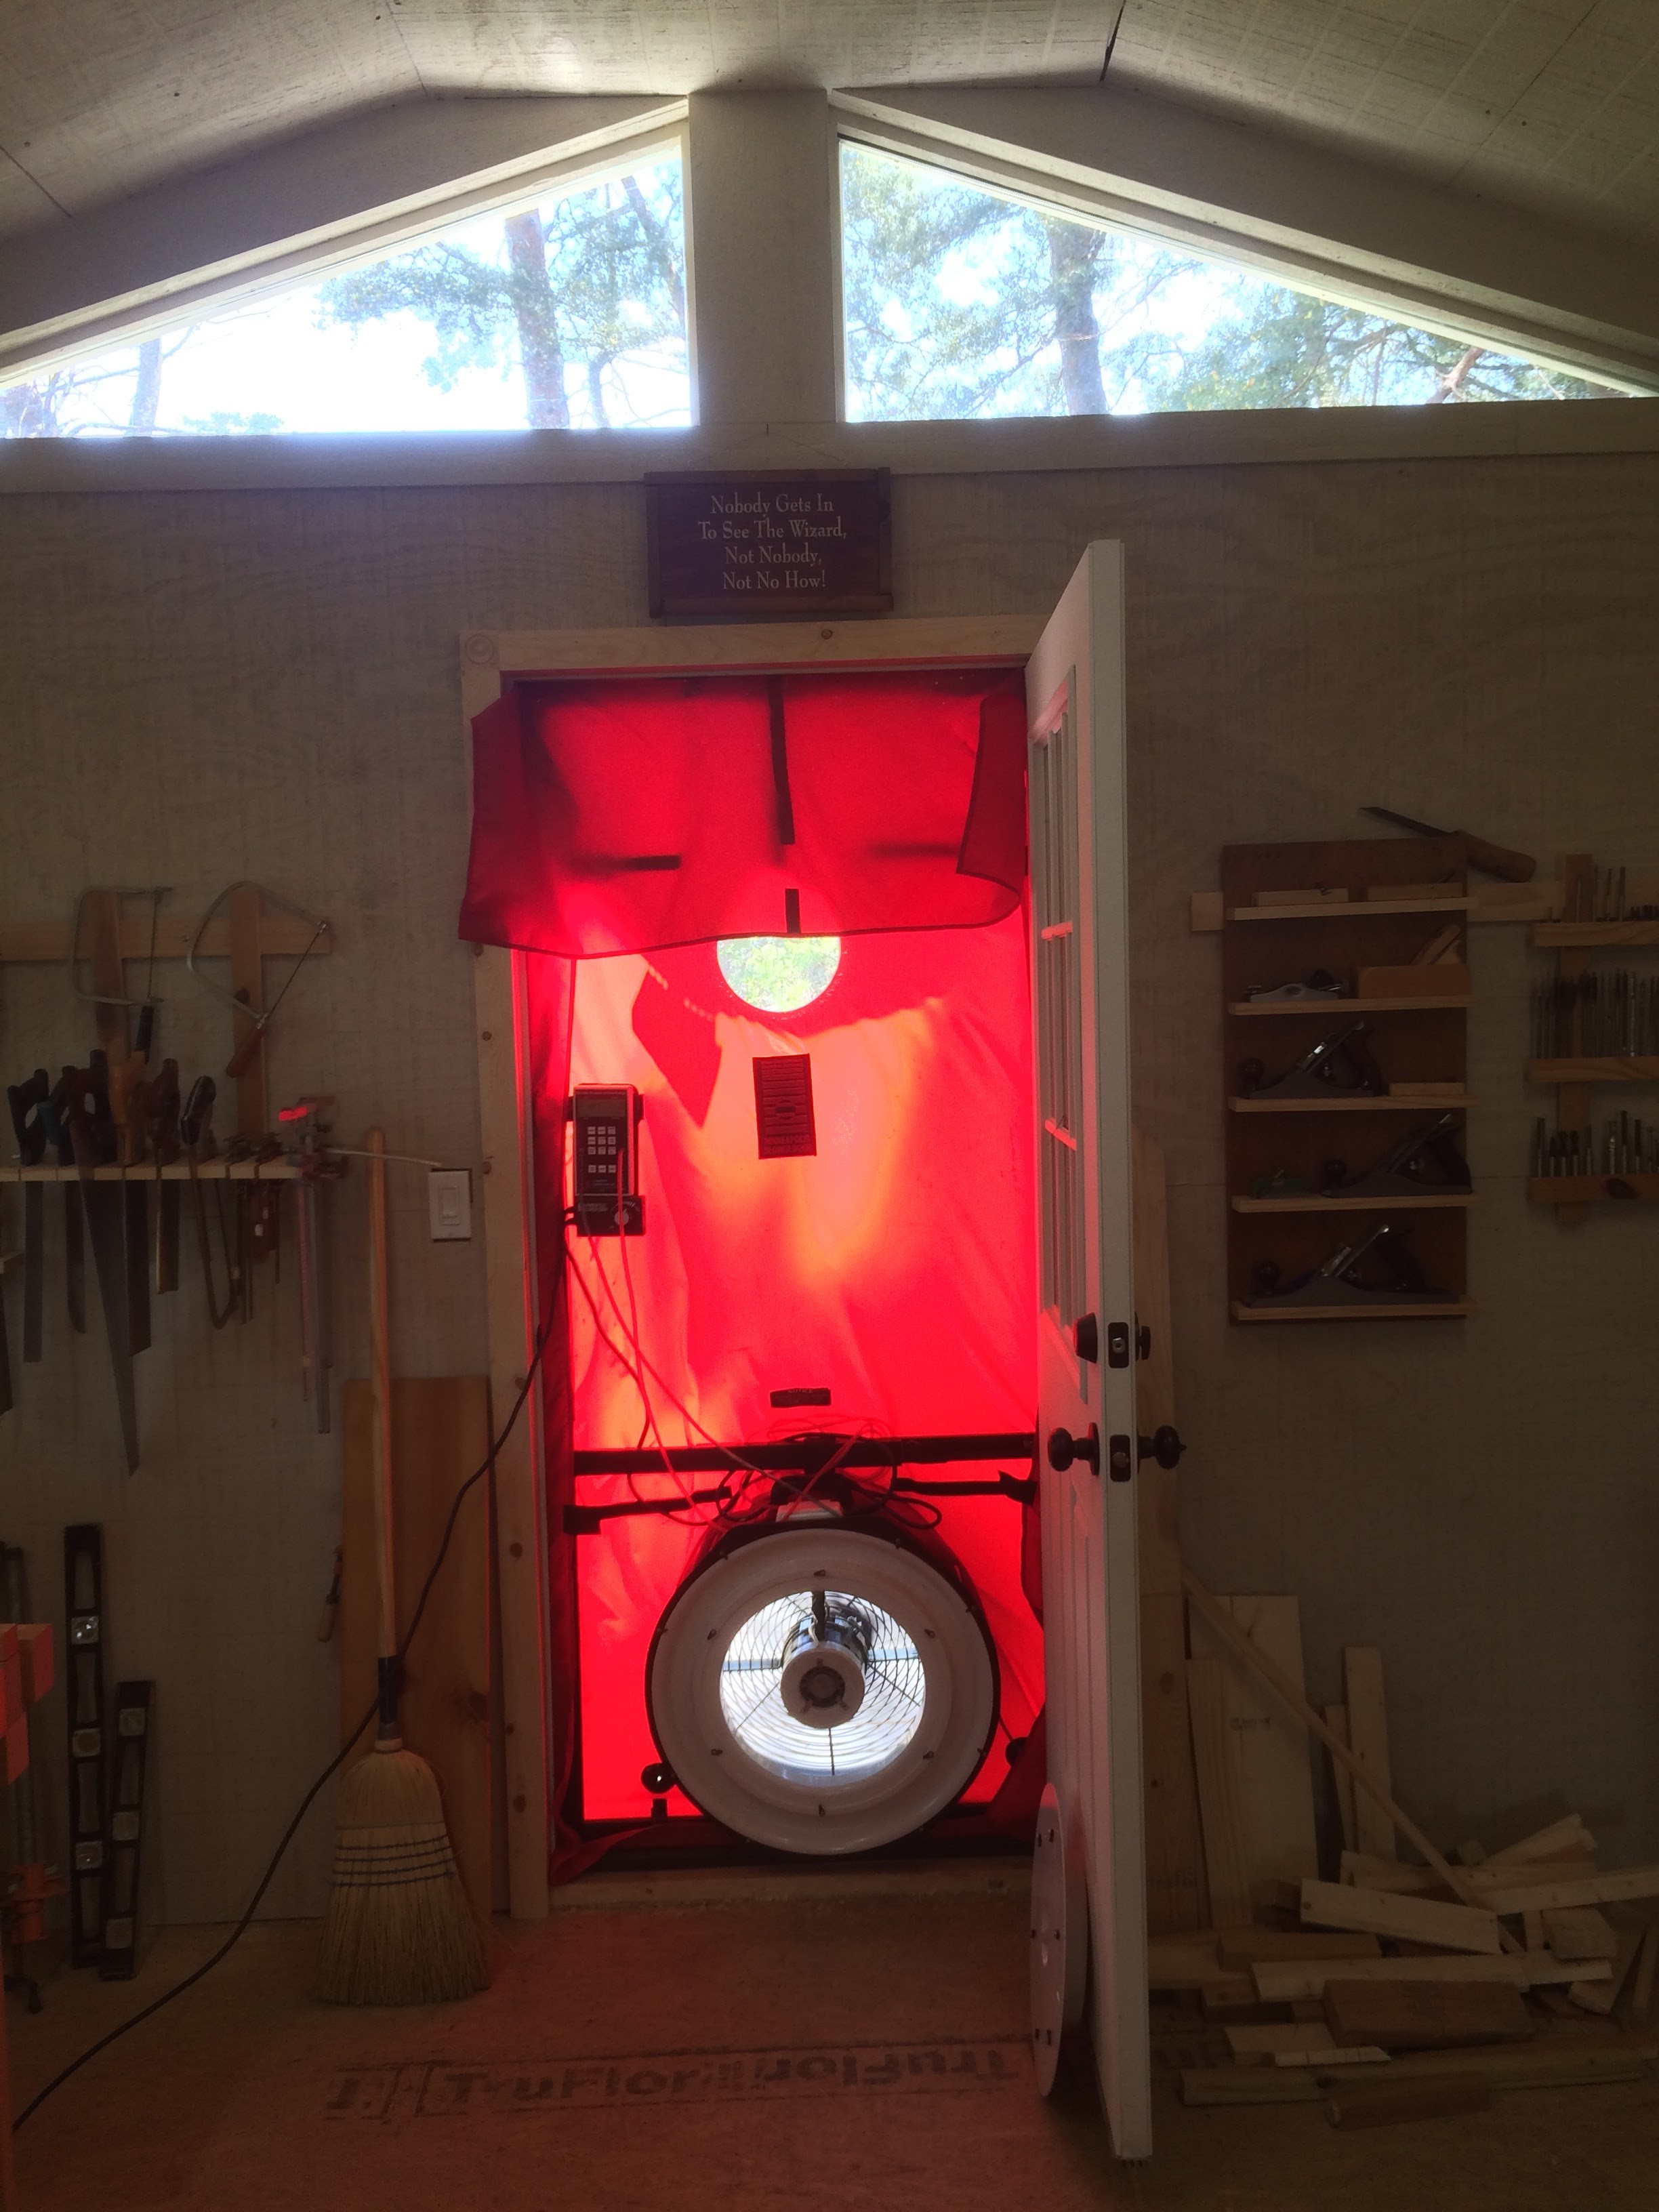
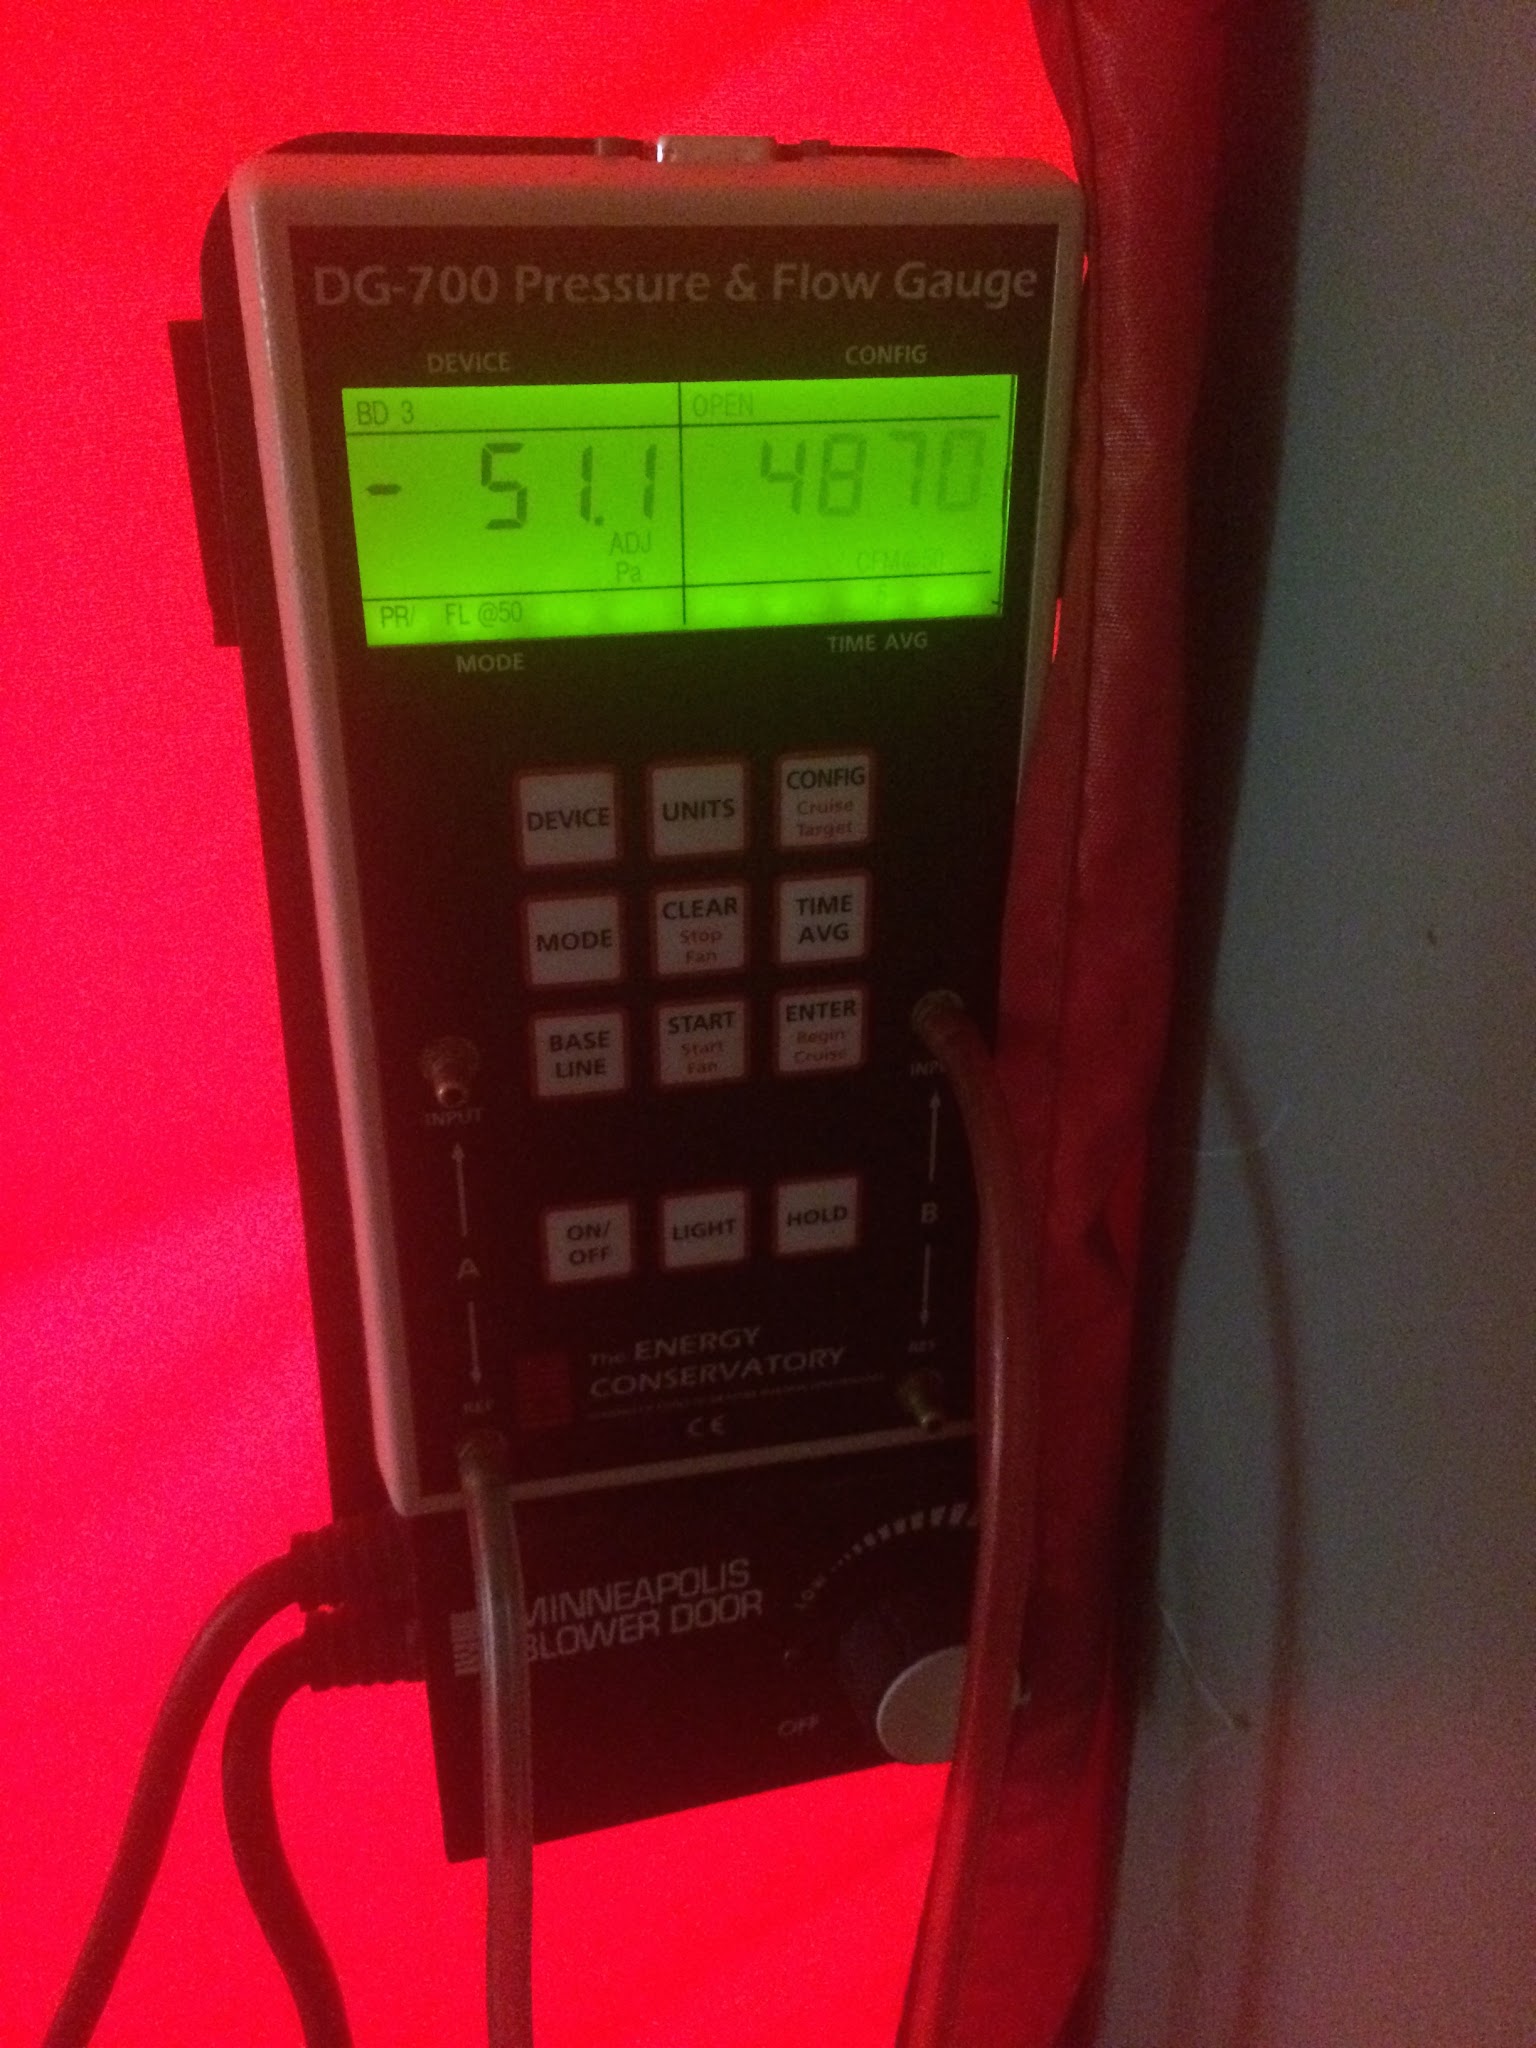
At the initial consultation, the air leakage was so high that I asked if any windows could be open. No windows were open. Literally speaking. Figuratively, we found the house to have open windows by using a blower door and infrared camera (pictures in the full story below.)
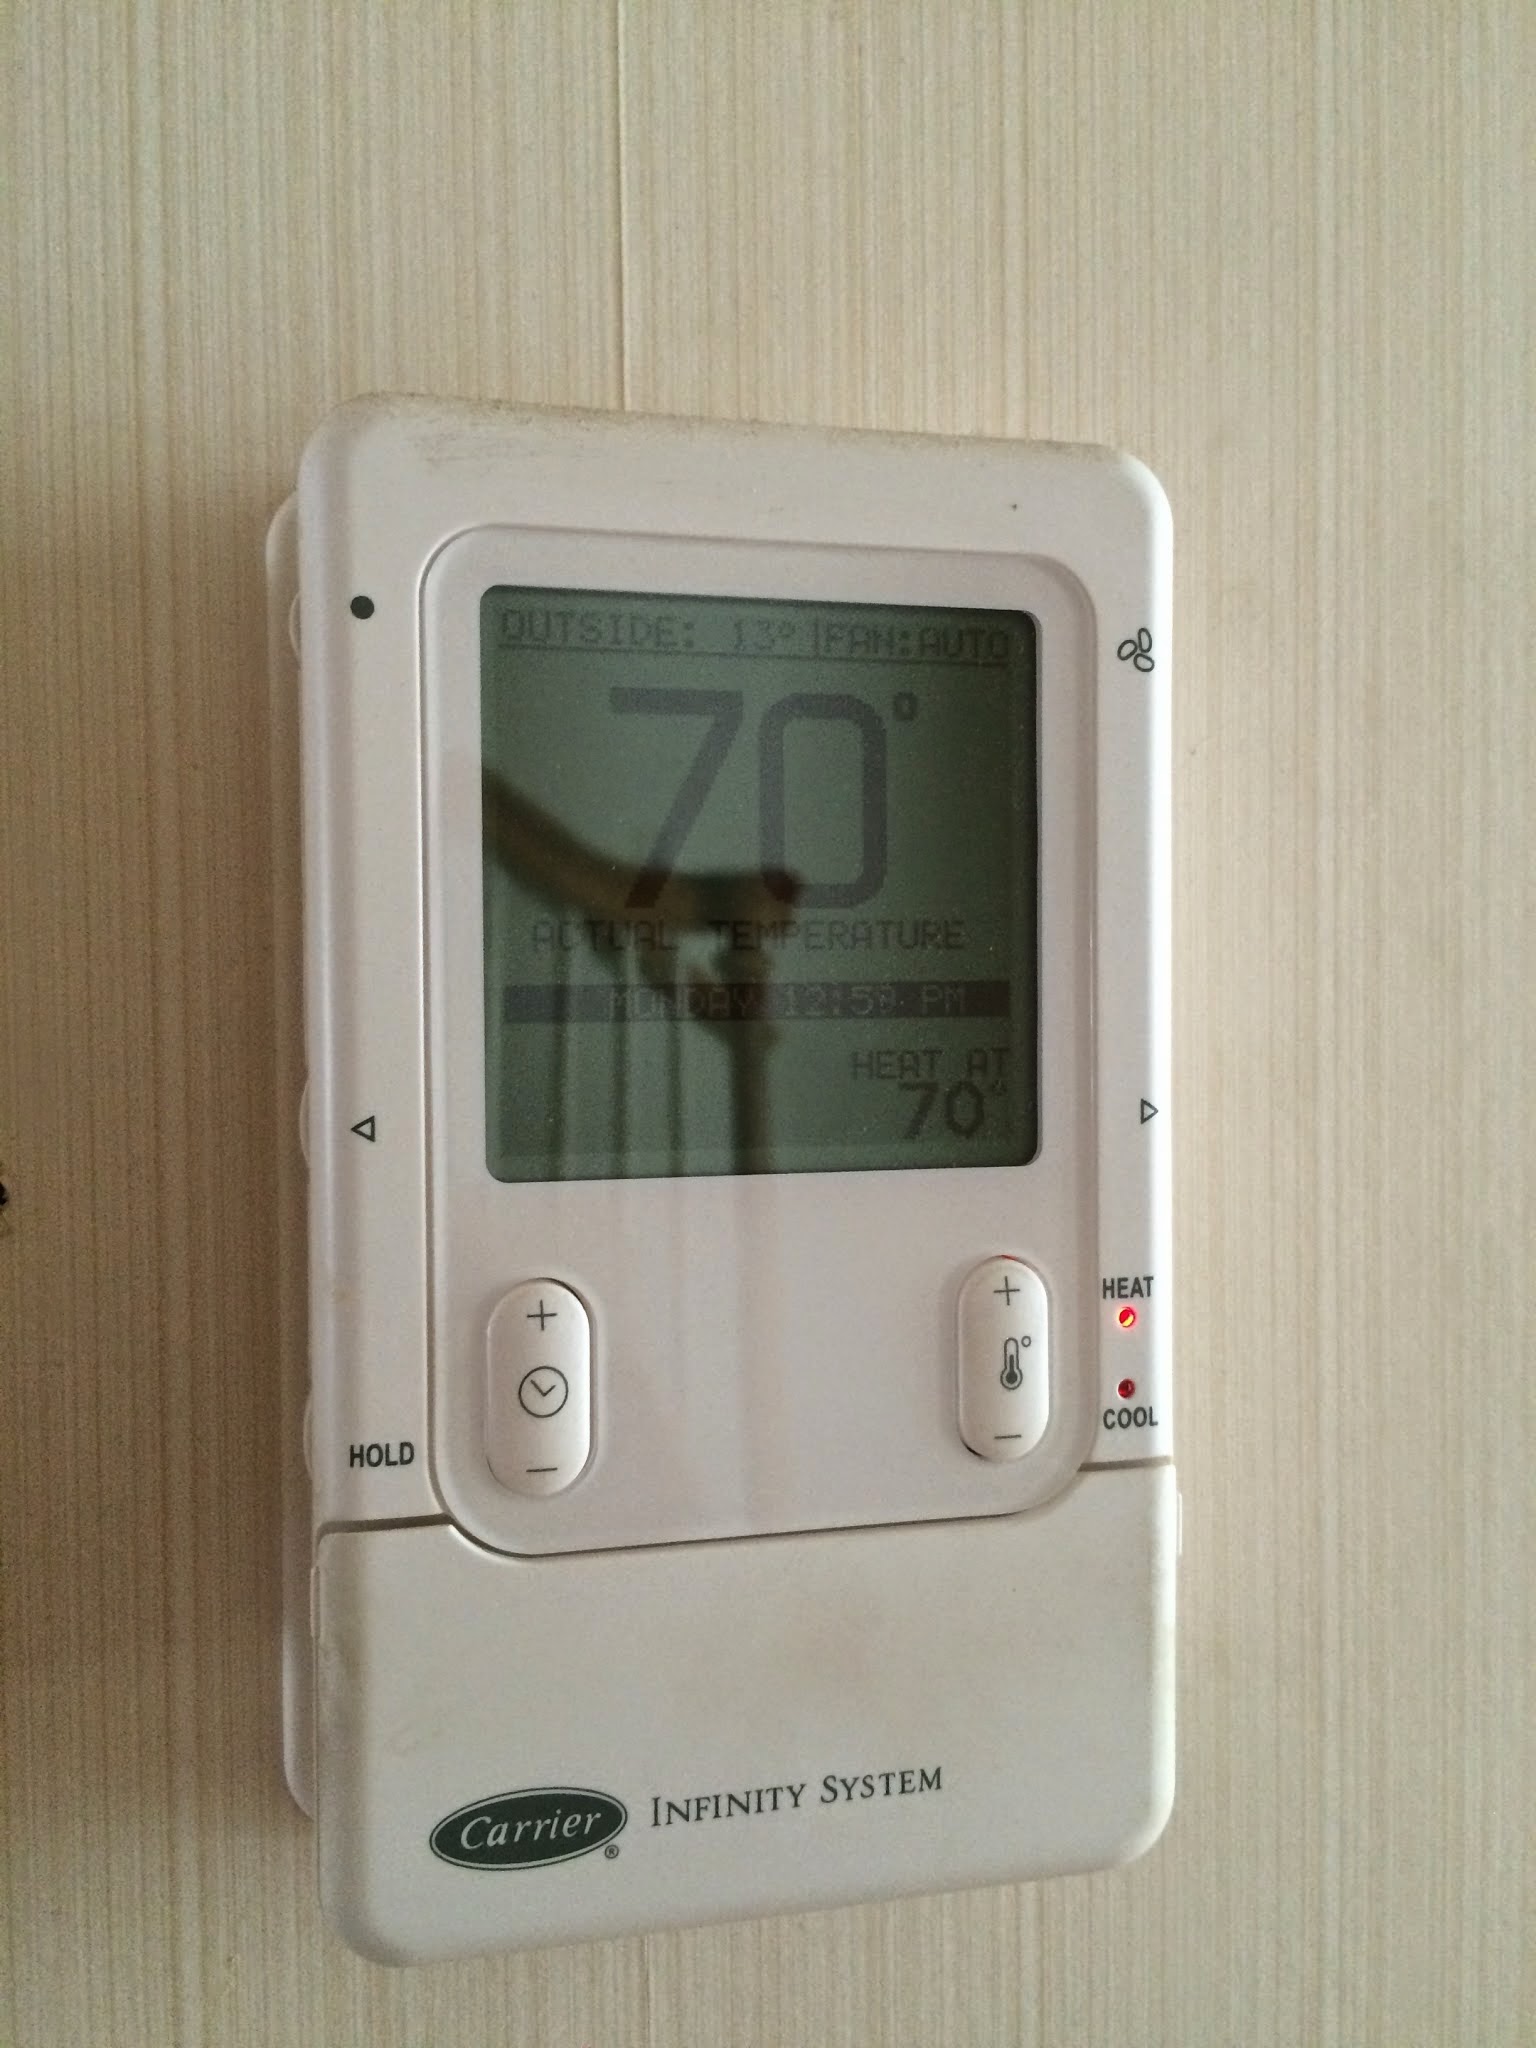
After a comprehensive project, Carlton is back in his office, which is in the mid to upper 60s with the house at 70. The tweaking continues, I expect it will get better still. Elaine’s craft room is the warmest room in the house from the second coldest. They now have an awesome home along with their amazing backyard!
Photo Album
See a bunch of notated project photos here.
Problems to Solve
- Carlton’s office is freezing in winter. 5-8 degrees cooler than first floor adjacent to it. (This is what started the project.)
- Elaine would like to play her string instruments again. It’s too cold and humidity levels get too low.
- Craft room is too uncomfortable to use.
- Hadn’t experienced it yet, but upstairs was expected to be hot. Elaine likes it cool in summer.
- House is generally uncomfortable, chilly, and drafty.
- Reduce icicles and ice damming.
- Both have seasonal allergies. Both also have dry skin in winter.
Results
- Carlton’s office is within 2-3 degrees of the rest of the house. Office comfort is up from 1/10 to 8/10. Continuous Optimization continues.
- Overall comfort is up to 8/10 to 9/10.
- Very large 58.8% reduction in air leakage.
- First floor and second floor can be equalized in temperature by playing with dampers, down from a 7 degree split.
- Craft room is the warmest room in the house during winter!
- Ice damming is substantially reduced. (See pics in full story.)
- Humidity is under good control, the basement mustiness is much improved, but not perfect. (There is a plan for next steps, if Carlton wants to.)
Client Feedback
“As I write this it is 17 outside and the office is 66. That seems a pretty significant leap. Last winter - I don’t recall but in the 50s for sure. It was so cold I couldn’t even stay in it.” This was winter 2015-2016, he found the damper for his office was partly closed. That is part of what we call "Continuous Optimization" where we make adjustments to improve comfort further. When he opened it and changed the windows in his office, his feedback changed to this:
"I thought of you today when I was sitting in my office working totally comfortable all - day - long. And I don’t think it got out of the 20’s - so pretty cold too. Two years ago I could not have endured being in that office all day. Today, it’s every bit as comfortable as any other room in the house."
Upgrades
-
Air Sealing and Insulation
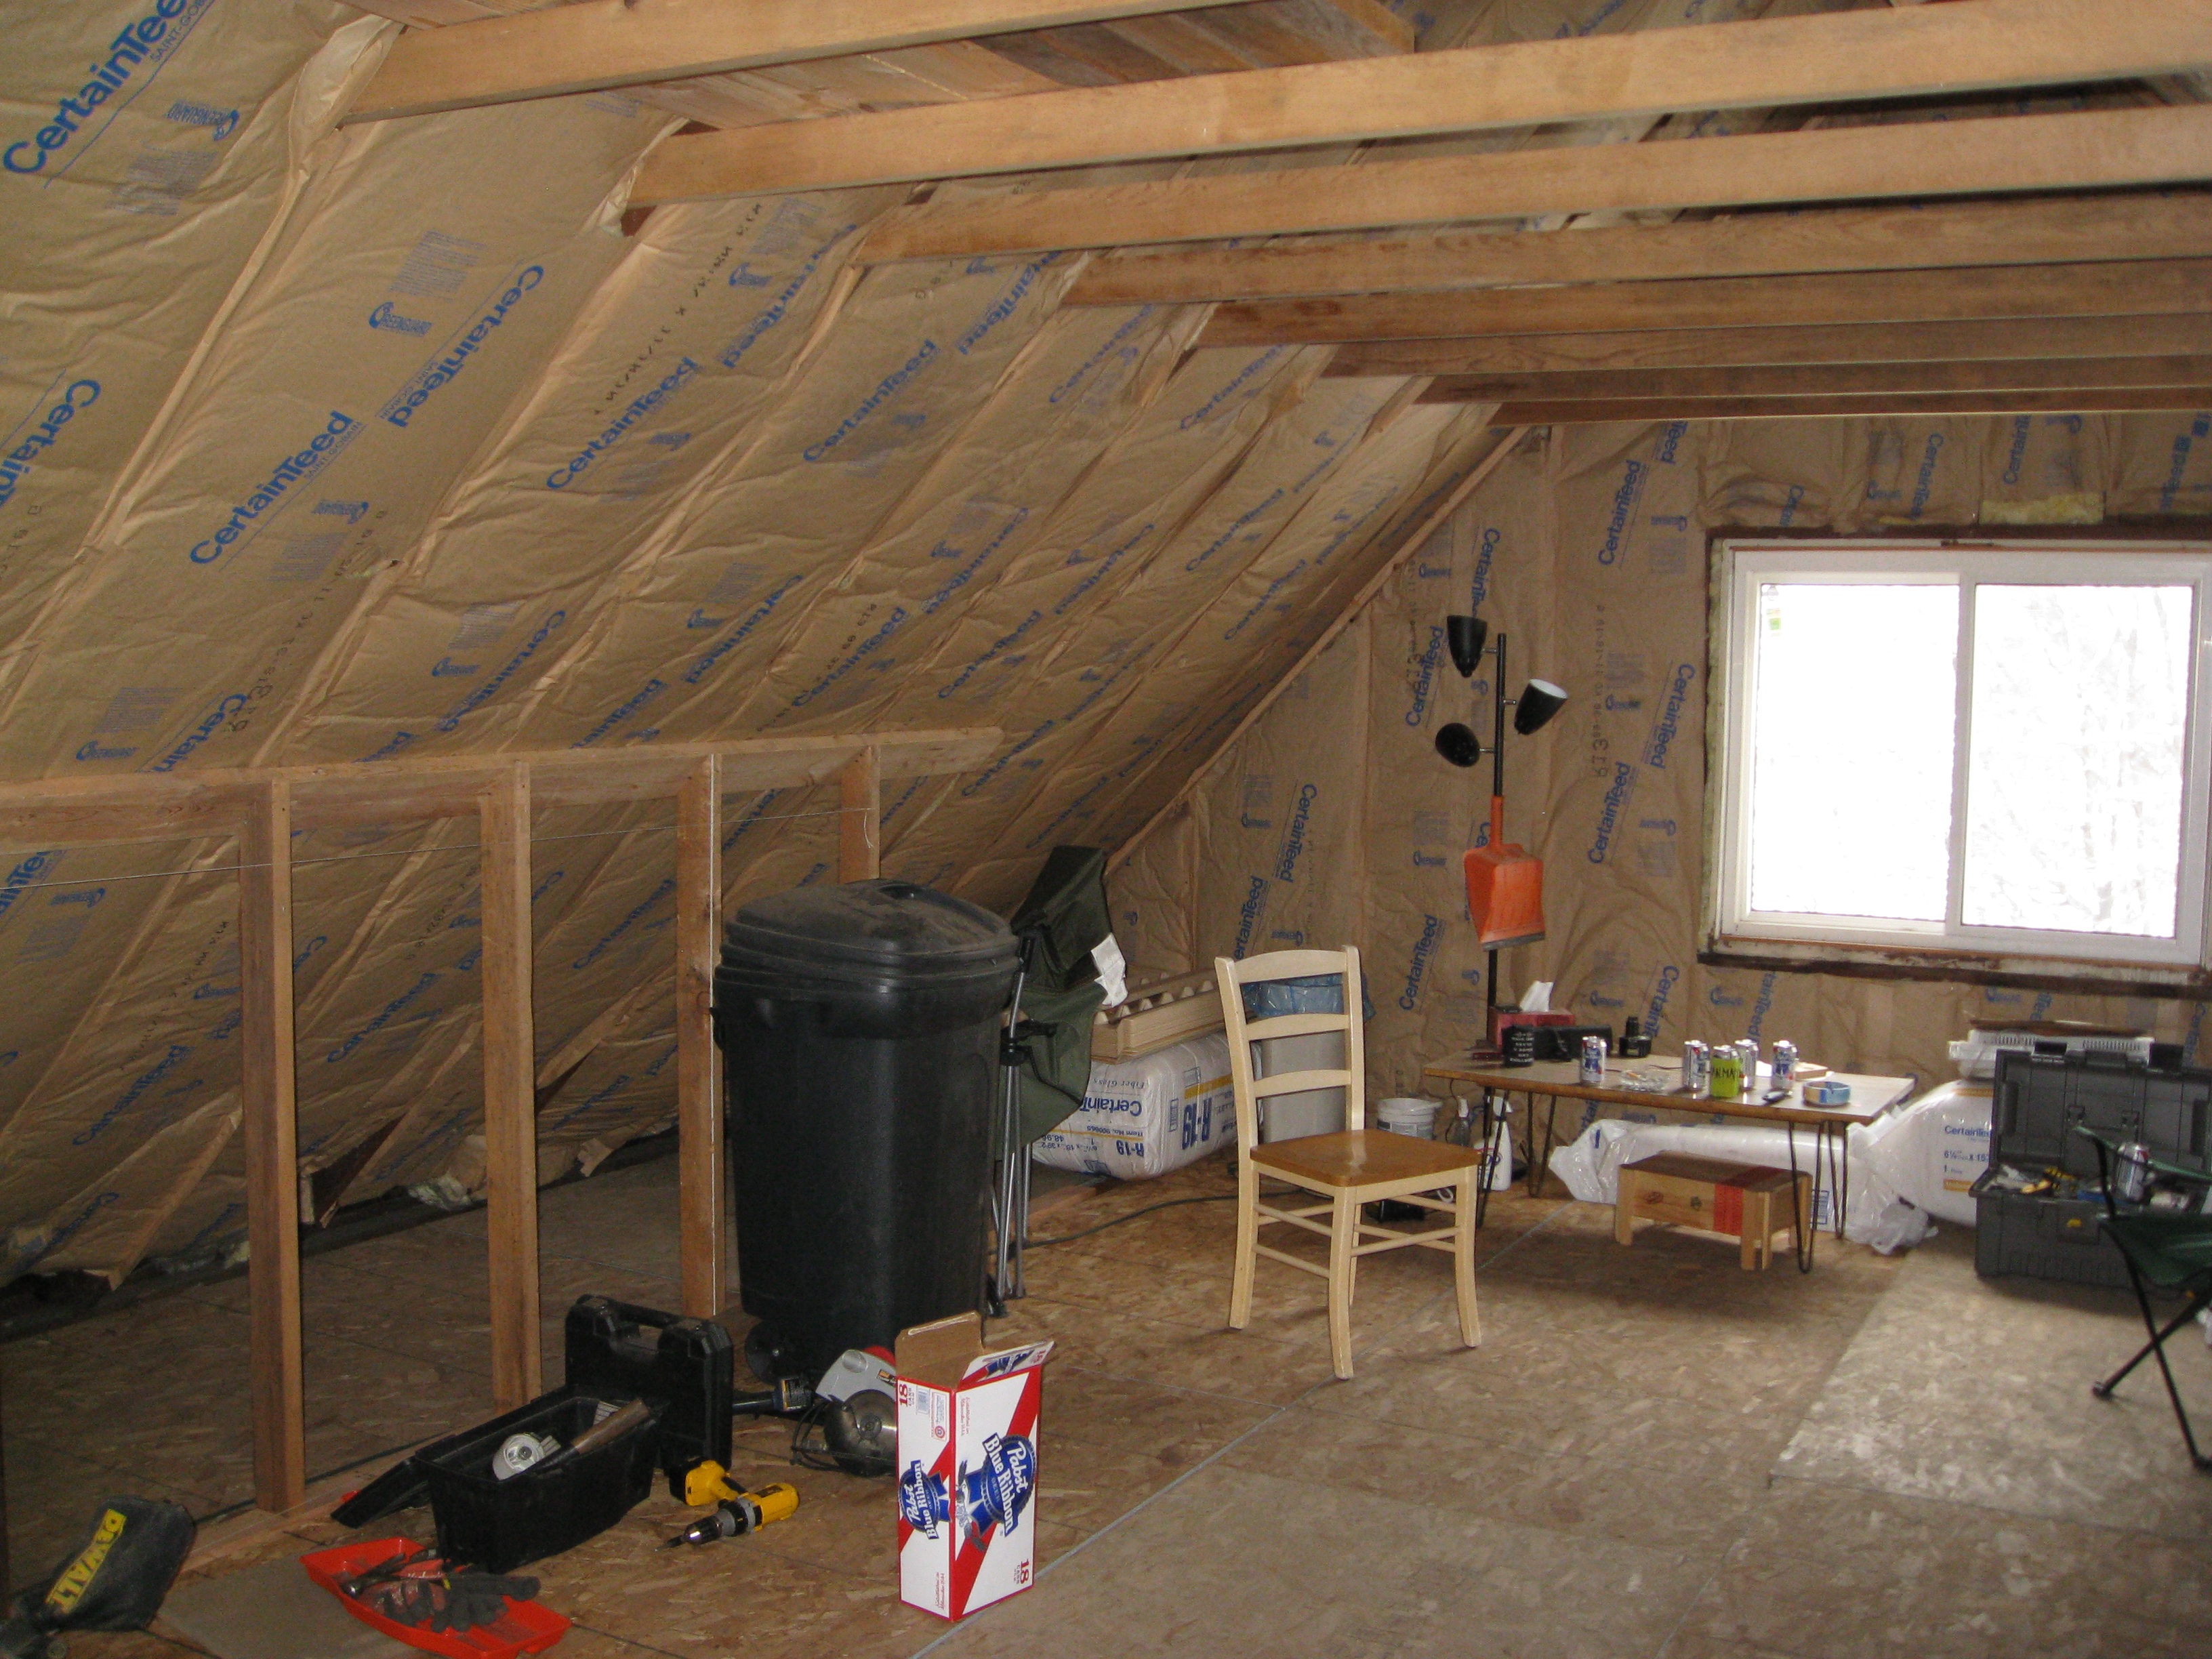
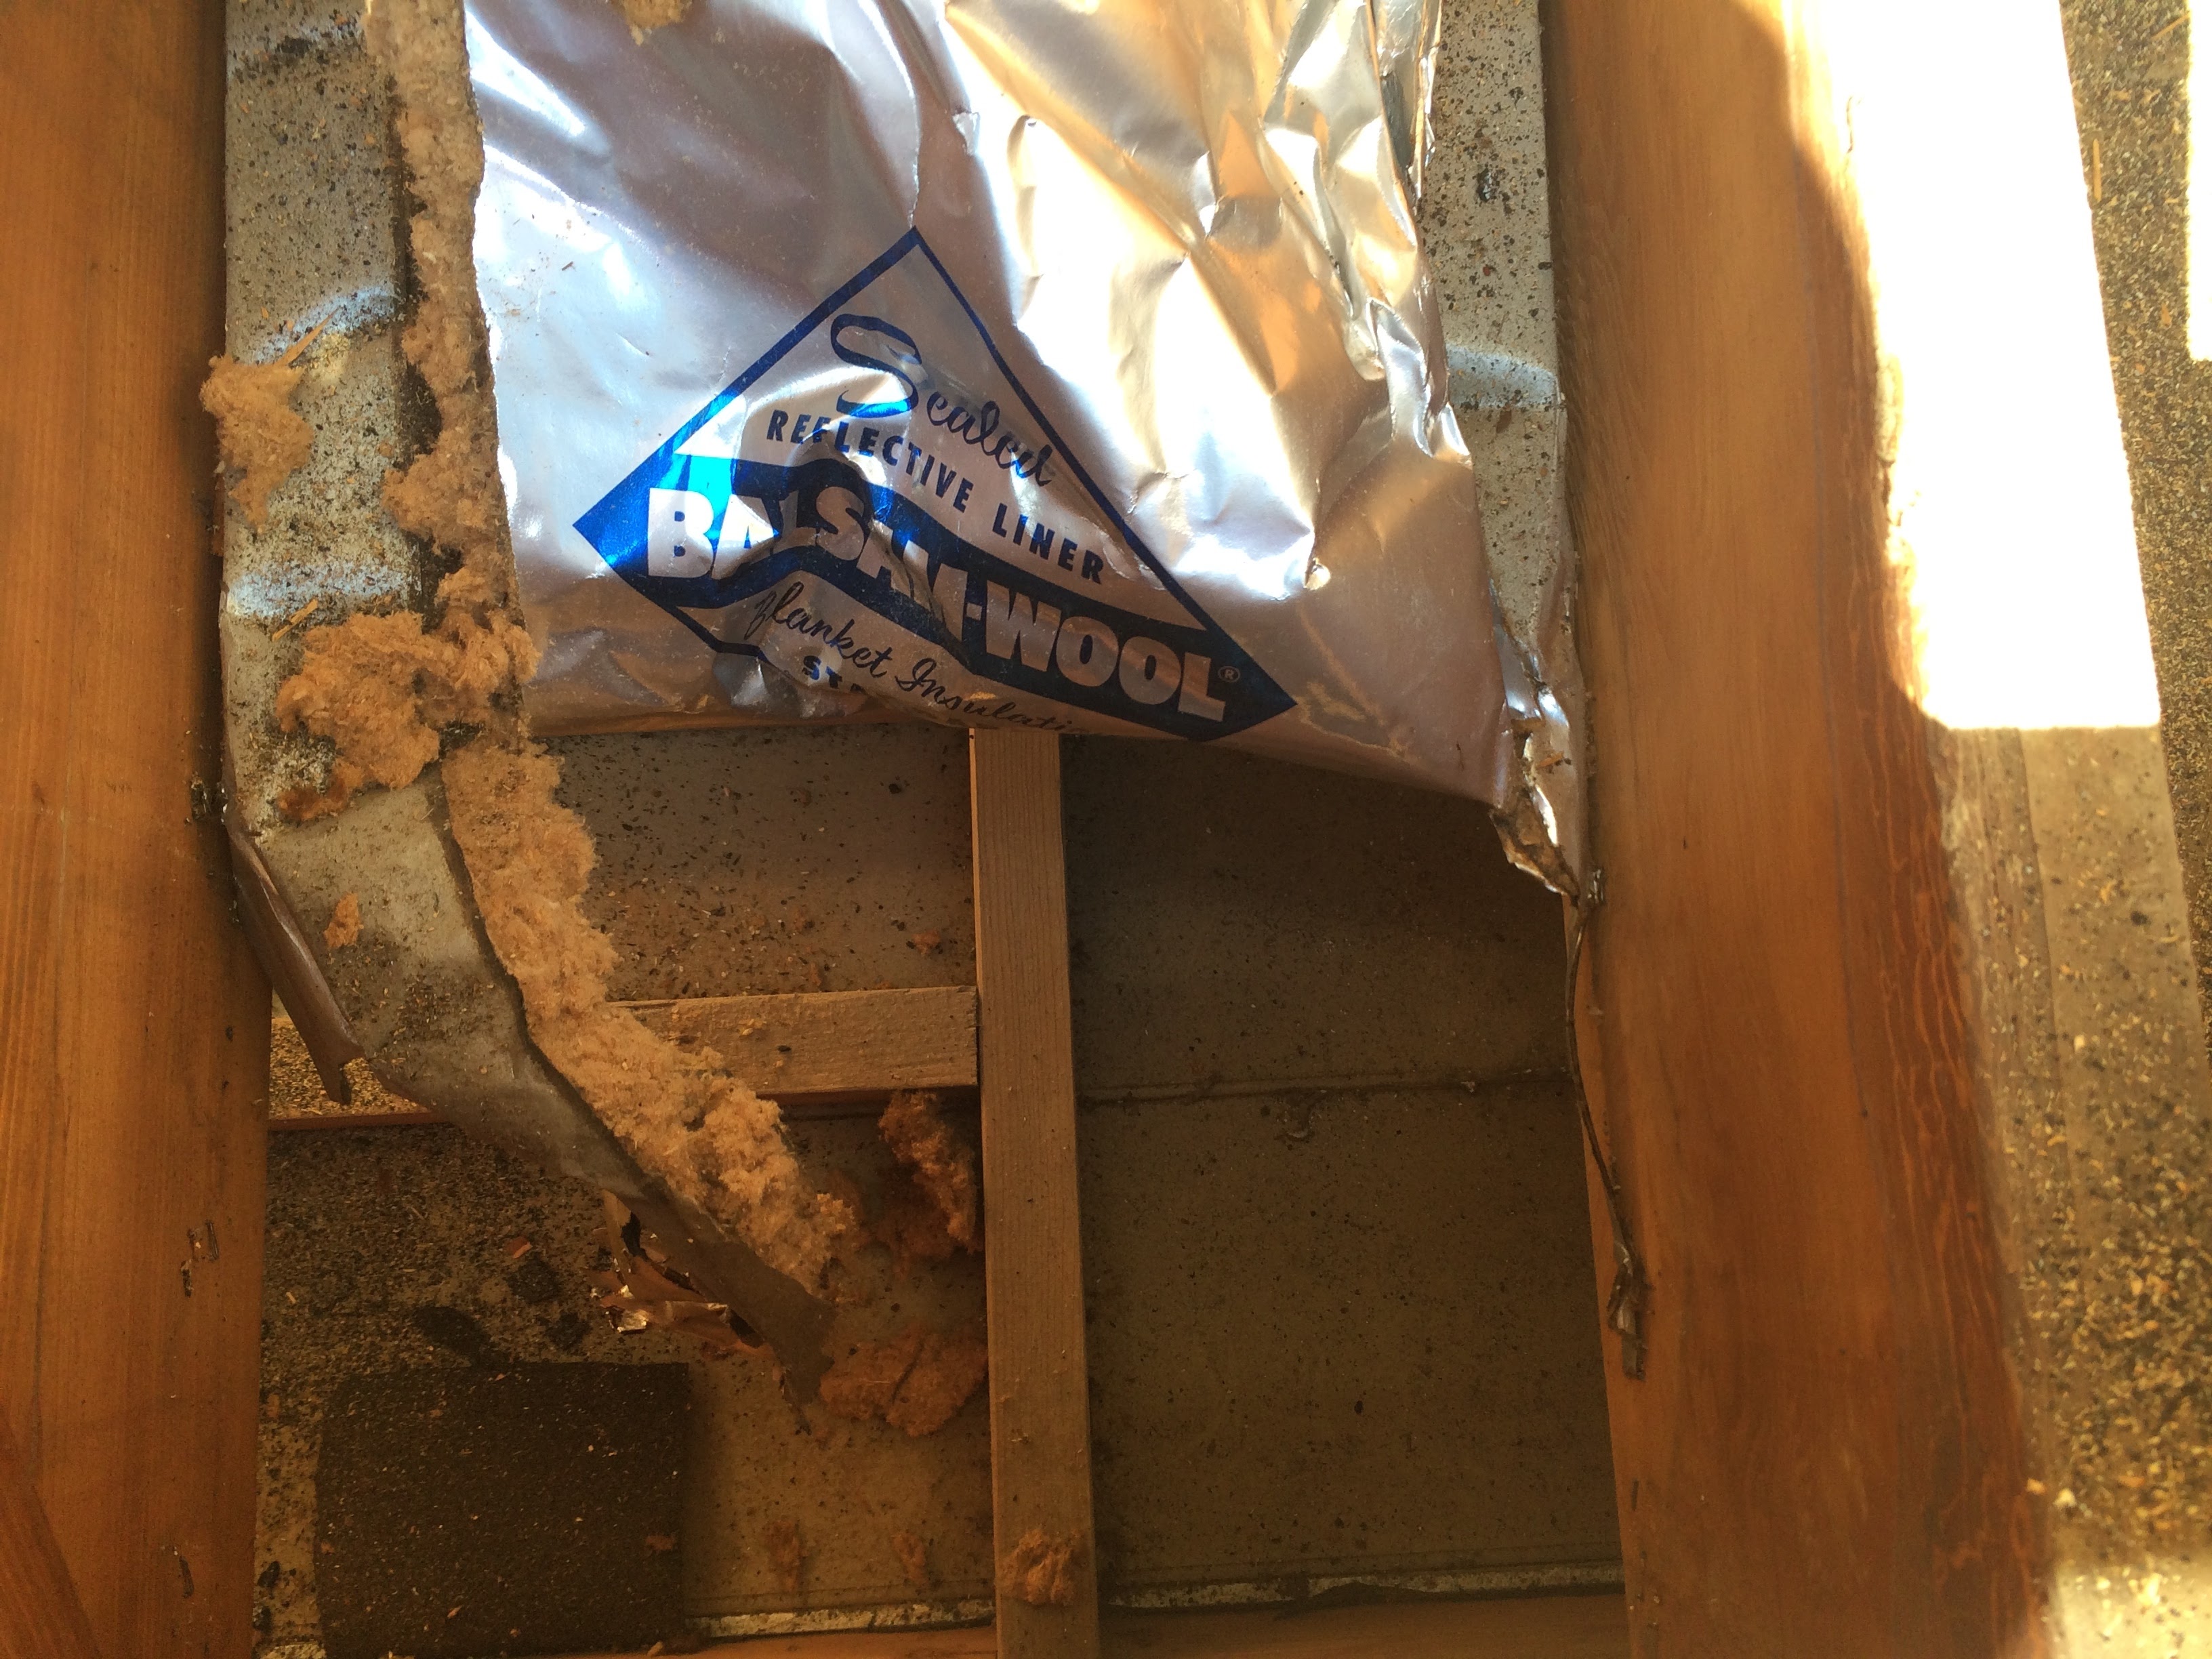
- Upper Attic - Removed insulation, air sealed, installed R-49 blown cellulose. Whole house fan was removed and replaced by a sealed hatch.
- Accessible Knee Wall Attics - Opened up cavities as needed. 3.5” closed cell spray foam on roof, 2” on walls.
- Inaccessible Knee Wall Attics - Removed roof, sealed with foam. New roof installed as previously planned.
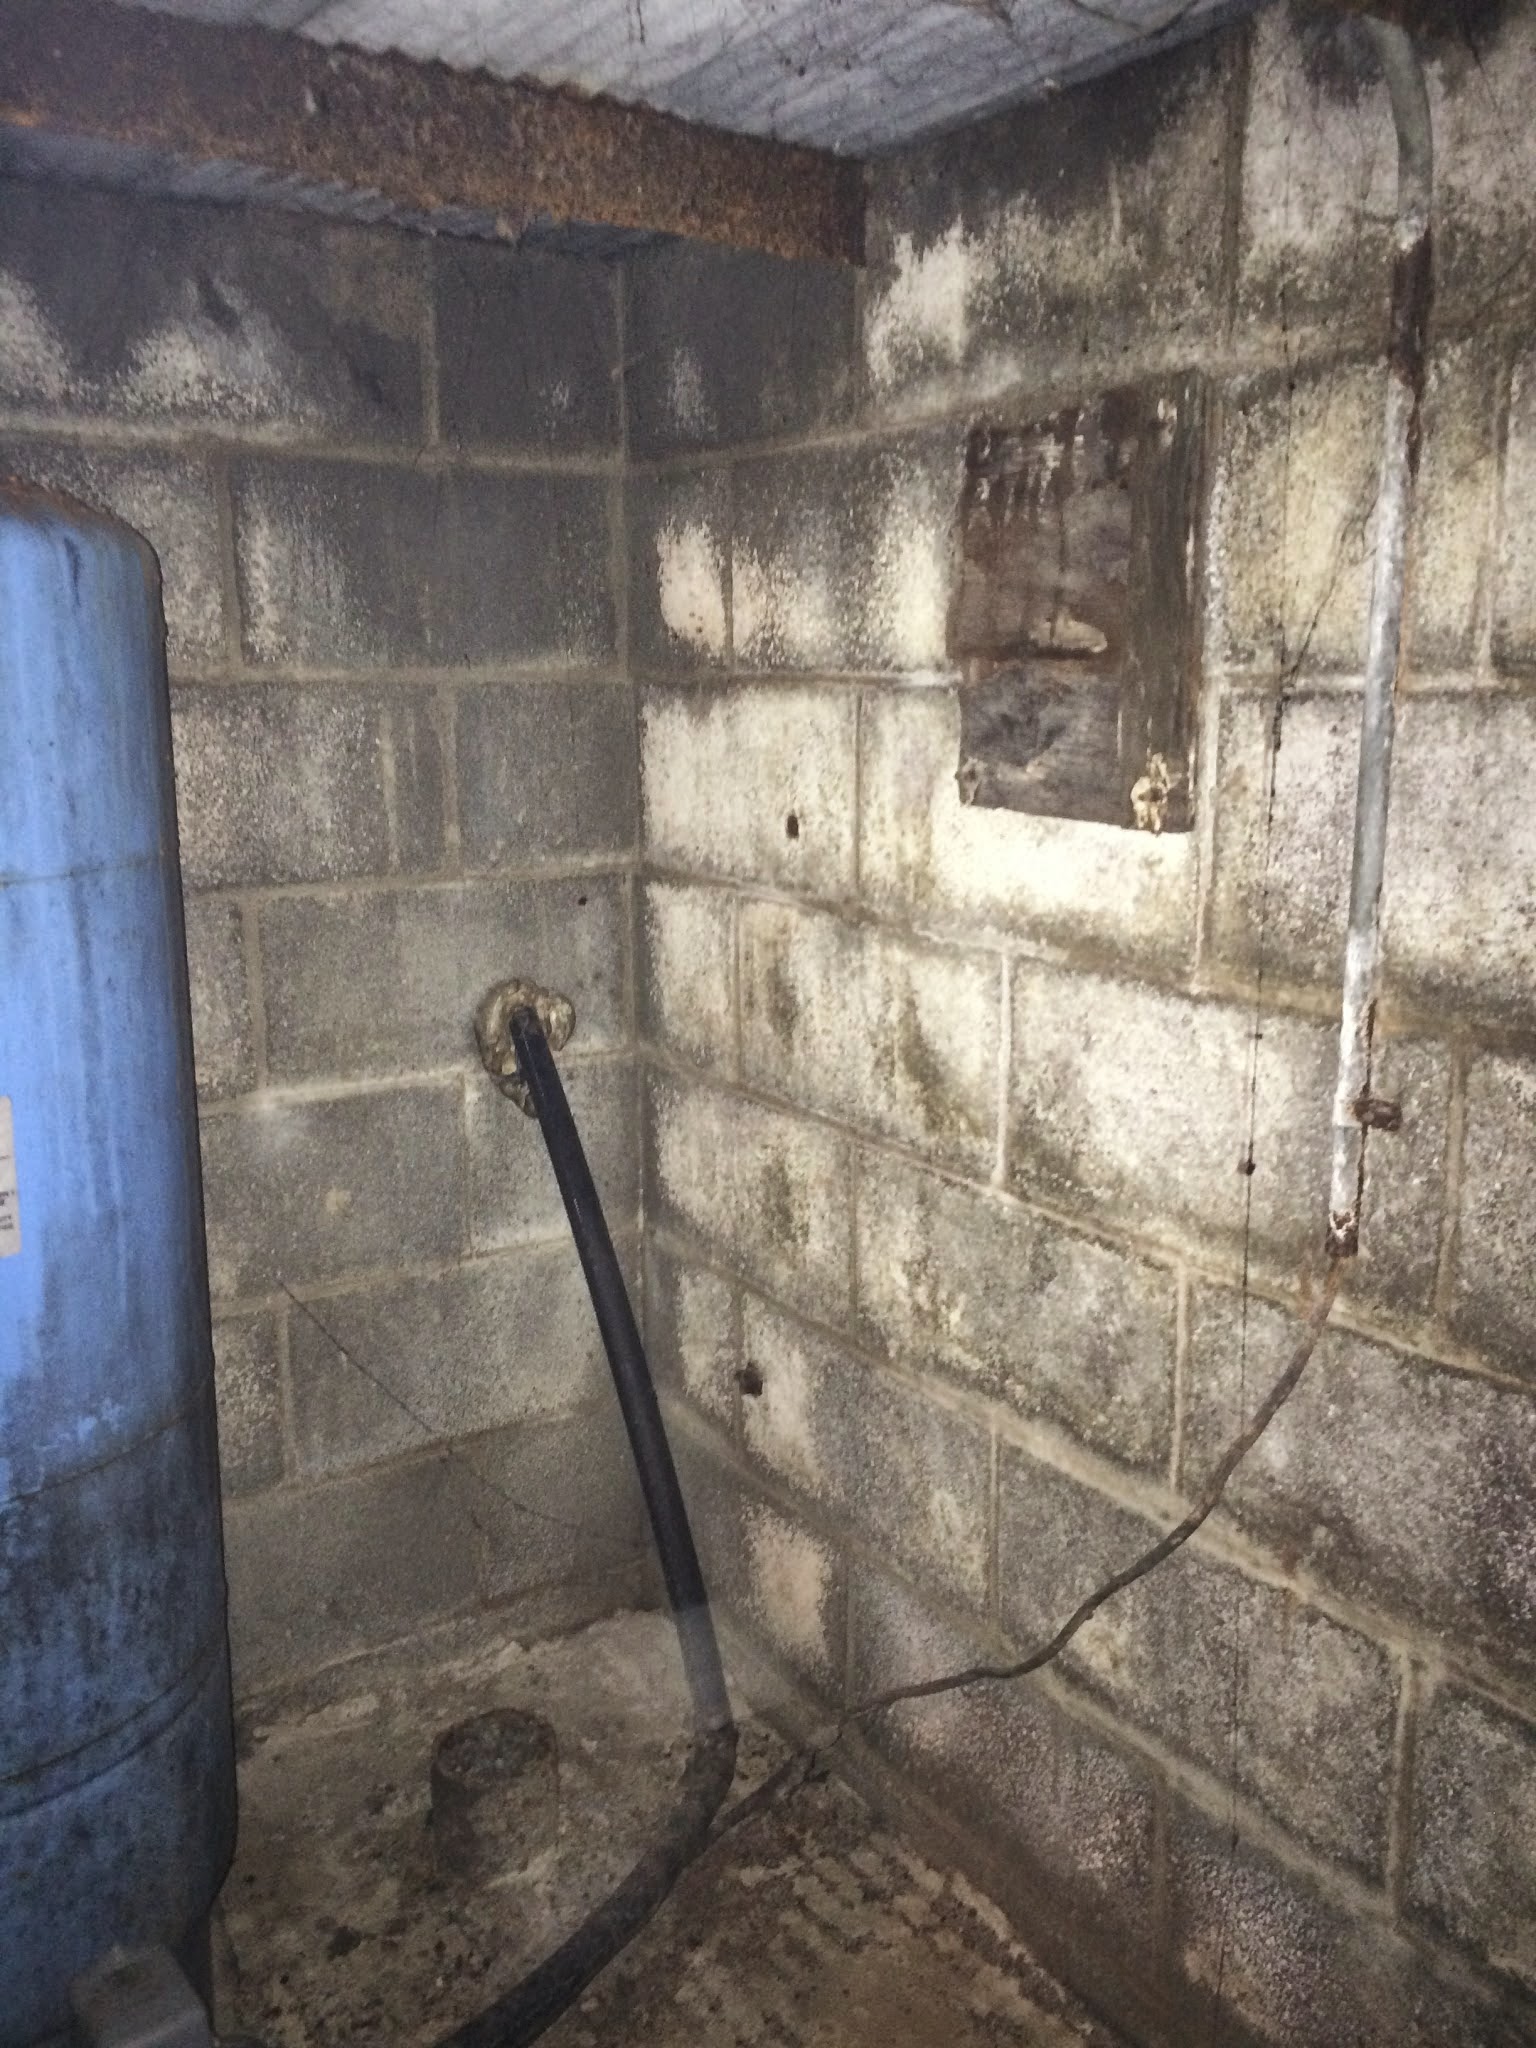
- Crawlspace - Encapsulated with plastic, foamed walls. Sealed rim joists.
- Basement - Closed cell foam in accessible rim joists. One wall got foam from exterior in work room.
-
HVAC
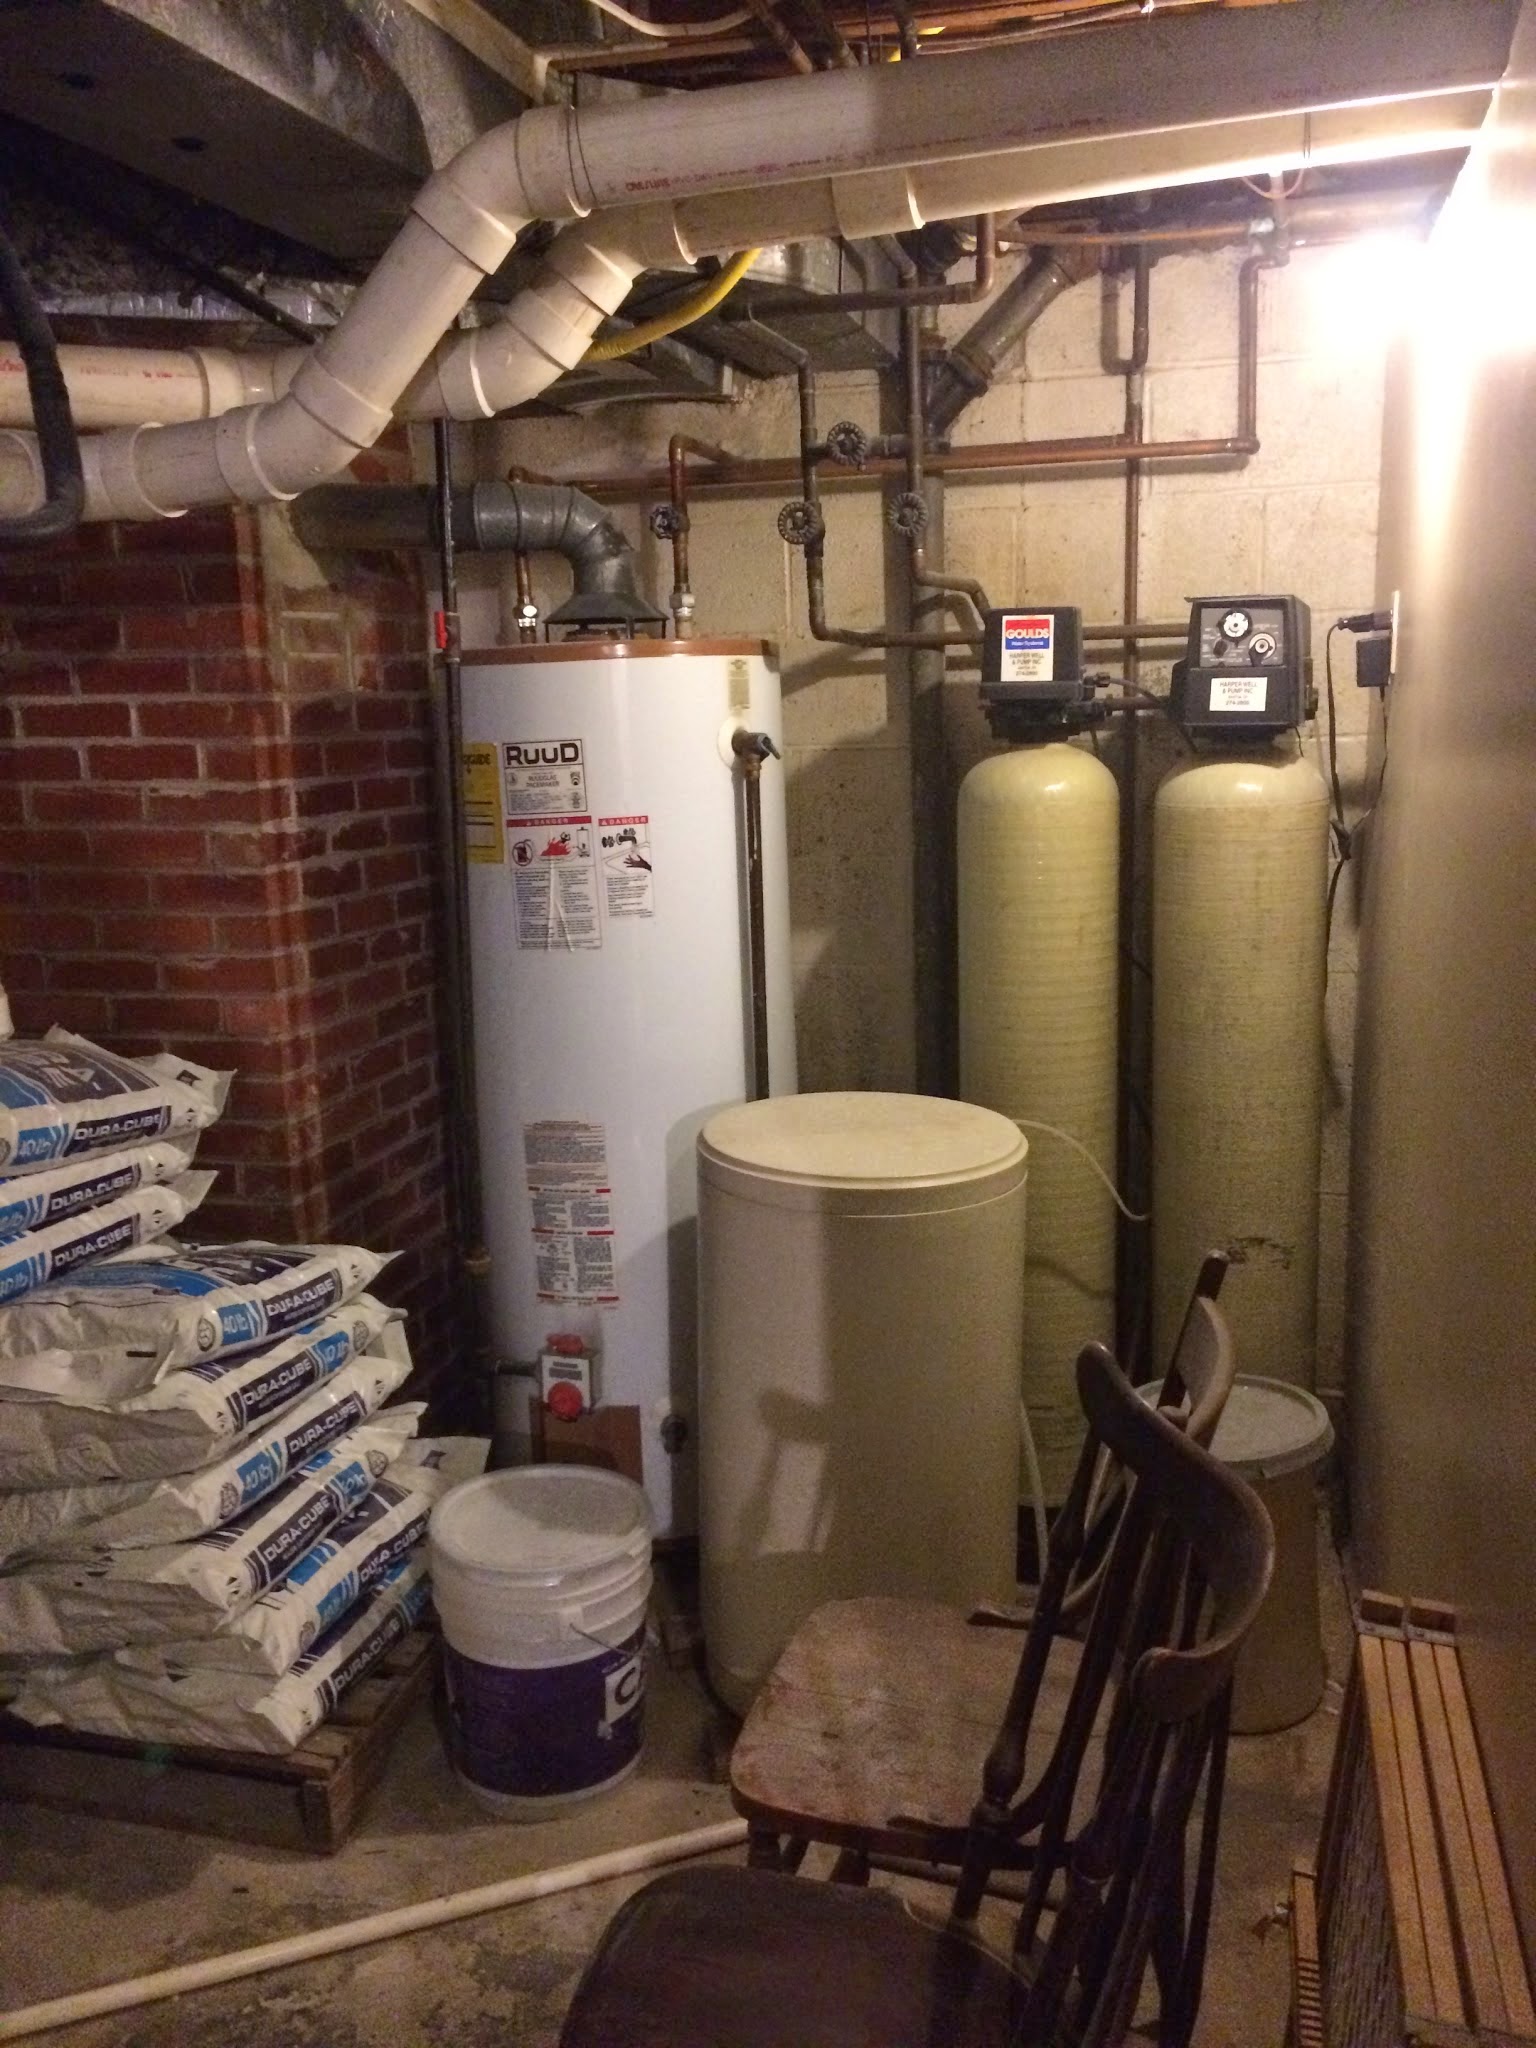
- Electric water heater installed, decommissioned chimney.
- Lots of Continuous Optimization with dampers and thermostat settings. Comfort and humidity levels substantially improved.
Full Story
It’s not often that I ask if a window is open at the first blower door test. I was truly stunned by how high the 8910 blower door number was. This house was so leaky, it made the sunken Titanic look seaworthy.
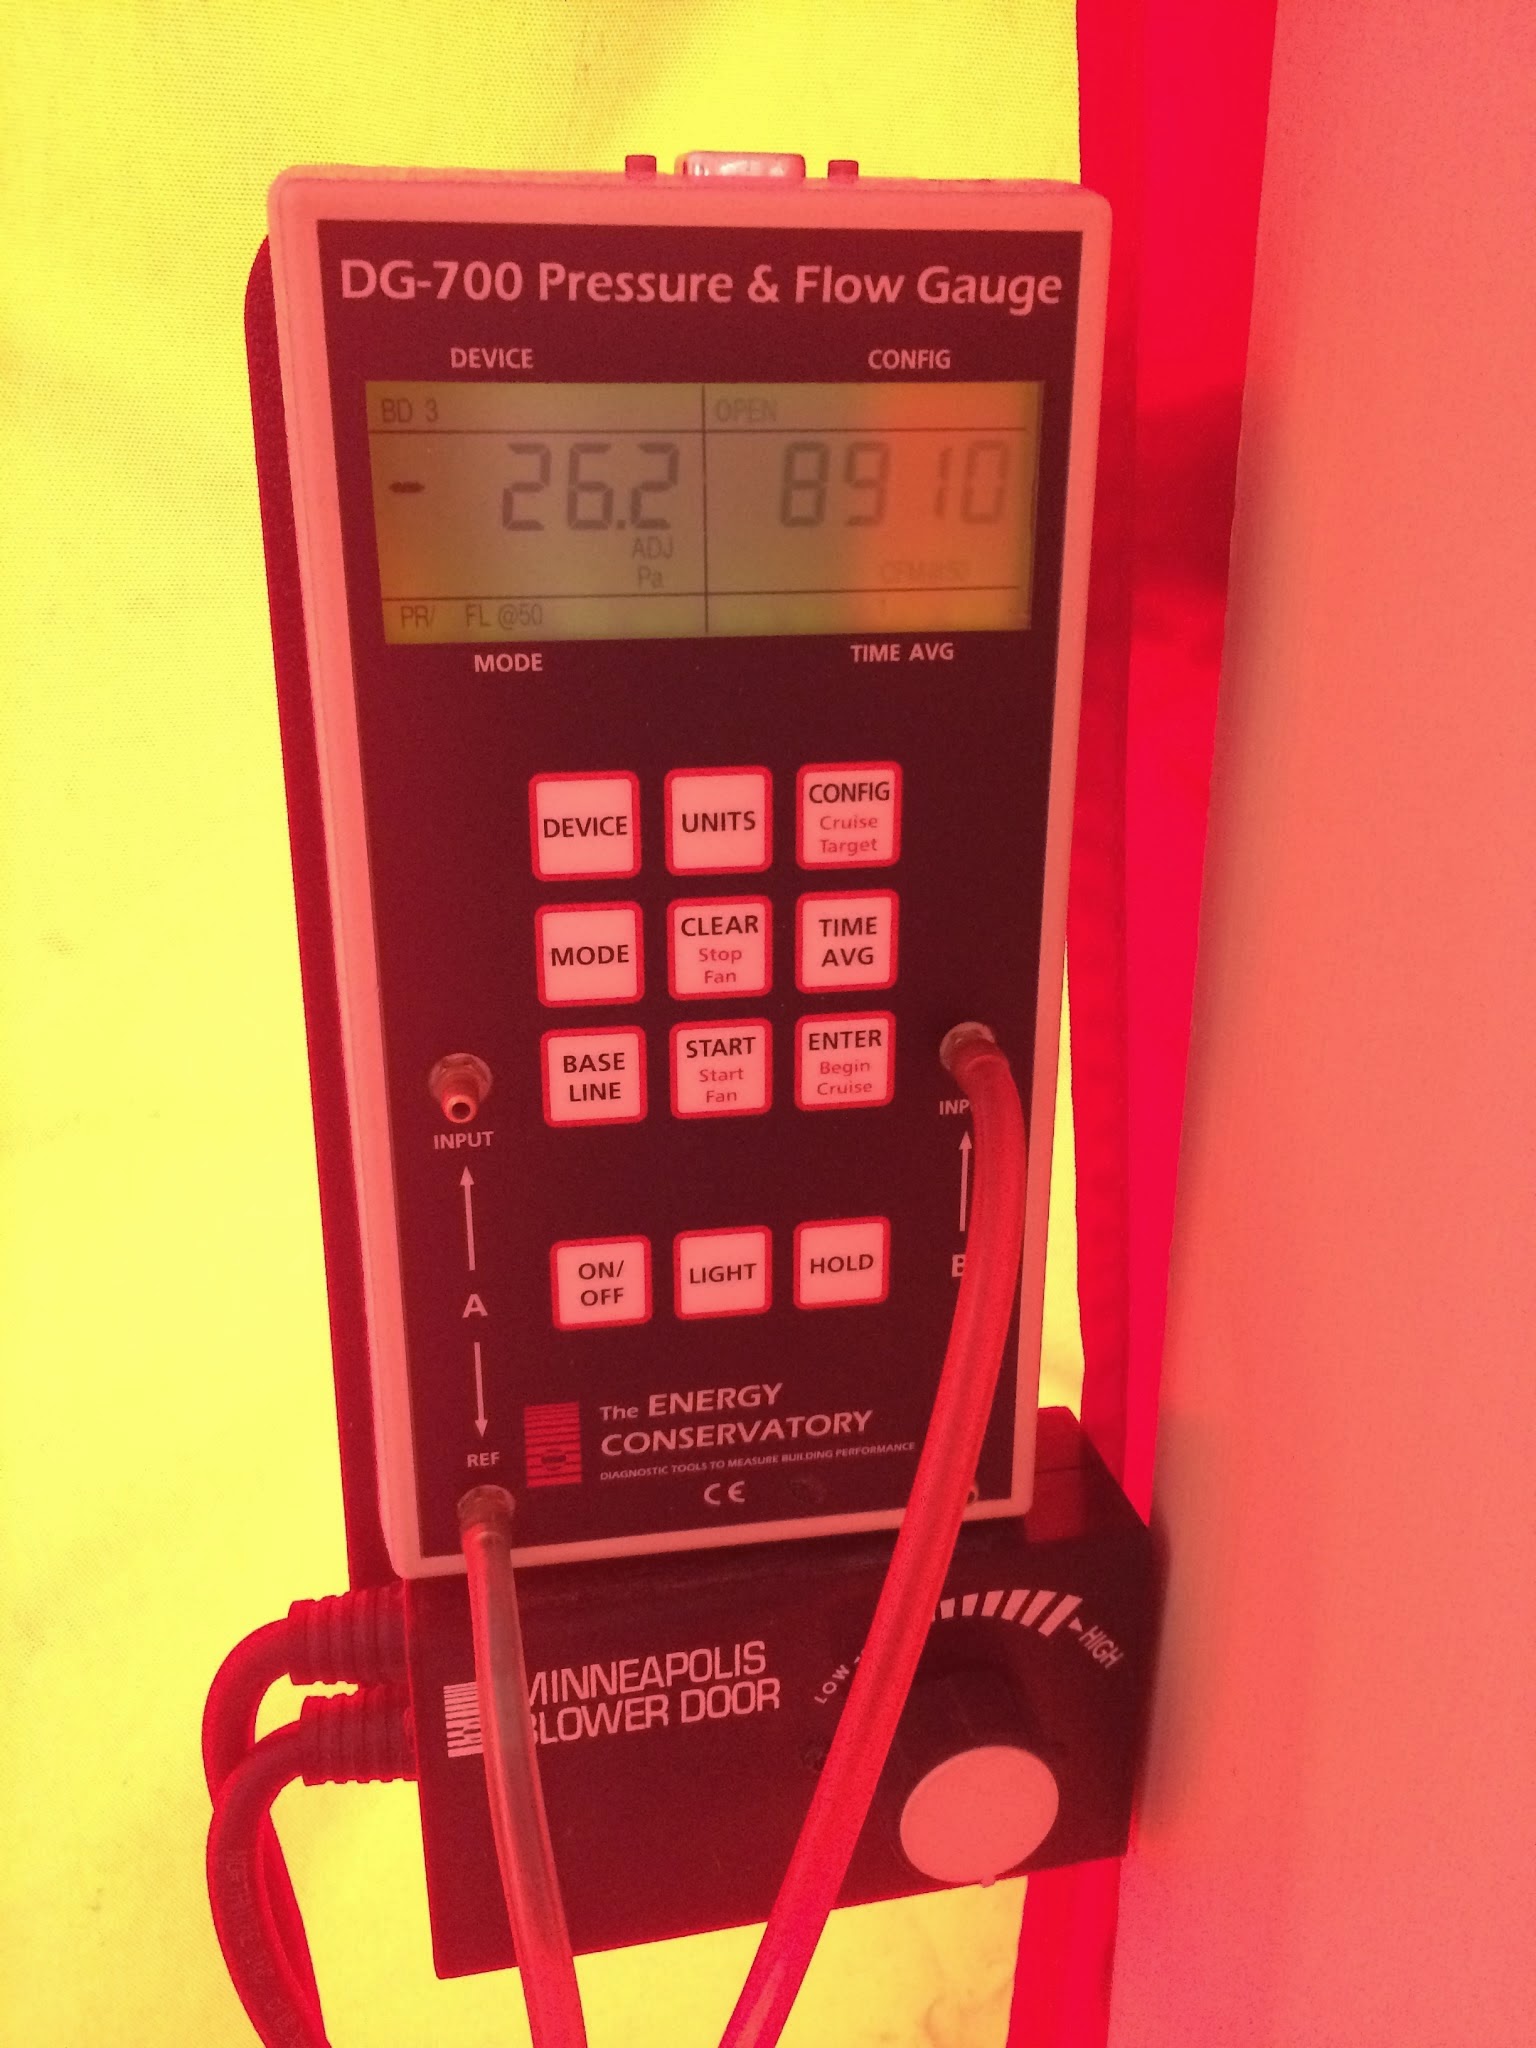
For reference, we find that when you get a house to where its blower door is roughly equal to square footage, you can gain enough control to solve client problems. A 1:1 ratio is about a B-/C+. This house is about 2800 square feet, so it was at a whopping 3:1! We got it close to 1:1 by the end.
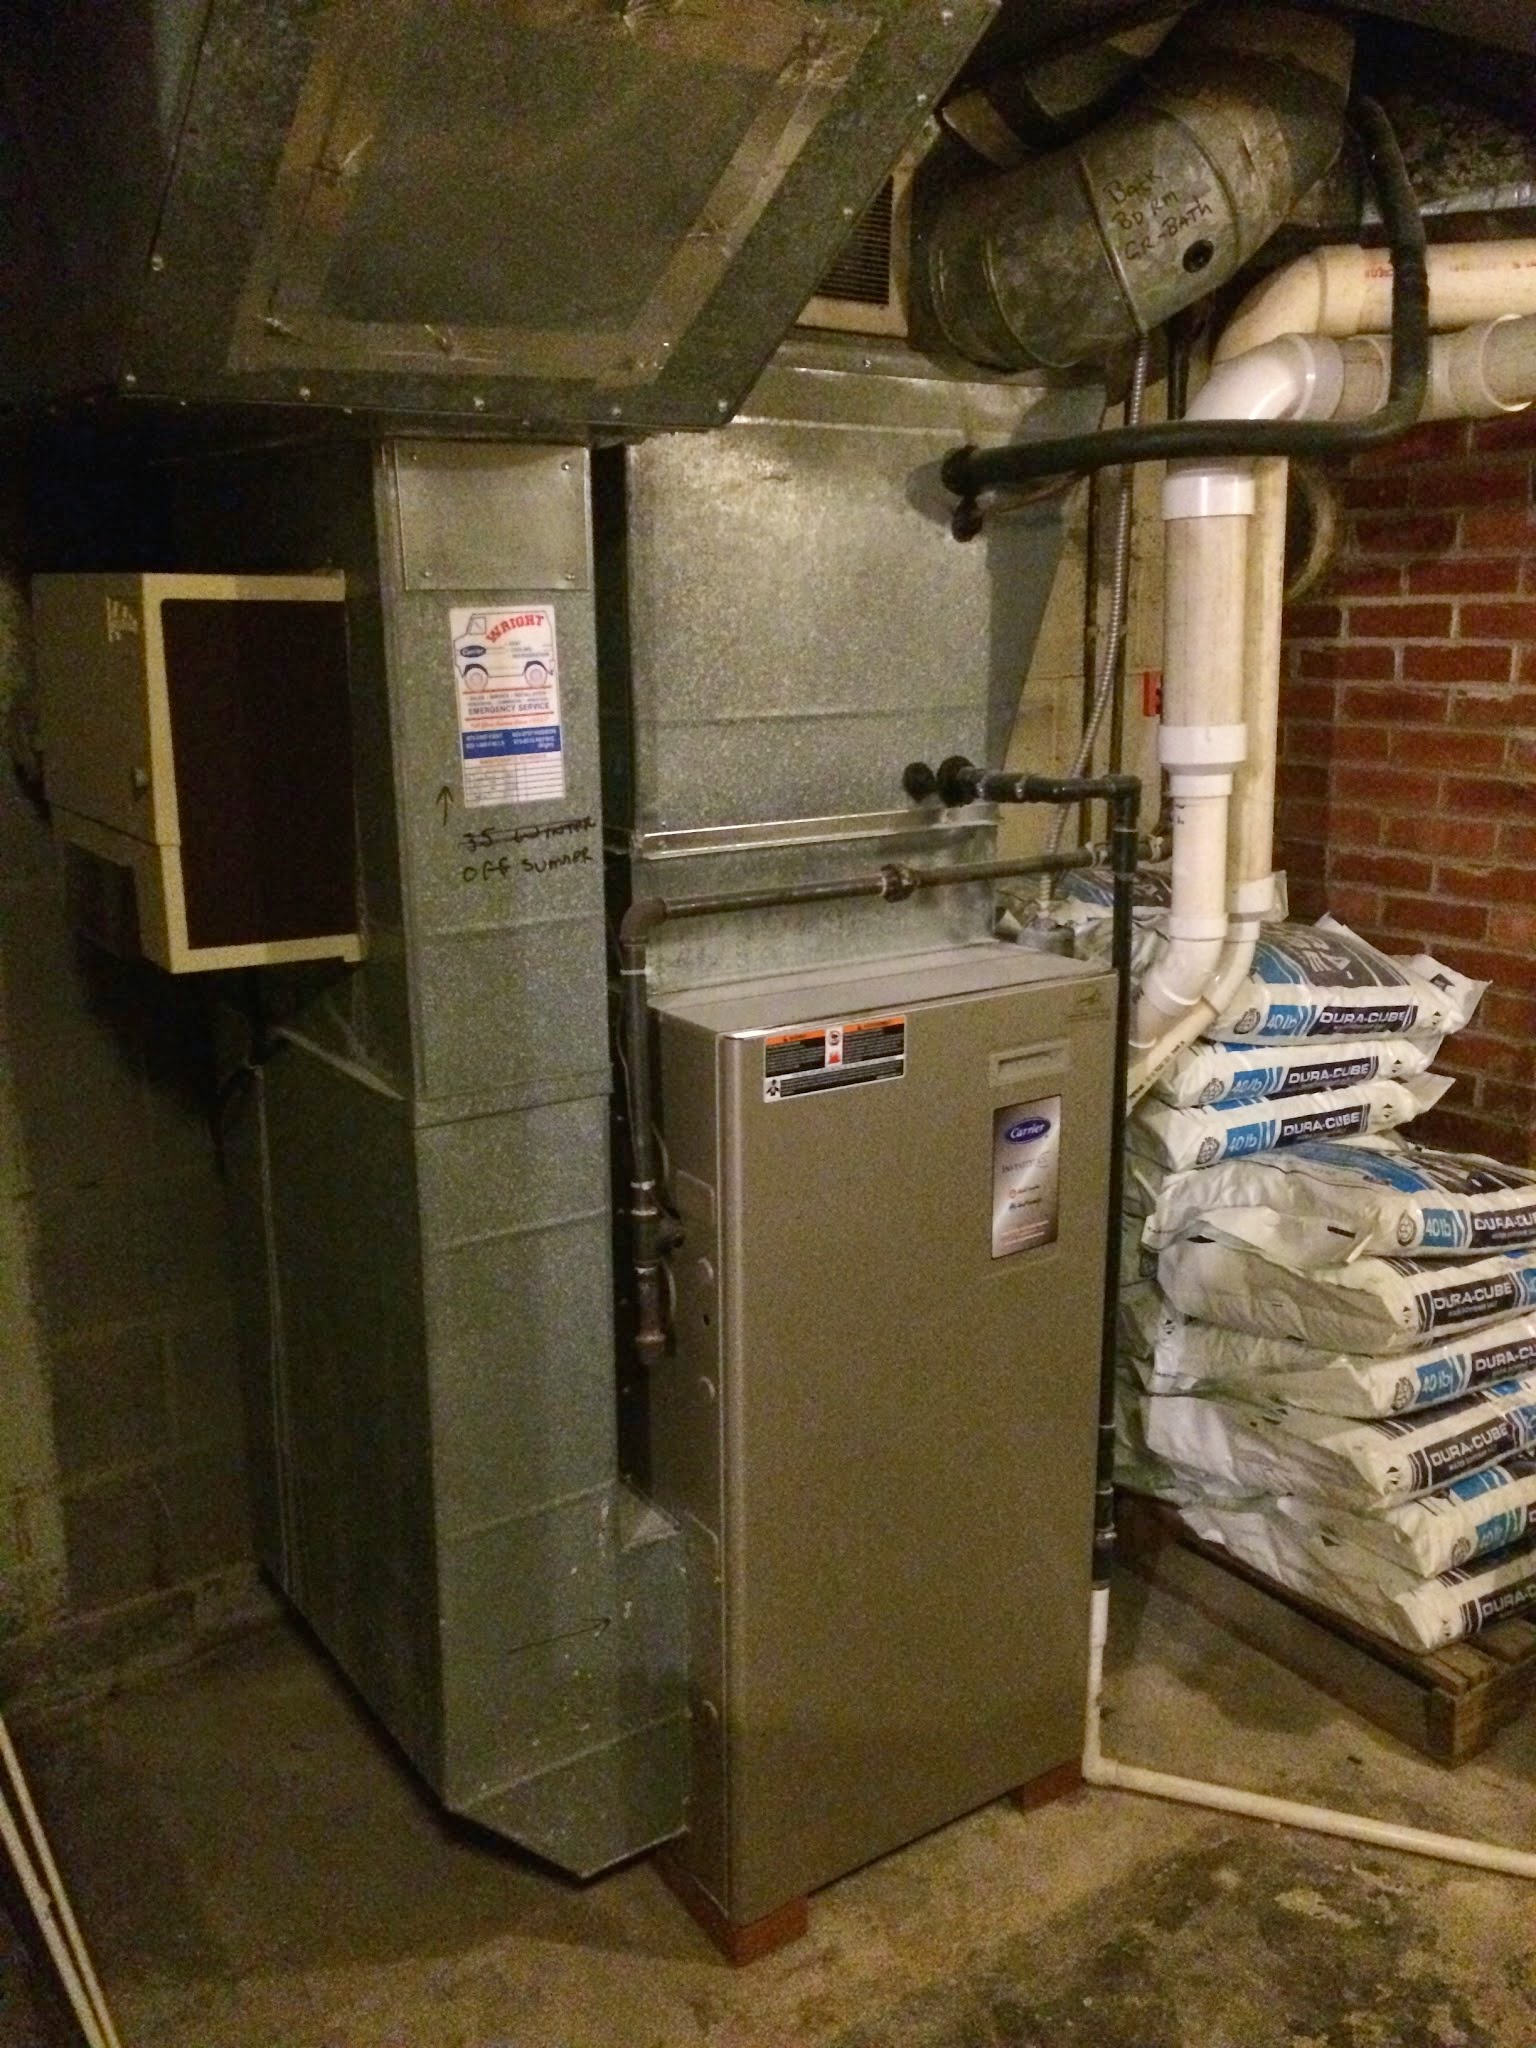
Part of why I was stunned is that the natural gas usage was quite low for what I expected. The home has a modulating furnace that has multiple stages. Since they only run as hard as the house needs at any given moment, they can be remarkably efficient when compared to a 1 or 2 stage furnace. The modulating furnace covered up major air leakage problems in this case. It could not provide comfort, though. It’s a good example of how a house needs to be reasonably tight and have the right HVAC system, a constant refrain in our work.
The good news is, the house is built like a tank. It was built for a doctor in the 50s, and the construction was very expensive for a home this size. For example, the laundry room floor is poured concrete with steel beams and a crawlspace below - commercial construction. It’s always nice to find you have good bones to work with!
Diagnosing the Home
Let’s take a look at some of the problems I found.
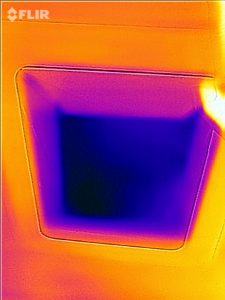
This is the whole house fan. Before air conditioning, these were a great way to cool the house off in the evening. Open some windows downstairs, turn this (wicked loud) fan on for 10-20 minutes, and presto! A cooled off house.
There are two problems with whole house fans now:
- Nighttime temps are getting higher in the summer, which means more humidity stays in the air, which means you’re not really cooling off the house, but rather sucking moisture inside.
- They leak like sieves. This lets hot attic air into the house on summer days, and lets heated indoor air into the attic on winter days. Observe:
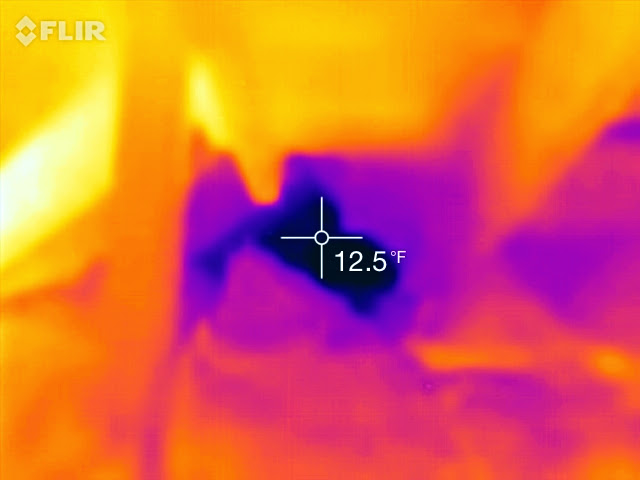
The blower door is on, sucking cold air into the house. Purple is really cold, white is hot. The whole house fan leaked like crazy.
We ended up replacing it with a well-sealed attic hatch. If you have a whole house fan, I highly recommend removing it and turning it into a hatch or drywalling over the hole. As nighttime temperatures and humidity levels increase, a tighter home and air conditioning are the best way to get comfortable in summer.
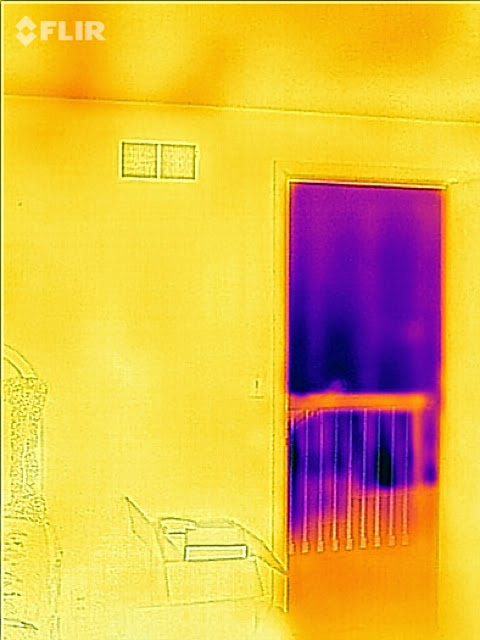
This house gifted me with another amazing infrared shot, too:
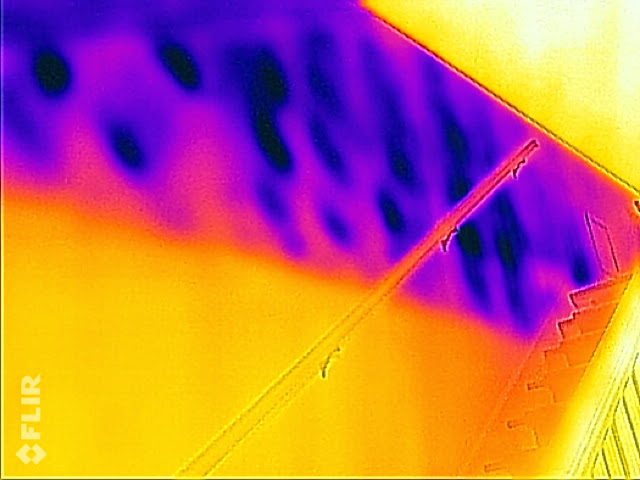
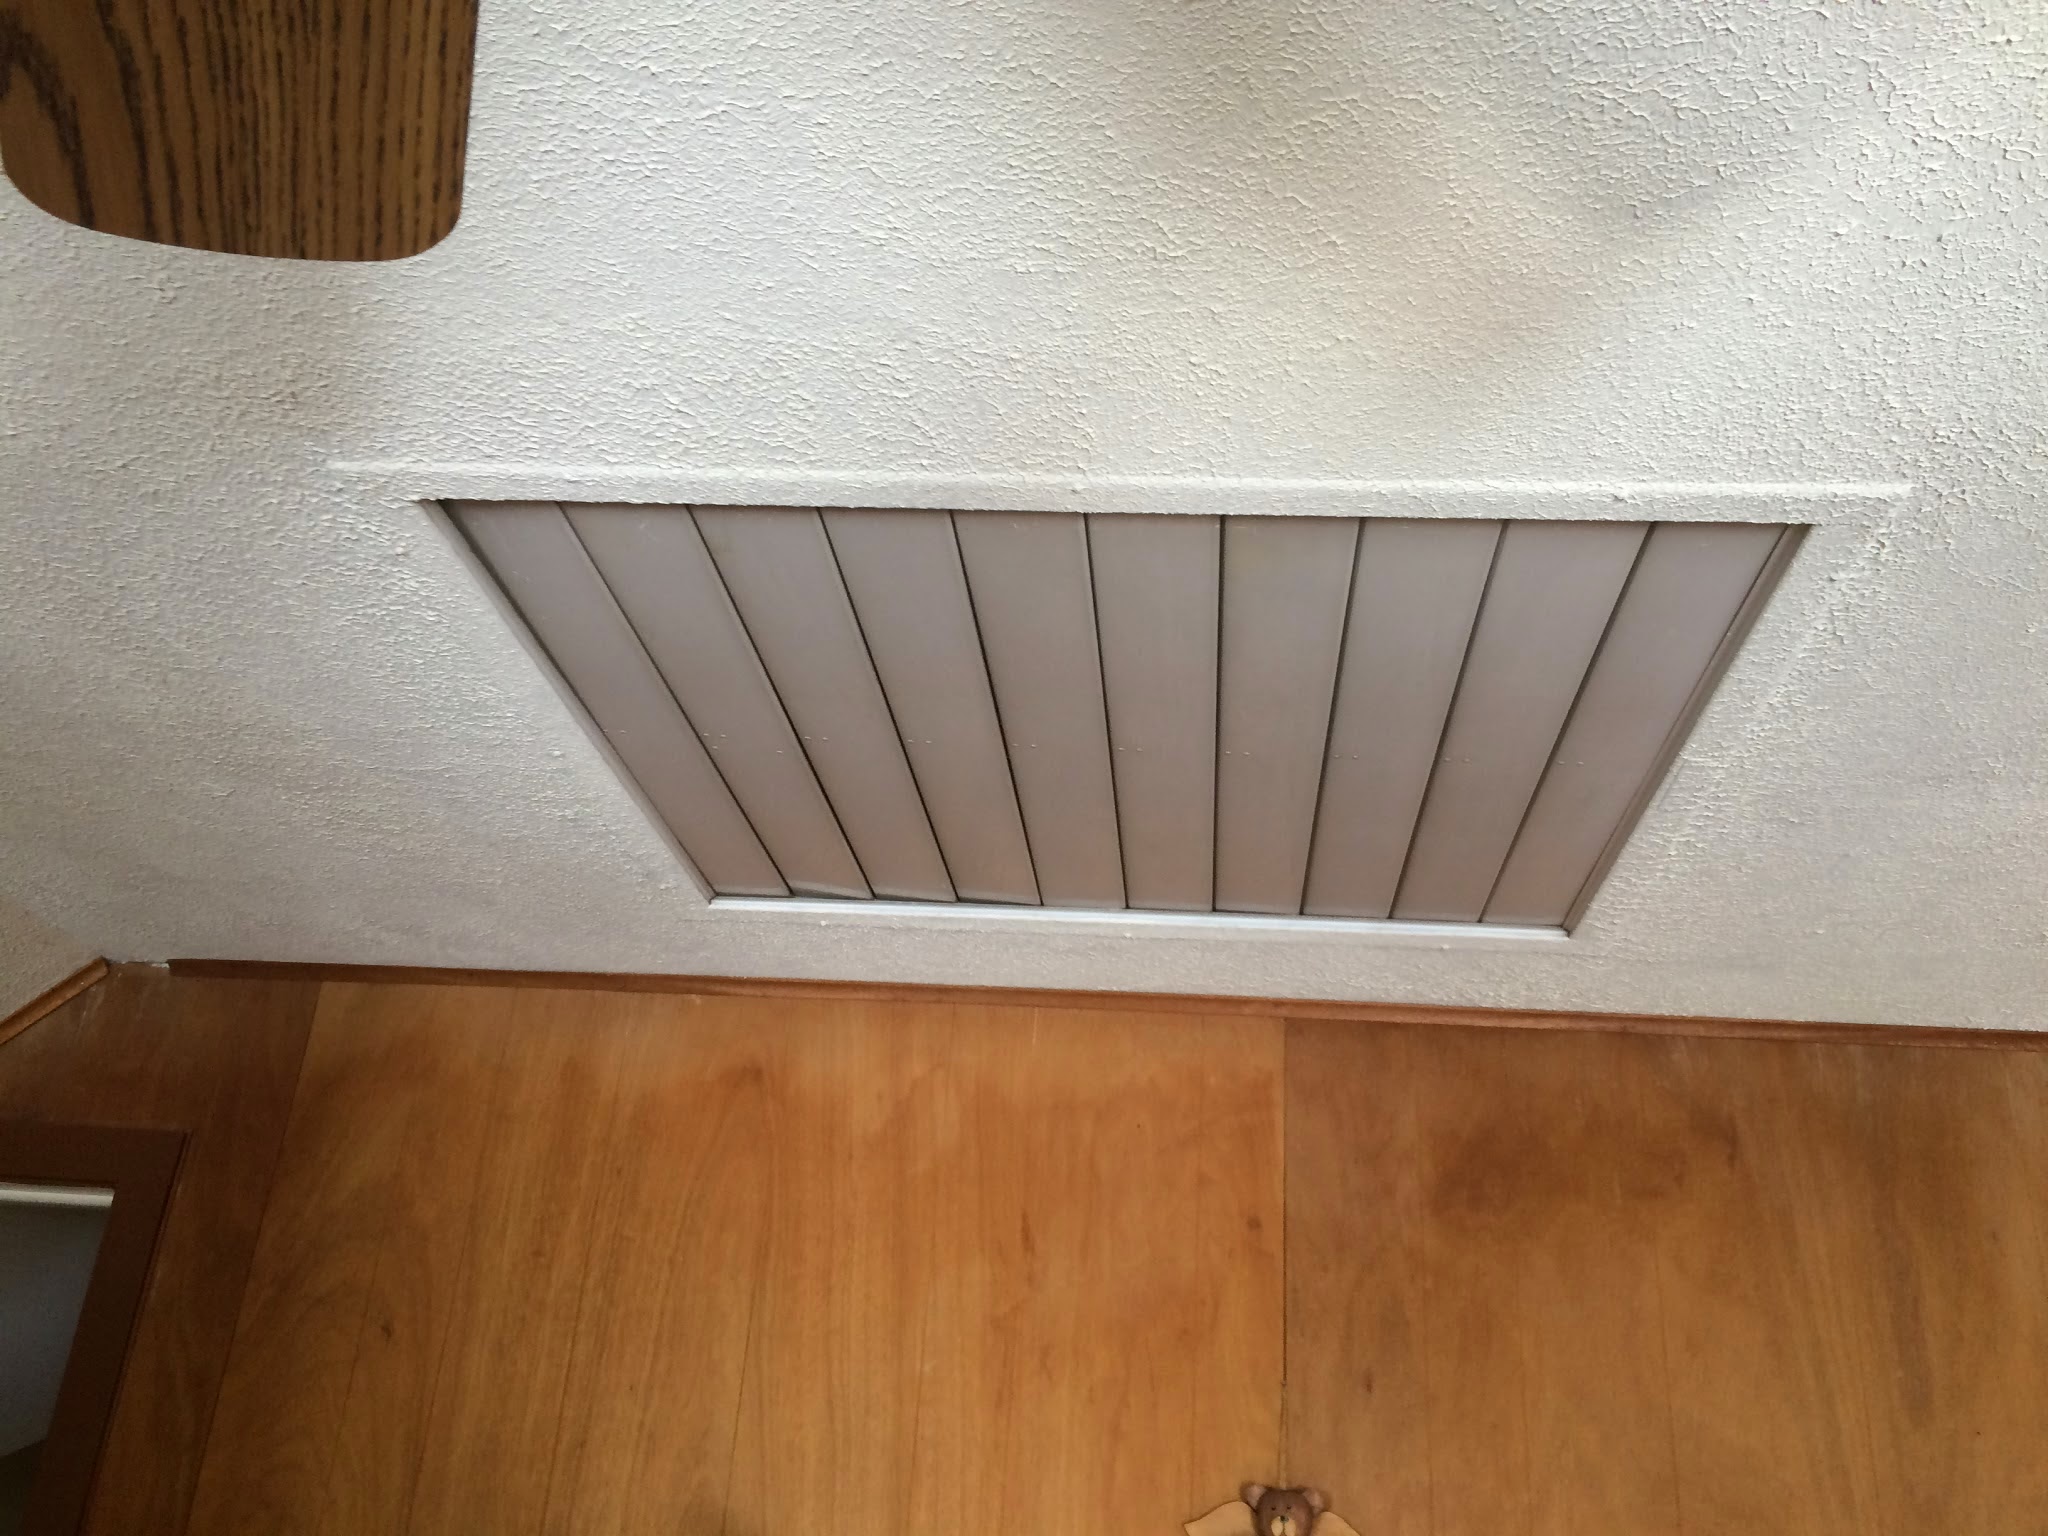
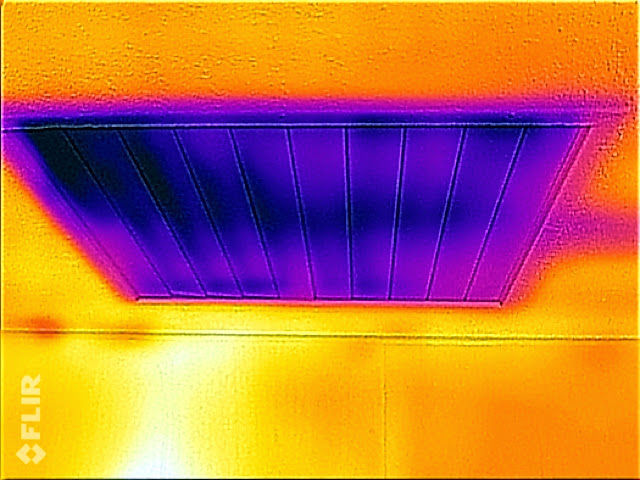
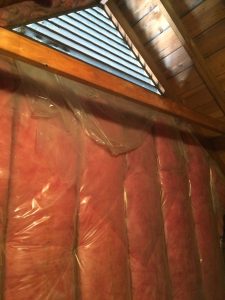
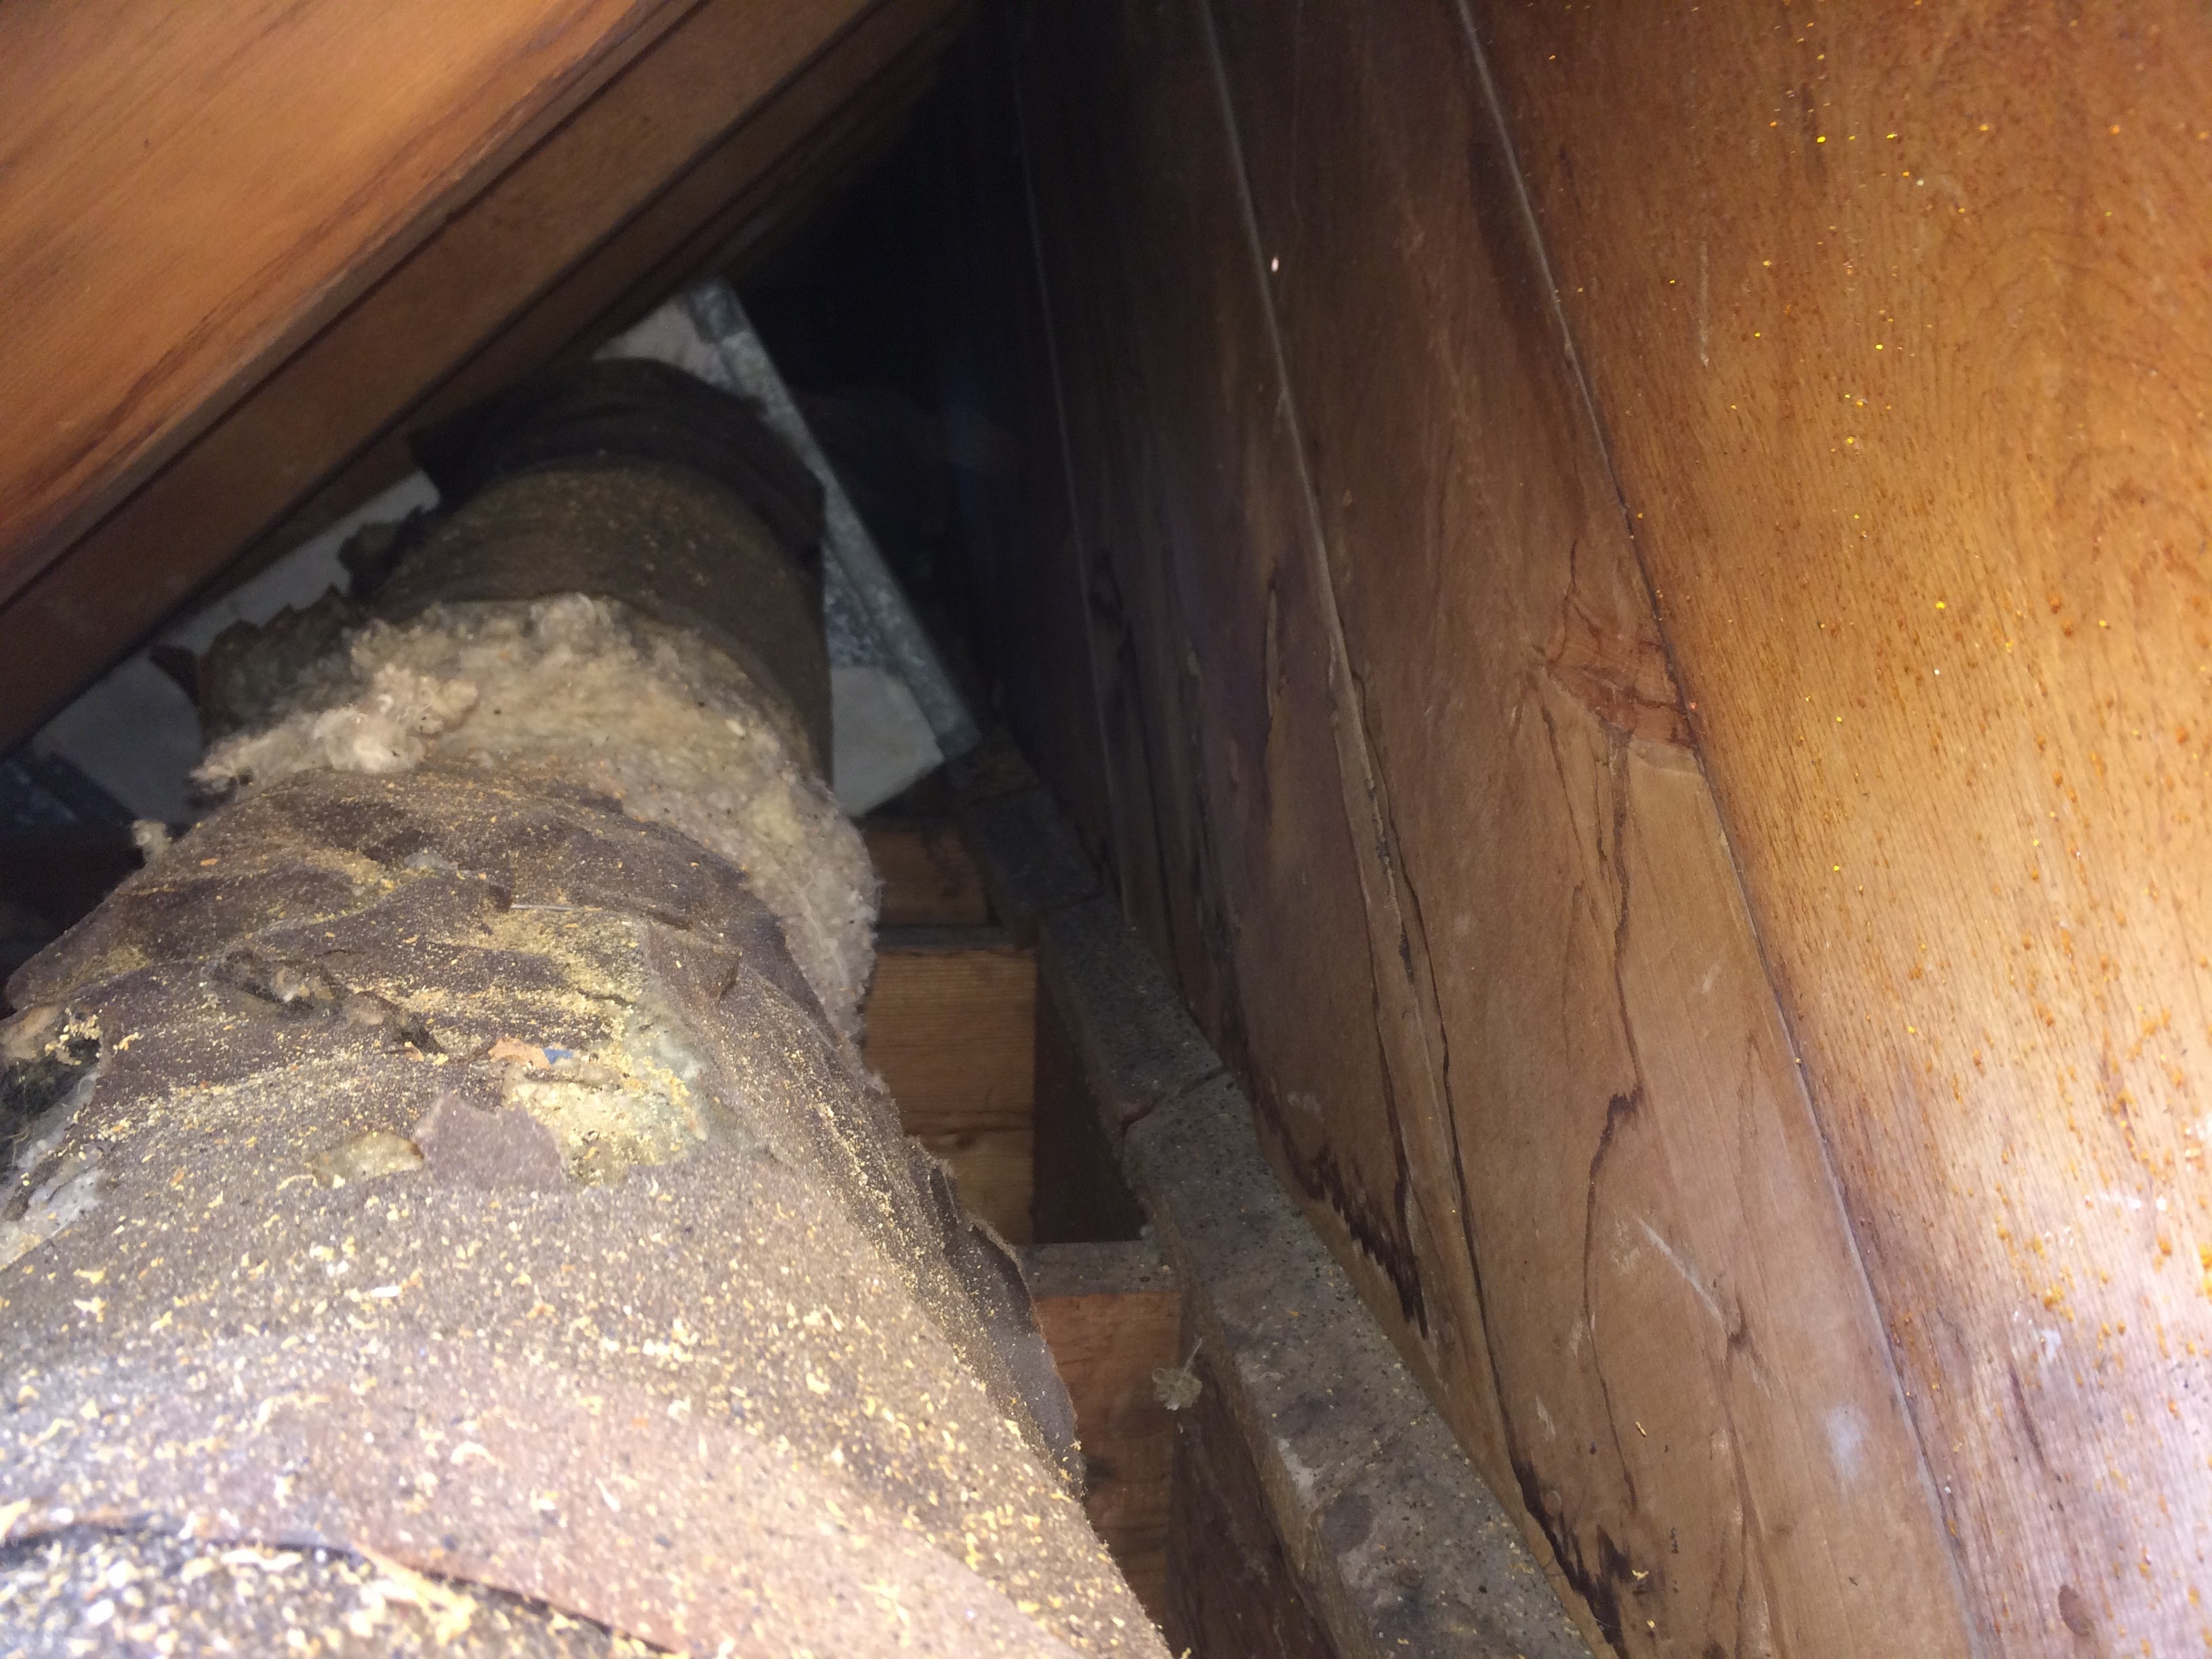
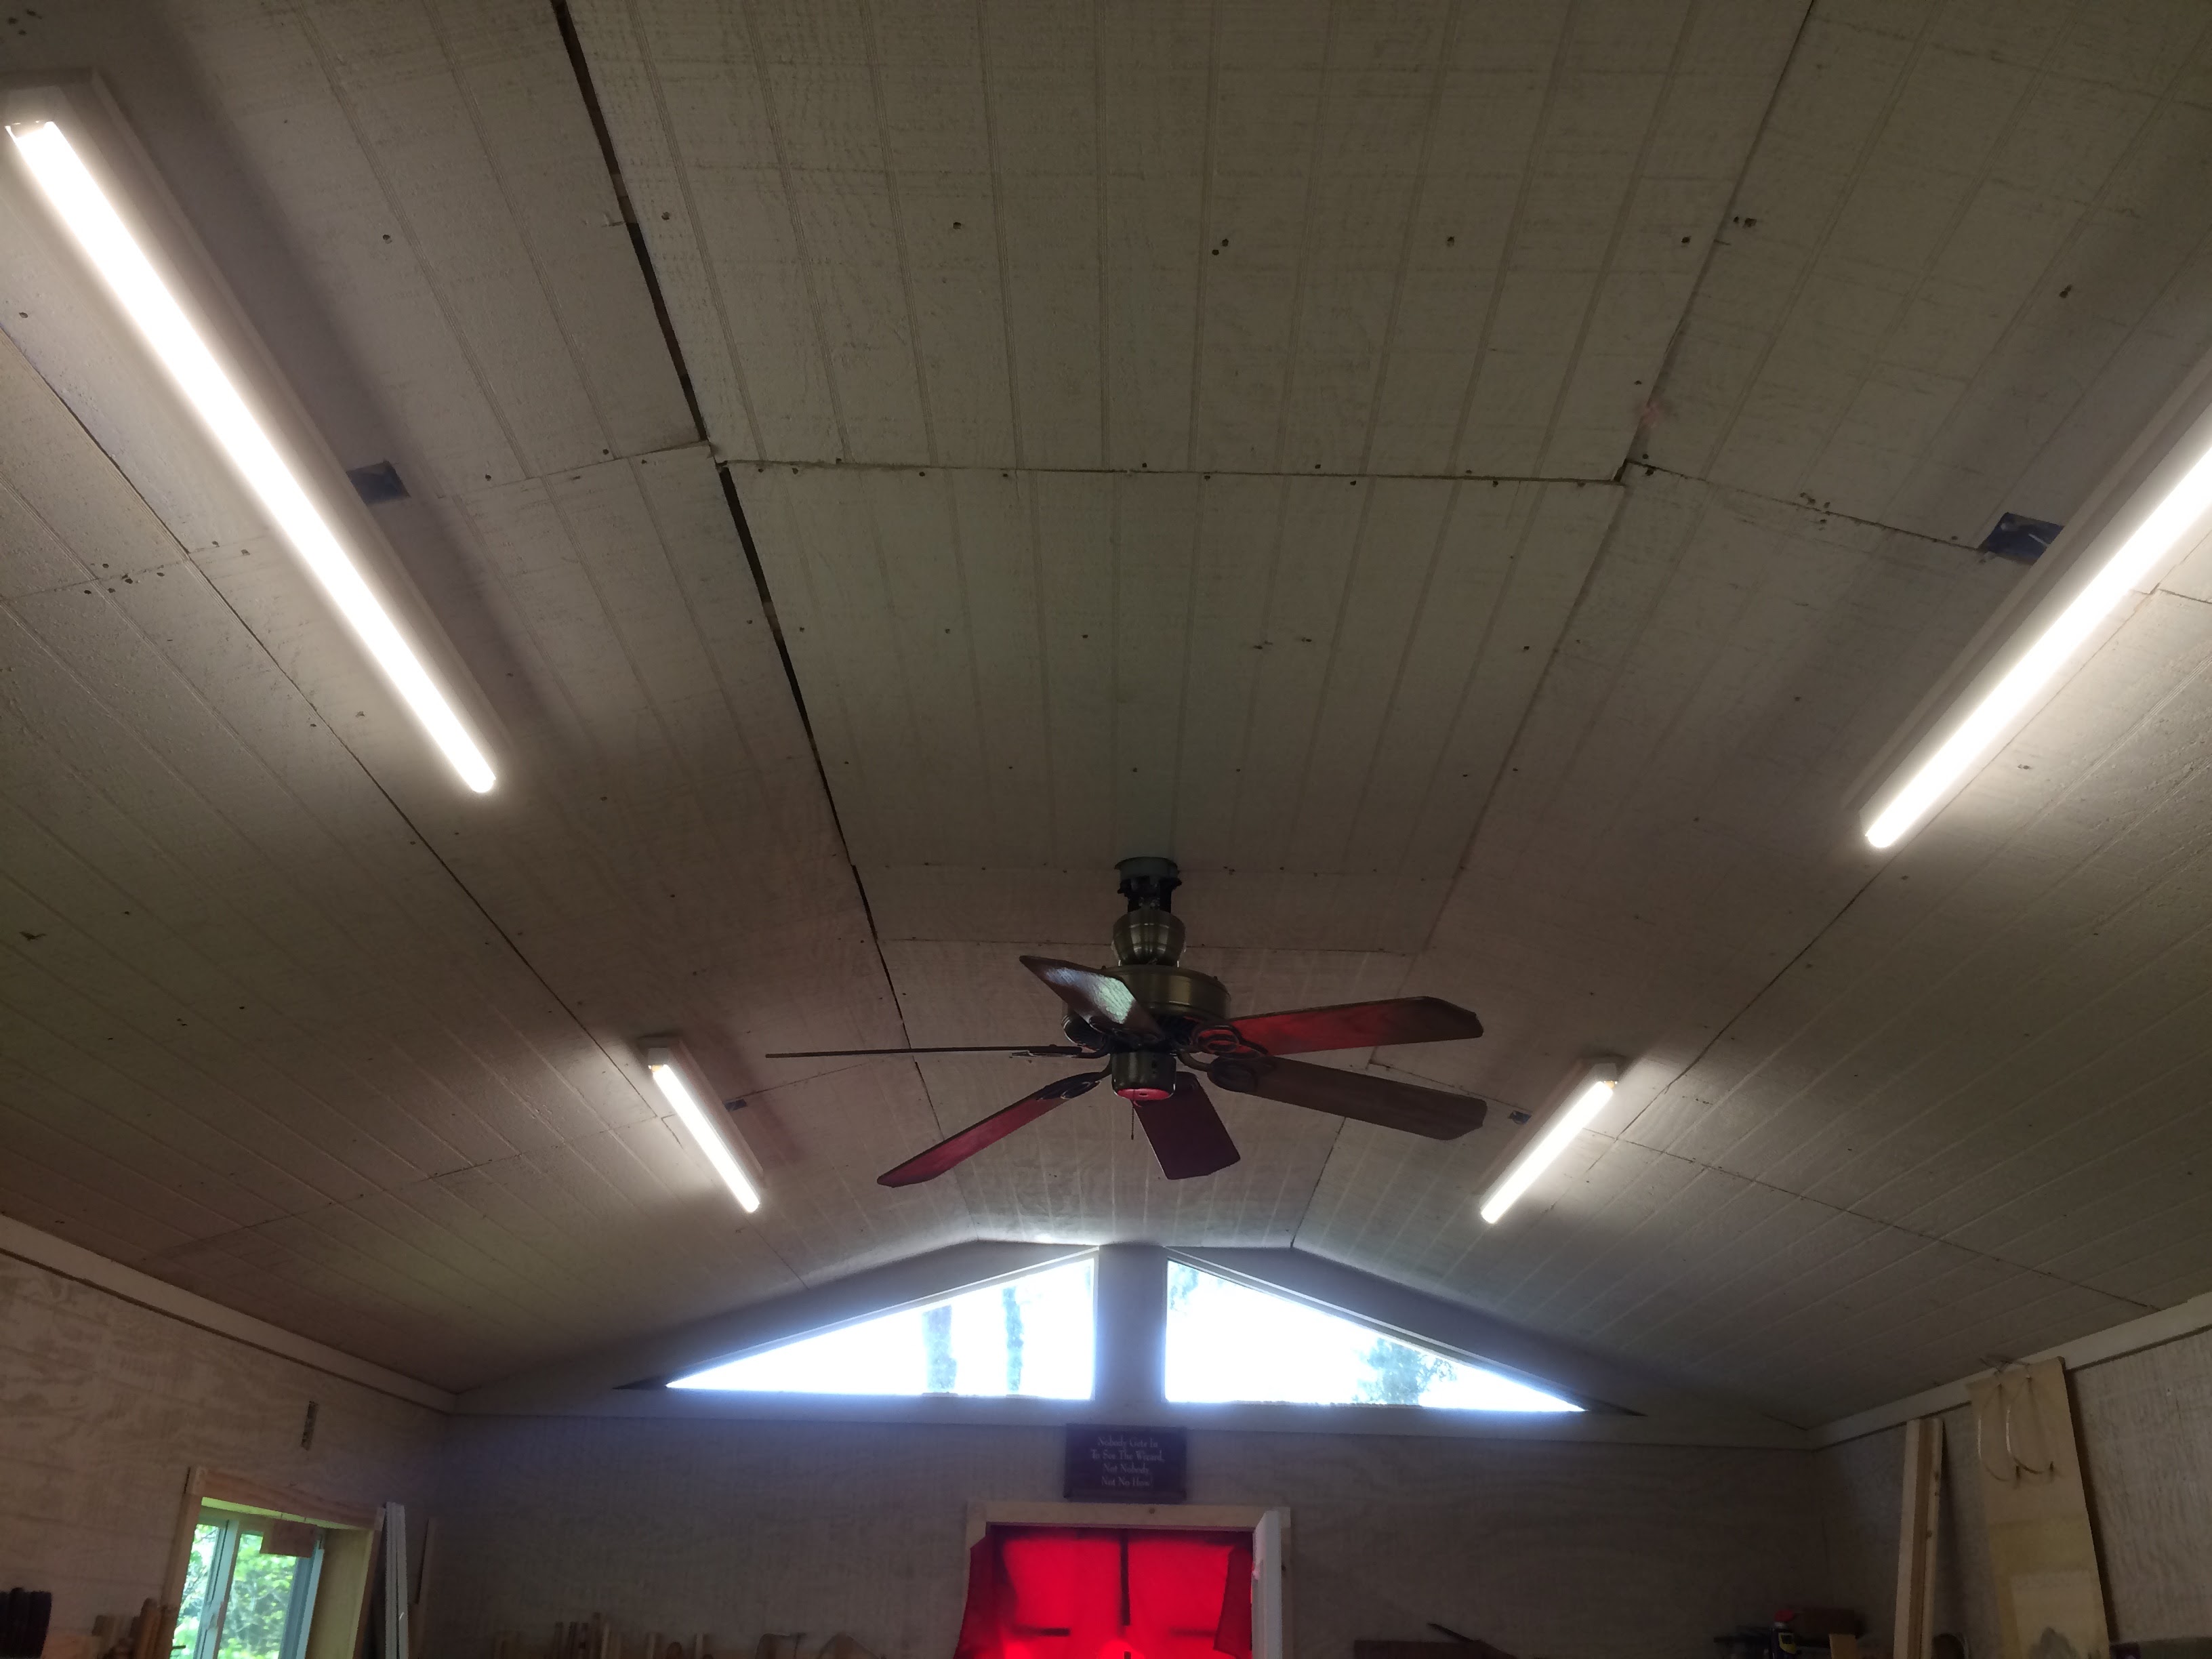
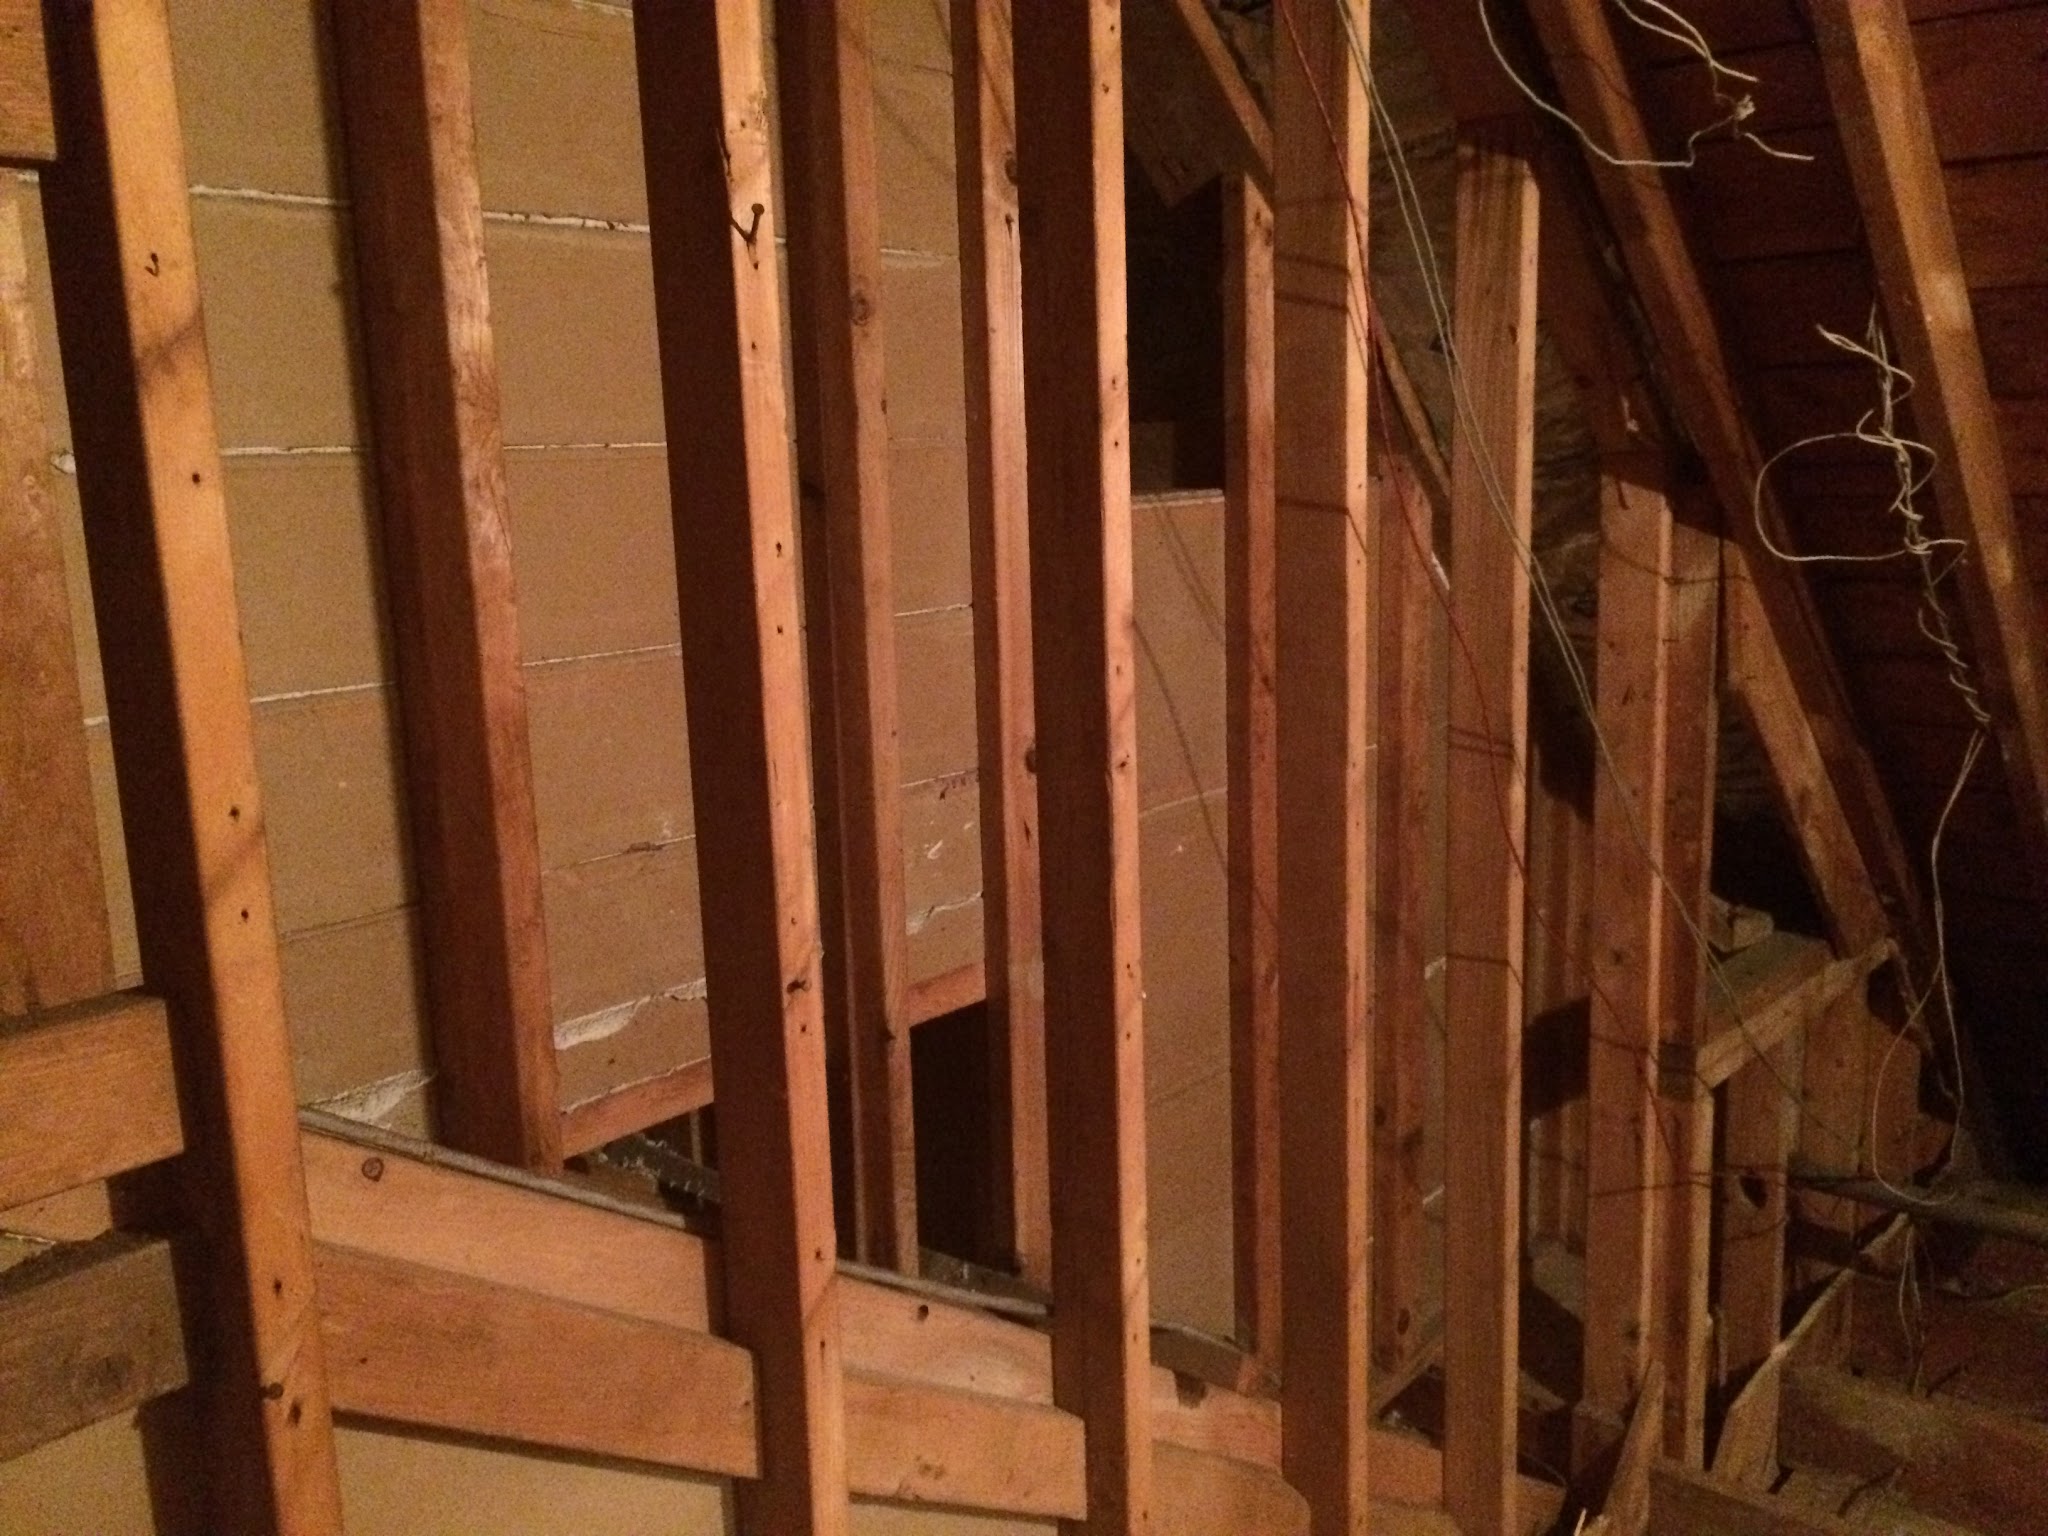
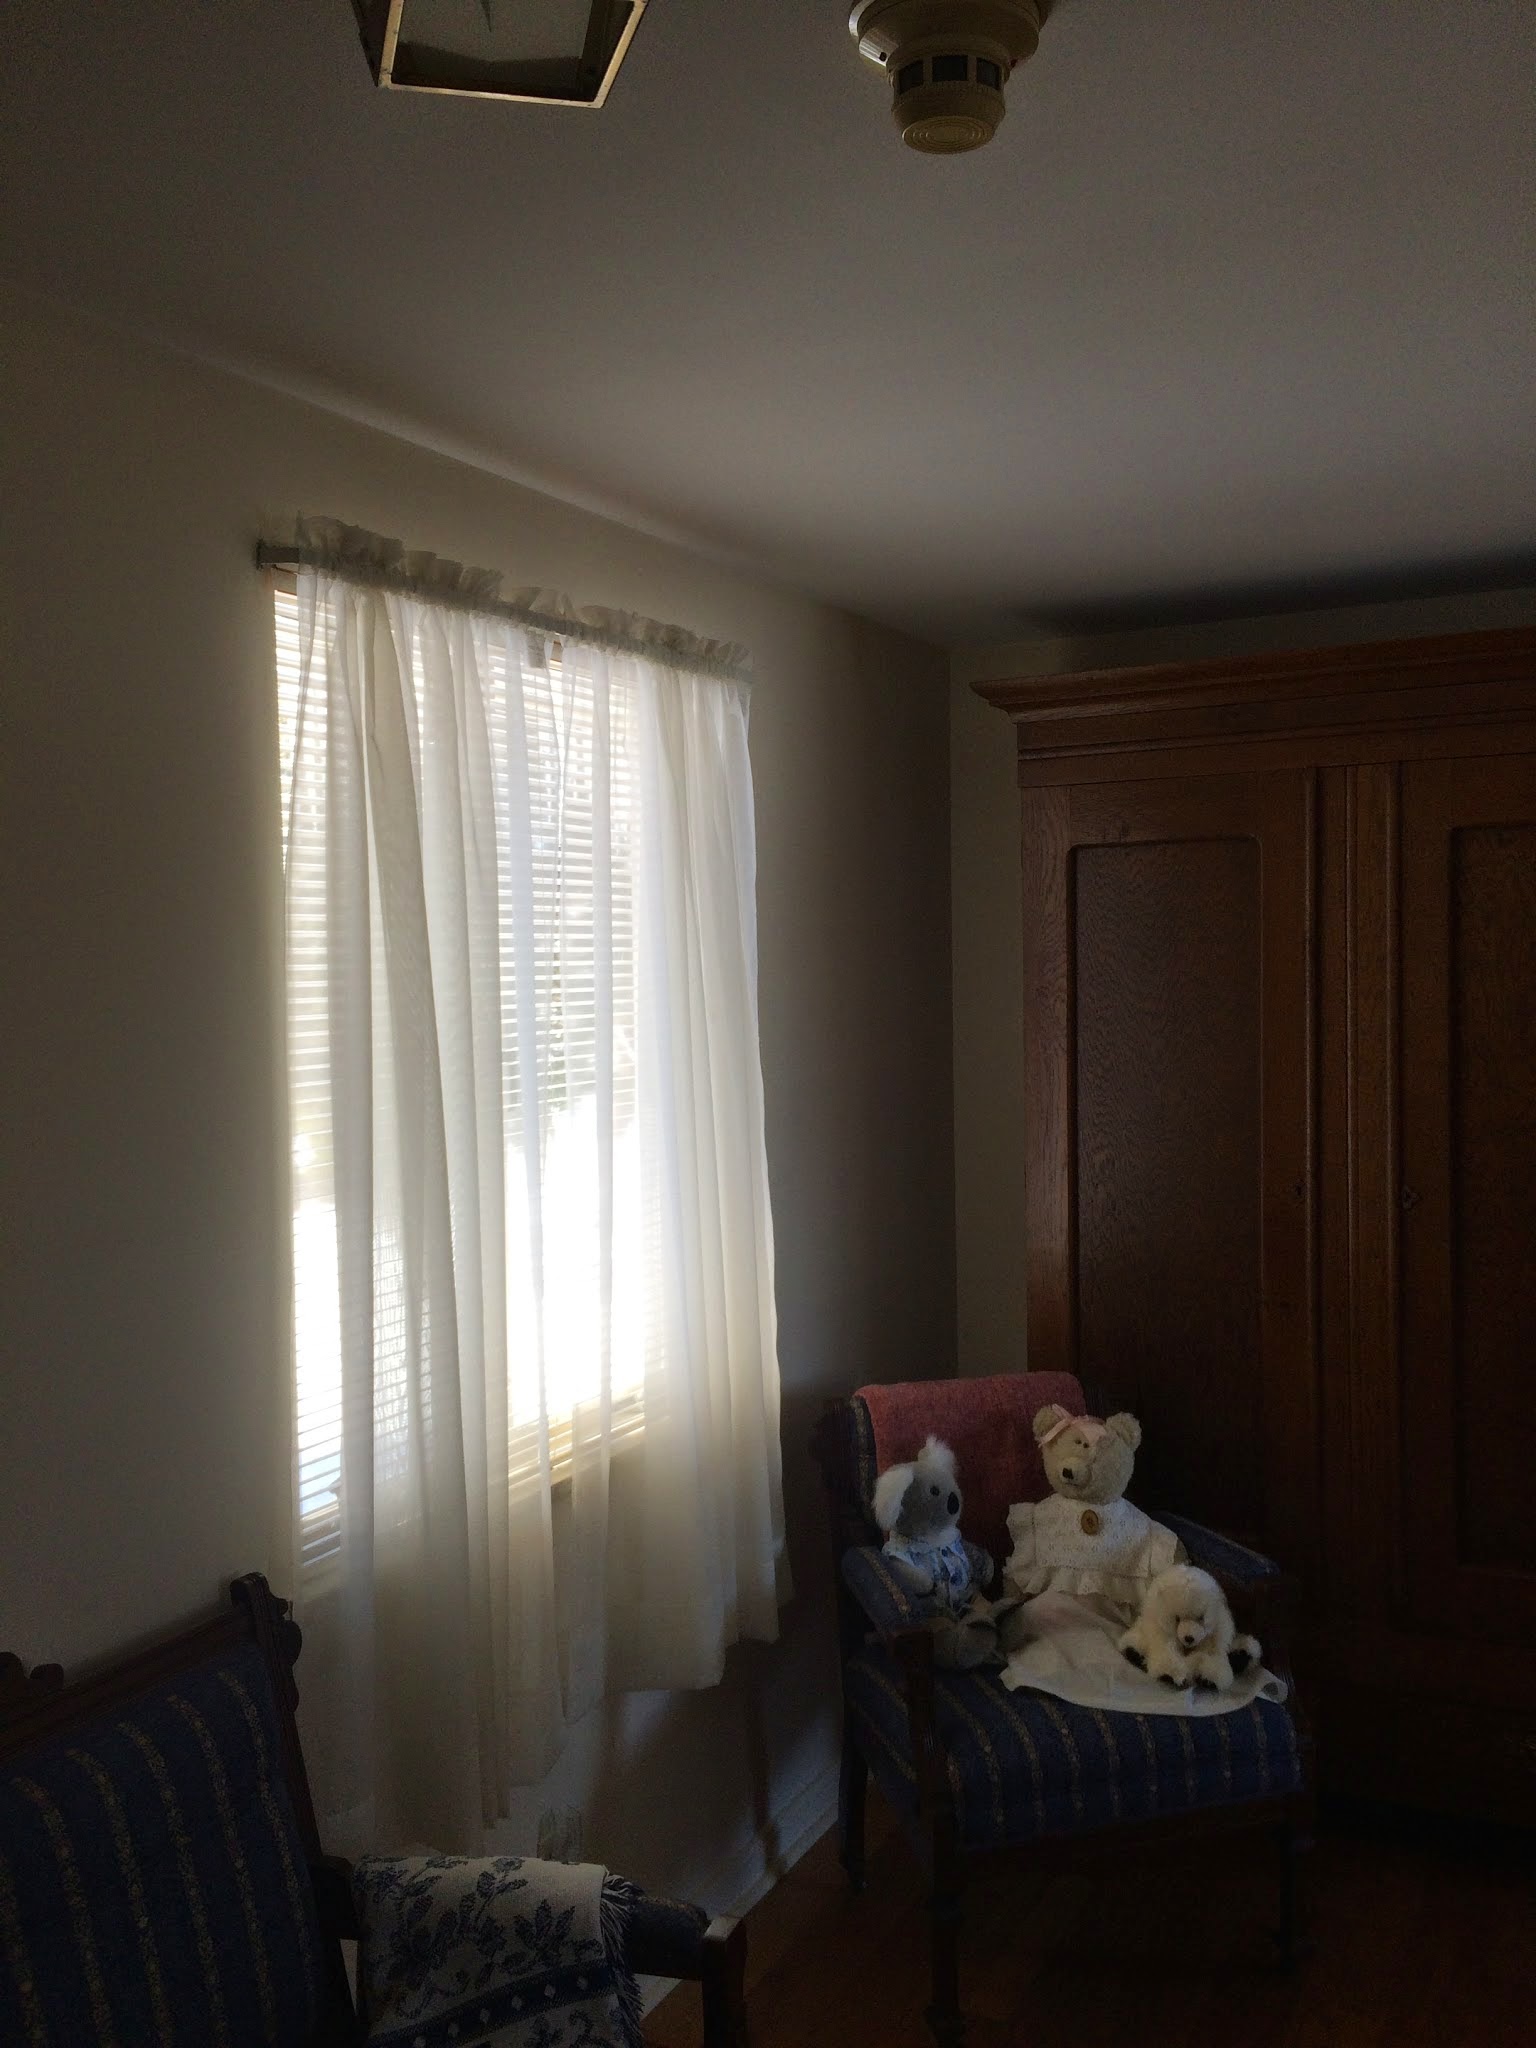
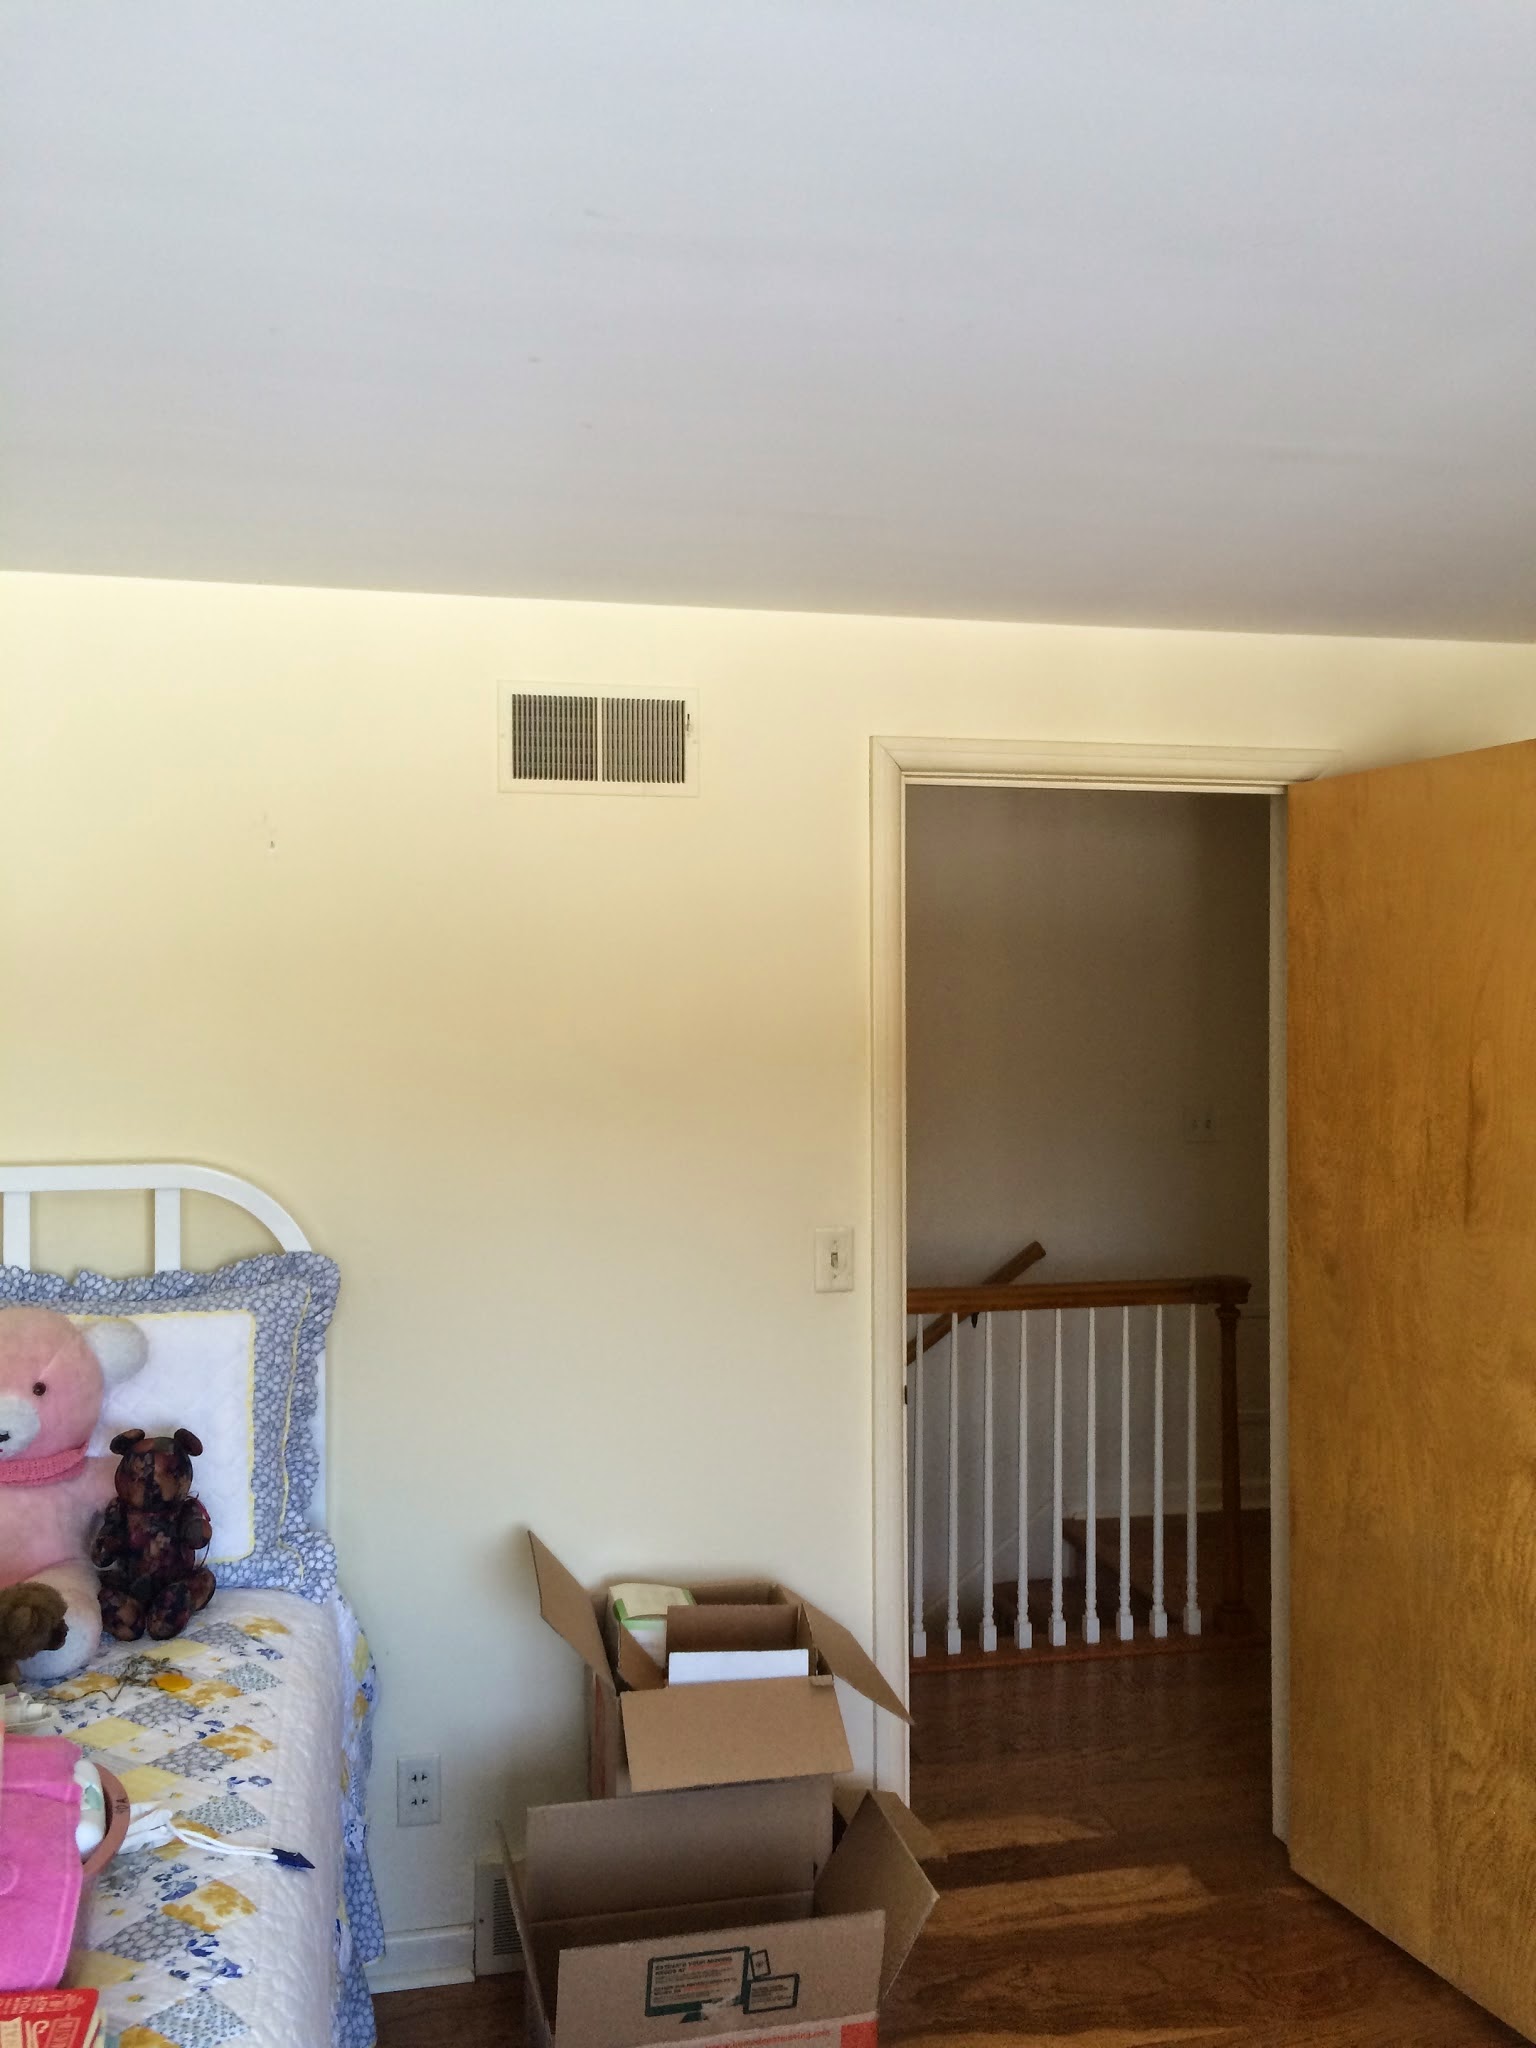
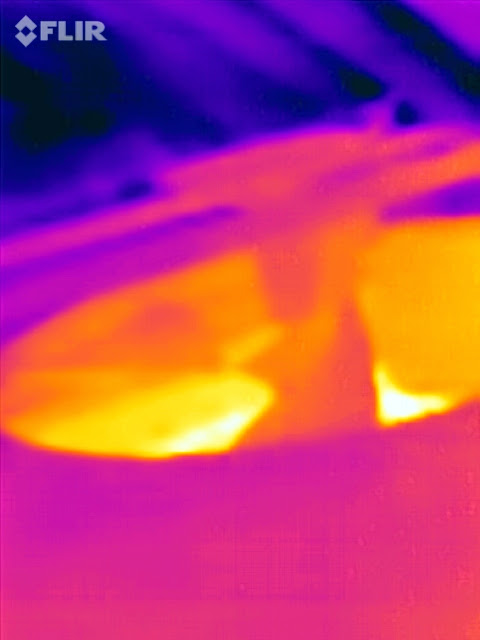
This shot is going up the steps. Note the very clear line where yellow turns to purple/pink. That wall was very cold. It’s what’s called a knee wall: there is an attic on the other side. The second floor wall looks to be completely uninsulated. The laundry room is on the other side of the first floor wall. Here’s what it actually looks like:
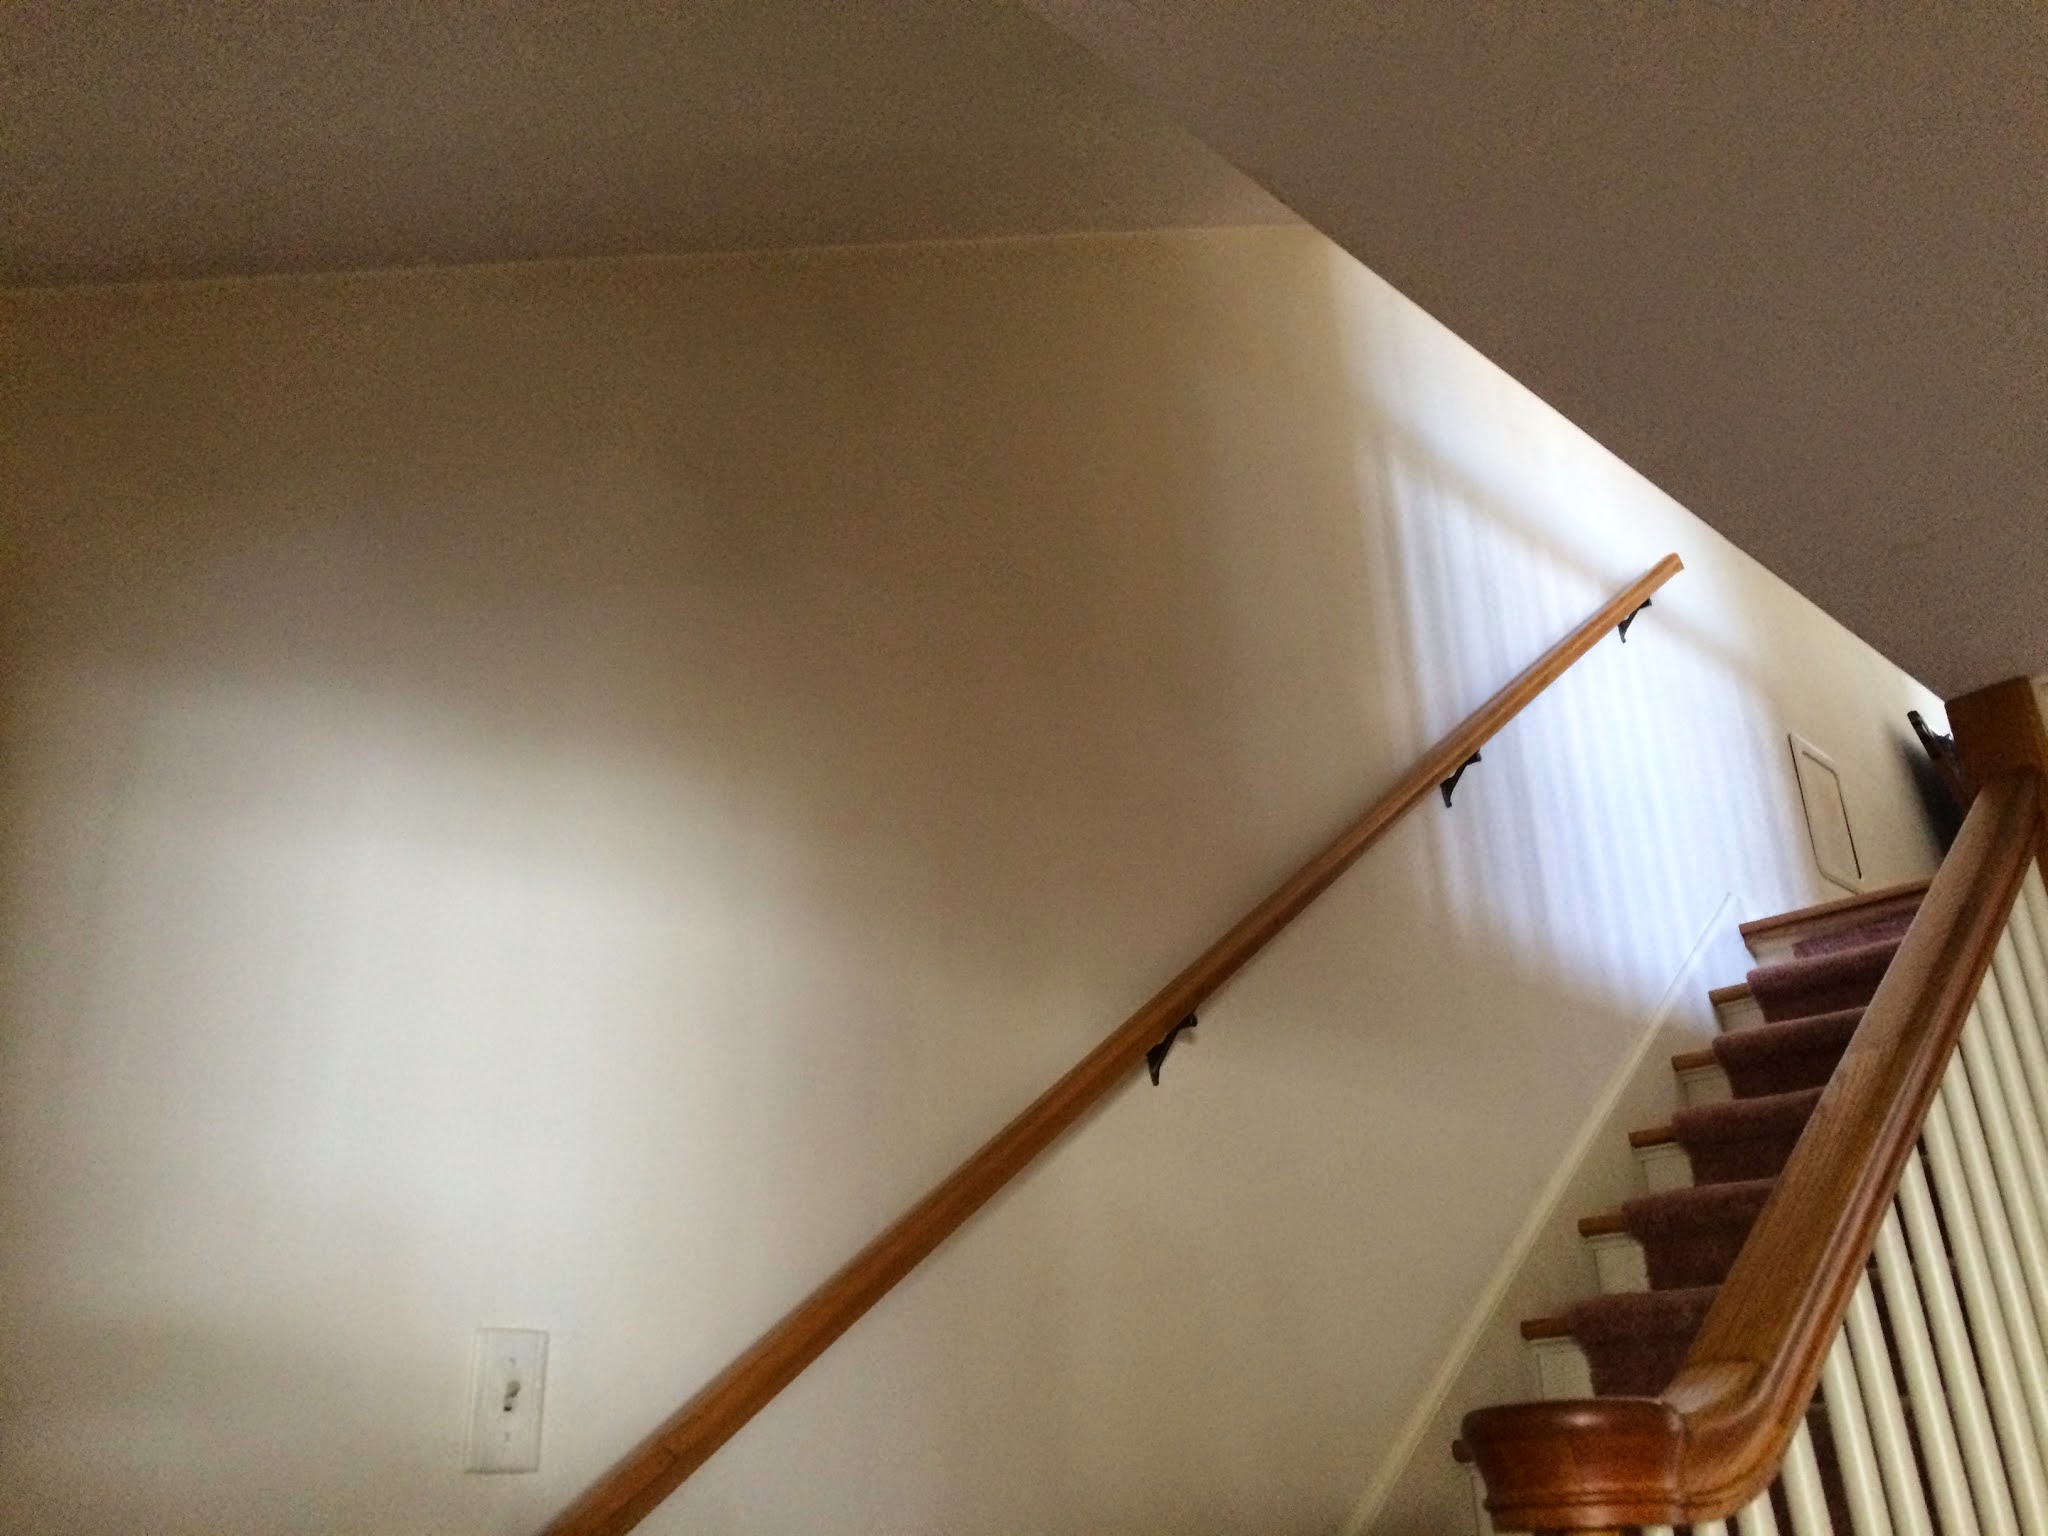
The hallway was one source of comfort complaints. At the audit, I climbed into the attic on the other side and found this:
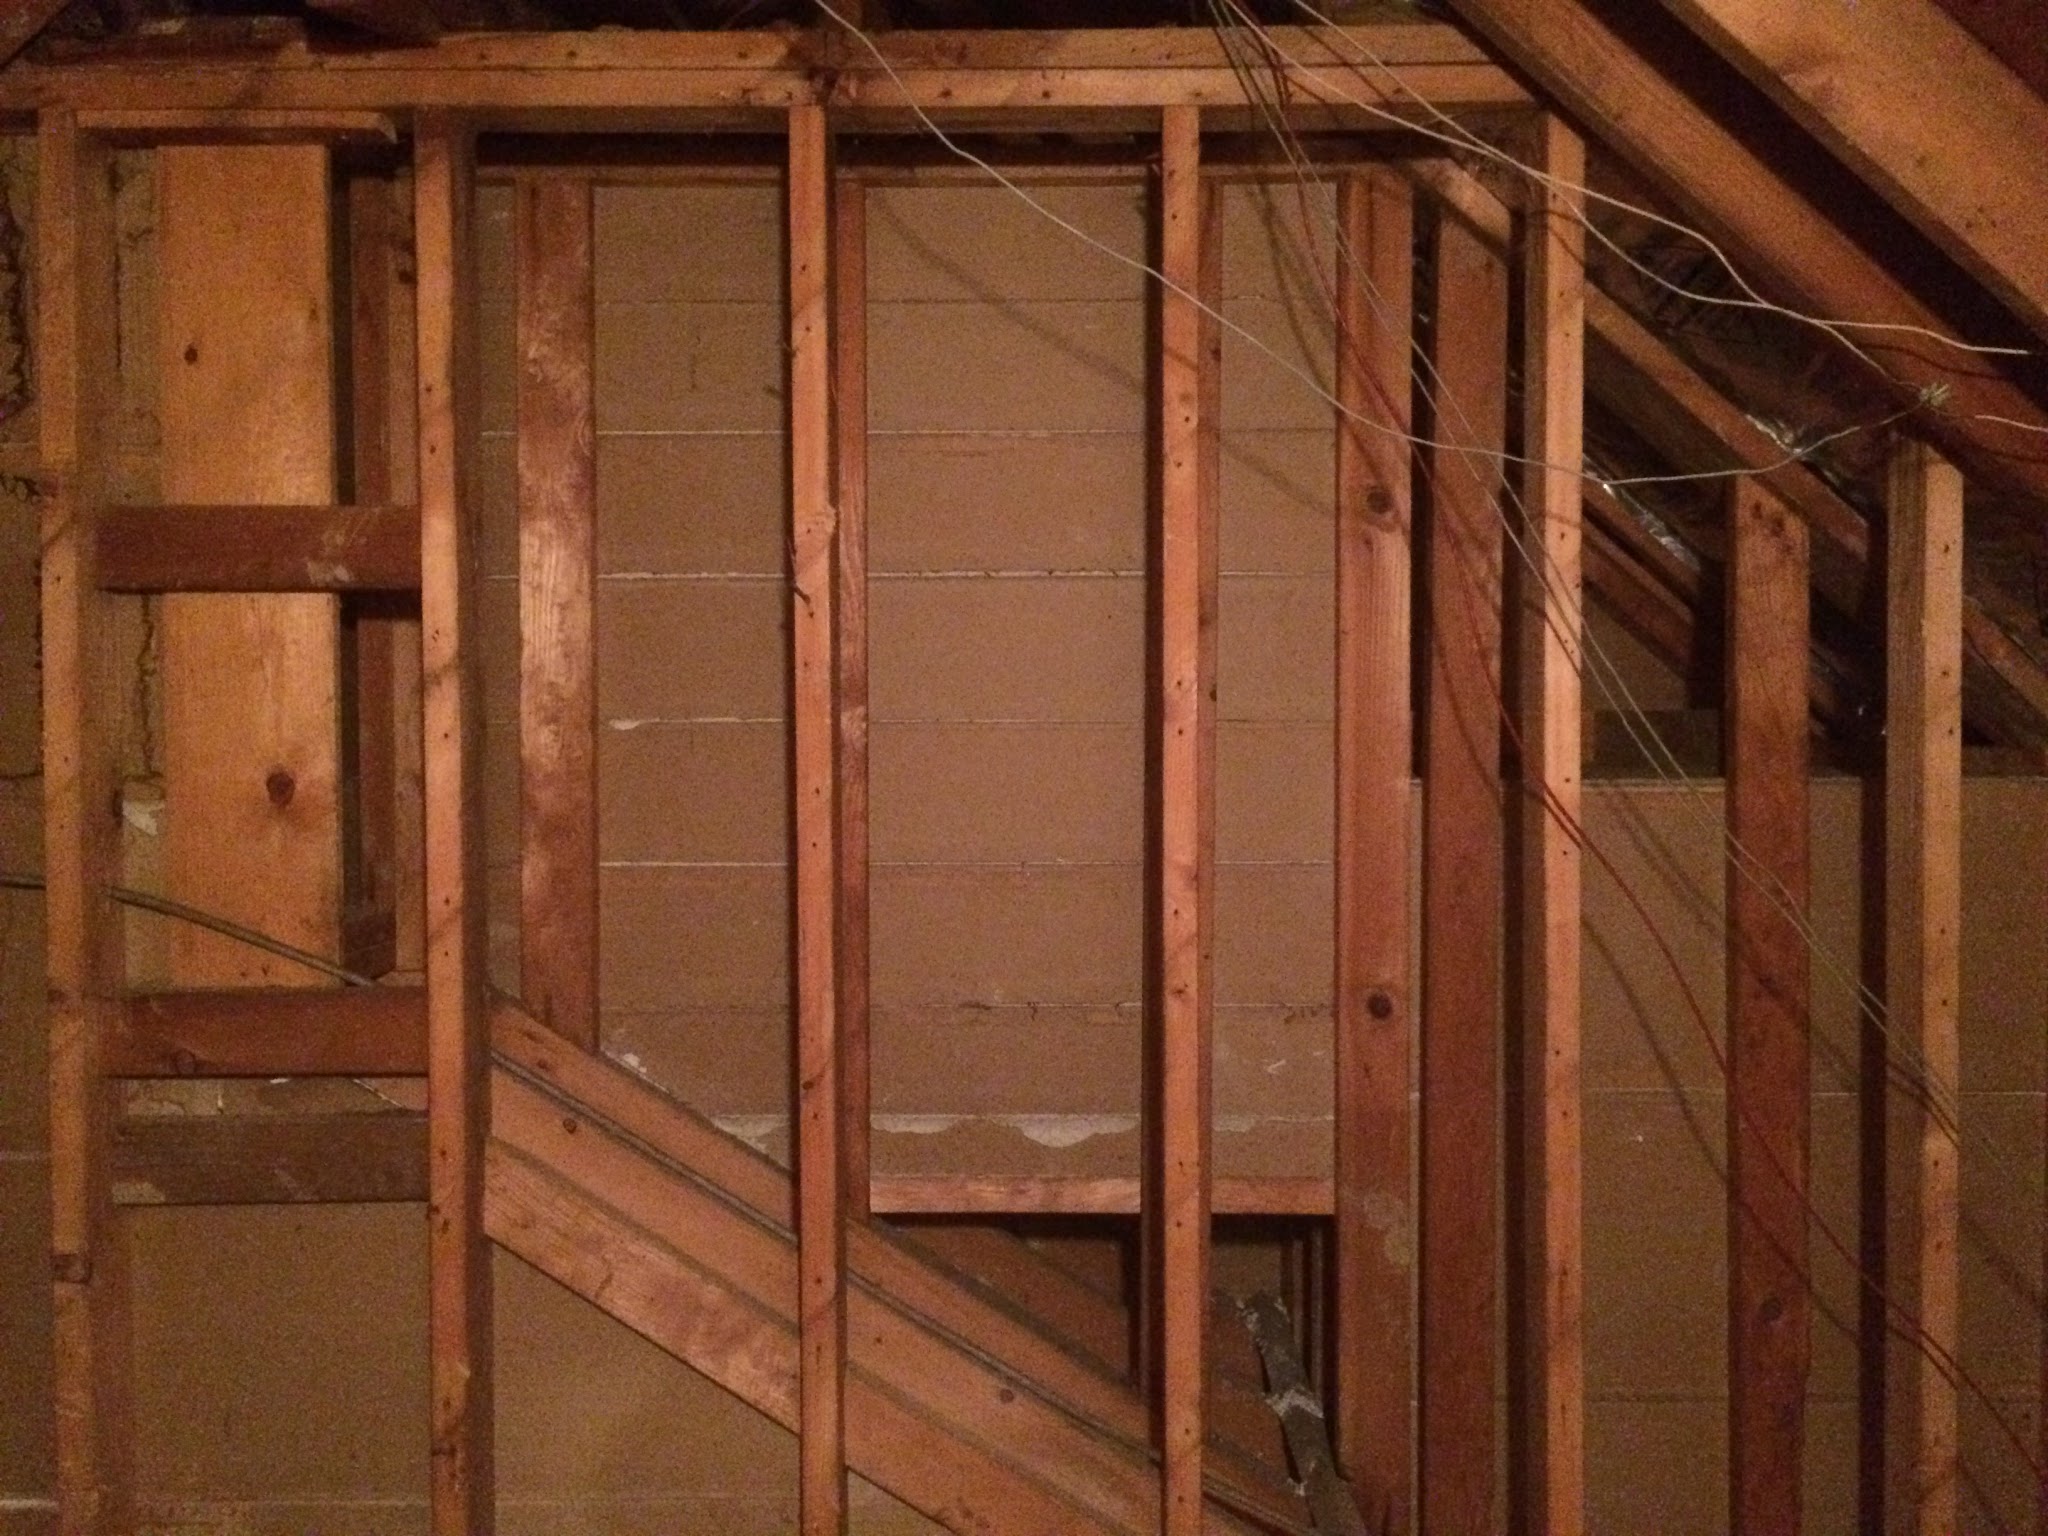
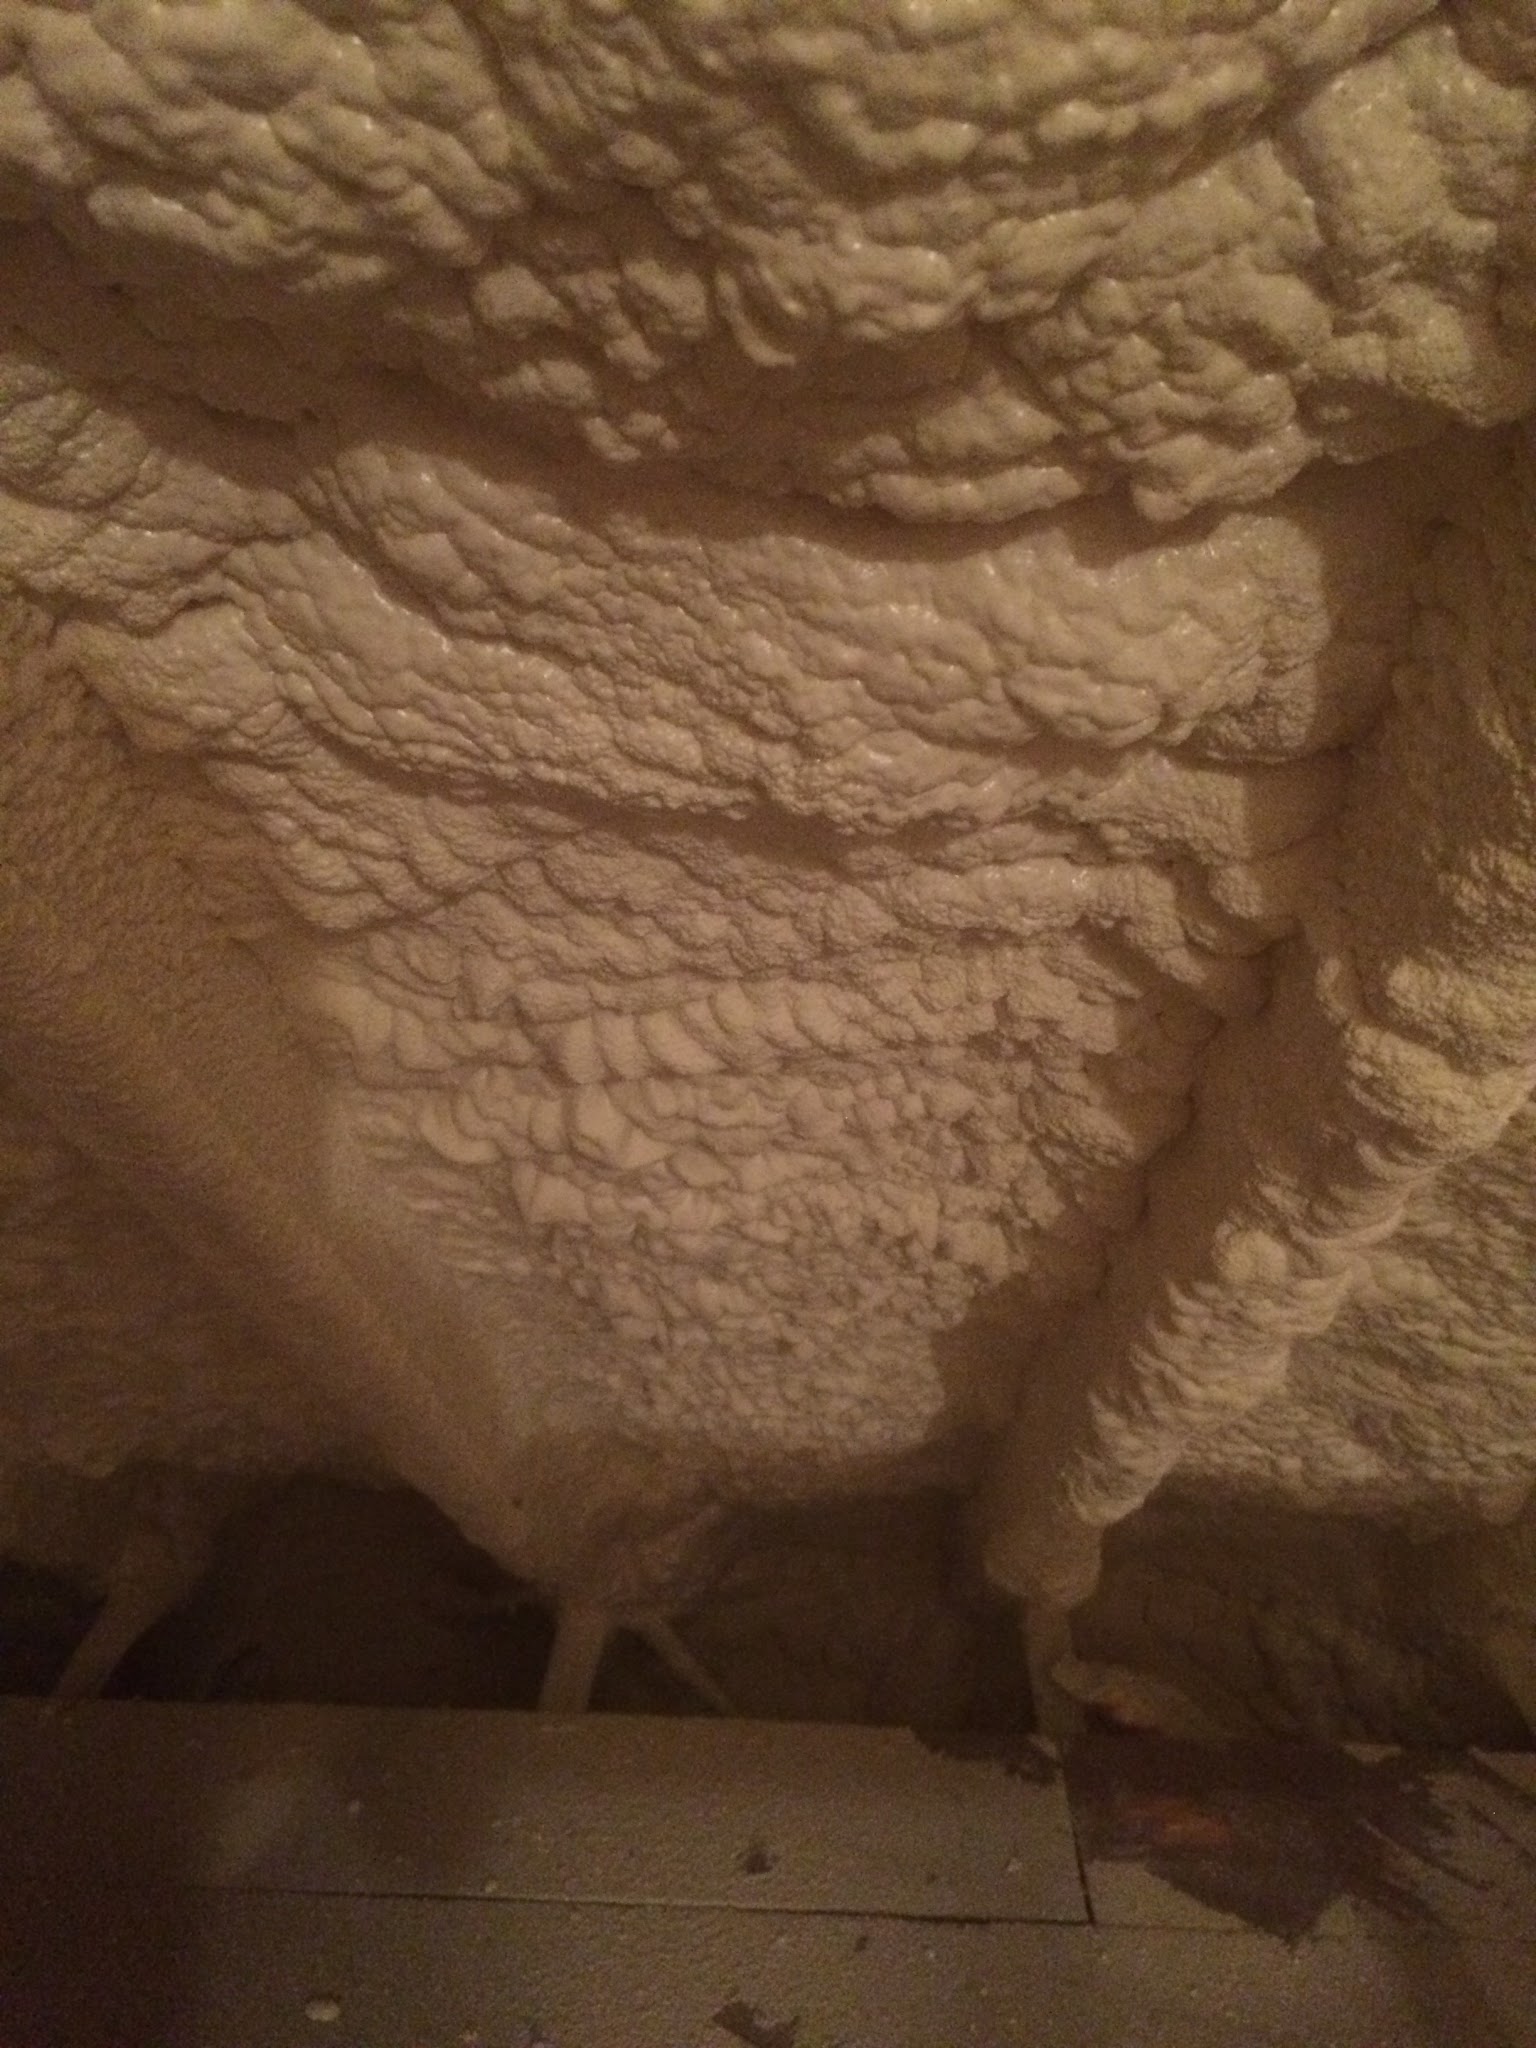
Look ma! No insulation! When I first saw it, this wall was covered with sheathing, we had to remove it to see this. A big part of our work is opening things up so we can see what’s going on. We do have X-ray vision to some extent thanks to a blower door and infrared camera (I call them Batman and Robin), but there is no substitute for getting into a space to figure out exactly what needs to be done.
We ended up foaming it, this wall alone was responsible for 21% of the leakage reduction we achieved, a whopping 1100 points on the blower door. For reference my in-laws’ 1800 square foot home has a TOTAL leakage number of 995. This one wall leaked more than my in-laws’ entire home!
Here’s what it looks like today:
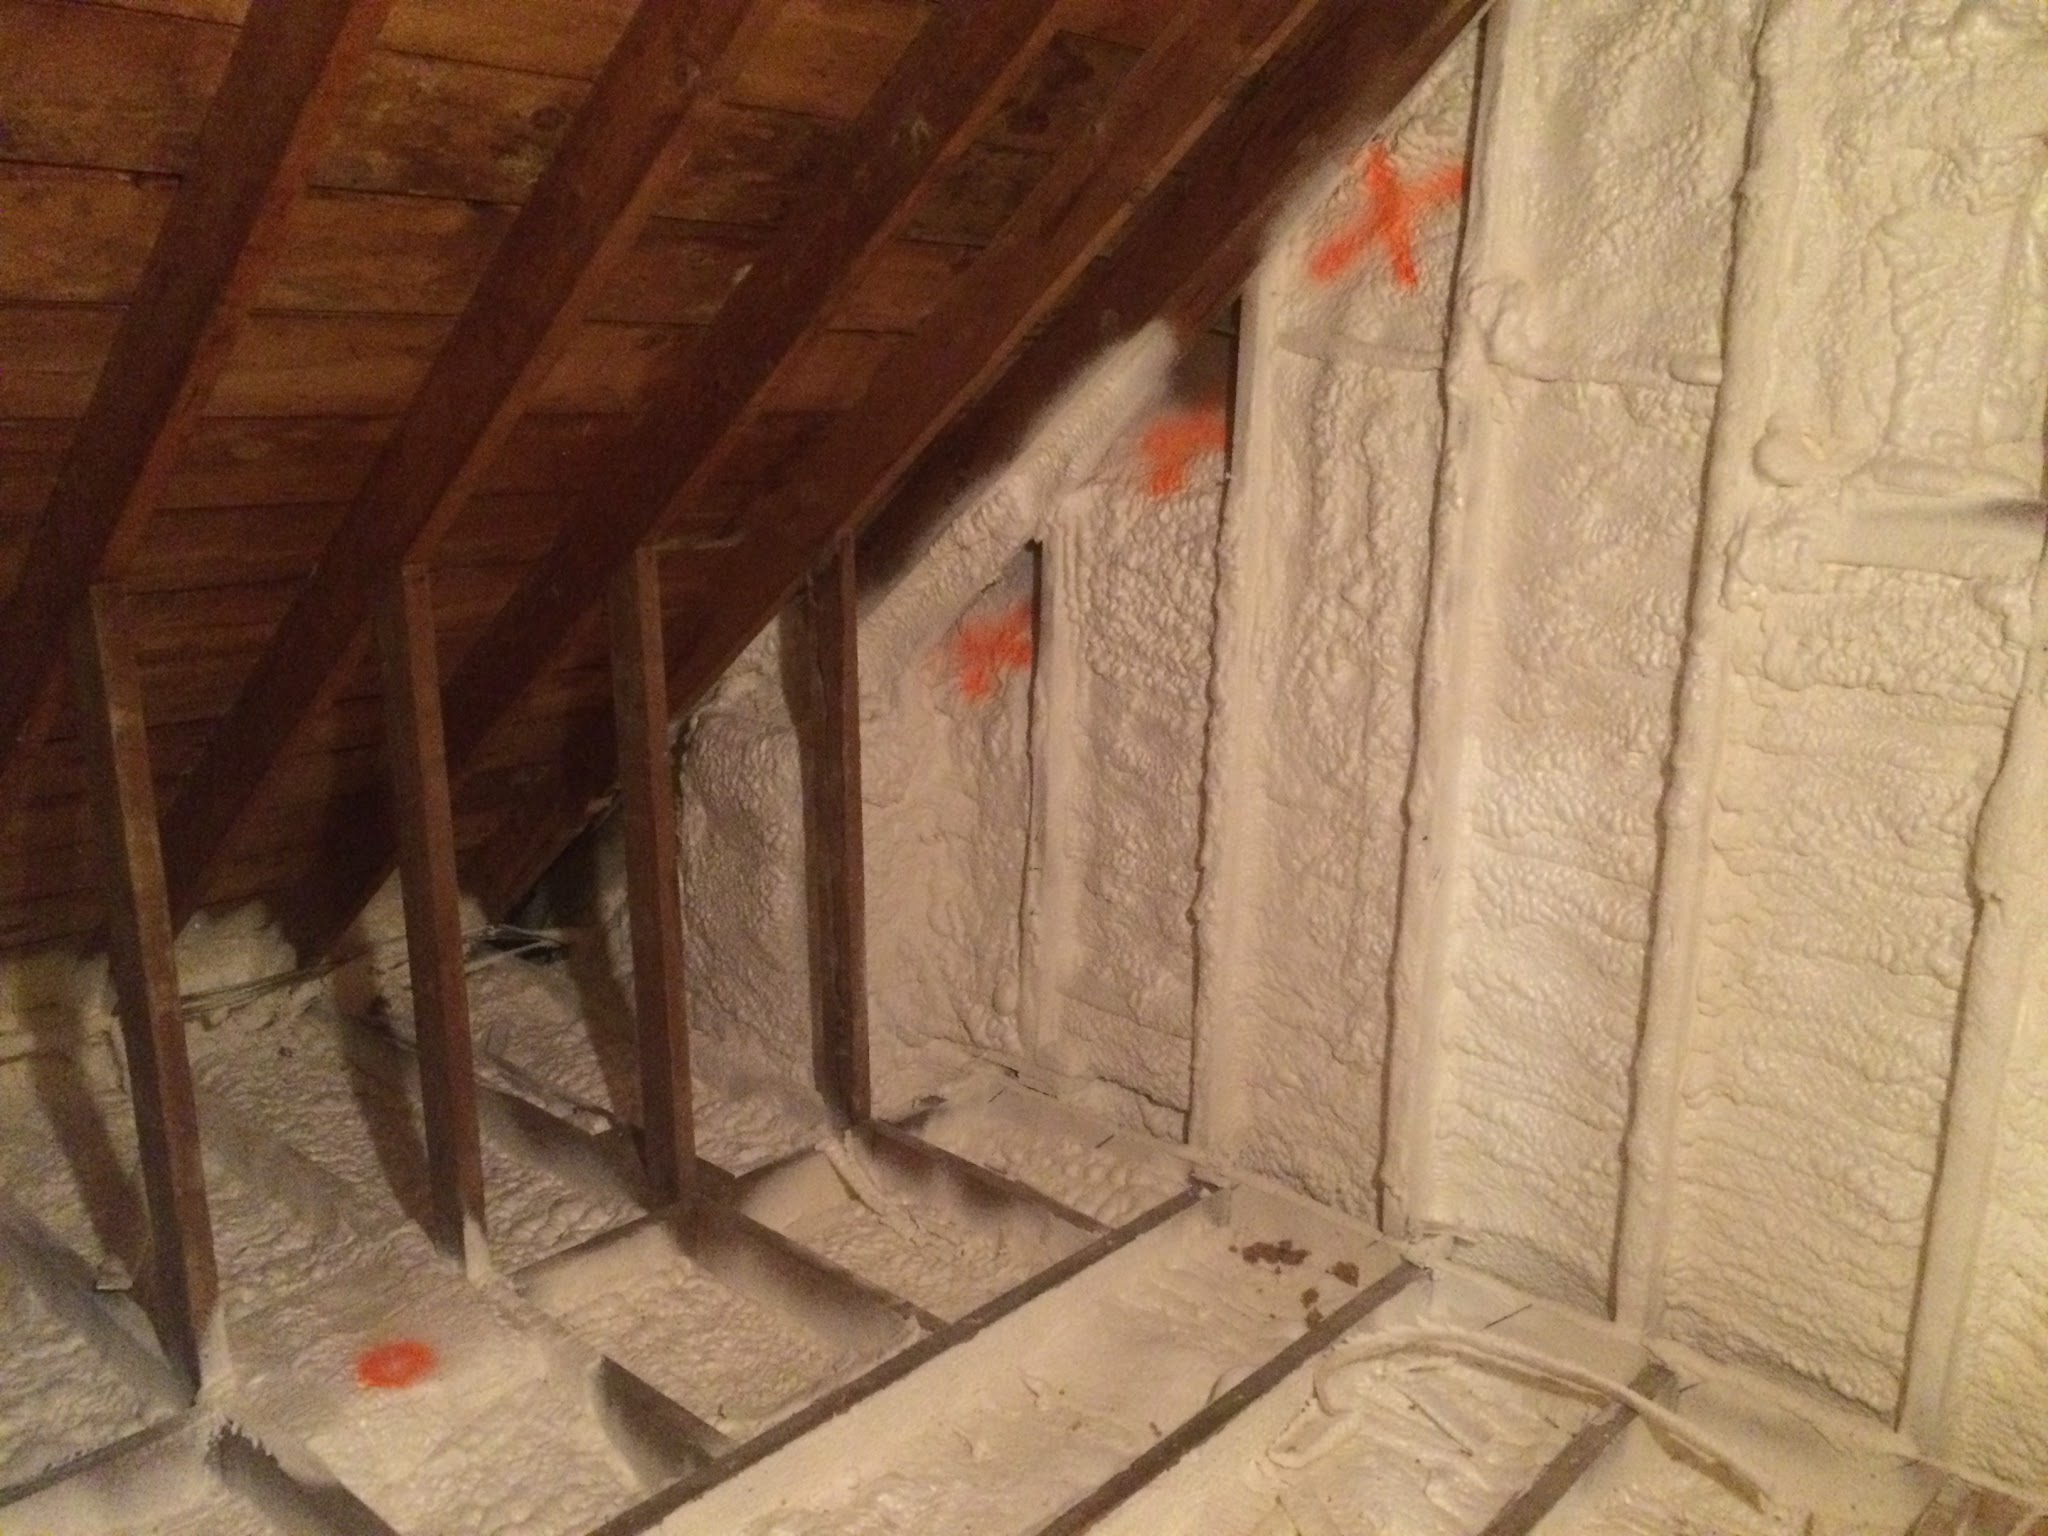
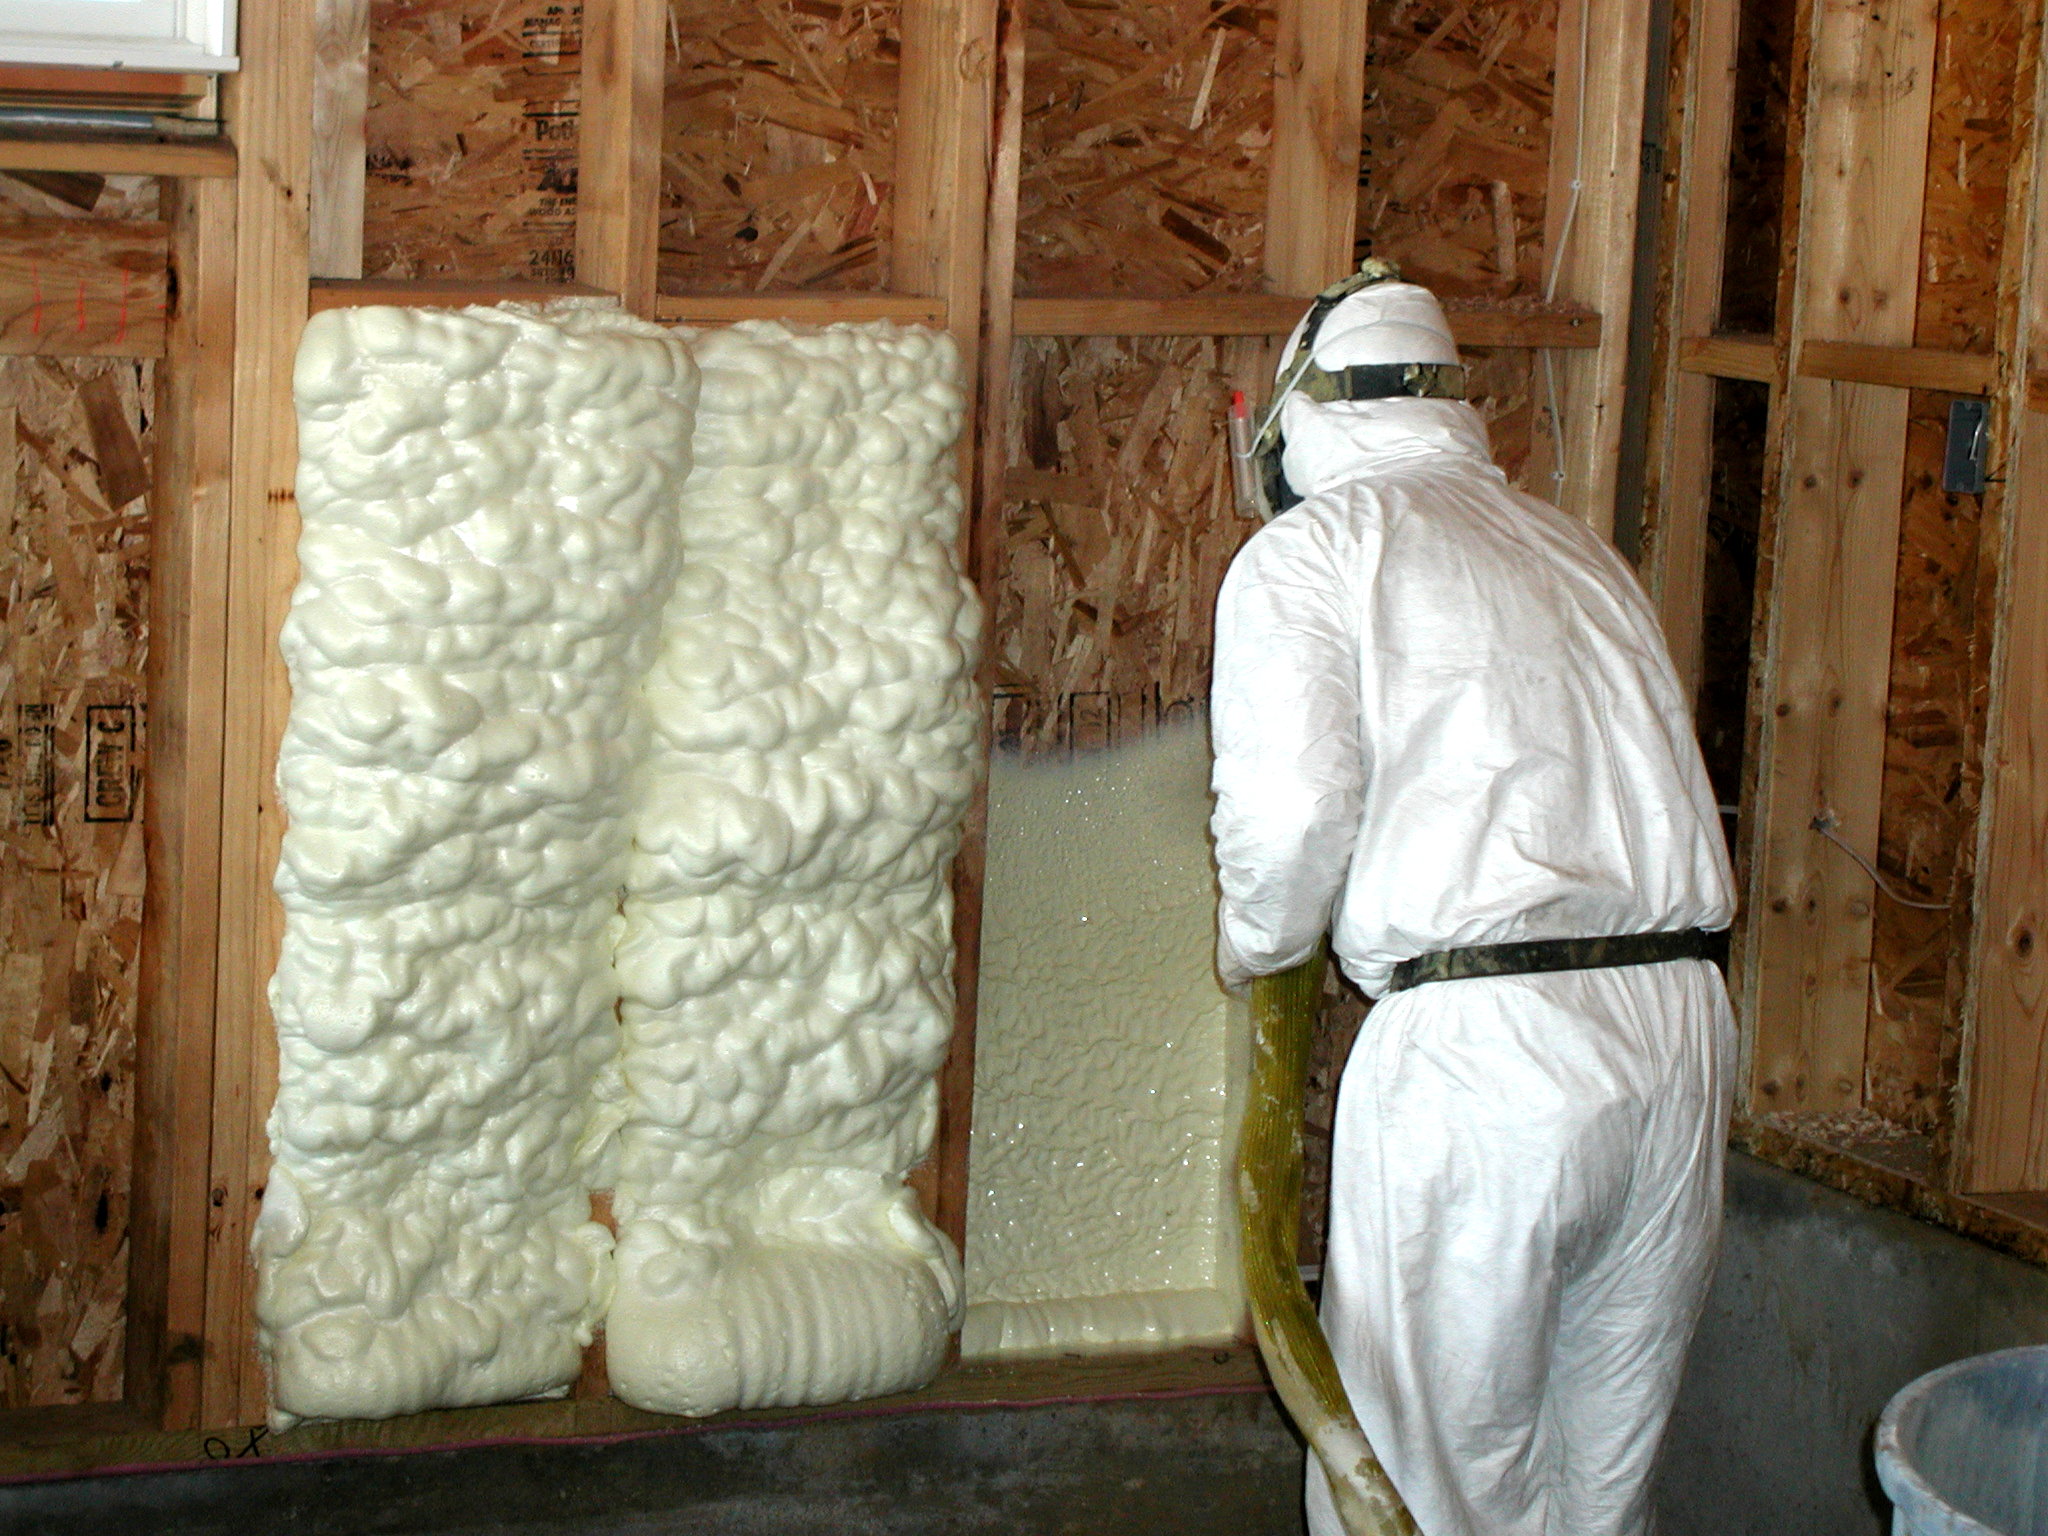
By the way, as you read the other case studies, you may notice I’m now a huge fan of closed cell spray foam. There’s a simple reason: it’s really freaking effective. Getting this same result with another product in such a weird space is likely impossible, and would have involved 2-5 times the labor. In this case, it also provided the insulation we wanted at the same time. So while it’s not the healthiest stuff during application nor is it as environmentally friendly as I’d like, the stuff just works.
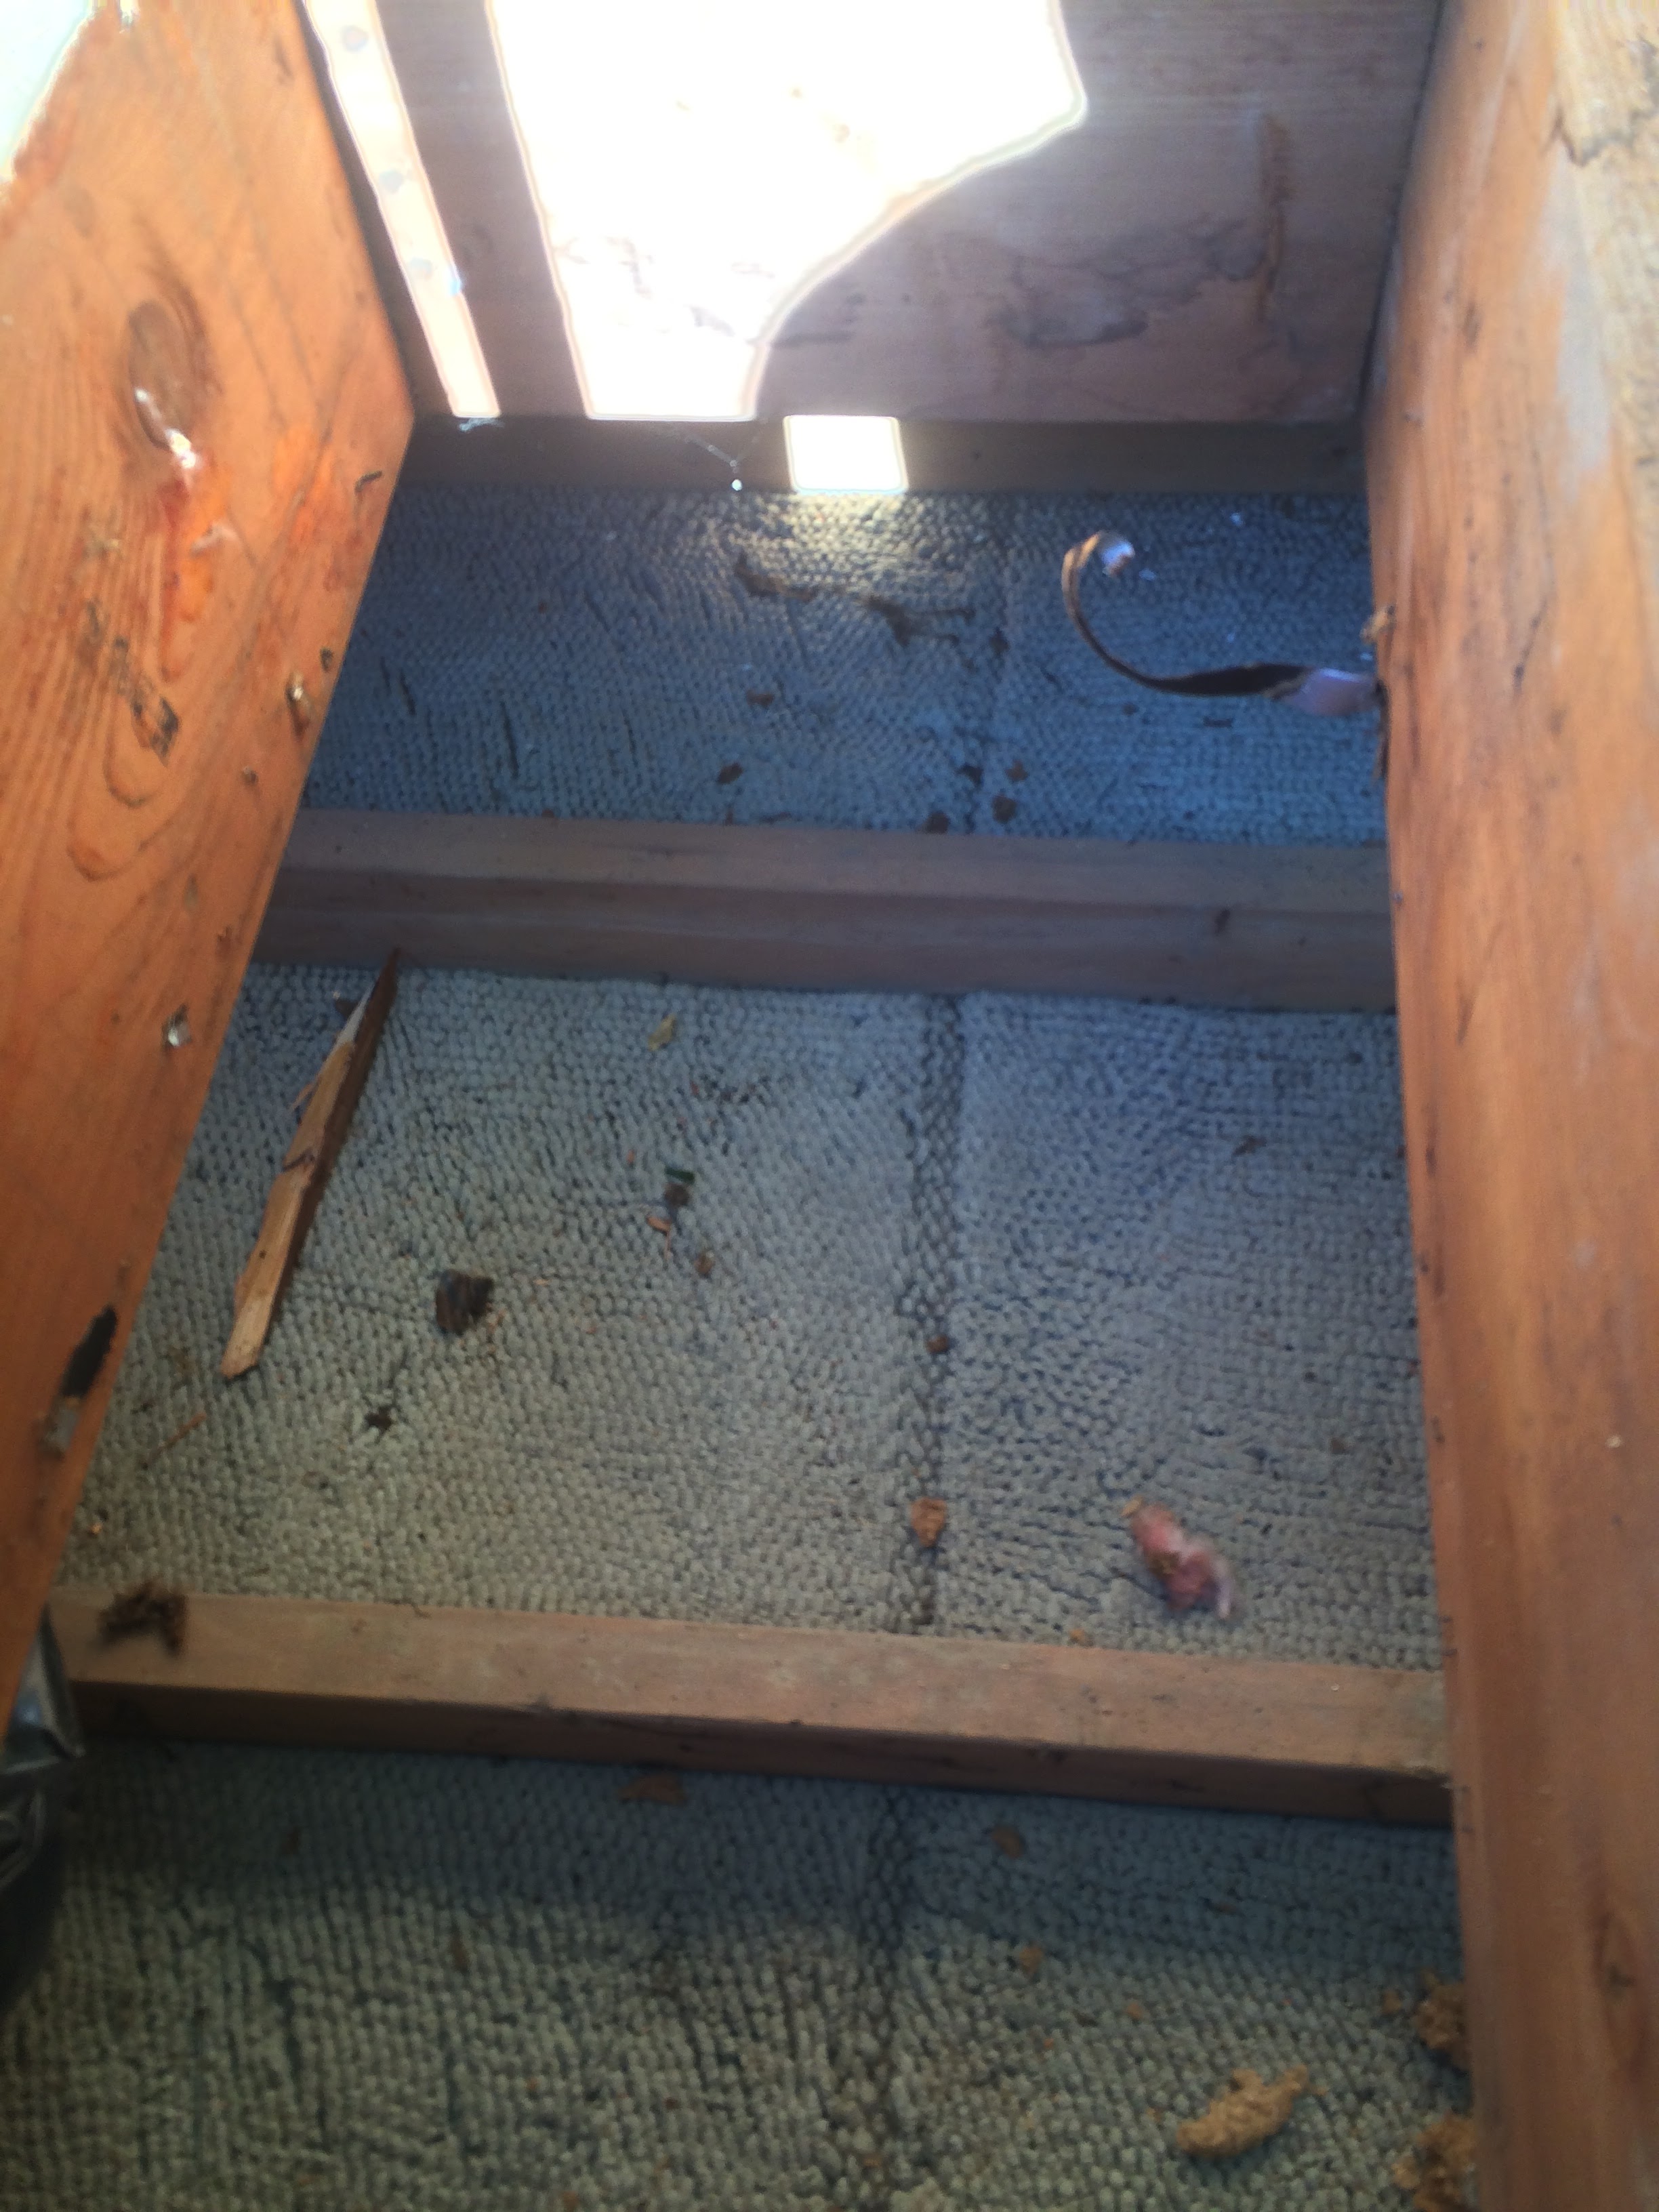
You may have noticed the laundry chute at the top of the stairs. It was also a problem:
Lo and behold, the laundry chute went right through the attic I just showed, just to the left of the picture:
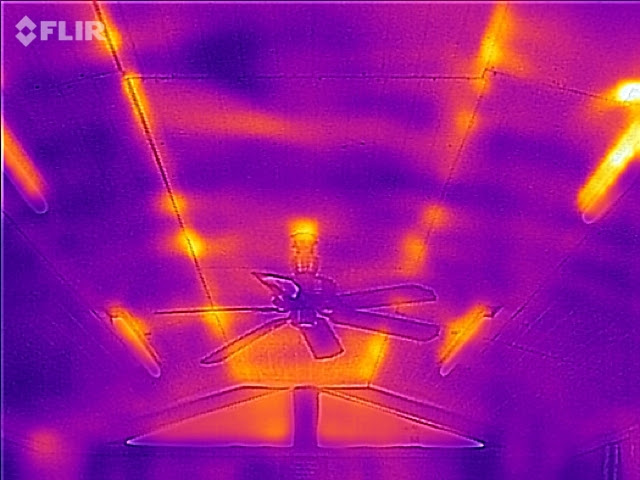
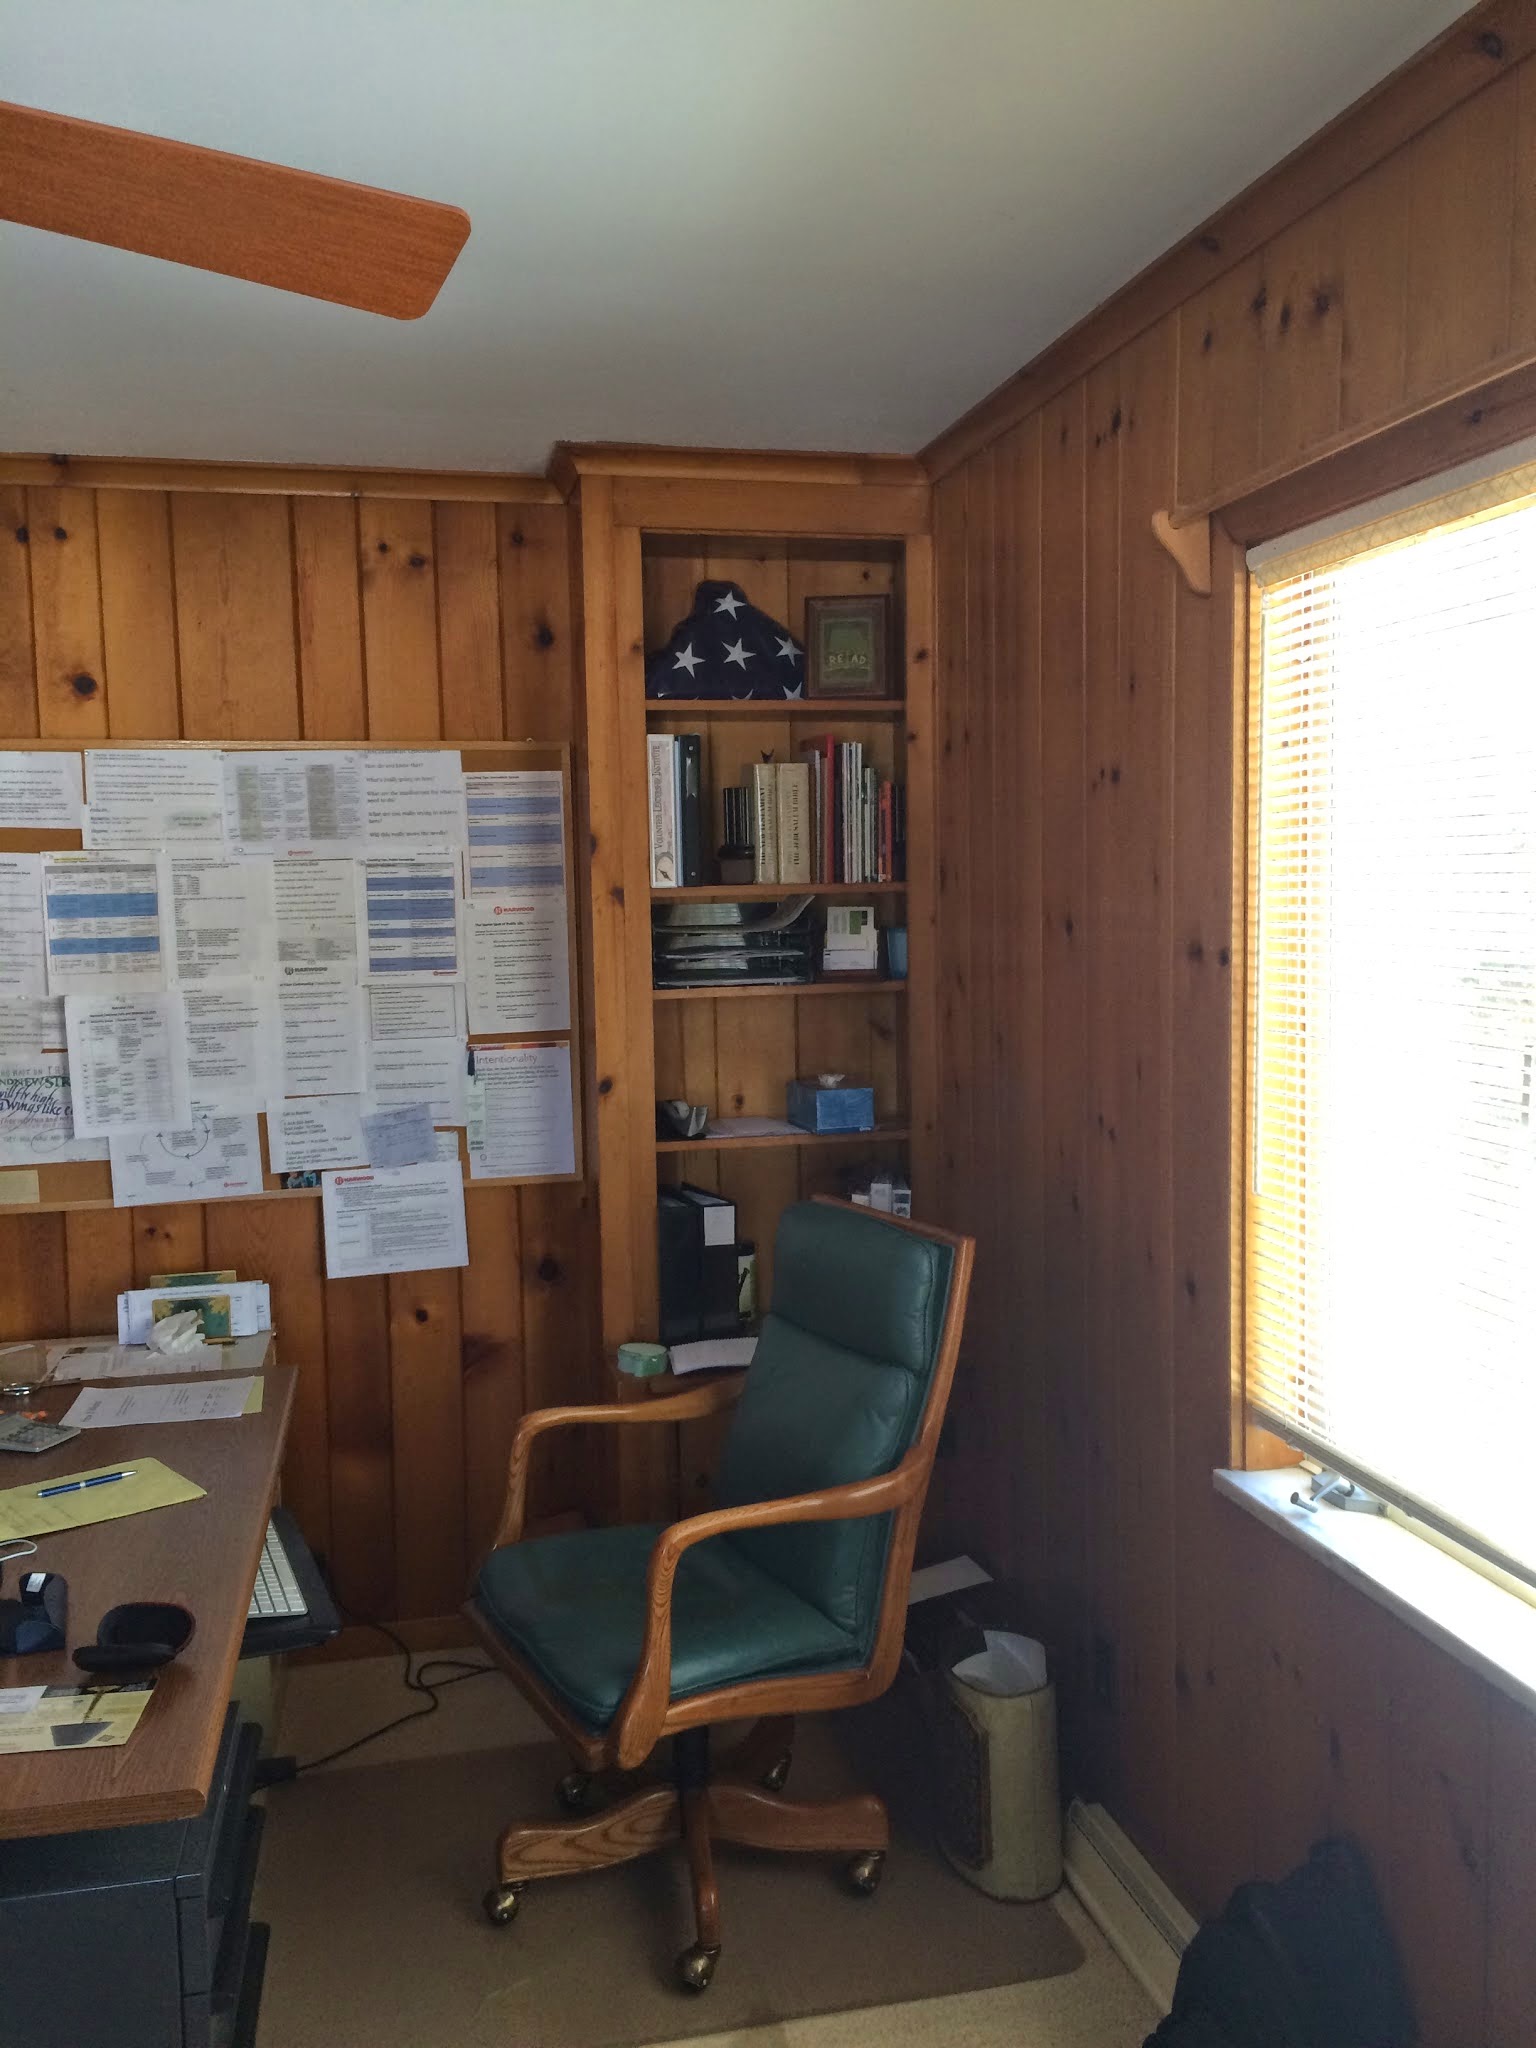
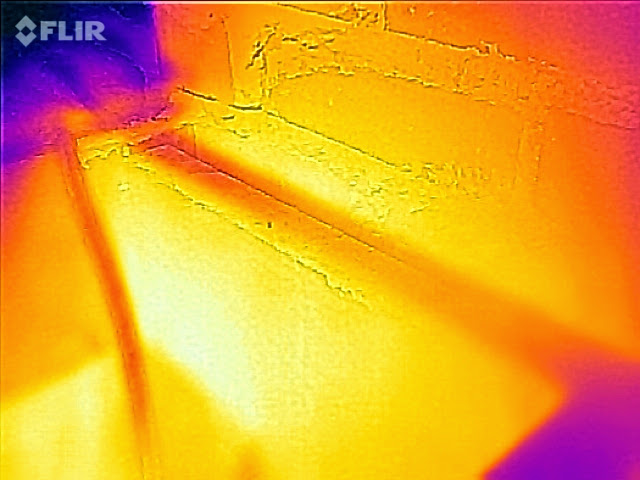
The laundry chute got the snot foamed out of it too. Next up, let’s look at Carlton’s office:
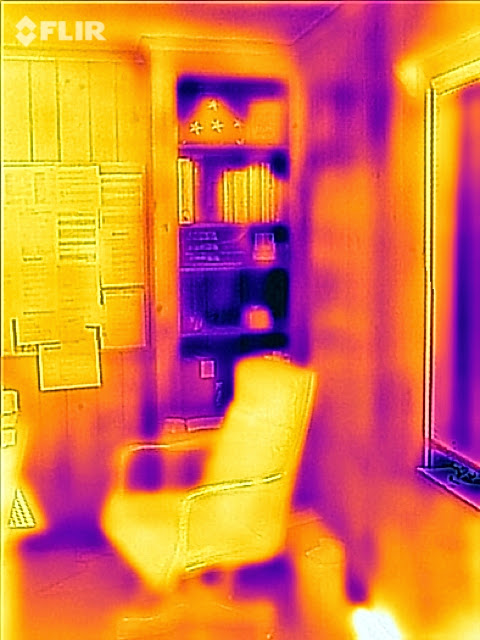
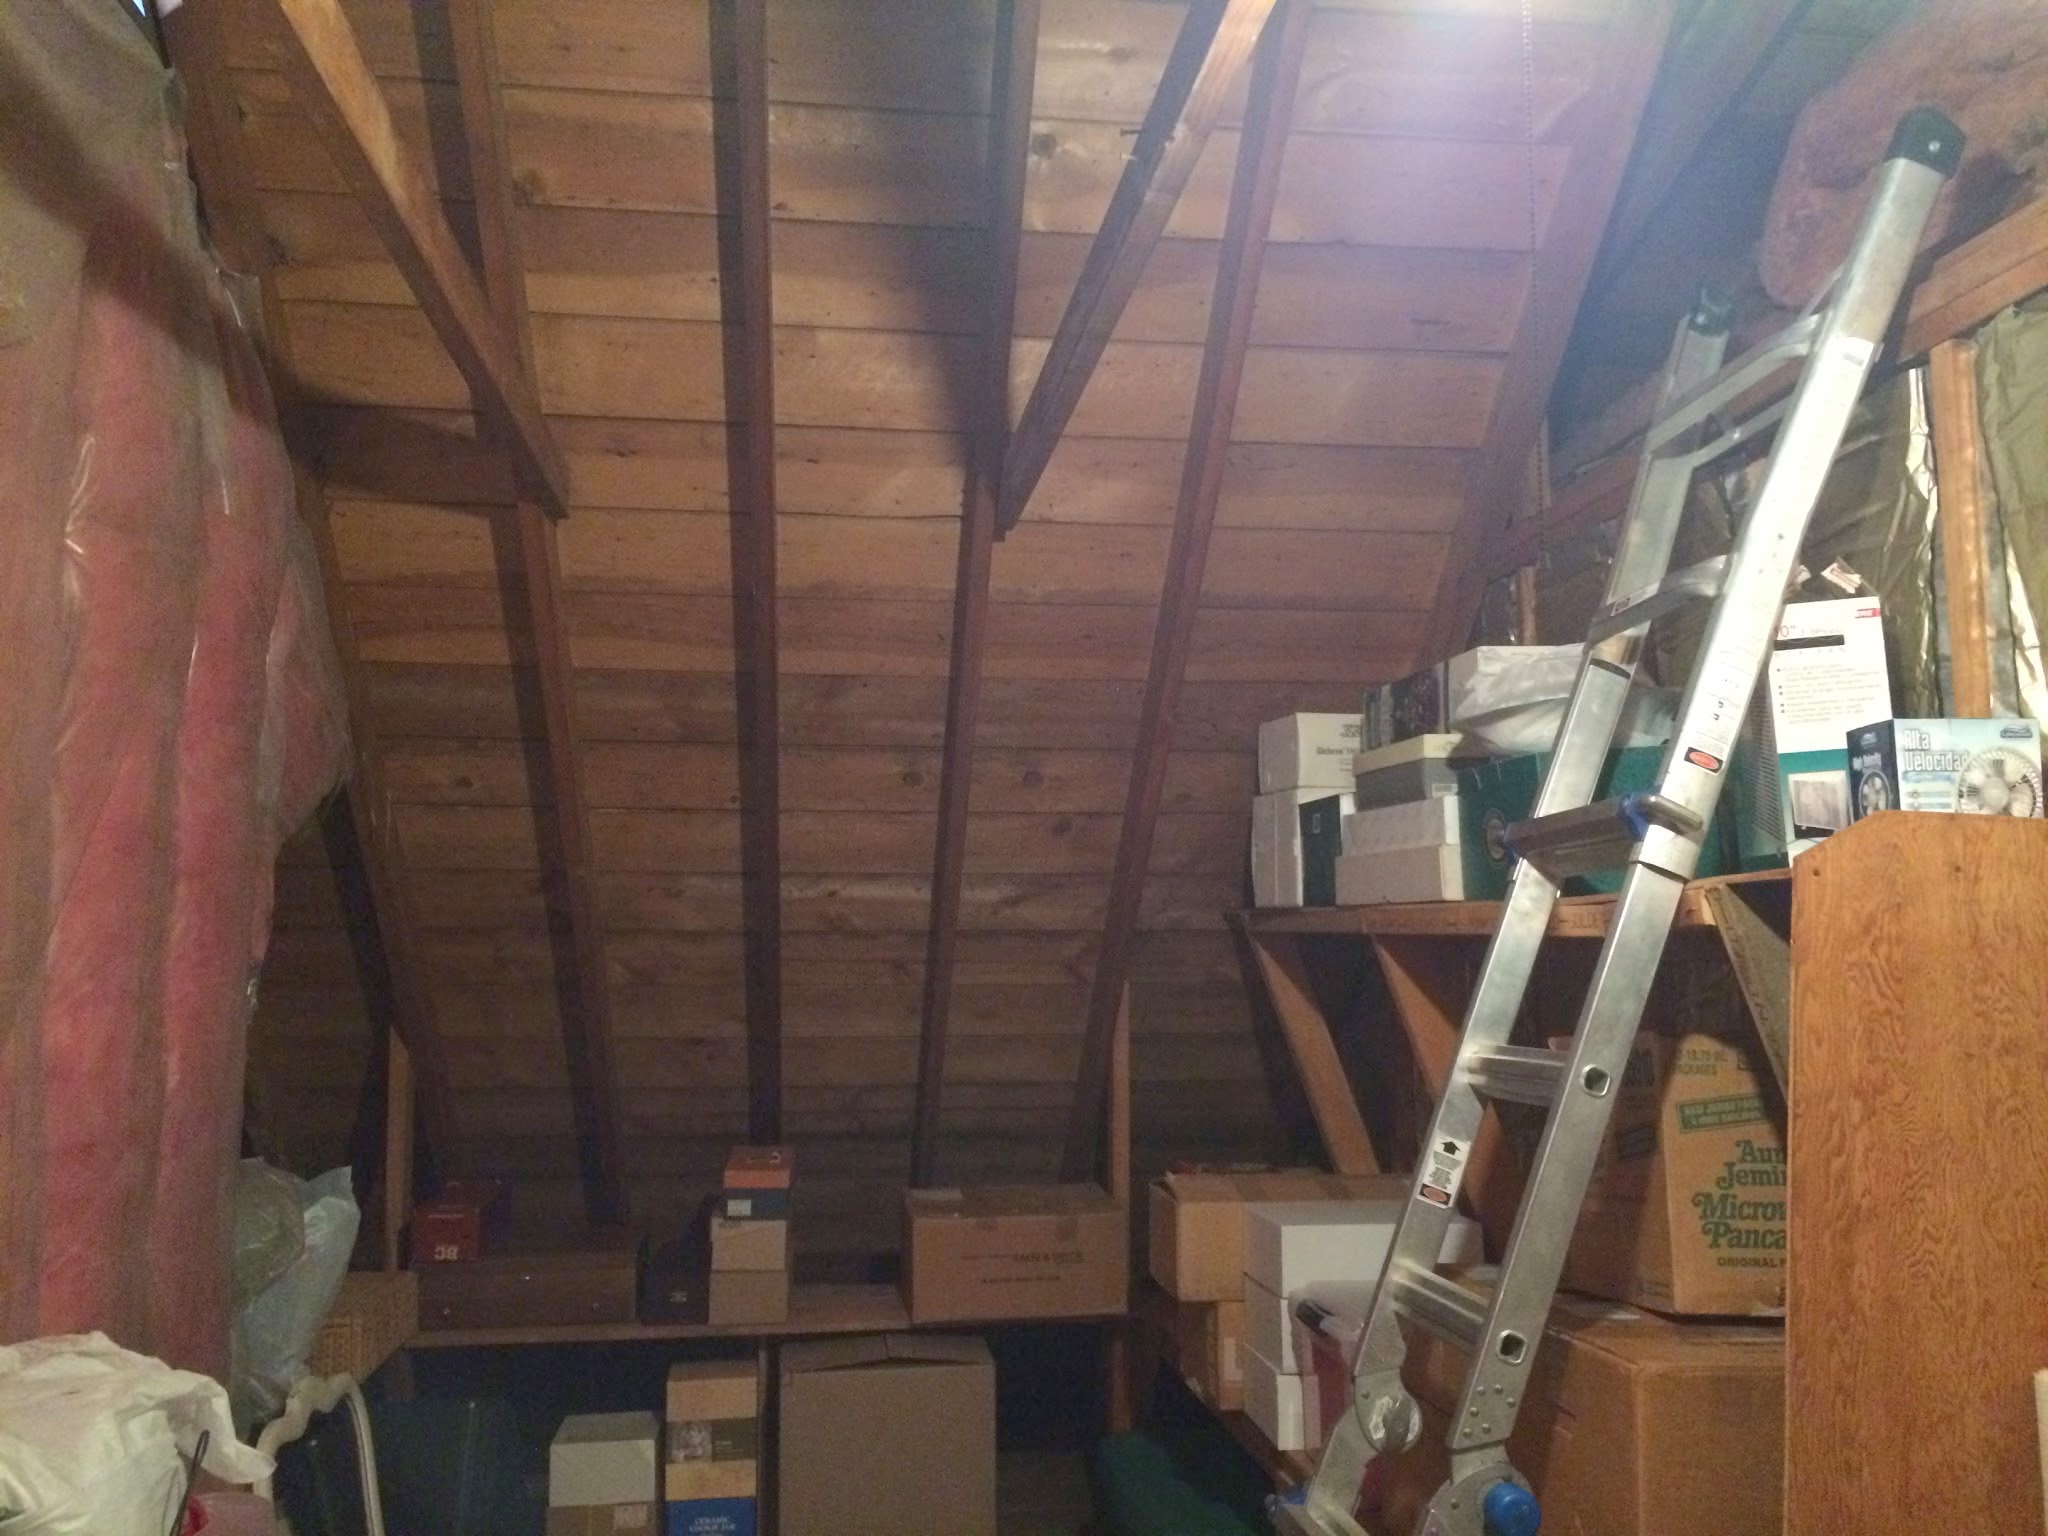
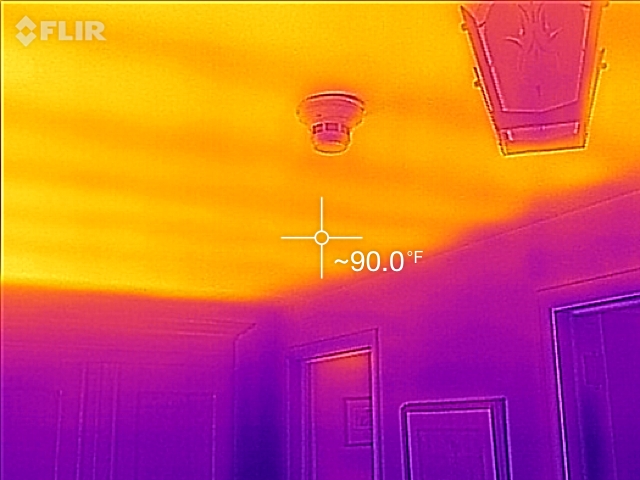
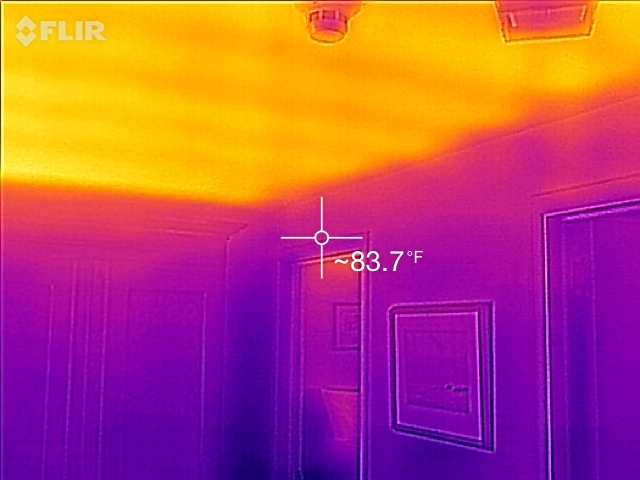
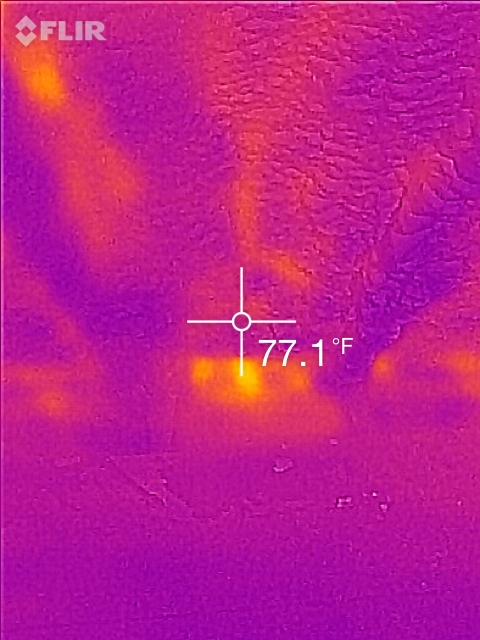
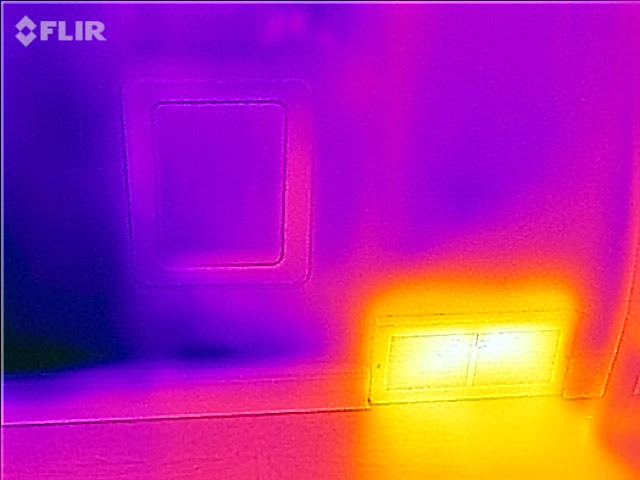
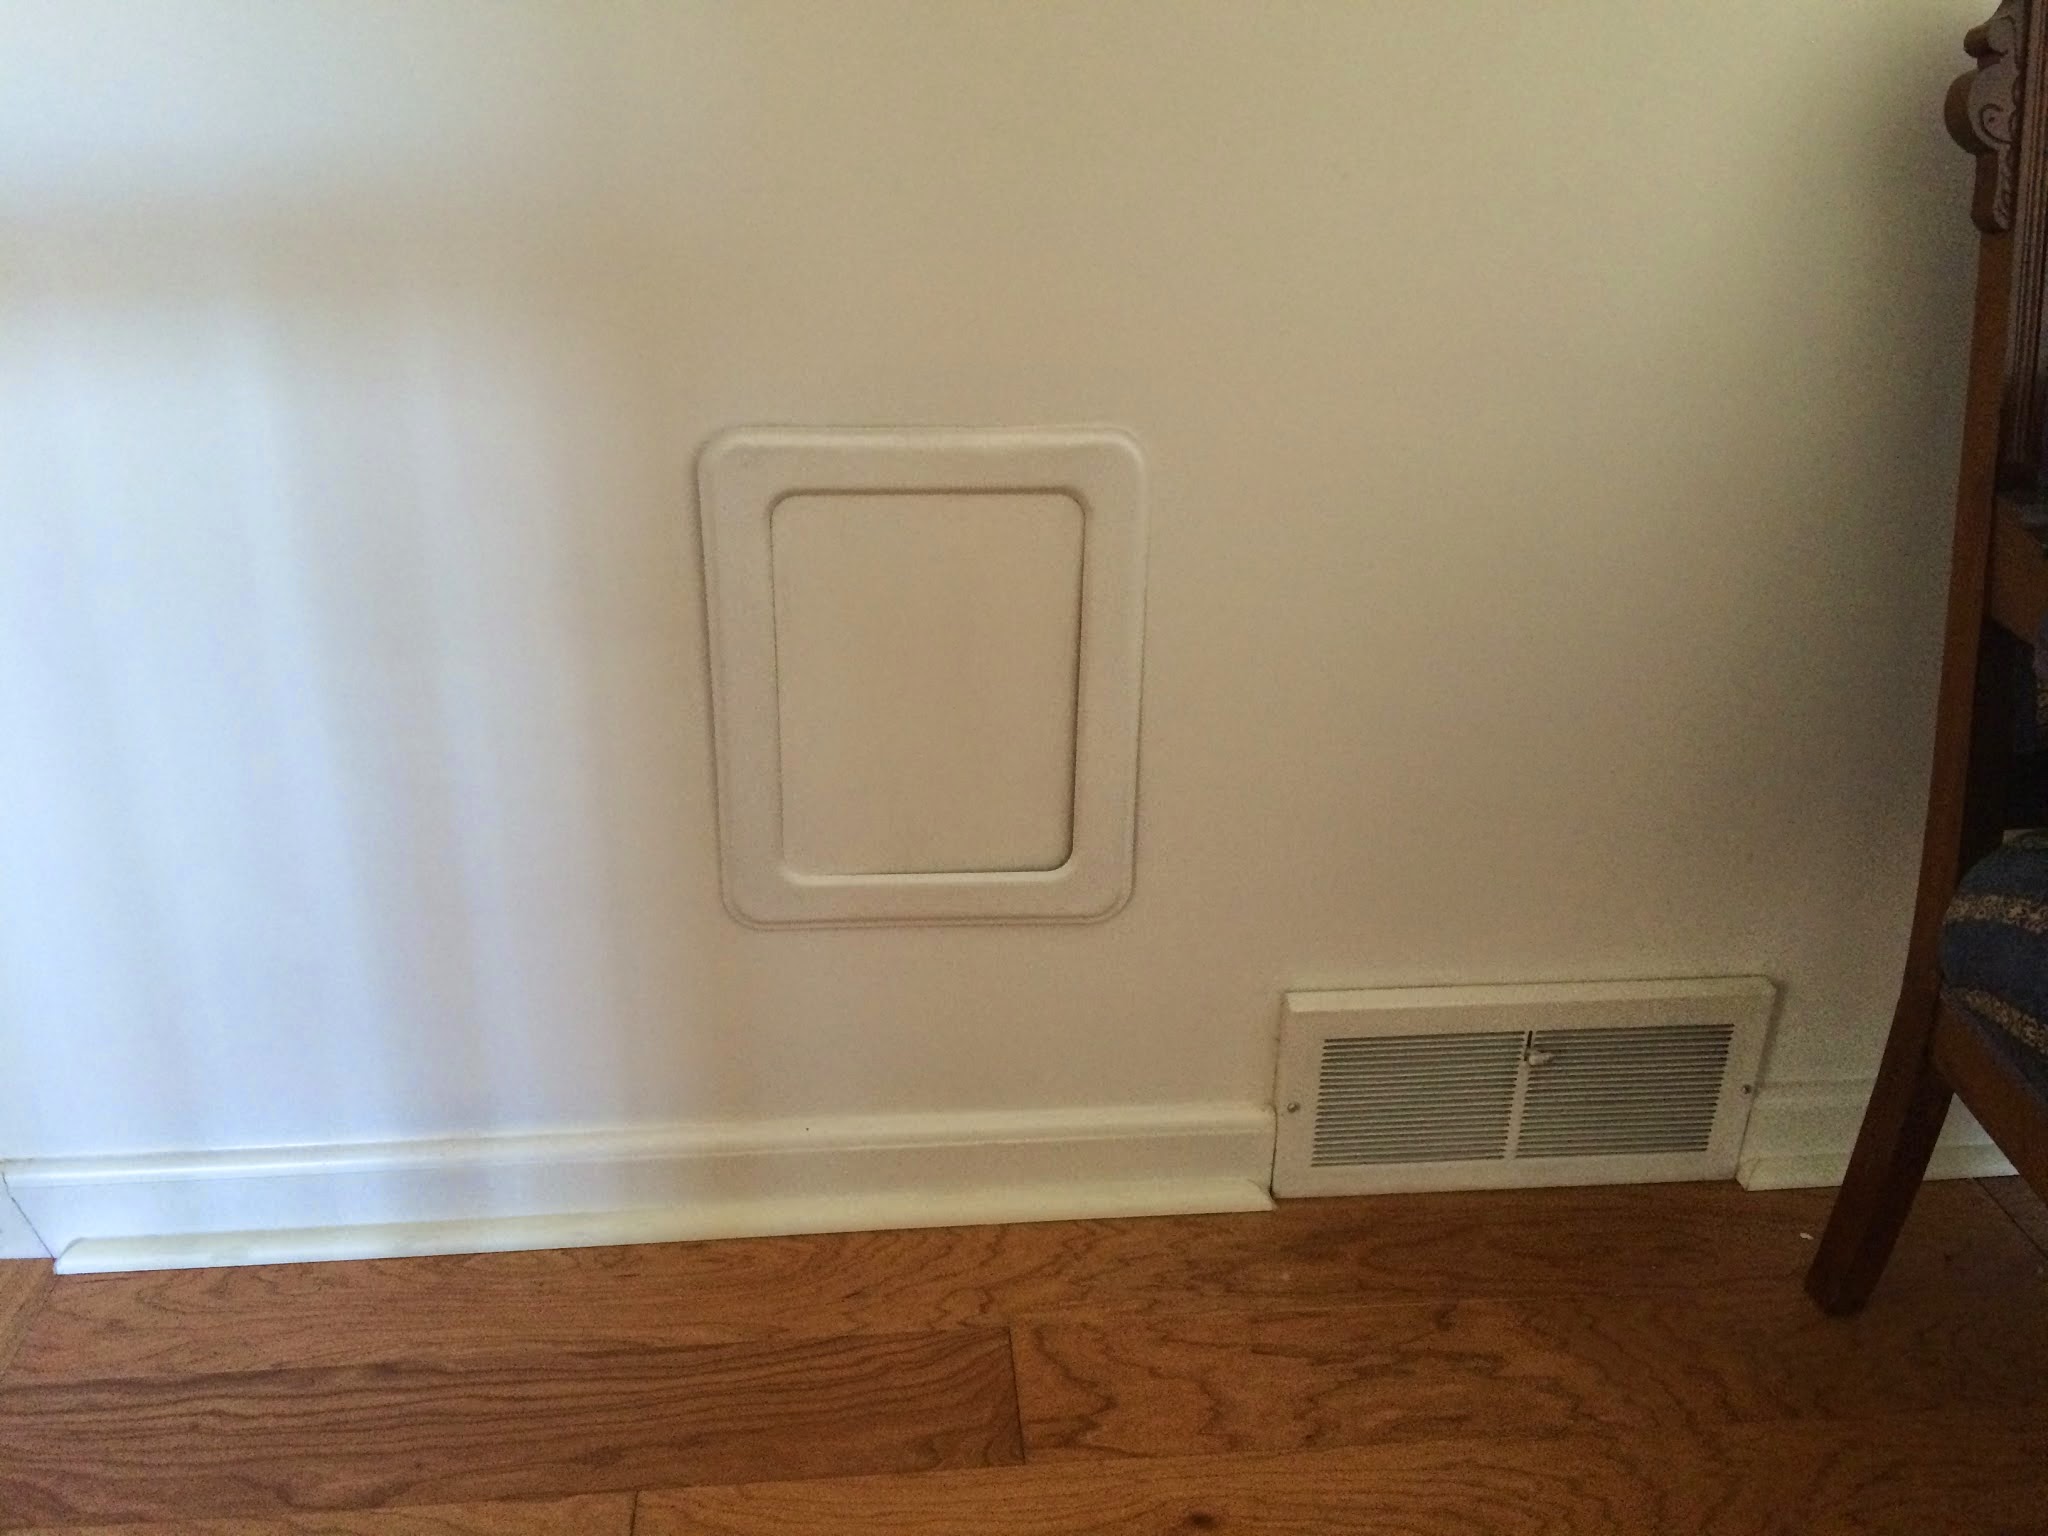
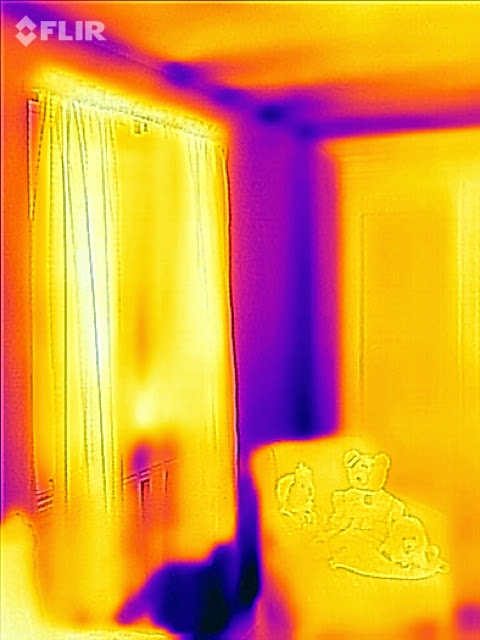
Note how cold the shelves are behind the chair. It turned out that there was a hole in the ceiling right above the shelves. It got foamed shut later.
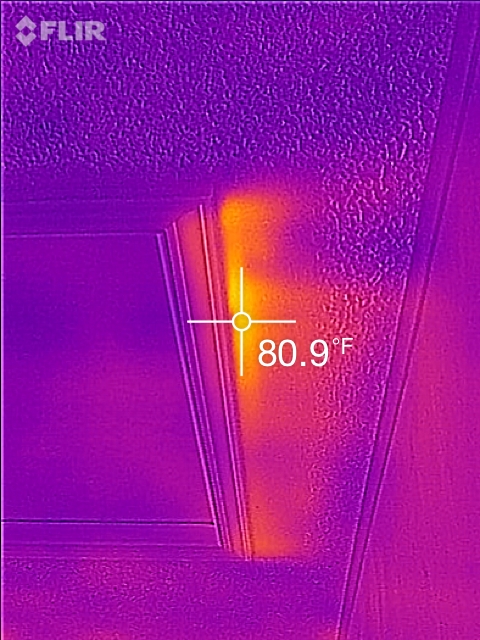
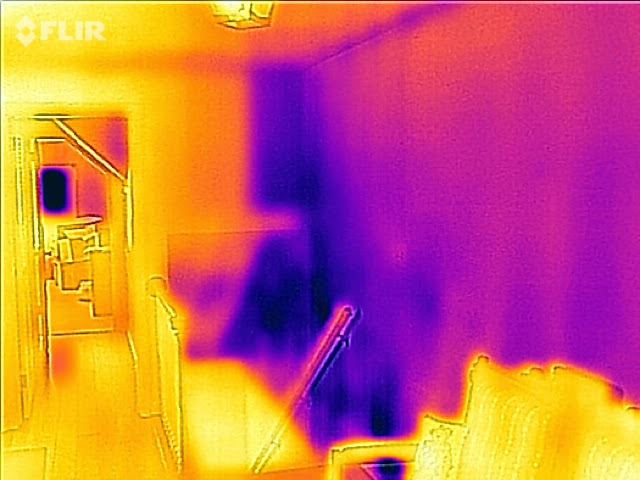
The master bedroom upstairs has a cold wall, sure enough, here it is infrared:
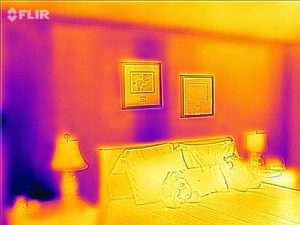
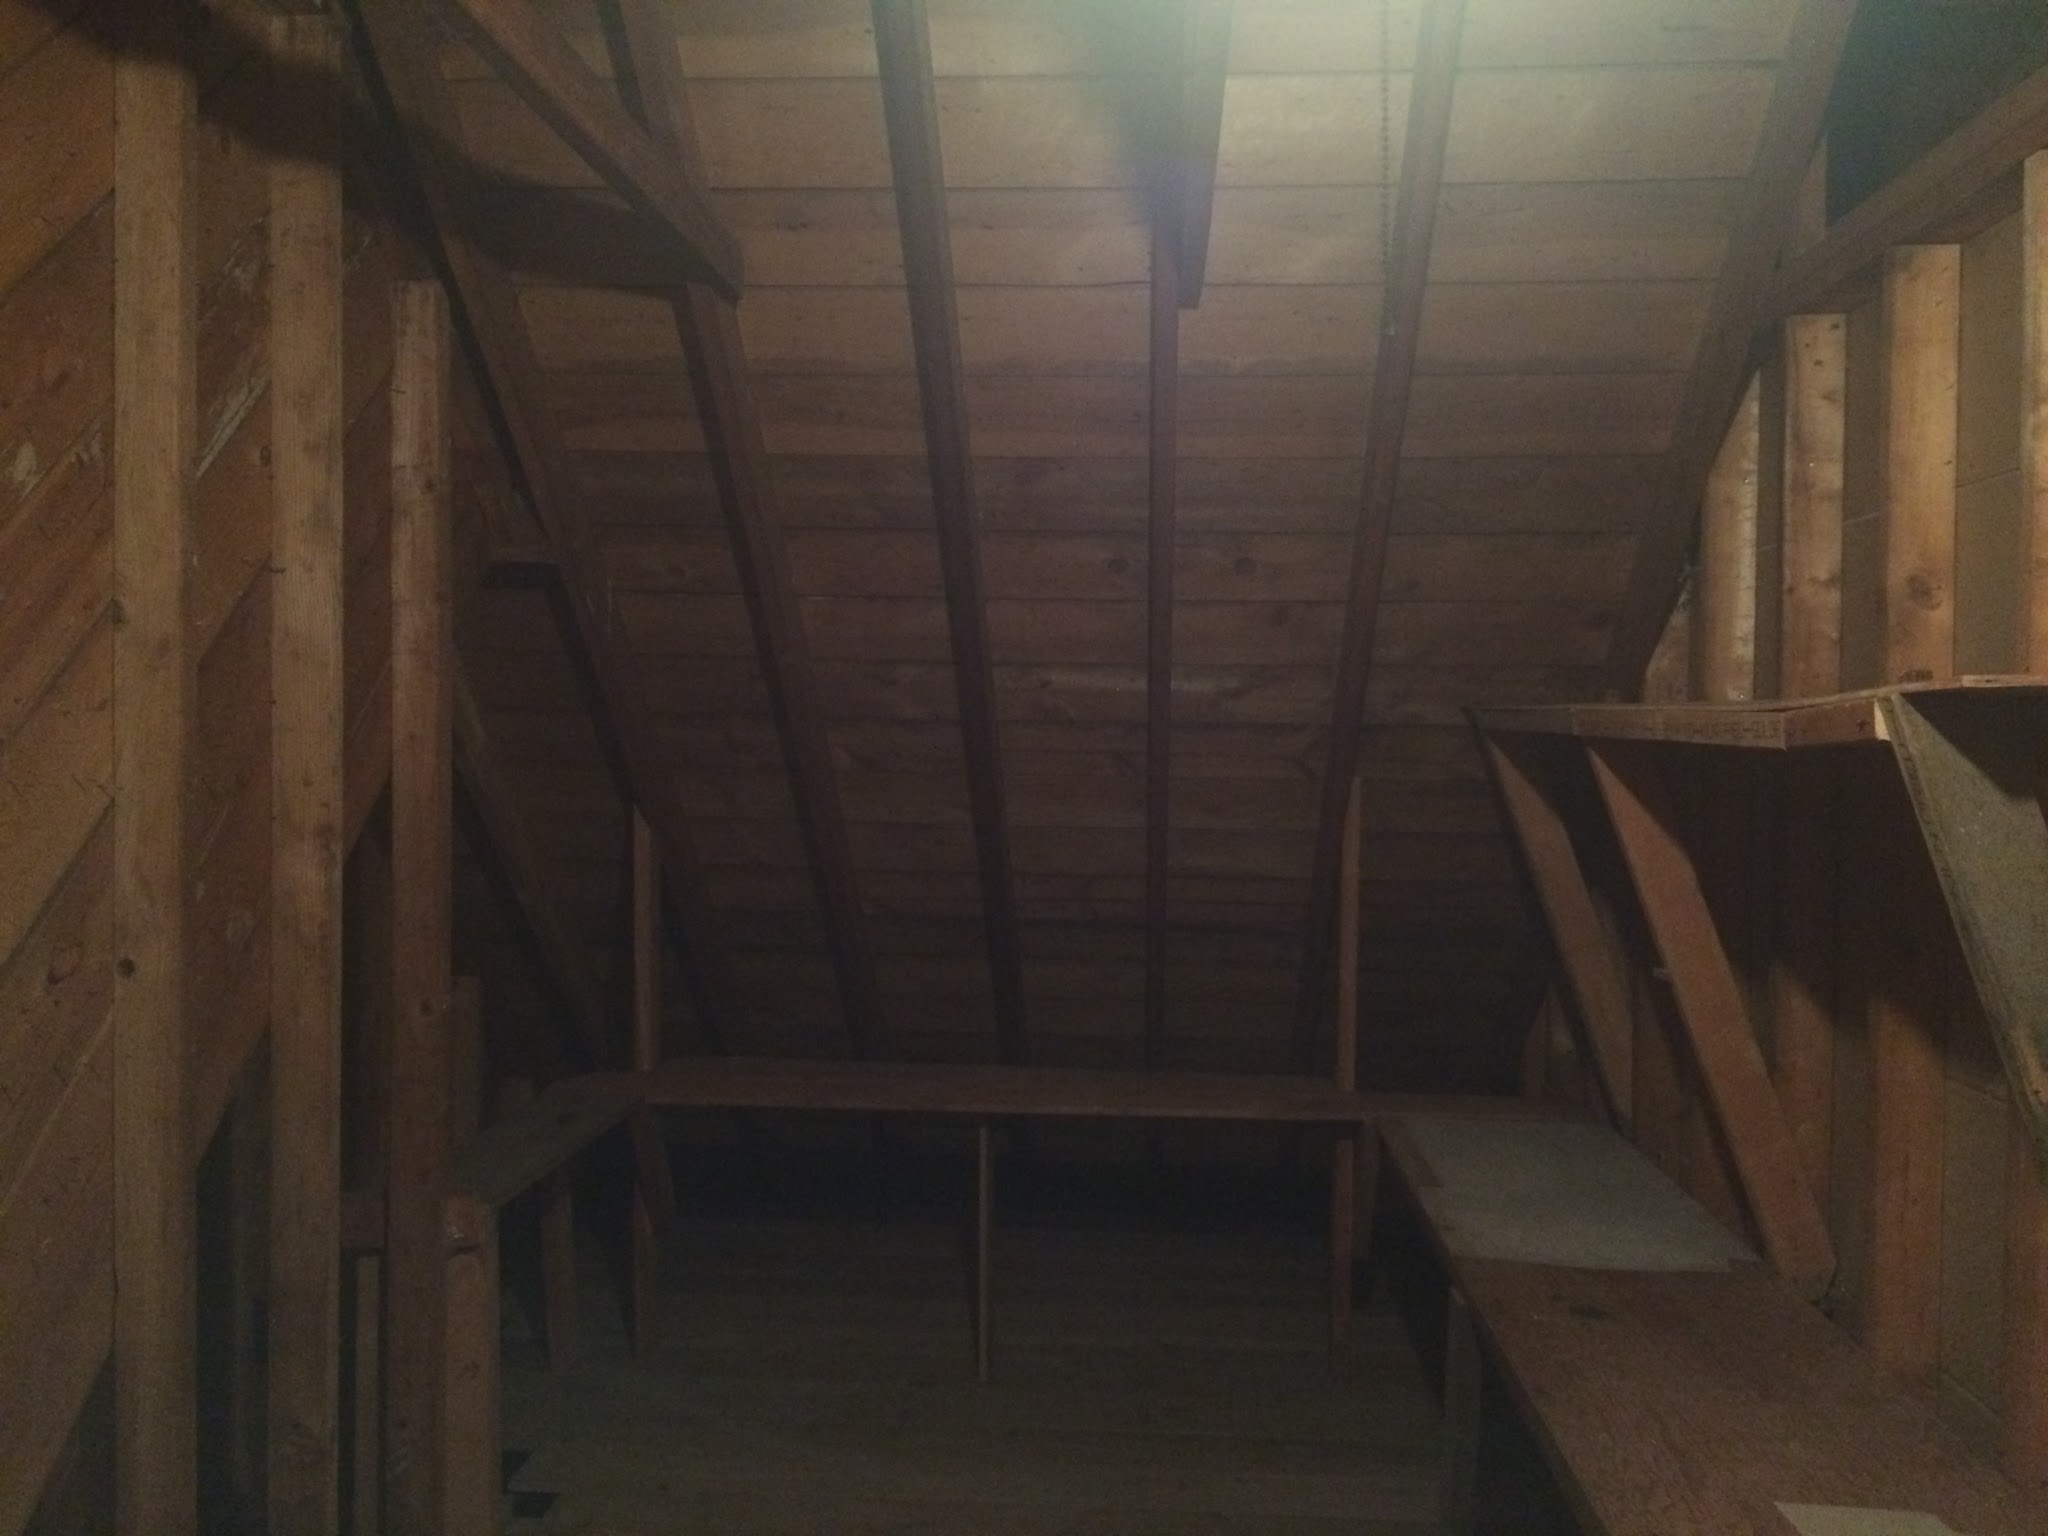
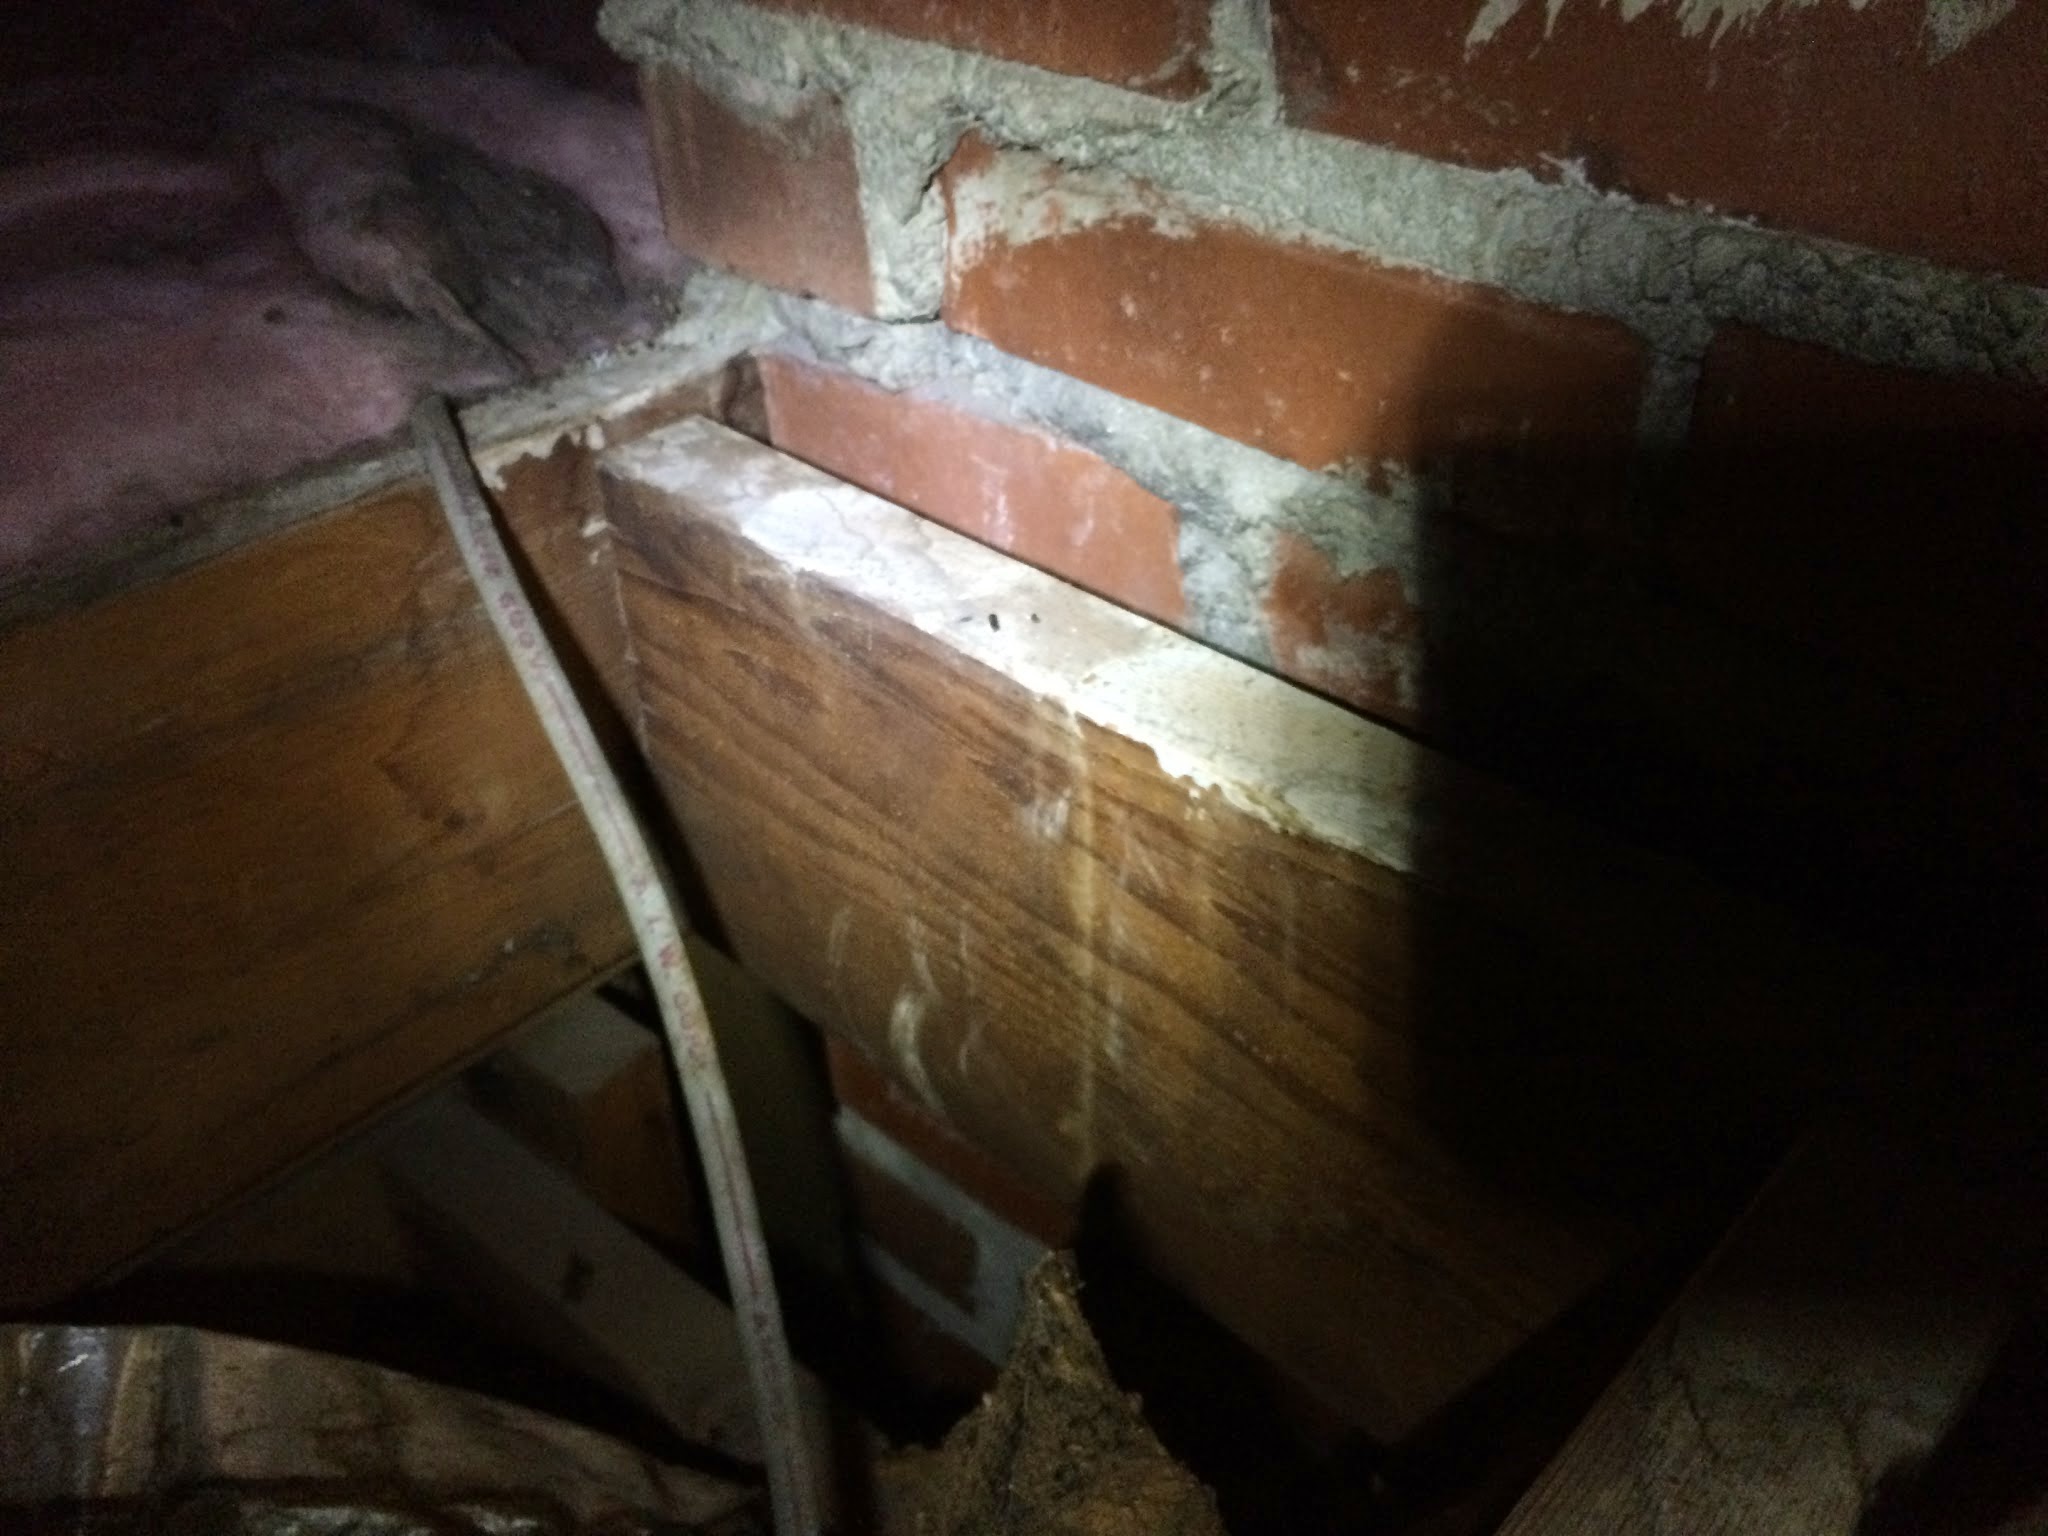
This wall should be all yellow. It’s not. The pink streak in the middle is where the insulation in the wall wasn’t touching the drywall. There is a rather strange attic on the other side of the wall that is used for storage. That same attic is above Carl’s cold office. Here’s what it looks like:
This attic has a really dumb thing: insulation on the wall on the left with a giant gable vent for attic ventilation above it. That insulation was as effective as a coat on a snowman:
It’s a pretty typical mistake that I see where someone just doesn’t quite get how insulation and air sealing works. This is the equivalent of a screen door for a submarine. Worse, the plastic on the wall is likely to hold moisture inside, and could lead to rot, mold, and/or termites. A wall needs to be able to release moisture both directions - to the inside and to the outside. This one can’t.
We ended up bringing this space inside the house by spray foaming the roof deck, walls, and gable vent. It’s now temperature controlled storage. The office and the master bedroom have both become more comfortable because of this space being part of the house rather than mostly outdoors.
These issues are only a sampling of what I found during the energy audit. This is a very complicated home with a lot of problems to solve. The odds of a little bit of insulation or HVAC work making a difference are very small. It needs a substantial solution, or it’s not worth wasting money on.
I delivered recommendations to Carlton and Elaine based on the budget we had agreed on, and we worked together to select what we would execute. Here’s the story of doing the project.
Phase 1 - July 2015
This project ended up being done in two phases. The first phase tackled the majority of the air sealing and insulation work, 10 months later we tackled a few other spots that were inaccessible until the roof was being replaced.
My former foreman Clayton McCune and his brother Cameron were immensely helpful getting the preparation stages of this home completed. The upper attic needed to have the insulation removed. New bath fans needed to be installed and vented through the roof. The crazy knee wall by the cold stairway needed to have sheathing removed so we could see what was underneath. You saw in the photos above that it was totally uninsulated, and we found out that it was immensely leaky as well.
Clay also built a new hatch where the whole house fan had been:
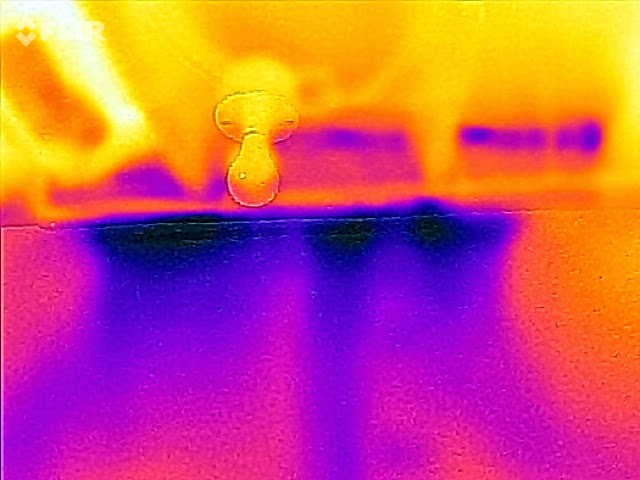
The upper attic had a fair number of opportunities to tackle, here’s one small example, the light fixtures leak quite a bit of air, they are far easier to find and seal when the attic insulation is removed.
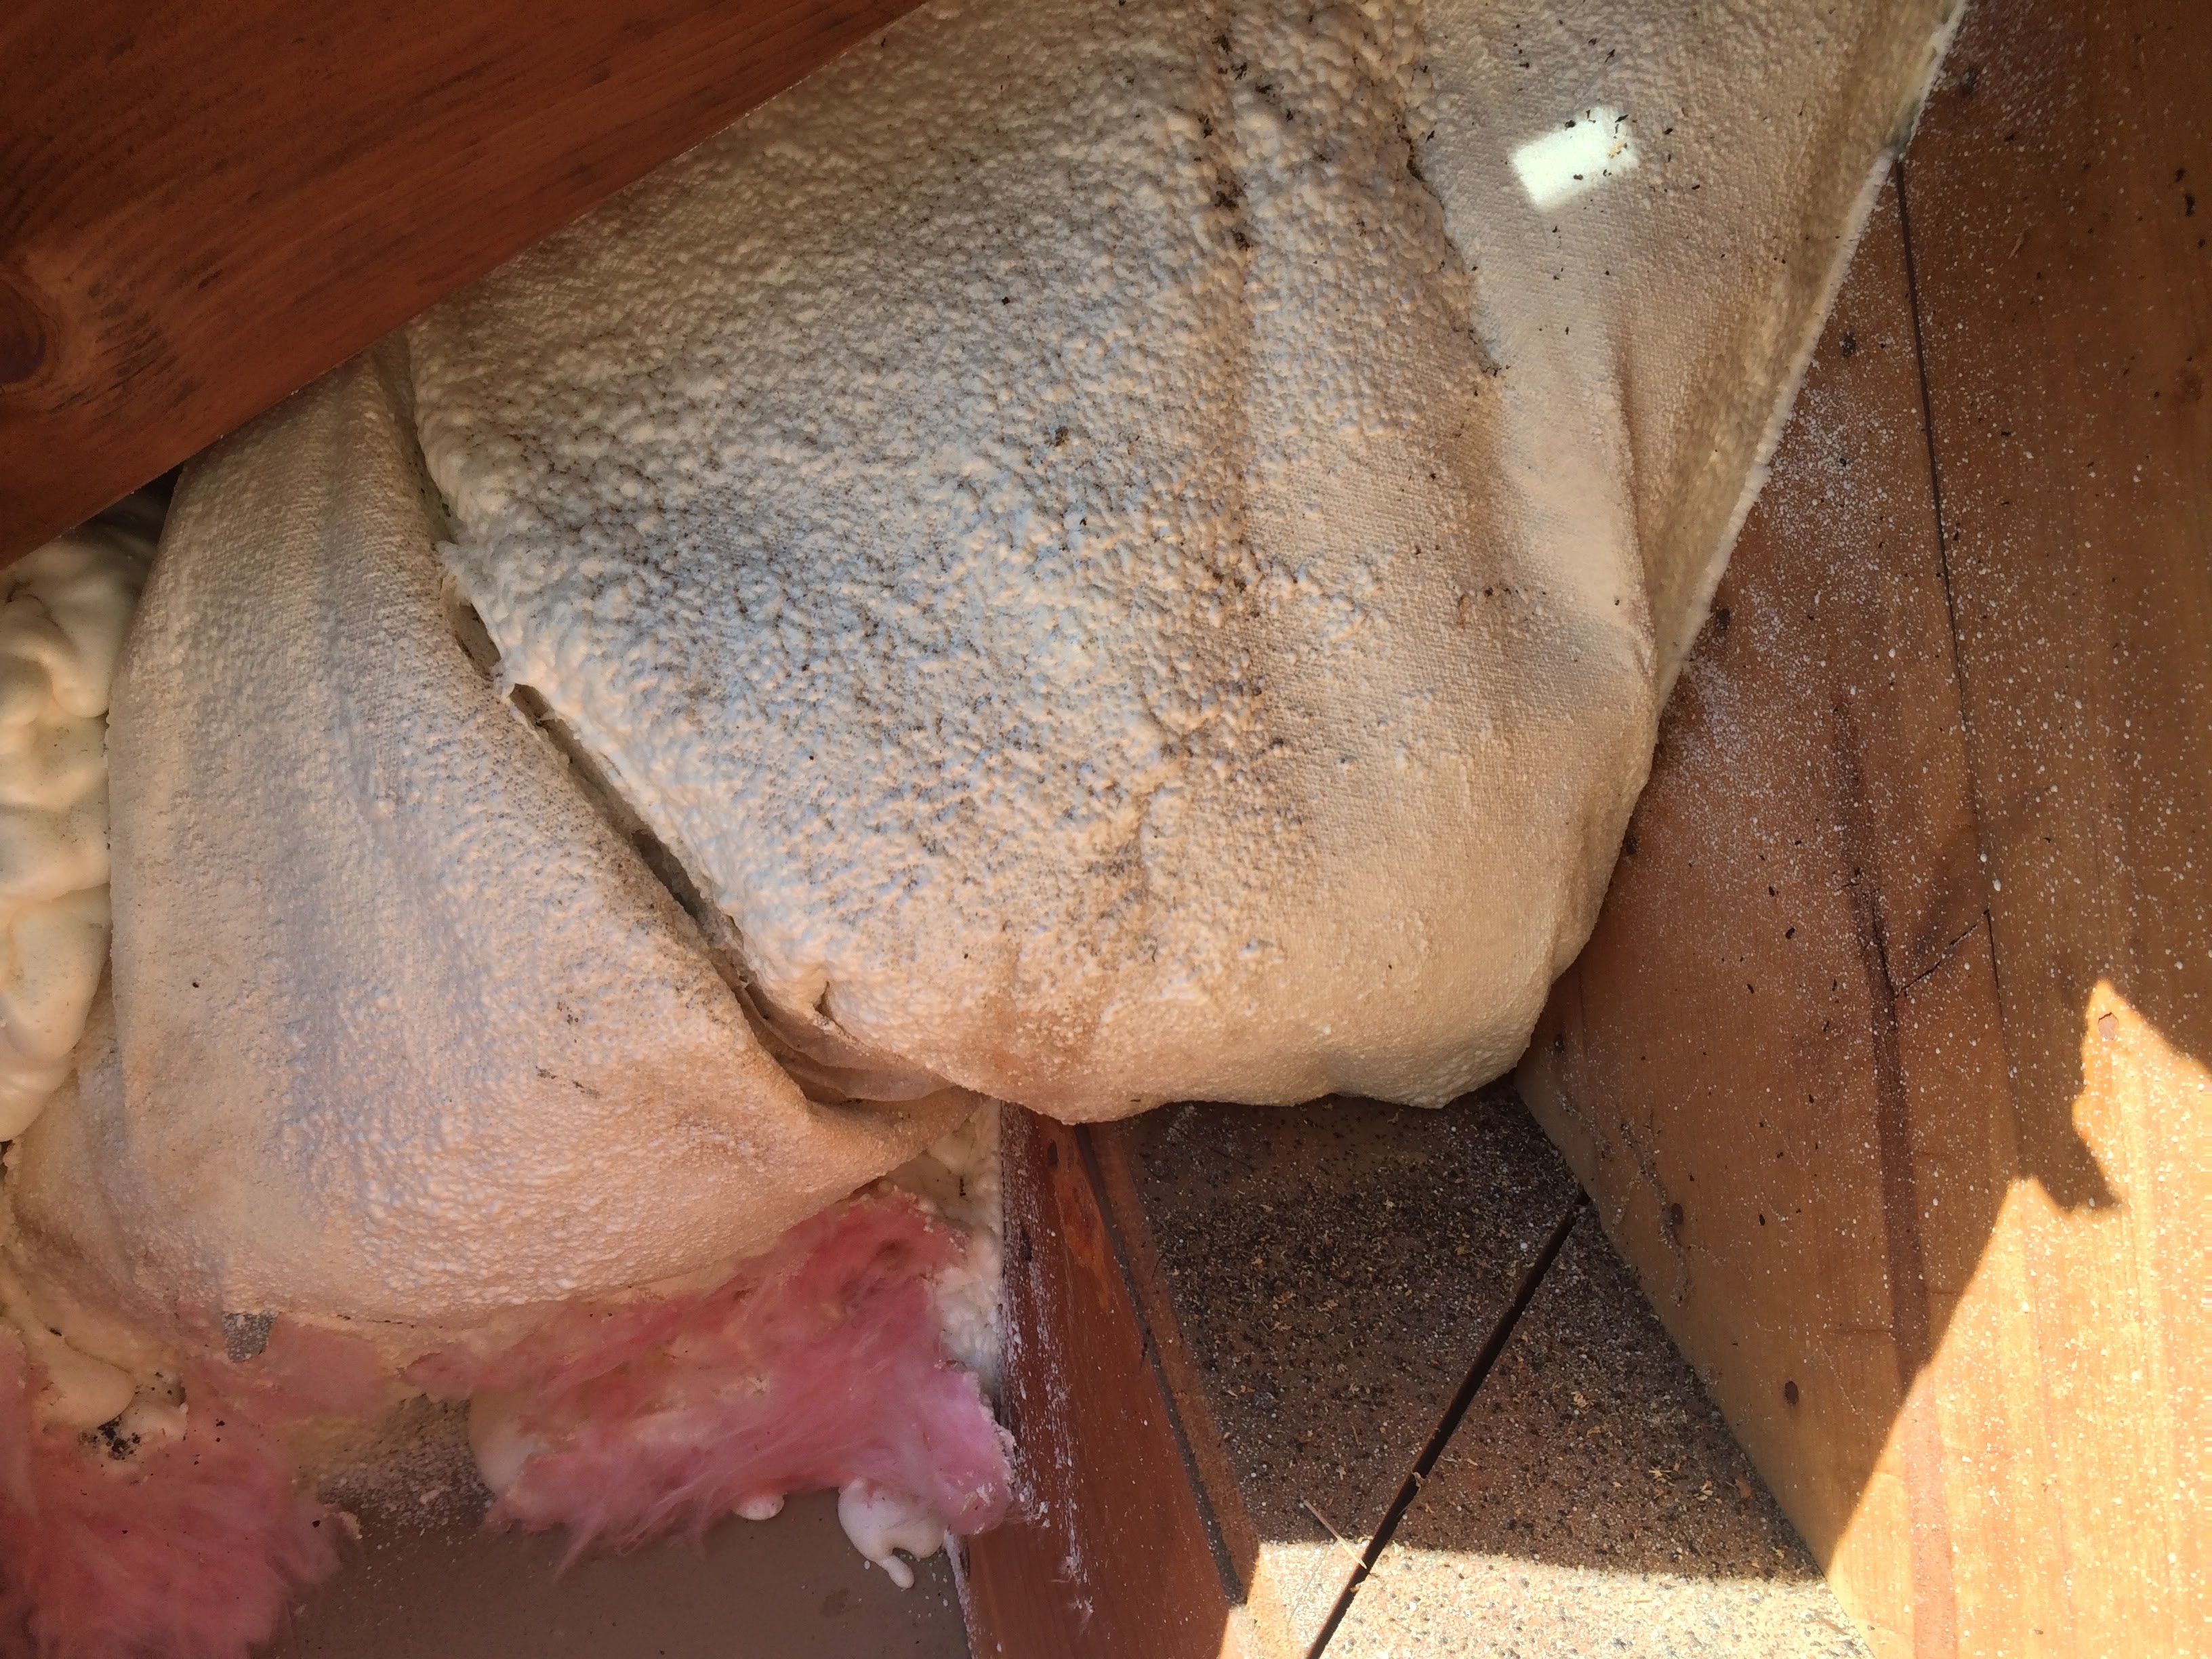
There were a number of “open wall cavities” which are places where you can look down right into the wall of the second floor. They are sources of a lot of heat loss. Removing the insulation let us find more of them. It also gets rid of the critter poo that collects in an attic over time.
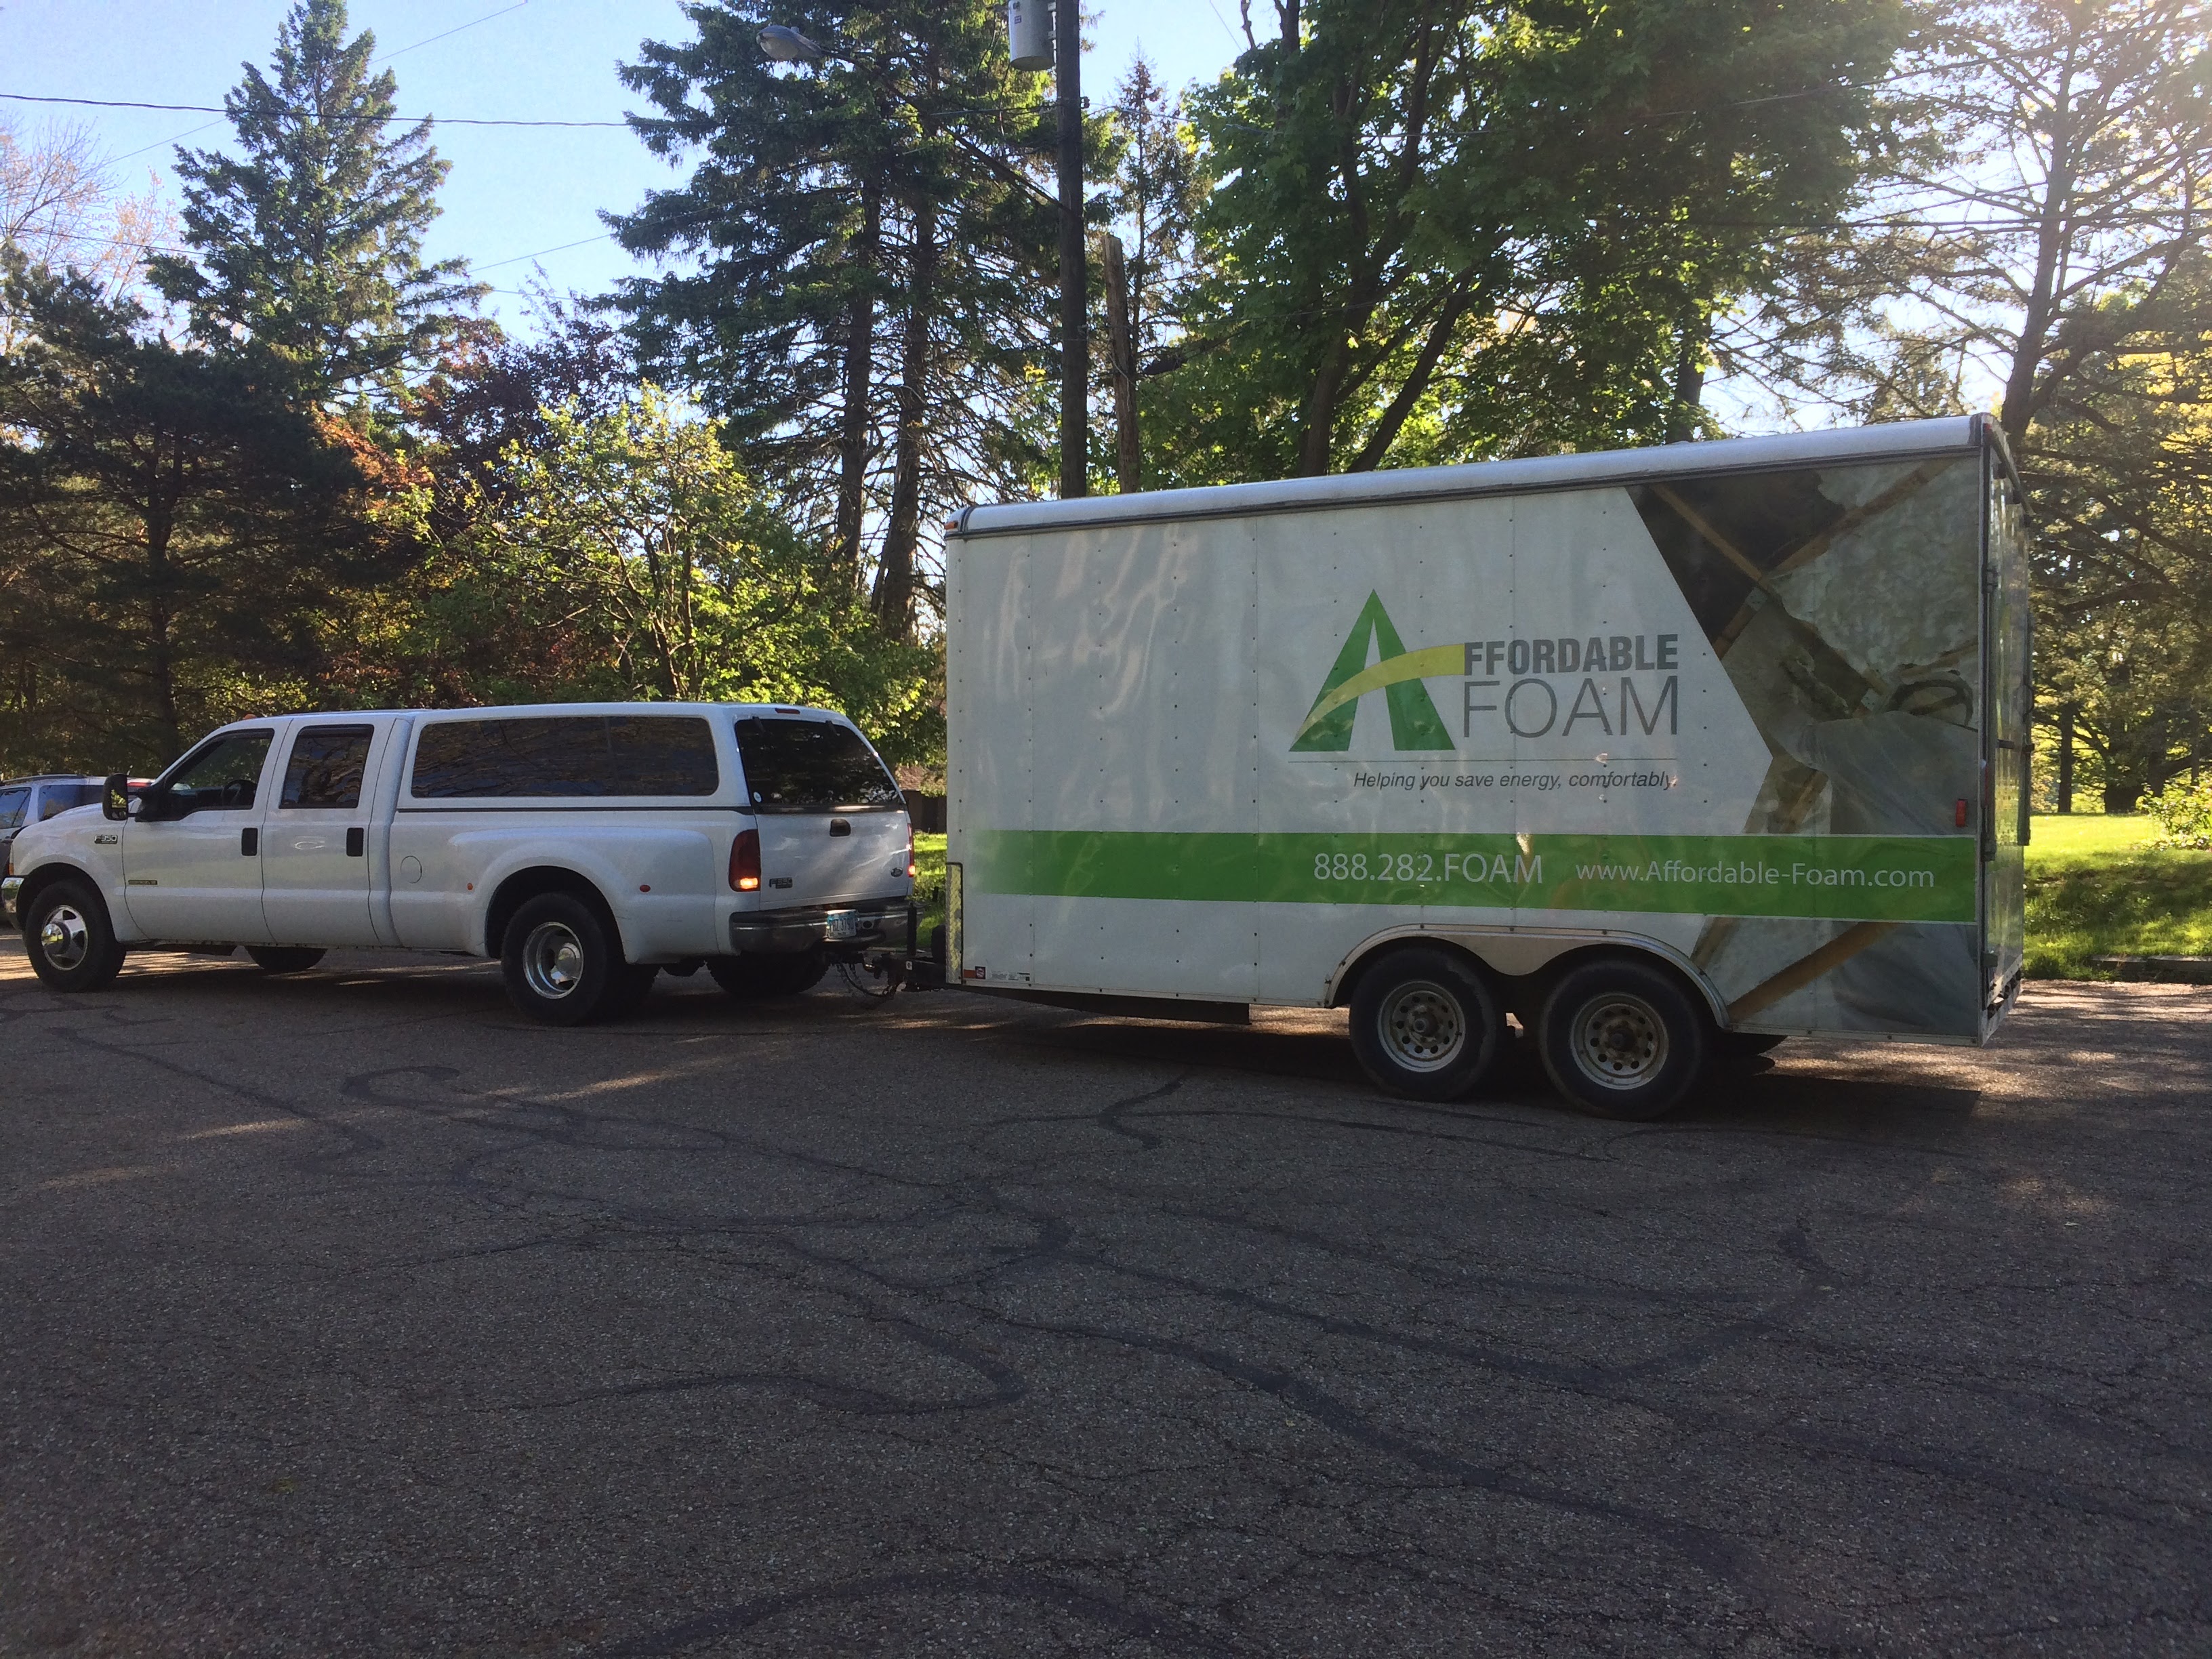
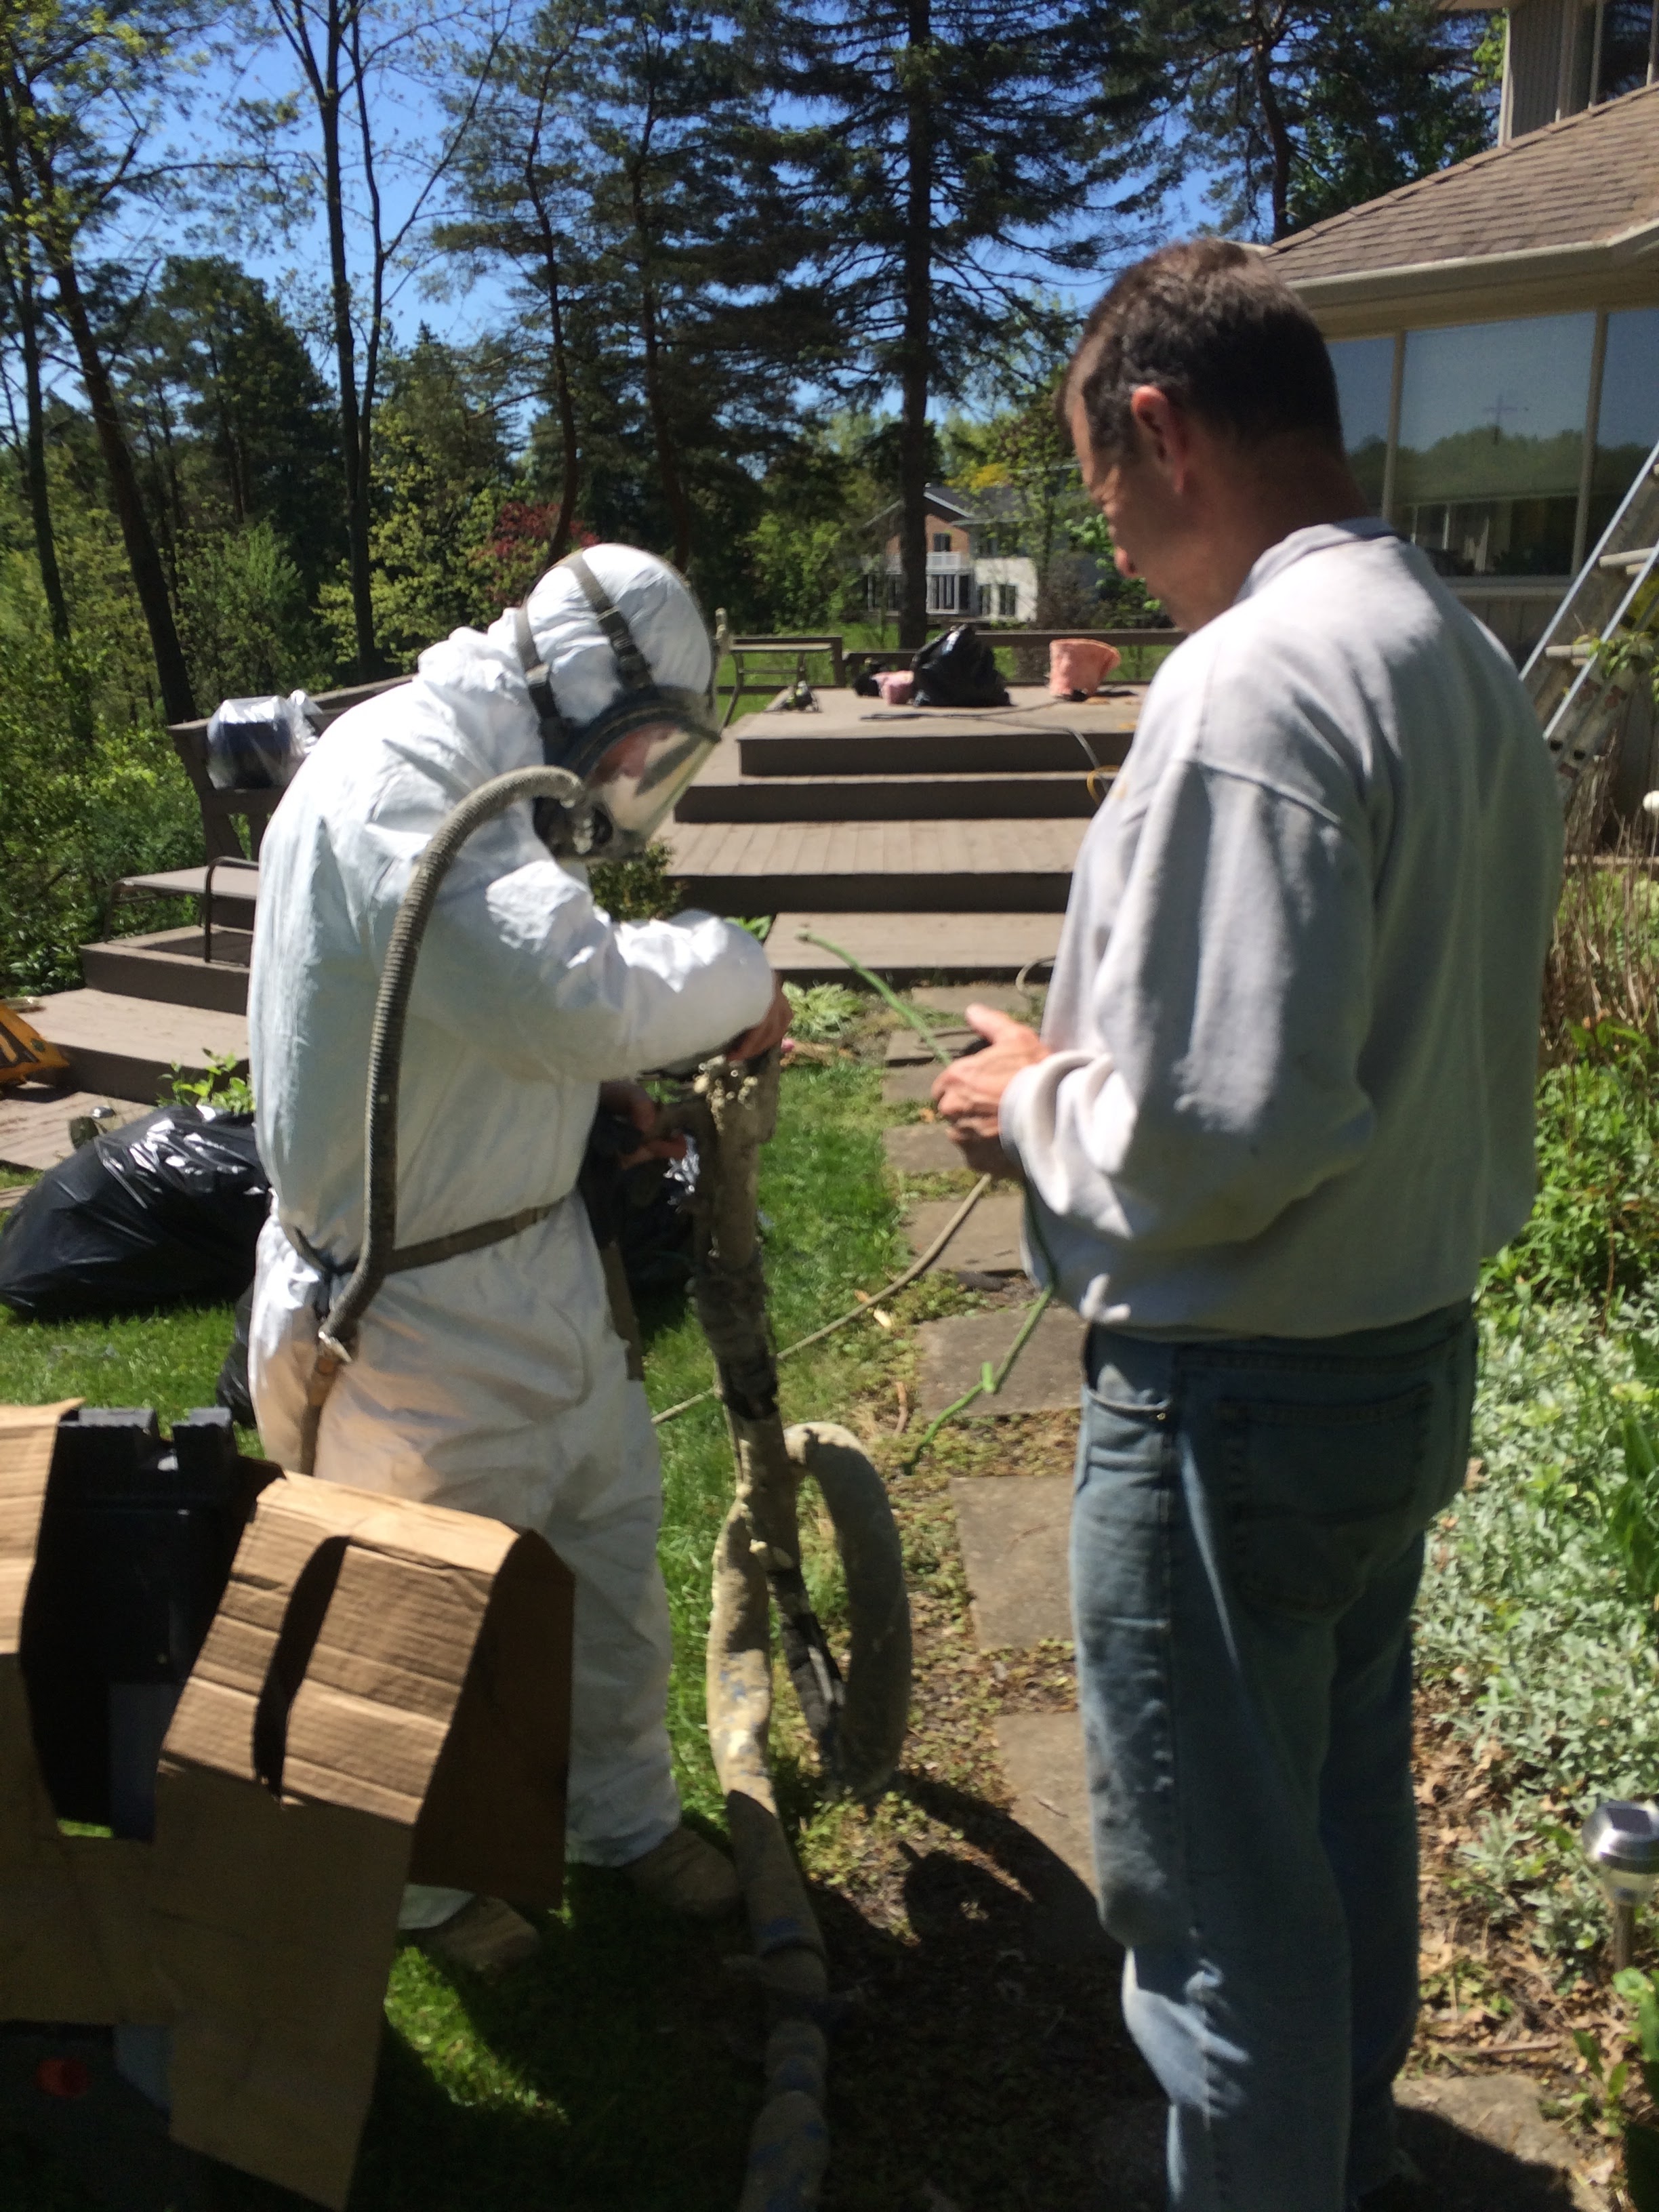
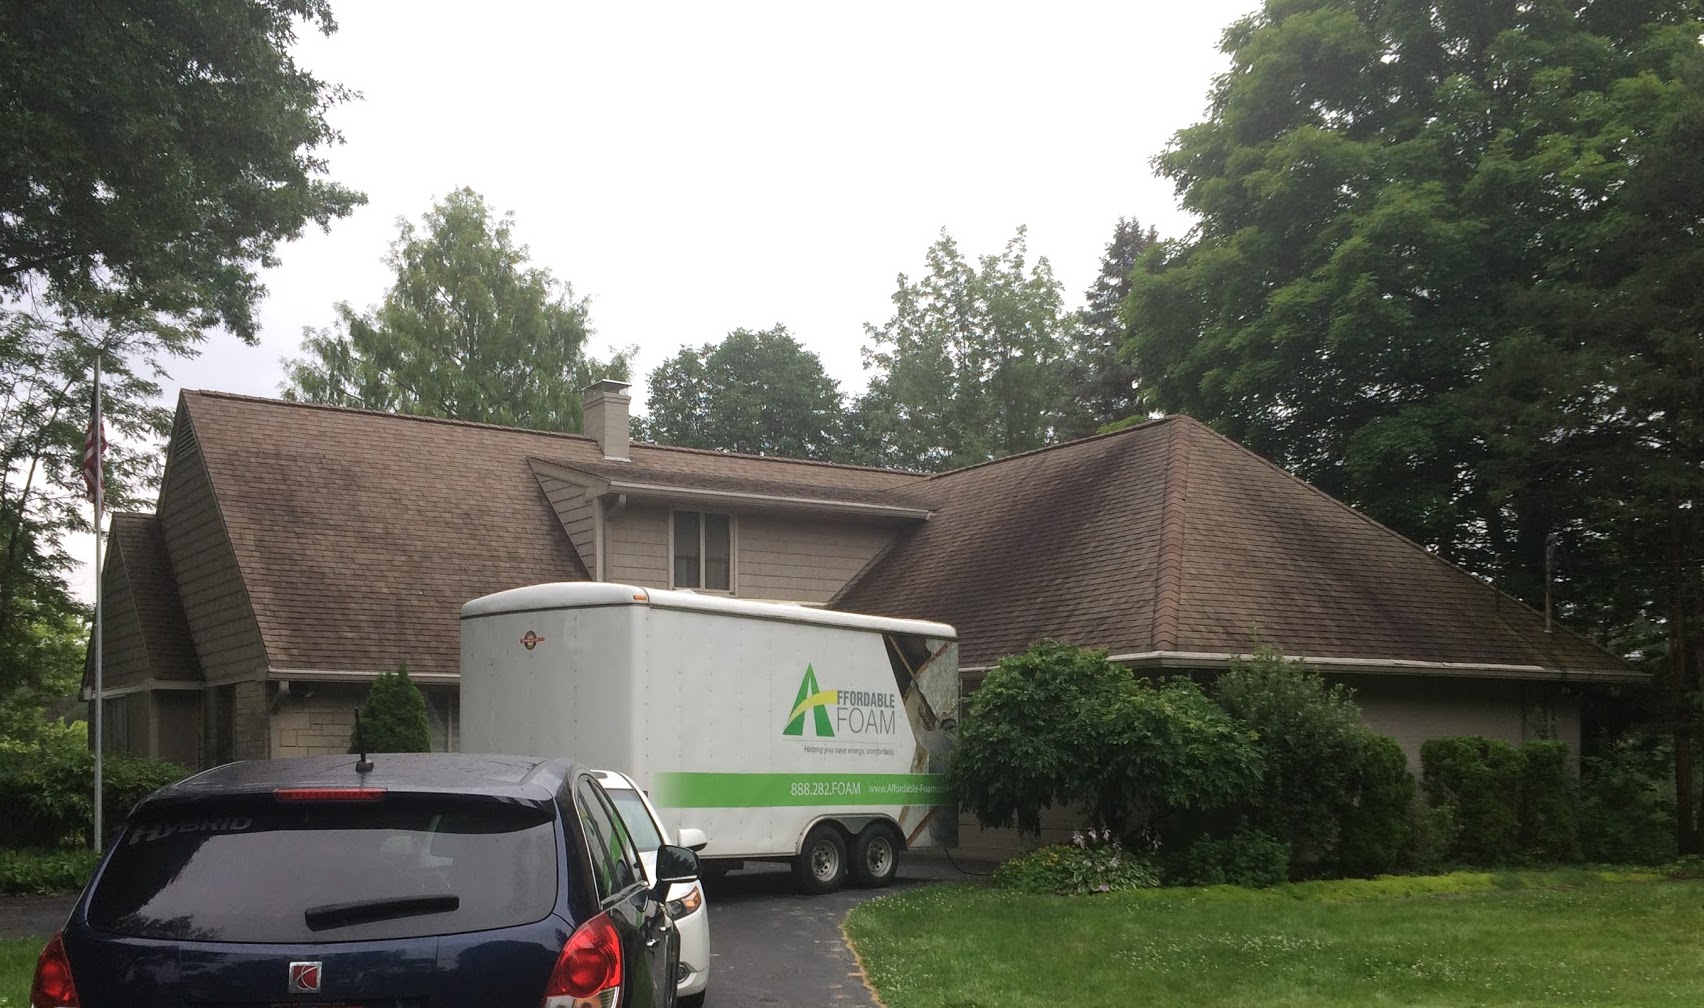
Once the preparation was complete, Gary Smith and Donny Oney of Affordable Foam came in to get everything sealed up and insulated.
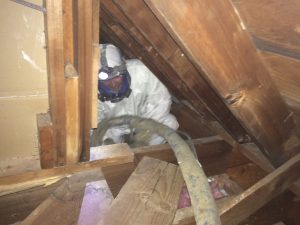
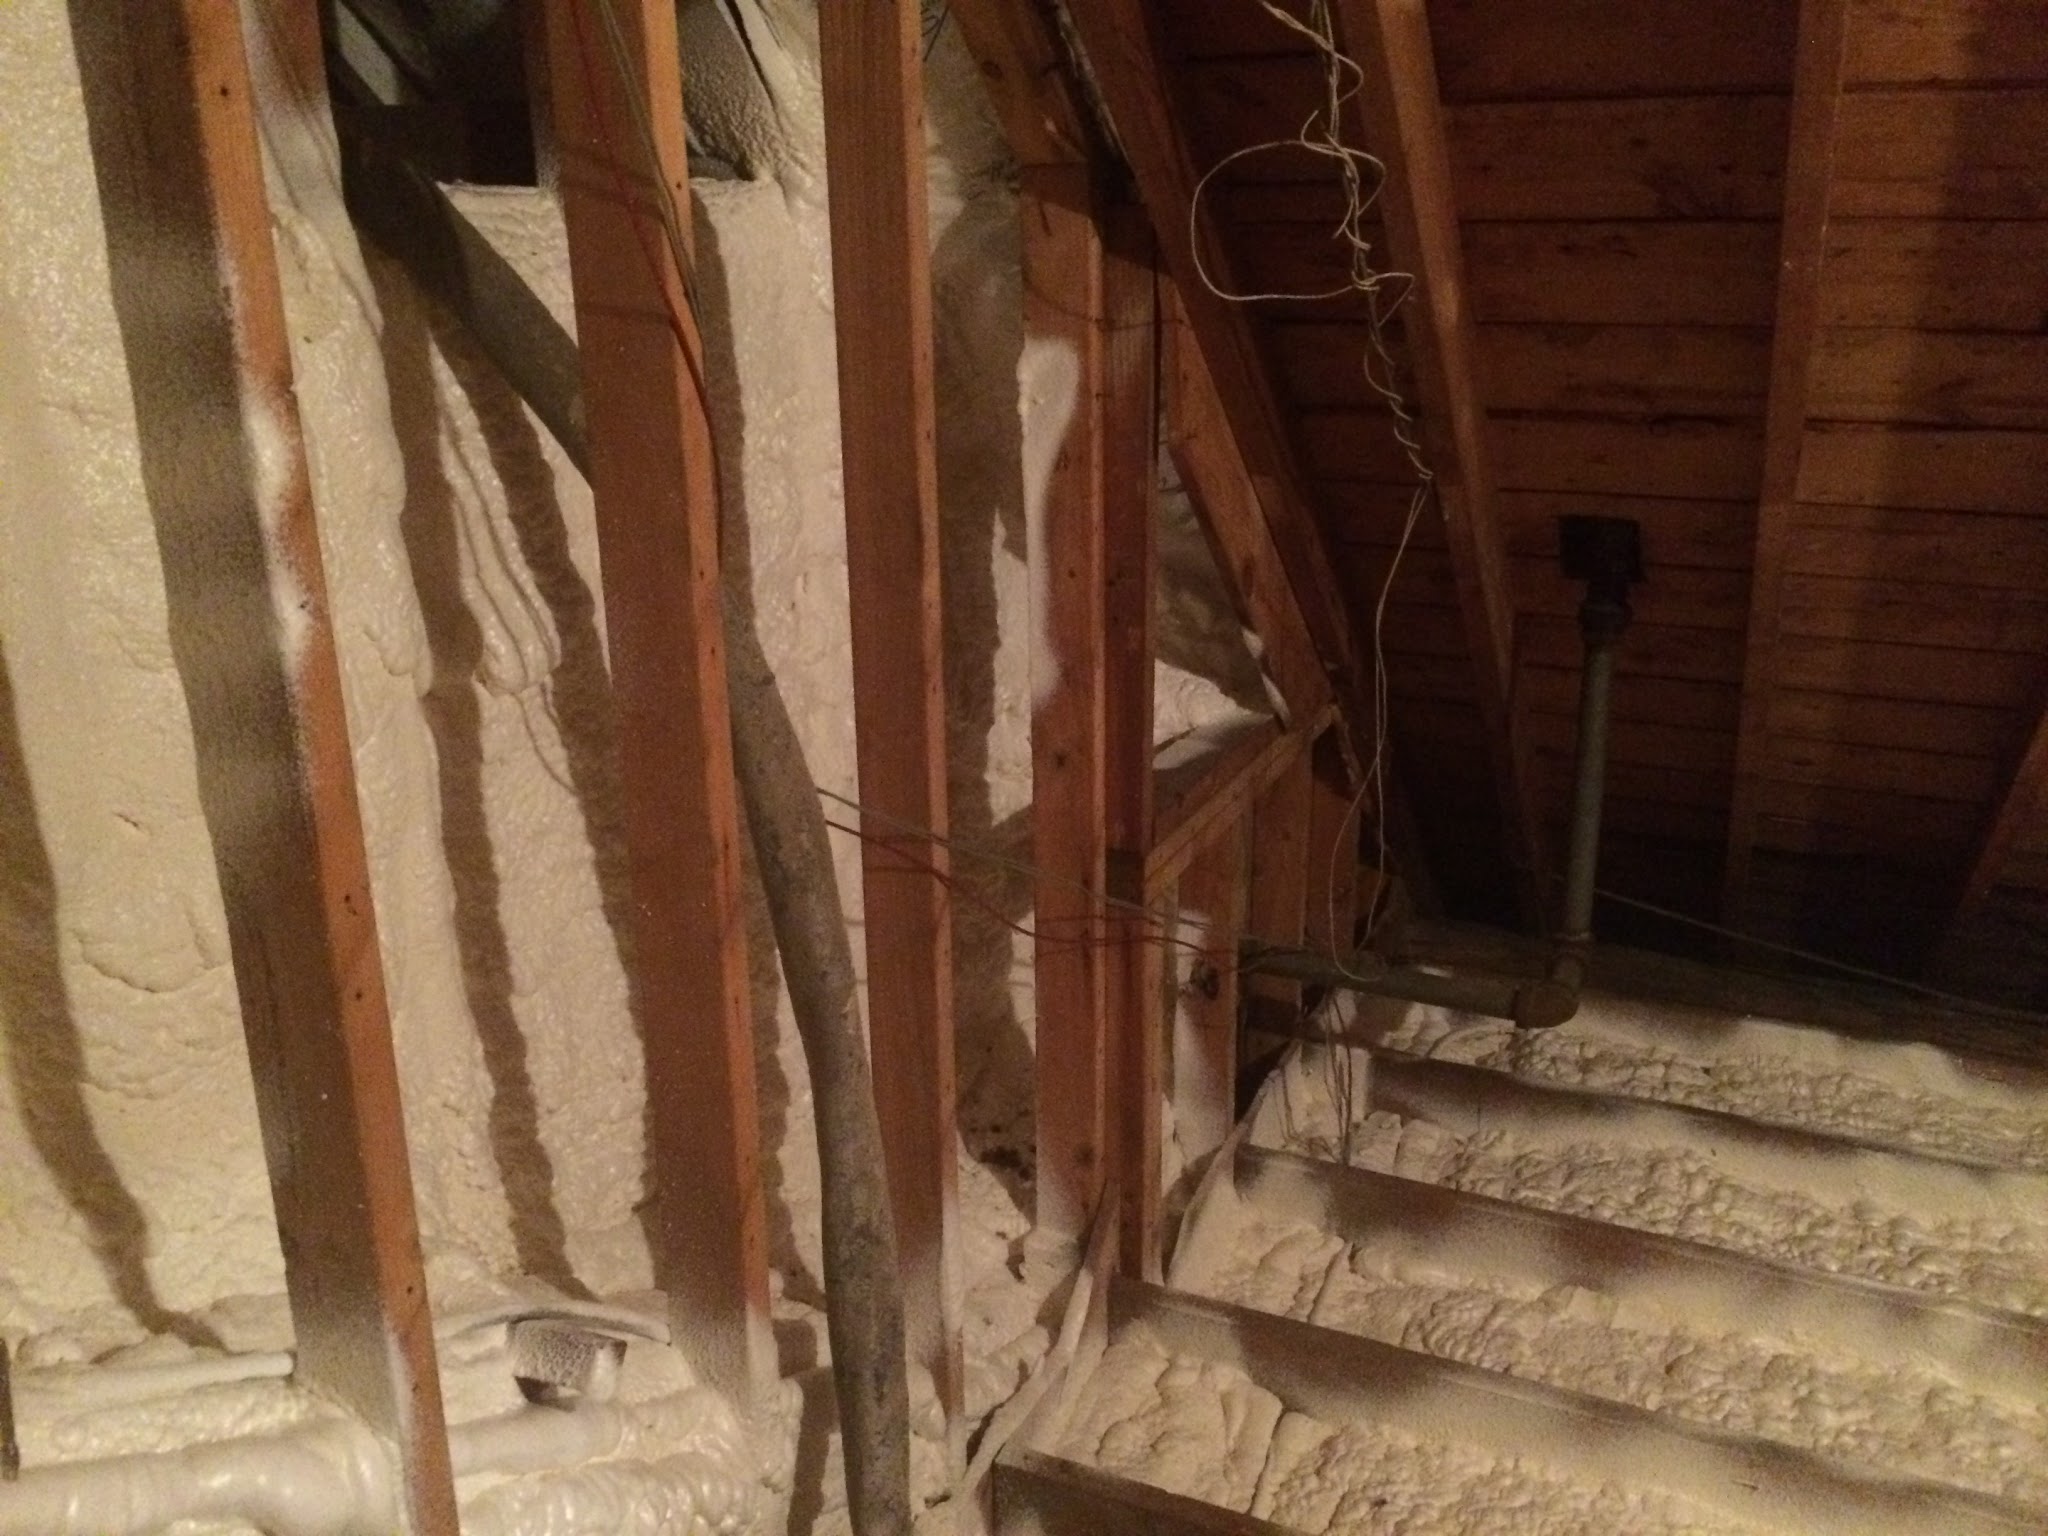
Here is Donny wedged into the small attic above the front porch. This same spot is on top of the cold shelves in Carlton’s office. See the pink fiberglass under the foam hose? That’s the hole over the shelves. A few minutes later that leak was sealed by foaming over the fiberglass.
This photo is also above the office. The fiberglass is stuffed into the cavity that goes into the soffit over the office. It was attic ventilation, but now this attic will be inside the house, so it doesn’t need ventilation any longer. By sealing this area, we reduce how much air can leak from the office to the outdoors, part of making the office more comfortable.
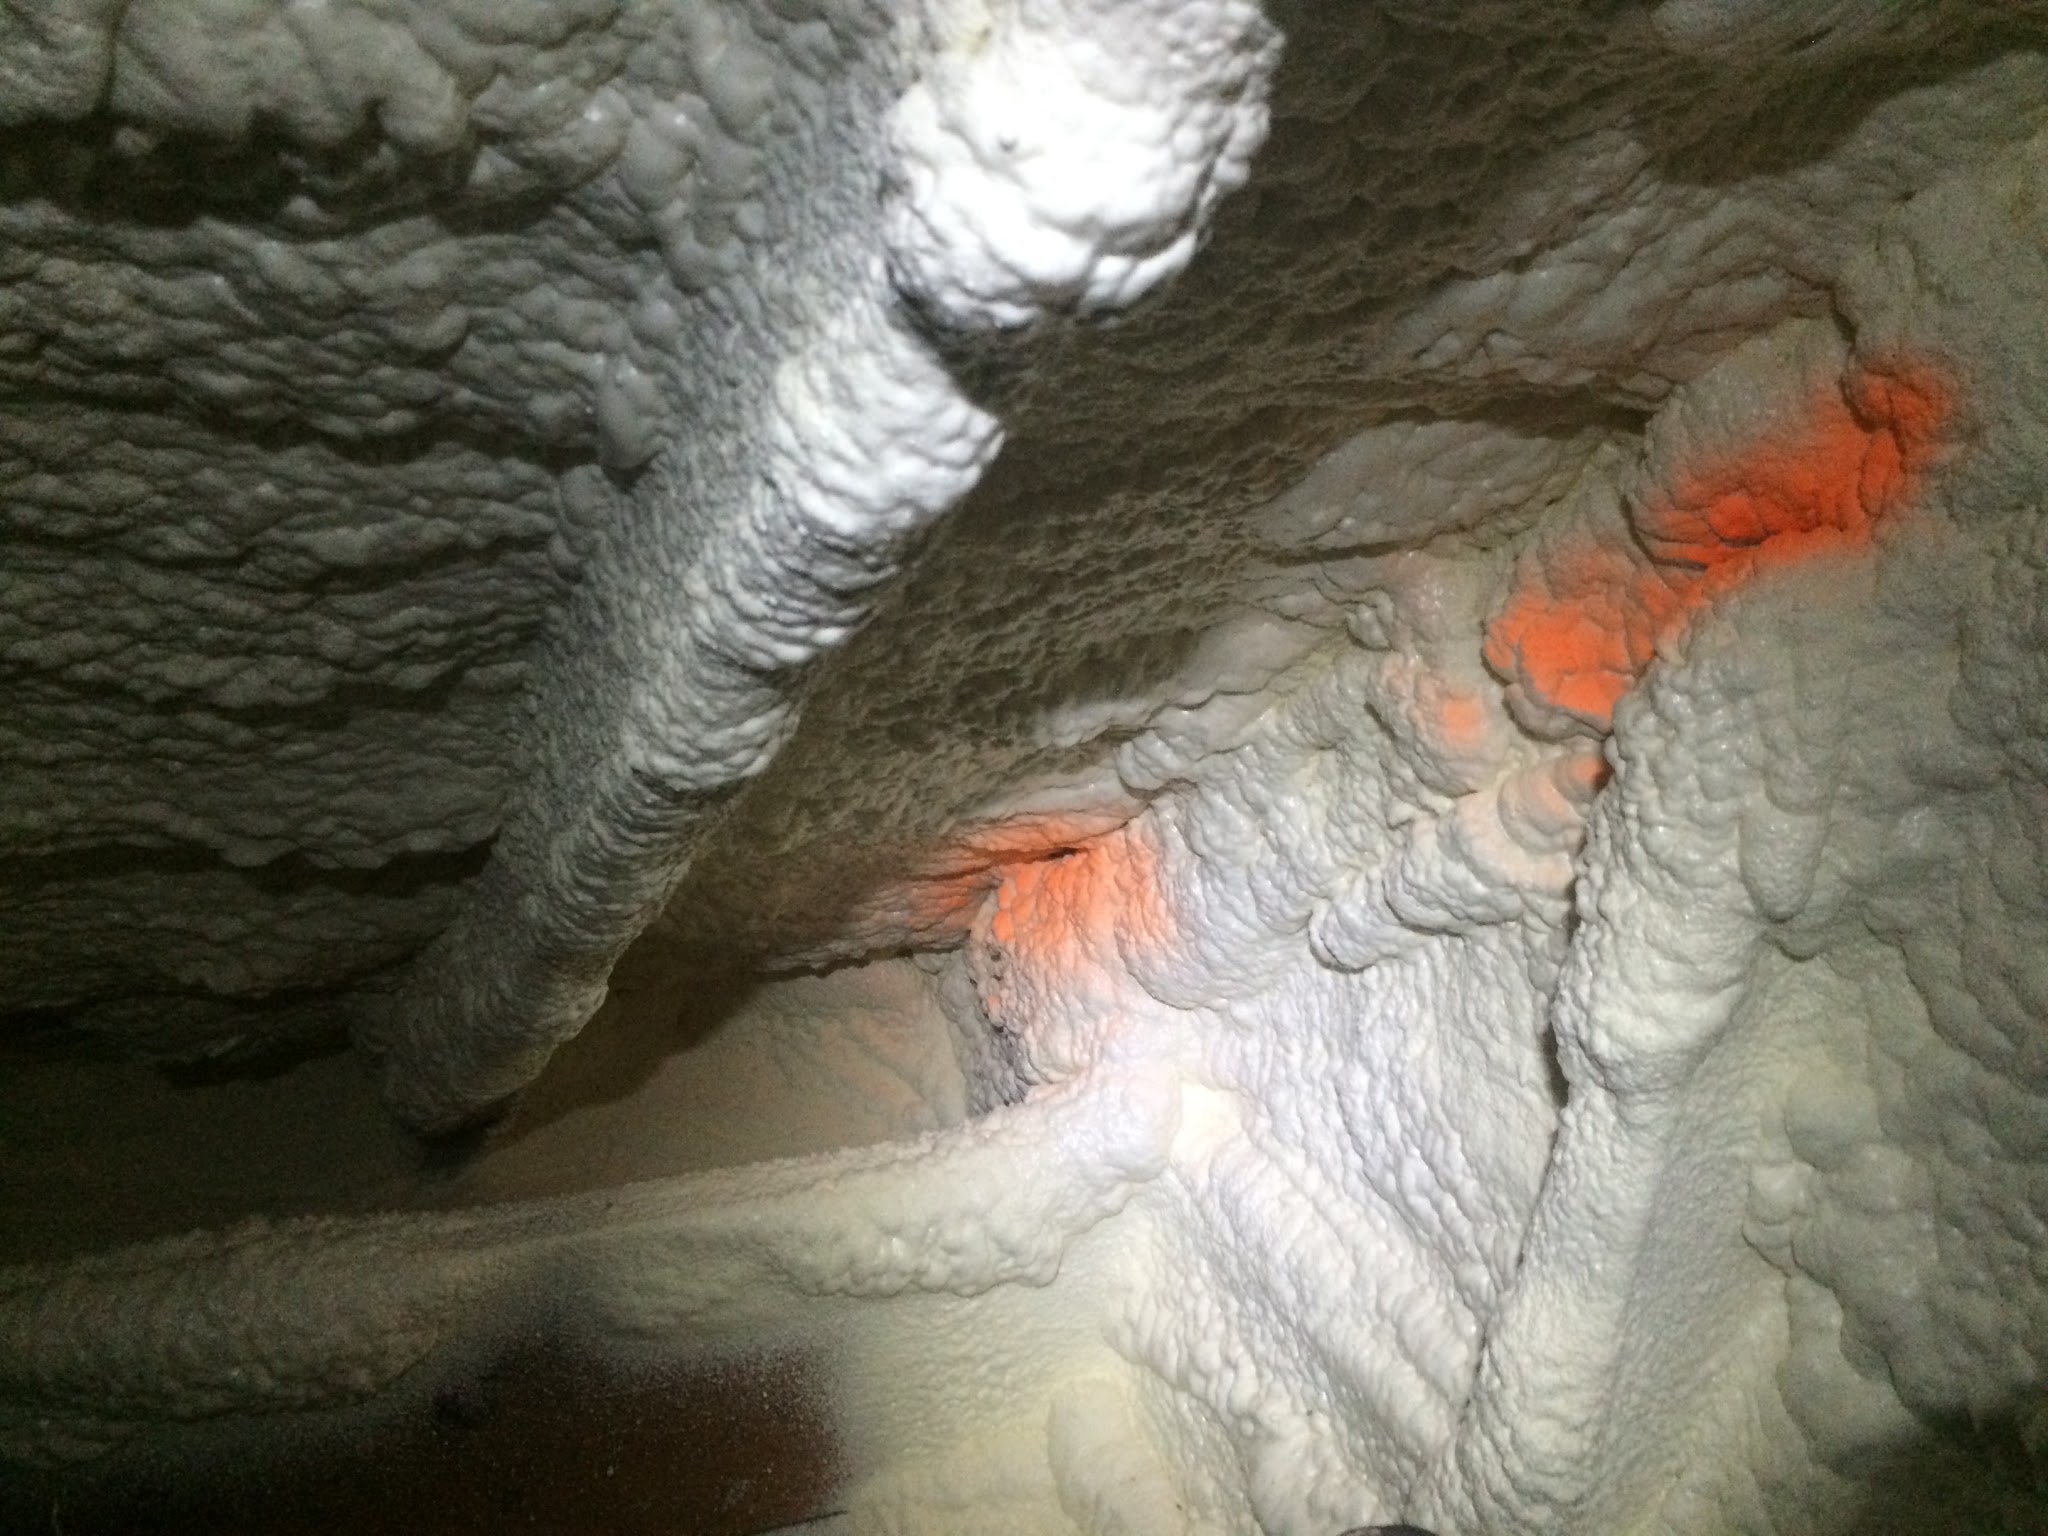
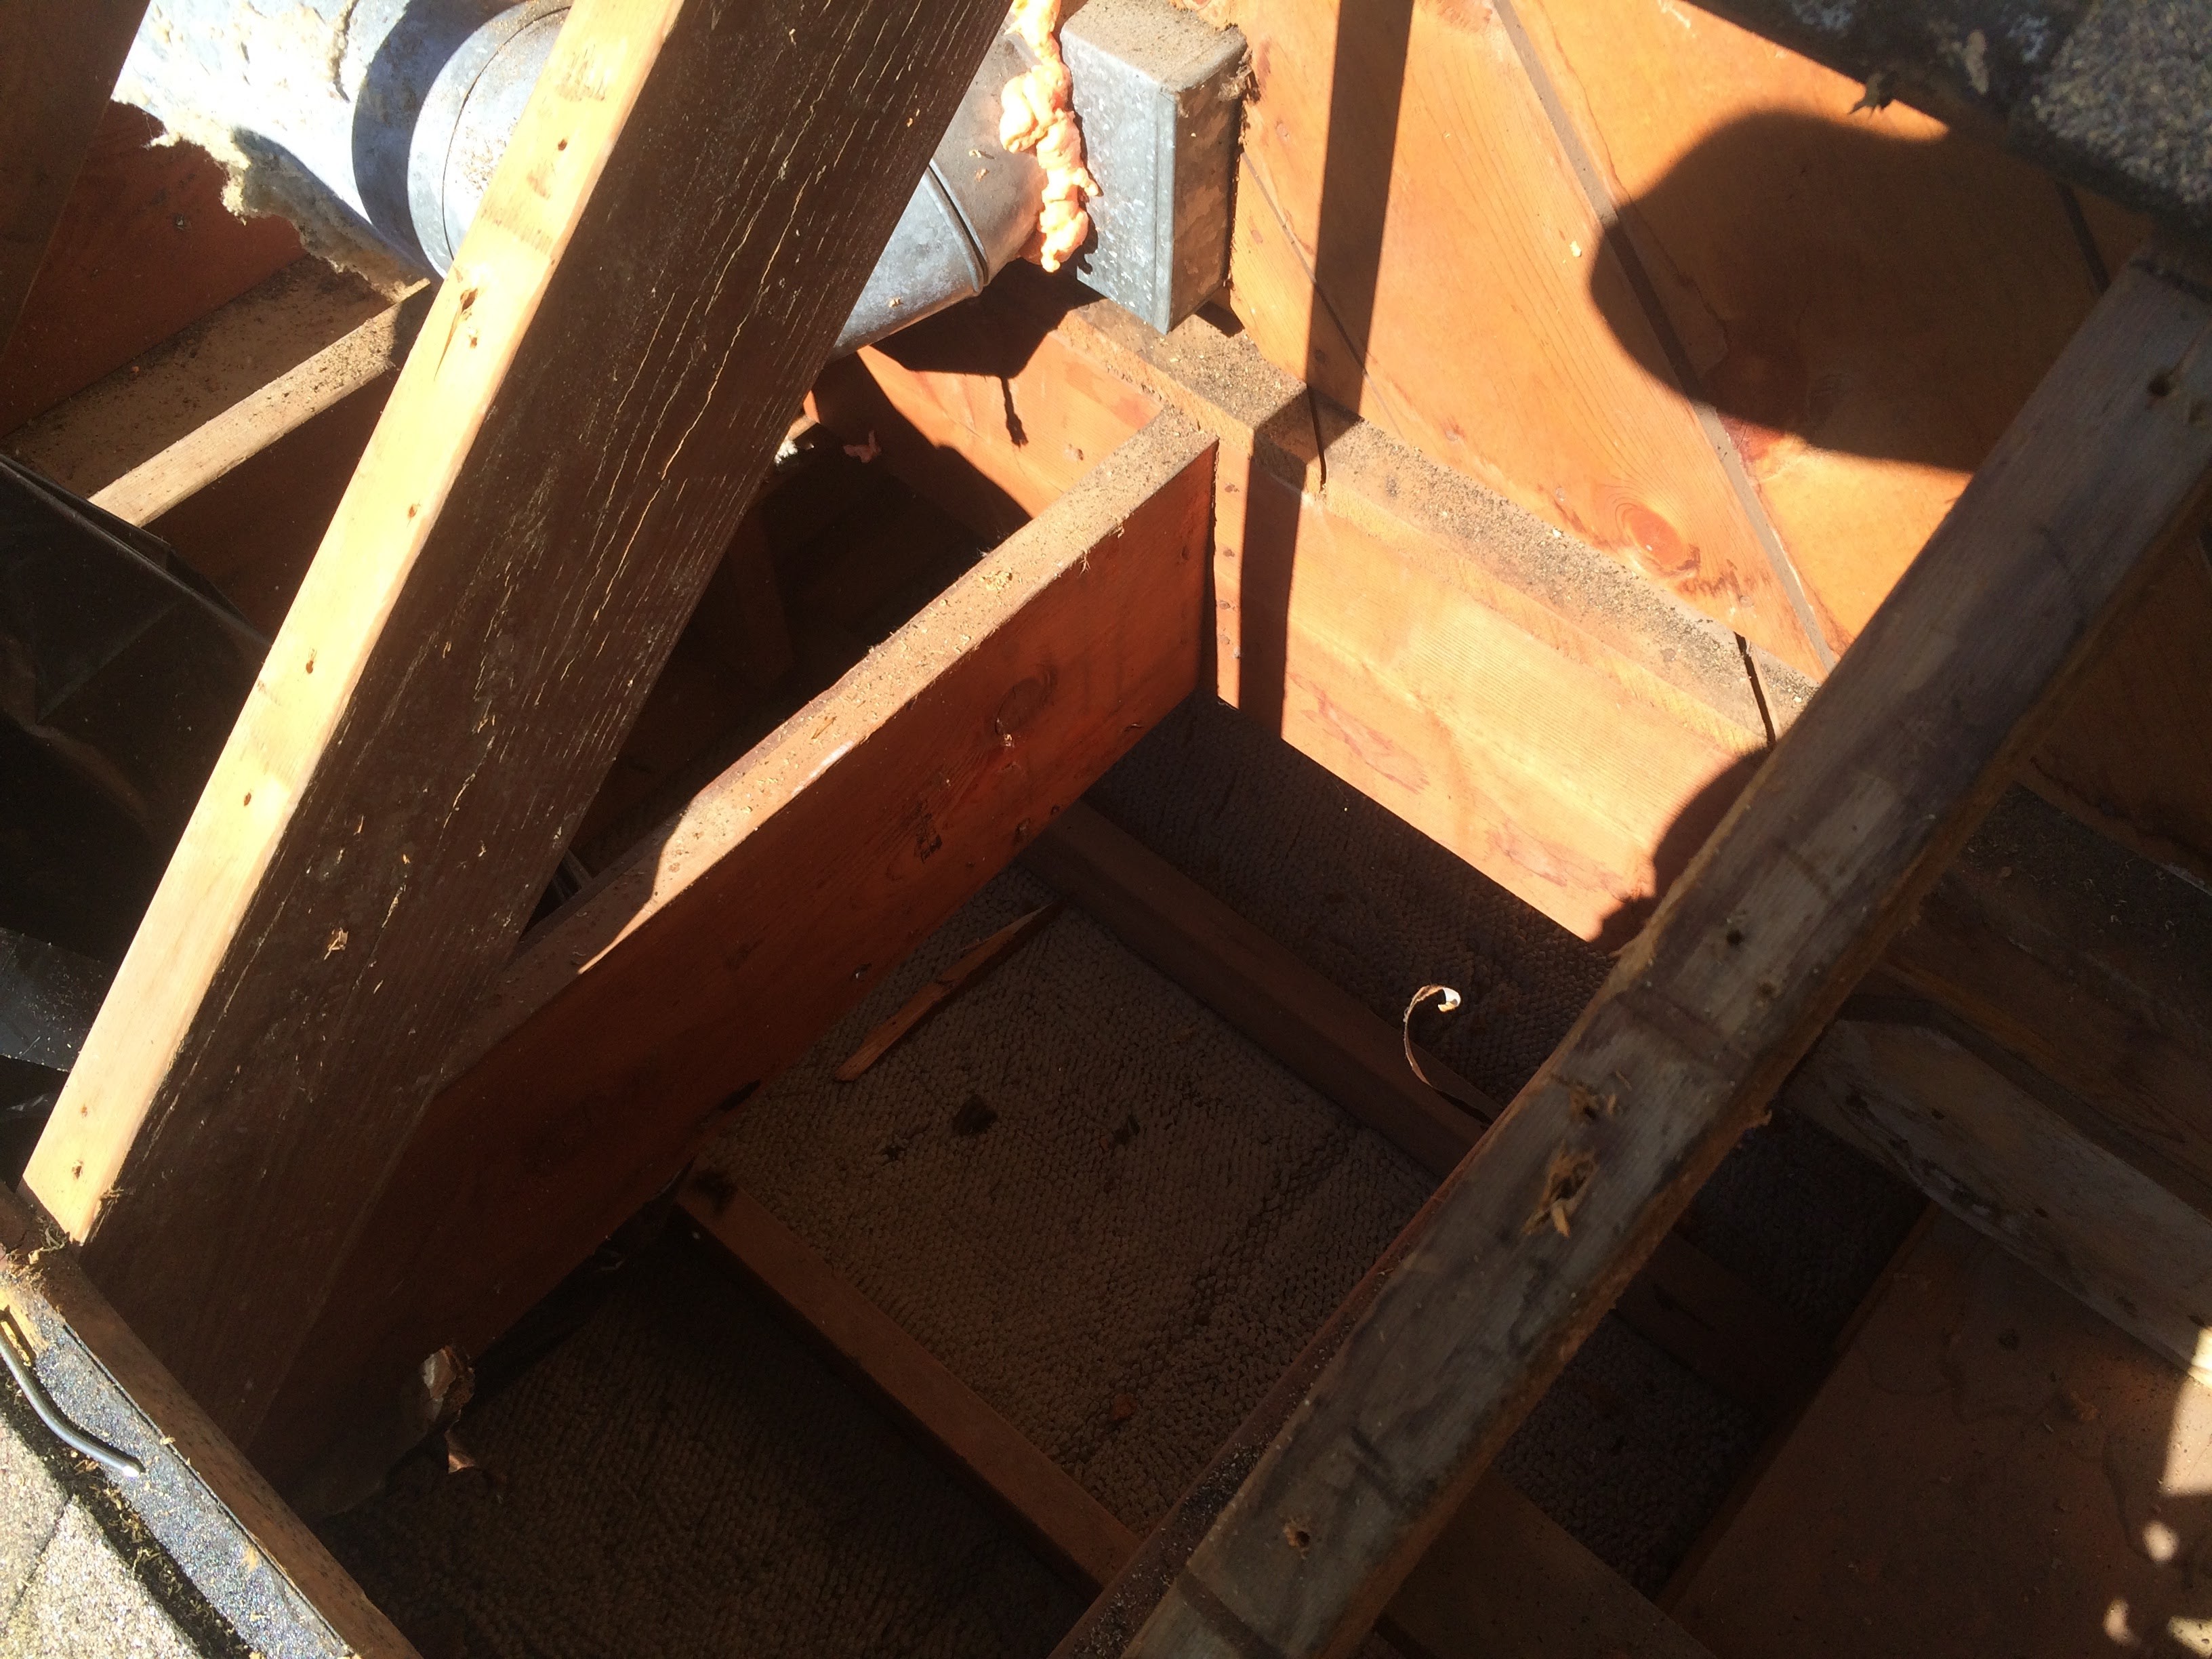
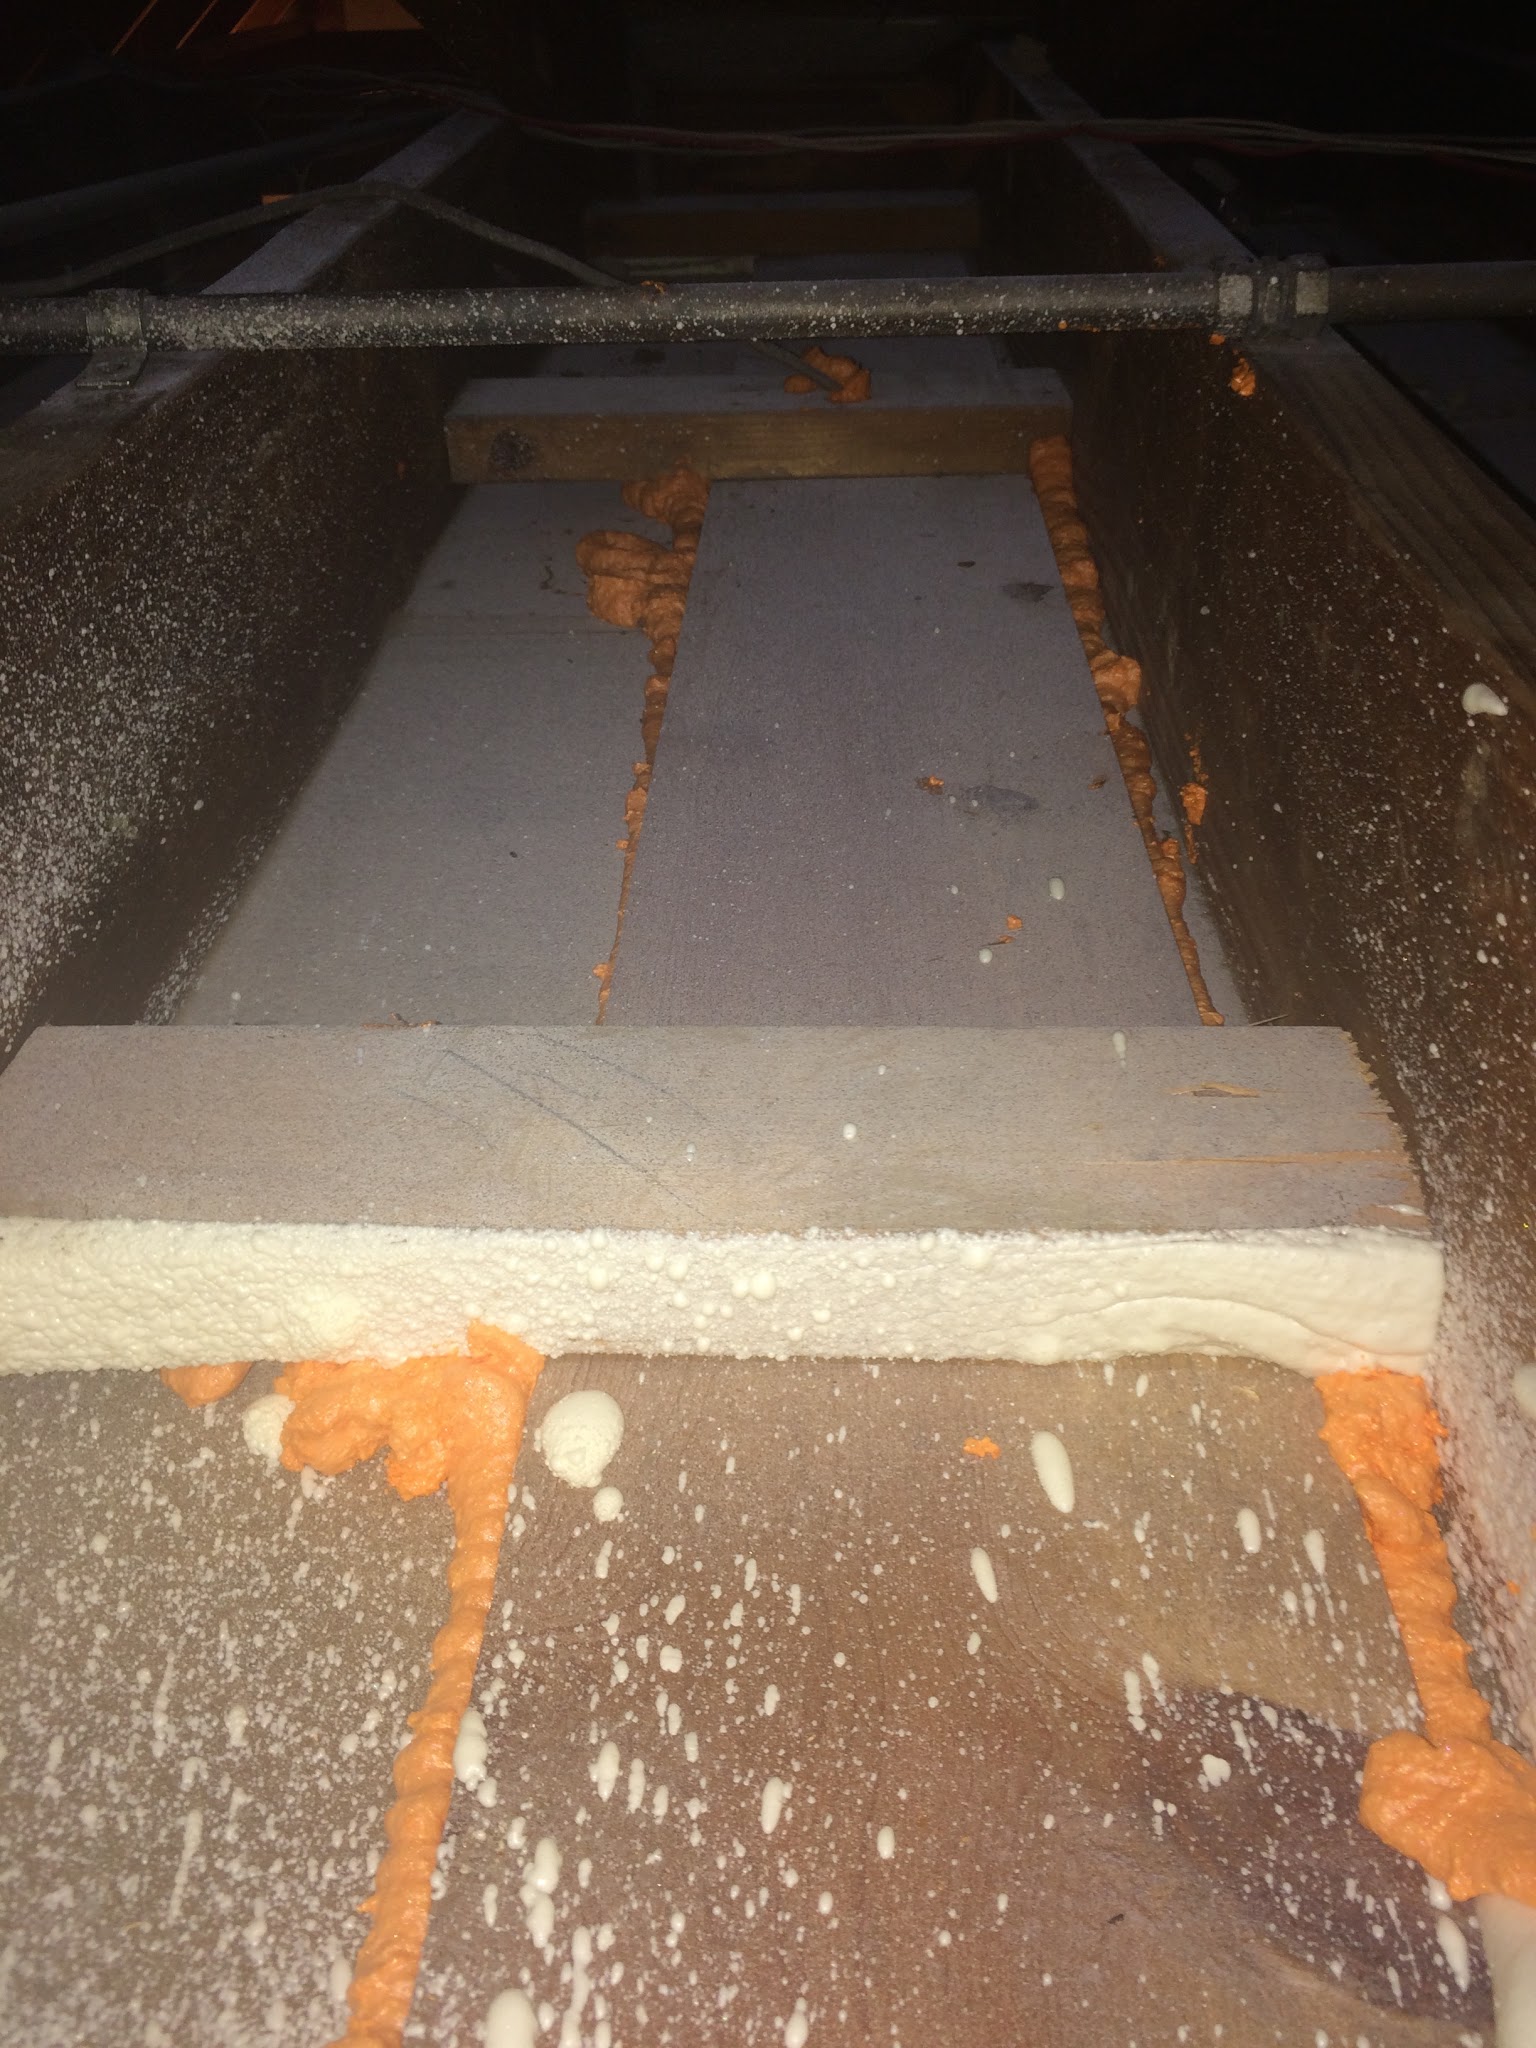
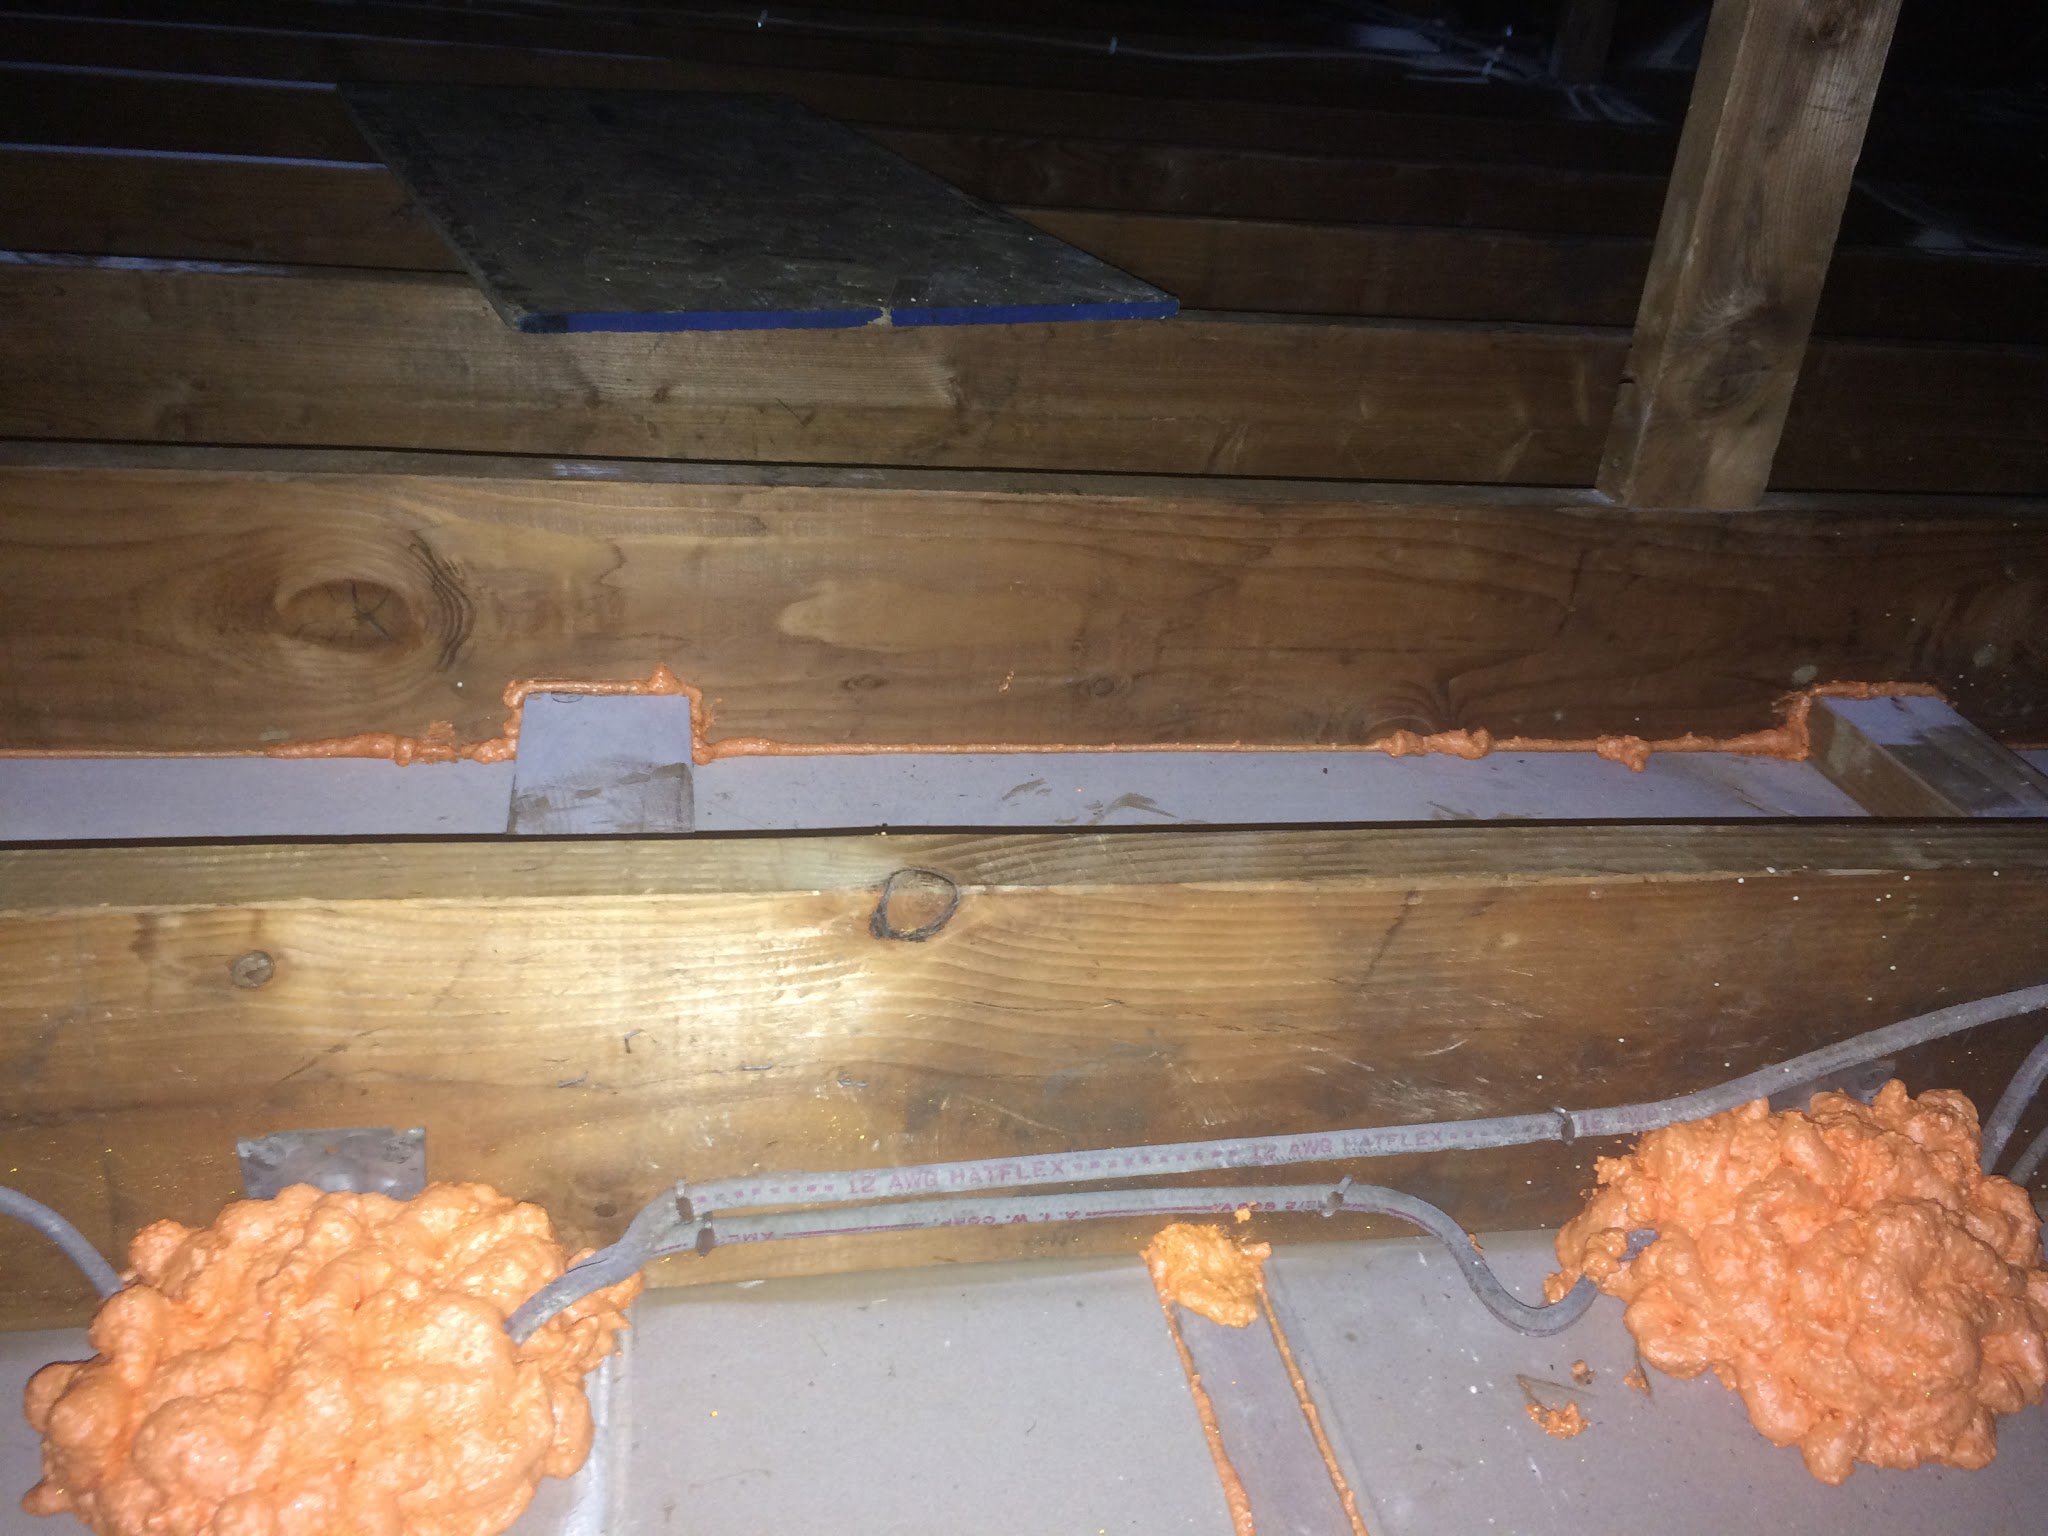
This is the attic above the laundry room, the wall is the cold wall from earlier next to the stairs. It’s tough to see, but behind the little knee wall stud is the laundry chute, all foamed up.
Note the orange Xs on the wall. Those cavities are 8 feet tall, but we can only see part of them here. I marked them for Clayton so they could blow cellulose up them when they came back to insulate the upper attic. Without someone who understands the full scope of what’s going on, details like that get missed, and the hallway might have remained cold.
I also use fluorescent spray paint to mark small misses:
Gary and Donny call this “Natepicking”. It drives Donny up the wall. As you saw earlier, whoever is spraying foam is suited up in Tyvek with a mask. They can’t see very well. Where we work is usually dark. Spray foam is a blunt instrument, it’s easy to have small misses. By using fluorescent spray paint, the installer can see the misses even through the mask. When they can’t see the color anymore, the miss is taken care of.
Those misses can add up, and sometimes they are very large (my record is 800 points for one hole, again, almost as much as my in-laws’ house leaks!) Some time spent on the day of install and then more time the day after can catch most of these issues. Quality Control is a critical part of our work.
I need to repeat, Gary and Donny do really good work. I greatly enjoy working with them. There are some jobs when I am pointing out niggling stuff just to justify my existence, other times there is a legitimate miss, usually in an unseen place that can only be found with a blower door and infrared. Many of those leaks can’t be found before the project because they are smaller than other nearby leaks. Until you seal the big holes, you can’t find the smaller ones.
If there are misses made, it usually doesn’t reflect on the quality of the install, it reflects the limitations of the installation process and the need for diagnostics to find them. That said, there are plenty of crappy spray foam companies out there. As my friend Spray Foam Mike says, you hire the sprayer, not the company.
It’s important to note that Comprehensive Home Performance work is an iterative process. We don’t work with budgets that are hundreds of thousands of dollars. We work with you to do a careful diagnosis and work plan, execute, and see how far you moved the bar. If it’s far enough, we stop. If it’s not, we see what’s next on the list, and it’s your decision if it’s worth doing it.
Often there are things that you simply can’t find until you tackle the first big part of the project. As I write this I’m planning to go to a client home who still has a very leaky third floor despite spray foam and a bunch of testing on my part. There may be a weird leak in a wall somewhere that we couldn’t find until we sealed a bunch of other leaks. You take your best shot, then test. If necessary, take another shot. One iteration follows another. I’d love to say that there are guarantees, but there aren’t. There are only likelihoods, i.e. I have 80% certainty in this plan. This is like medicine for homes, when’s the last time a doctor gave you an iron clad guarantee?
There are also times when I screw up. The days of foam install were hot. By the time we got to the upper attic, it was over 120 degrees up there. I was bone tired and afraid of falling through the drywall. So I didn’t go up and check after Donny sealed it. That was a mistake, thankfully not a huge one. I went up shortly thereafter with a small foam gun and caught a lot of misses like those light fixtures above. I sealed them as best I could and got out of the attic so Clayton and Cameron could start blowing cellulose. Phase 1 was complete.
Phase 1 Results
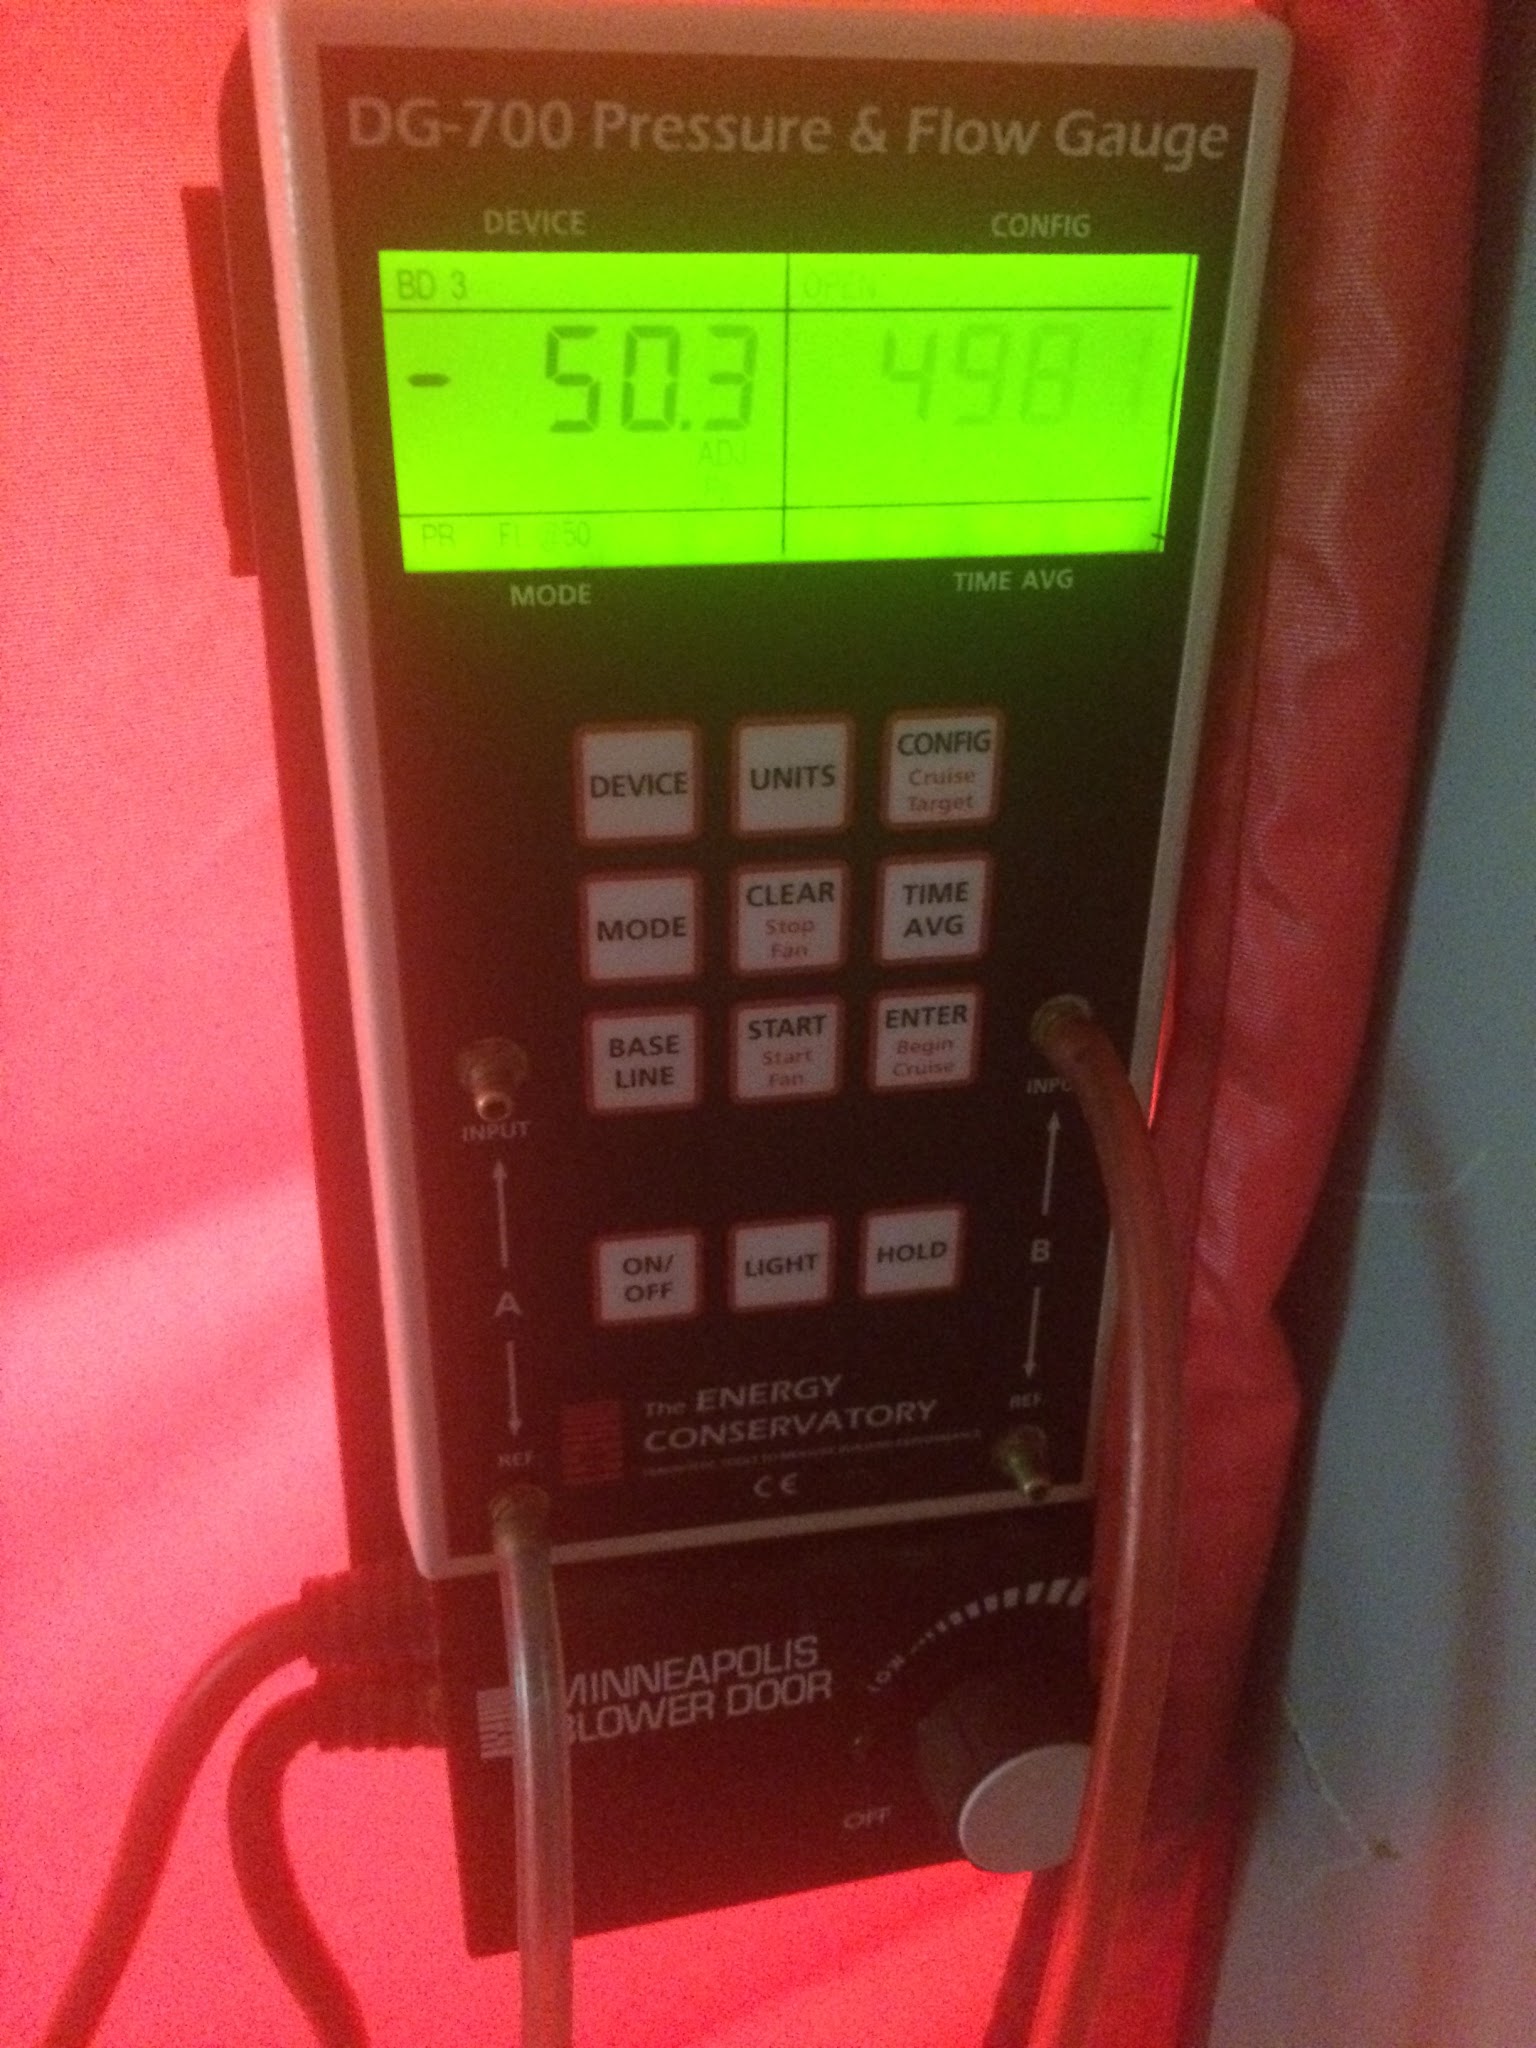
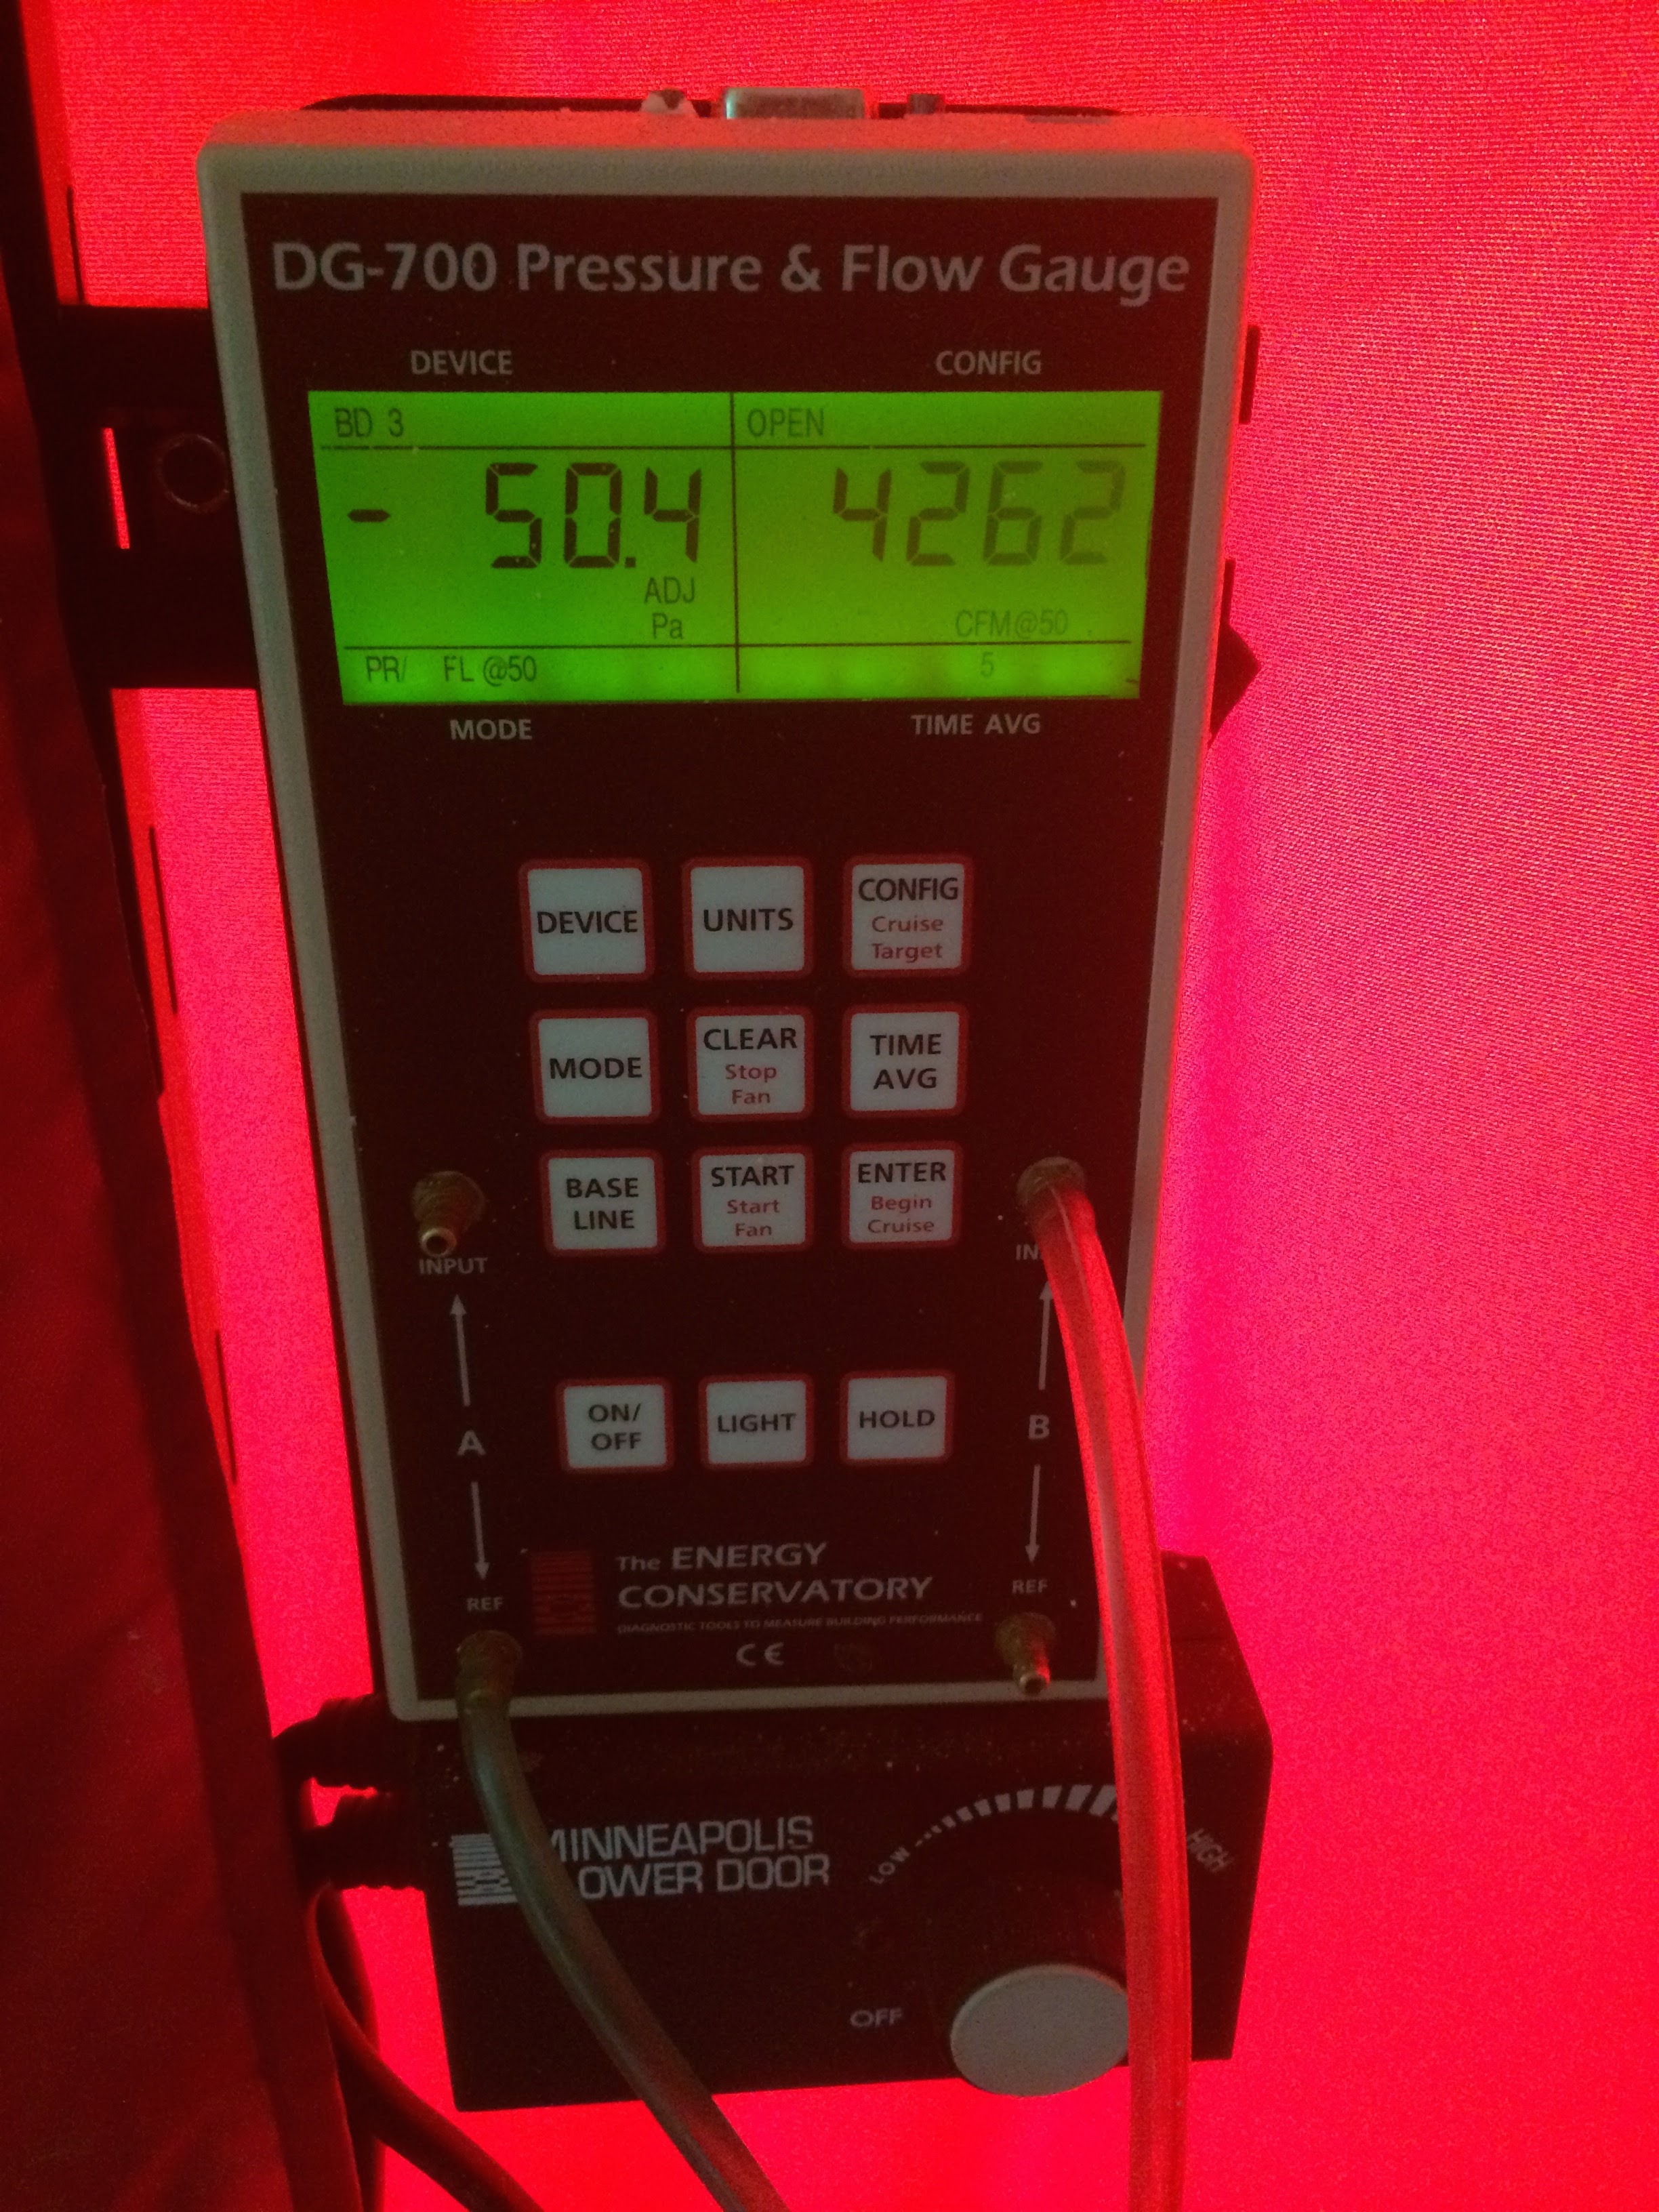
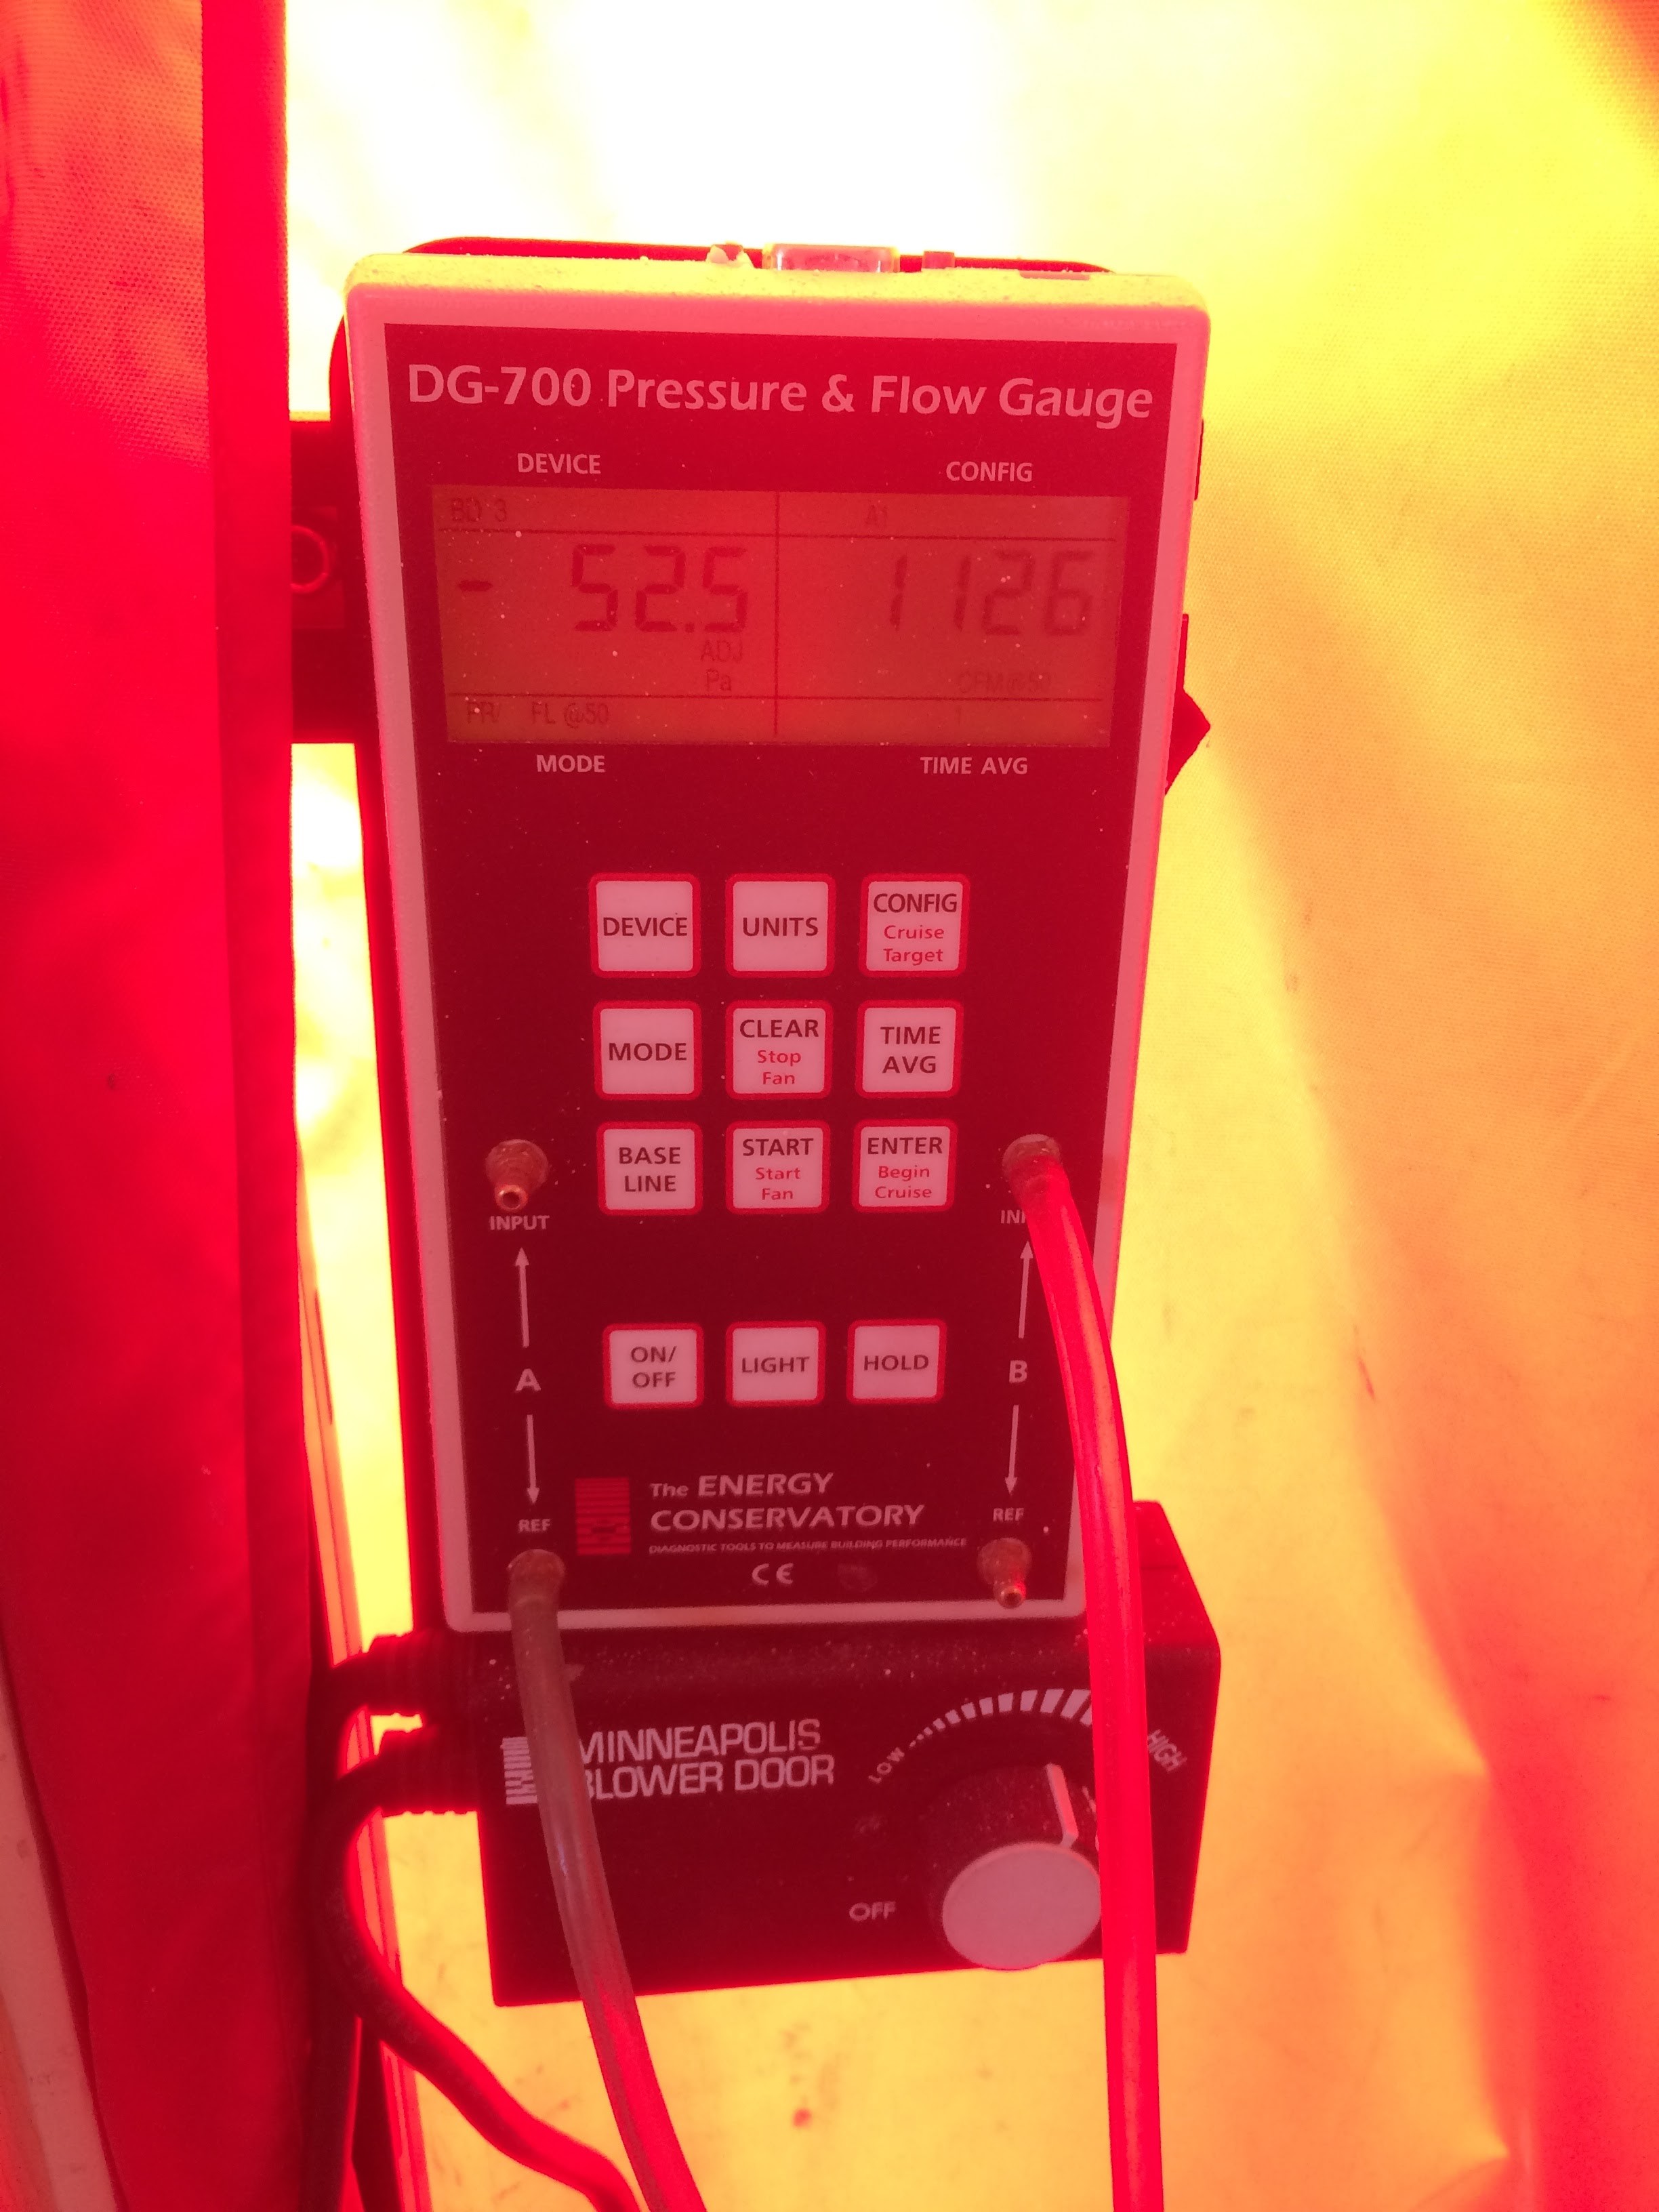
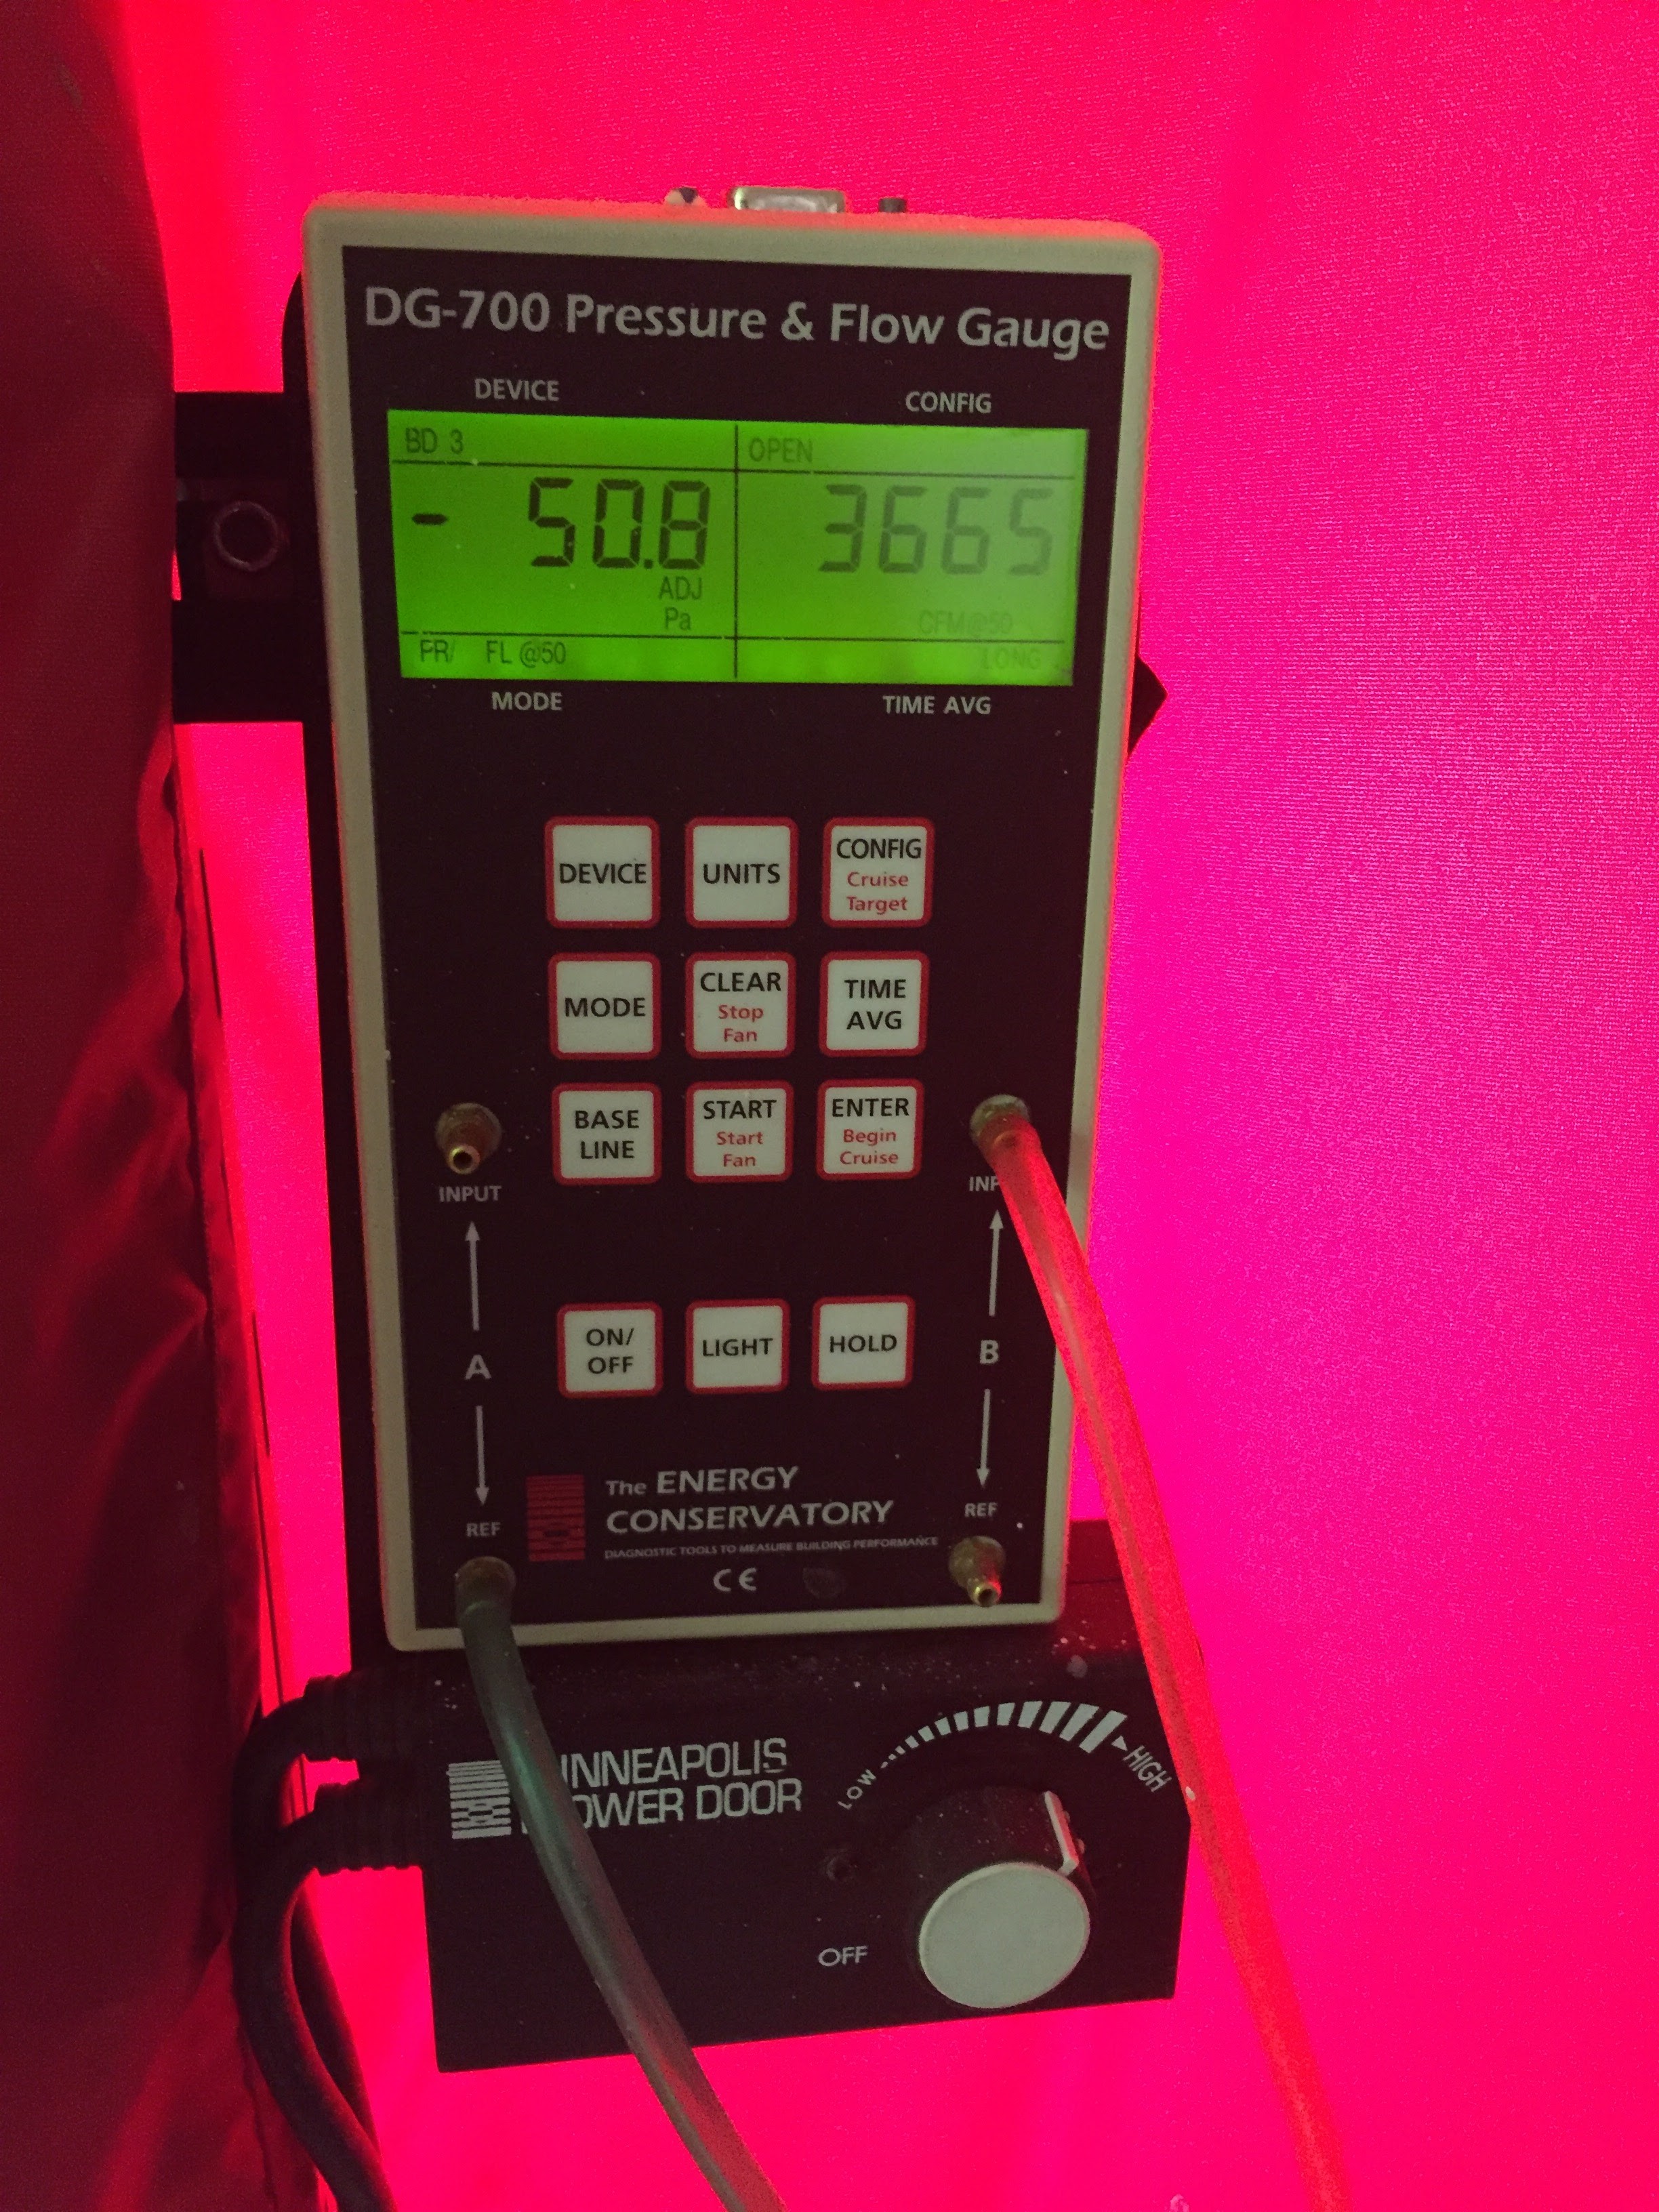
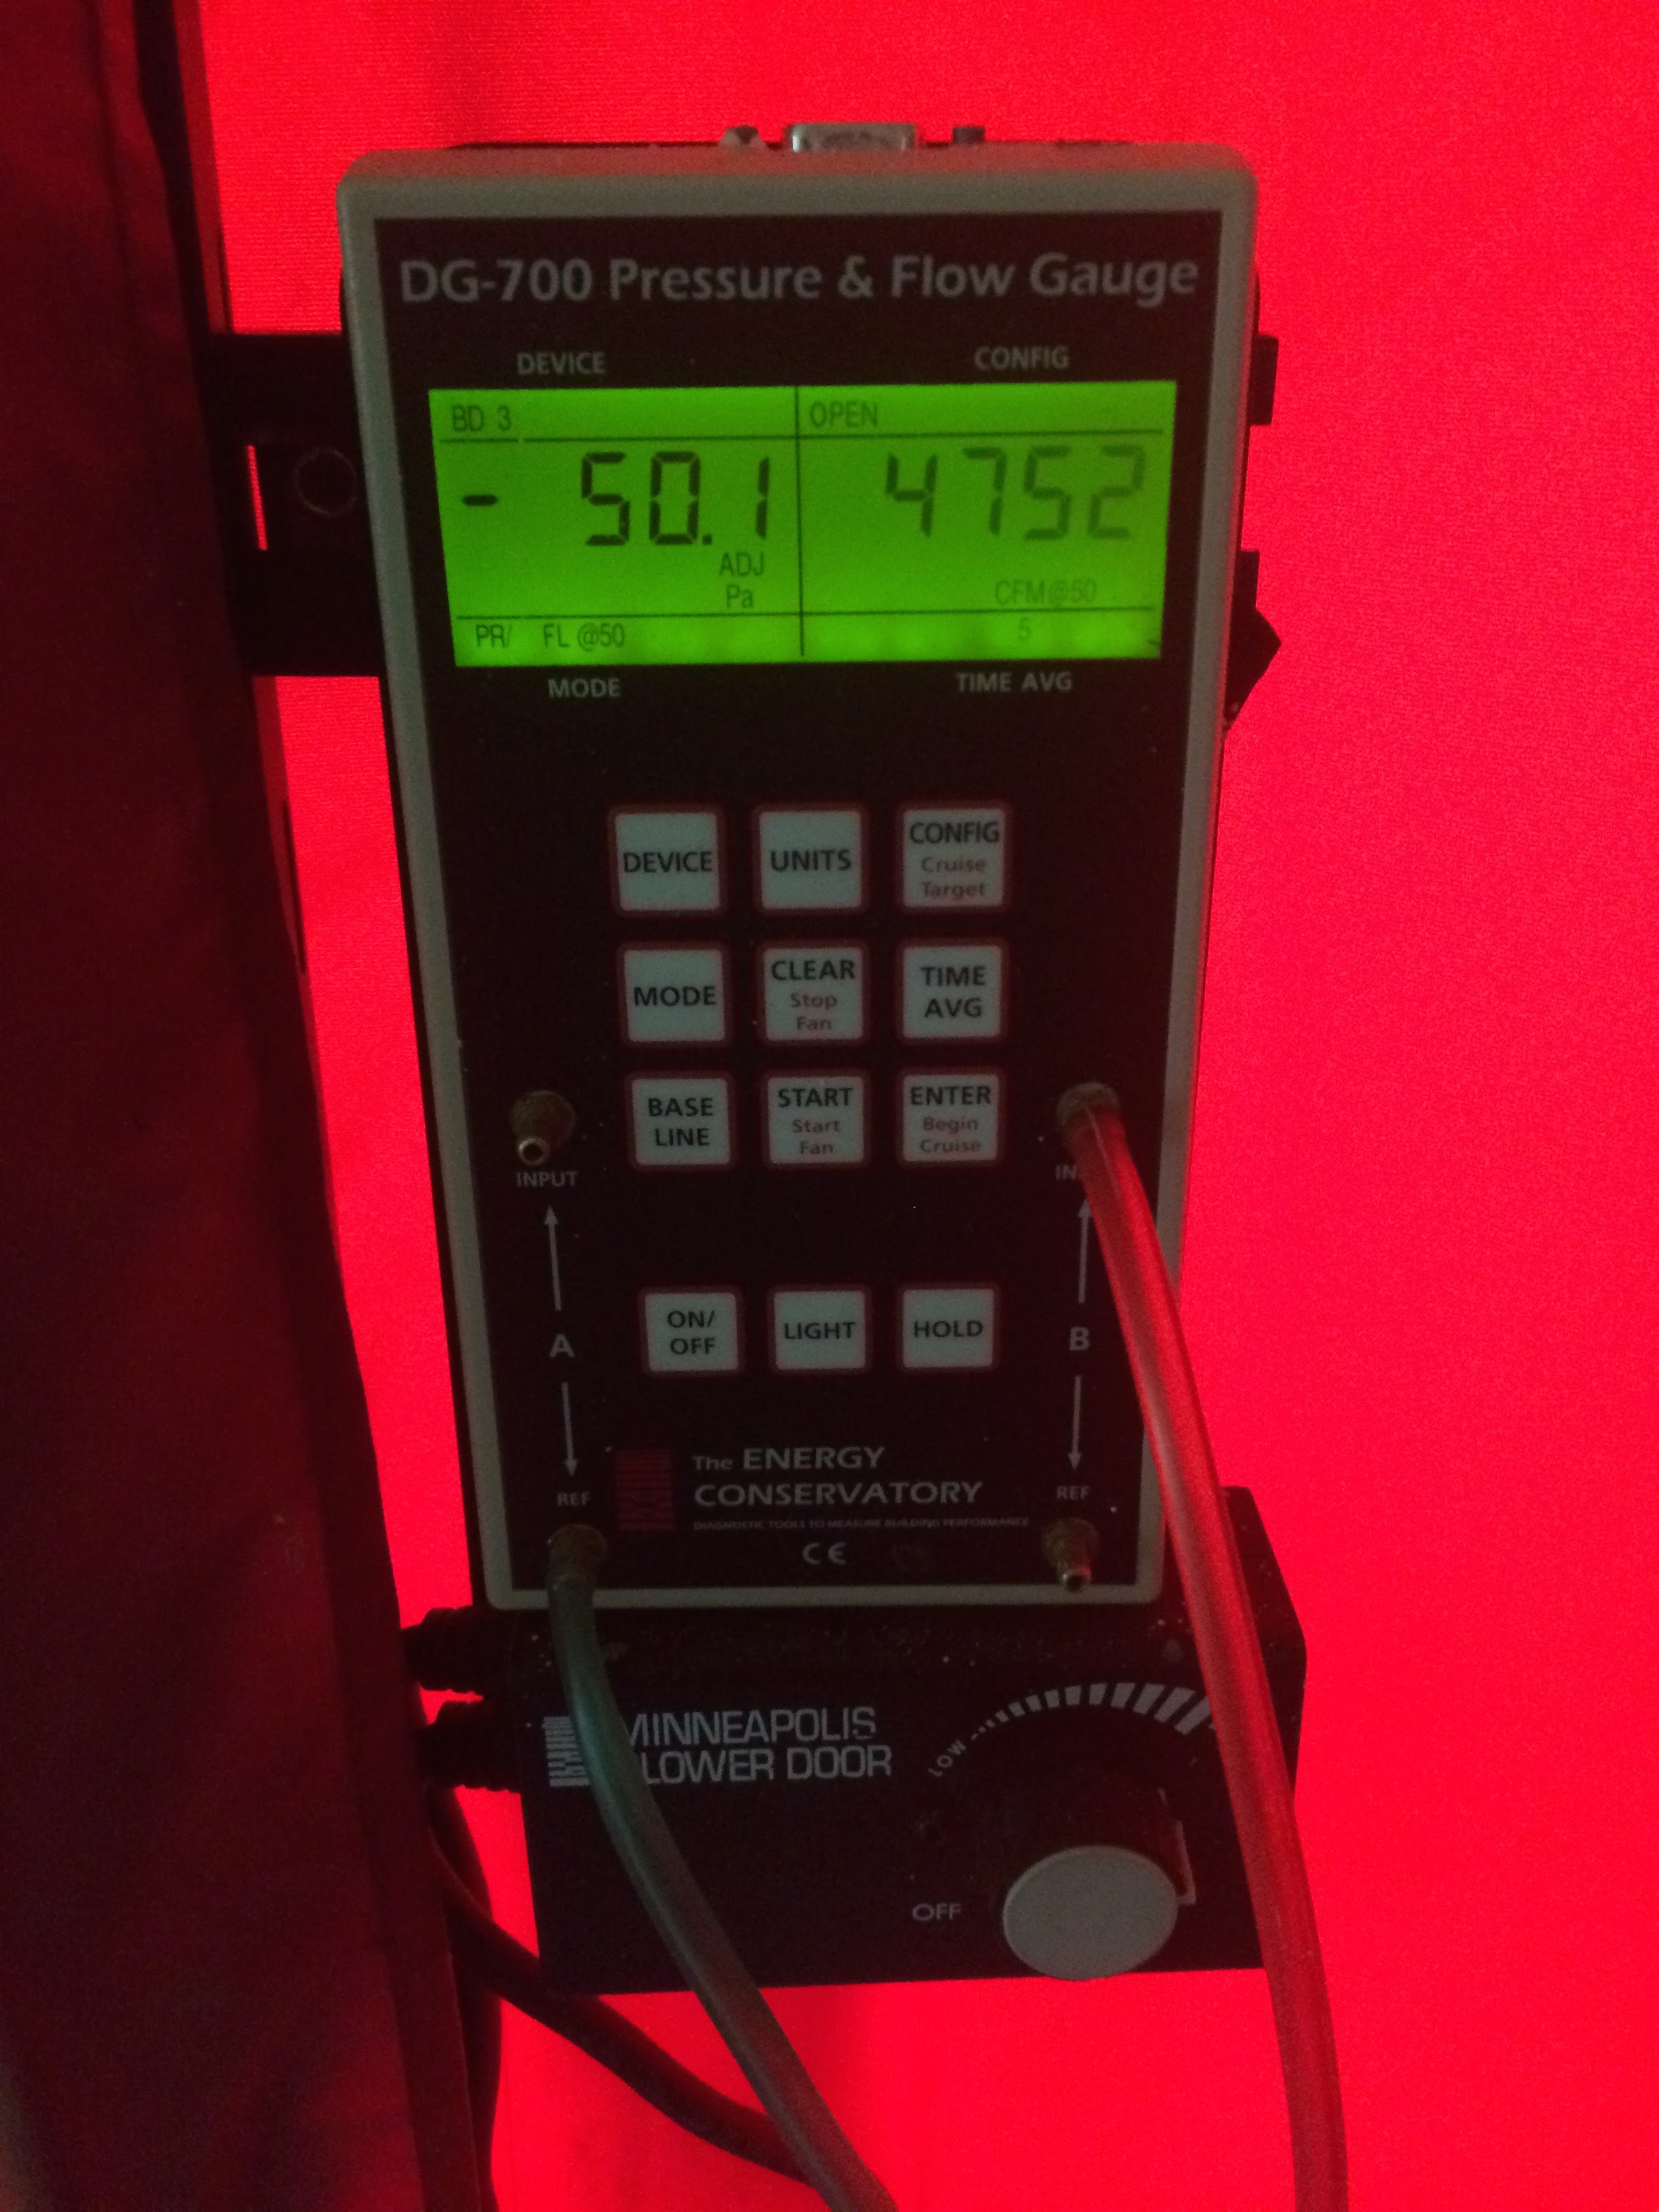
The blower door target for Phase 1 was 5000 points, down from 8900. (The actual unit is cfm50, or cubic feet per minute at 50 Pascals, but it’s just confusing, you don’t really need to know it.)
After spray foam, we were just above target, around 5300. I was pretty bummed, I take targets seriously, and it was my first miss. After I did the final sealing in the attic and Clayton installed cellulose in the attic, we beat the target at 4981:
A Silly Mistake & A Tipping Point
After the first phase of foam was complete, there was no insulation at all in the main attic above the second floor (this house has eleventy-billion attics! Ok, only 7.) I took an infrared pic of it:
This is in the summer, so yellow (warm) is bad. It felt like the sun was shining on your head here. The second floor was hot like the oven in Hansel and Gretel.
Which is where I made my mistake. Carlton emailed me a few days later, after the AC had been on for a while, and said he noticed the house felt far more comfortable at a higher thermostat setpoint than it did before. Before he liked 72, now 75 felt good. I told him he was wrong. Yeah, like I said, dumb. (Being a classy guy, he took it in stride until I apologized later.)
The reason I thought he was wrong was twofold: first, there was no insulation in the upper attic, so it was hot upstairs. Second, the house was still very leaky. 5000 points is still pretty bad. There was no way that was good enough to deliver better comfort. Or so I thought.
Typically in summer, if I can help a client reduce their humidity levels, they feel comfortable at higher temps. One client likes 80 degrees. (?!) Most clients say 74-78 degrees. We tightened this house just enough that the air conditioner was doing a good job of dehumidification where before the moist outdoor air rushed in faster than the air conditioner could remove it. We hit the tipping point. I just didn’t believe it.
There was likely another factor, too. Since there was absolutely no insulation in the top attic and the heat was pouring in, the AC had to run more to keep up, which means it did more dehumidification.
We had accidentally hit the tipping point. We are all about hitting the tipping point and trying to predict where it will happen. In this case we hit it, but I didn’t believe it!
Winter Comfort and Next Steps
Carlton reported dramatically better winter comfort in his office. Still not quite perfect, but he was happy to work in there where before he wasn’t.
We became friends through this process, he has become a mentor to me. We have breakfast every month or two. In addition to catching up and strategizing about how to jump start my sleepy industry, we extract information from each other. Usually I pump him for feedback about the house, and he pumps me for possible solutions to remaining issues.
One suggestion that grew out of a breakfast was to caulk the wood paneling in his office during a paint job. It turned out the caulk made about a 100 point difference in the blower door reading. His comfort level in the office moved from a 7/10 to a 8/10. Who’da thunk it? We decided to skip the very tricky wall insulation in there, which would require disassembling some of the paneling.
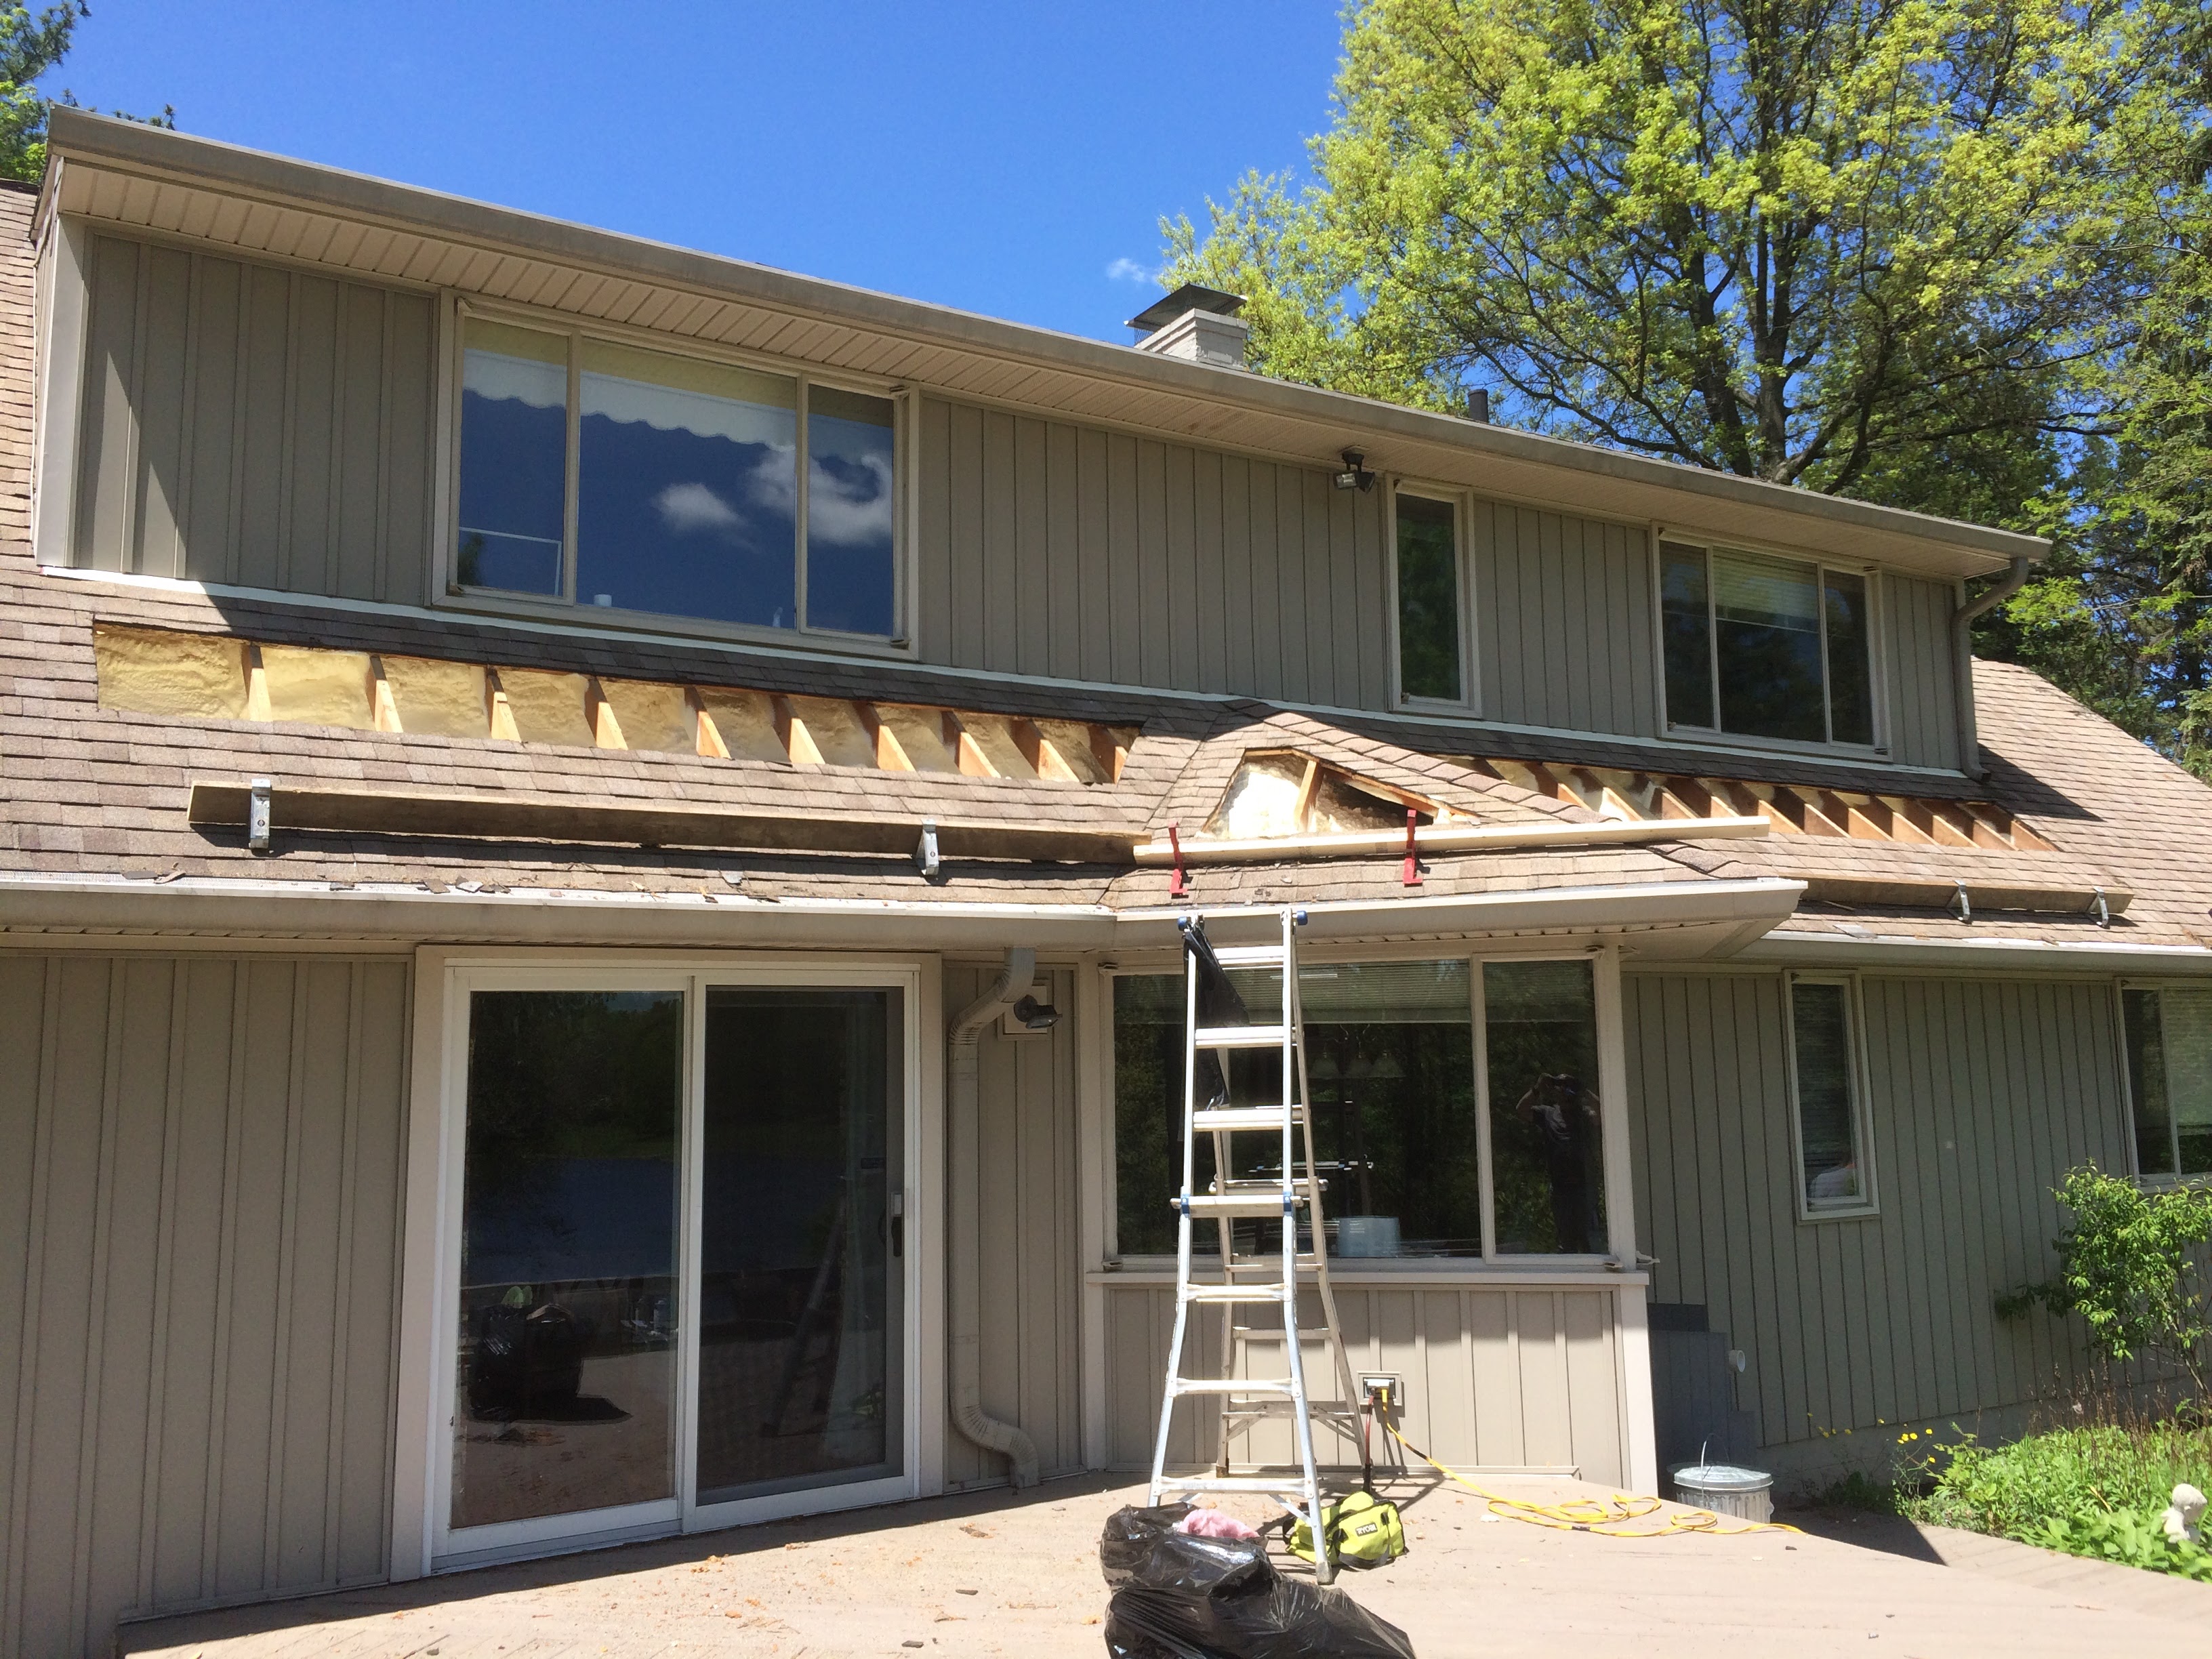
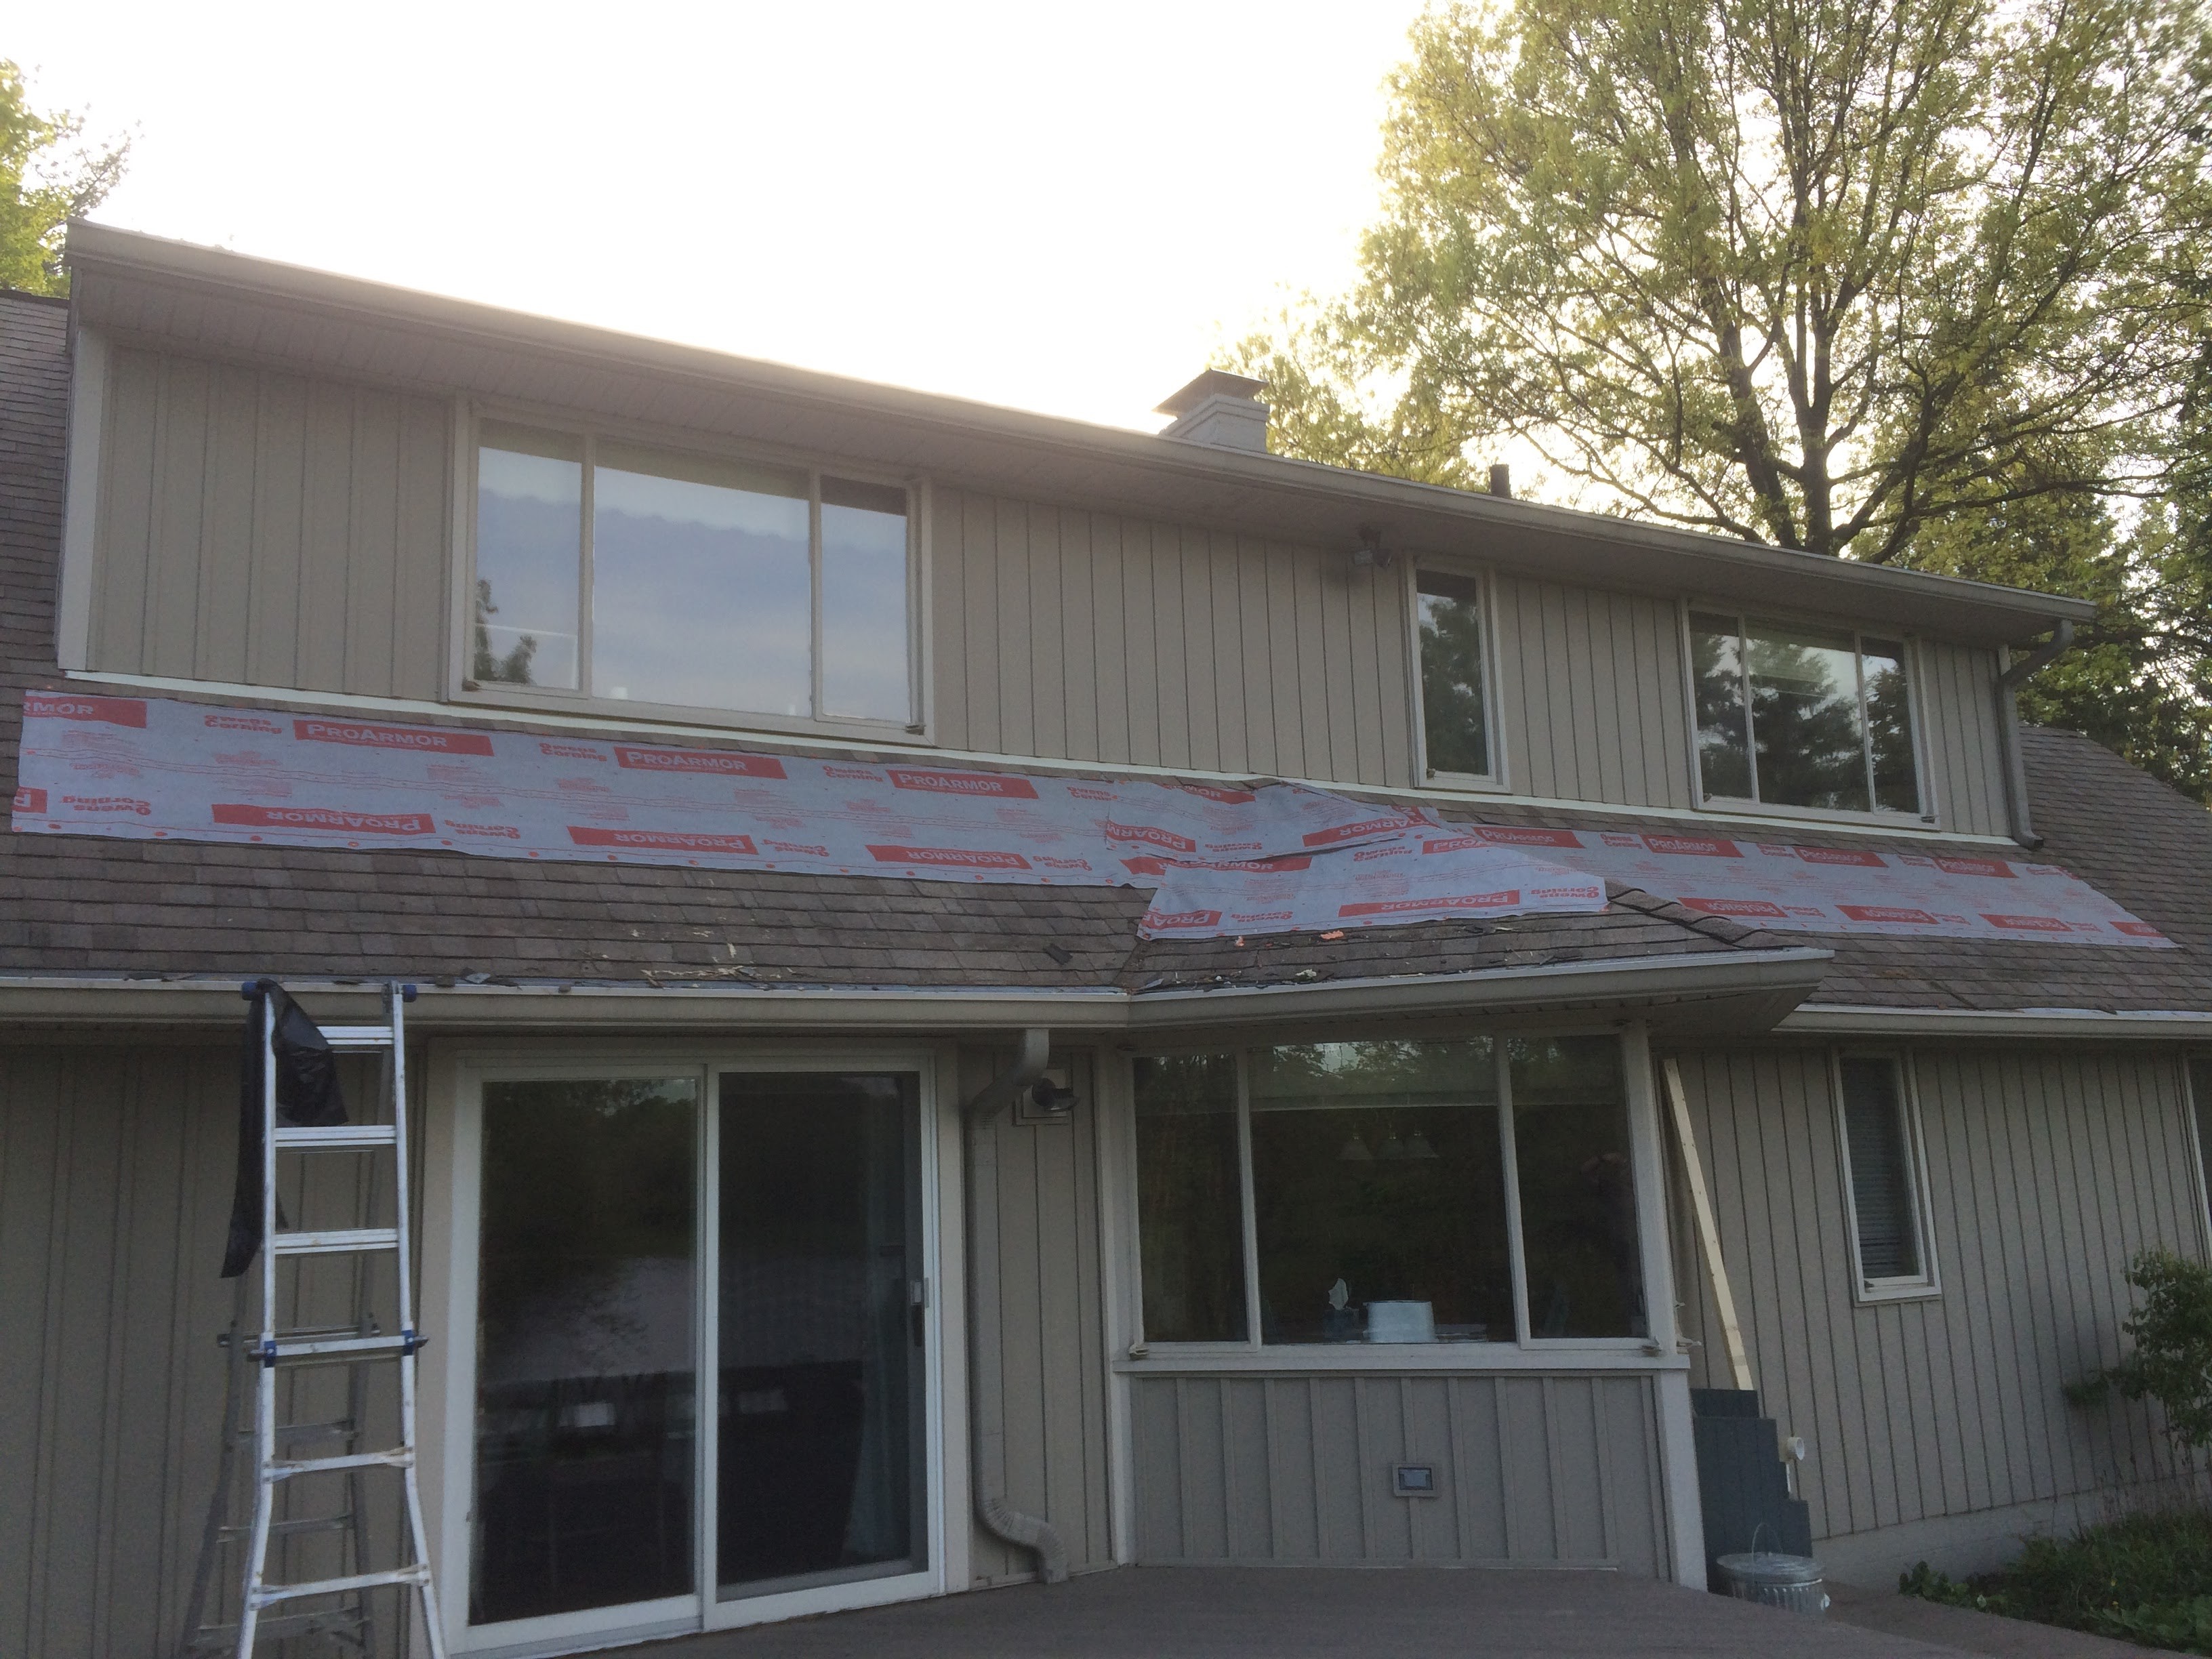
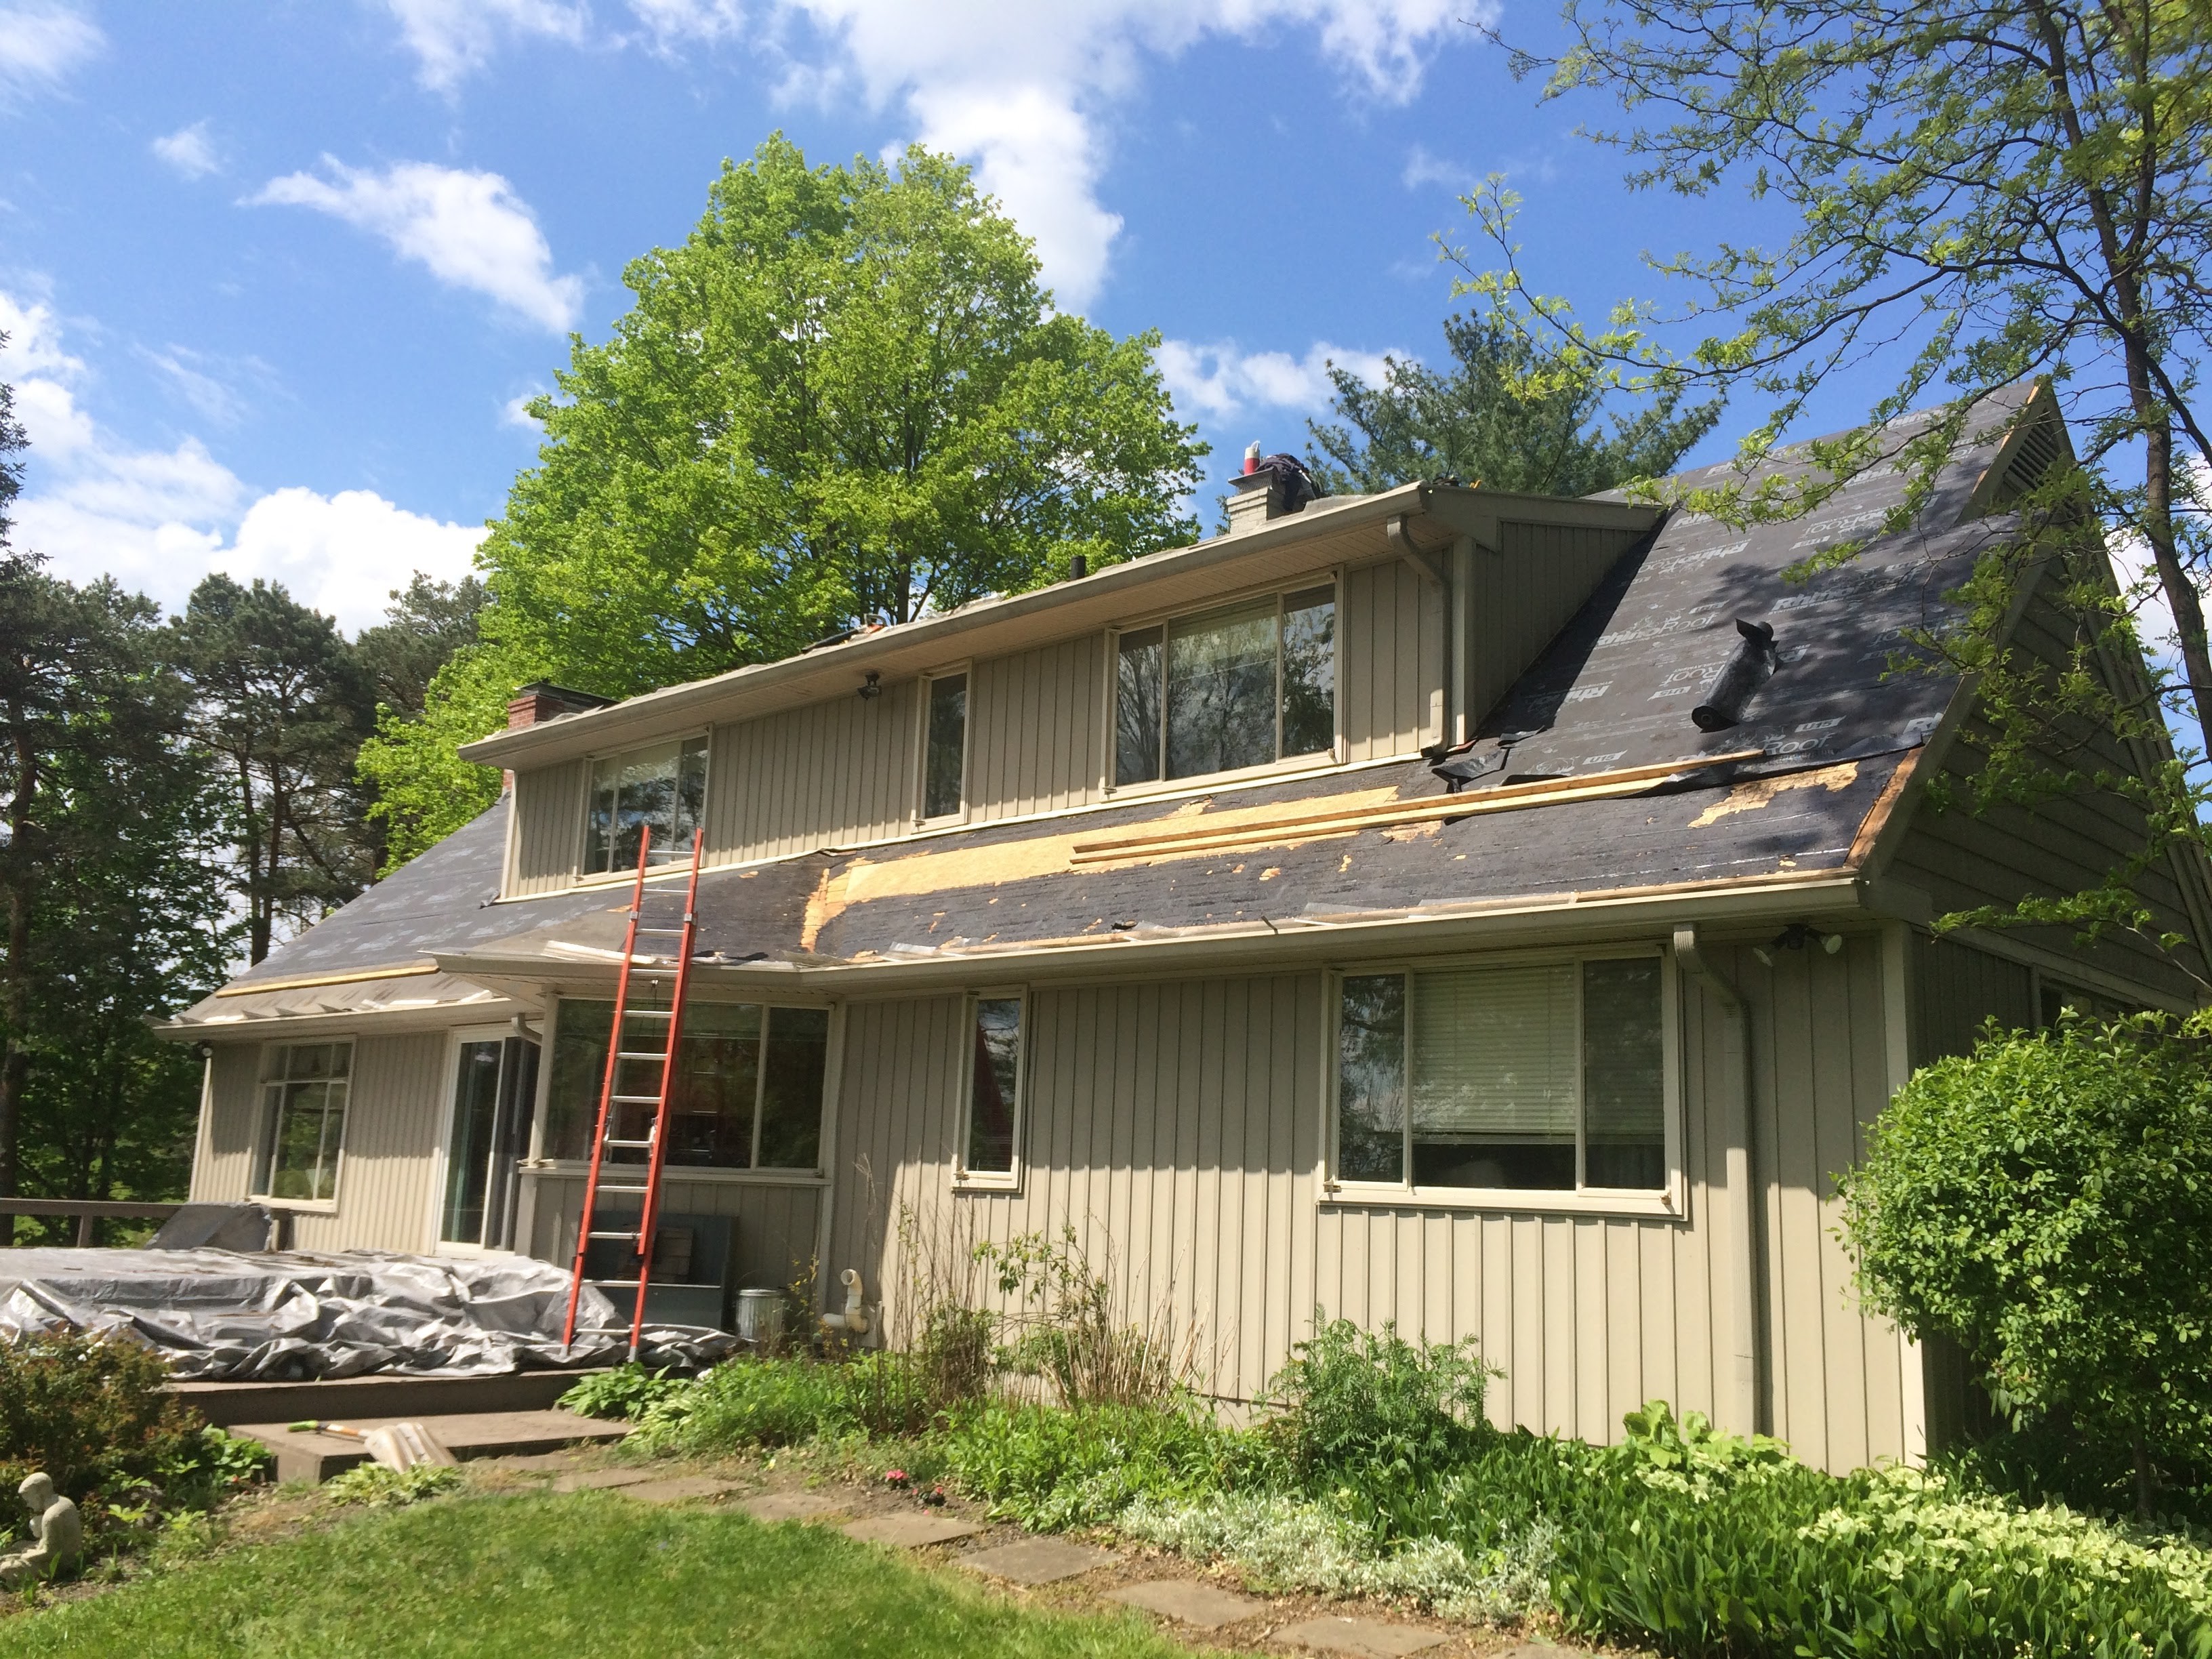
We also discussed the next phase at breakfast, which was sealing two critical areas that just weren’t reachable. We needed to cut open the roof to fix them, but it was too small of a job to interest a roofer, and a major coordination job. Call me crazy, but it’s bad when the rain can come directly into a client home. He planned to reroof the house, so we figured out how to do both the roofing and air sealing projects, which became Phase 2.
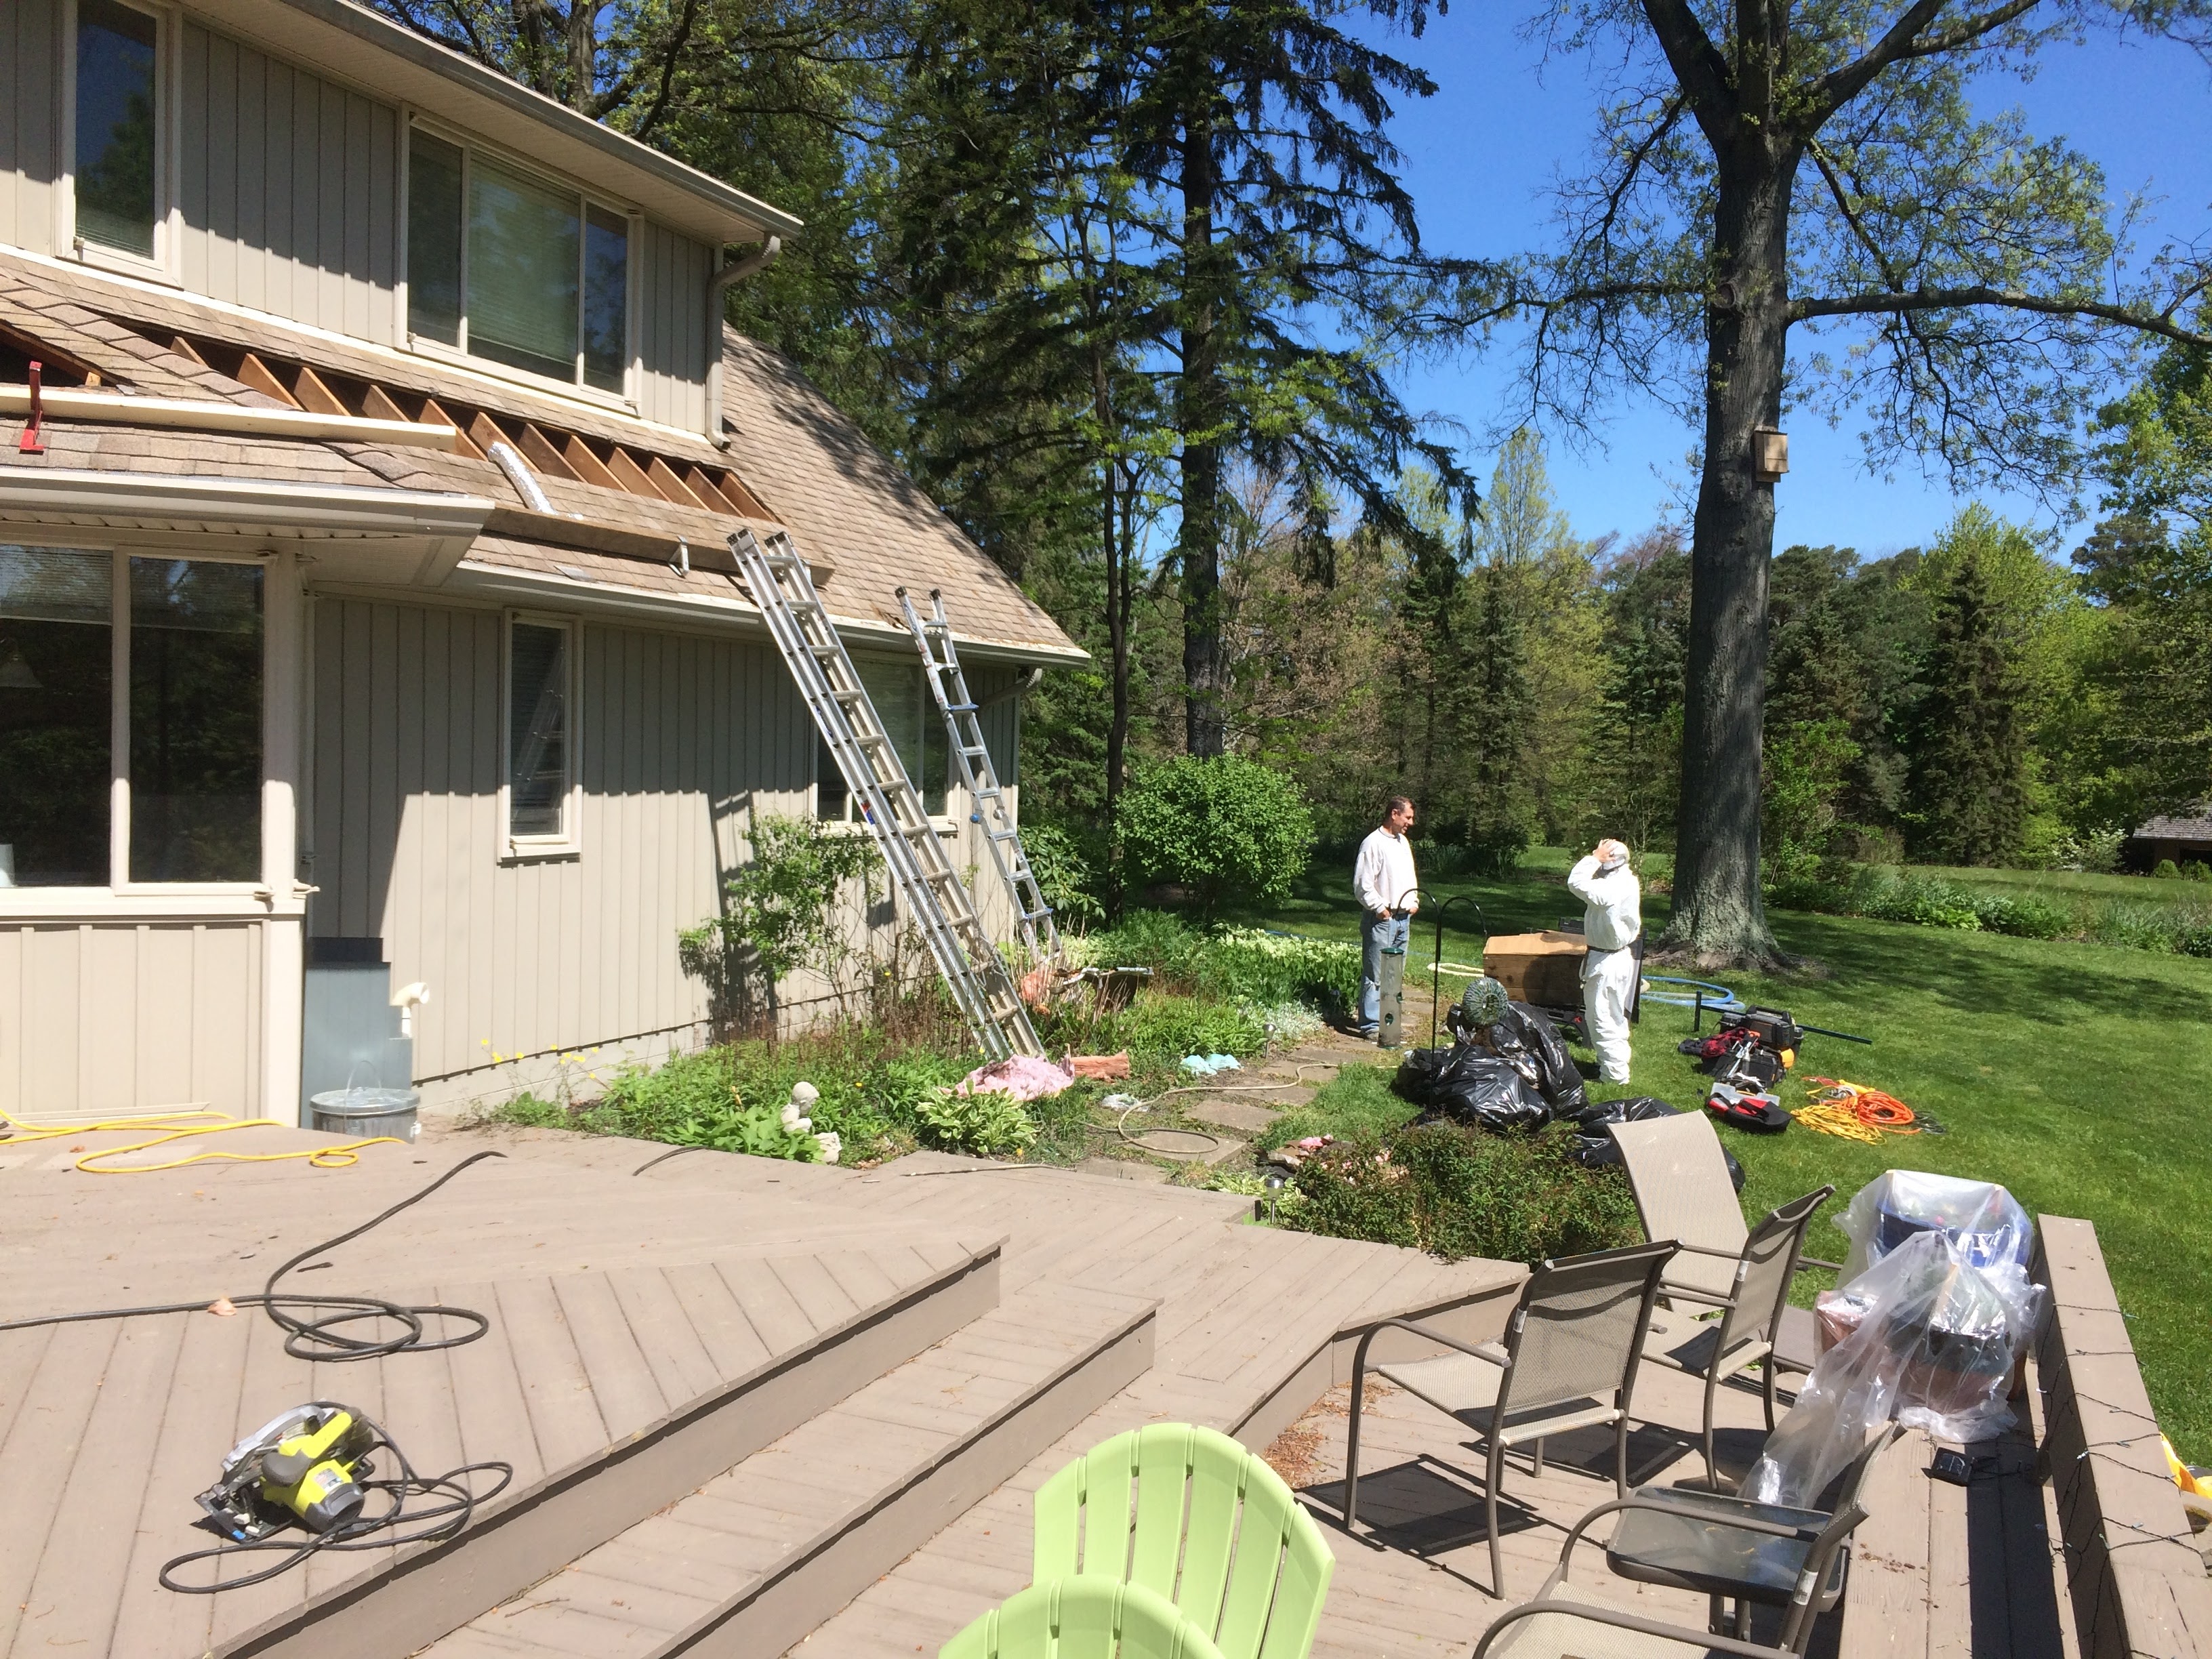
Phase 2 - May 2016
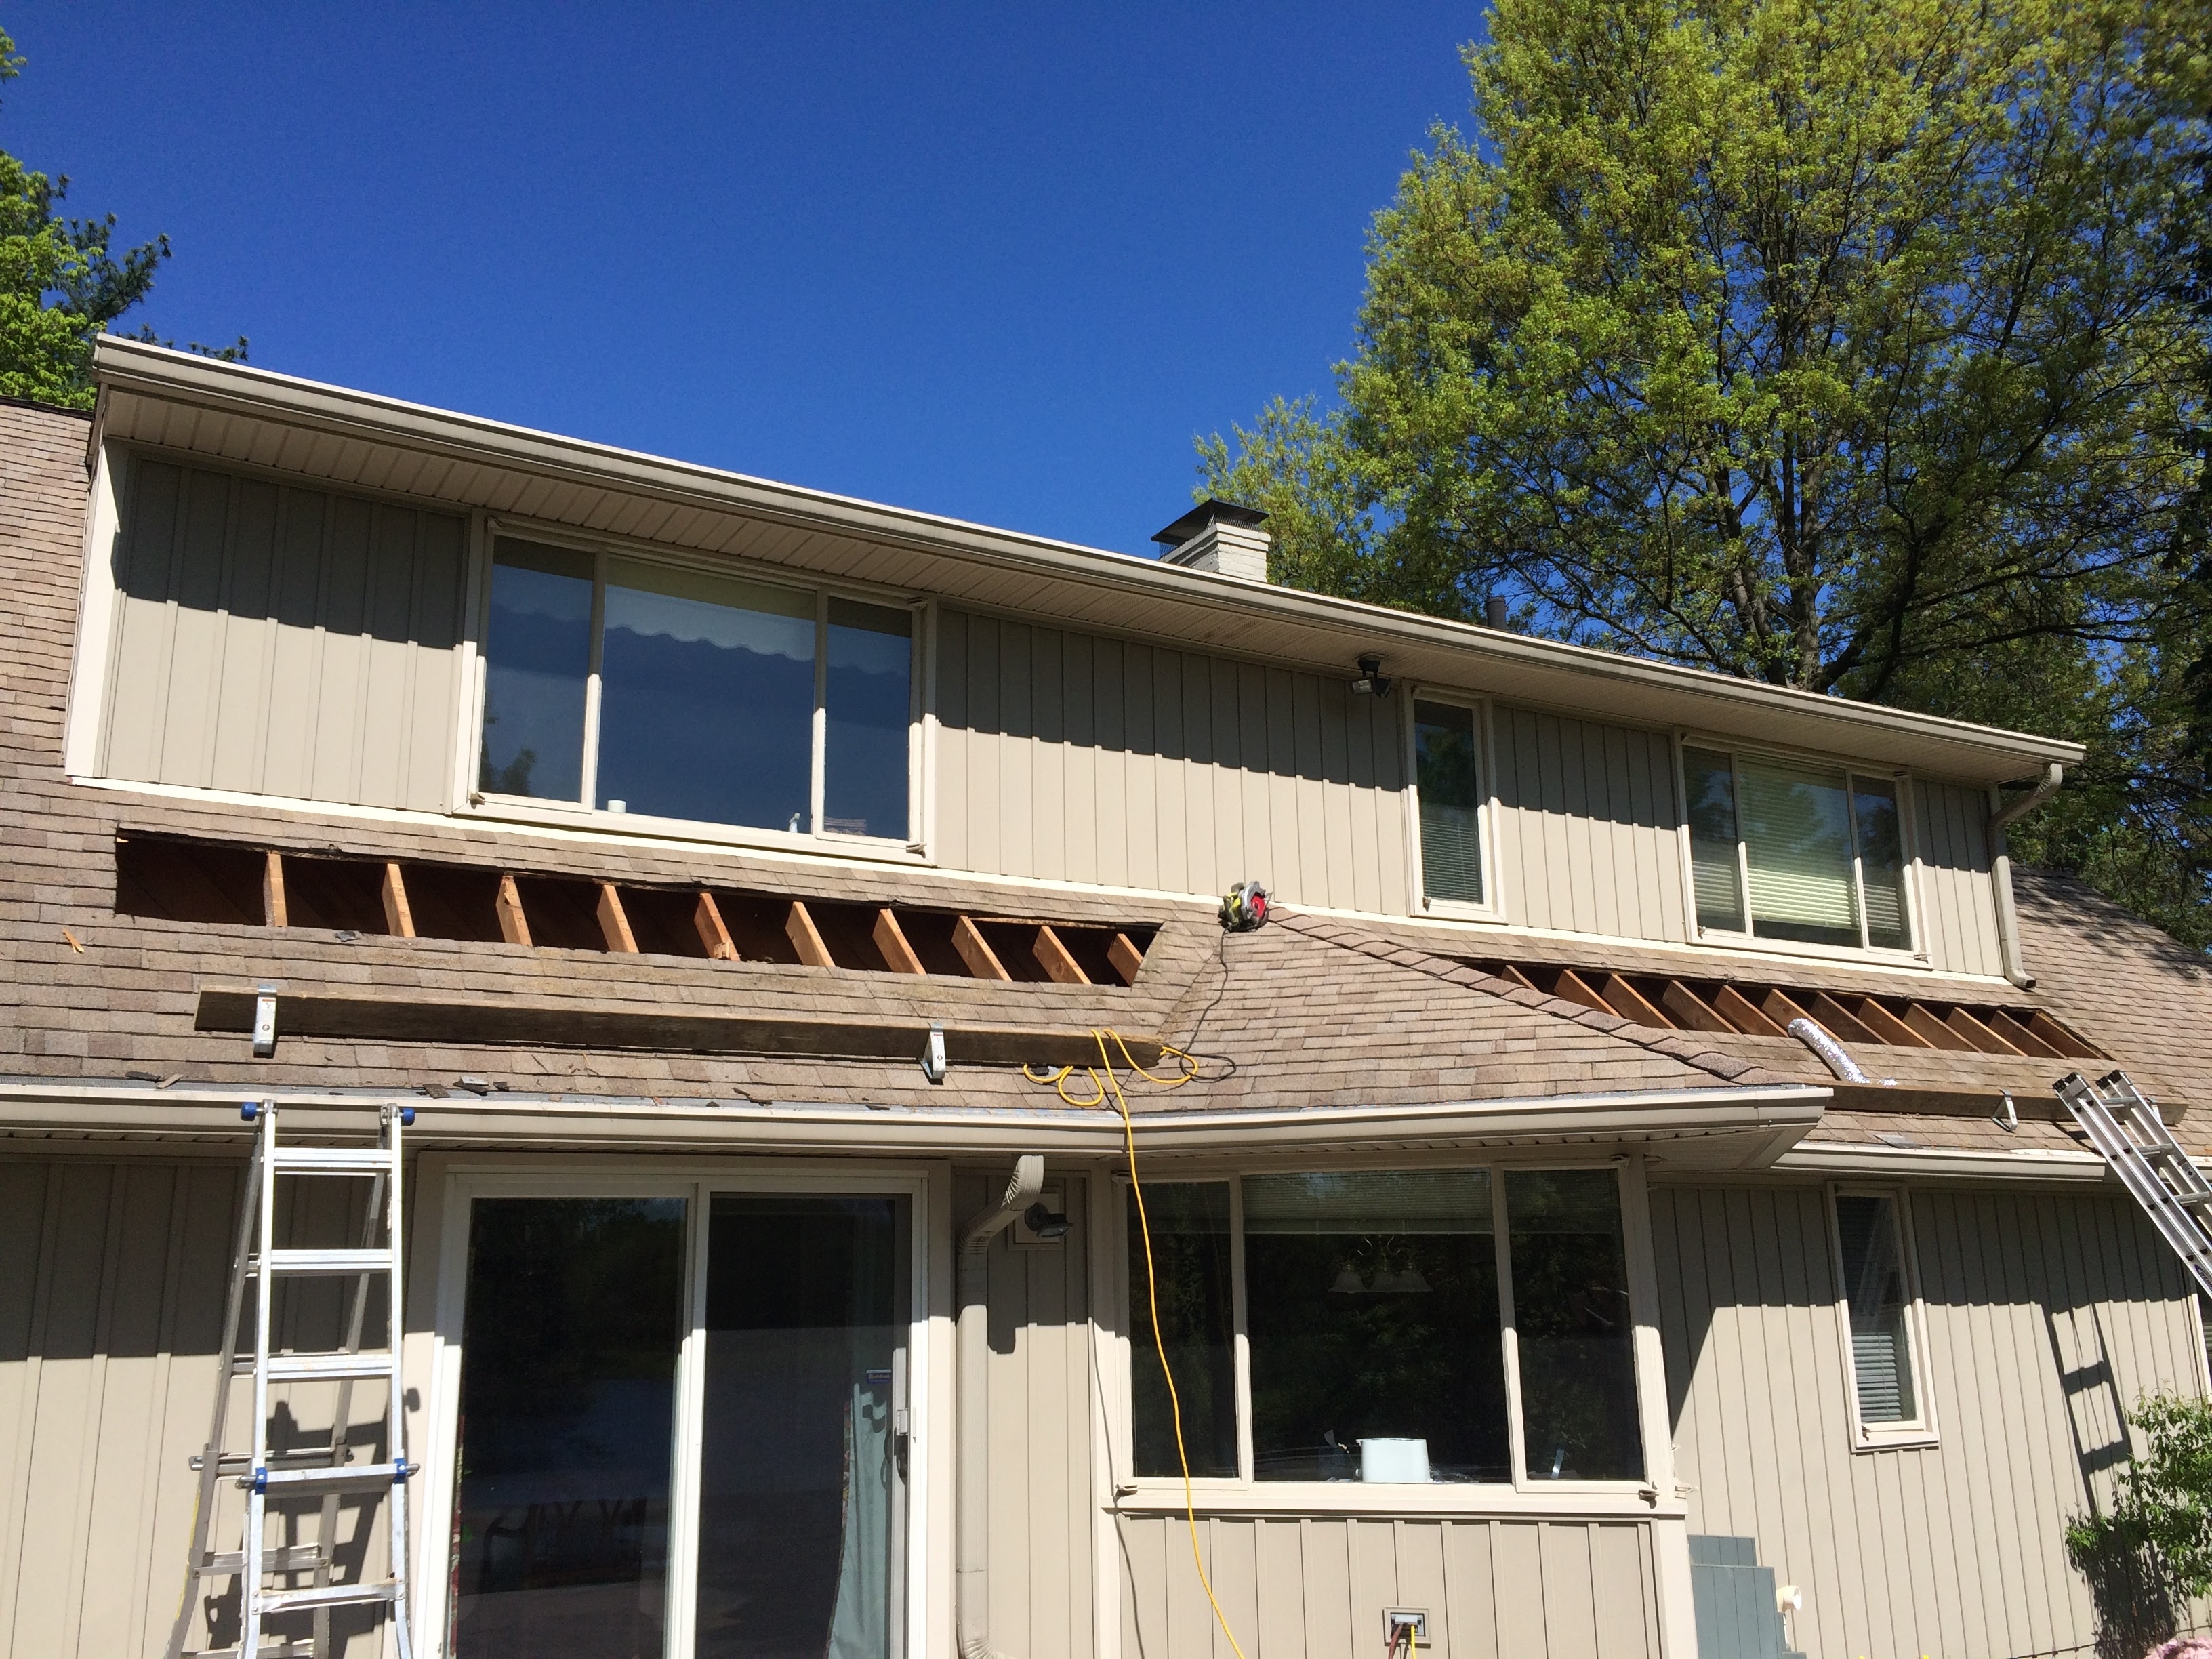
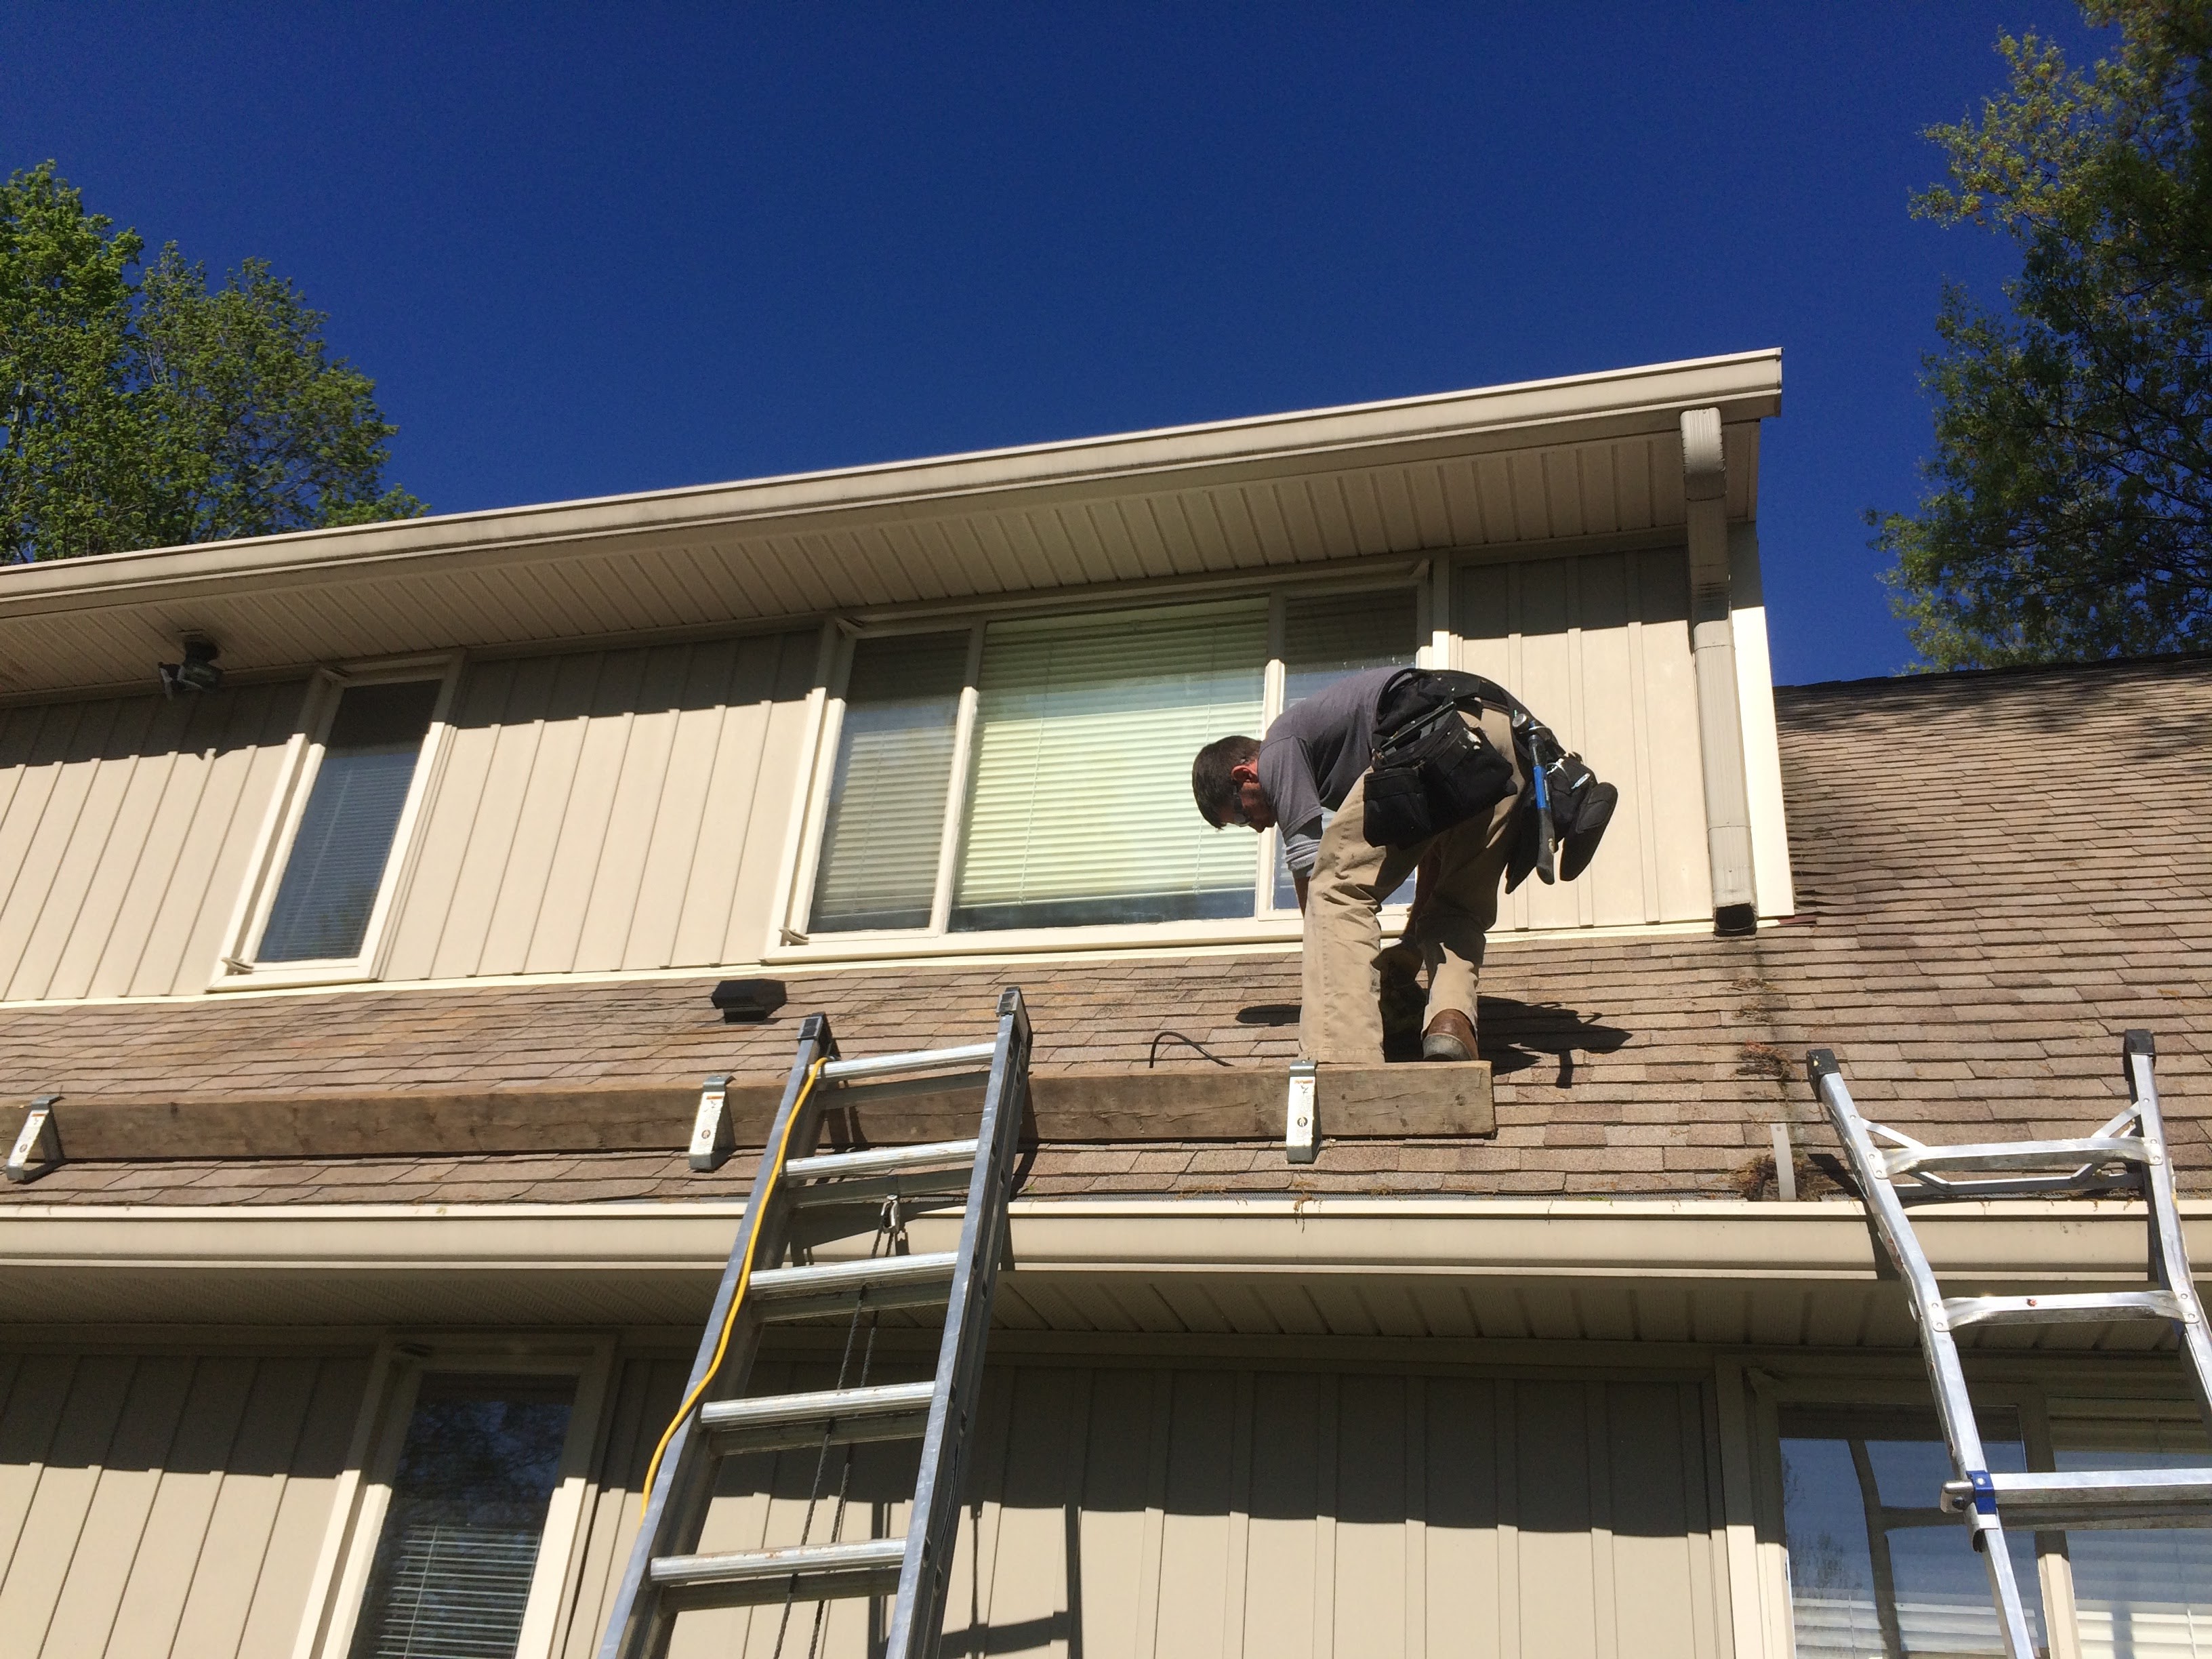
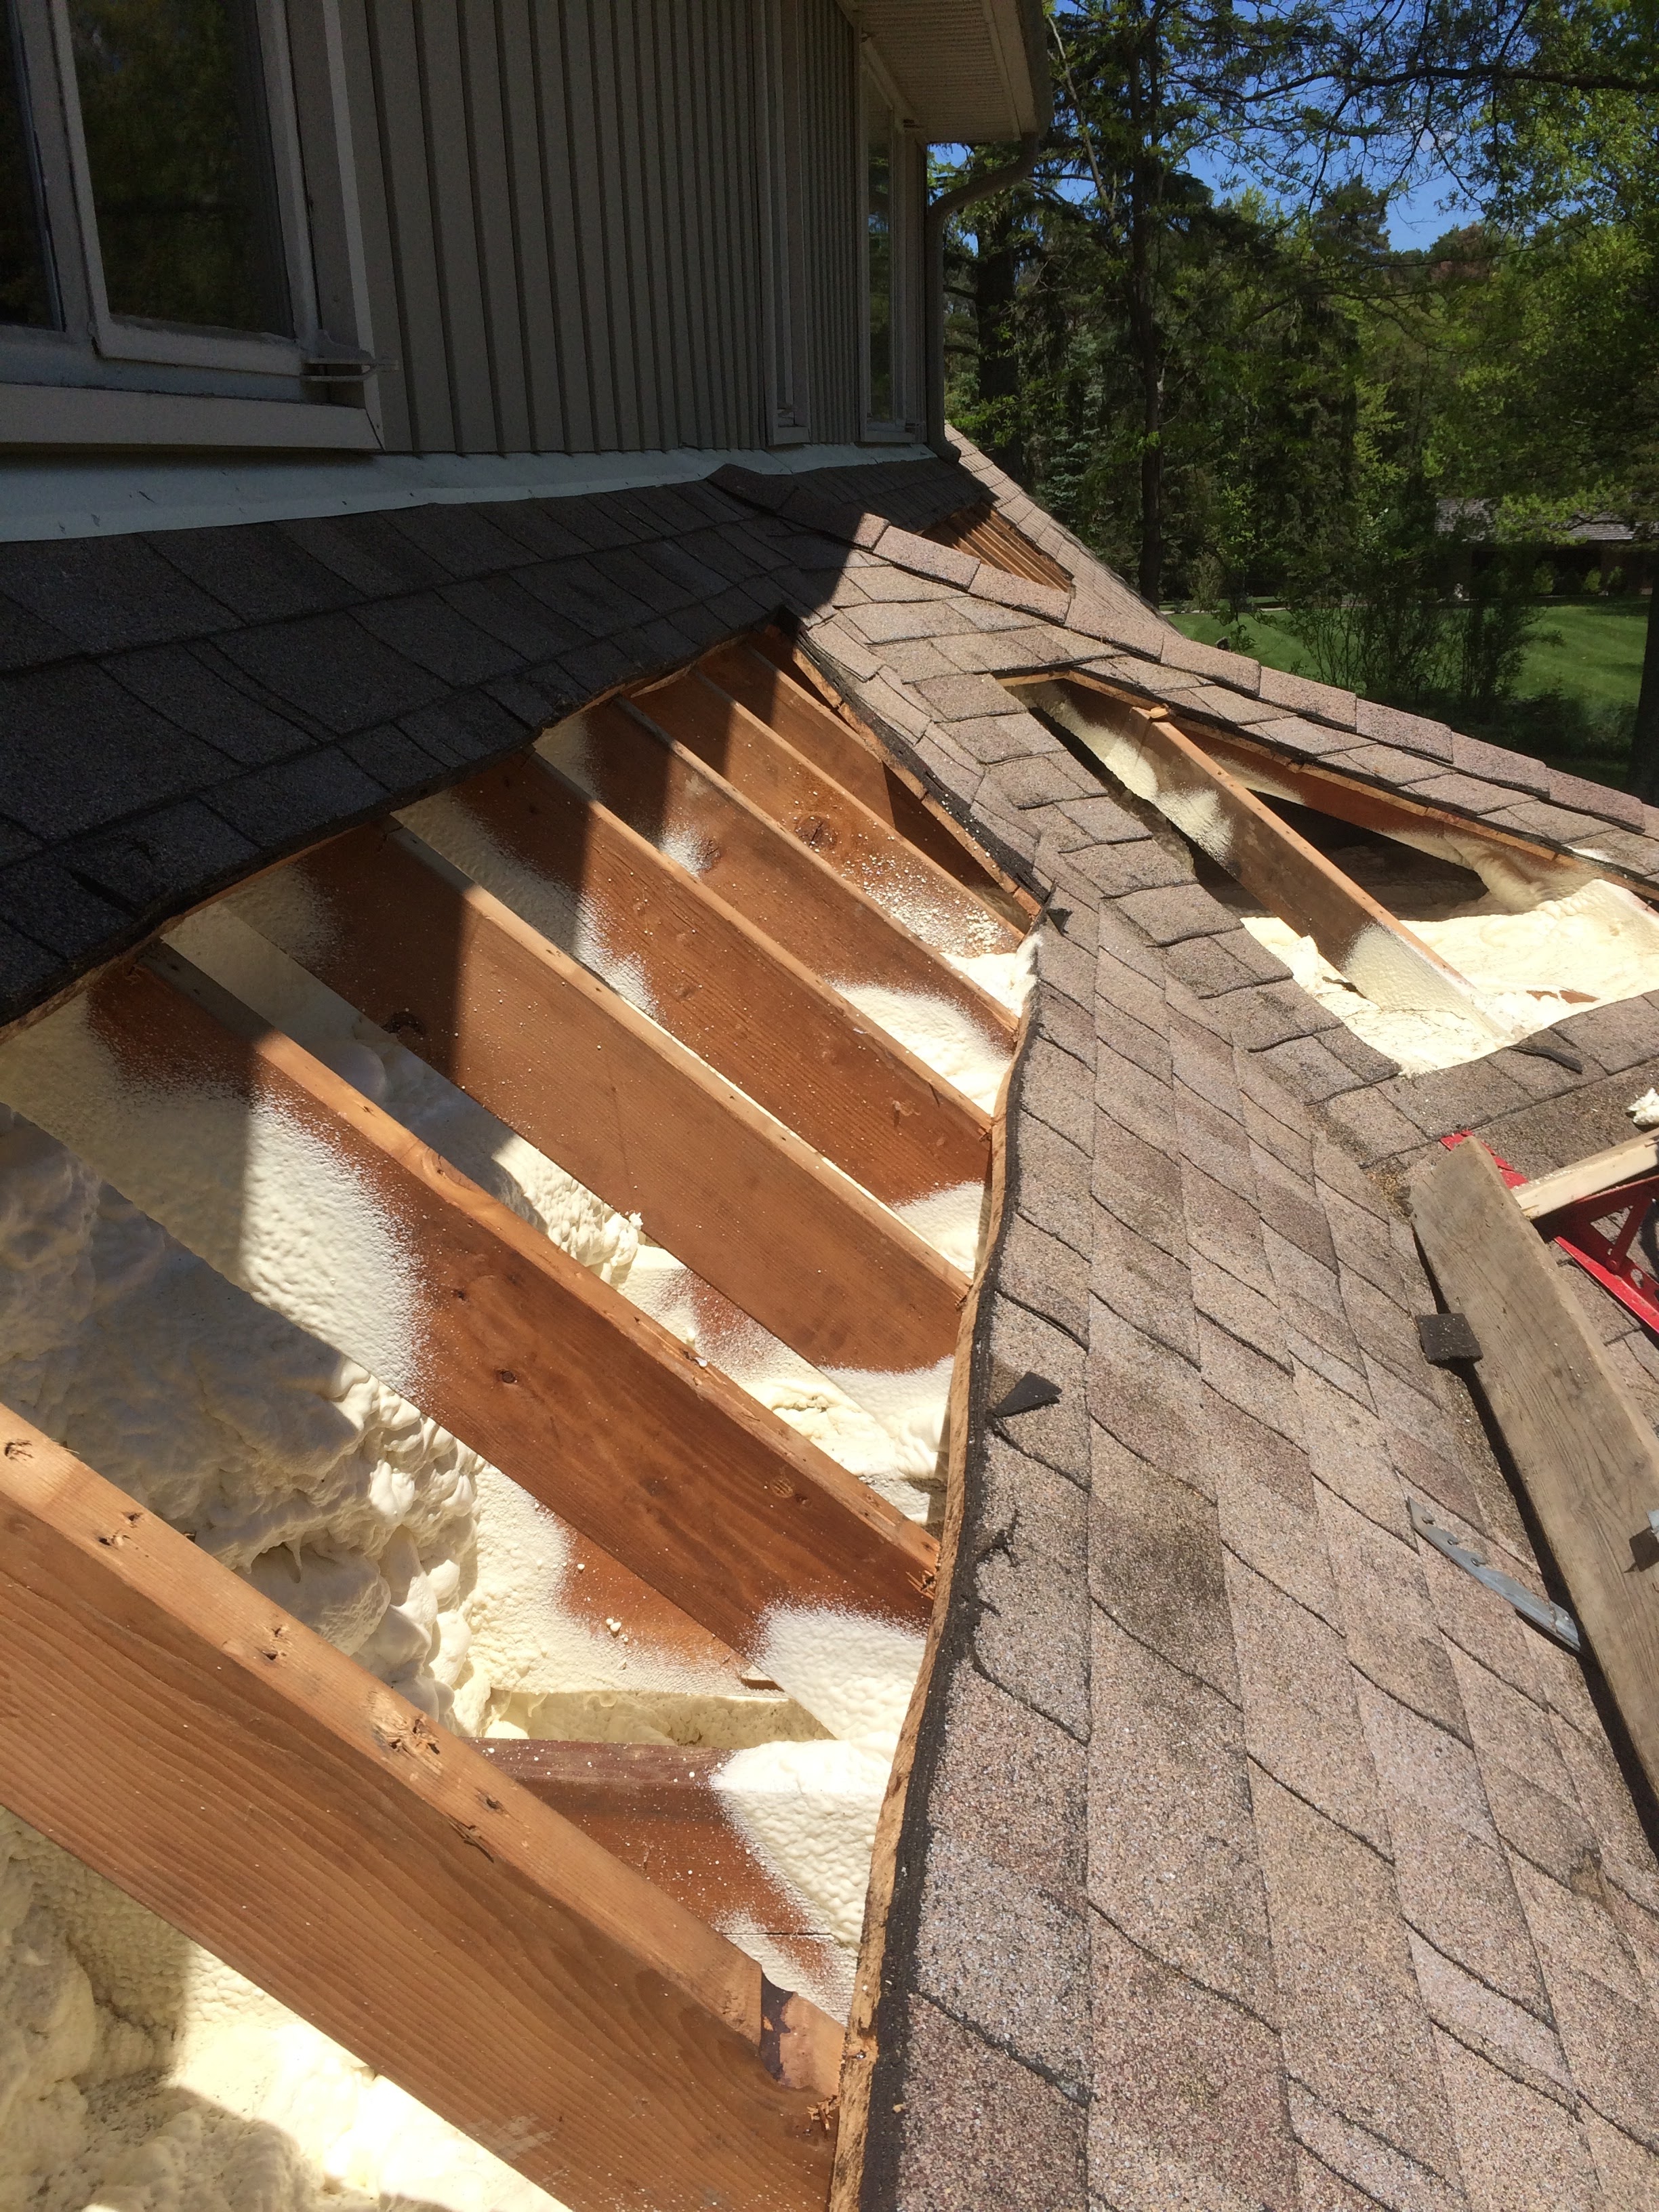
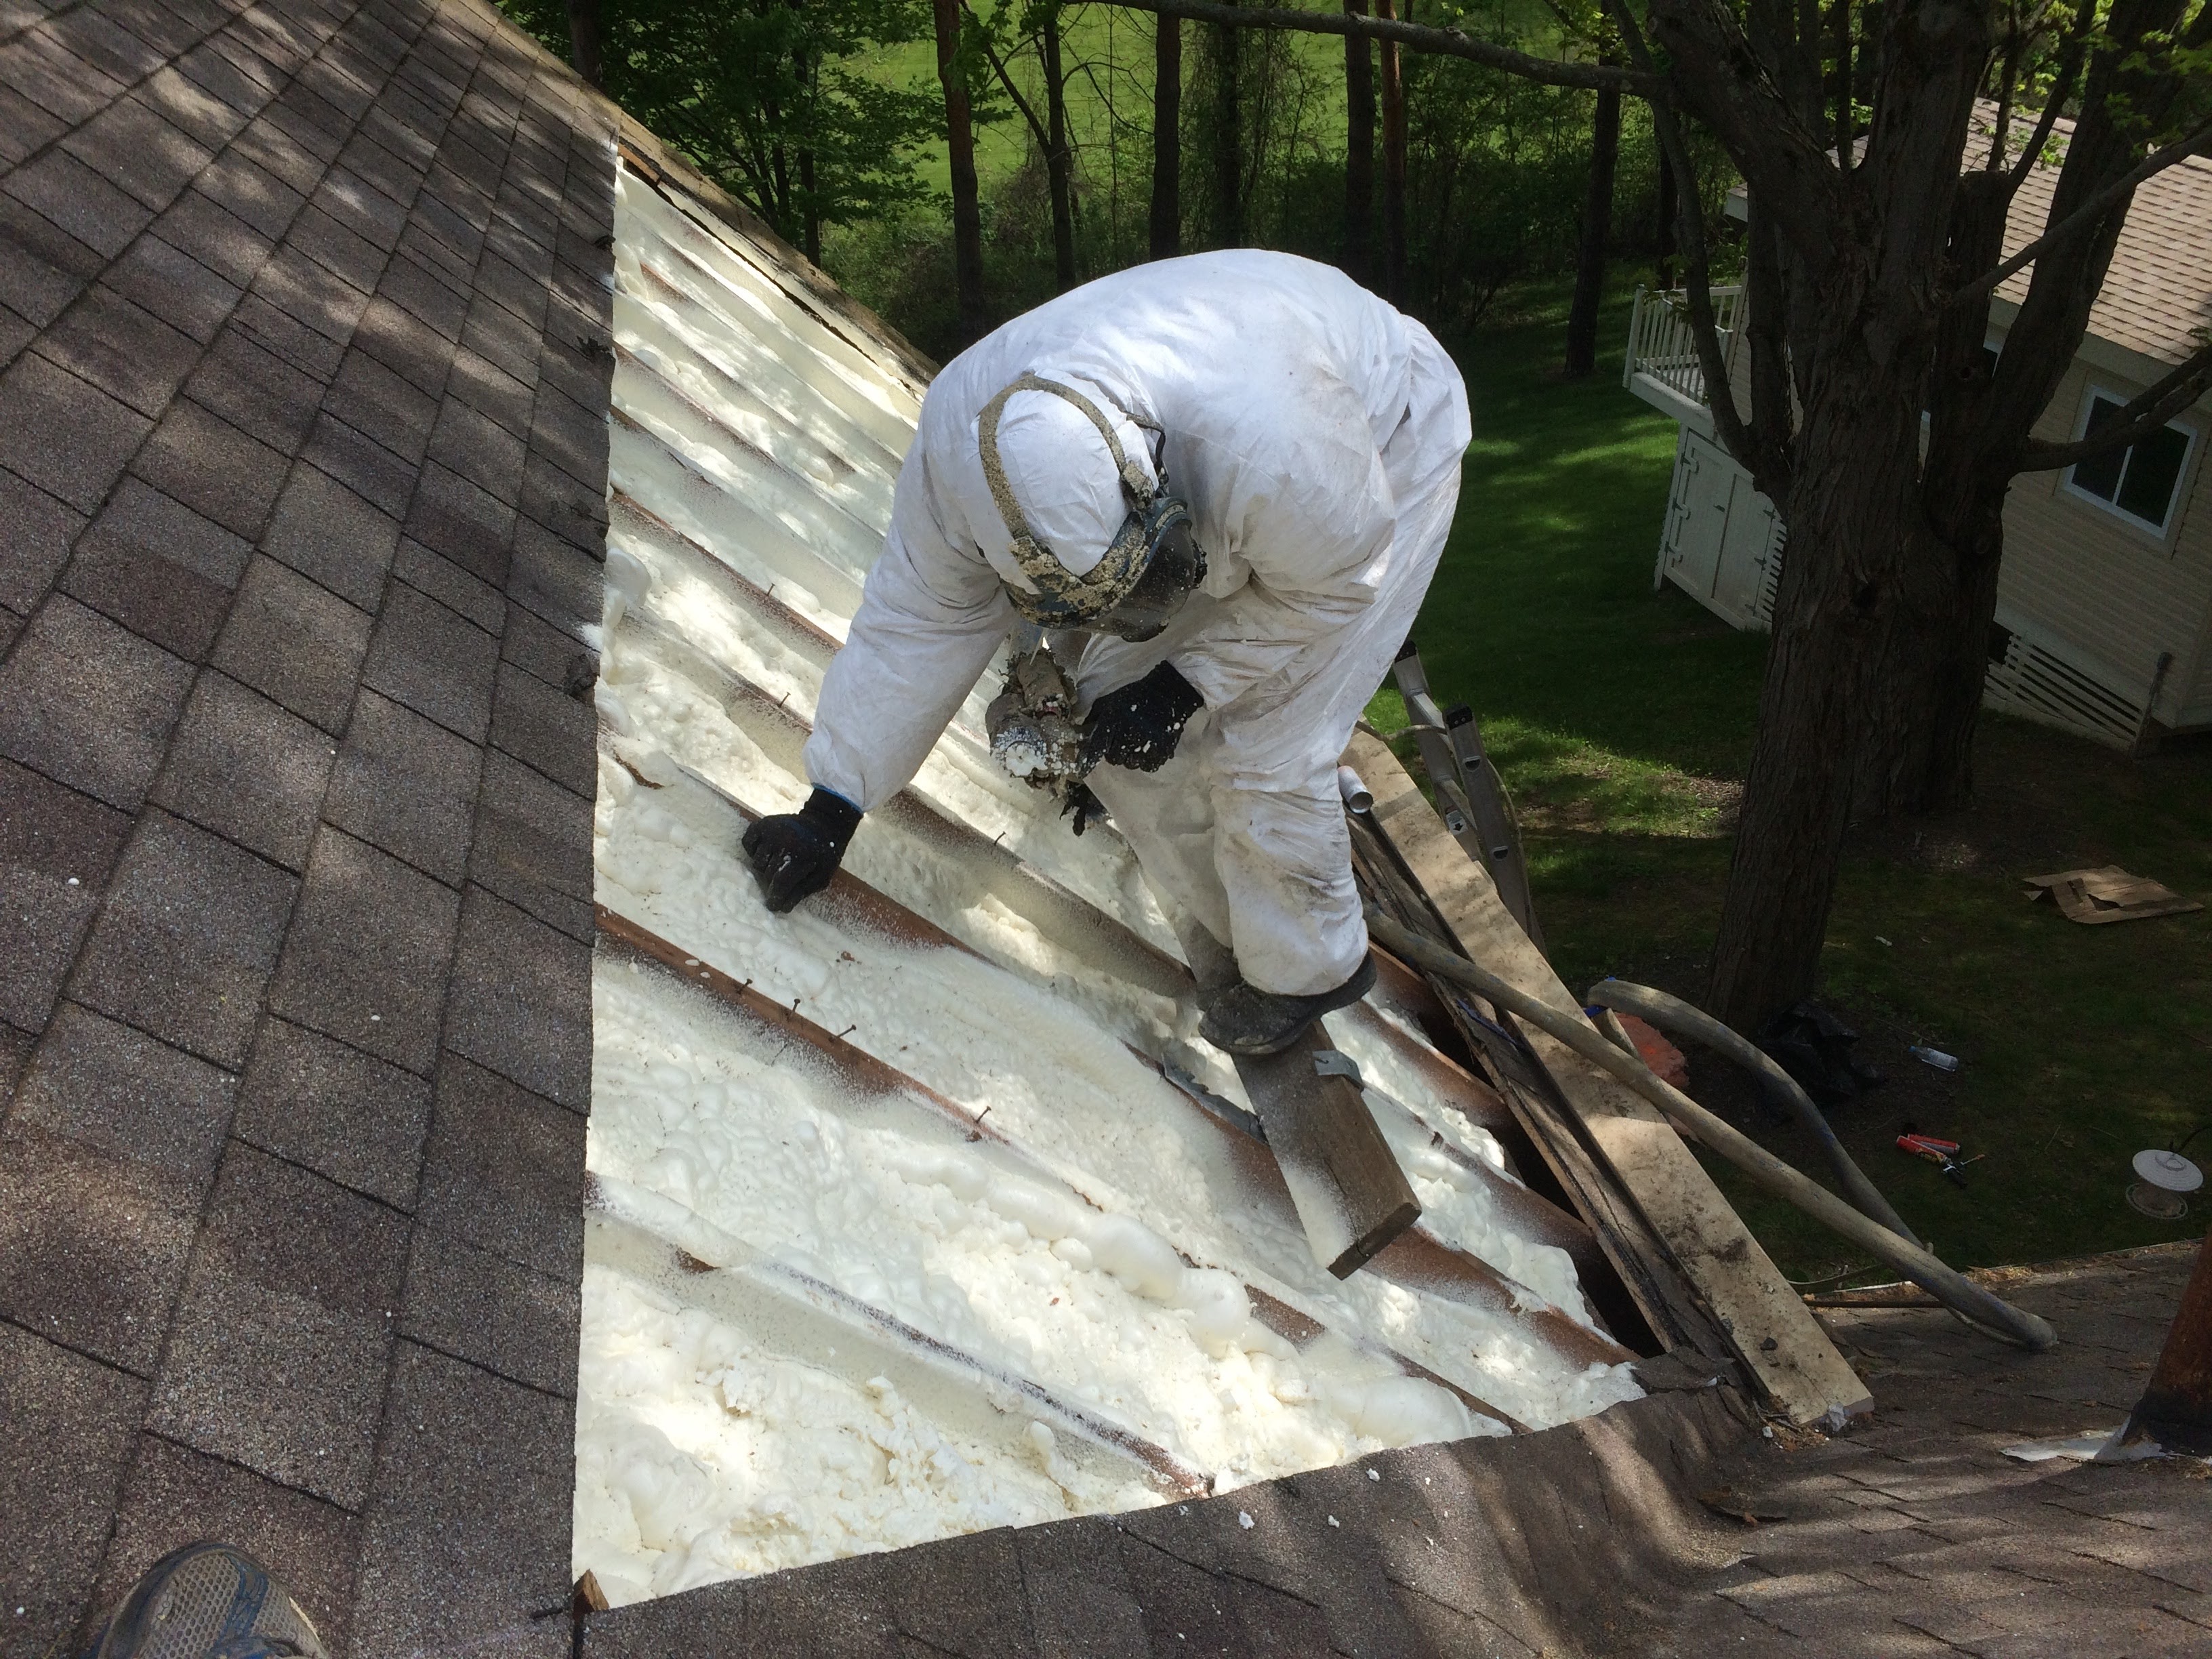
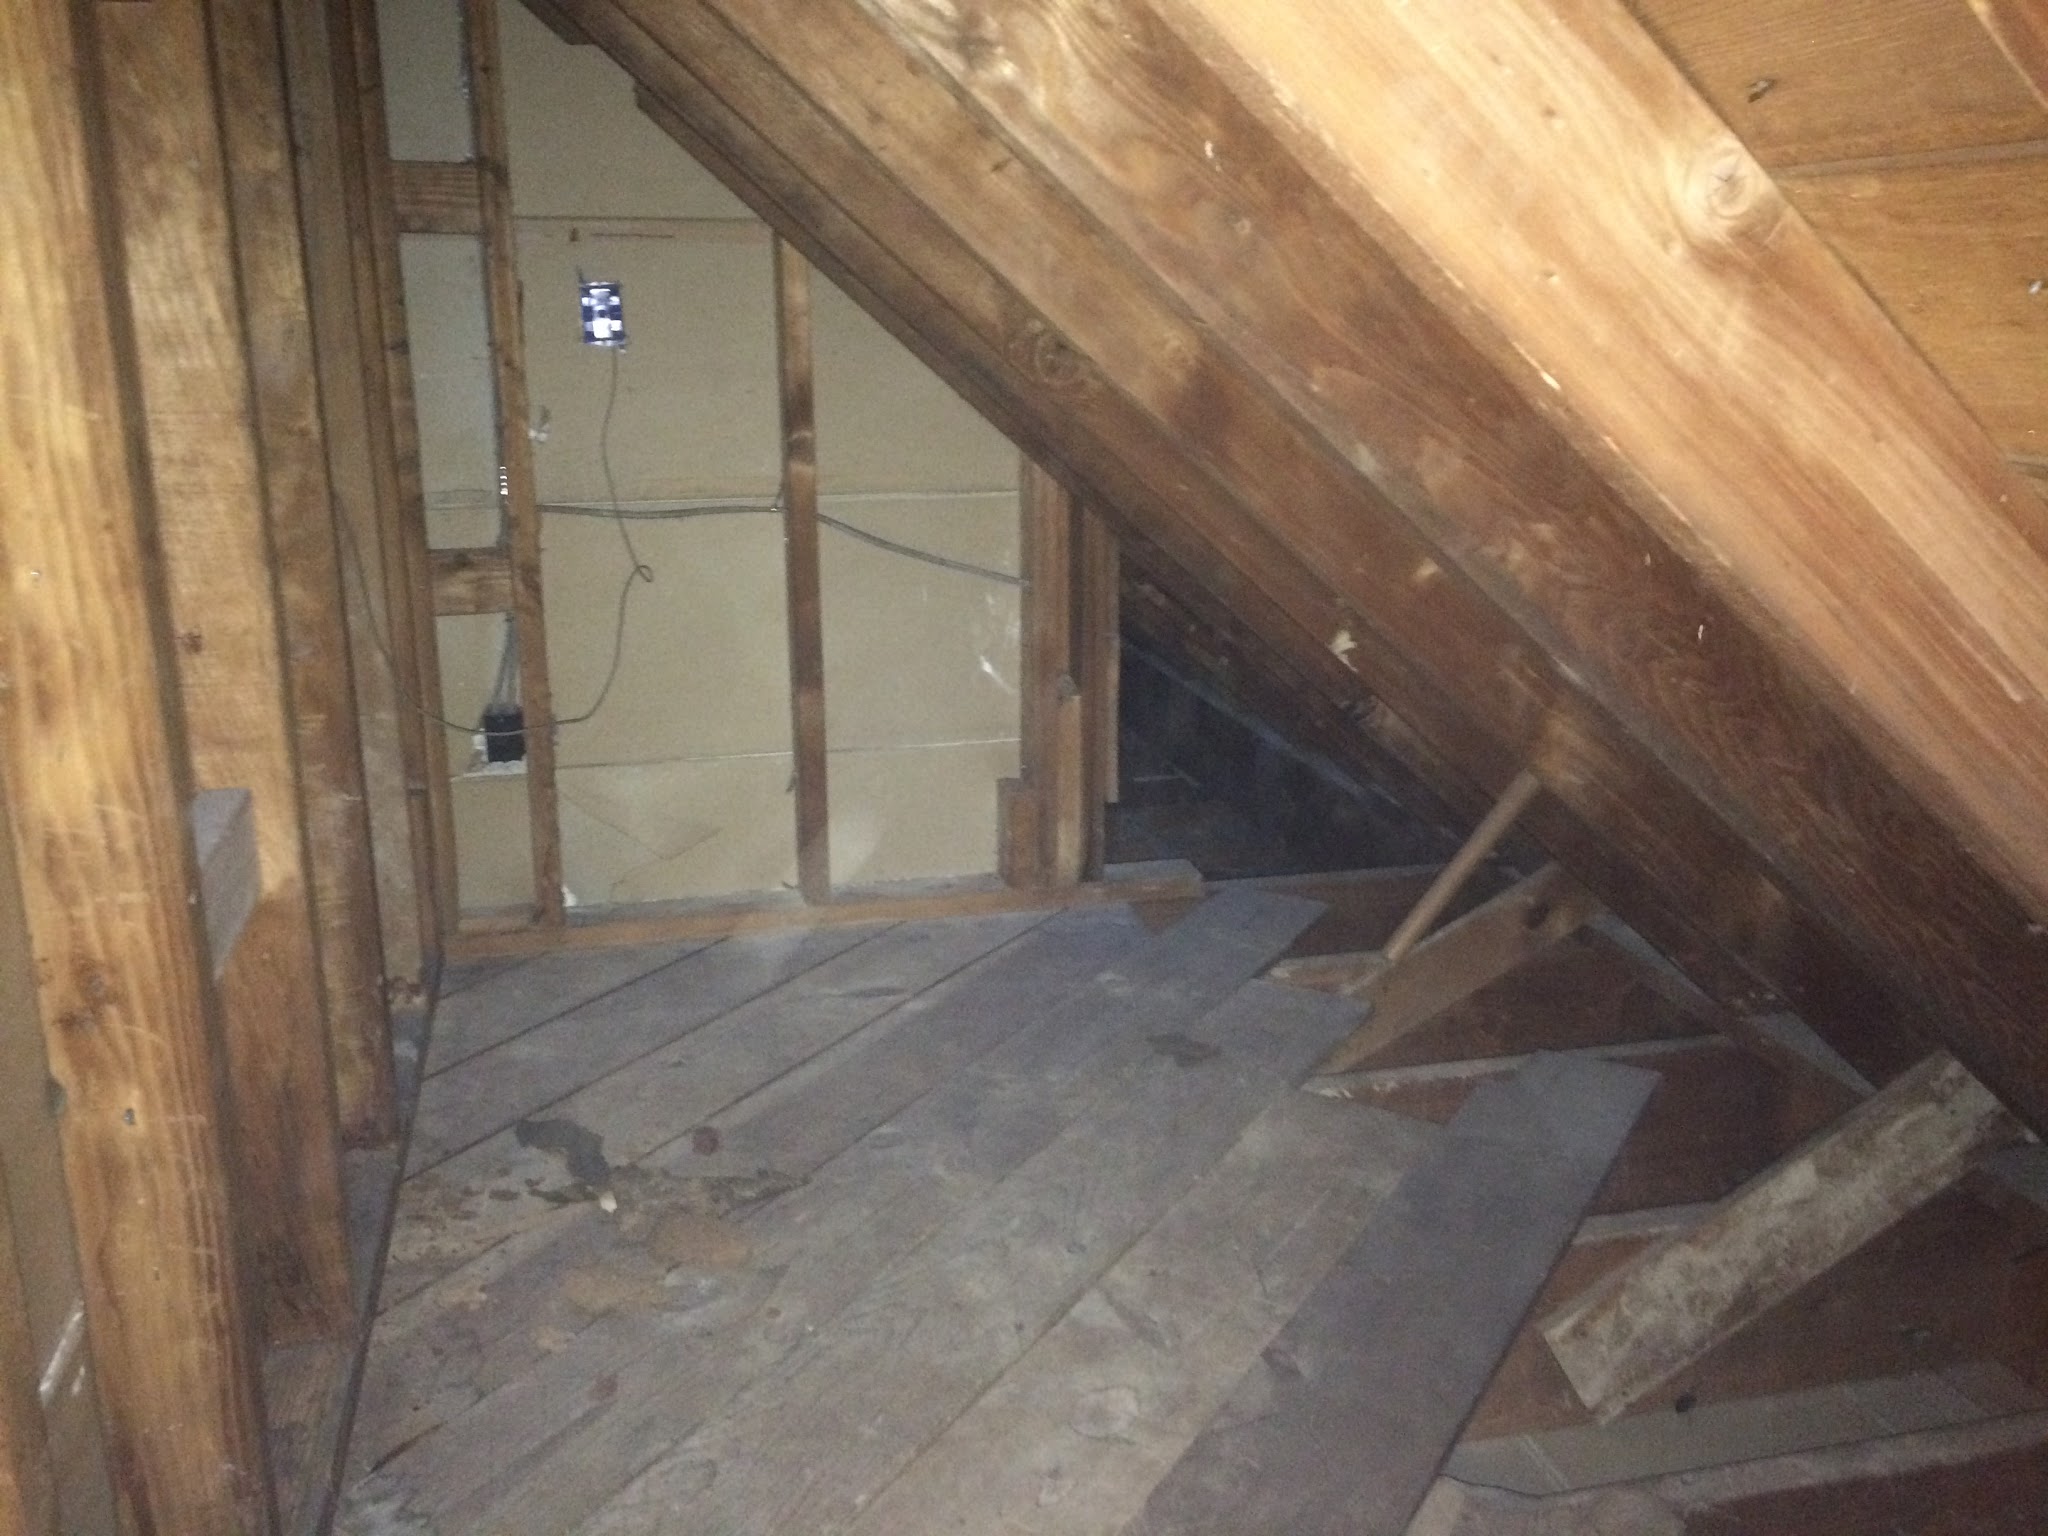
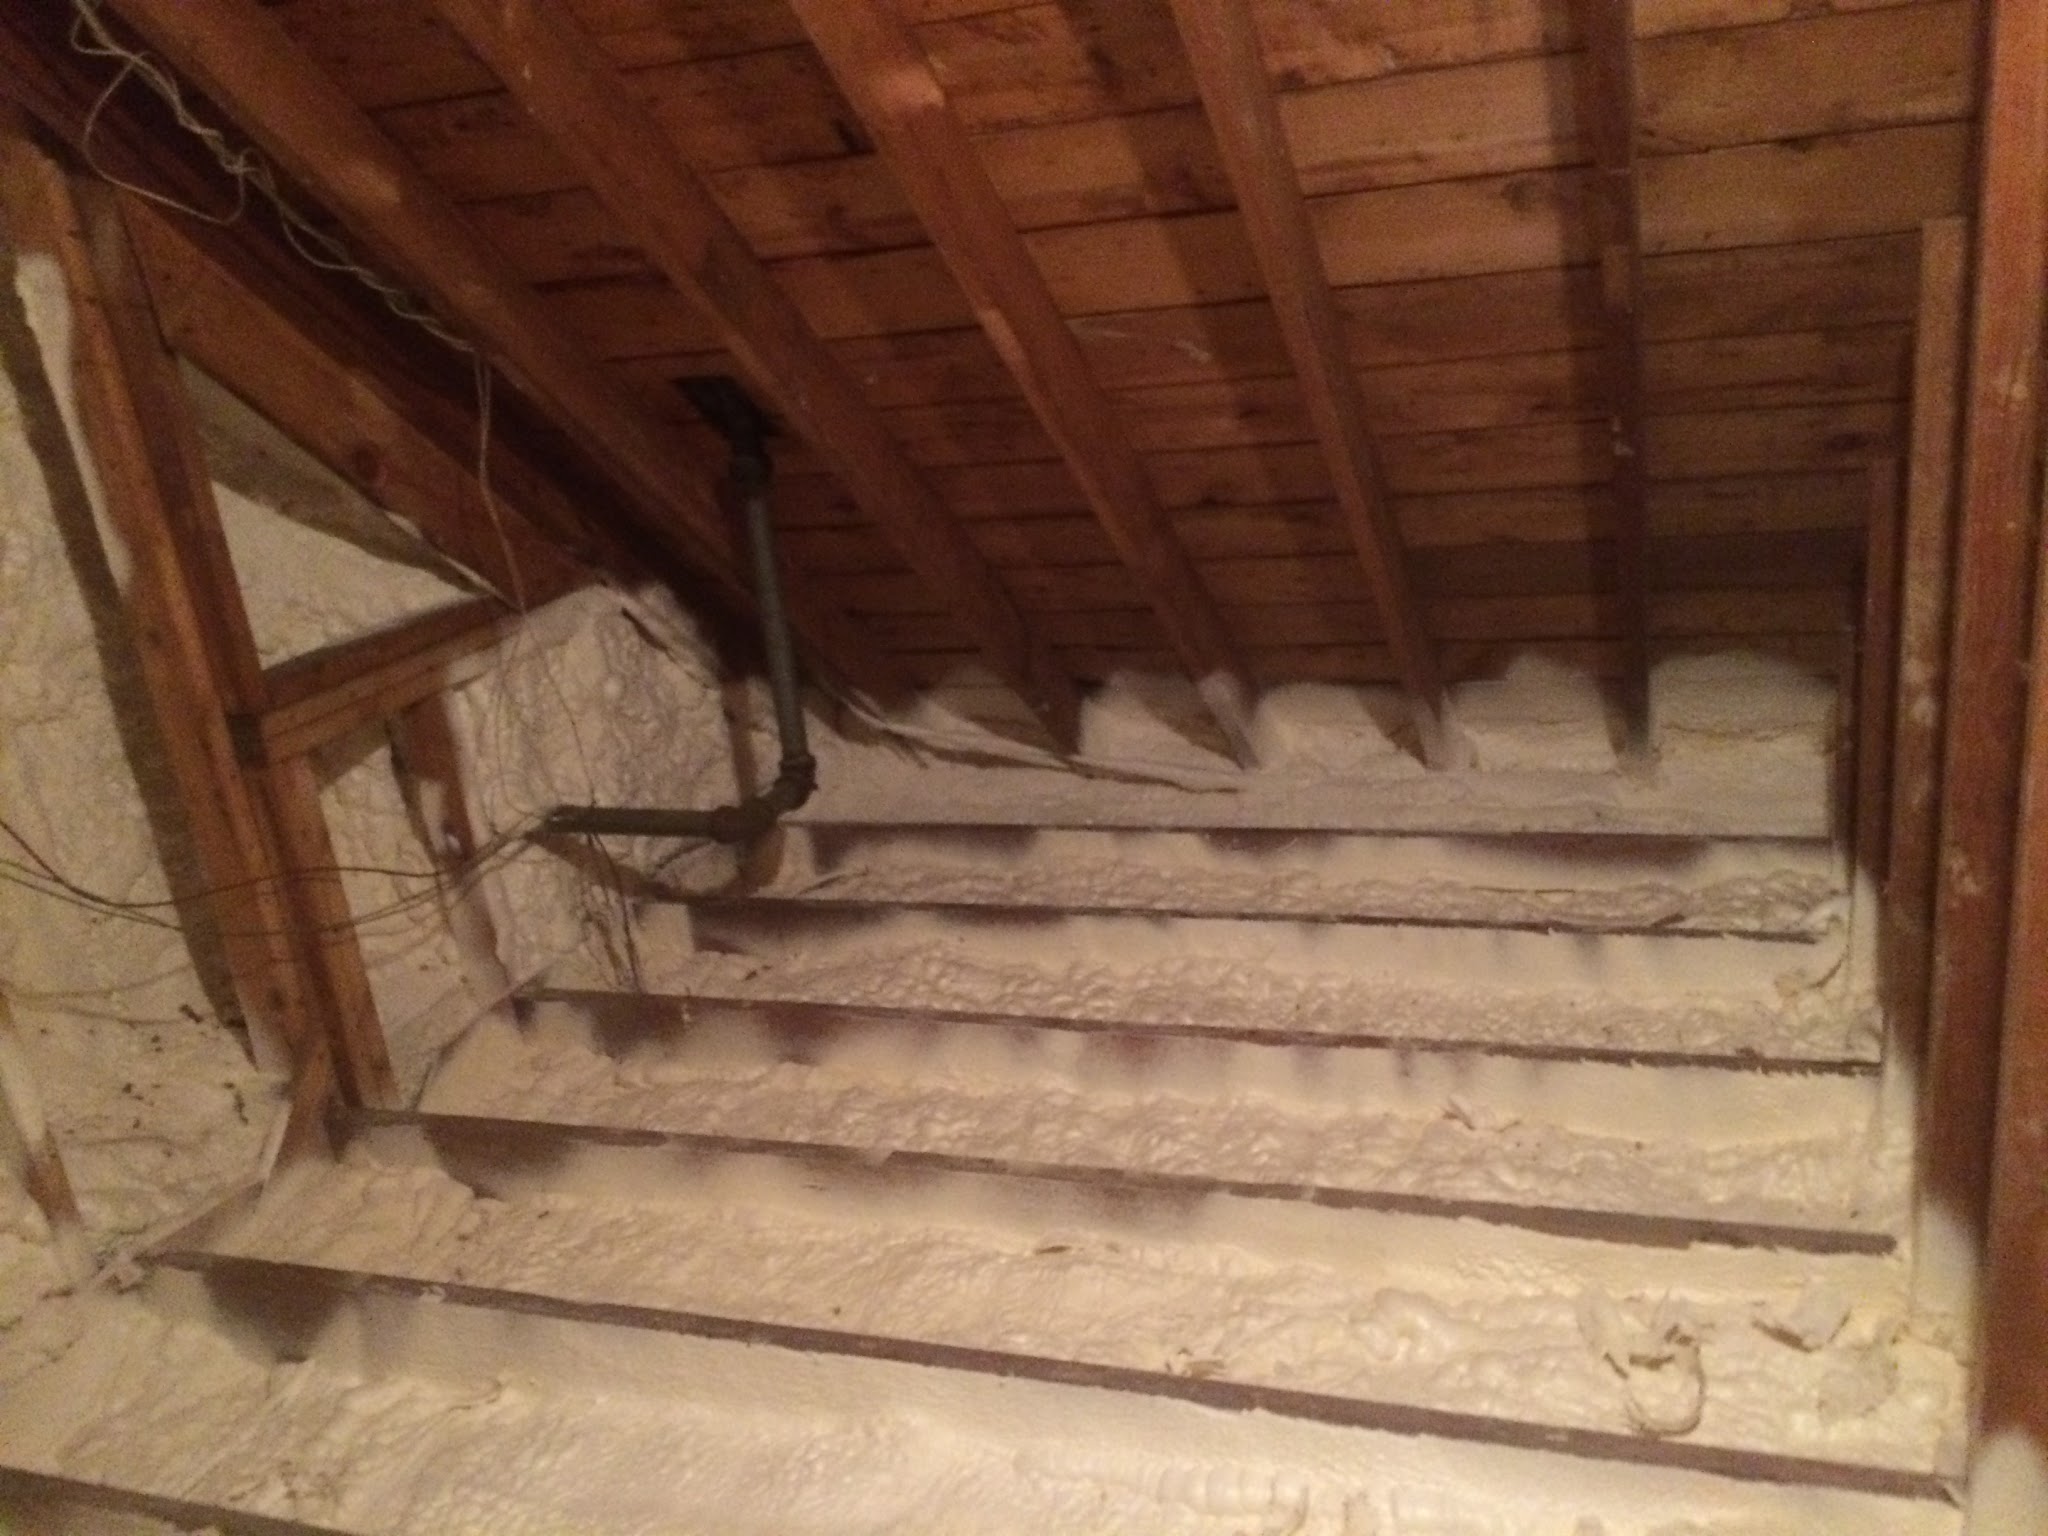
The comfort in the master bedroom upstairs and the guest bedroom was still sub-par. Note the part of the roof that’s opened up. My gut told me there was another 1000 points of leakage lurking in the back of the house inside those tiny little knee wall attics that were too small to access. (I was right… well almost. It was 885 points.)
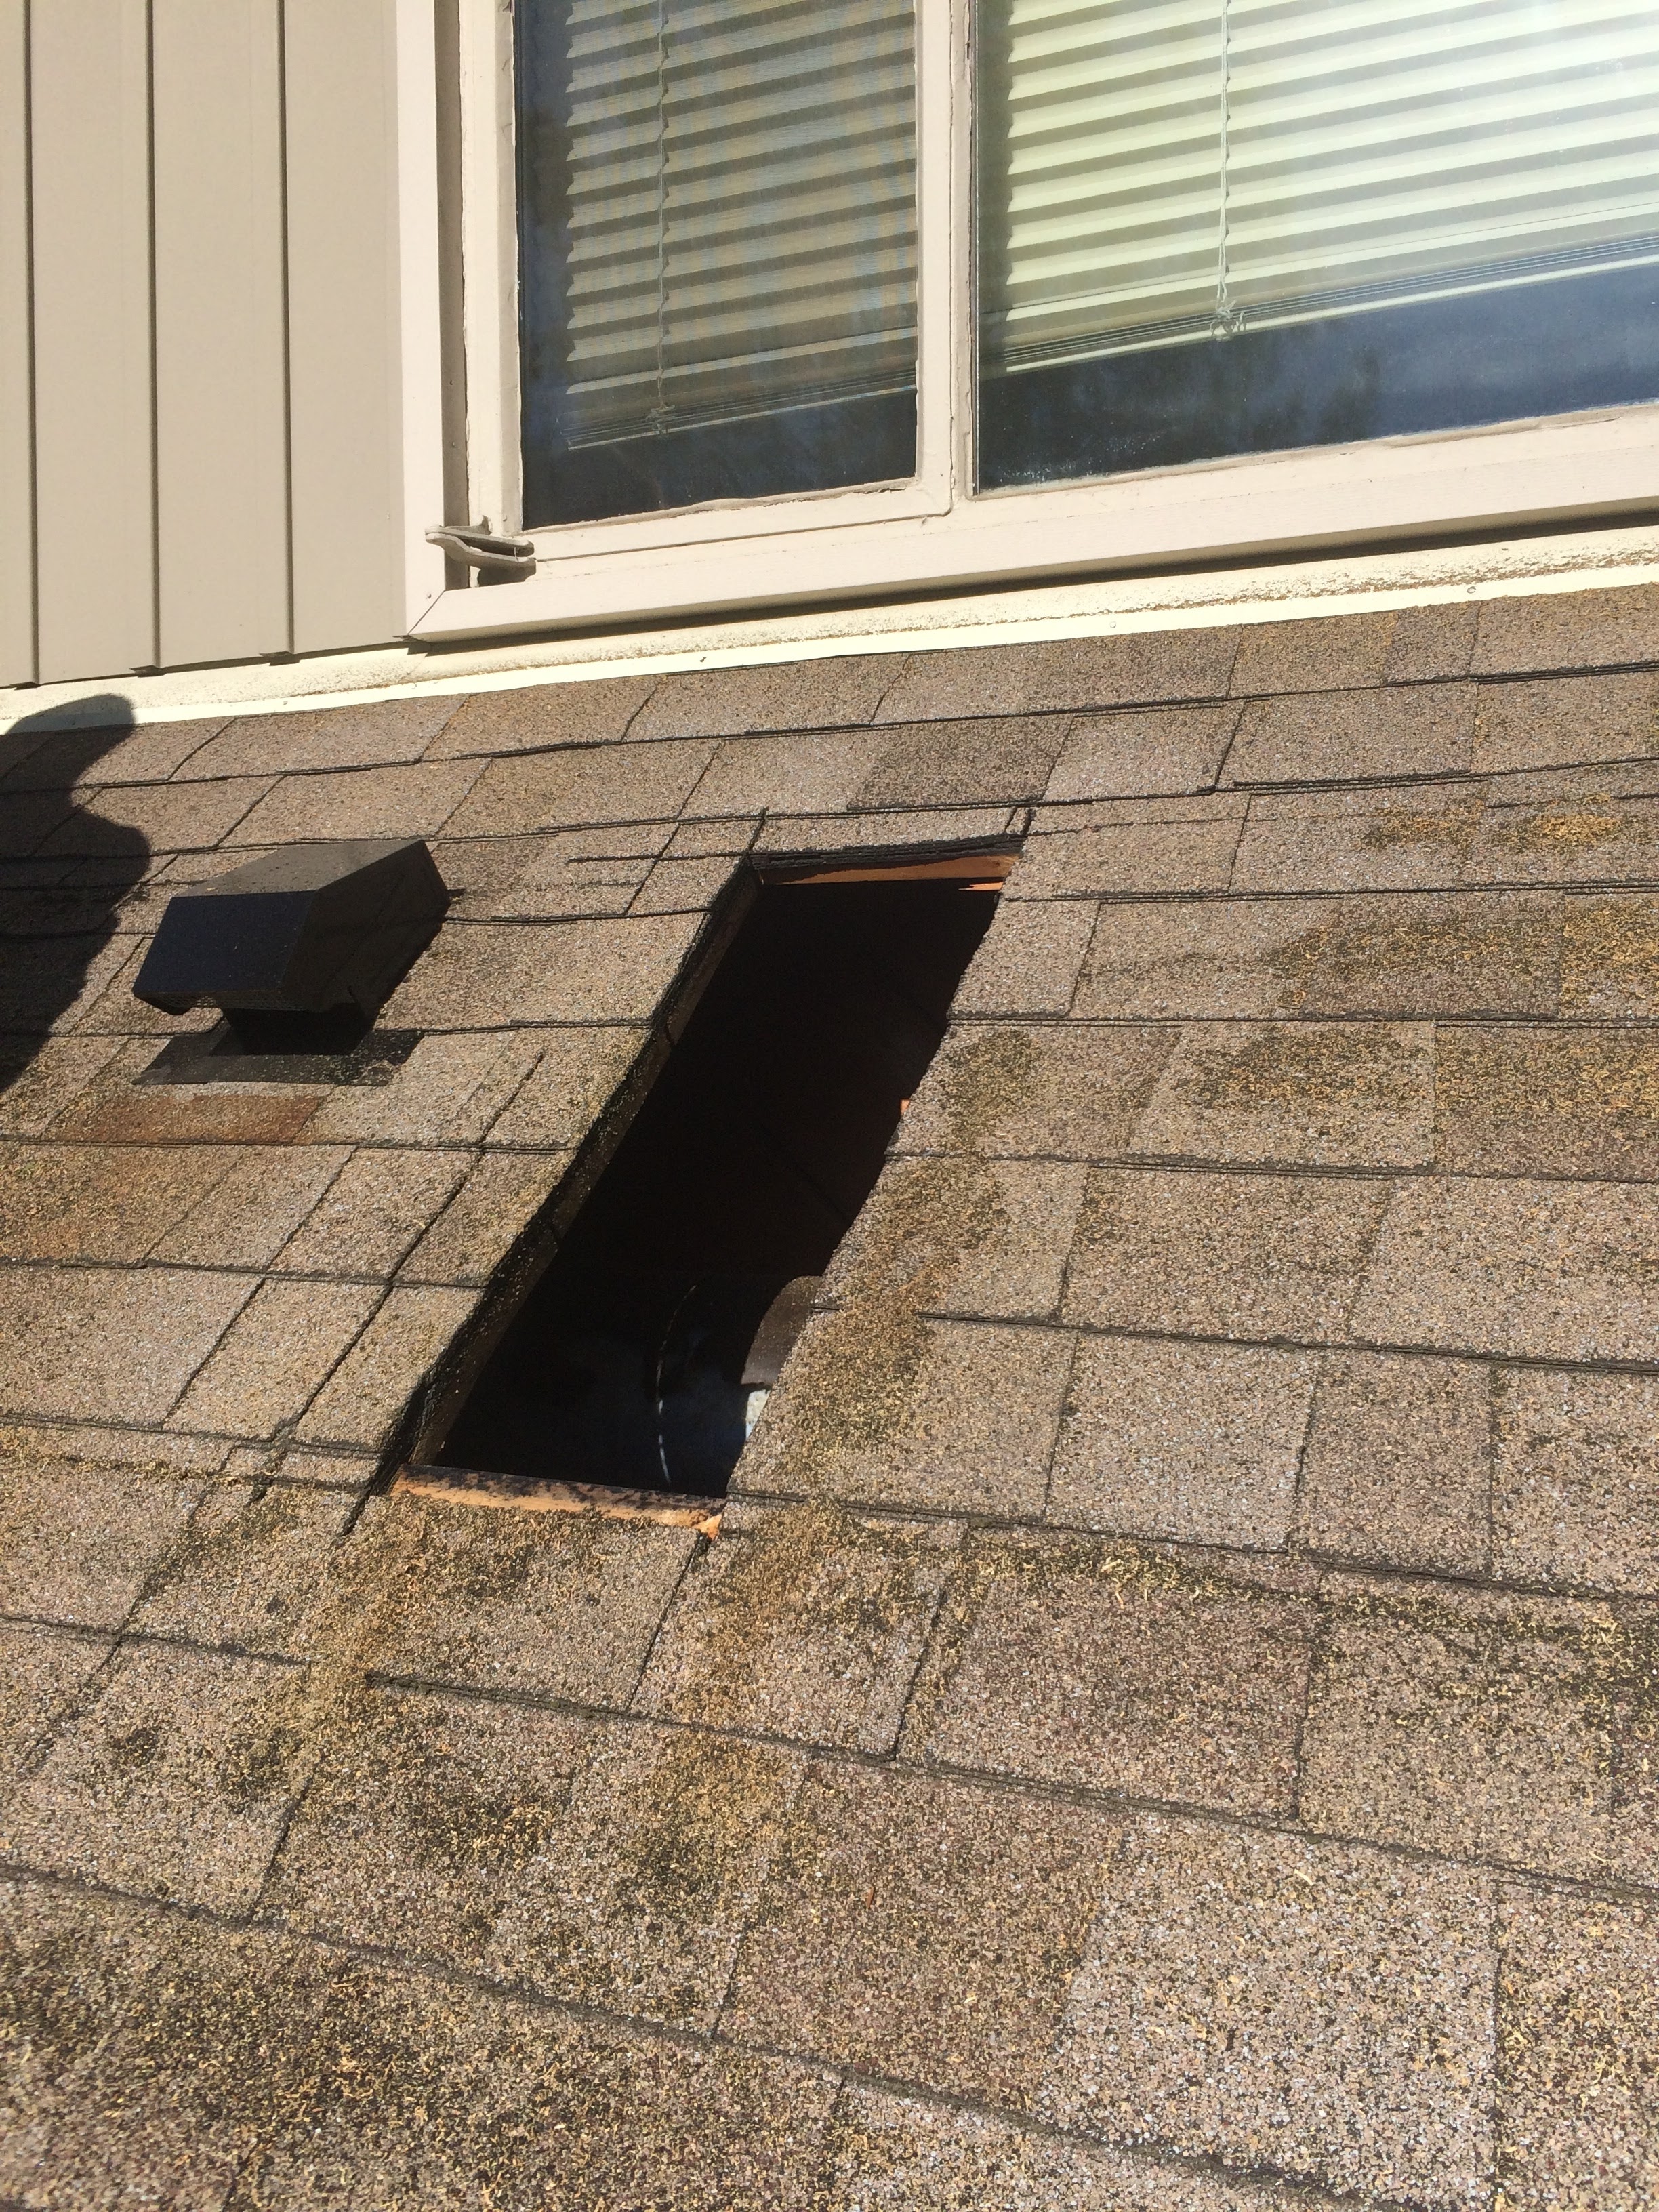
The trick was getting to it. There are two options, open up the ceiling in the rooms below, or open up the roof. The roof is easier.
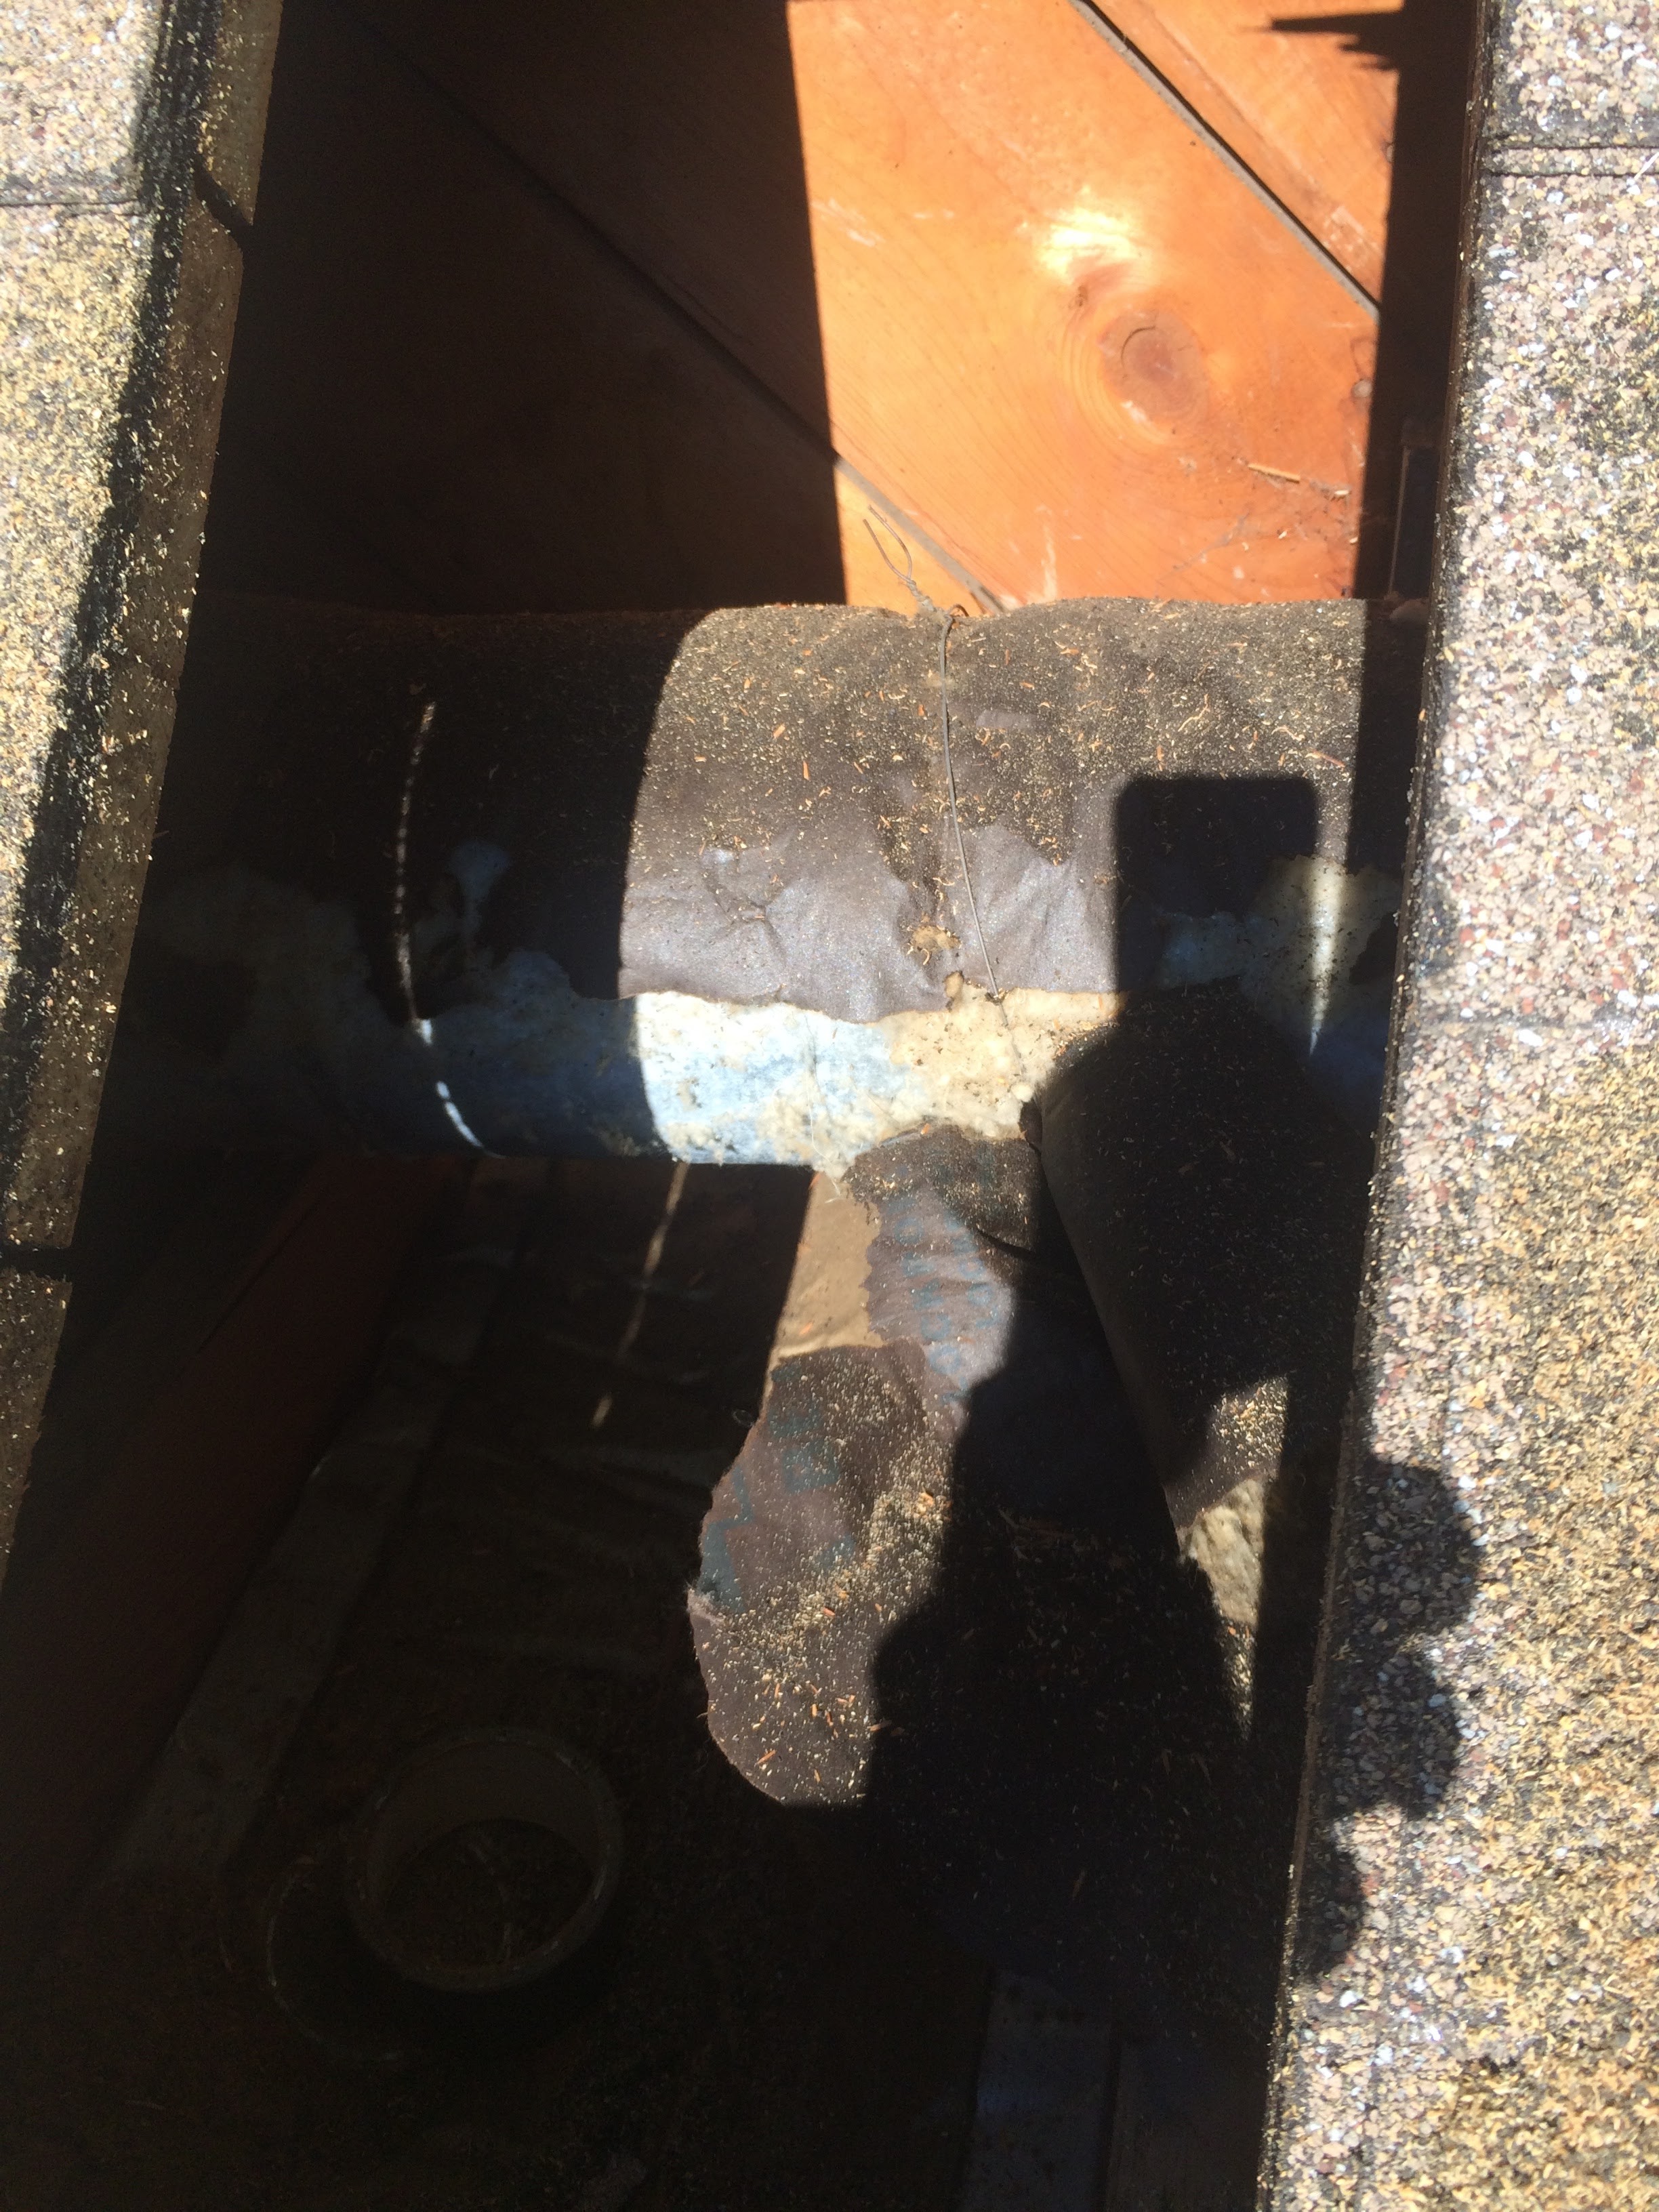
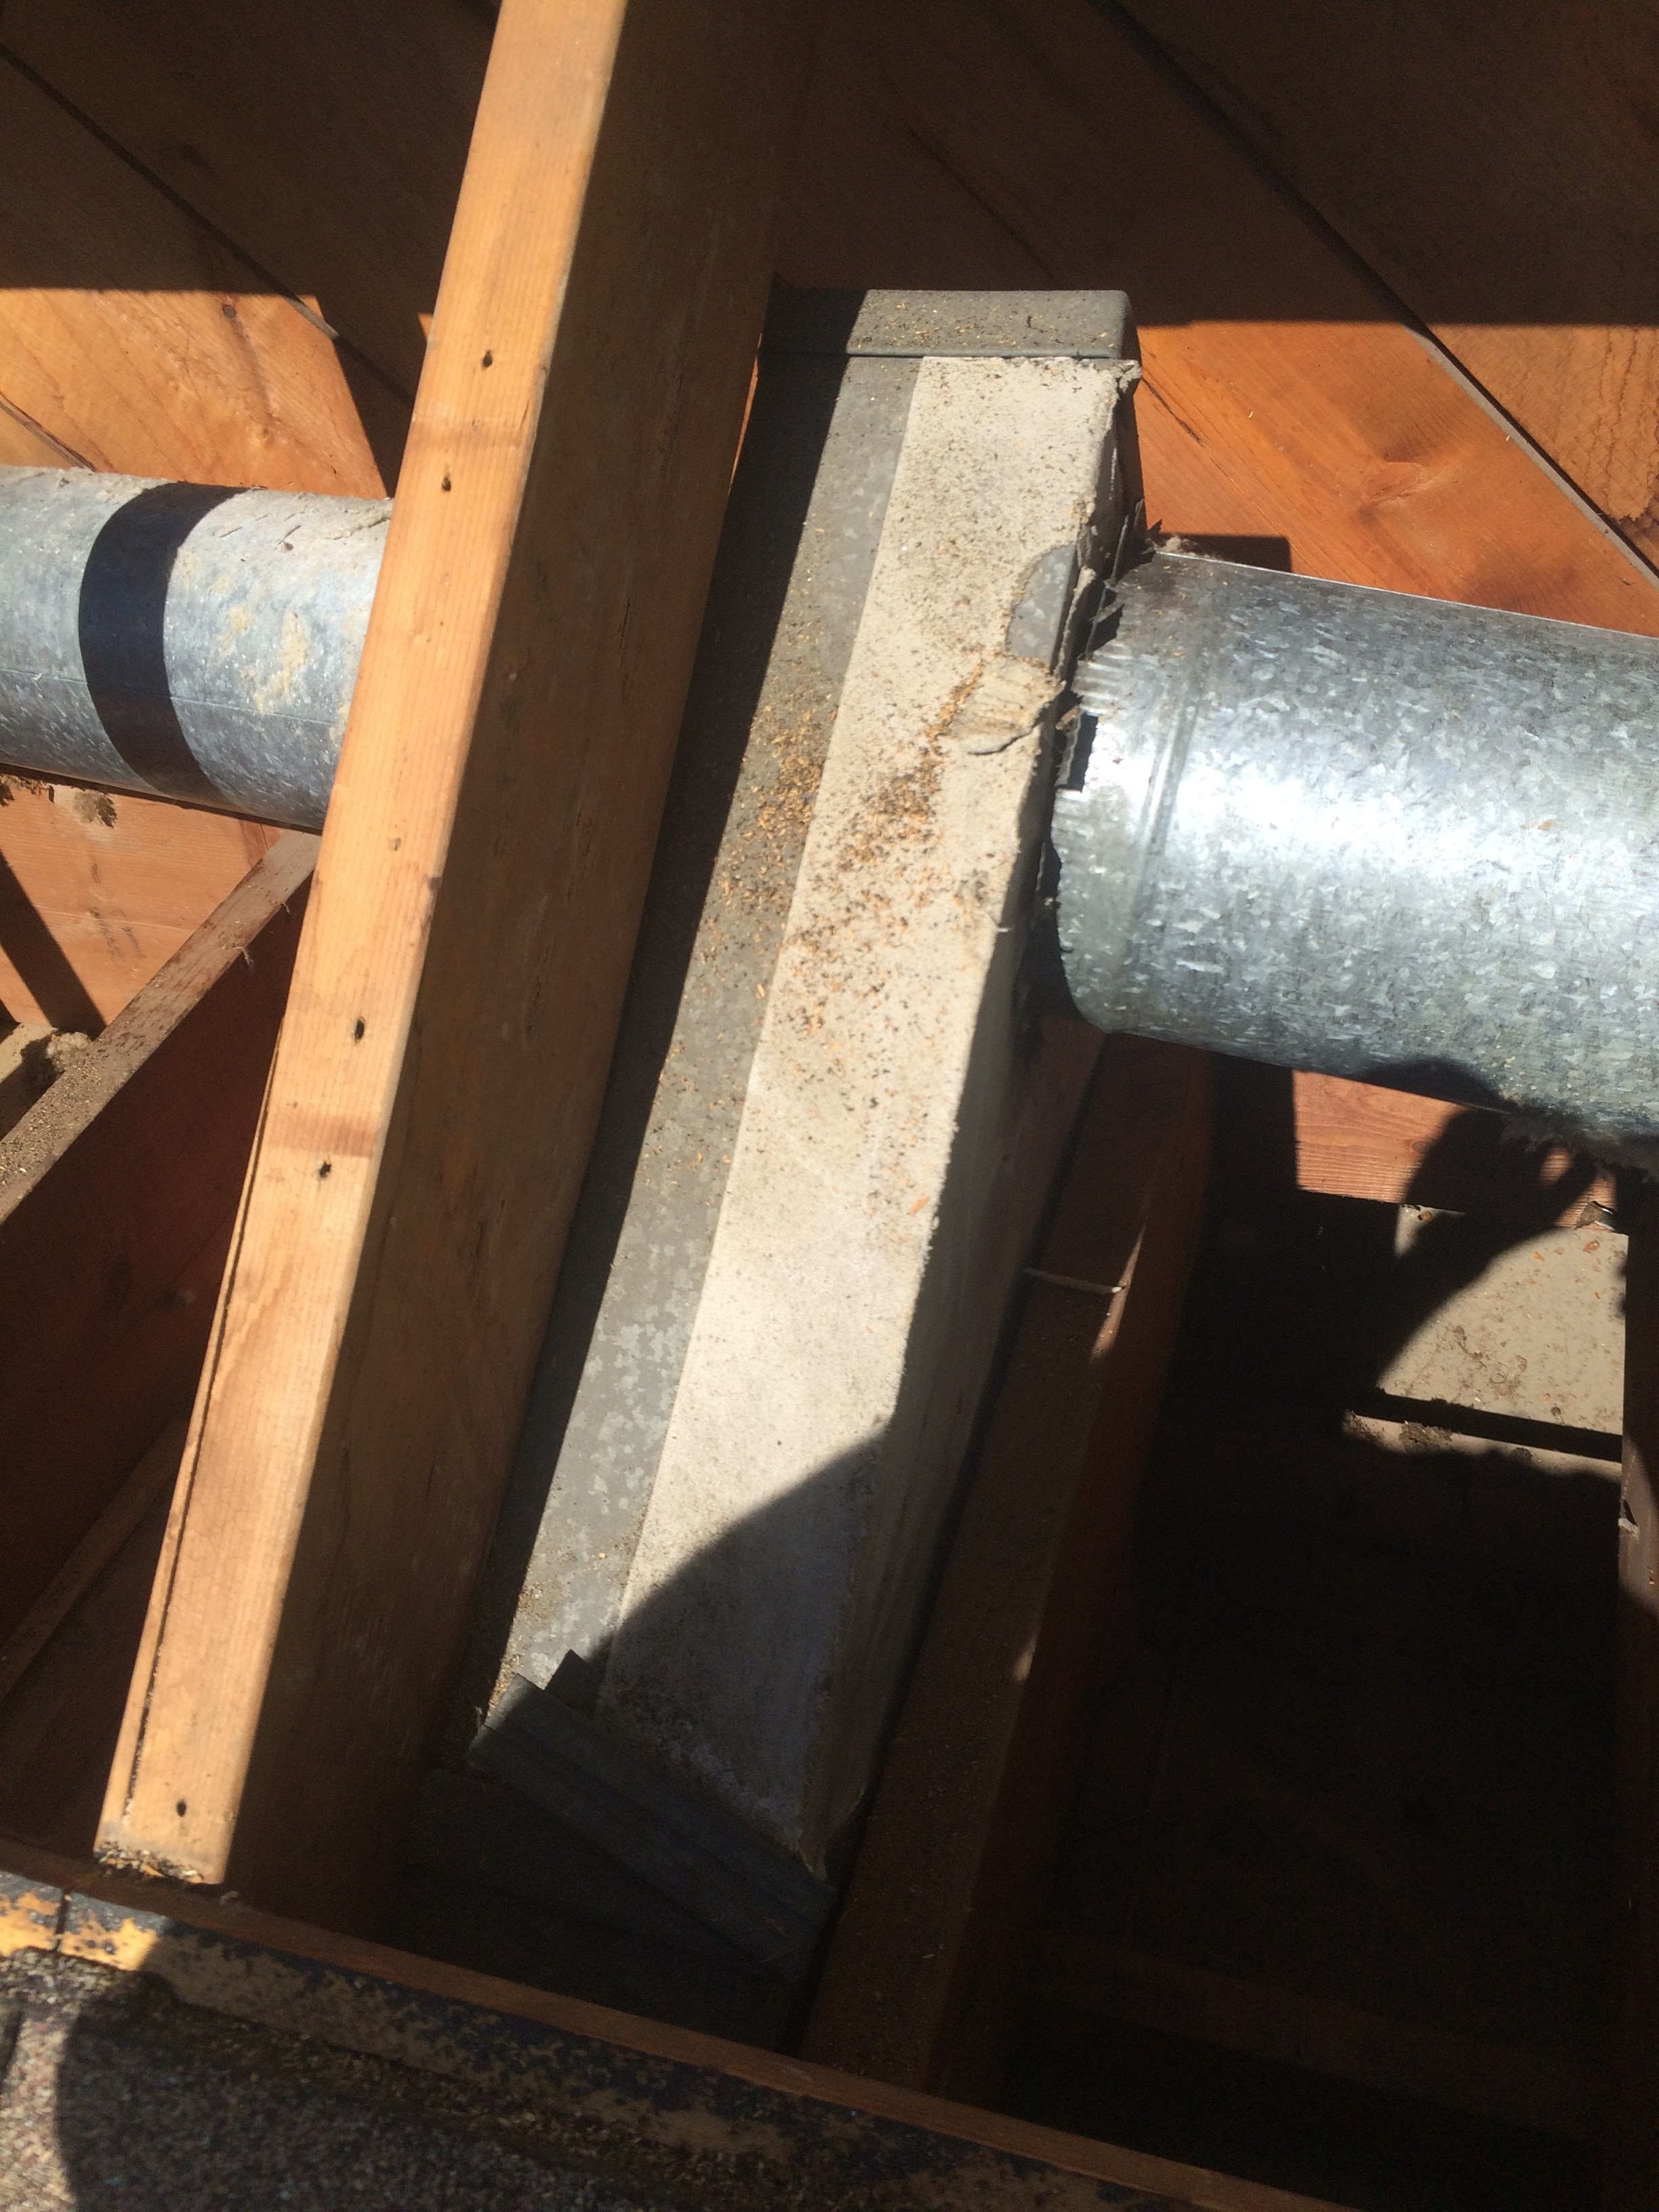
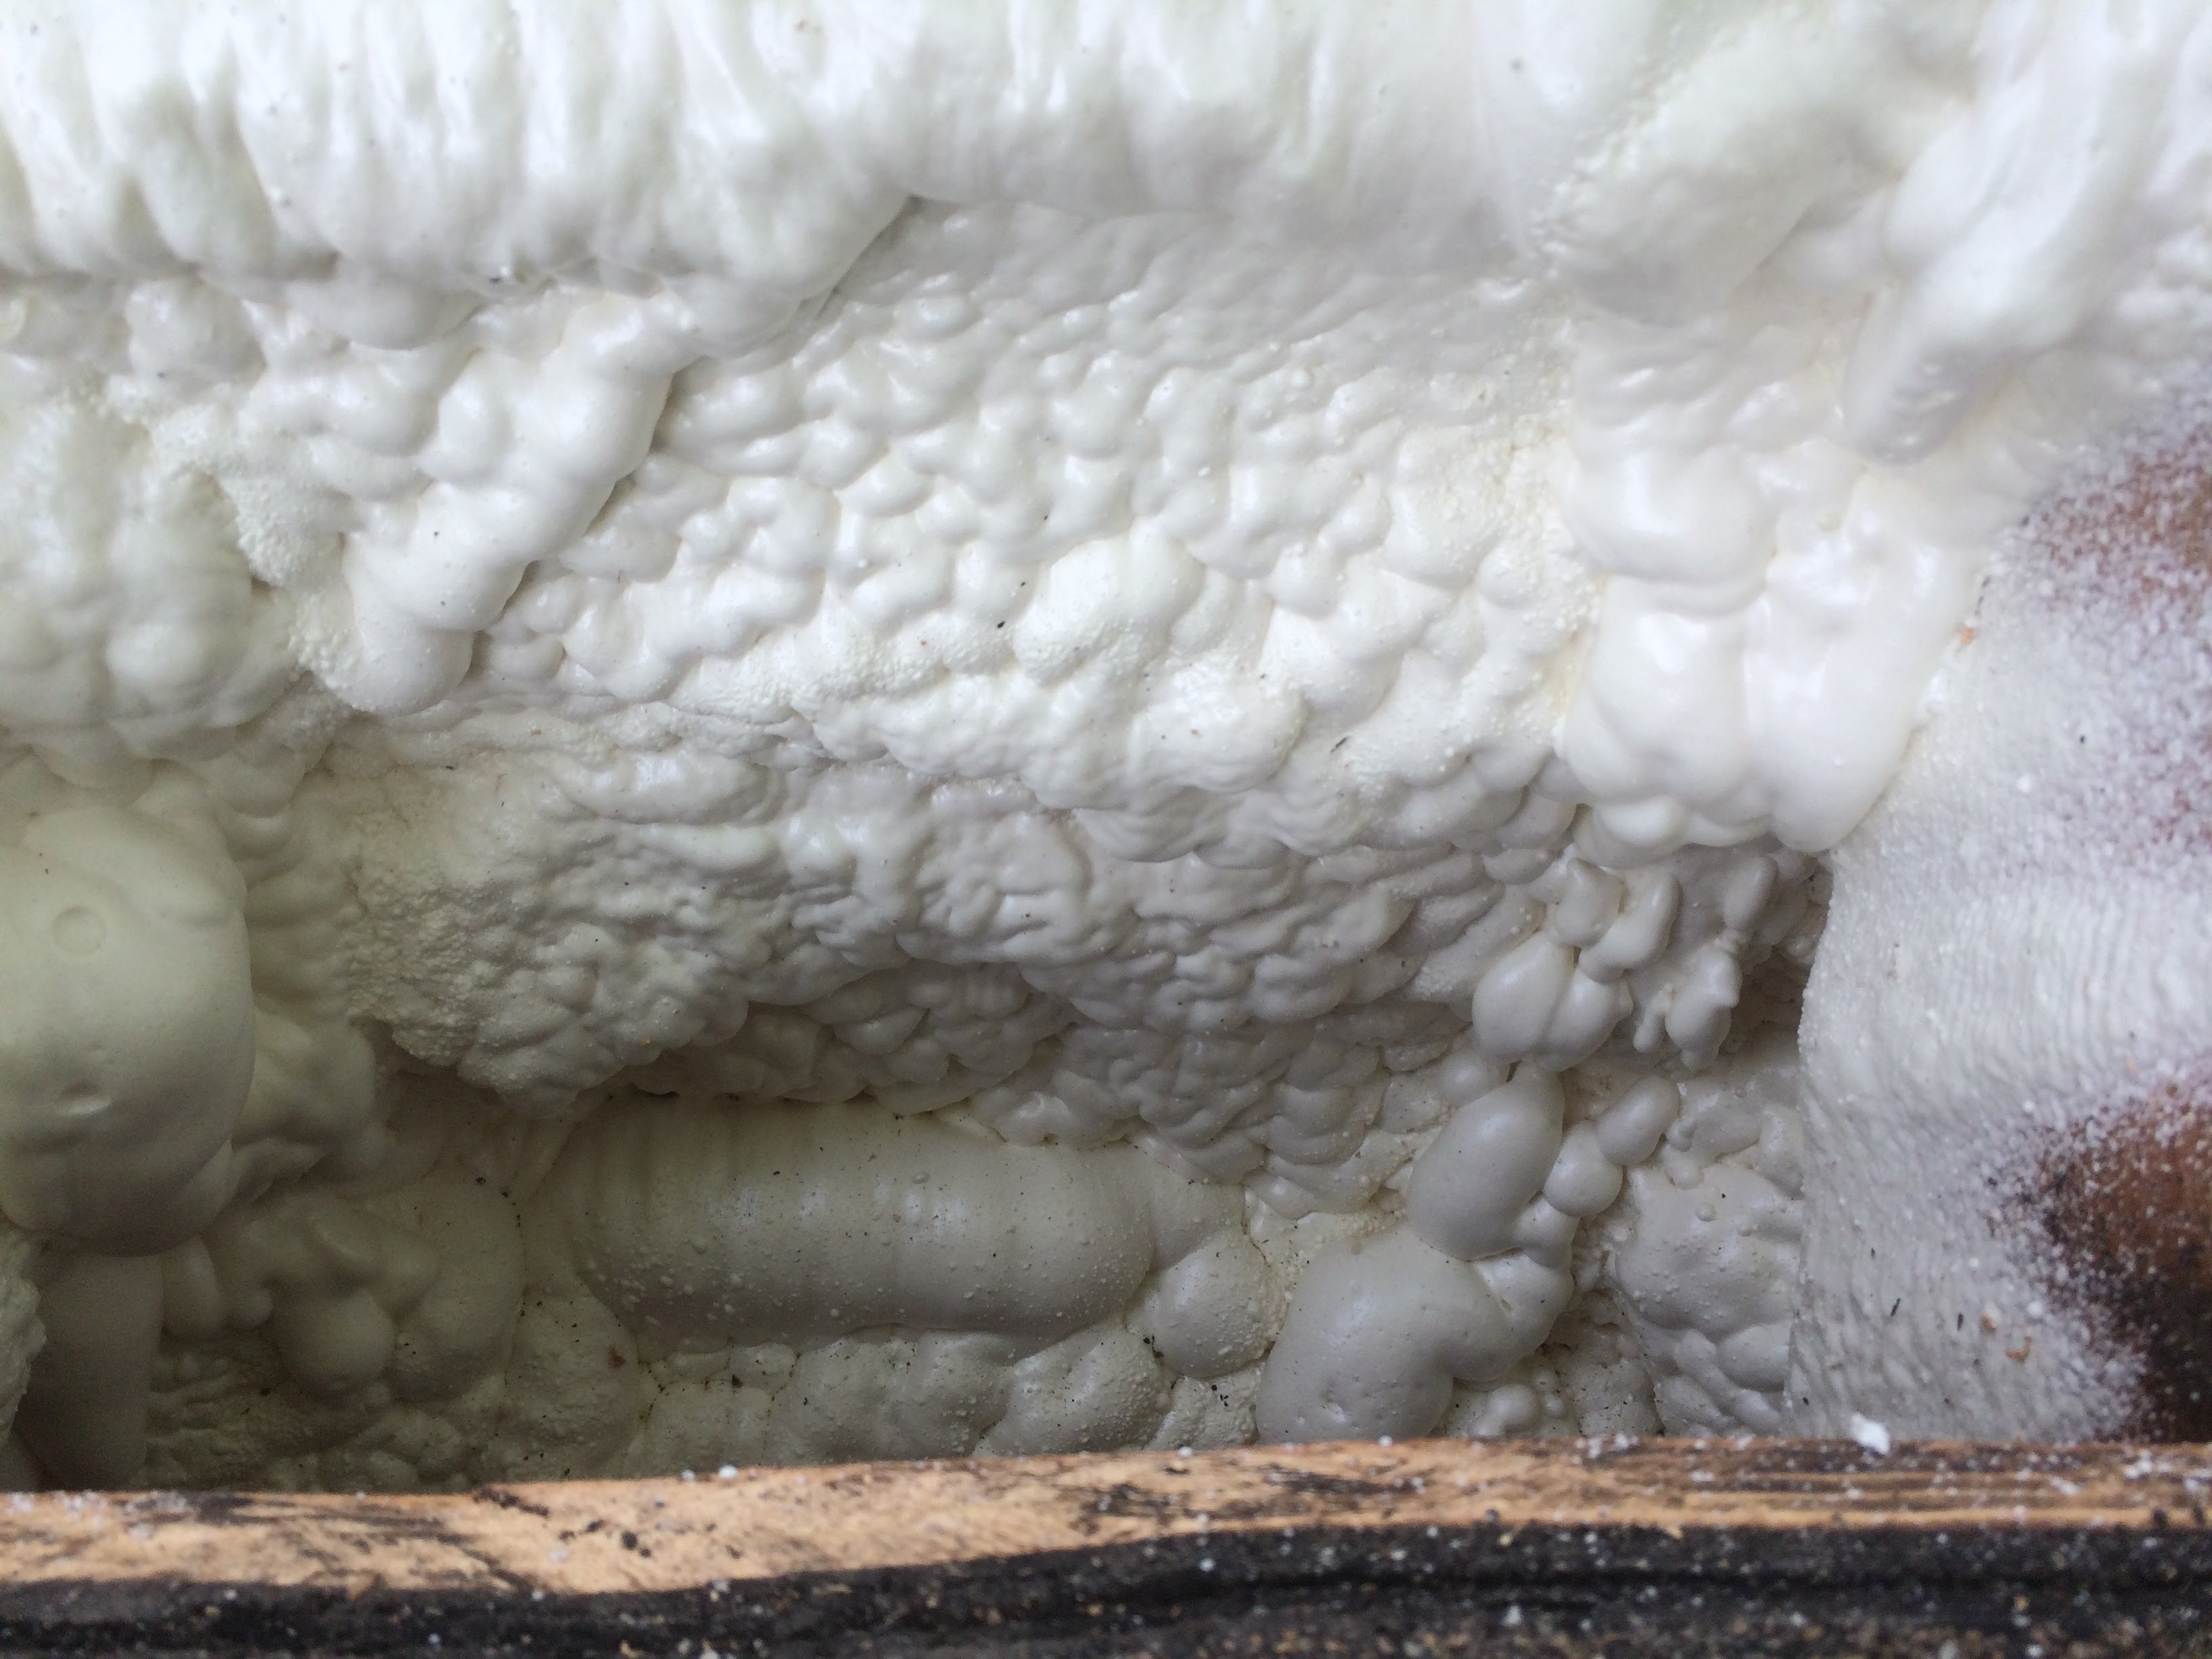
As you can see, we opened the roof up. There was an absolutely critical thing inside that needed to be dealt with: ductwork.
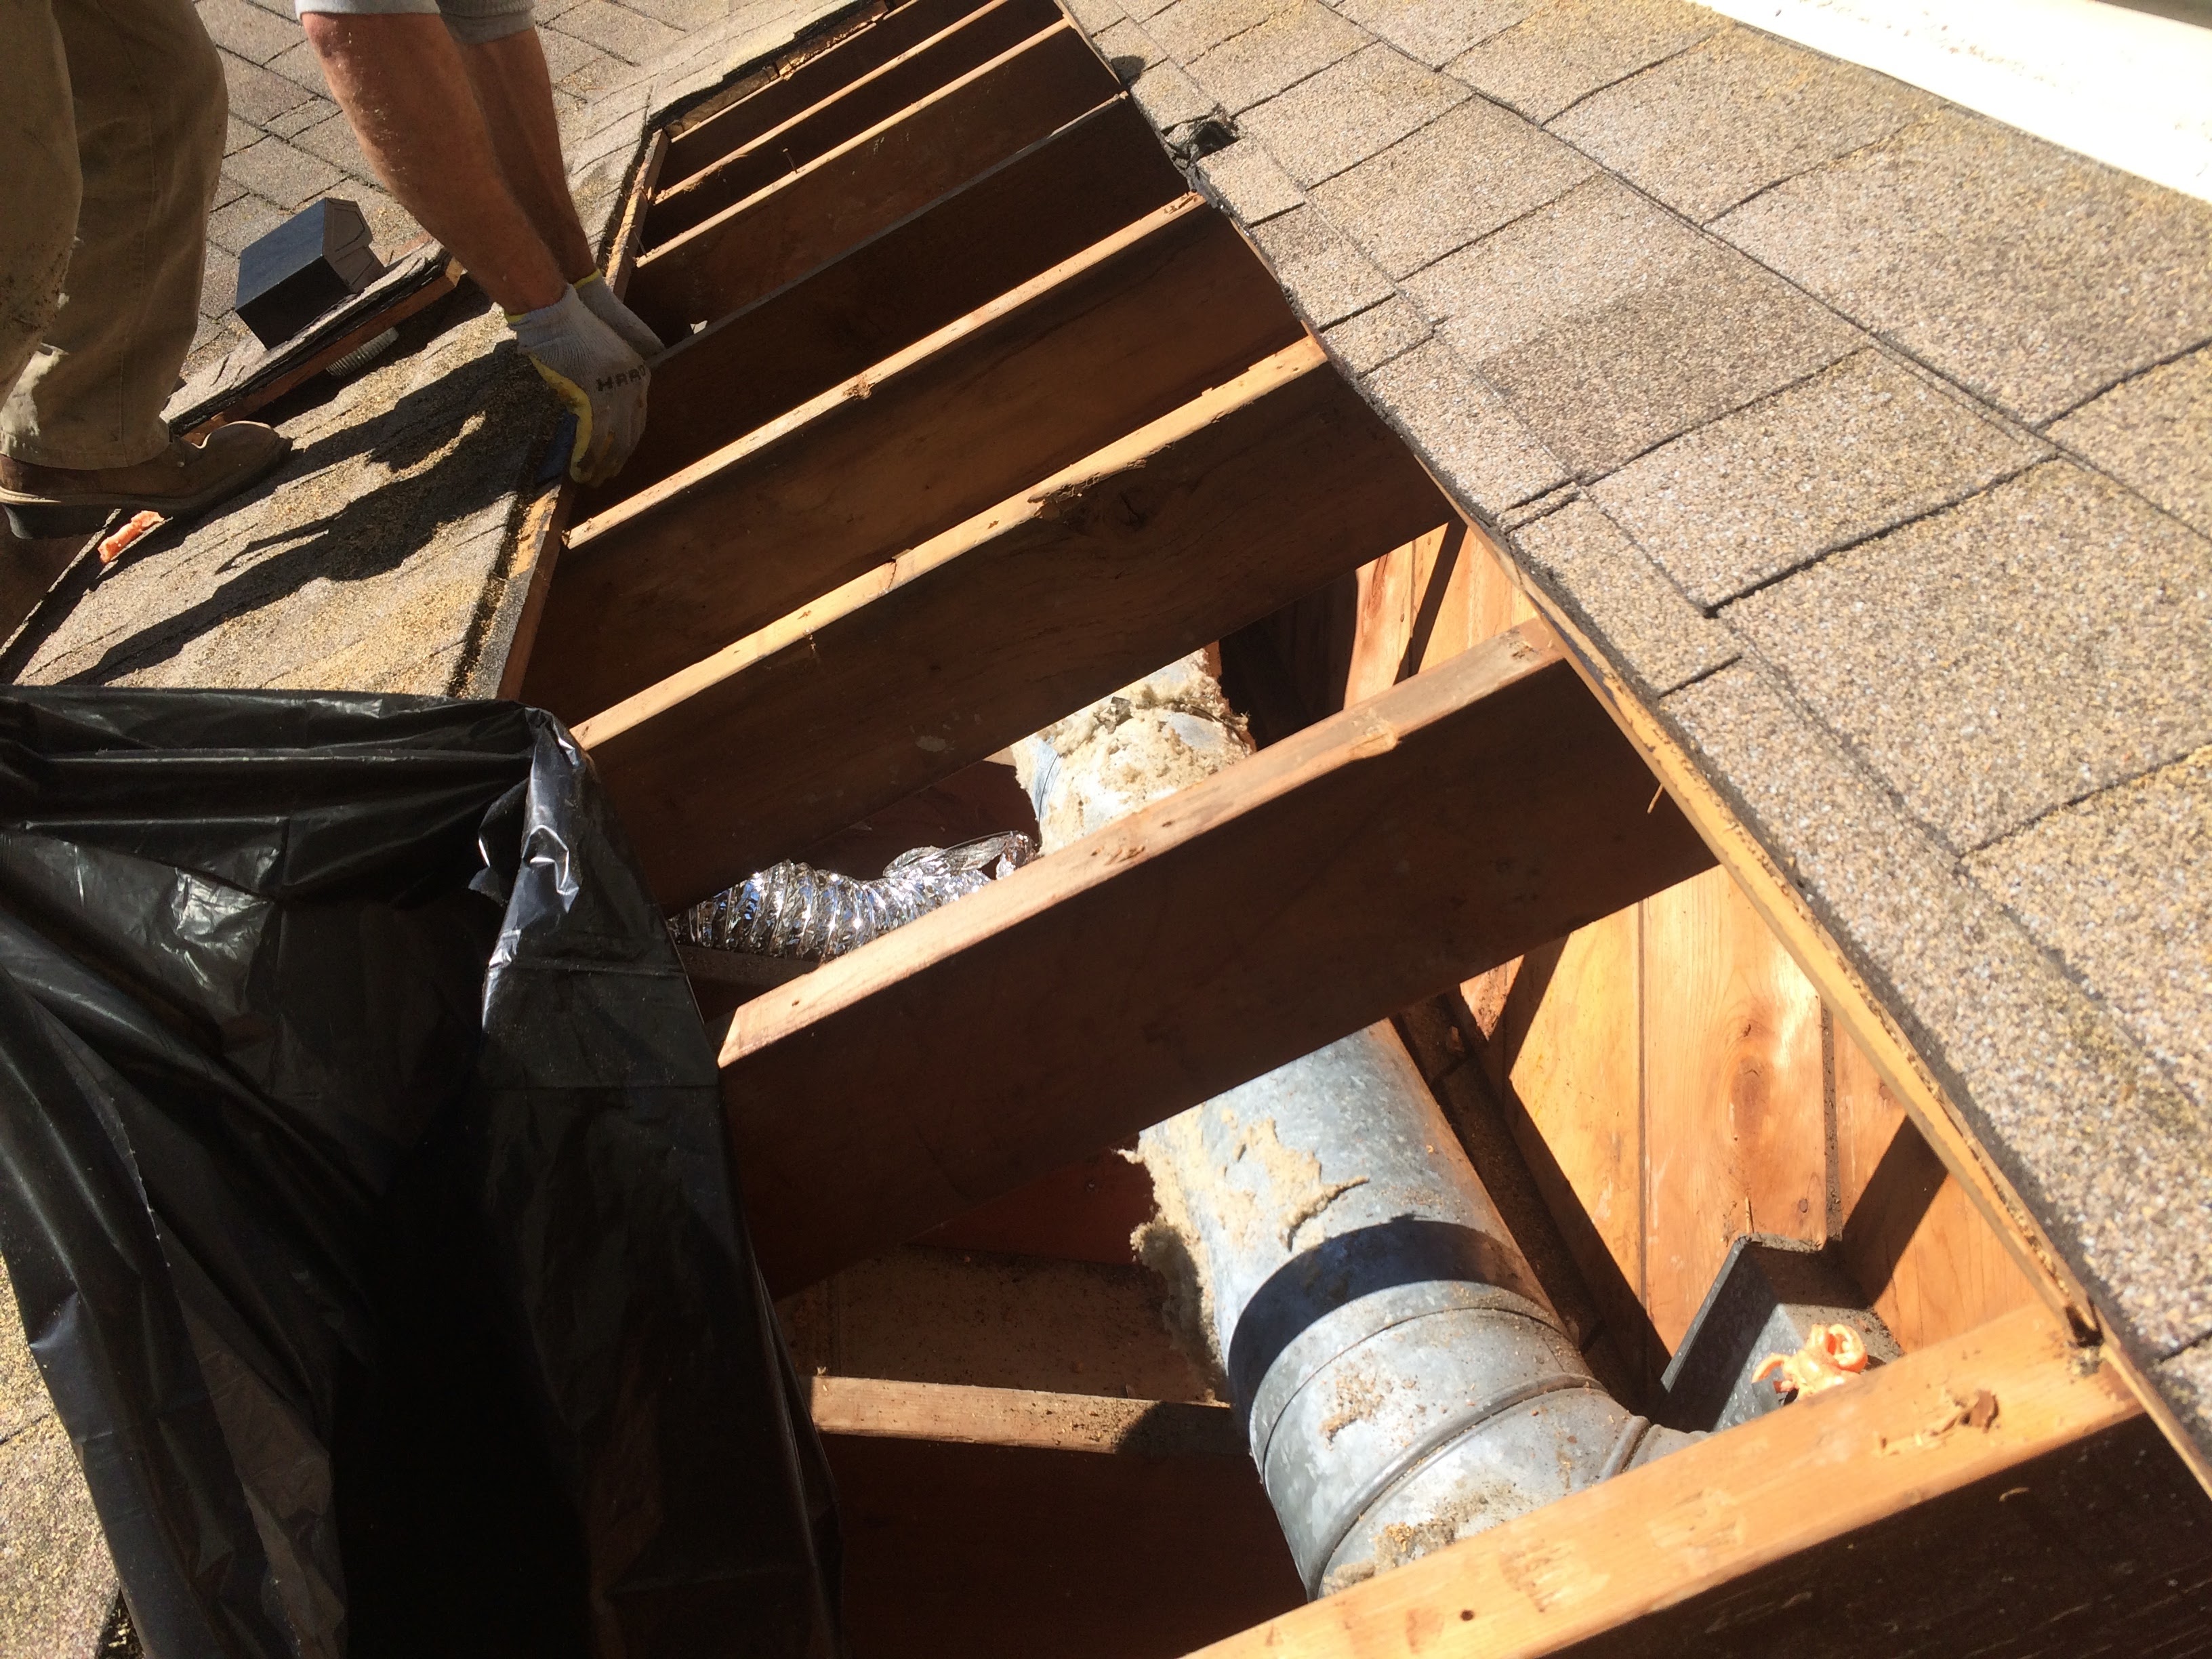
I wish I’d taken a better picture of the duct, but I didn’t. This supply duct blows heated or cooled air into the master bedroom and the guest bedroom. Running ductwork through an attic is pretty much the dumbest thing that can be done for comfort and energy use. (In the builder’s defense, they used actual wool insulation on the ductwork. I’ve never seen it before. Another example of the crazy good construction.)

There are several problems with attic ductwork:
- Tough to make ice in the oven. The attic is 130-140 degrees on a hot day, 55 degree air conditioned air is not going to come out cool enough to cool the bedrooms.
- Tough to heat inside the fridge. Conversely, in winter that attic may be 10-20 degrees with 120 degree heated air blowing through the duct. Not as much heat comes out into the bedrooms, which stay cool.
- Giant sucking sound - When heated or cooled air leaks out of the house like this, that’s air blowing out of the house. It has to come back in somewhere else. So not only are you losing expensive conditioned air, but you are sucking in air that needs to be heated and cooled. No bueno.
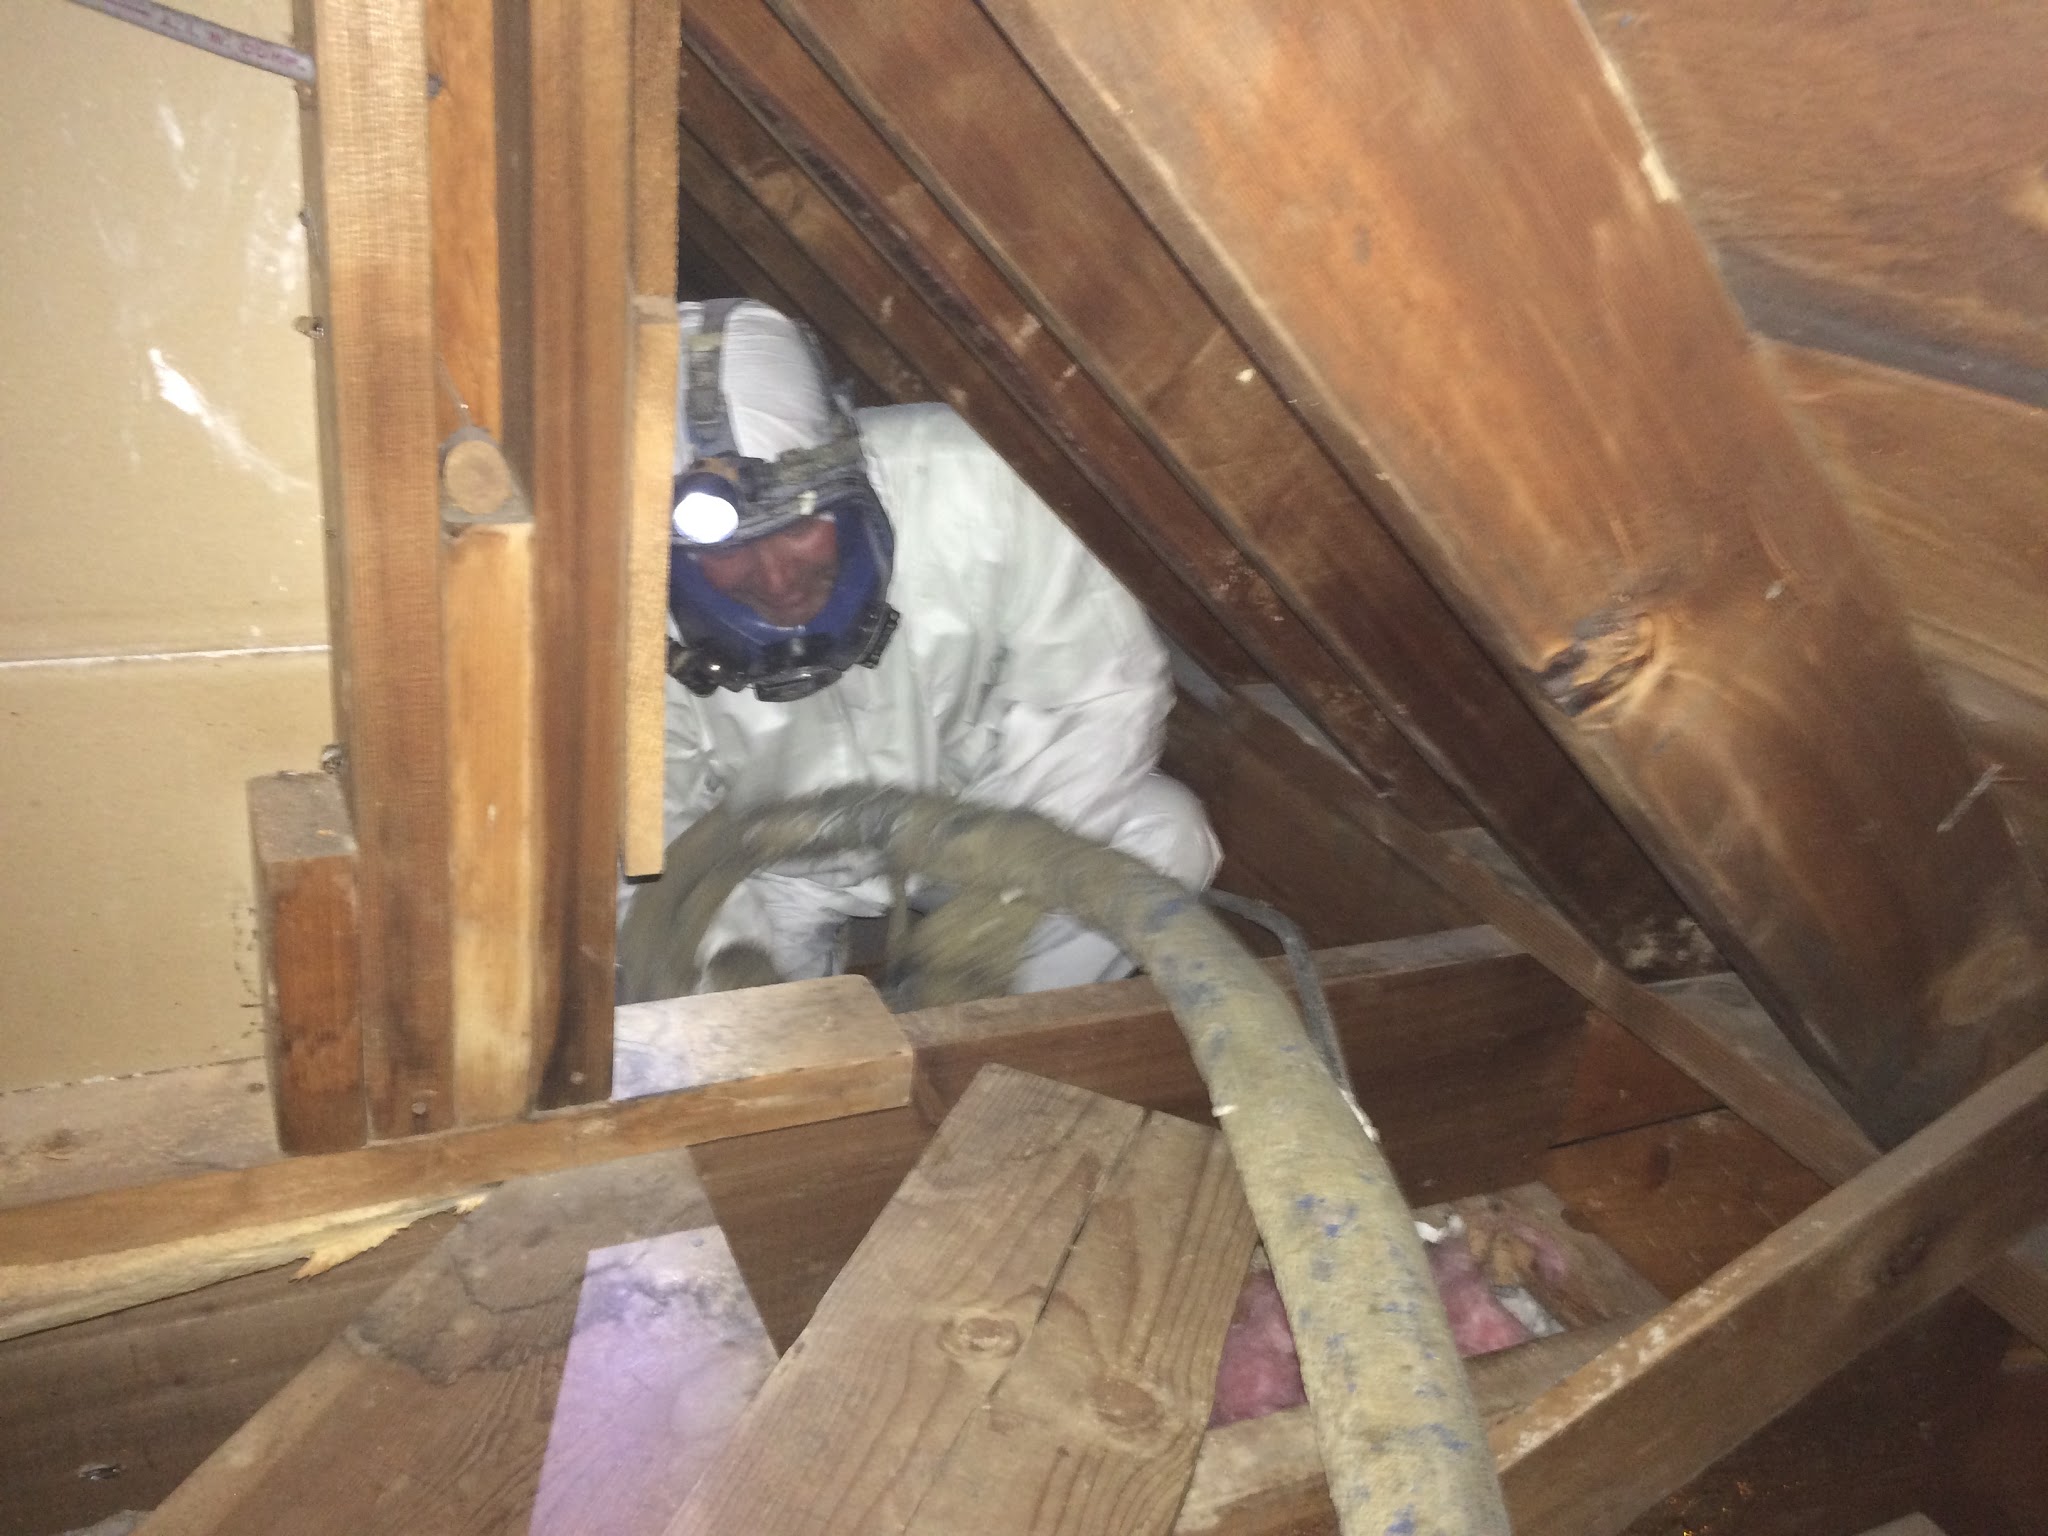
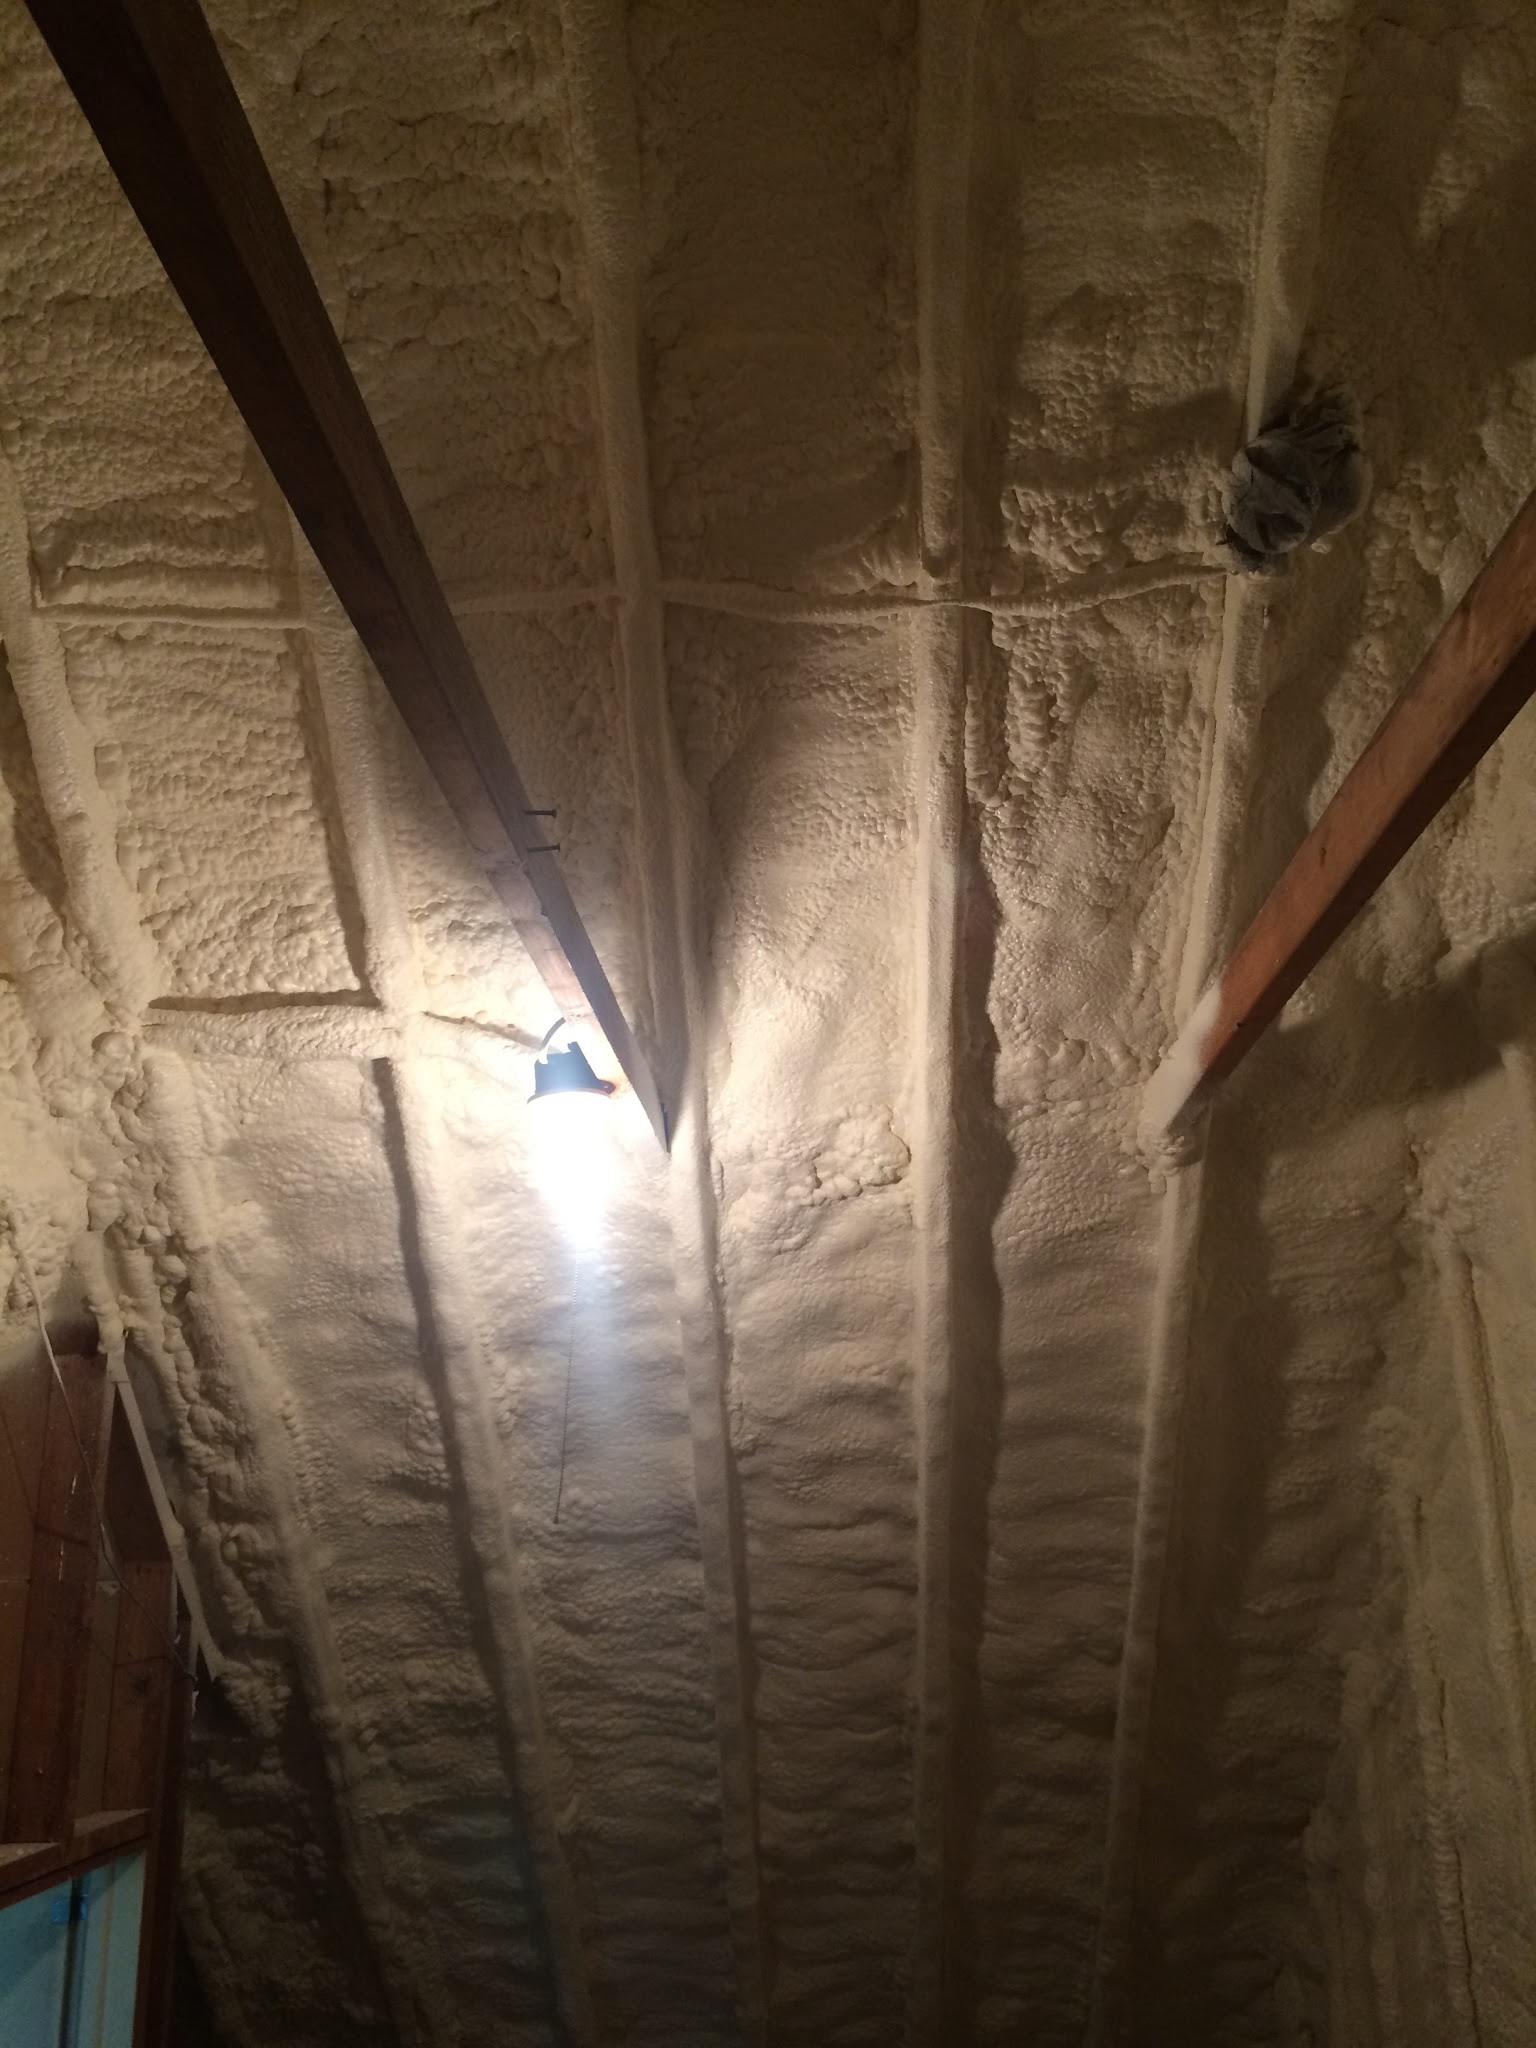
The solution? Spray foam of course. Sometimes it feels like I need more tools in the toolbox, but this sledgehammer is so wonderfully effective I tend to use it a lot.
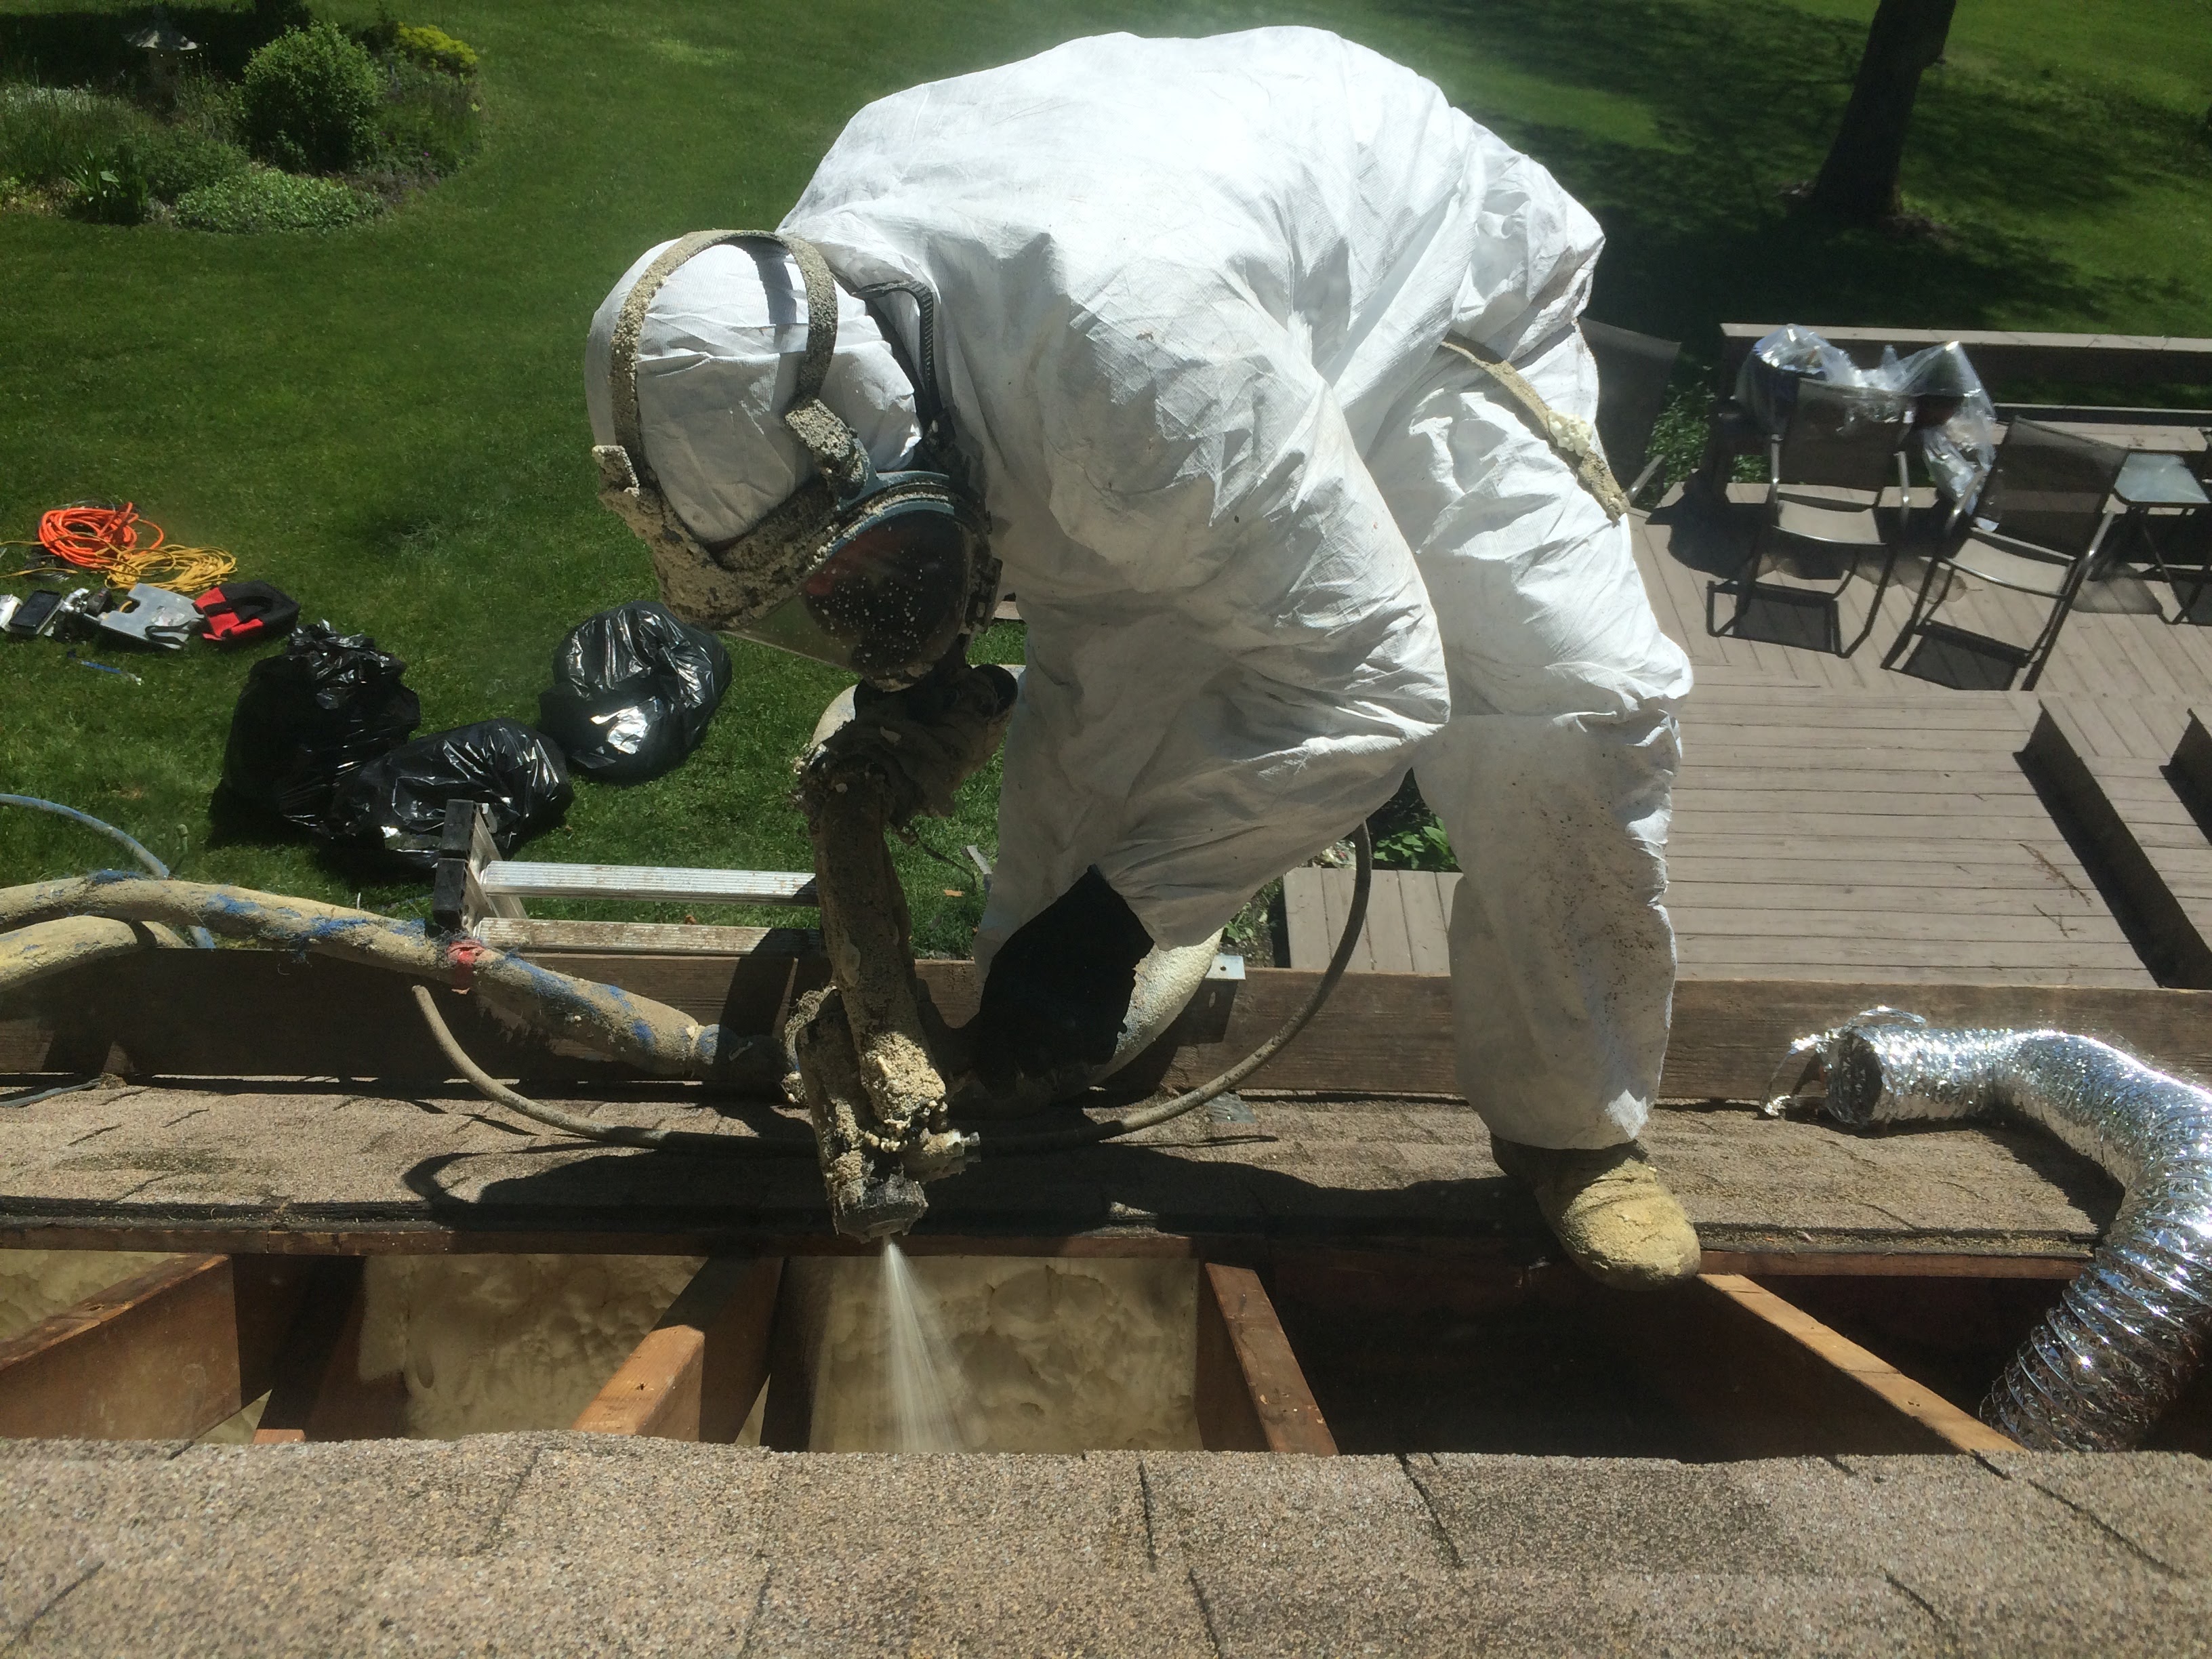
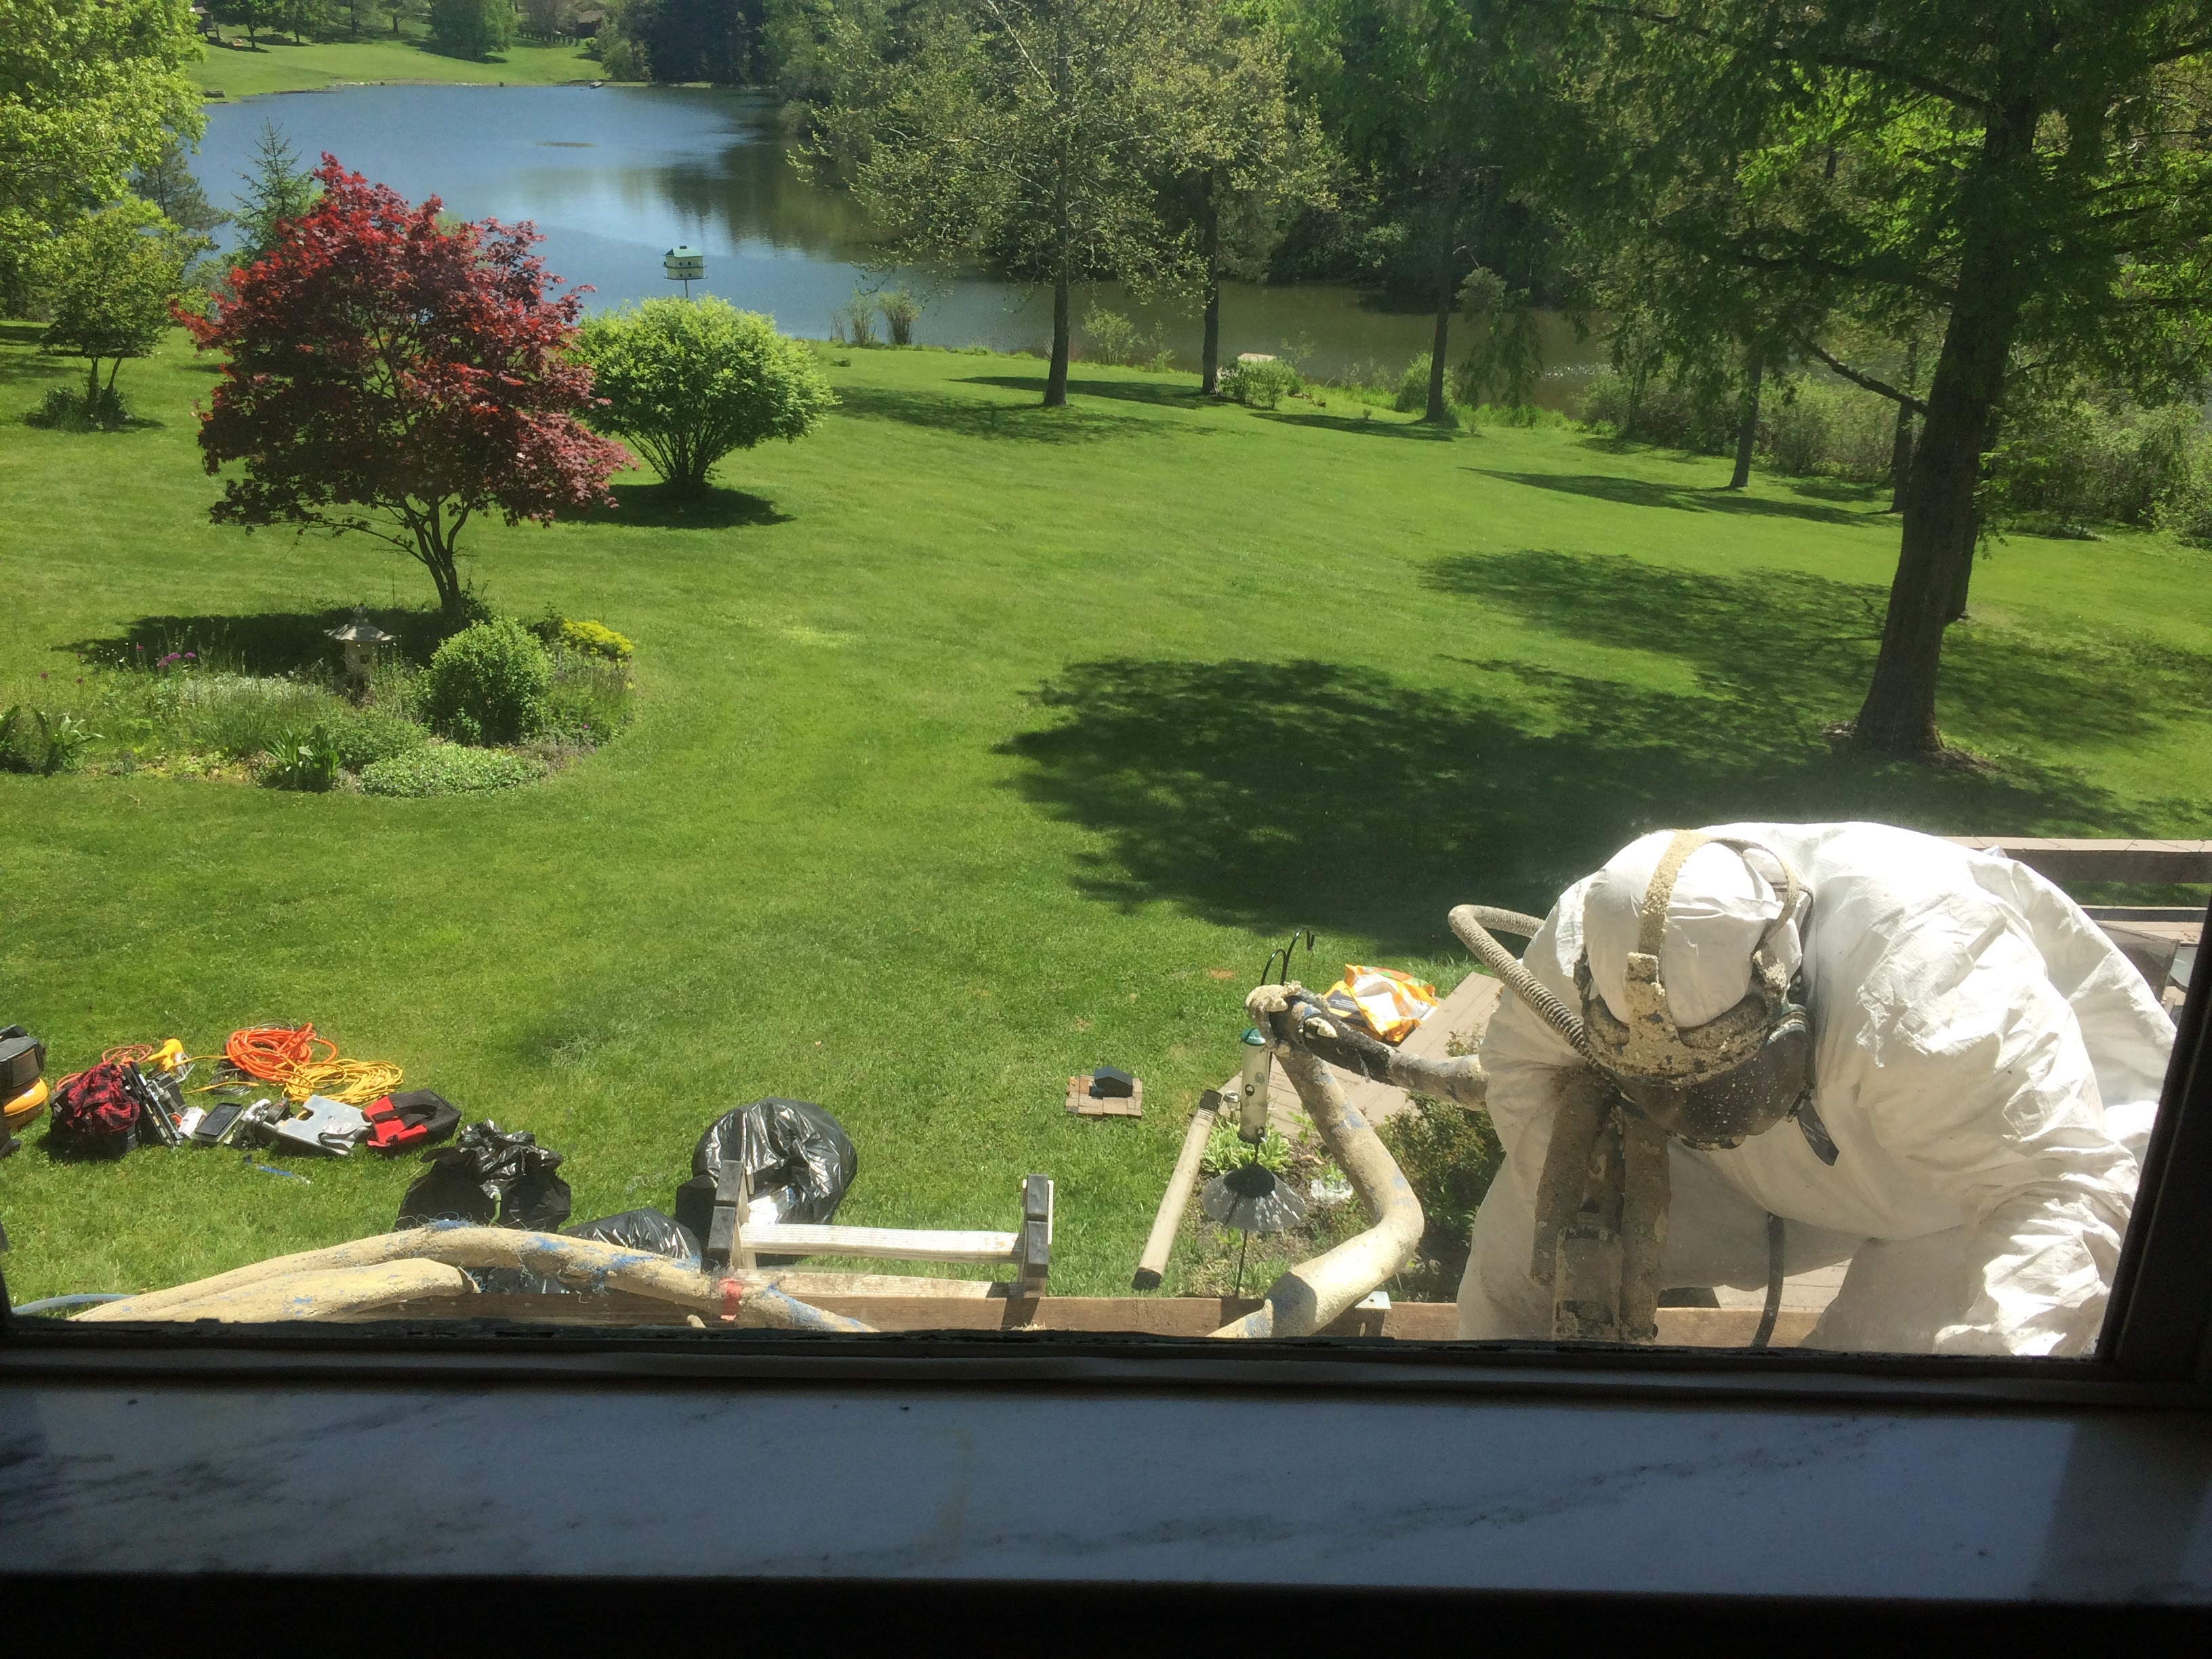
I love when I get to take good pictures, they are so rare in my world. I was standing behind a window on the second floor as I took this, with Carlton gleefully watching foam get sprayed next to me. Normally you can’t safely get this close, this was a rare exception. Donny is burying that duct in spray foam here.
In one of my other favorite photos, here is what the spray foam job looked like along with the ridiculously pretty backyard of this home.

We started the day at 4752, we were down to 3867, an 885 point drop. That’s almost exactly 10% of the total leakage in the home. I was really glad Carlton was up for the expense of fixing this.
A Note on Infallibility
An important note here, this area had a few tricky spots we had to figure out how to stuff full so we could foam them shut. Clayton was in roofing mode that day, my job was air sealing. Clay is fabulous at air sealing, he and our old insulation contracting crew achieved results good enough that the utility energy auditor distrusted his gauge when testing out one of our projects. (Another case study, the 1900 Two Story is the second home we’ve done for the client with the killer leakage reduction.)
As good as Clay is, he told me that he completely missed a number of air sealing opportunities I was looking at. The blower door reduction may have been half what it was, or worse, without another set of eyes. I always like getting another set of eyes on a project, I am far from perfect. Gary at Affordable Foam has caught a number of my misses. My clients routinely point out things I missed because they know the house better than me. Please don’t believe anyone is infallible. Good Building Scientists should have small enough egos to take direction.
The Last Piece
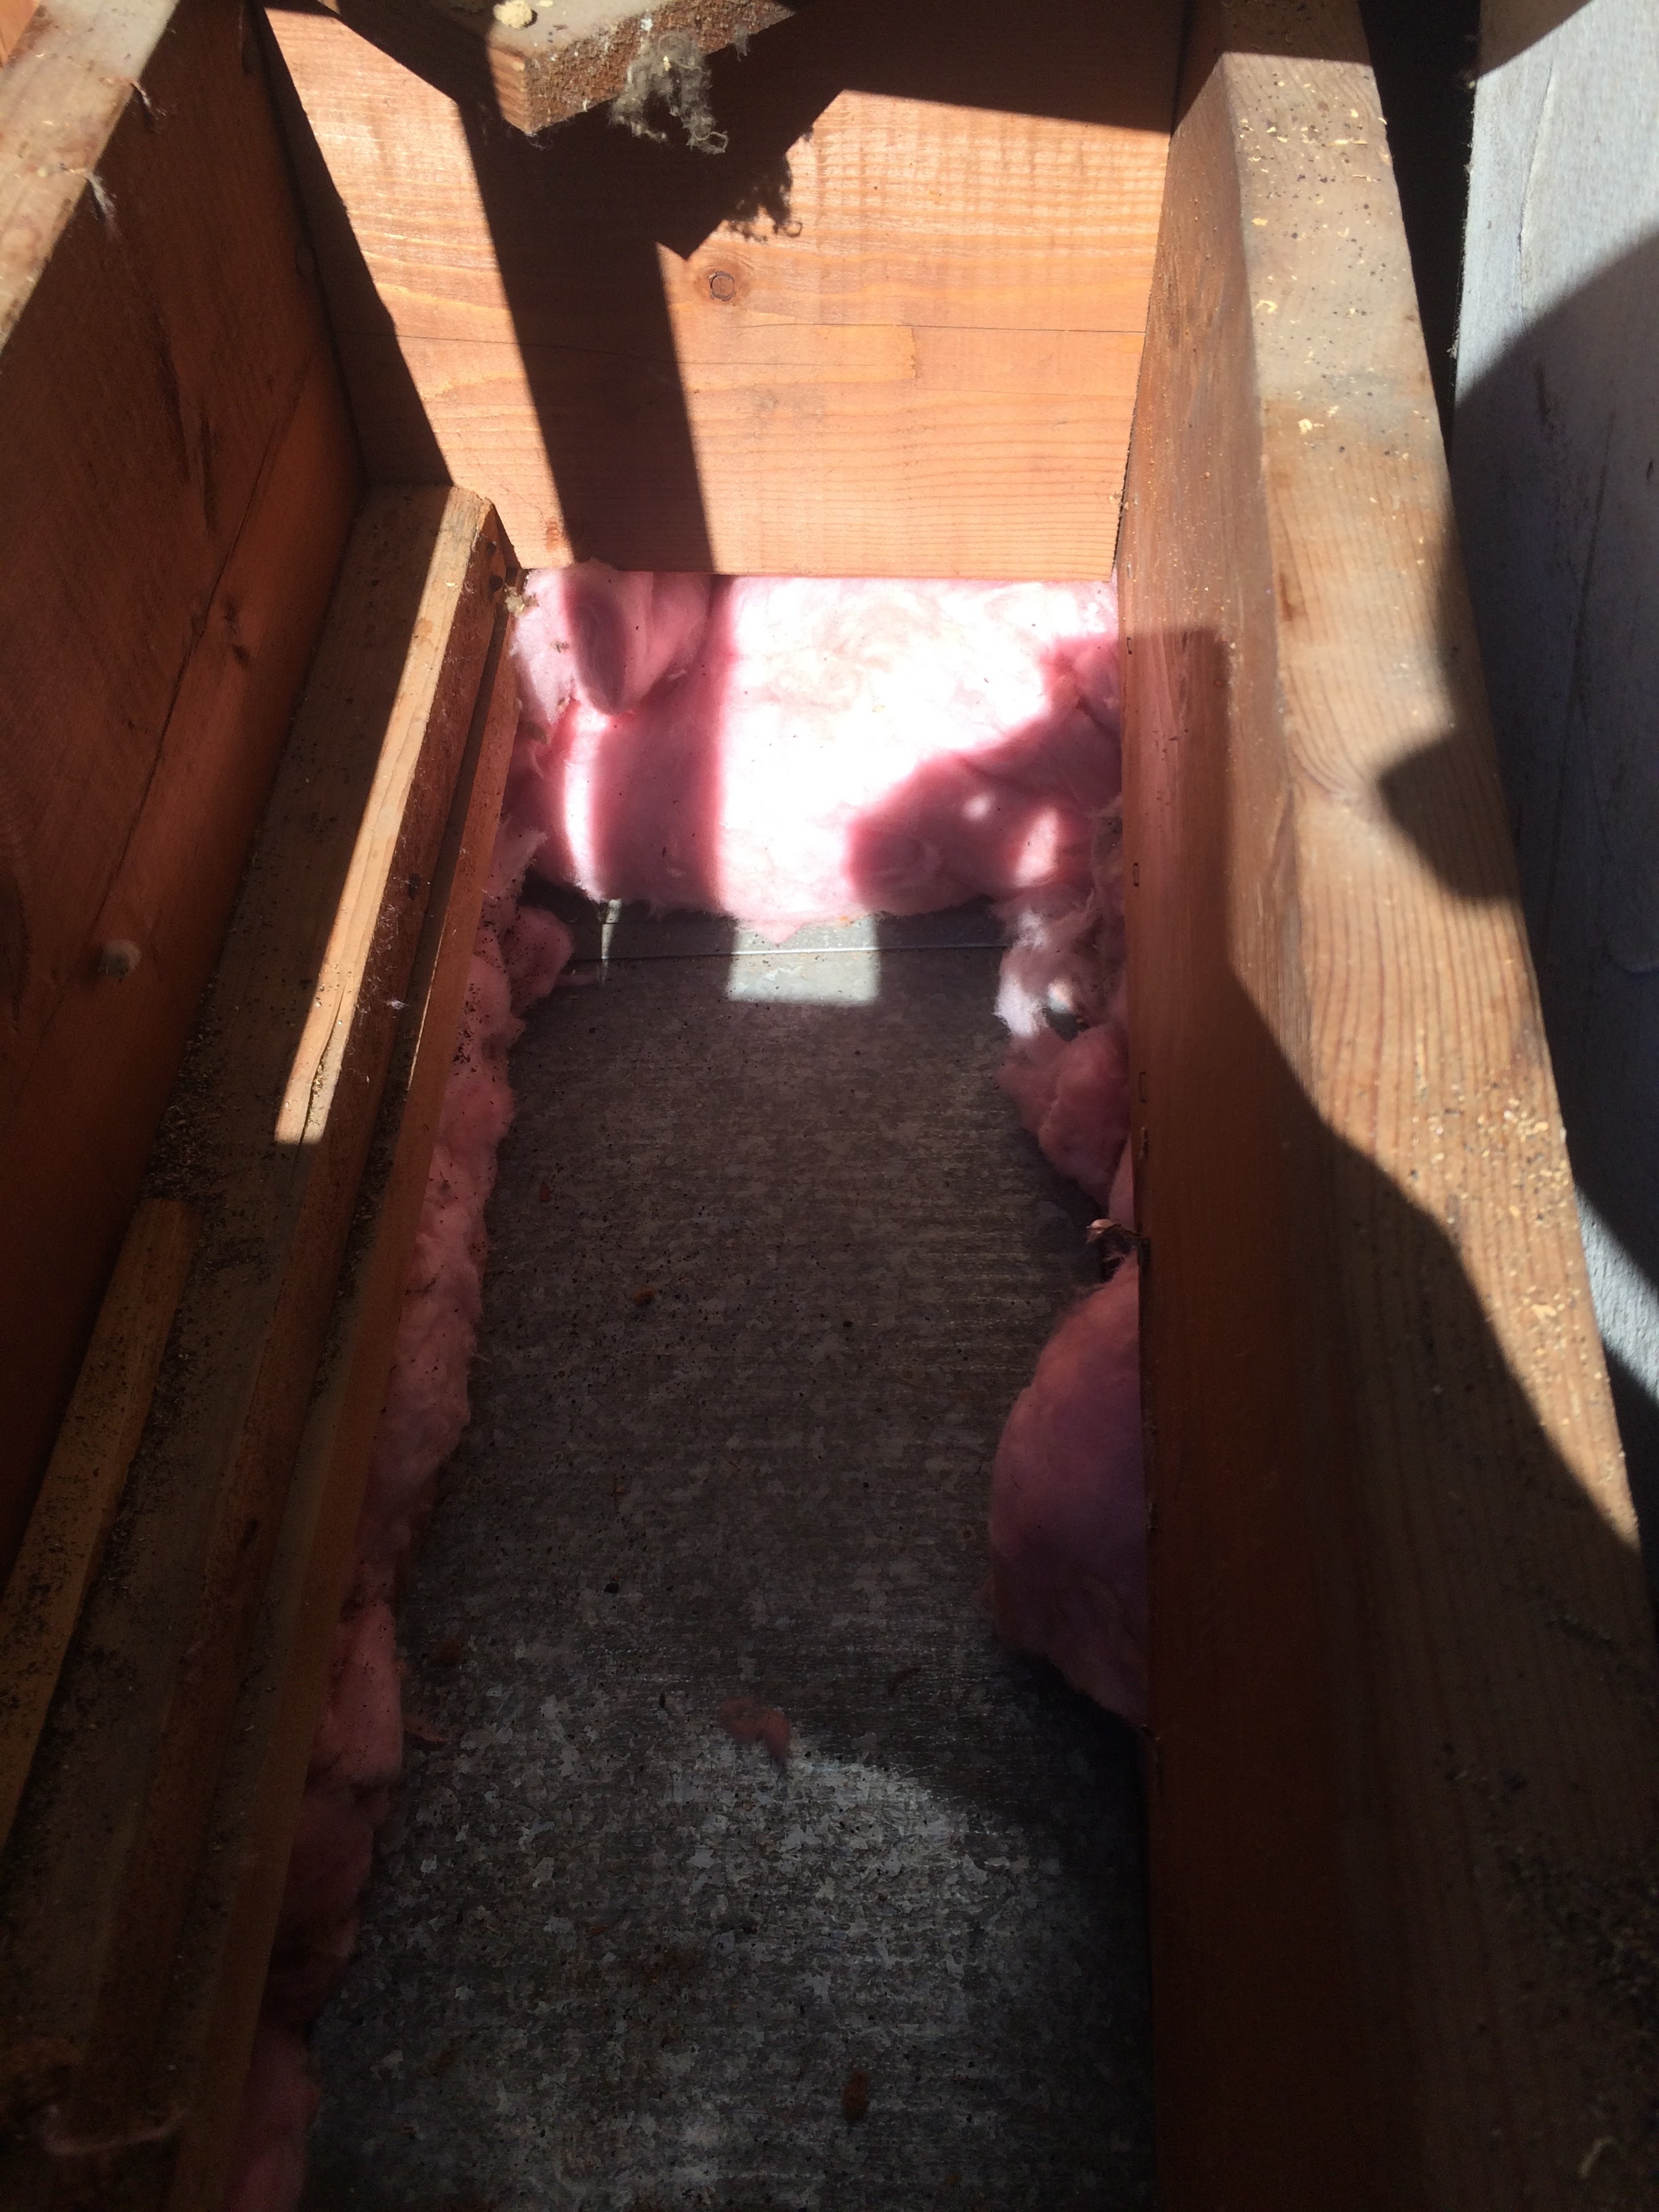
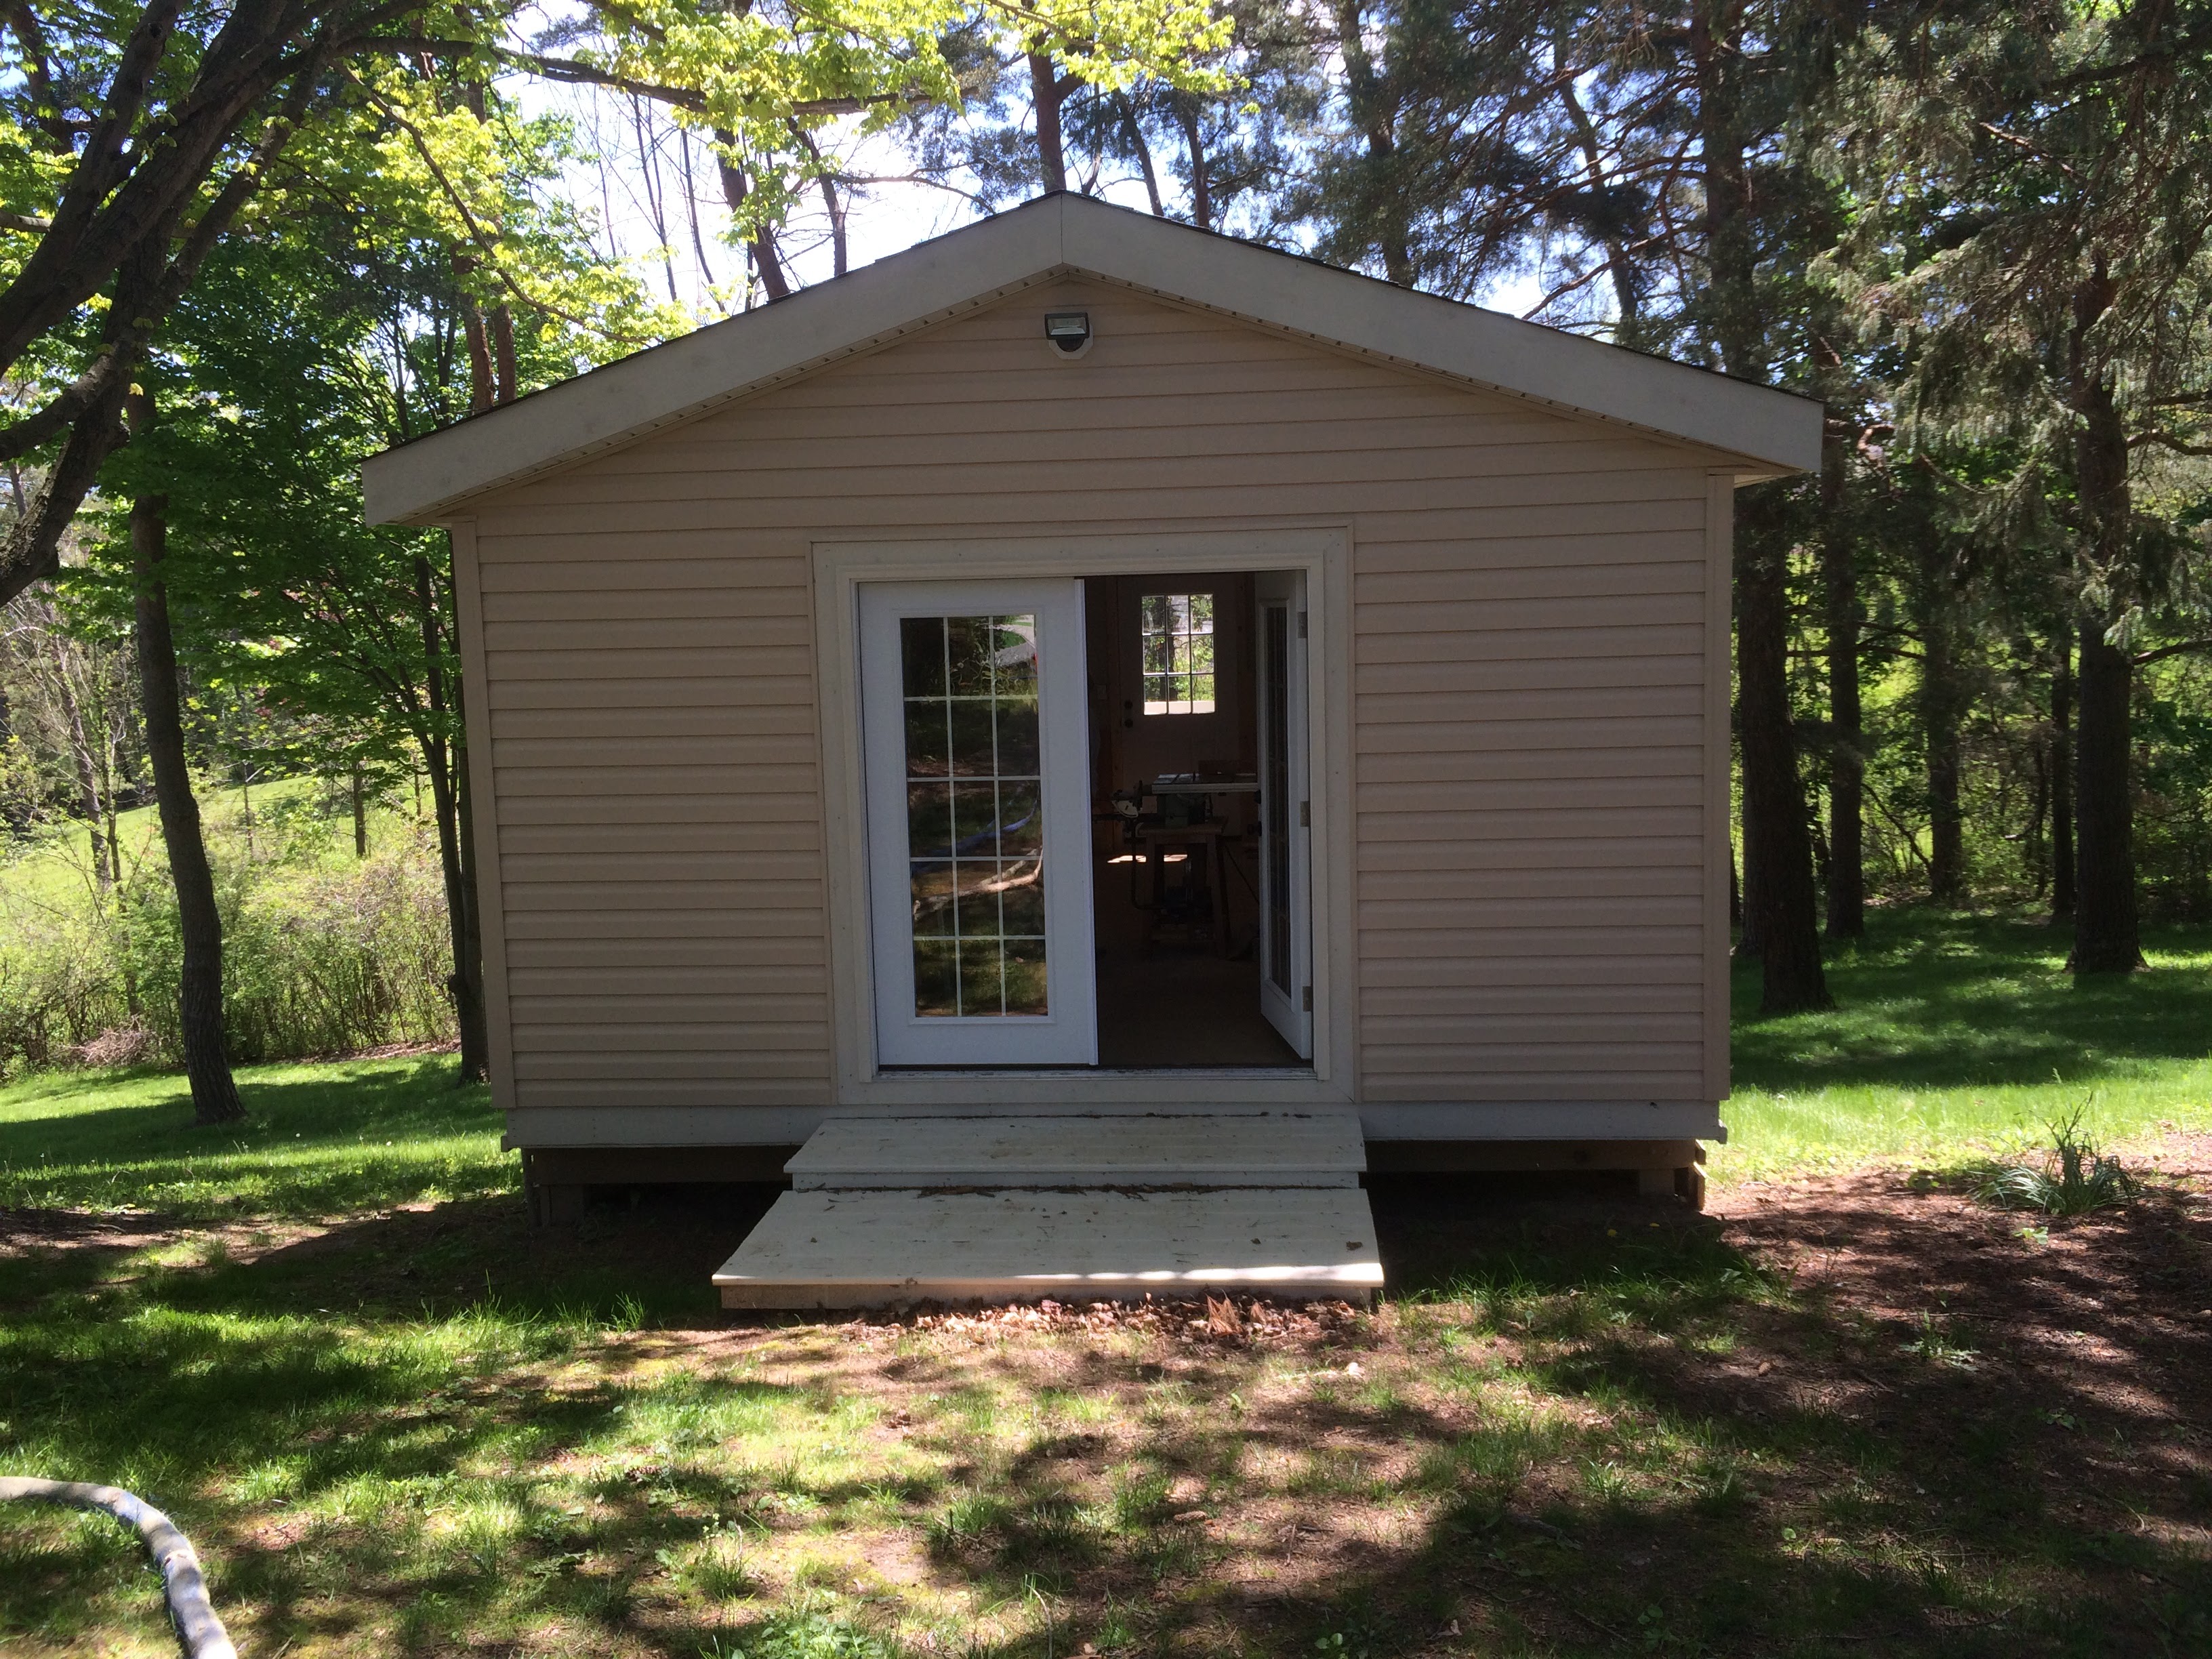
The last bit of the project was a weird little knee wall in the front that was only about 12” tall.
This is the front of the craft room, you can see its window around the corner, next to the chimney. This was one of the coldest rooms in the house during winter, it’s now the warmest.
This little wall is what I wanted to be sure to hit. I was hoping it might be 300-400 points. Being fairly high in the house, it’s likely to be a leak that leaks a lot. Leaks at the top and bottom of a house are the ones that move the most air.
All foamed up! Elaine’s craft room is tight enough that she should be able to break out her stringed instruments and play.


In the end, the team achieved a whopping 58% reduction in air leakage, from 8910 to 3665. I was very happy with this result. Since the house is 2852 square feet, this is pretty close to the 1:1 leakage ratio I shoot for. 3665:2852 is pretty good. We’d already achieved noticeable results at 4850.
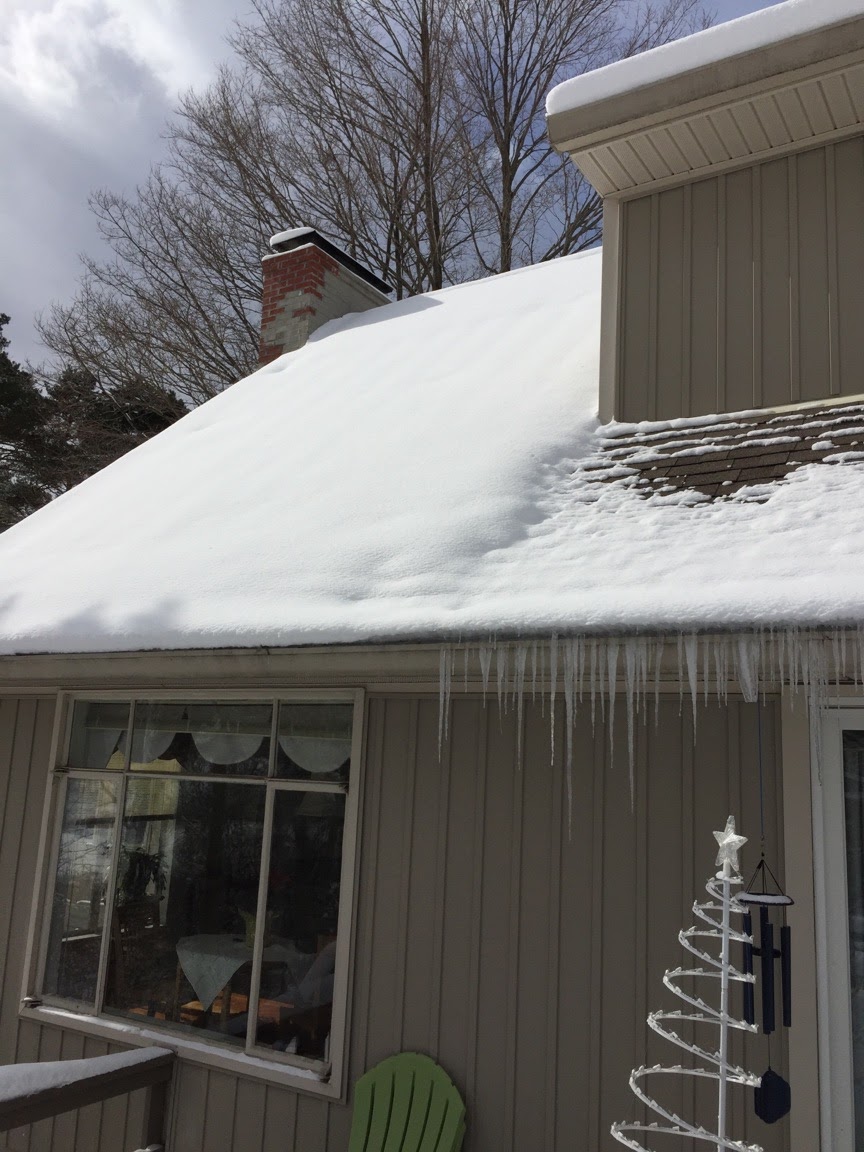
Ice Damming Results
One of the other goals was to reduce ice damming. When houses leak too much heat, they melt the snow on the roof. That water runs into the gutter and refreezes. If enough water freezes, it overflows the gutter and becomes an icicle. The frozen ice in the gutter becomes an ice dam. The bad stuff happens behind the ice dam, as there’s a pool of water that develops. If the pool gets deep enough, it will run under the shingles and get into the house, rotting wood, ruining walls and ceilings, possibly causing mold, making wood wet enough to support termites, and other not-so-nice things.
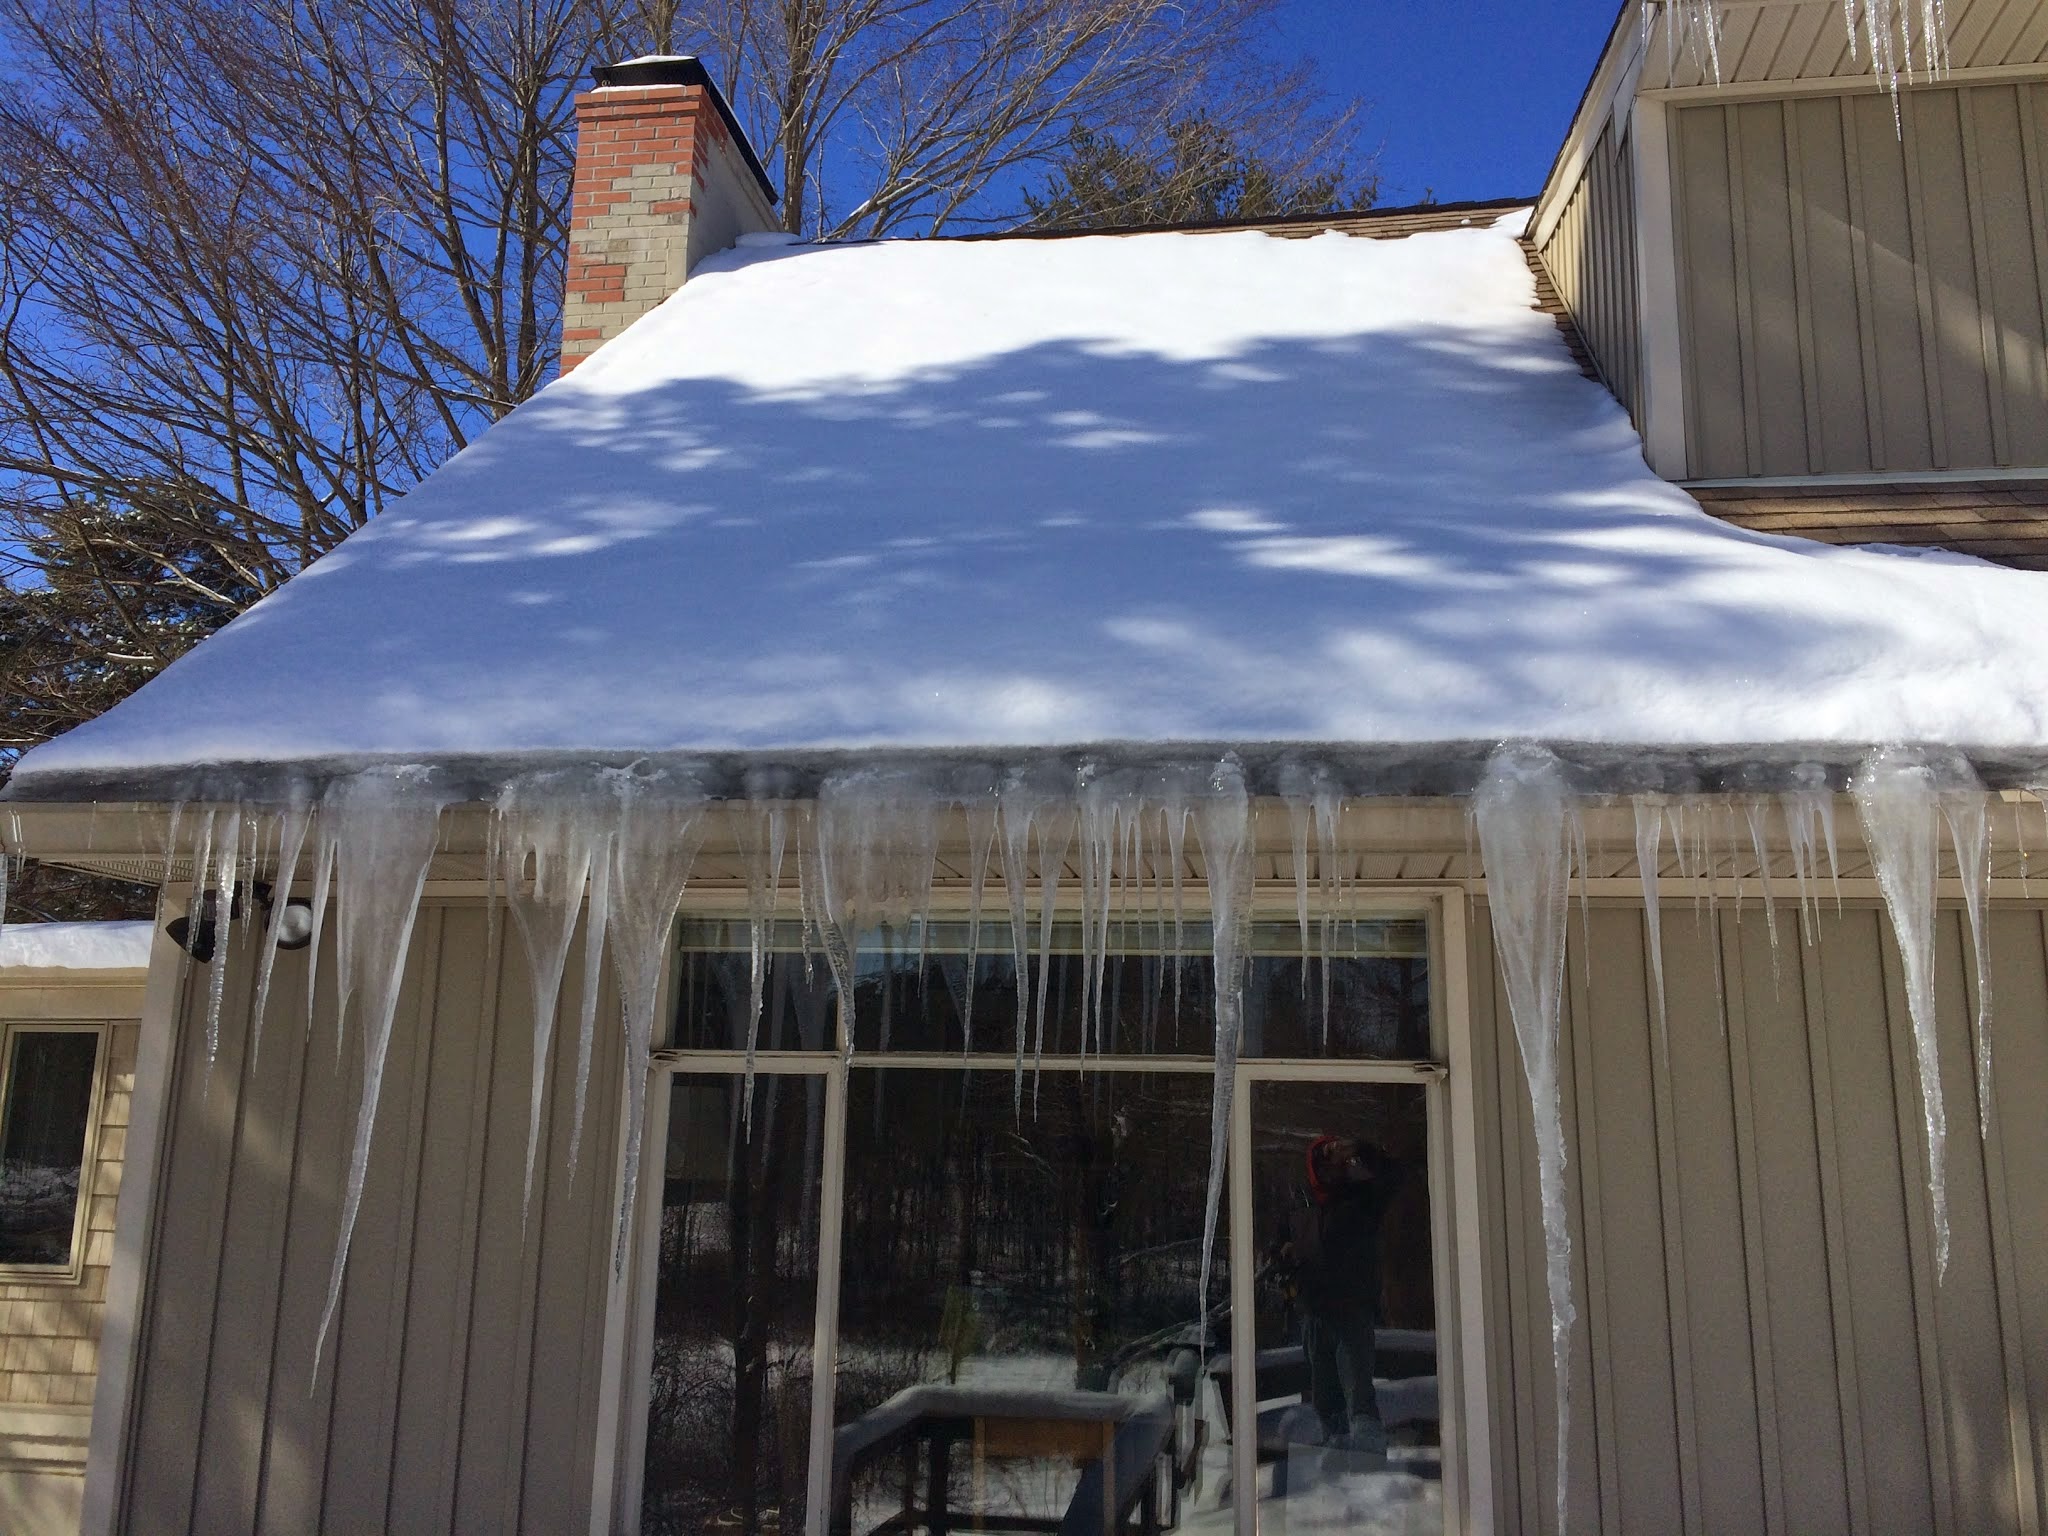
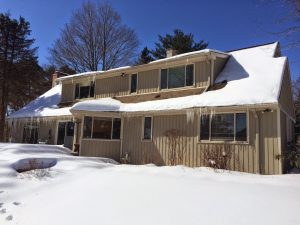
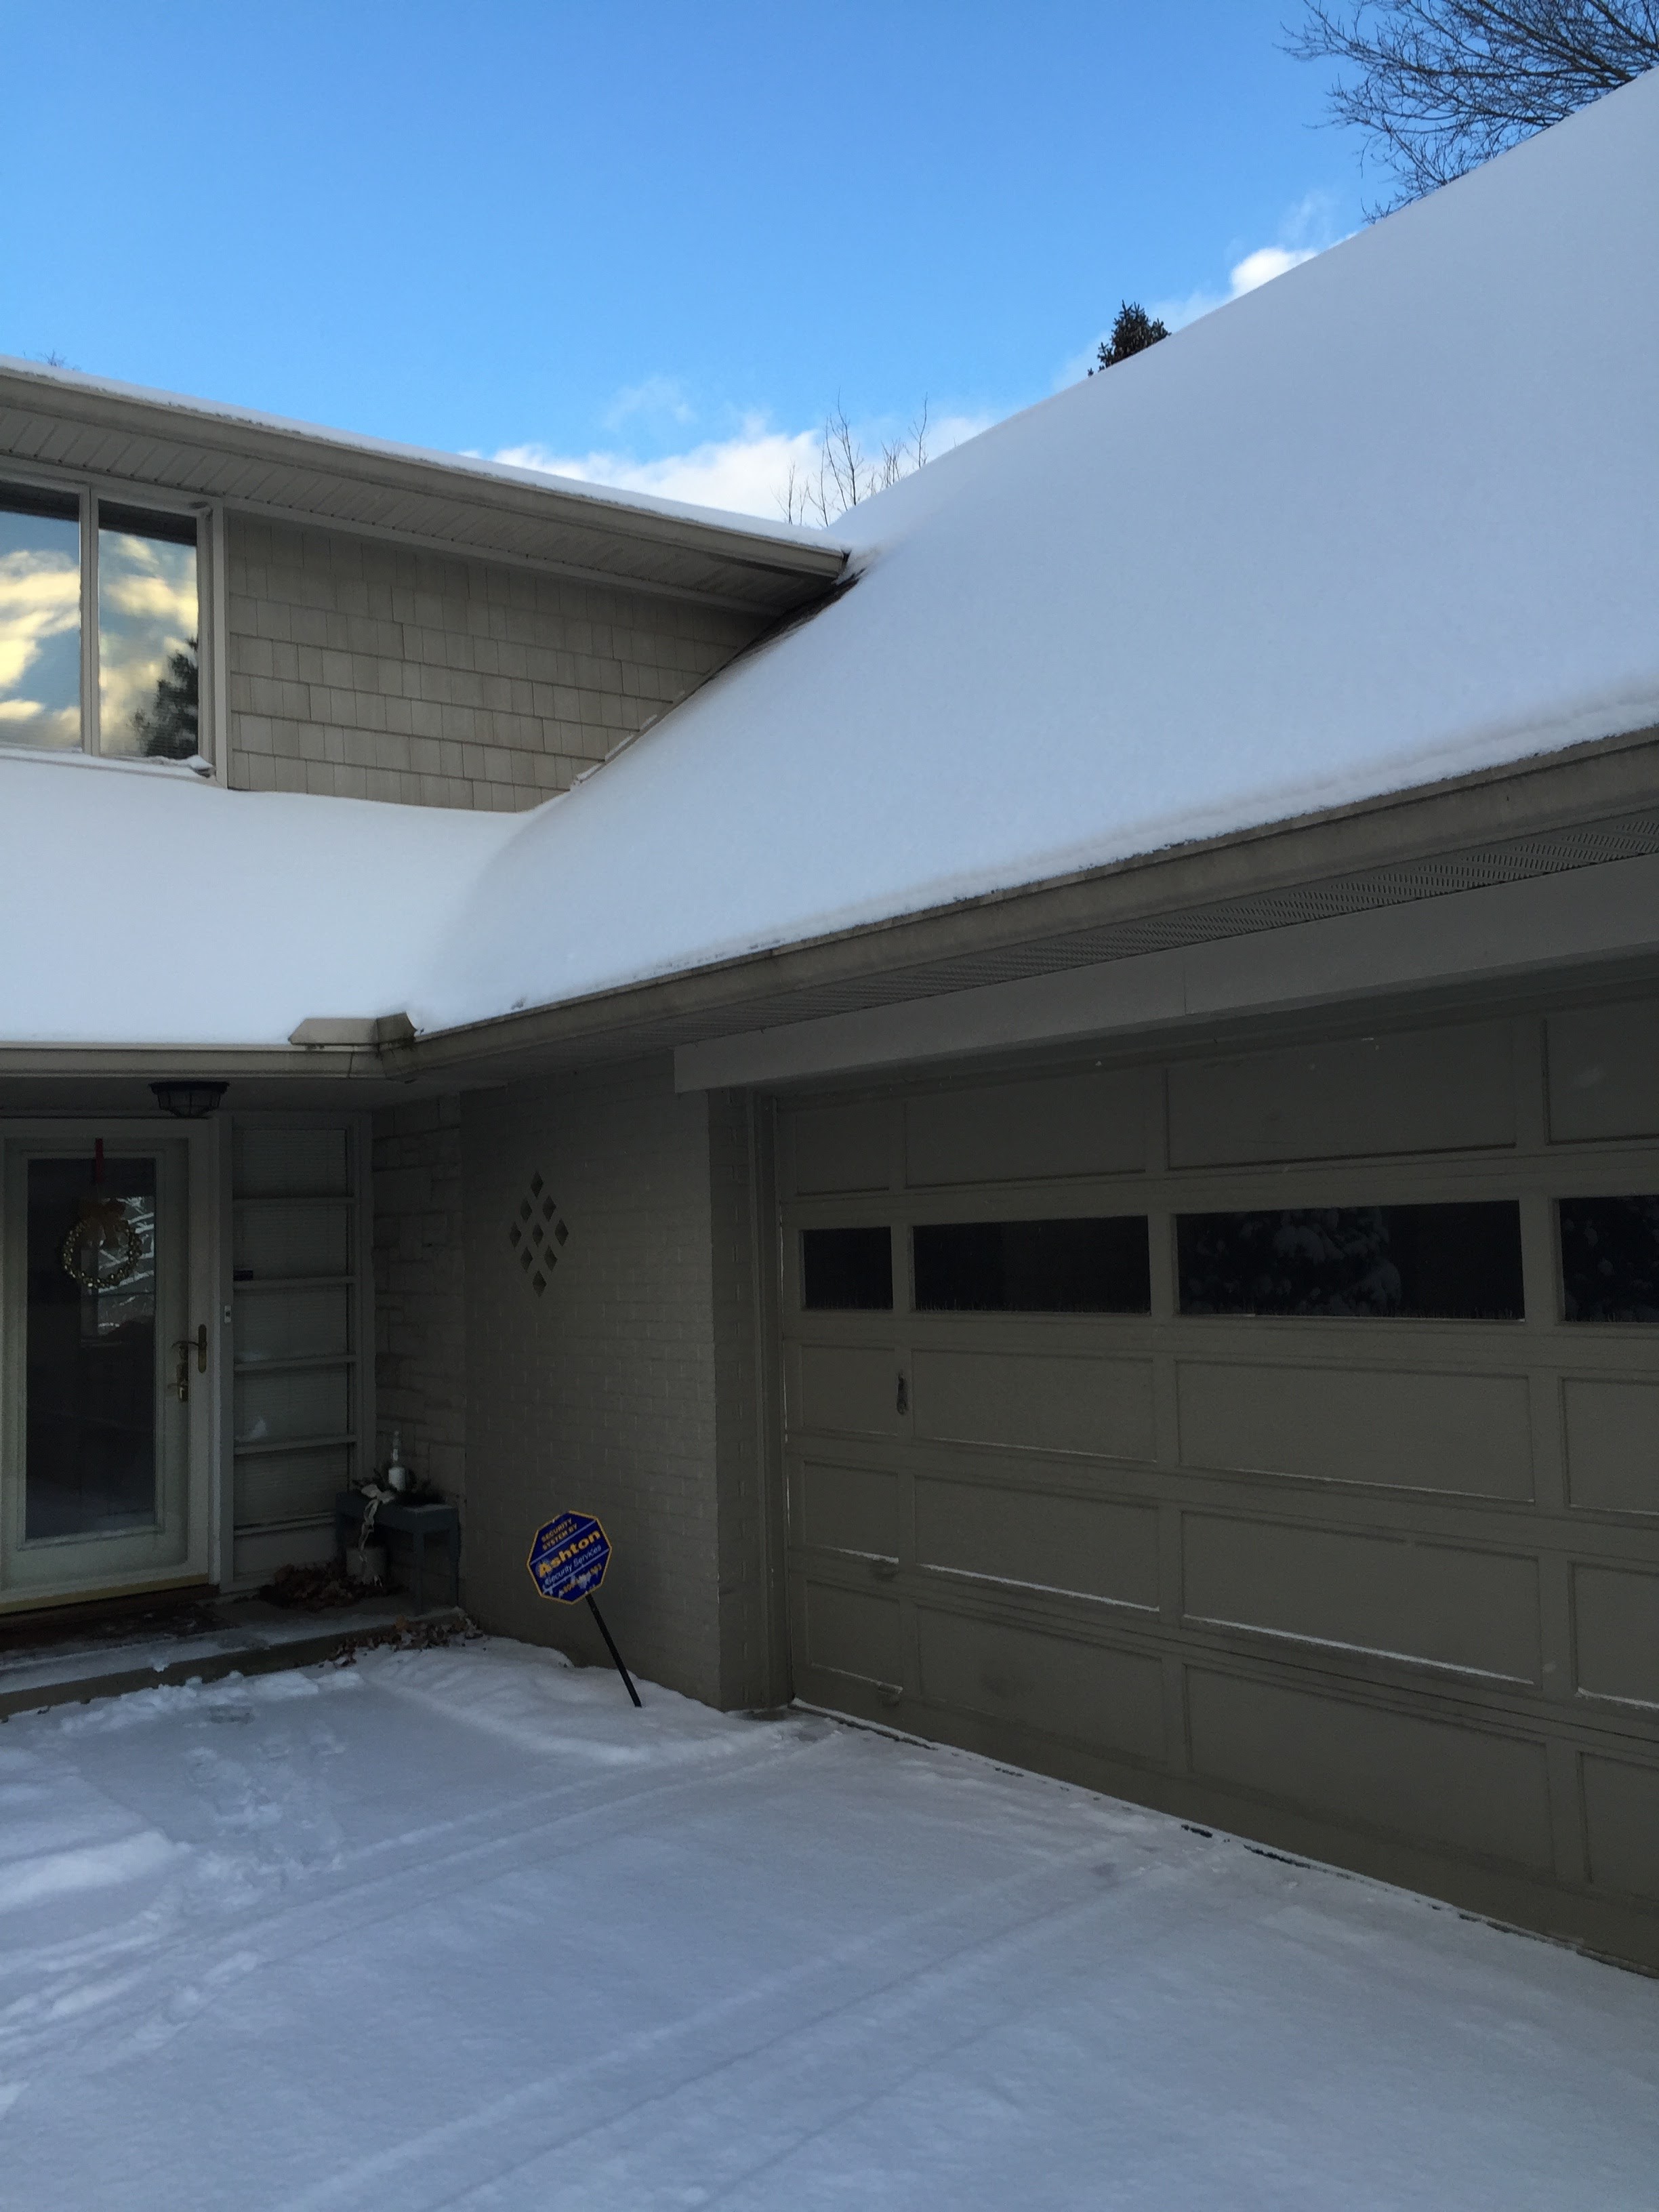
This is the back of the house, the opposite side of the craft room we foamed in phase 2. This photo is before the project during my energy audit. There were almost two feet of snow on the ground, and the icicles were pretty big.

This shot is a different angle that Carlton sent me the following winter. The window on the left is the same one from the previous photo. Note how the snow is staying on the roof above the window. This is much of why the craft room is warmer. Meanwhile, to the right of it is the tiny knee wall we so laboriously opened up a few months later. It’s a good side by side shot.
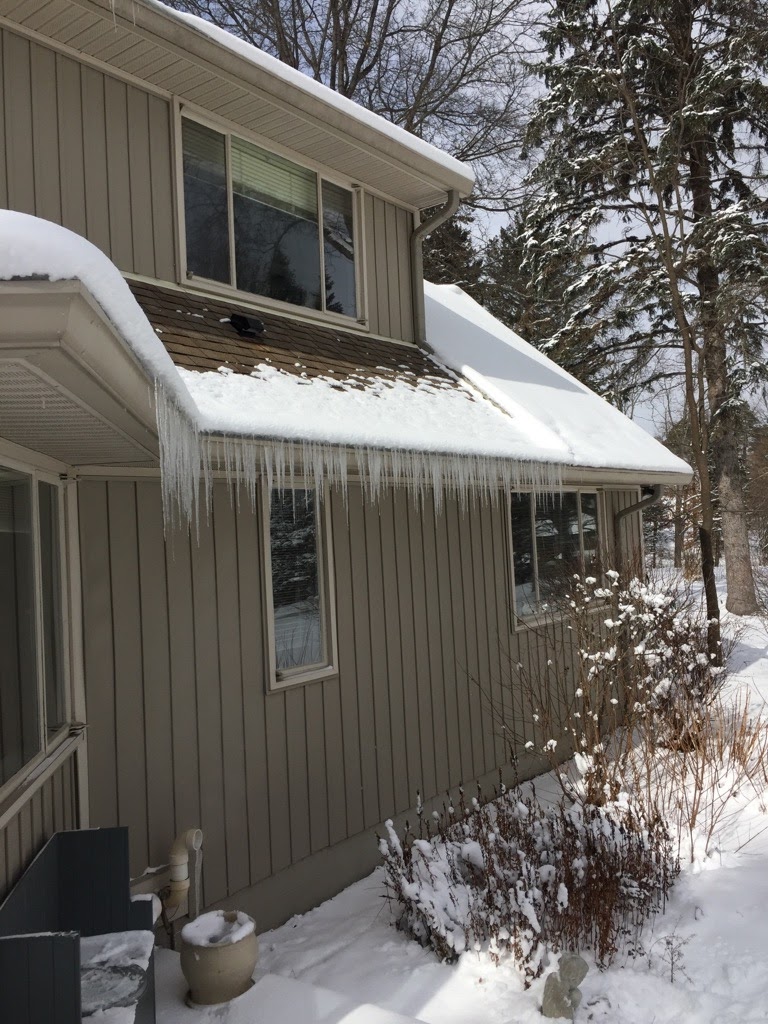
This is the other side of the back of the house. Note the same pattern, above the tiny knee wall the snow is melted, on the insulated roofline of the attic over the office, no ice. This only required 3.5” of foam at a whopping R-20 or so. Code is R-38. R-49 to R-60 is the Department of Energy recommendation. This shows it doesn’t take that much R-value, but it DOES take a good air seal.
This winter, I’ll get pictures of the whole back roofline, and fingers crossed no more ice! Or as I tell clients, expect a 60-90% reduction, enough that you don’t need to worry about bad things happening. There’s no way to completely eliminate ice damming because the sun will melt snow even if heat from inside the house doesn’t.
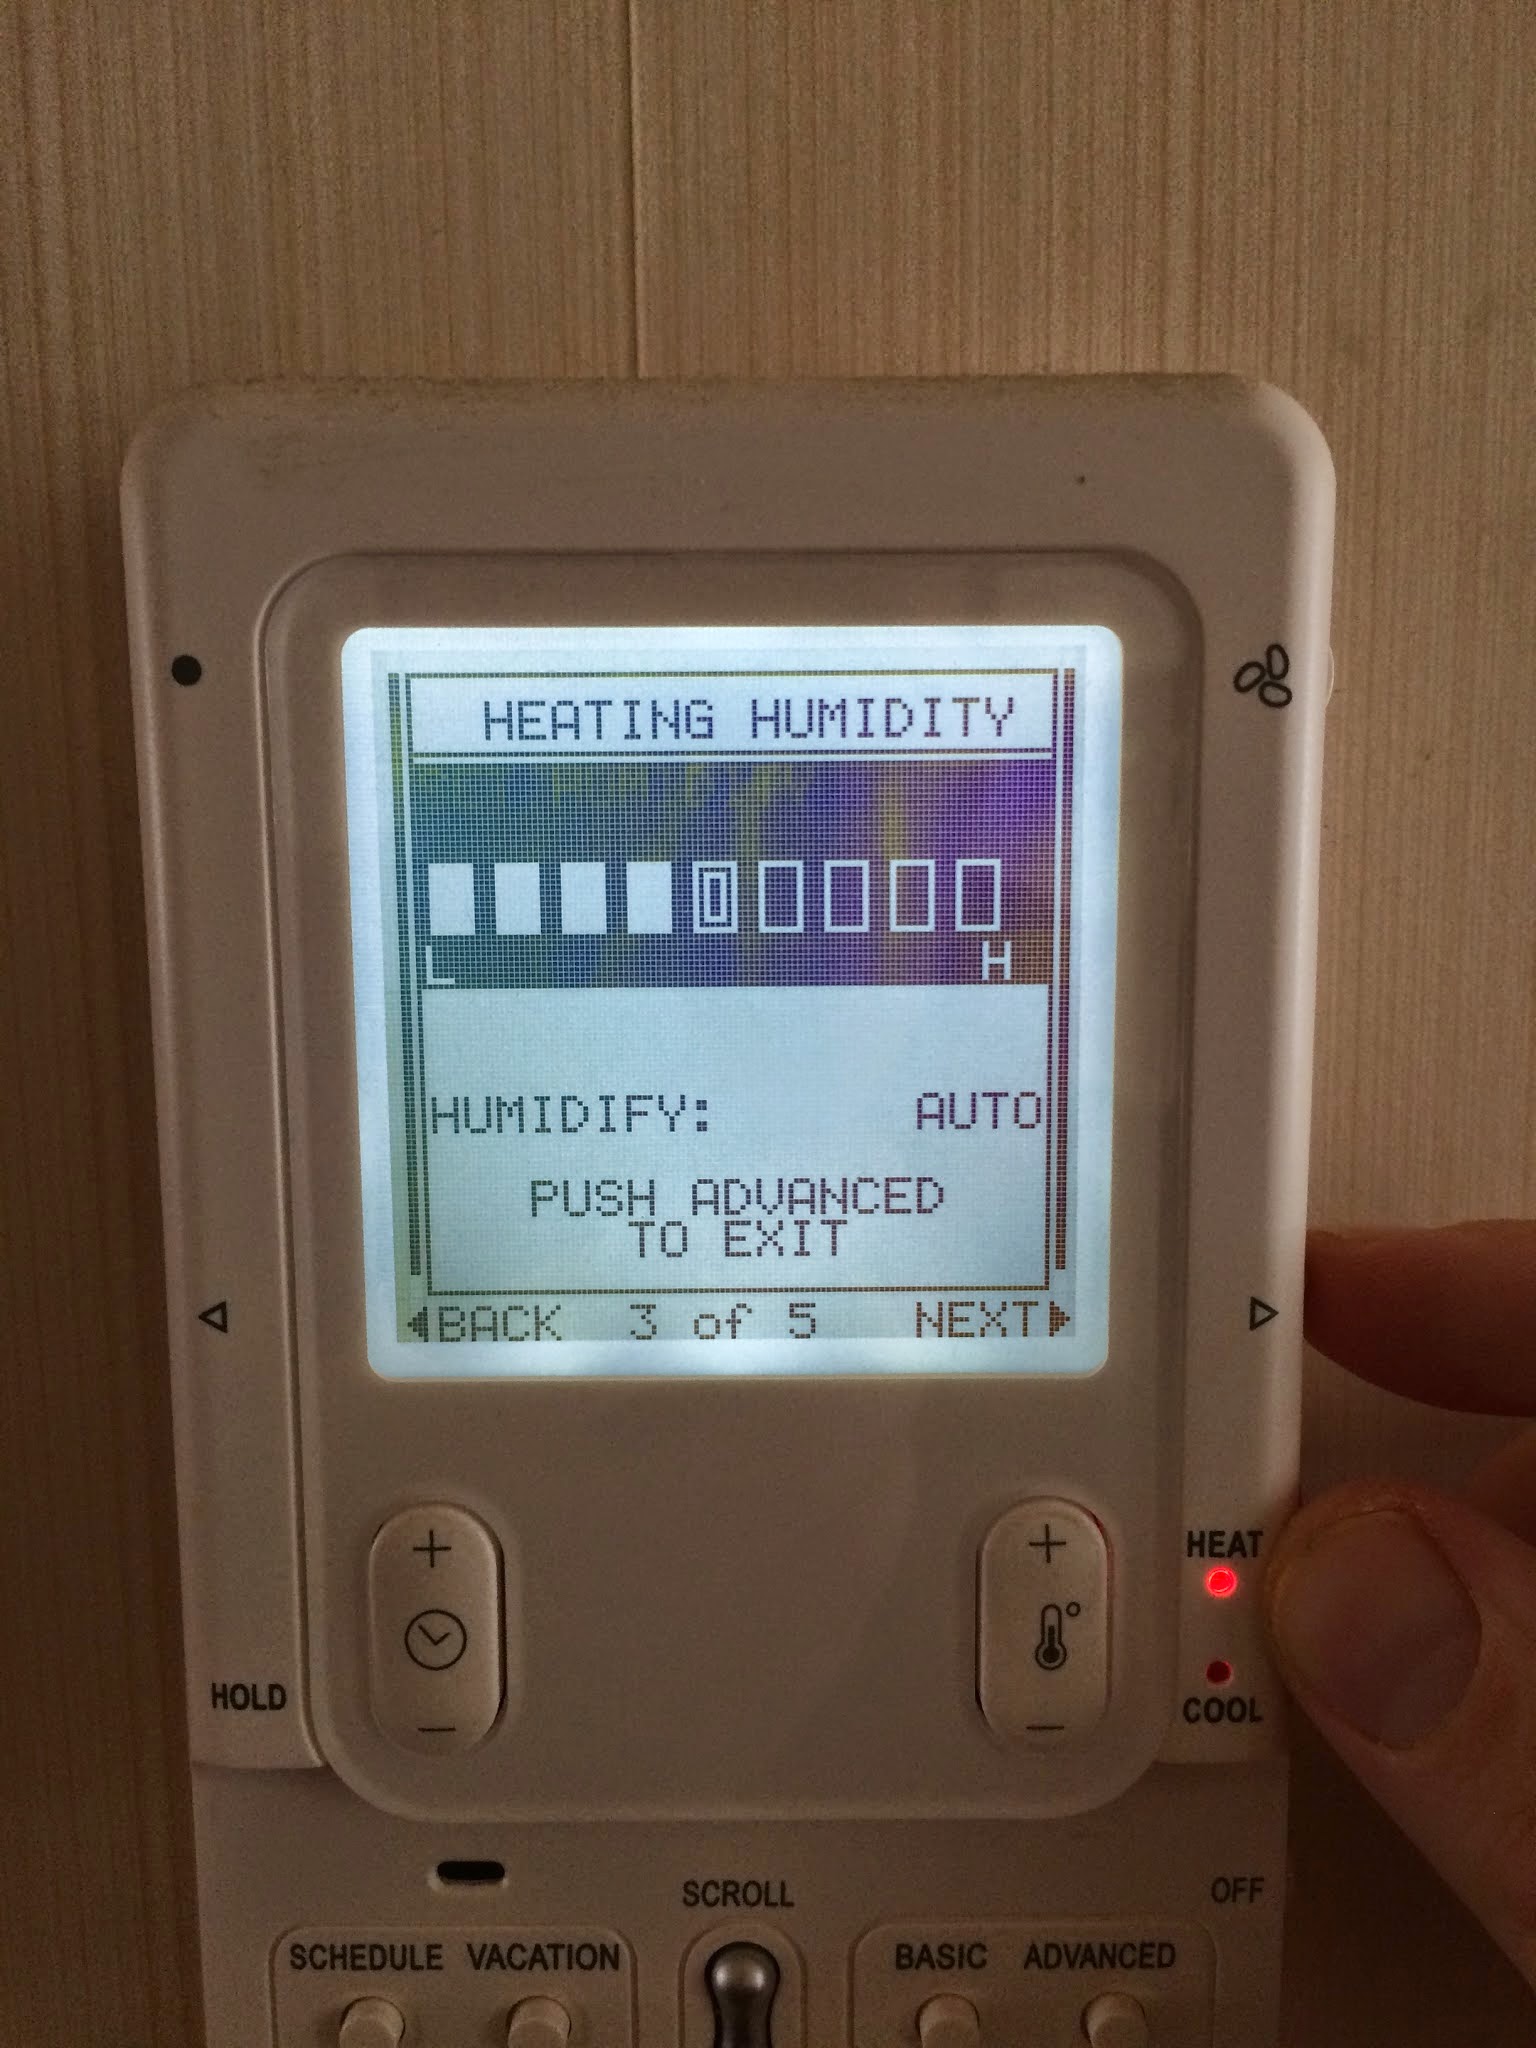
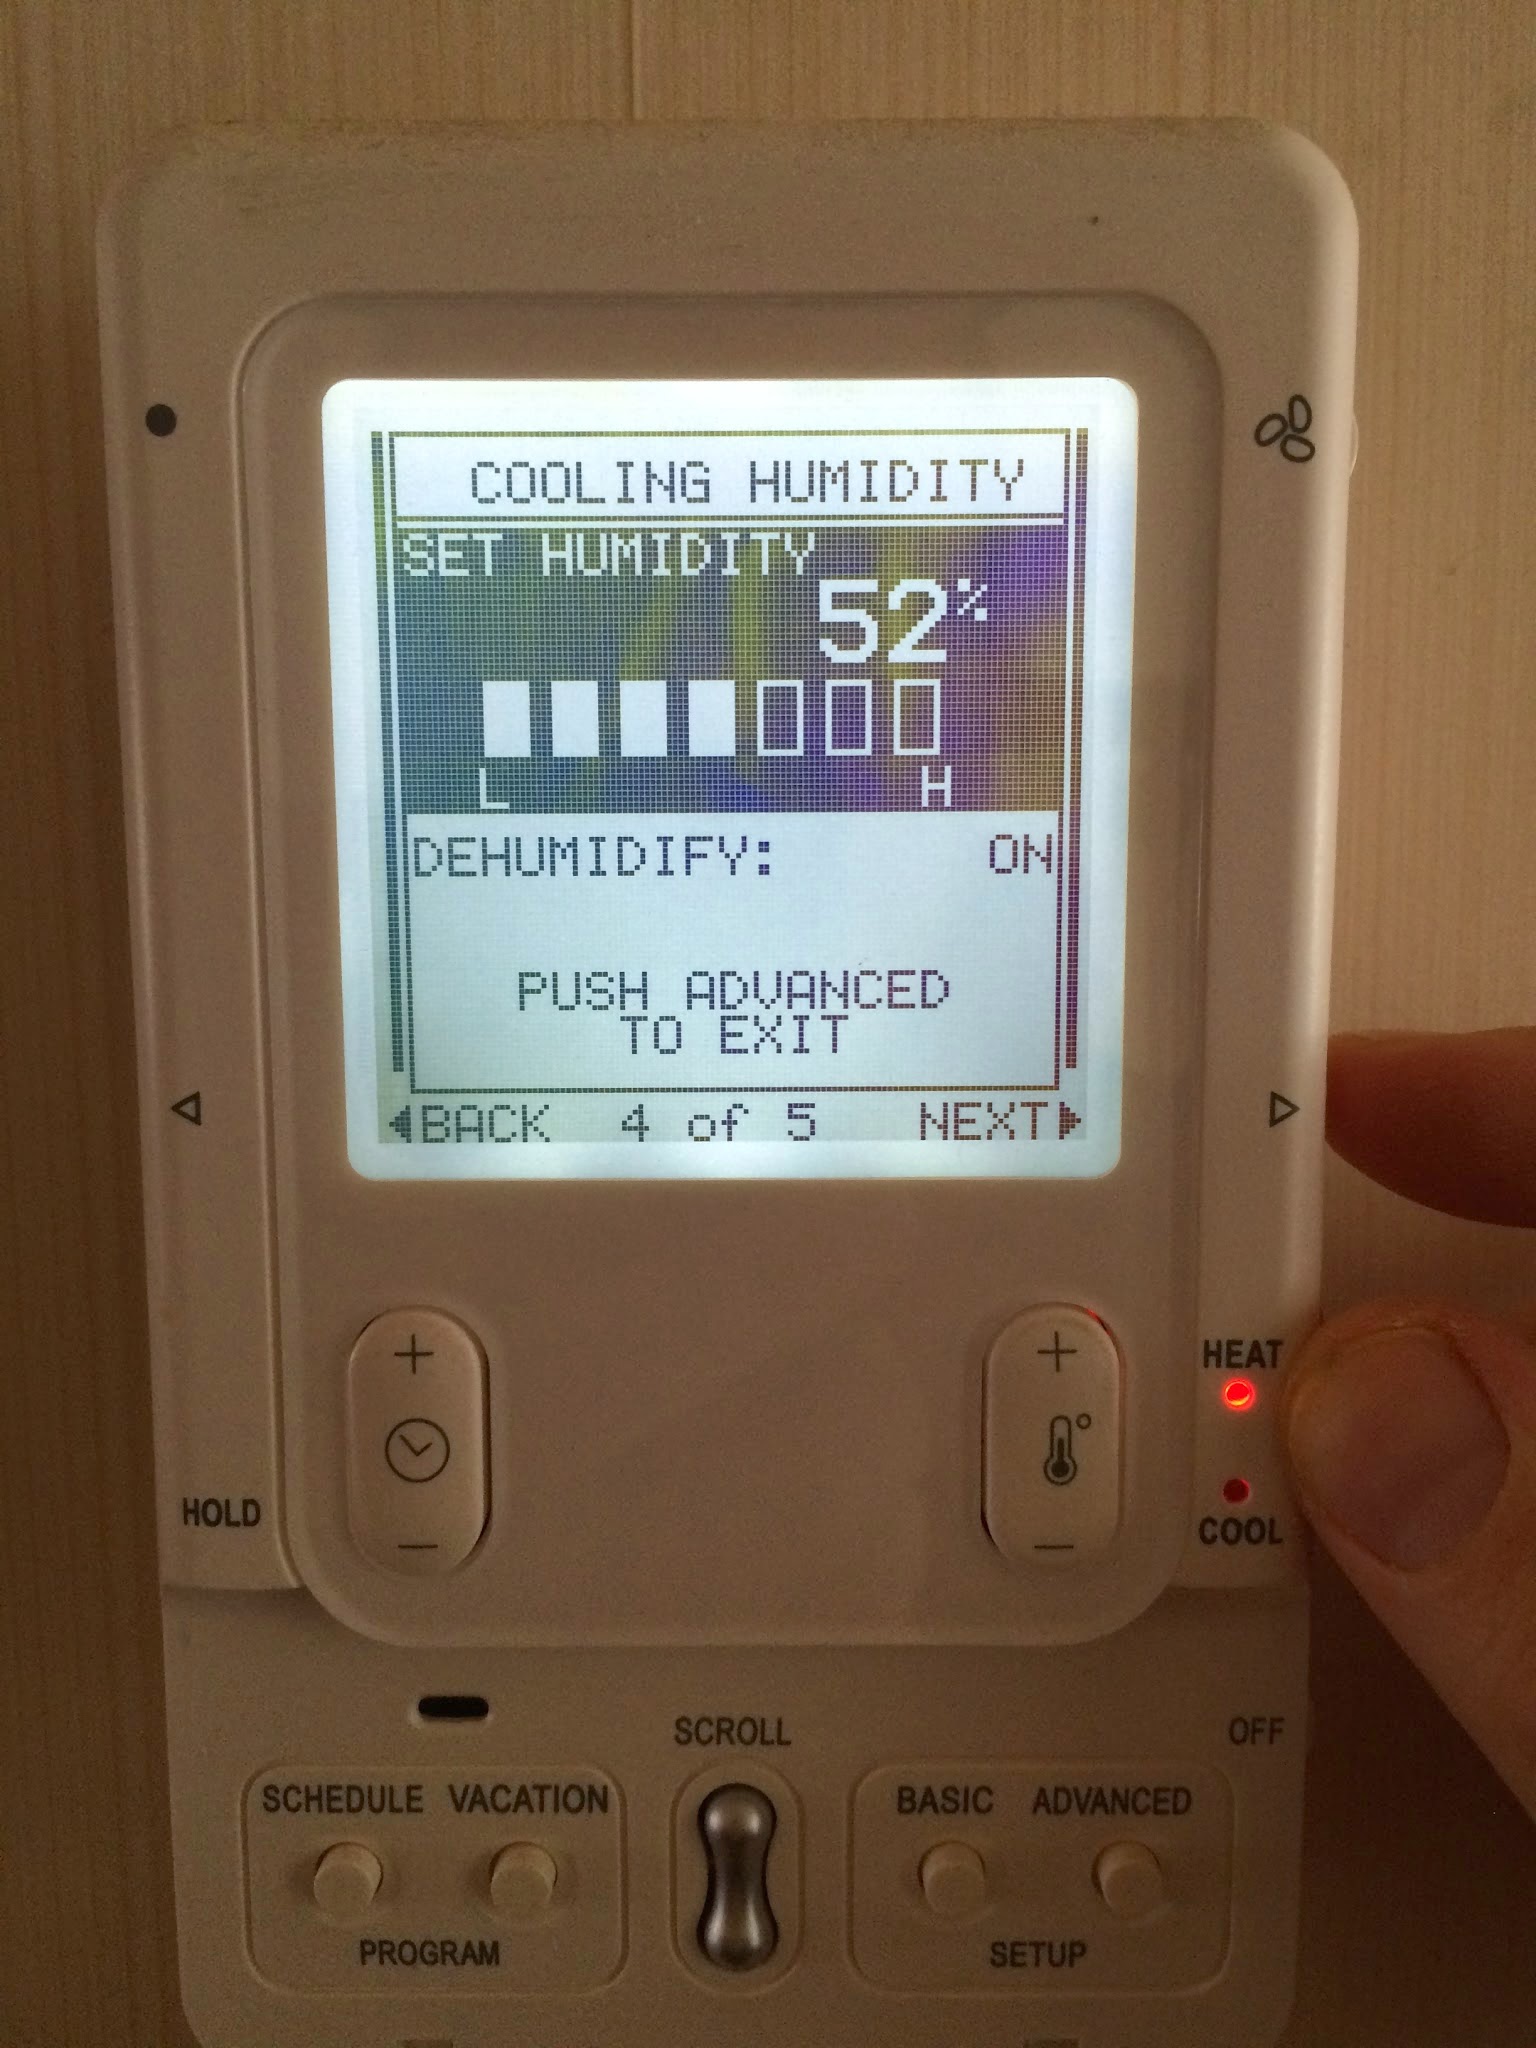
Continuous Optimization
The last step of Energy Smart’s process is called continuous optimization. We just radically changed the system of systems that is Carlton’s house. (Or your home…) Expecting it to perform perfectly immediately after the project is wishful thinking.
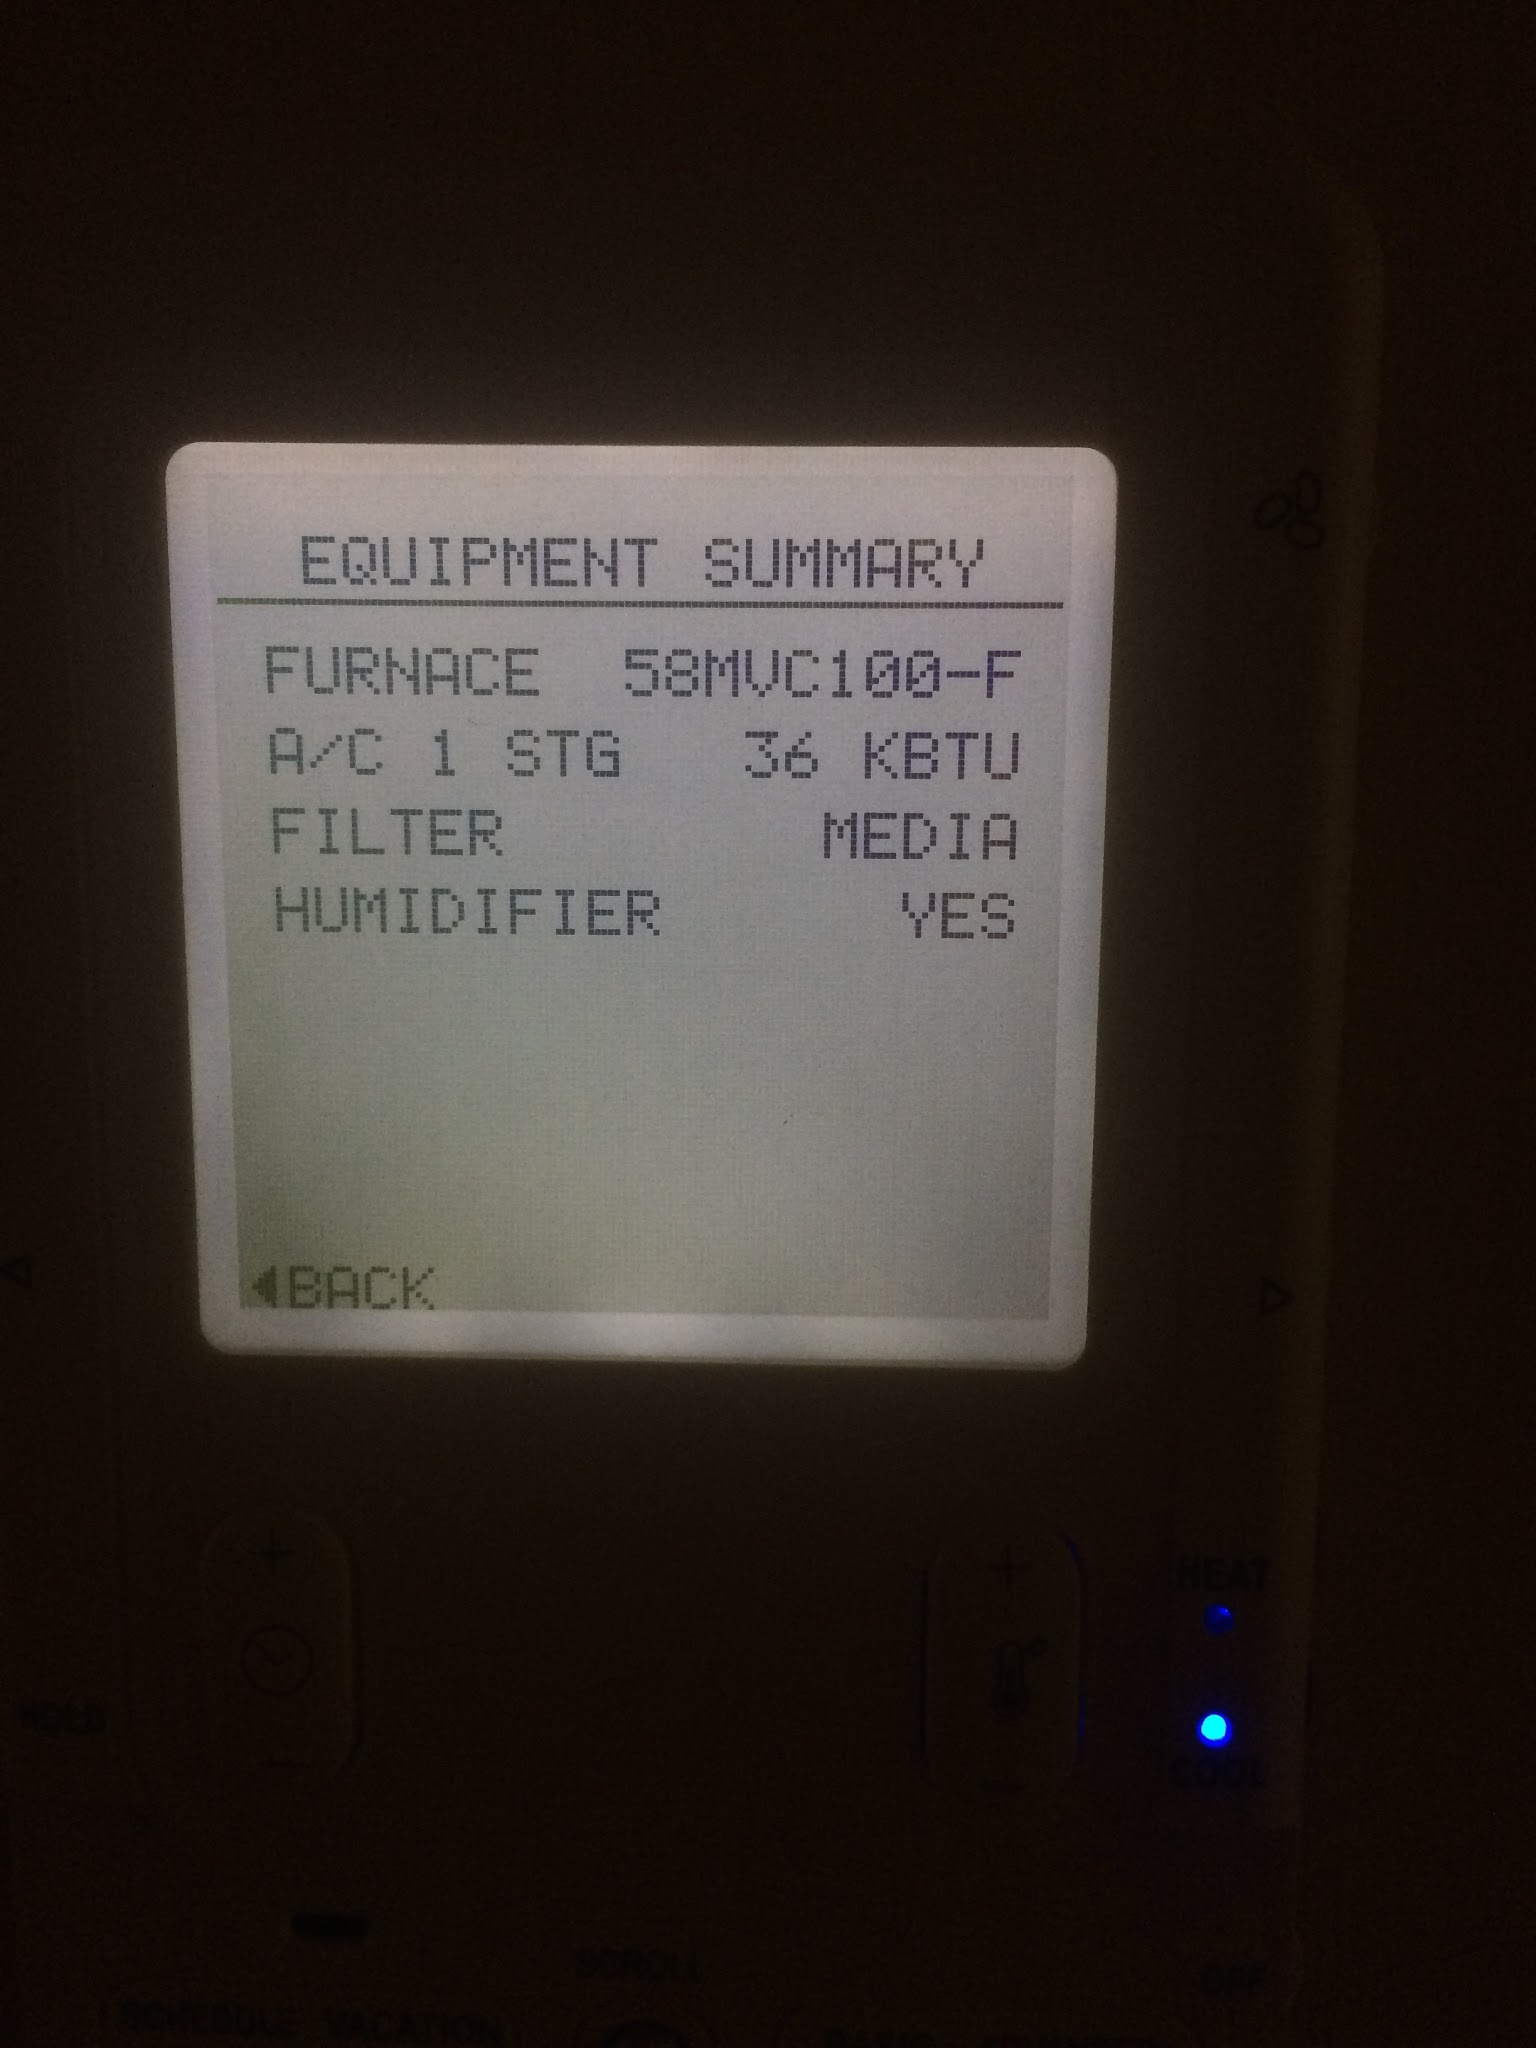
When we start, most homes only have a few on/off switches like a single stage furnace that only turns on or off, there is no middle ground. (See our free HVAC guide for more on that.) When a project is complete, we often have added additional knobs that can be adjusted. In this case, Carlton has a very nice furnace that is modulating, the one that fooled me into thinking the house is tighter than it was. That furnace has three fan speeds and at least 3 heat outputs. It can be configured to run in a number of different ways.
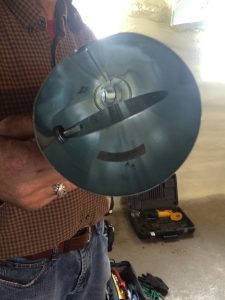
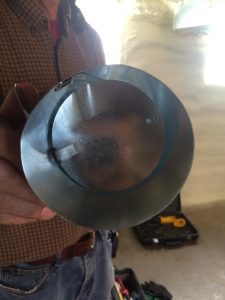
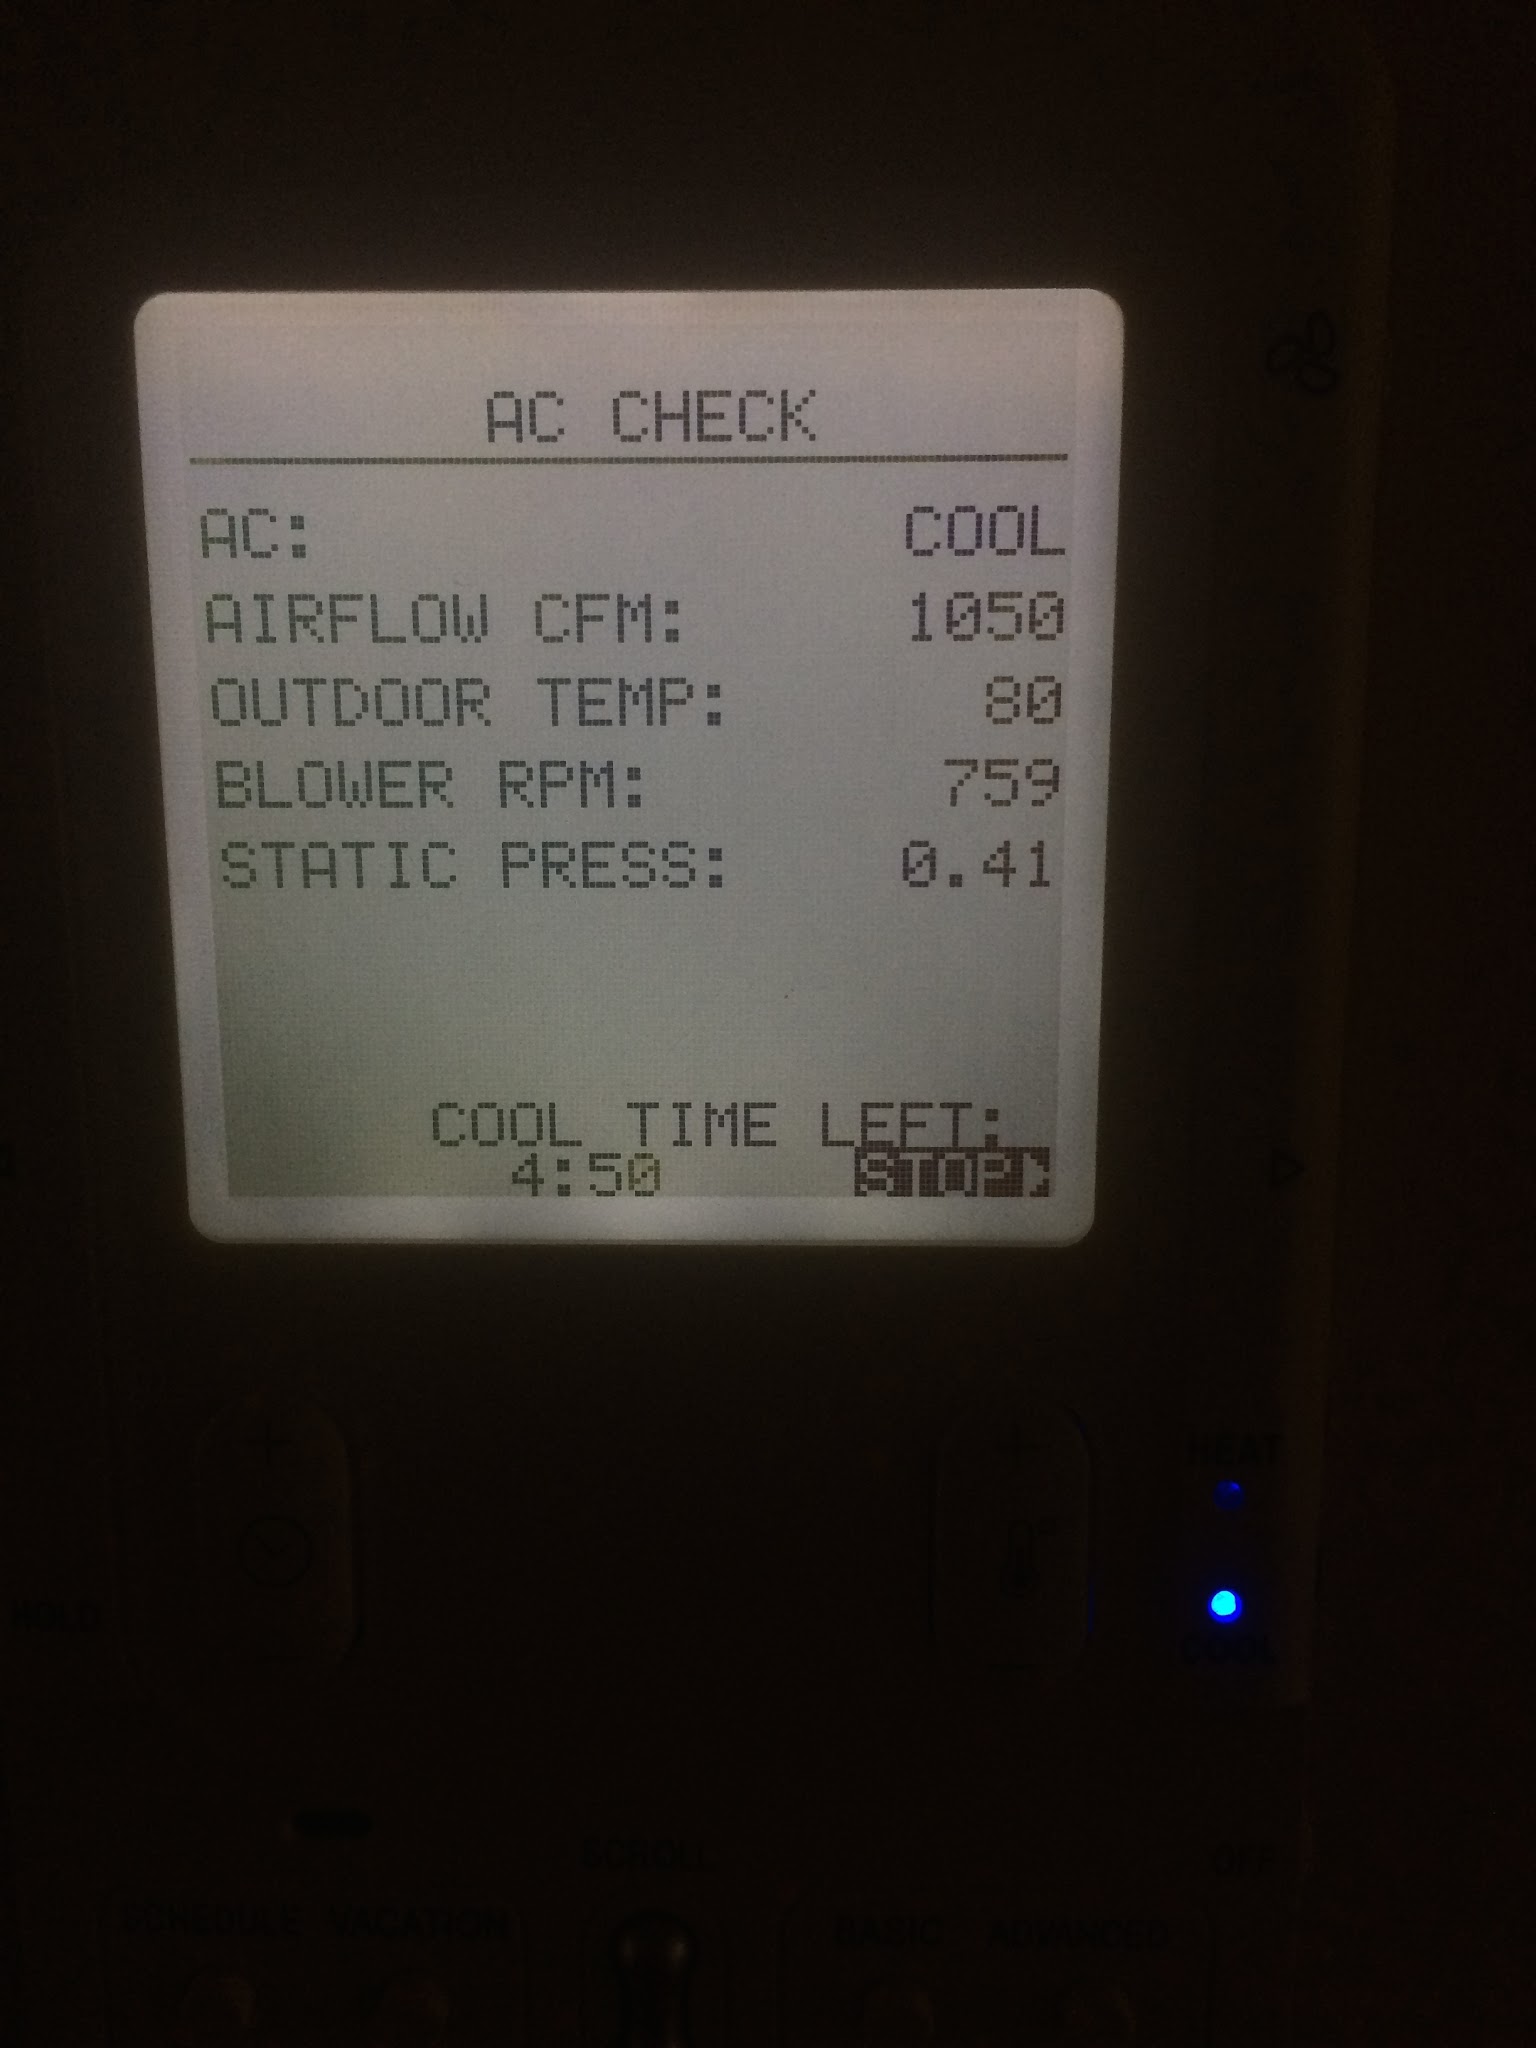
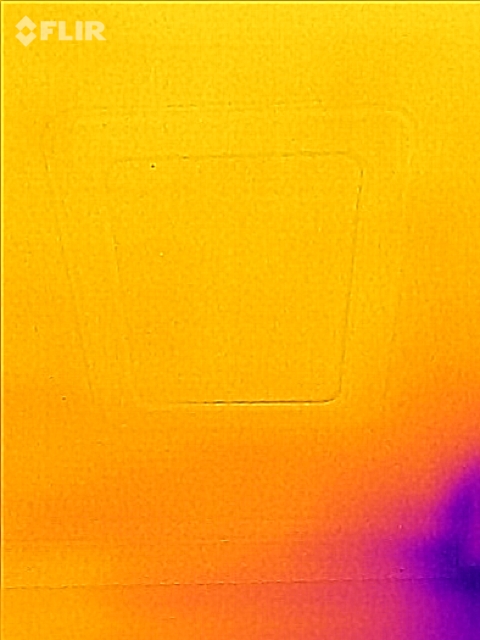
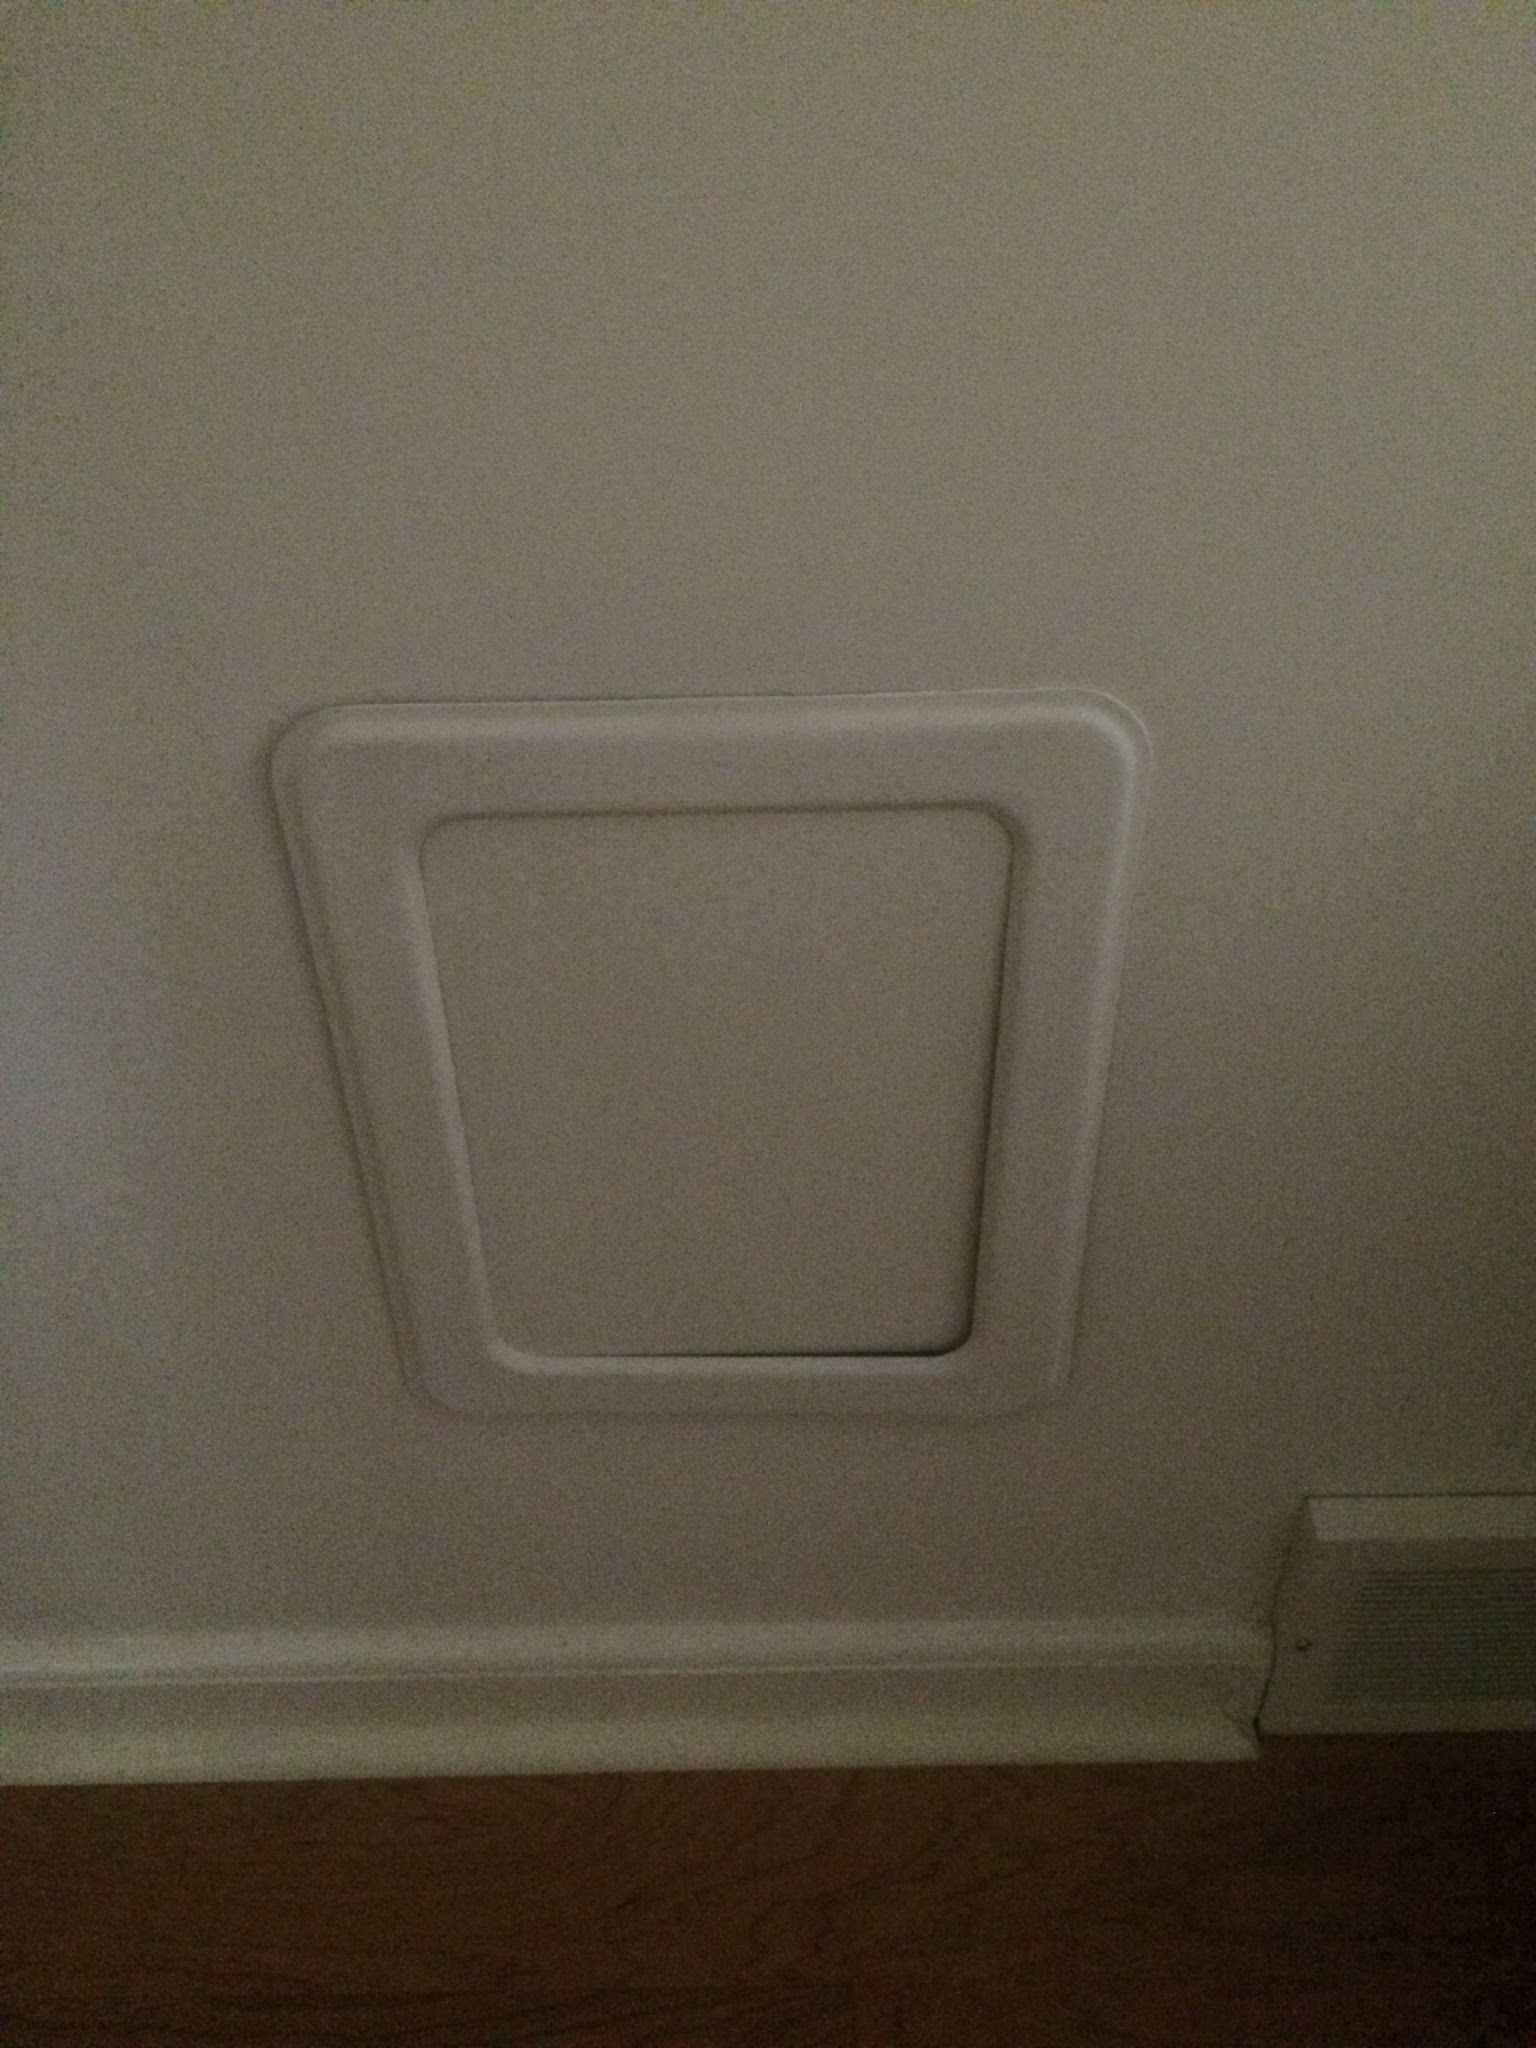
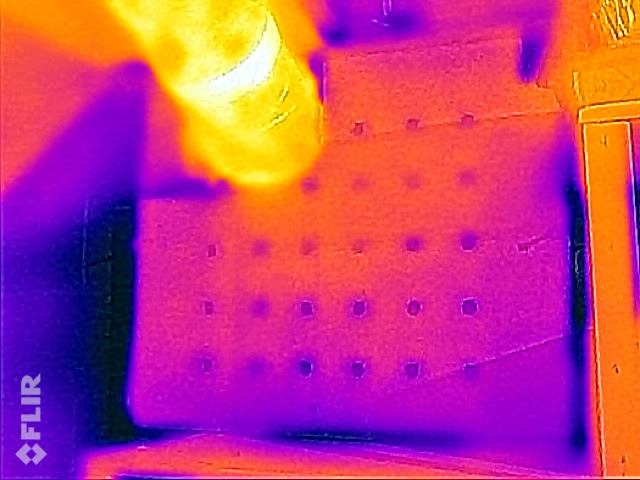
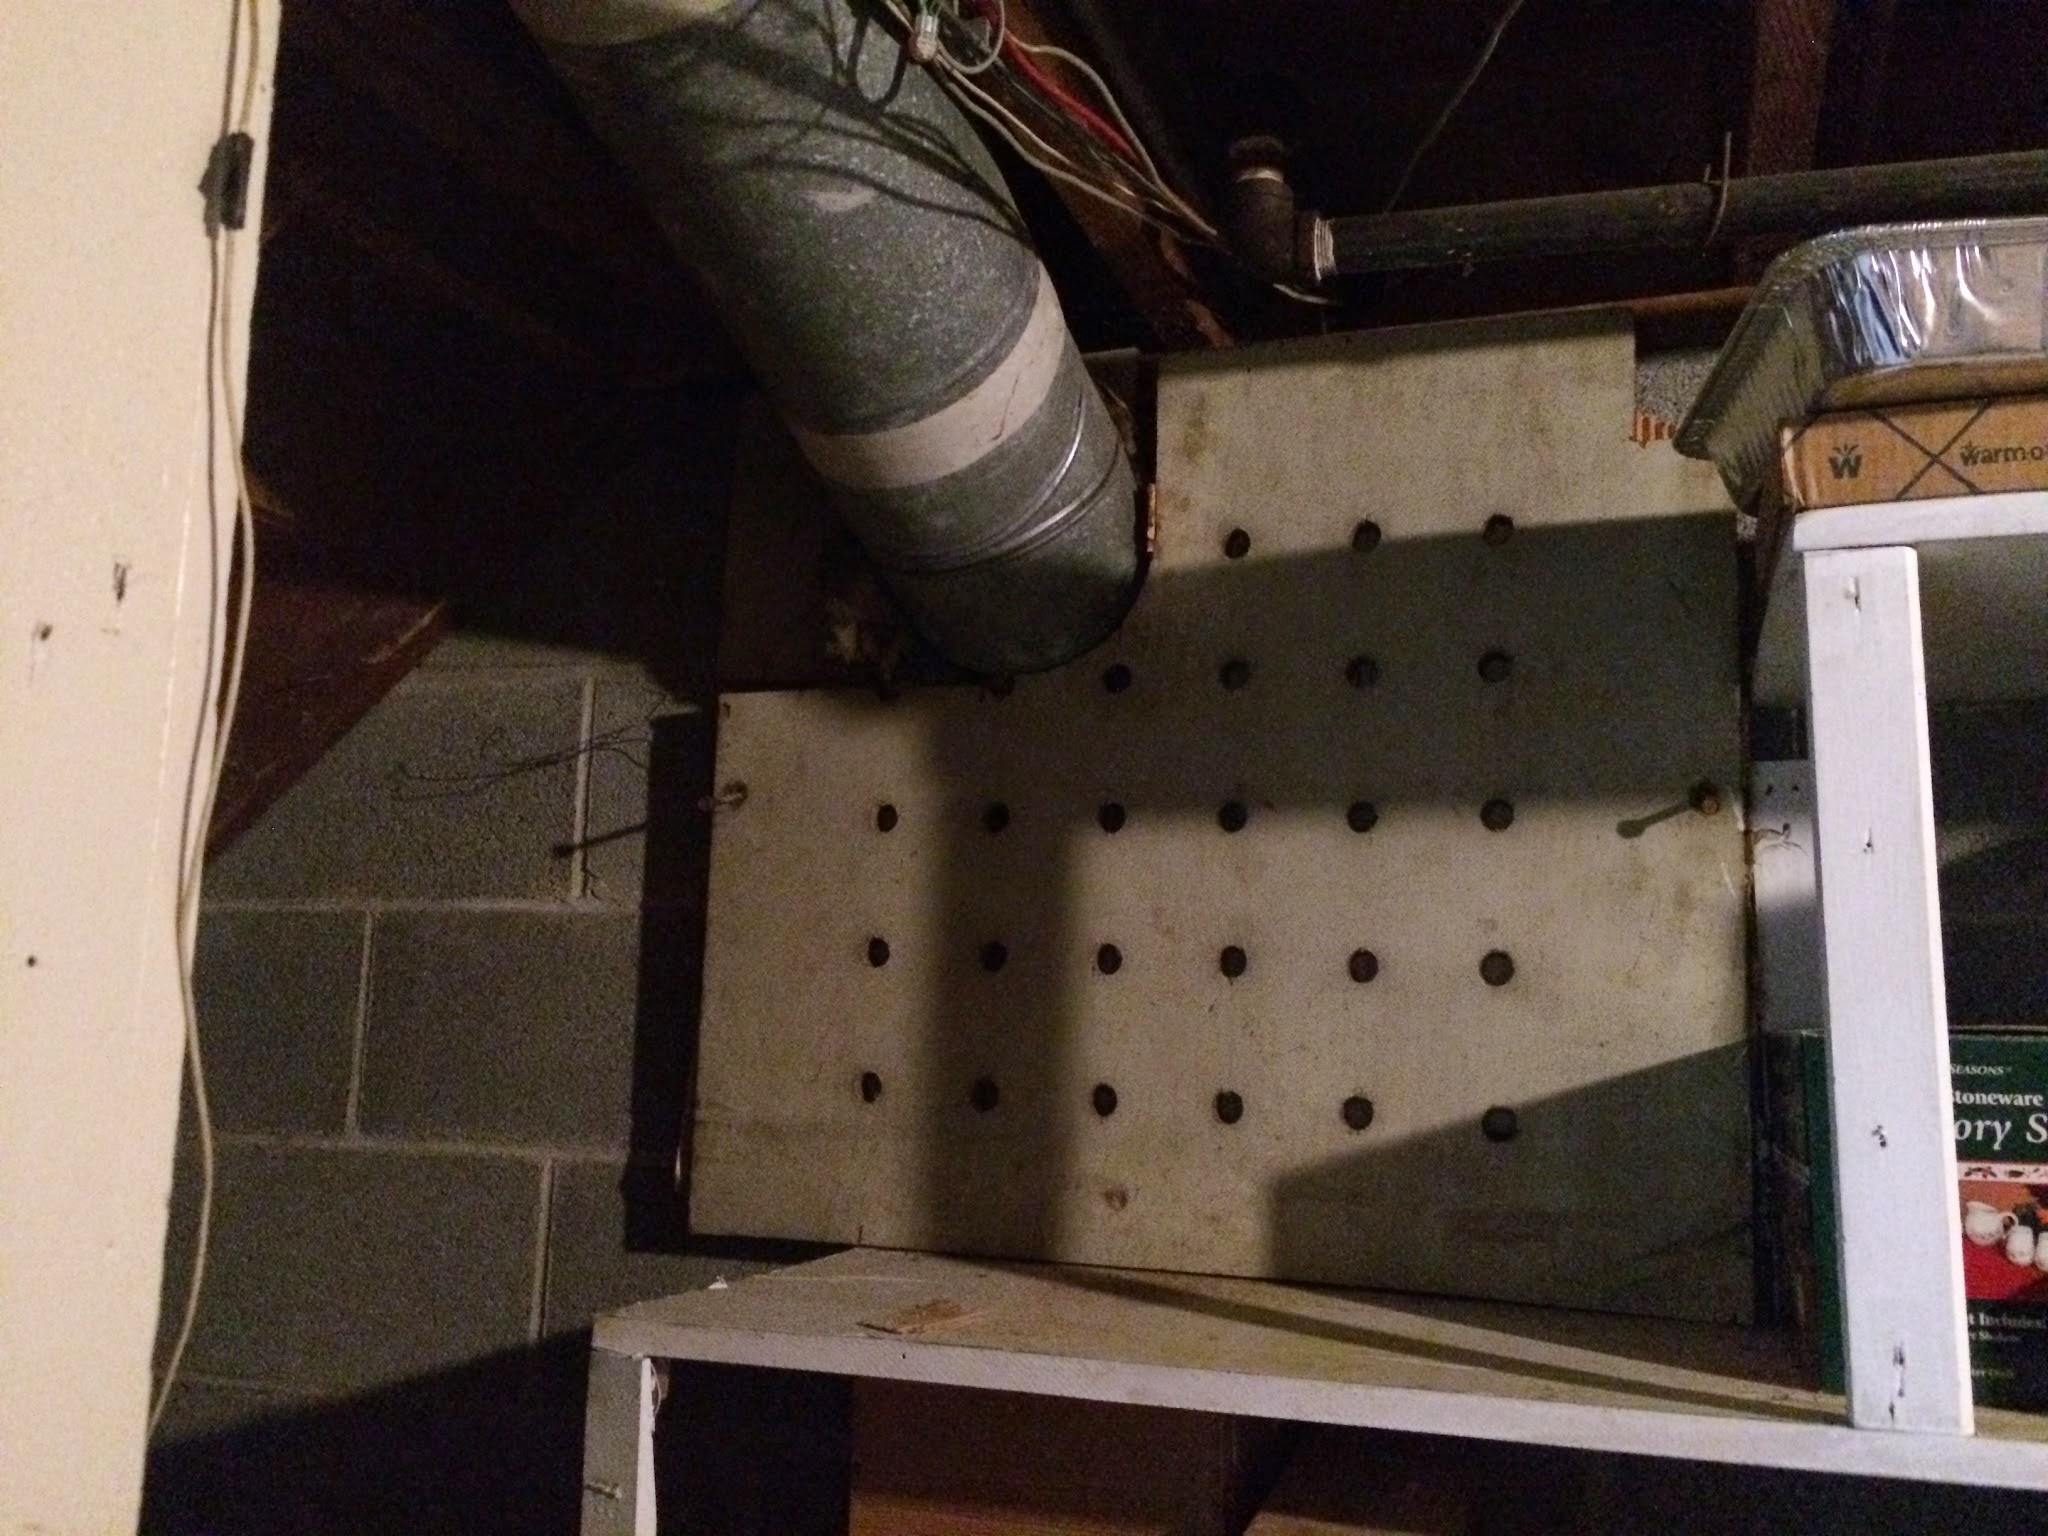
The other critical adjustment in this case is the dampers. Dampers are essentially a valve inside your ductwork that let you turn one duct on or off by turning it. You can use these to push more heated or cooled air to the rooms that need it, and less to the ones that don’t. Here’s what dampers look like open and closed:
When the project was complete, Carlton noted a fairly large temperature difference between the first and second floors. It was 2-7 degrees. That’s not acceptable in my book, at least not until we optimize and find out just how much we can do. If we can get that difference to 2-3 degrees or less, most people won’t notice it.
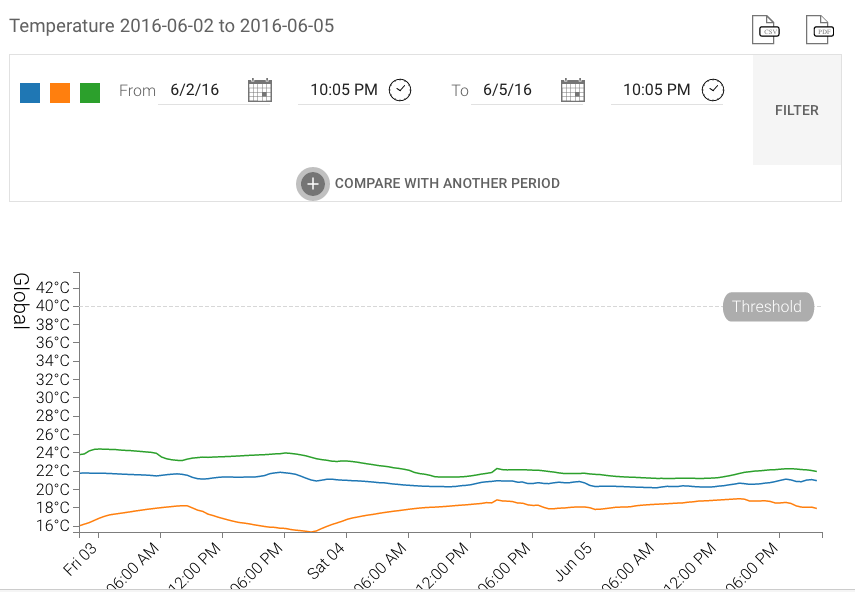
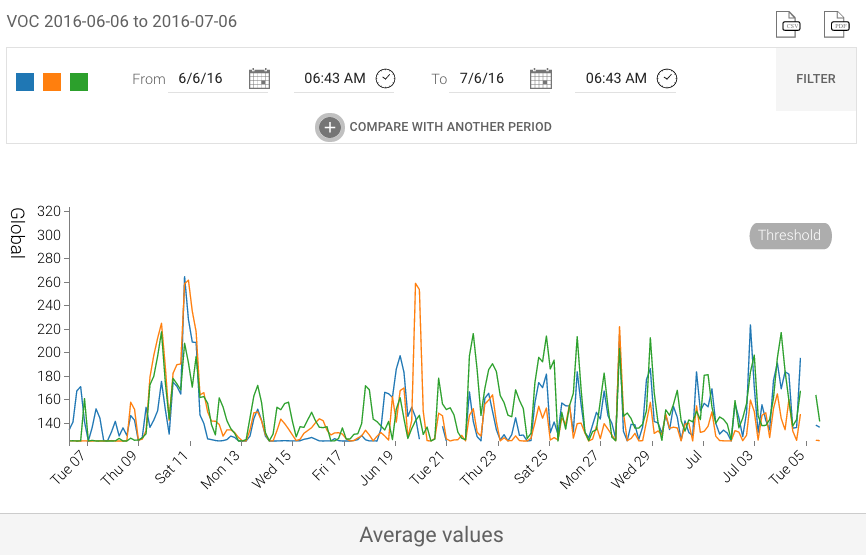
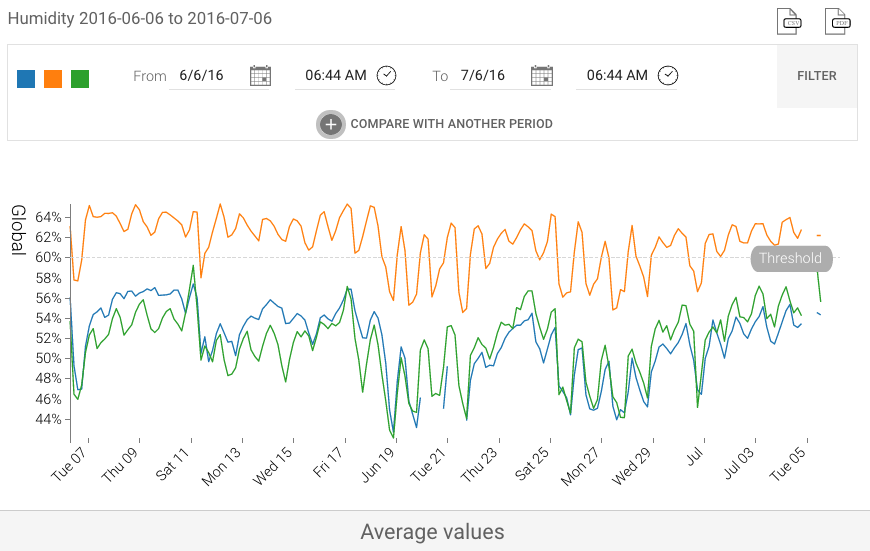
We’ve been using Foobot Indoor Air Quality monitors in our practice this year, and find them extremely helpful for Continuous Optimization. Take a look at this chart from the Foobot dashboard:
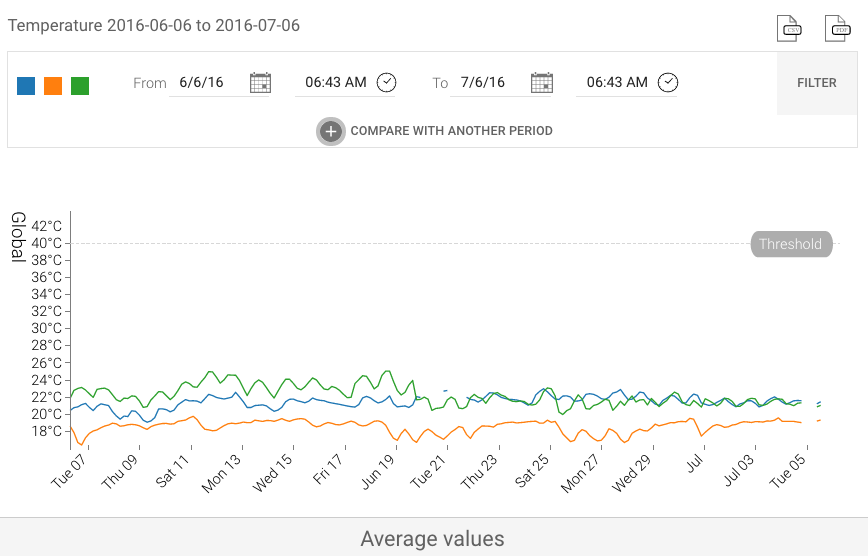
Carlton and I placed a Foobot on each floor. Orange is the basement, blue is the first floor, and green is the second floor. The air conditioning is on in these, the chart is from June-July 2016.
Note that at the beginning of the chart the first and second floors are separated by 1-3 degrees Celsius. (Foobot is a French company, the dashboard was still in metric at this time.) All of a sudden the lines cross, in fact the first floor often runs warmer than the first. Carlton had adjusted the dampers so more air was pushed to the second floor. Pretty cool, huh?
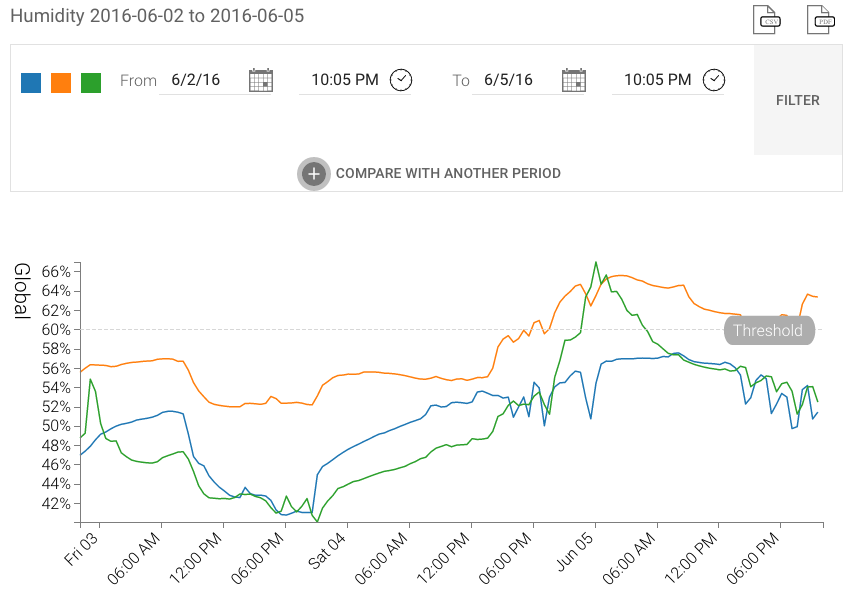
But not totally cool. Carlton noted that the basement still smelled pretty musty, even with the dehumidifier running its heart out down there. With Foobot, we noted that the relative humidity was breaking the 60% mark fairly often, which is when bad things start to happen.
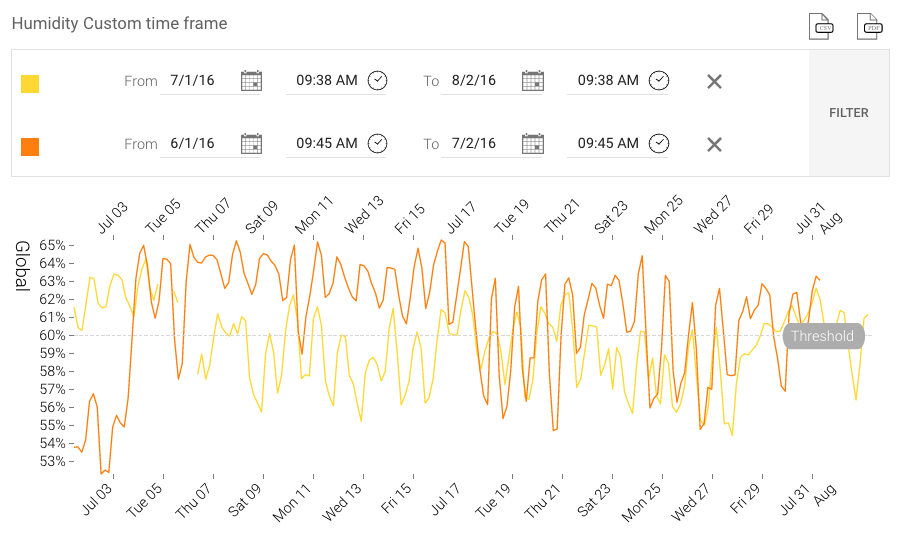
The chart above compares June (in orange) and July (in yellow) humidity levels in Carlton’s basement. It’s important to note that June was a very dry month for Ohio and July was more humid. Note how in July (yellow) the relative humidity is consistently below 60%. The basement smelled much less musty.
How did we do it? Well, now, I can’t spill all our secrets in a case study… you too will have to find out in the Continuous Optimization phase of your project.
Conclusion
In the end, I’m very proud of this project. This home was very challenging and complex. Getting it to a tipping point was considerably more difficult than most of the other projects I’ve worked on. In the end, it worked, and worked well, and I got a friend out of it too!
As you can see, the Energy Smart process is pretty involved. The good news is we’ve structured it so it’s like eating an elephant: one bite at a time. It’s very collaborative, and we work hard to keep it from being too overwhelming. There are definitely a few places in the process where the information can be like drinking from a fire hose, but then we give you time to digest before making a decision. Part of why we have built these case studies and we’re writing a book is to reduce the fire hose treatment by having you do a little learning upfront.
The good news is, outcomes like Carlton’s with a radically improved home are not the exception, they are the rule. We want every client home to be a case study. Our goal is to solve your problems within your budget.
The whole process starts with an initial consultation where we find out what you want to solve and do some blower door testing. We discuss the rest of the process with you there. We don’t recommend you sign up for an initial until you’ve spent some time reading on the website. When you are ready, simply click the “Get Started” button at the top right of every page on the website and fill out the questionnaire.
Before you do that, though, please do some more reading. You might start with our chapter on how your furnace and air conditioner really work. Or get the Home Performance 101 guide at the bottom of every page. Get educated, then we can help you solve problems. Thanks for reading!
Detailed Numbers
Gas Use Before 1300 therms
Predicted Use After 966 therms
Actual Use After 849 therms
Normalized Use N/A
Electric Use Before 11,000 kWh
Predicted Use After 12,912 kWh
Actual Use After 13,174 kWh
Normalized Use N/A
Energy Savings Predicted $308
Energy Savings Actual Not Calculated
Energy Use
Electric
- 1 year before N/A
- 2 years before N/A
- 3 years before N/A
- 1 year after 13,174
- 2 years after N/A
Natural gas
- 1 year before N/A
- 2 years before N/A
- 3 years before N/A
- 1 year after 849 therms
- 2 years after N/A
Duct Leakage
- Before N/A
- Predicted N/A
- After N/A
IAQ measurements
- Before N/A
- Predicted N/A
- After N/A
Load Calc Heating/Cooling
- Before Heating 61,100 BTU/hr
- Before Cooling 35,469 BTU/hr
- Predicted Heating 41,573 BTU/hr
- Predicted Cooling 28,992 BTU/hr
- After Heating Not Measured
- After Cooling Not Measured
Zonal Testing - Not measured.
Static Pressure - Not measured.
Curious what your EUI is? Grab a recent gas and electric bill and click here.
-
- 1957 Cape Cod Case Study


Year Built 1957
Square Footage 2852
Energy Use Index*
Before 59.9
Target 50.2
After 46.3**
Air Leakage (cfm50)
Start 8910
Target 5000
End 3665
*EUI is a measure of overall usage, regardless of fuel. 0 is fabulous, that means the house makes as much energy as it uses. 50 is pretty good. 100 is piggish.
** The winter was very mild, so this number will go up. Carlton also built an outbuilding workshop that he heats with resistance electric, which has driven usage up. We need another year to tell for sure!